Overview
The Basic Information Questionnaire snippet provides a set of components designed to collect PII (personal identifiable information) from an end-user. Due to the sensitivity of PII, it is important to follow Security Best Practices when collecting information. The Basic Information Questionnaire snippet is available in the Marketplace and can be added to any environment.
Here's how the snippet looks in Express View:
And here's how the snippet looks in the Module Builder:
How the Snippet Works
The Basic Information Questionnaire snippet works by collecting data using the components listed below:
Customizing the Snippet
There are a few ways you could customize the Basic Information Questionnaire snippet. You can set fields as required, so the end-user must complete a field before moving forward. You may want to add a Button component that saves the end-user's data in the database. You could add extra information fields to your snippet or change the order of the components. Perhaps some of the fields don't fit your needs, and you'd rather hide a few components. The beauty of snippets is that you can use them as a foundation. From there, you're free to customize and build whatever you want.
Making a Field Required
Set a component to require end-users to complete it. If end-users don't fill out the component's field, they cannot progress to the next module.
To make a component required:
Hover over the component.
A 5-button toolbar appears above the component on hover-over.
Click the
.jpg) (Settings) button to open the Configuration window.
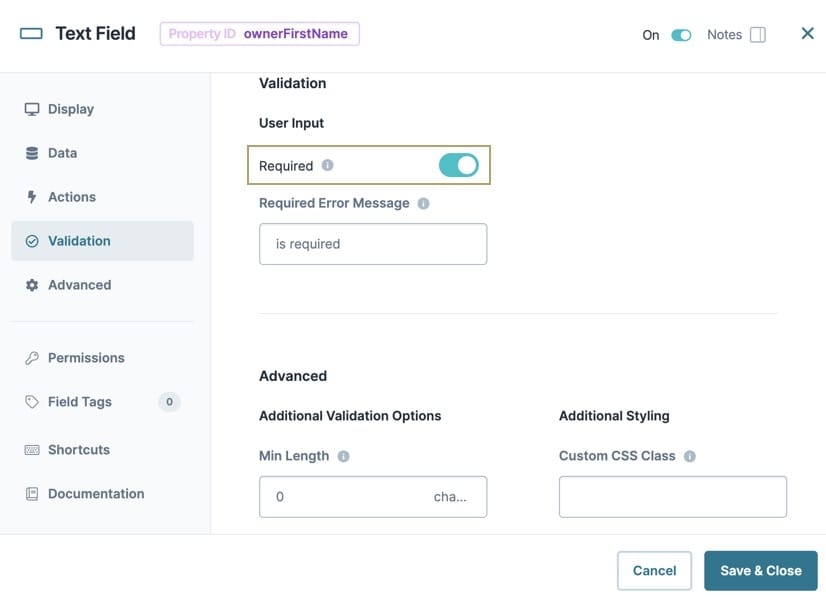
(Settings) button to open the Configuration window.From the side navigation panel, select
 Validation.
Under User Input, set Required to
 (ON).
(ON).Click Save & Close.
Save your module.
Now, the end-user must complete the required fields before they can navigate further.
Adding a Component
To collect more data from an end-user, add extra data collection components. To add a component:
In the left sidebar of the Module Builder, search for the component you want to add.
Drag and drop the component onto your canvas.
Set the Property ID and Label Text for your component.
Click Save & Close.
Save your module.
Changing the Order of Your Components
Change the order or location of your components in a module:
Hover over the component.
A 5-button toolbar appears above the component on hover-over.
Click and drag the
.jpg) (Move) button, dropping the component when it's in position.
(Move) button, dropping the component when it's in position.Save your module.
Hiding Unused Components
If the snippet has fields you don't need now but may want to use in the future.Use the Hide Field setting.
Hover over the component you want to hide.
A 5-button toolbar appears above the component on hover-over.
Using the toolbar, click the
.jpg) (Settings) button.
(Settings) button.Under the
 Display panel, set the Hide Field toggle to
  (ON).
(ON).Click Save & Close.
Save your module.
Removing a Component
Is there is an entry field you want to delete from your snippet? To remove the corresponding component:
Hover over the component you wish to remove.
A 5-button toolbar appears above the component on hover-over.
Using the toolbar, click the
.jpg) (Remove) button.
(Remove) button.Save your module.
Adding a Button Component to Save Submission Data
The Button component saves submission data to the database. Submissions tie to your module's unique ID. You can access these submissions at any time or even create a dashboard to organize end-user data.
Drag and drop a
.png) Button component onto your canvas, placing it at the bottom of panelBasicInfo.
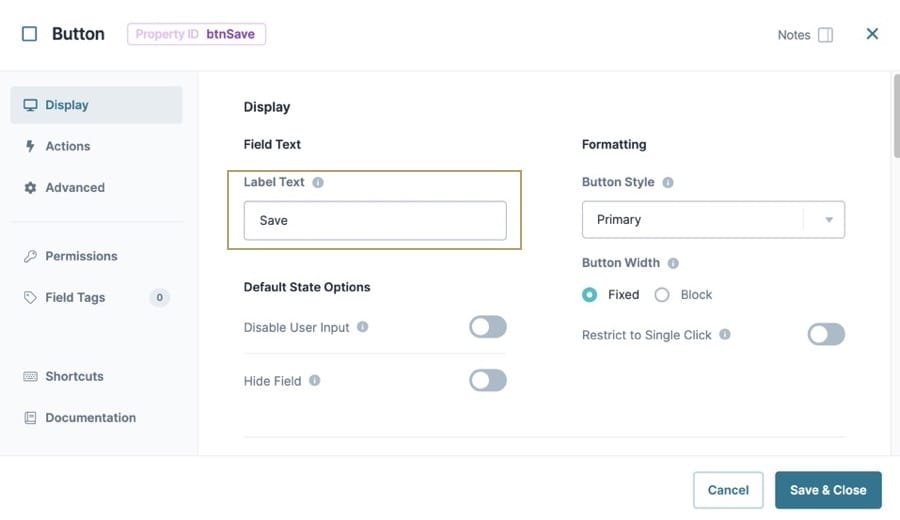
Button component onto your canvas, placing it at the bottom of panelBasicInfo.In the Property ID field, enter btnSave.
In the Label Text field, enter Save.
Click Save & Close.
Save your module.
Now, when your end-user accesses your module in Express View, they can press a Save button. The button creates and saves a submission of the information they entered.

