Overview
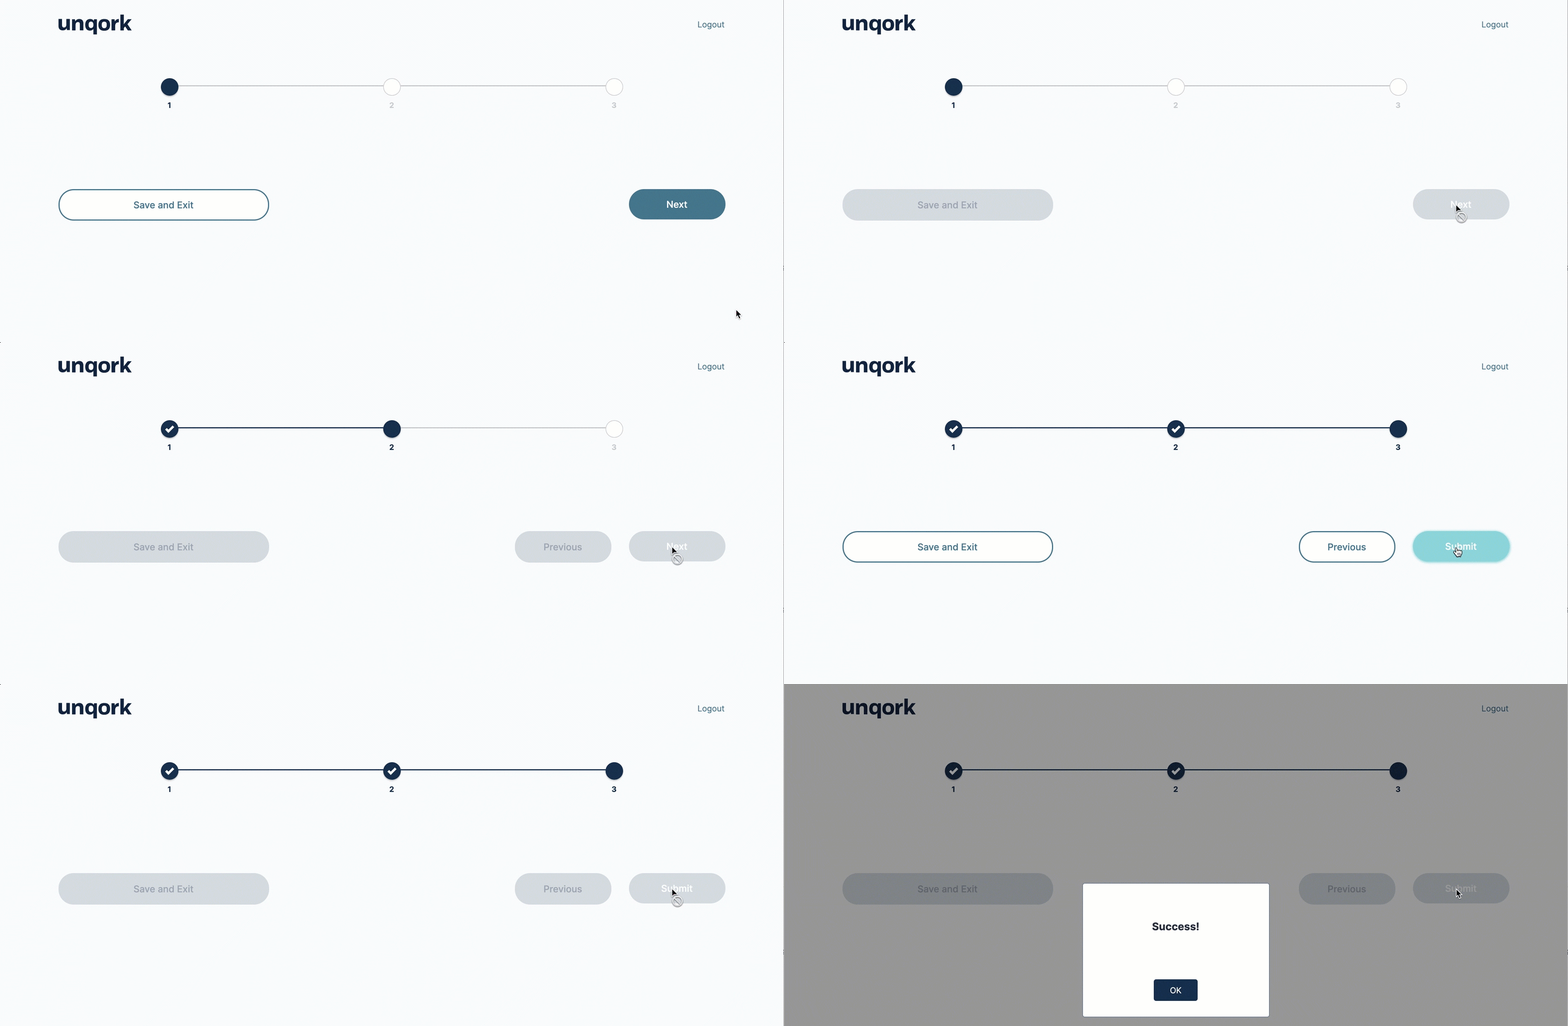
The Base Navigation snippet introduces you to the functionality of the Navigation component. The snippet has working navigation with buttons for Next, Previous, Save and Exit, and Submit. You can use this as a foundation for your application and add components to customize each screen. You can also add or remove steps in the navigation. Remember, adding navigation to your application improves your end-user's experience. Imagine how annoying it would be to scroll through a long list of fields. Instead, your end-user can work through organized pages.
This snippet is a good fit if you're building an application for an onboarding flow, maintenance flow, or similar.
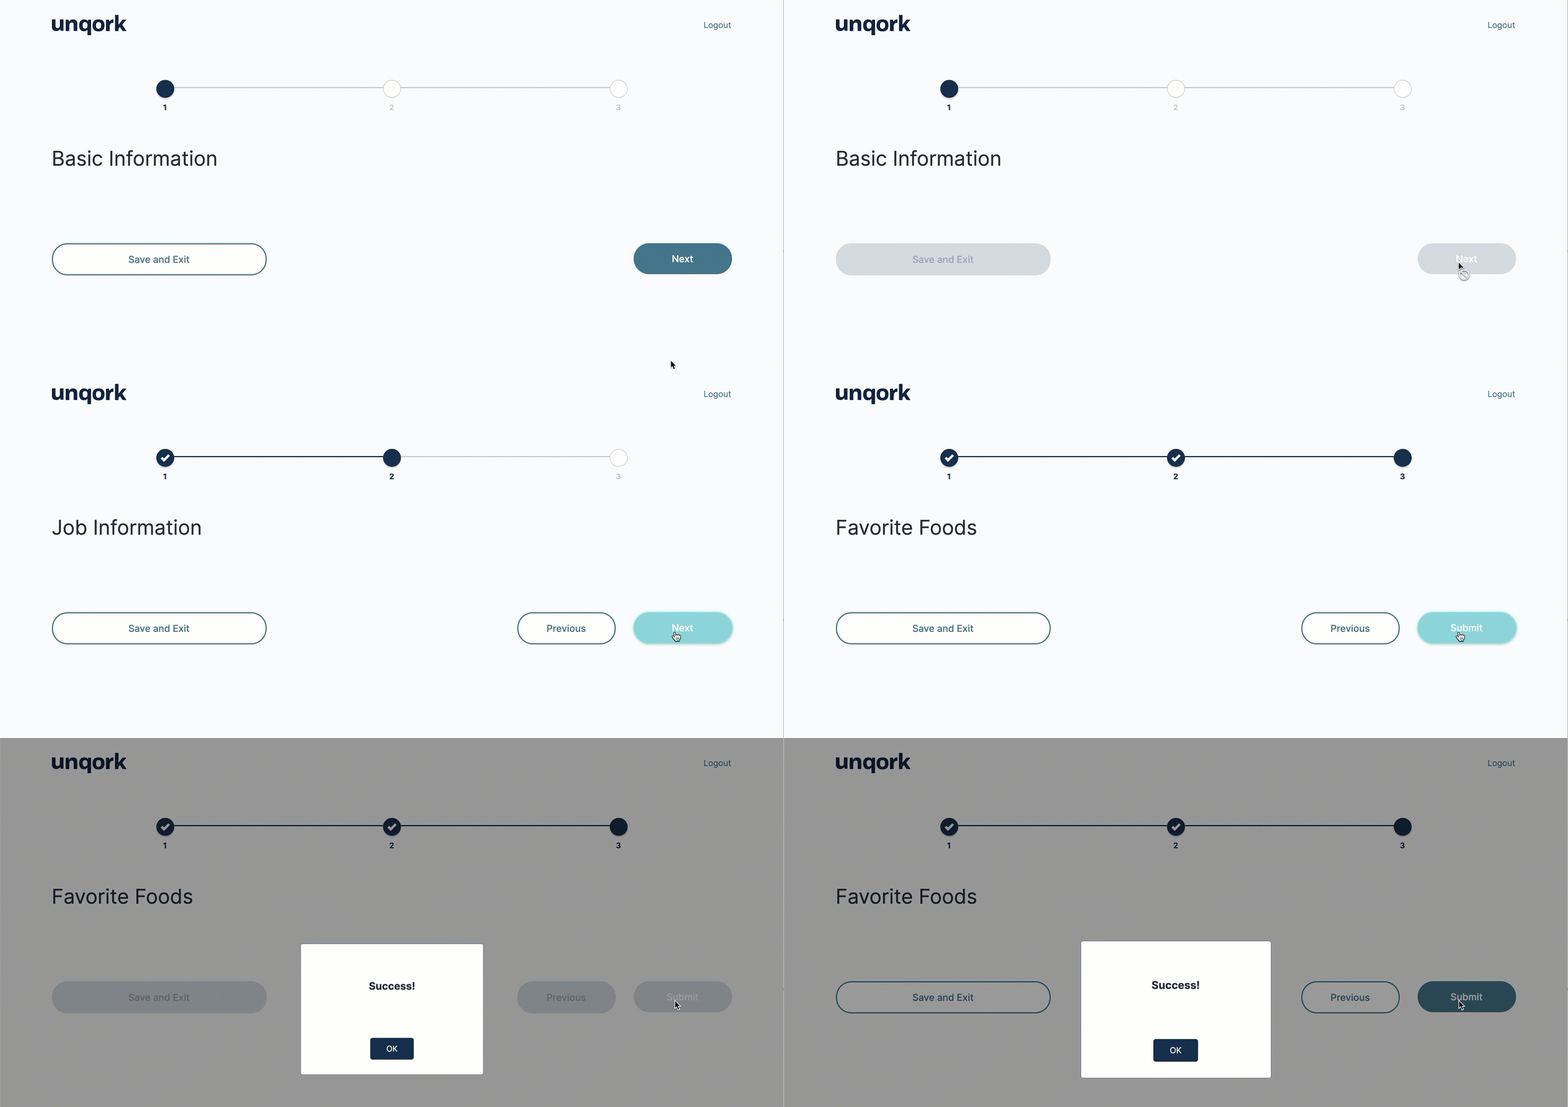
Here's how the snippet looks in Express View:
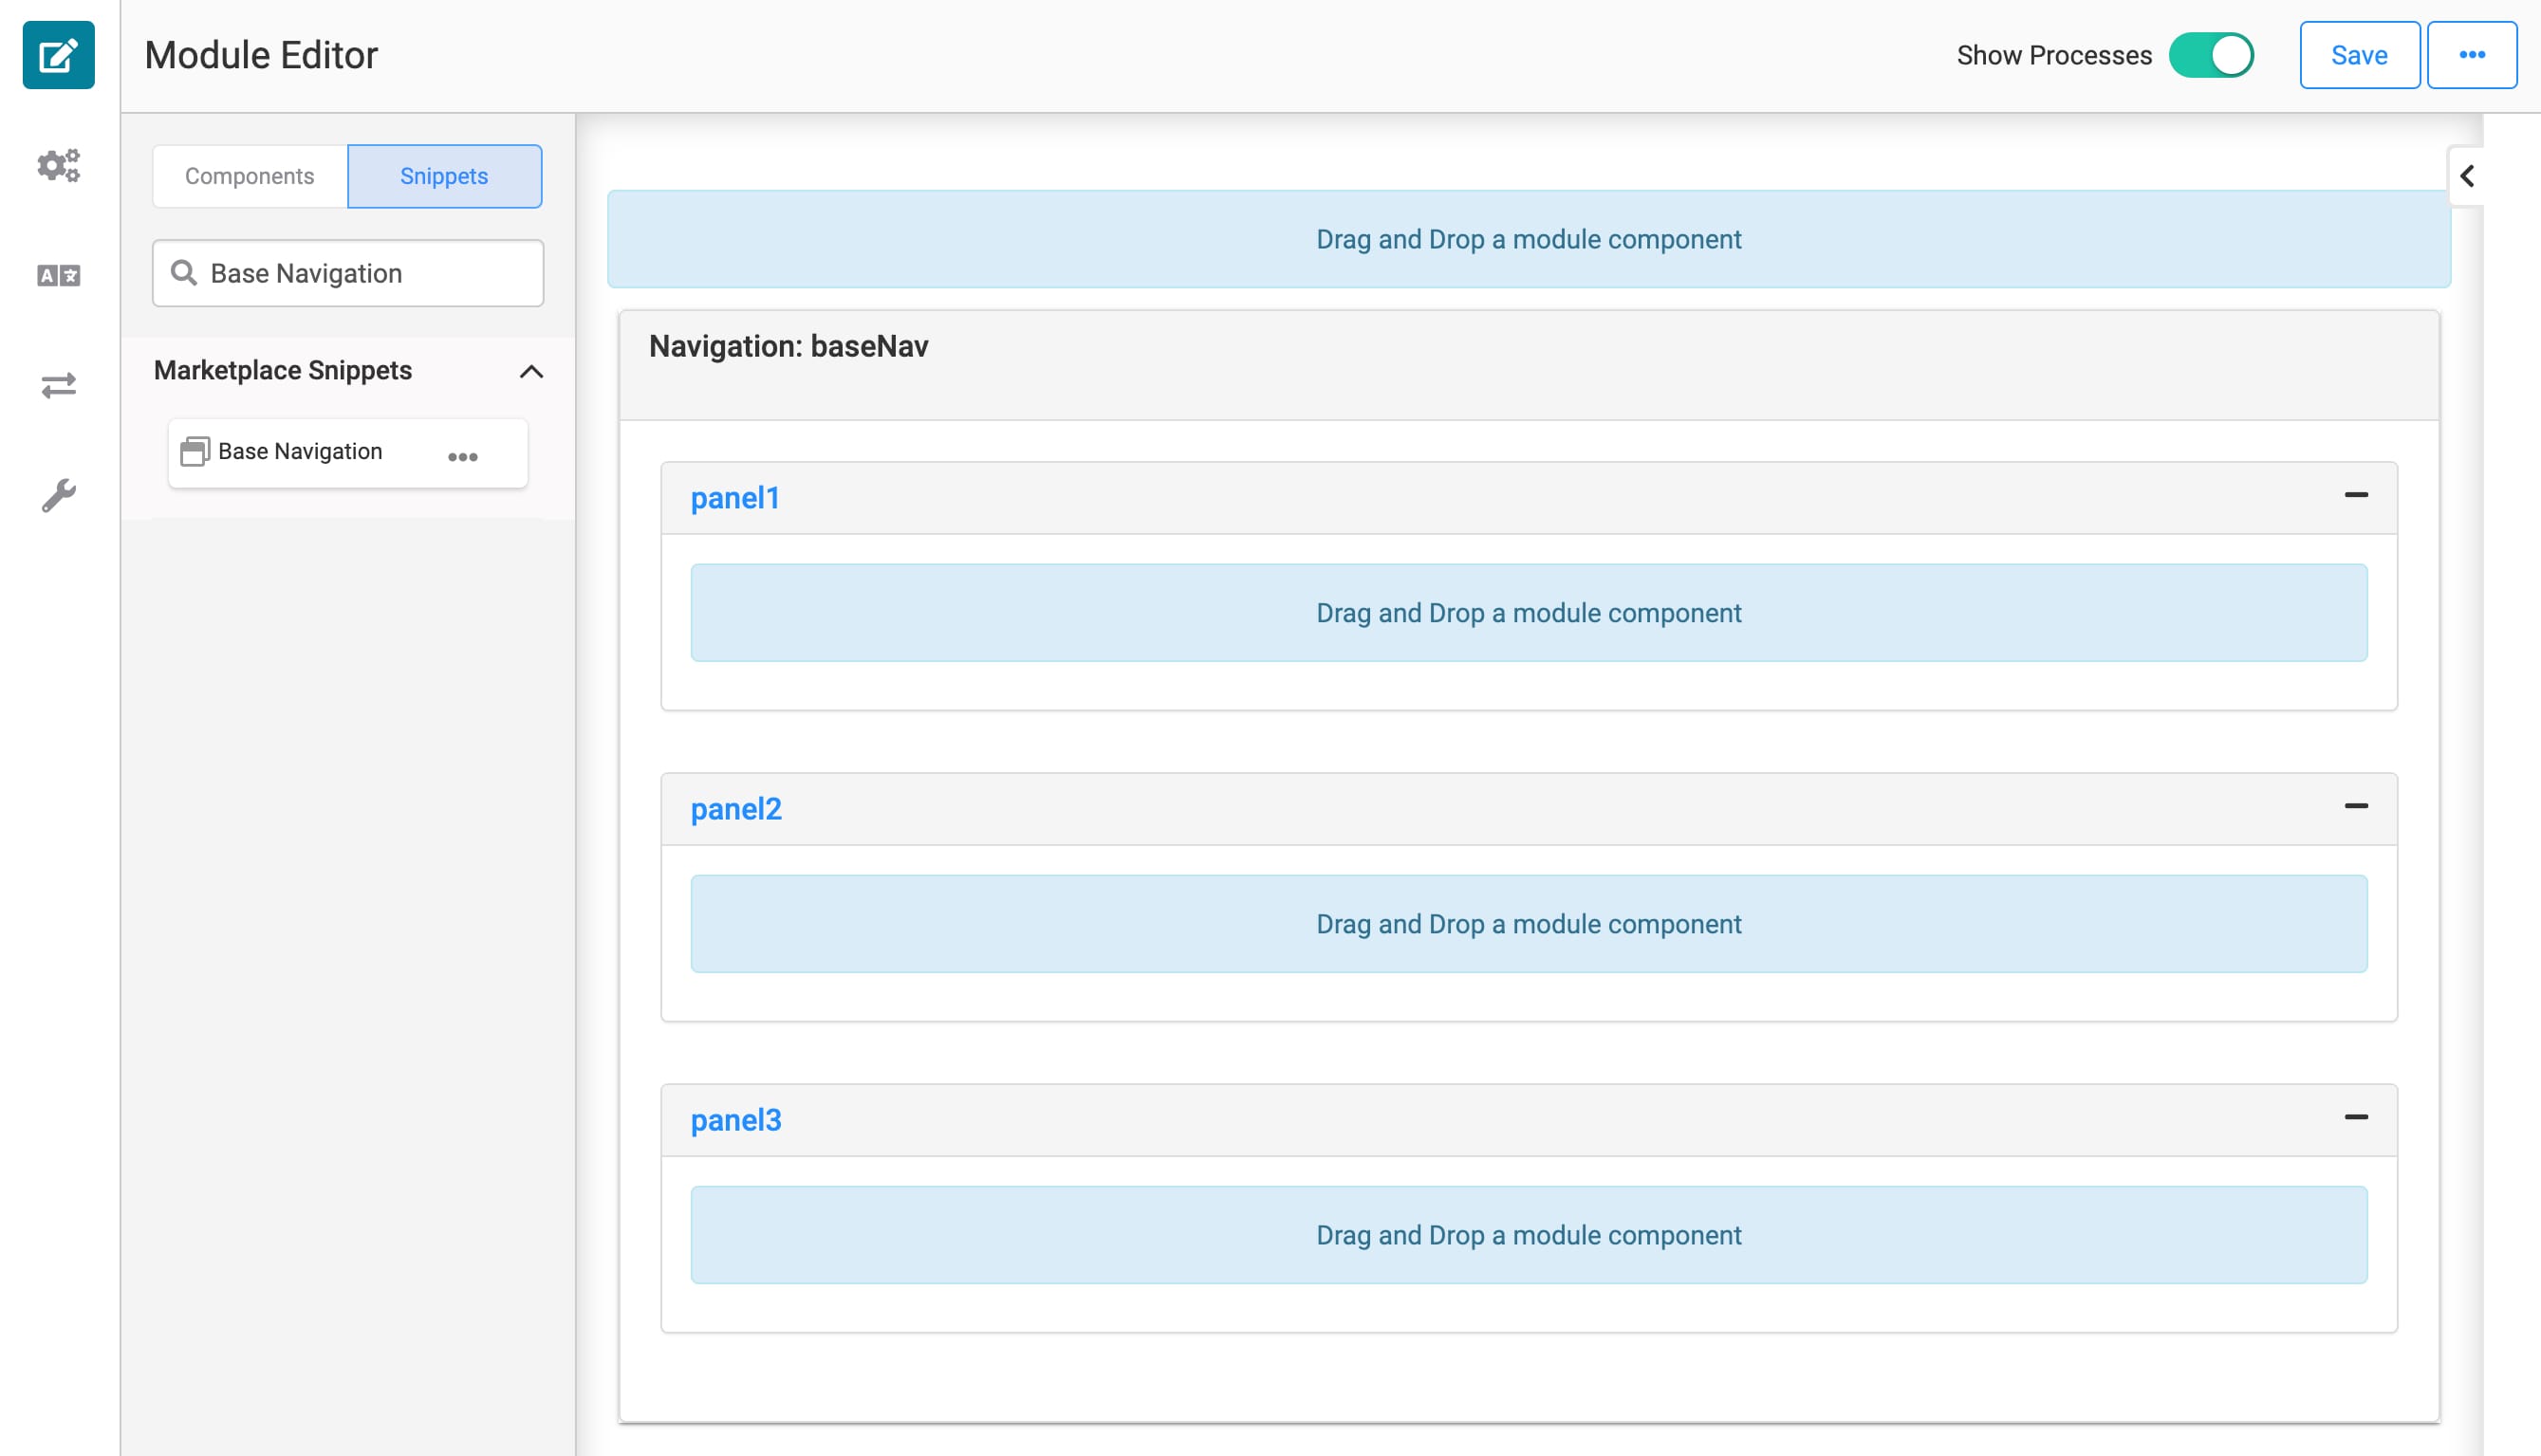
And here's how the snippet looks in the Module Builder:
How the Snippet Works
The main driving force of this snippet is the Navigation component. The snippet's Navigation component holds 3 Panel components that make up the steps of this snippet's navigation.
The Navigation component's Panels table creates each navigation page. The Panel component referenced in the first row of the table becomes the first page. The Panel component referenced in the second row of the table becomes the second page, and so on. It's best practice to limit the number of pages in a single module. Having to work through page after page isn't a great user experience.
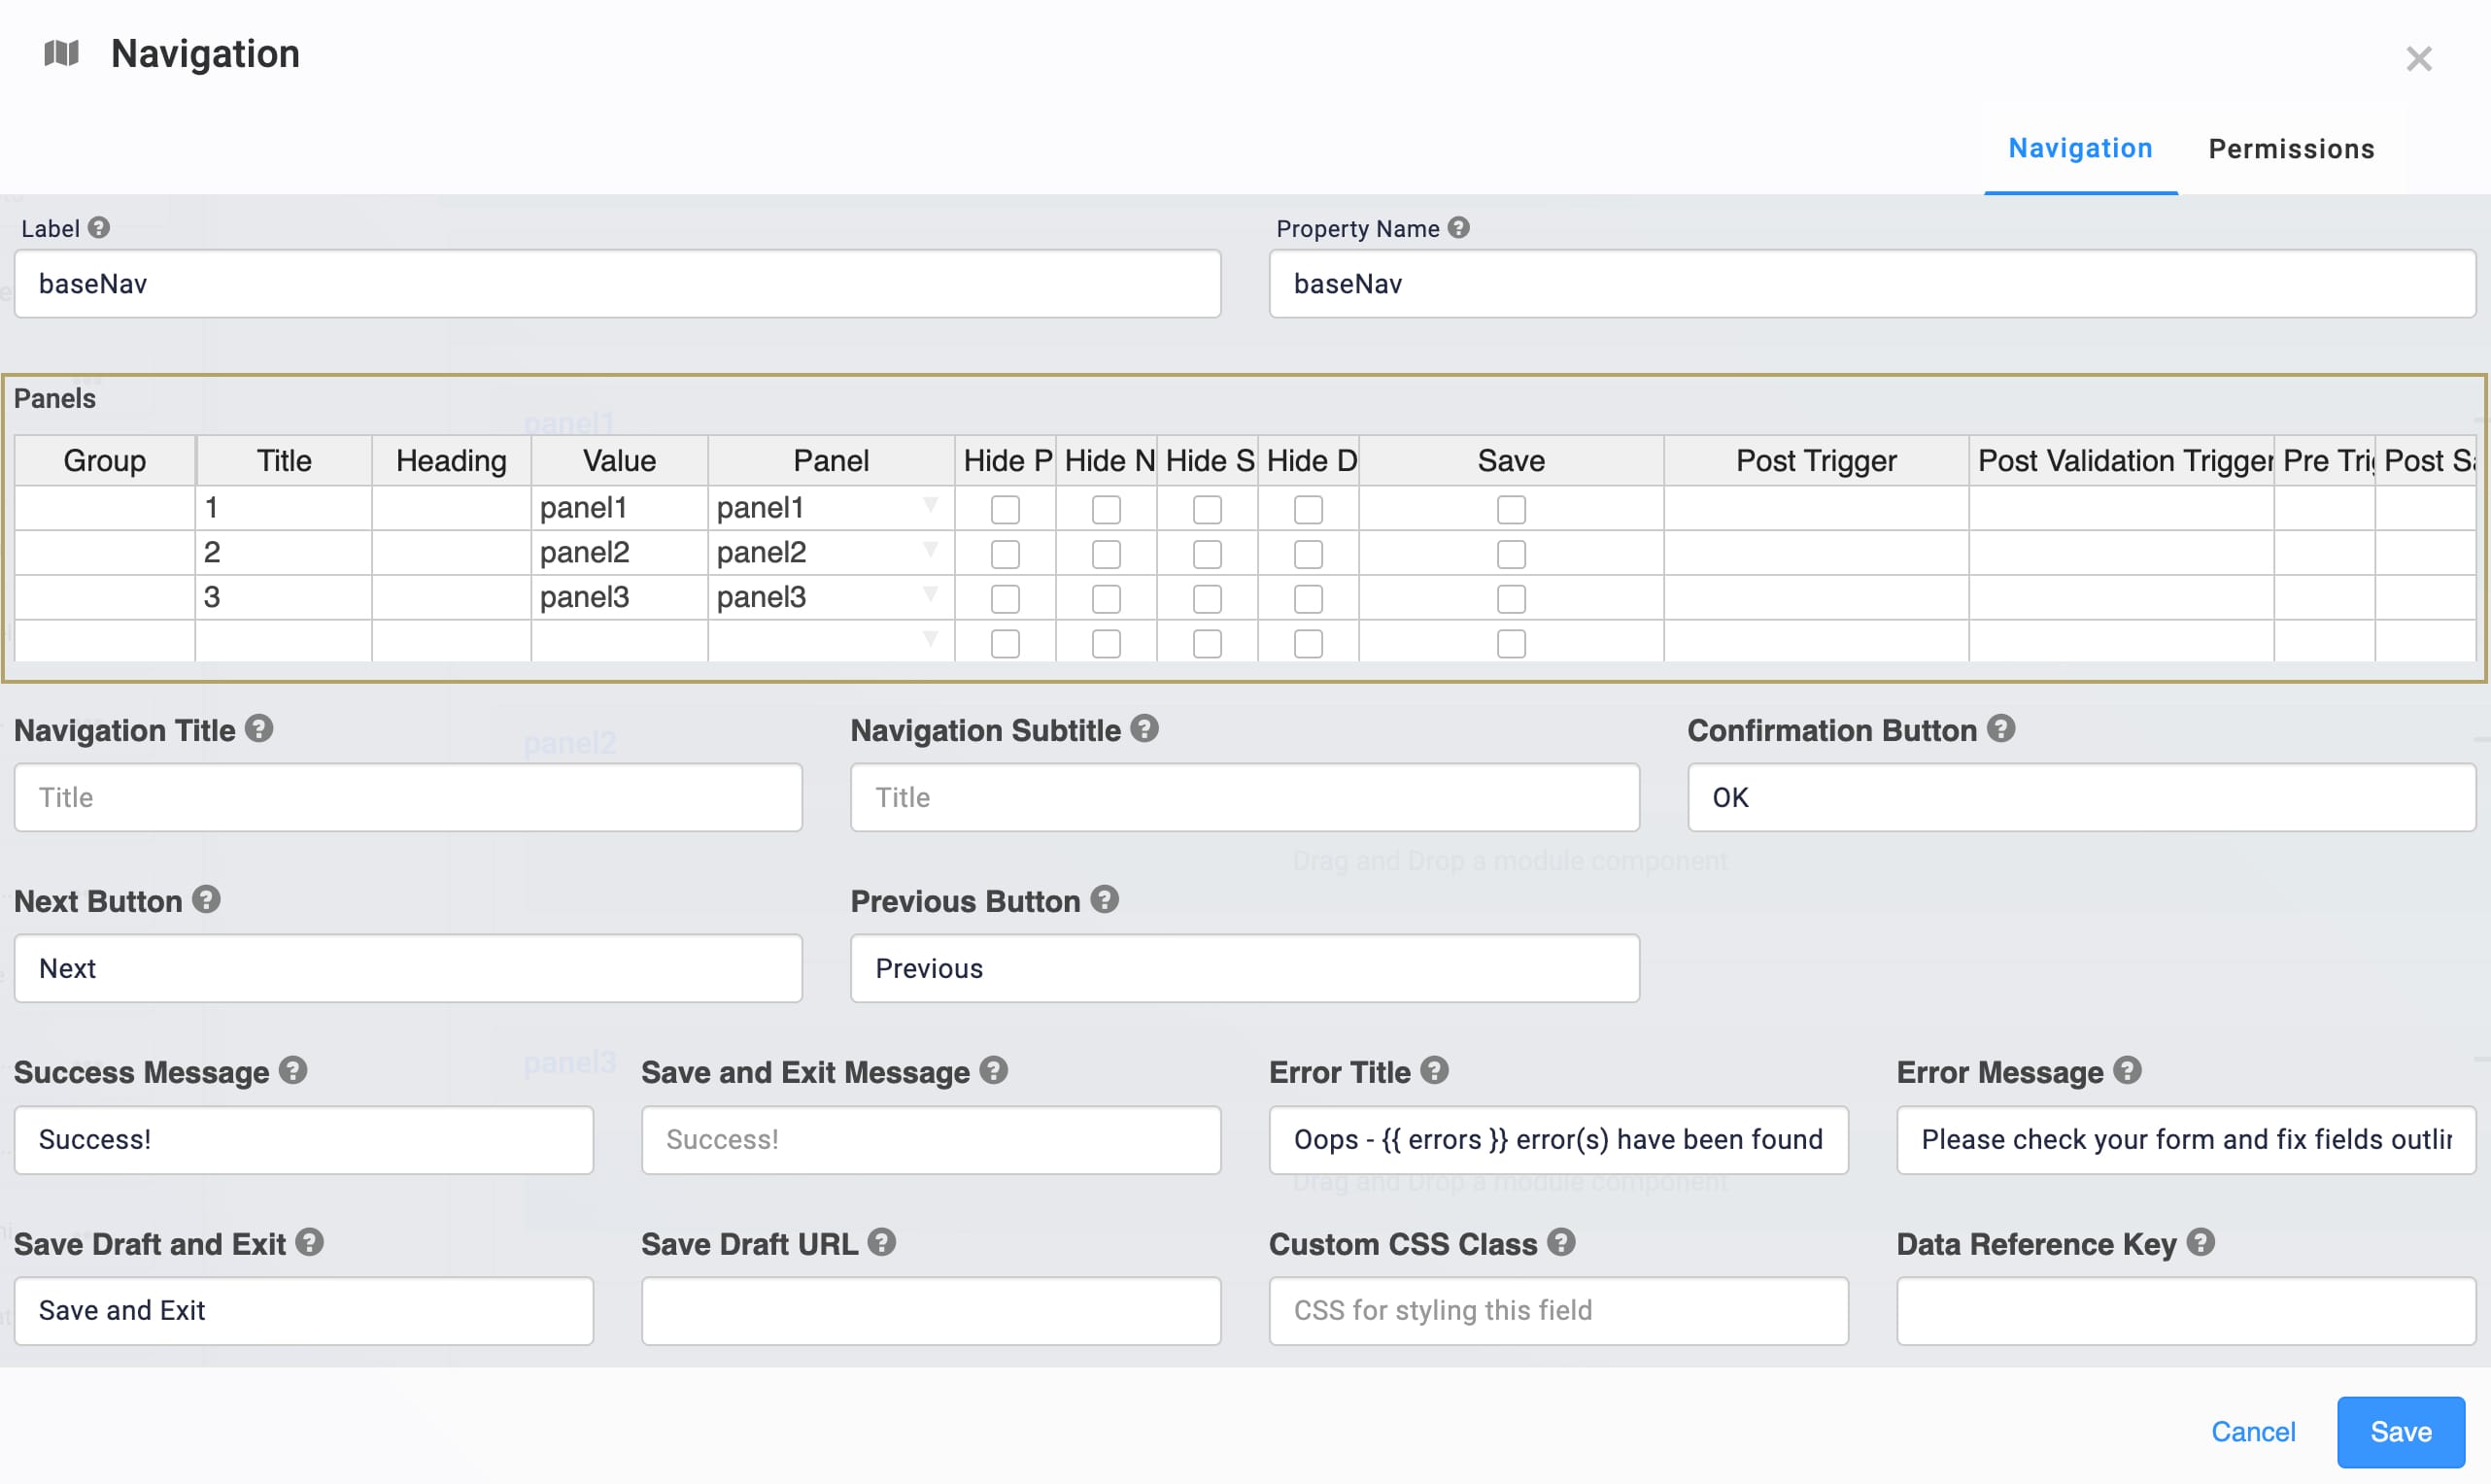
The Panel components referenced in this table must nest inside the Navigation component in the Module Builder. This snippet comes with 3 Panel components and their corresponding navigation pages. You can add or delete Panels to change the number of steps in your application's flow.
Setting Up the Snippet
The Base Navigation snippet works right off the shelf. To improve the end-user experience, you might also add a Submit URL to your Navigation component. Without this, your end-user's journey ends on the last navigation page. If you enter a Submit URL, your application redirects your end-user to that URL after they click Submit (and click OK on the Success message).
Adding a Submit URL to the Navigation Component
Here are a few options of how to update the Submit URL field:
To send your end-user to another module after they click Submit: Use /#/display/moduleId and replace moduleId with the destination module's ID.
To generate a submission on this module: Use /#/display/destinationModuleId/{{data.submissionId}}/thisModuleId and replace destinationModuleId with the ID for the module to direct users to after they click Submit. Replace thisModuleId with your current module's ID.
This option saves the submission to your current module. After the submission saves, your application takes your end-users to the destination module.
To send your end-user to a site outside of Unqork after they click Submit: Enter the full URL of the website.
To update the Navigation component:
In the Module Builder, hover over the baseNav Navigation component.
A 5-button toolbar displays above the component on hover-over.
Using the toolbar, click the
.jpg) (Settings) button.
(Settings) button.In the Submit URL field, enter the URL where you want your end-users to go after they click Submit.
Click Save.
Save your module.
Customizing the Snippet
There are many ways you can customize the Base Navigation snippet. Here are common ways to customize the Base Navigation snippet:
Add or delete navigation pages.
Add Headers to each navigation page.
Use a vertical layout and organize your navigation pages into groups.
There are countless ways to customize this snippet's Navigation component. To learn more about what the Navigation component can do, search Navigation component in our In-Product Help.
Adding or Deleting Navigation Pages
There are 2 basic steps to adding or deleting a navigation page: adding or deleting a Panel component, and updating the Navigation component.
Add or Delete a Panel Component
To add a Panel component:
In the Module Builder, drag and drop a Panel component onto the canvas, nesting it in the baseNav Navigation component.
In the Property Name field, enter panel4. Leave the Title field blank, unless you want the Panel's Title visible in Express View.
Click Save.
Save your module.
To delete a Panel component:
Before you delete a Panel component, double-check the Panels table in the Navigation component. This table shows you what navigation page corresponds with each Panel component. From there, you can close out of the Navigation component and continue onto the deletion steps.
Hover over the Panel component you want to delete.
A 5-button toolbar displays above the component on hover-over.
Click the
.jpg) (Remove) button.
(Remove) button.Save your module.
Update the Navigation Component
If you add or delete a Panel in your snippet, you must update the Navigation component's settings.
To update the Navigation component:
Hover over the Navigation component.
Using the toolbar, click the
.jpg) (Settings) button.
(Settings) button.Update the Panels table:
In a new row, enter the title for your new navigation page in the Title column.
In the Value and Panel column, enter your new Panel's property name.
To delete a navigation page, delete the row that corresponds with the Panel component you deleted.
Click Save.
Save your module.
Adding Headers to Navigation Pages
To improve your end-user's experience, you can add headers to your navigation pages.
To add headers:
Hover over the Navigation component.
Using the toolbar, click the
.jpg) (Settings) button.
(Settings) button.In the Panels table, enter the header you want for each row in the Heading column.
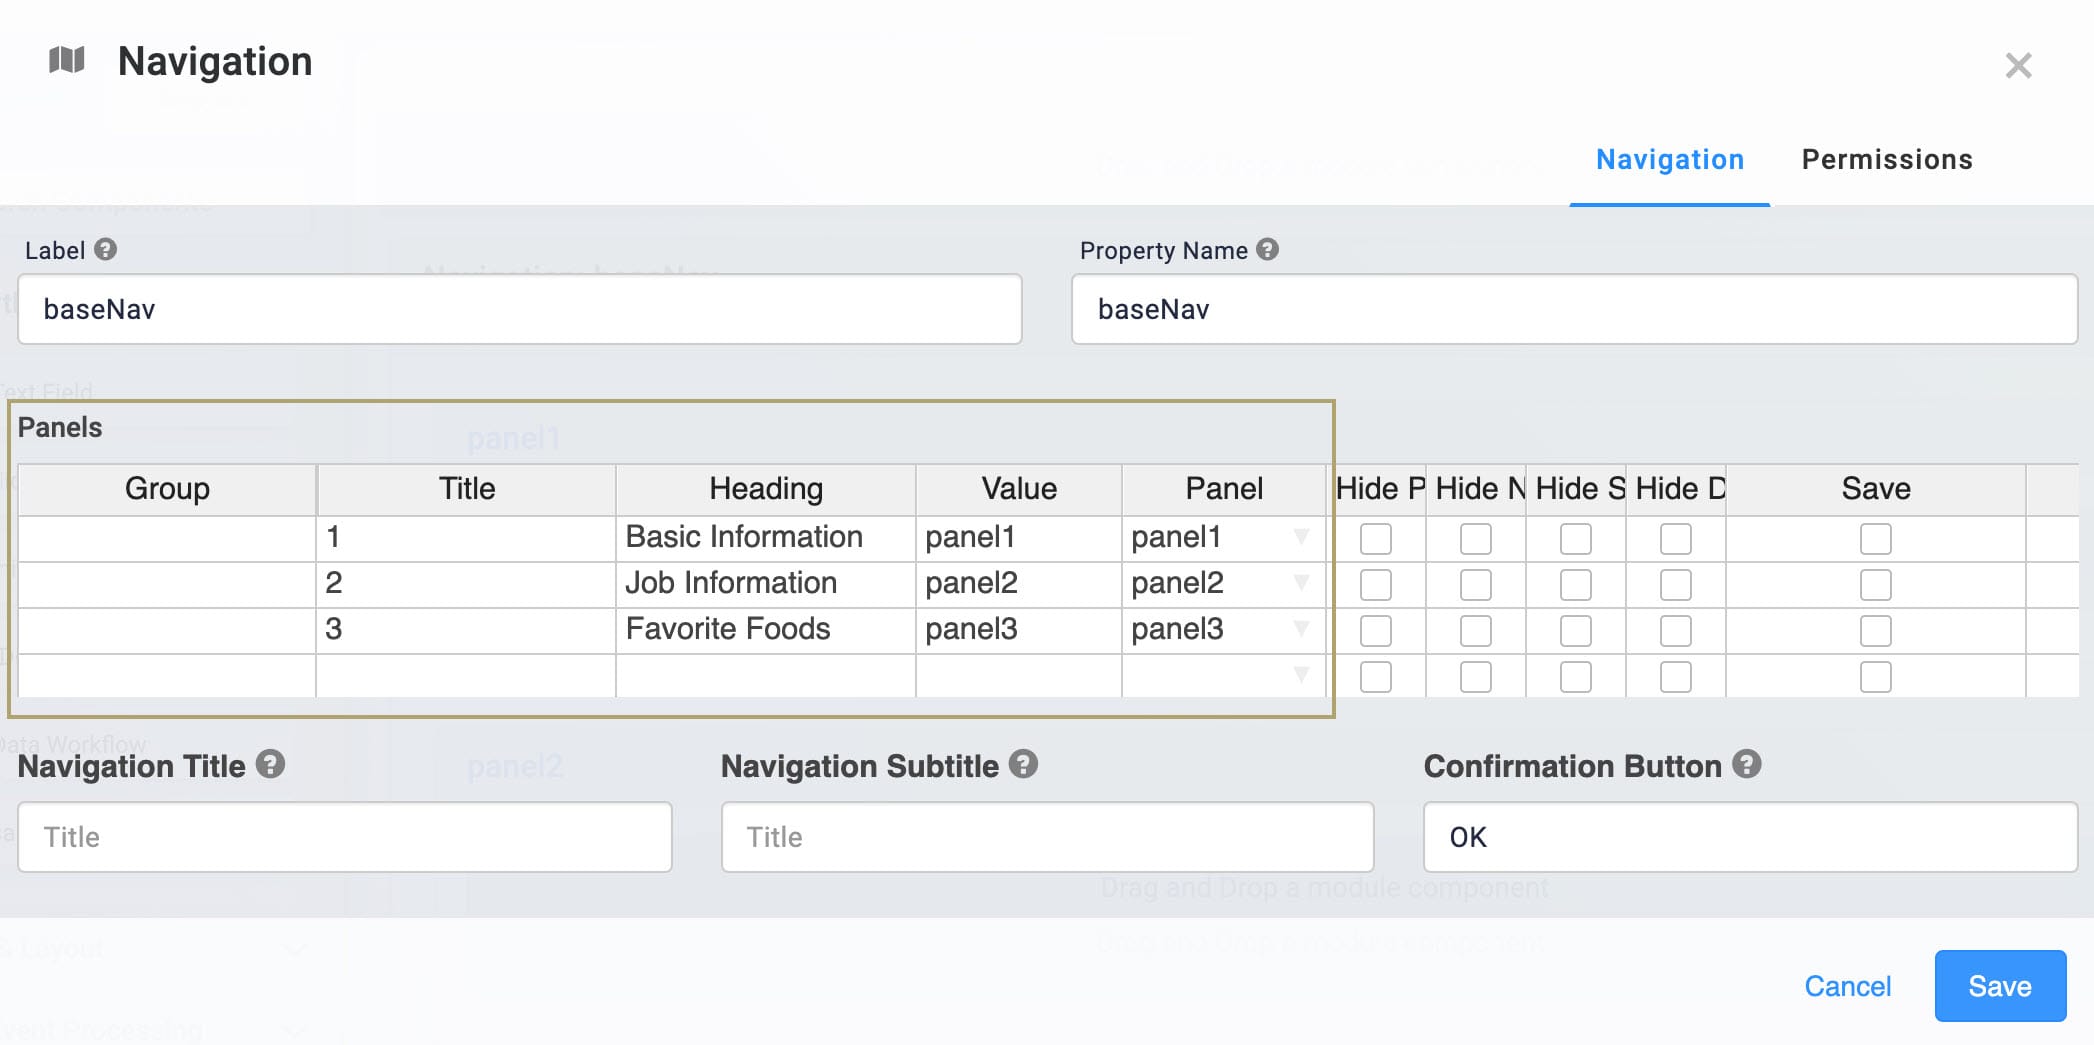
You can also change the Title column if you want to customize each navigation page's title. You can use either the Title or the Heading, or both. Play around with the component to find the layout that works best for you.
Click Save.
Save your module.
Now, when you preview your module in Express View, here's how the navigation looks:
Using Groups and a Vertical Layout
By default, the Base Navigation snippet has a horizontal layout. This means your end-users navigate the pages from left to right. If you want, you can change to a vertical layout instead. To help further organize the vertical layout, you can use Groups. Here's an example of how an onboarding navigation flow looks when organized by Groups in a vertical layout:
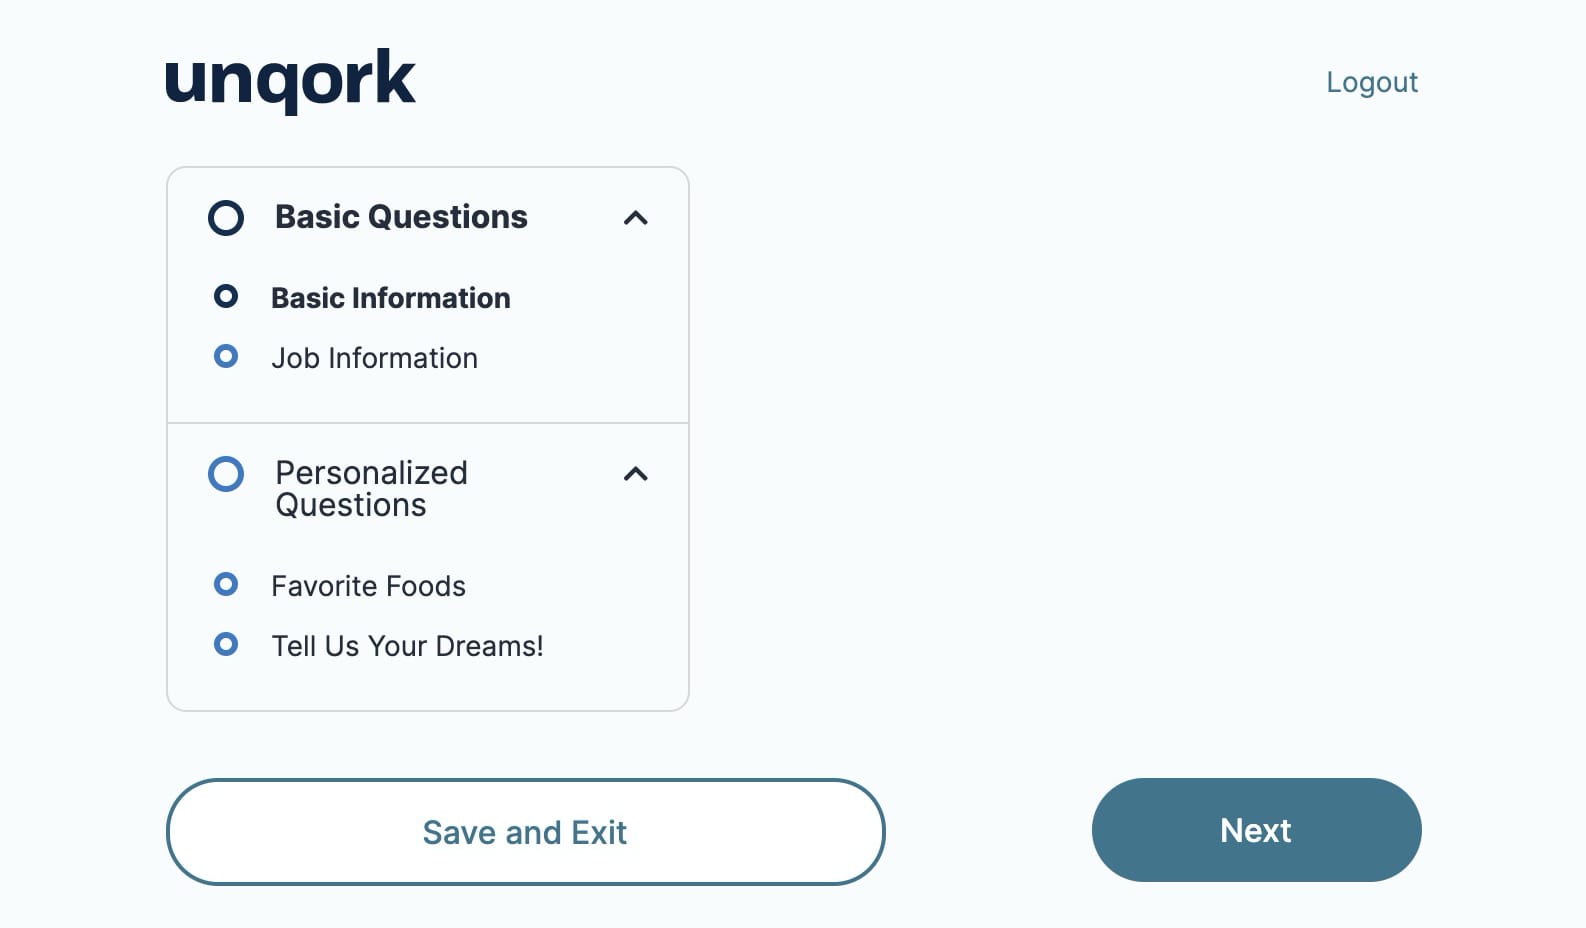
And here are the steps to create the above navigation:
Hover over the Navigation component.
Using the toolbar, click the
.jpg) (Settings) button.
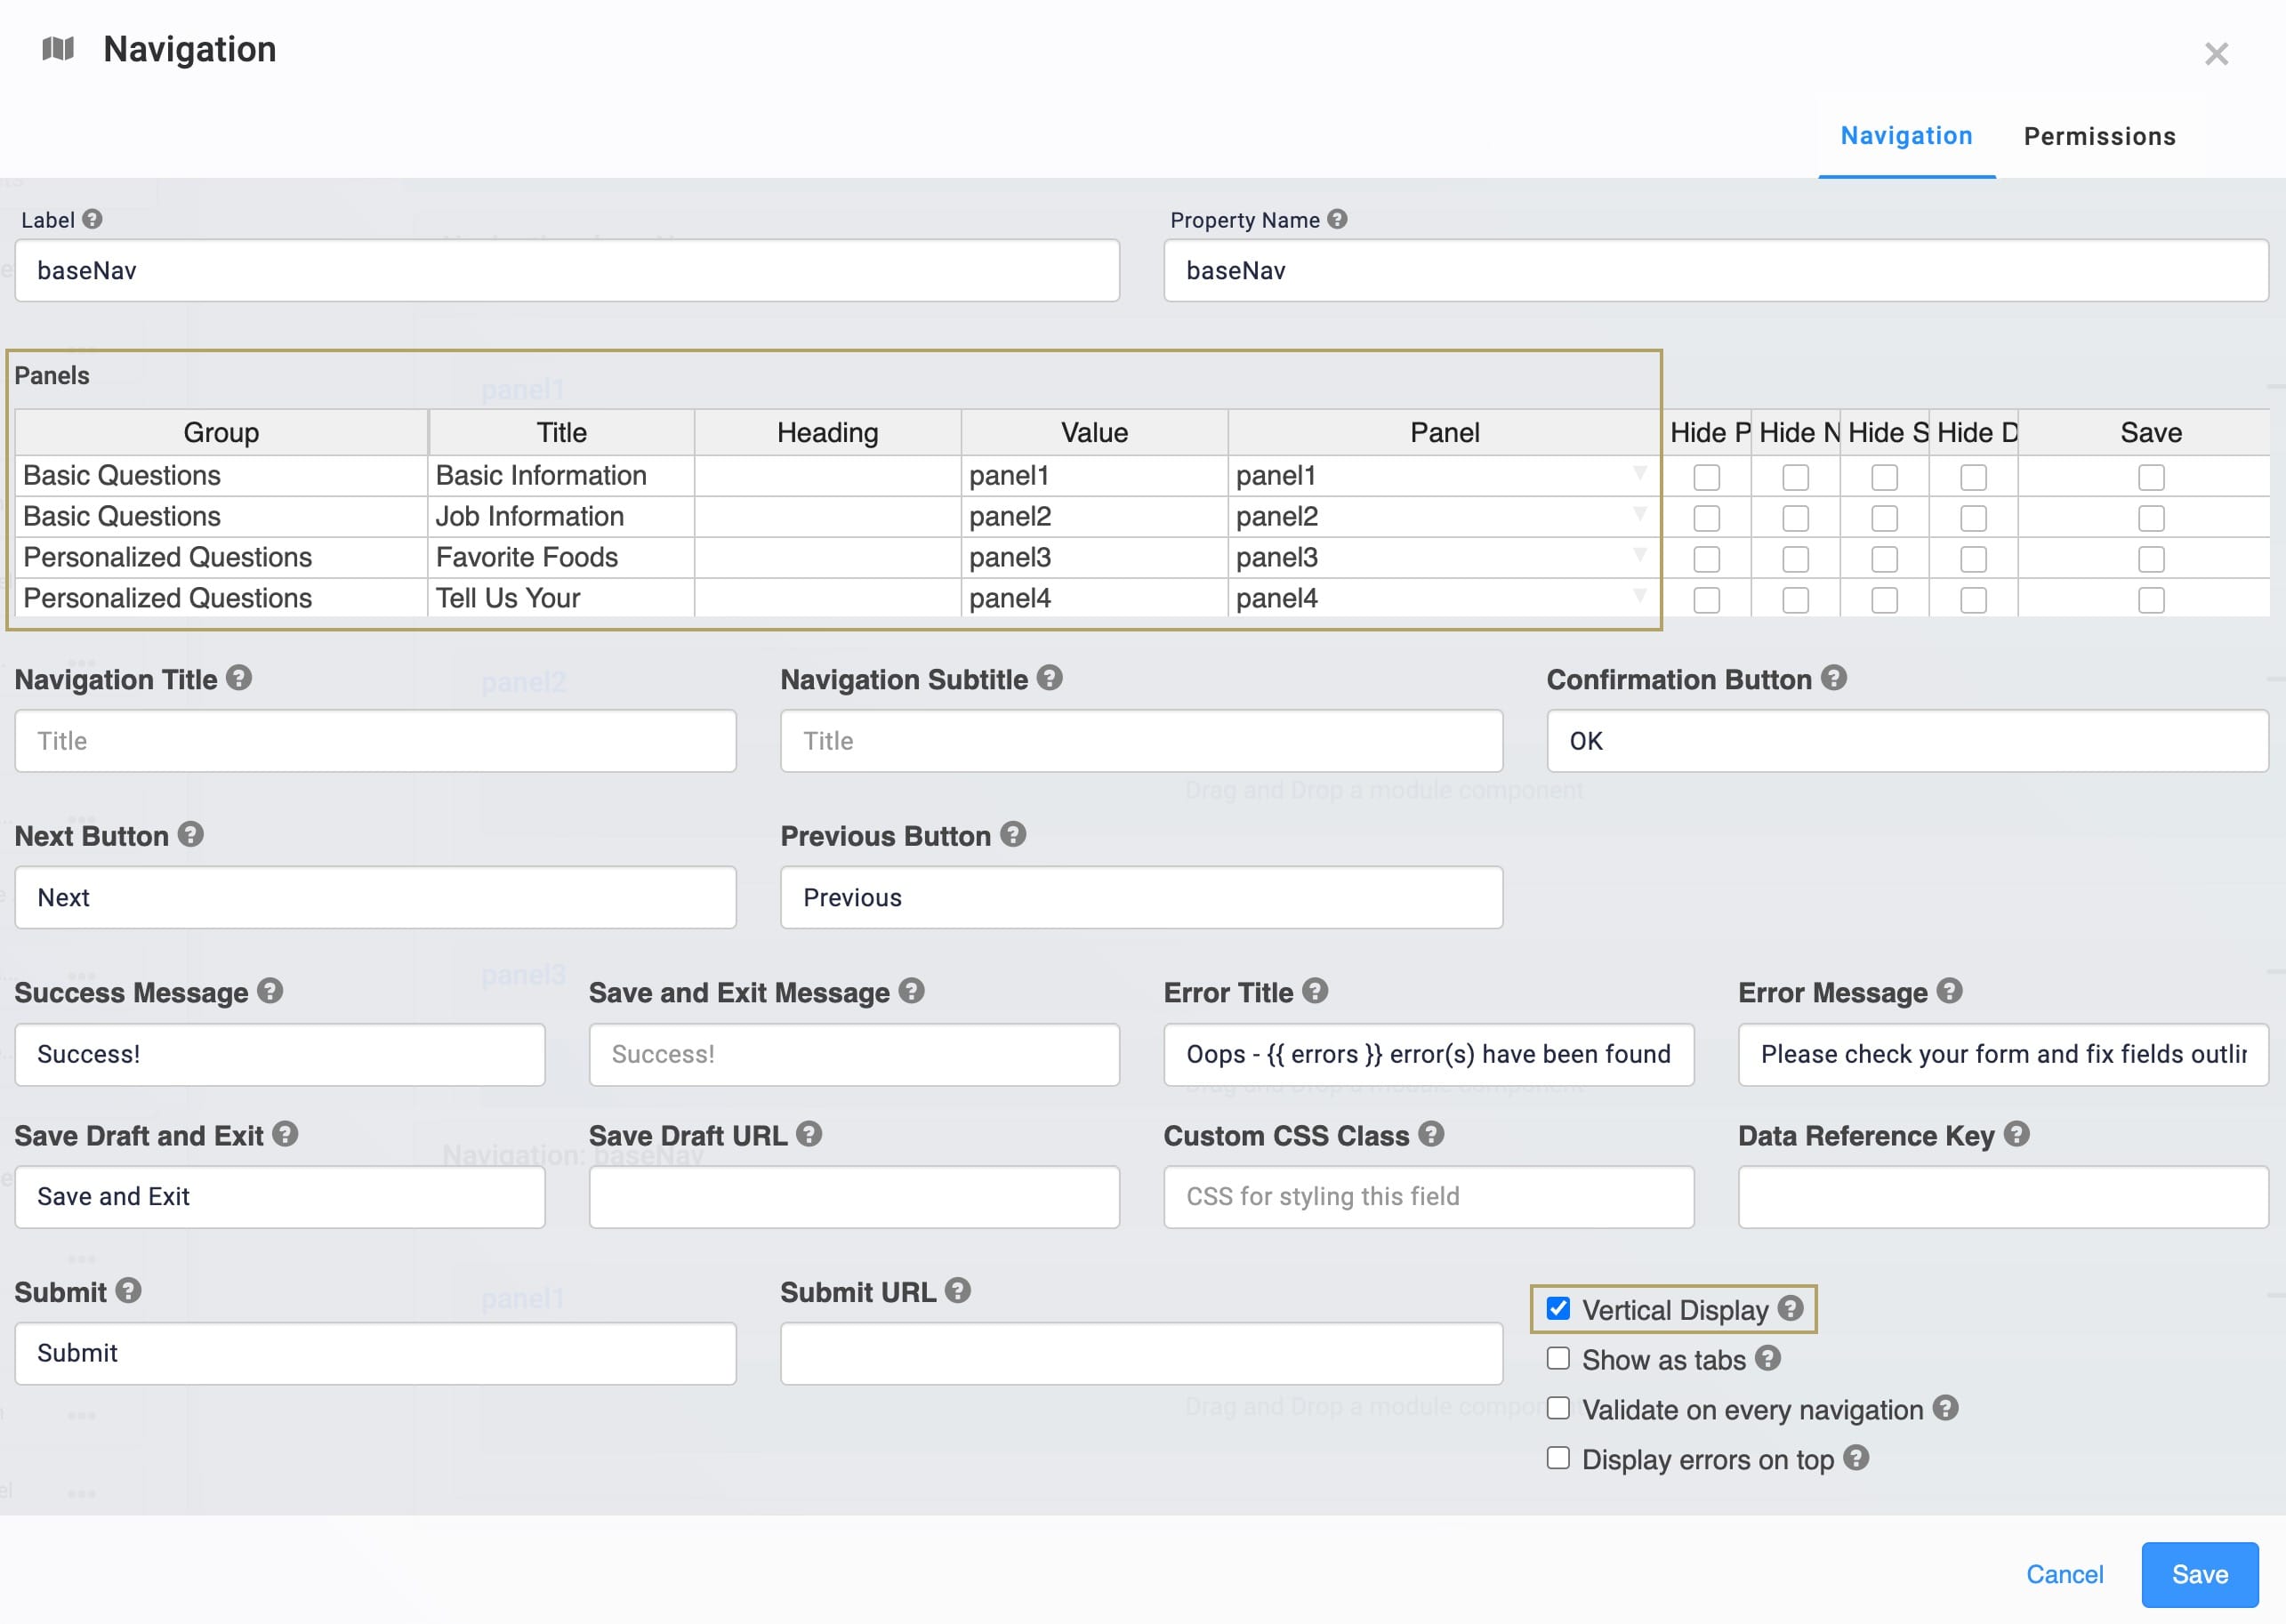
(Settings) button.Update the Panels table as follows:
Group
Title
Heading
Value
Panel
Basic Questions
Basic Information
panel1
panel1
Basic Questions
Job Information
panel2
panel2
Personalized Questions
Favorite Foods
panel3
panel3
Personalized Questions
Tell Us Your Dreams!
panel4
panel4
Click the Vertical Display box.
Click Save.
Save your module.