Overview
The Generate Excel snippet gives you an Export button you can add to your module. When your end-user clicks the button, they'll download an .xlsx file of the module's data.
This snippet is a great addition to a dashboard. Use it any time to give your end-user the ability to export their dashboard data.
The snippet works out-of-the-box, exporting the data found in the Data Table component. But, when you set the snippet up in your own module, you can configure it to export any of the data in the module.
Here's how the snippet looks in Express View:
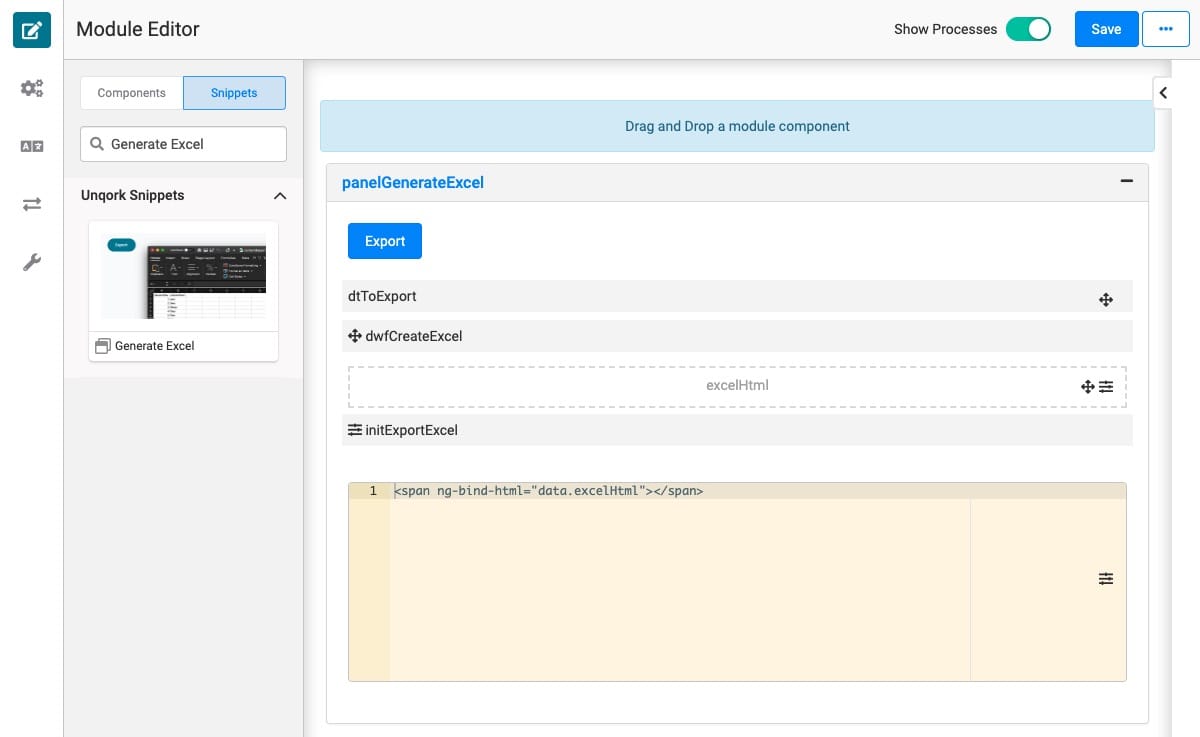
And here's how the snippet looks in the Module Builder:
Adding the Snippet
Once you determine a need for generating an excel sheet, you'll add the Generate Excel Snippet.
Before you use this snippet in your application, you must install the snippet to your environment.
Adding the Snippet to Your Environment
To add the snippet to your environment:
At the top right of the Unqork Designer Platform, click Library.
Click Templates.
Click Marketplace.
You can also access the Marketplace at any time by visiting https://marketplace.unqork.io.
In the Search the Listings Directory field, enter Generate Excel.
Click the Generate Excel tile.
Click Install to Environment.
Click Install Template.
If you aren't logged in, you'll see a field for Environment URL and a Login button. Enter your environment's URL where to install the template. For example: [environmentname.unqork.io]. Click the Login button. Then, return to step 4 and click Install to Environment again. Follow the remaining steps as listed.
Now, you can now use your newly installed snippet in your application.
Adding the Snippet to Your Module
After you install the Generate Excel snippet to your environment, you can drag and drop the snippet into your module:
In the left sidebar of the Module Builder, click the Snippets button.
In the search bar, enter Generate Excel.
Drag and drop the Generate Excel snippet onto your canvas.
If you don't see the snippet at first, make sure to expand the Marketplace Snippets section.
Save your module.
How the Snippet Works
The Generate Excel snippet has 6 components that all work together. The chain of events starts with a button click and ends with an .xlsx file downloaded to the end-user's desktop.
First, your end-user clicks the Export button. The button triggers the Data Workflow. Here's what the Data Workflow's canvas looks like:
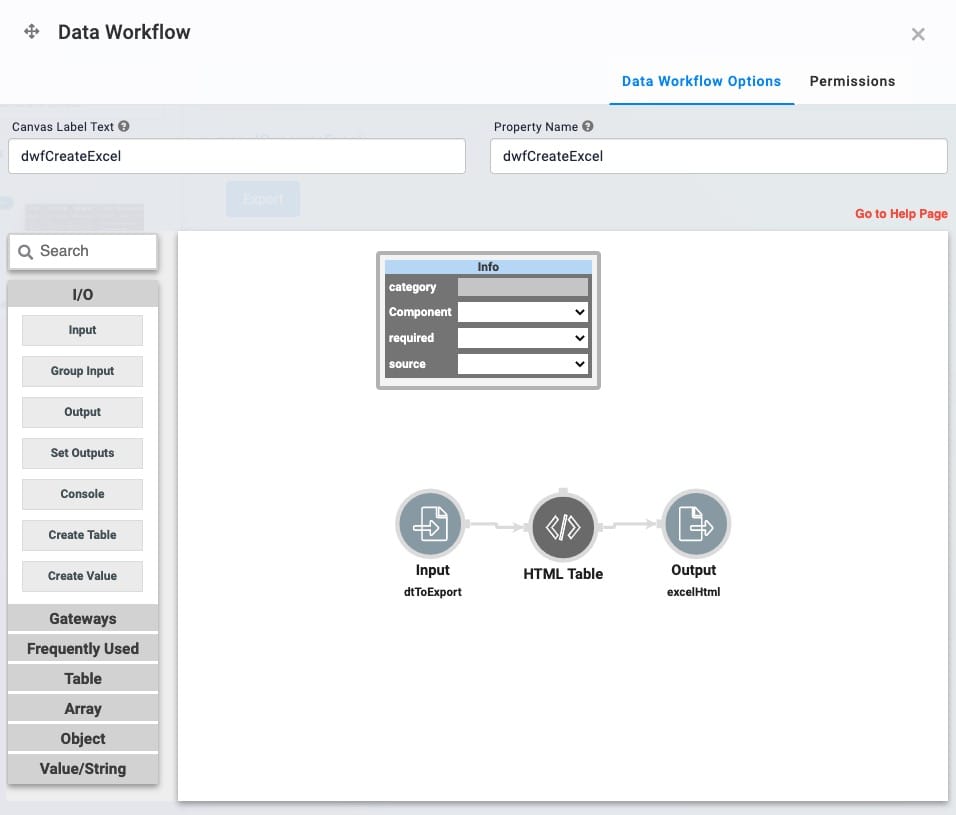
As you can see, the Data Workflow inputs the data from the Data Table. It then converts that data to an HTML table. Finally, the Data Workflow outputs the HTML table to the excelHTML Hidden component.
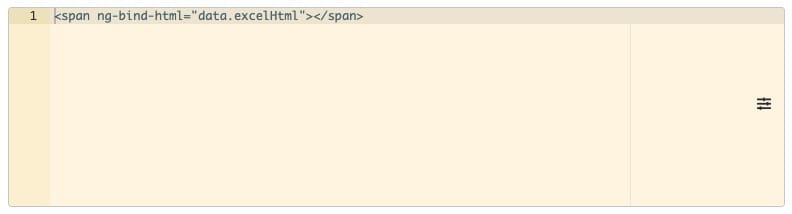
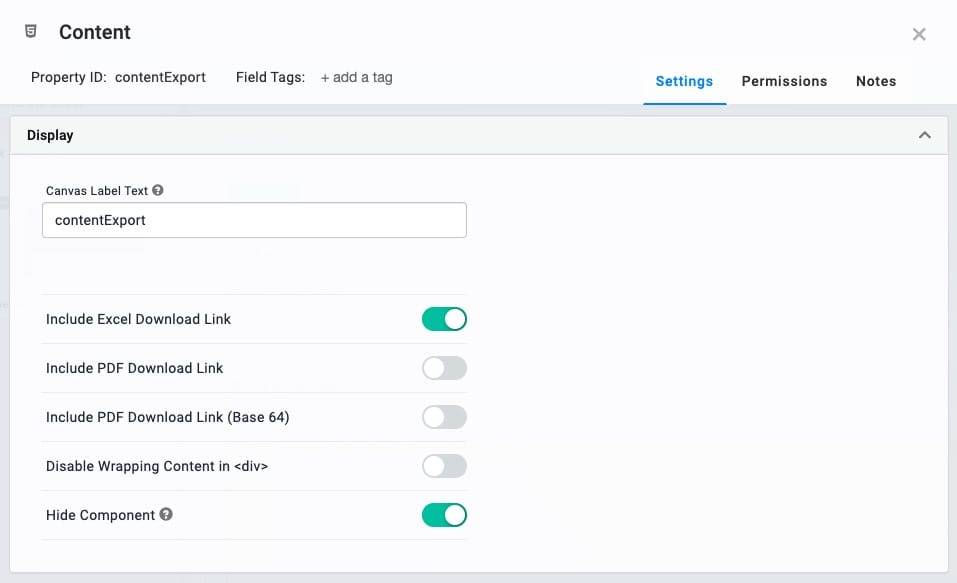
Then the initExportExcel Initializer component comes into play. This Initializer uses the Hidden component as its input. So, when the Data Workflow outputs data to the Hidden component, the Initializer gets triggered. The Initializer then triggers the Content component. The Content component is what actually downloads the Excel file. In the image below, you can see how the Content component pulls the data from the excelHtml component:
In the configuration window of the Content component, you'll see the toggle for Include Excel Download Link is set to ON. This allows the data in the Content component to download as an .xlsx file. The Hide Component setting is also set to ON. That way, the only thing visible in the front end is the Export button.
Setting Up the Snippet
By default, the snippet exports an .xlsx file that looks like this:
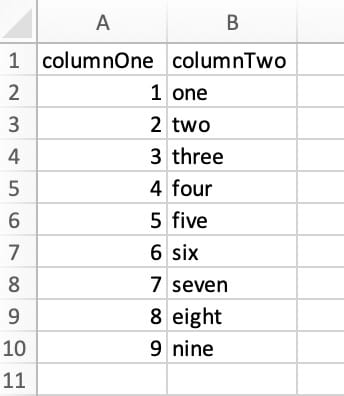
Most likely, this file isn't useful to you. That's because it's a placeholder. To integrate this snippet into your module, you'll customize the export with your module's data.
The file name comes from the Property ID of your export Content component. But, you can customize this feature as well.
Connecting The Snippet to Your Dashboard
The key to connecting this snippet to the module's data is in the excelHTML Hidden component. Whatever data you output into that Hidden component is exported in the Excel file. If you have a dashboard module, you have a Plug-In whose data you can output to the Hidden component. See below for how to connect this snippet to an existing dashboard.
These instructions assume you have a working dashboard.
Adding the Snippet
To add the snippet to your module:
In the left sidebar of Module Builder, click the Snippets button.
In the search bar, enter Generate Excel.
Drag and drop the Generate Excel snippet onto your canvas, positioning it either above or below the ViewGrid component.
Save your module.
Deleting the Data Table Component
In the Module Builder hover over the dtToExportData Table component.
A 5-button toolbar displays above the component on hover-over.
Using the toolbar, click the
.jpg) (Remove) button.
(Remove) button.
Updating the Data Workflow Component
In the Module Builder hover over the dwfCreateExcelData Workflow component.
A 5-button toolbar displays above the component on hover-over.
Using the toolbar, click the
.jpg) (Settings) button.
(Settings) button.Click the Input operator.
In the Component field, select your Plug-In component that retrieves submissions.

Click Save.
Your dashboard now has an Export button that pulls and exports the dashboard's data.
Customizing the Snippet
There are two different ways you can customize what data gets exported into the Excel file. You can either omit certain data from the file or choose which data to include in the file. Which method you choose depends on how many values you include in the Excel file. If you want to omit one or two values, the Omit operator is easiest. If you want to include a small number of the values, the Pick operator is better.
Updating the Data Workflow Component
In the Module Builder hover over the dwfCreateExcelData Workflow component.
A 5-button toolbar displays above the component on hover-over.
Using the toolbar, click the
(Settings) button.
Configuring the Pick Operator
The first way you can customize the Excel file is by choosing which data to include in the file. For this, you'll use the Pick operator.
Drag and drop a Pick operator onto your Data Workflow canvas.
In the Pick Keys field, enter the values to export. Separate each value with a comma.
Delete the line connecting the Input operator and HTML Table operator.
Connect the output port (right) of the Input operator to the input port (left) of the Pick operator.
Connect the output port (right) of the Pick operator to the input port (left) of the HTML Table operator.

Click Save.
Configuring the Omit Operator
The Omit operator works the same way as the Pick operator, but in reverse. So, enter any values you don't want to export into the Omit Keys field.
Drag and drop an Omit operator onto your Data Workflow canvas.
In the Omit Keys field, enter the values you don't want to export. Separate each value with a comma.
Delete the connection between the Input operator and HTML Table operator.
Connect the output port (right) of the Input operator to the input port (left) of the Omit operator.
Connect the output port (right) of the Omit operator to the input port (left) of the HTML Table operator.
Click Save.
Your Excel file now omits any values you added to the Omit operator.
Removing the Snippet
You might want to remove a snippet from your application. Here, you'll learn how to remove the snippet from your module. Then, you'll learn how to uninstall the snippet from your environment.
Remove the Snippet from Your Module
To remove the Generate Excel snippet:
In the Module Builder, hover over the panelGenerateExcel Panel.
A 5-button toolbar displays above the component on hover-over.
Using the toolbar, click the
(Remove) button.Save your module.
Remove the Snippet from Your Environment
Use the Unqork Template Library to remove unused snippets. To uninstall a snippet from your environment:
At the top right of the Unqork Designer Platform, click Library or Templates.
Find the snippet you want to uninstall.
Click the ellipsis (...) in the snippet's tile header.
Click Uninstall Template.
Click Yes, Uninstall in the confirmation modal.
You can visit the Marketplace and reinstall the snippet at any time.
What if you have an existing application built using this snippet and then uninstall the snippet from your environment? No problem. Your existing application remains unaffected. Also, your application doesn't have any ties to the snippet. So, let's say you reinstall a newer version of the snippet in the future. You can rest assured that the installation doesn't impact your existing application.