Overview
The Excel CSV Upload and Mapping snippet lets your end-user upload an Excel or CSV (comma-separated values) file to your application. From there, the snippet maps the Excel data to Unqork key names. This means your Excel data becomes Unqork-friendly, so you can reference it in your application. For example, you can easily build a dashboard that displays the data from your uploaded file.
This snippet is ready-to-use. So all you do is add it to your environment and add it to your module. Then, your end-user can upload a CSV file in Express View. You can also configure a dashboard to display data from the uploaded file.
There is a known issue with Chrome and Chromium-based browsers where uploading XLSX and XLS files from non-US locales might incorrectly parse the timestamp value. For example, the timestamp might be off by one-tenth. To avoid this issue, use a different browser (like Firefox or Safari), change your browser's locale, or manually adjust incoming date values to YYYY-MM-DD-T12:mm:ss.sssZ as a workaround.
Here’s how the Excel CSV Upload snippet looks in Express View:
And here’s how the snippet looks in the Module Builder: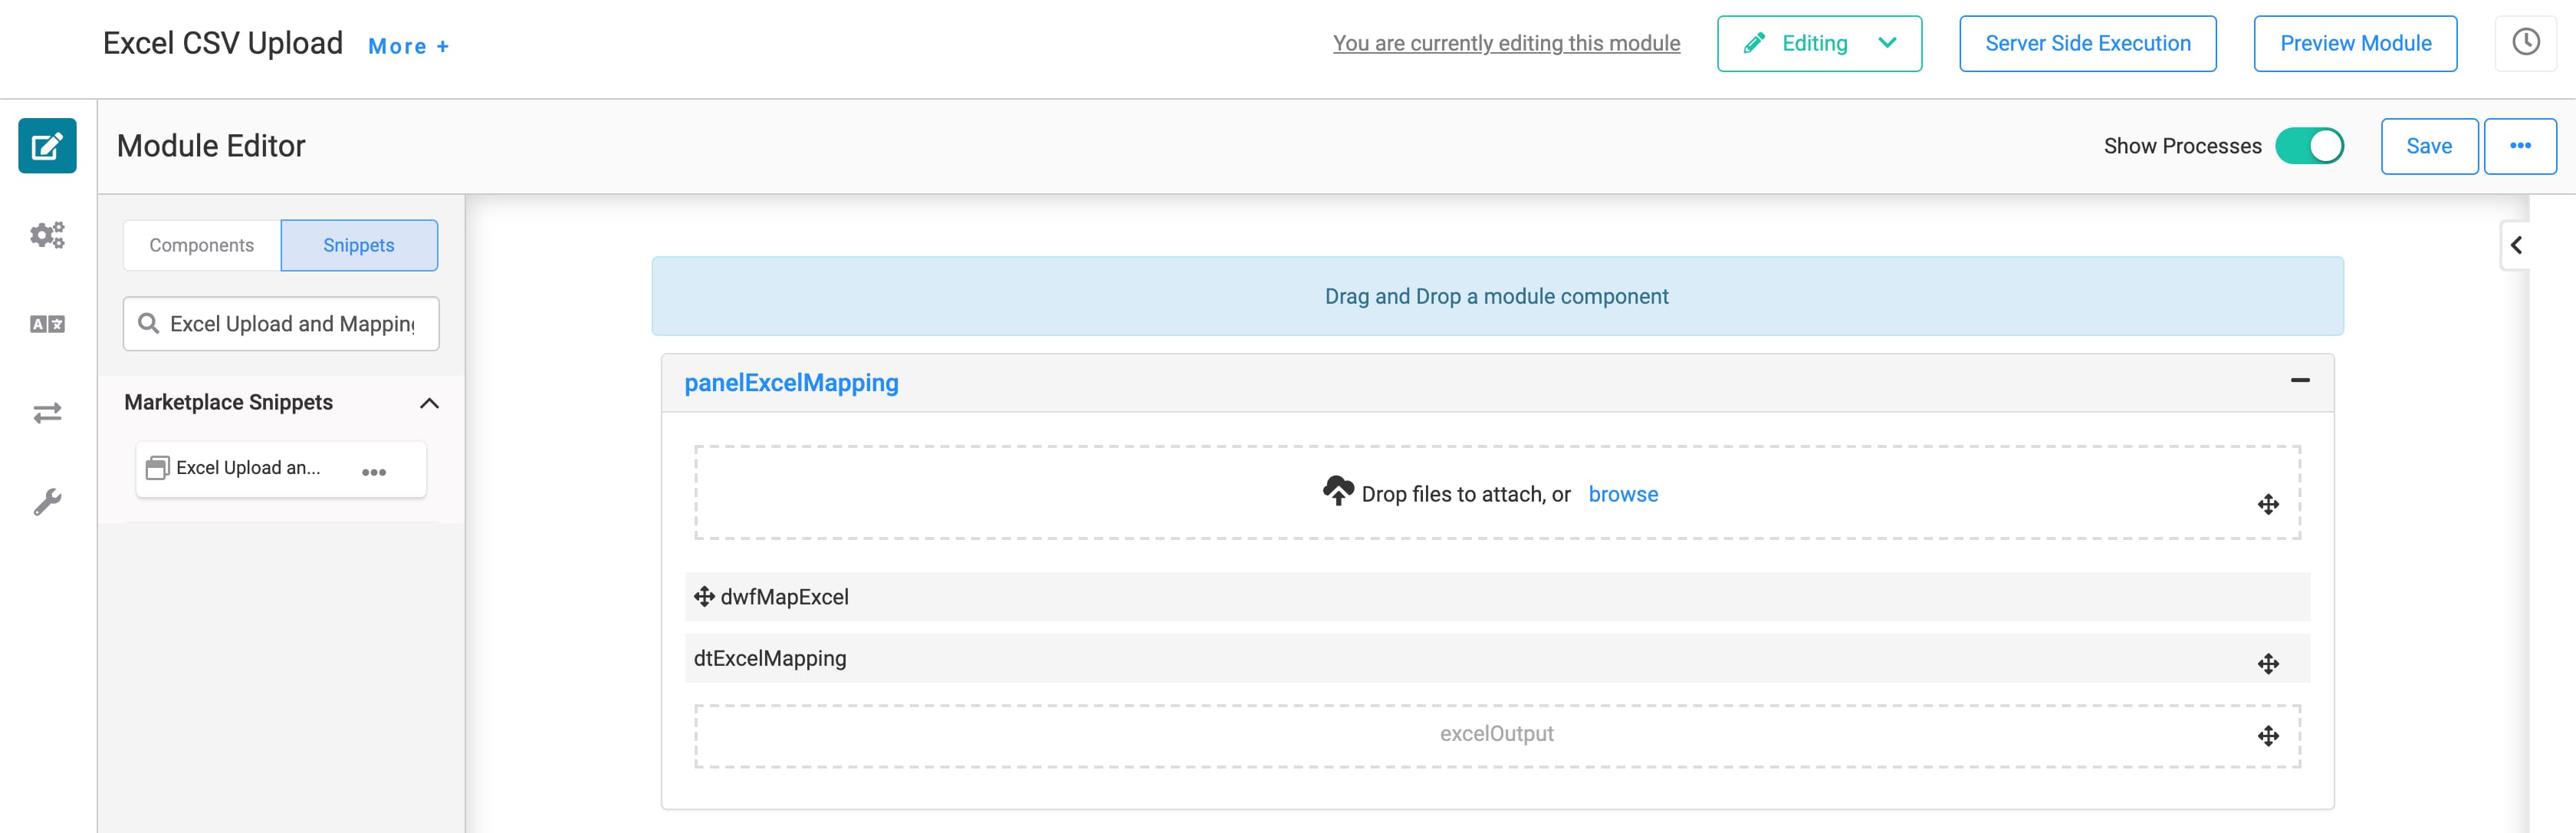
Adding the Snippet
Before you use this snippet in your application, you must install the snippet to your environment.
Adding the Snippet to Your Environment
To add the snippet to your environment:
At the top right of the Unqork Designer Platform, click Library.
Click Templates.
Click Marketplace.
You can also access the Marketplace at any time by visiting https://marketplace.unqork.io.
In the Search the Listings Directory field, enter Excel CSV Upload and Mapping.
Click the Excel CSV Upload and Mapping tile.
Click Install to Environment.
Click Install Template.
If you aren't logged in, you'll see a field for Environment URL and a Login button. Enter your environment's URL where you want to install the template. For example: [environmentname.unqork.io]. Click the Login button. Then, return to step 4 and click Install to Environment again. Follow the remaining steps as listed.
Now, you can now use your newly installed snippet in your application.
Adding the Snippet to Your Module
After you install the Excel CSV Upload and Mapping snippet to your environment, you can drag and drop the snippet into your module:
In the left sidebar of the Module Builder, click the Snippets button.
In the search bar, enter Excel Upload and Mapping.
Drag and drop the Excel Upload snippet onto your canvas.
If you don't see the snippet at first, make sure to expand the Marketplace Snippets section.
Save your module.
How the Snippet Works
The Excel CSV Upload and Mapping snippet lets your end-user upload an Excel or CSV file in Express View. From there, your end-user can download and view the uploaded file. The snippet also lets them upload files in bulk.
Here's how the components work together in this snippet. The File Component lets your end-user upload their file. After the upload, the File Component triggers your Data Workflow. The Data Workflow pulls the data from the uploaded file and from your dtExcelMapping Data Table component. The Map Keys operator in your Data Workflow maps each Excel column to an Unqork key name. You can see this mapping setup in your Data Table component. As it stands, the components map Field A to fieldA, Field B to fieldB, and Field C to fieldC.
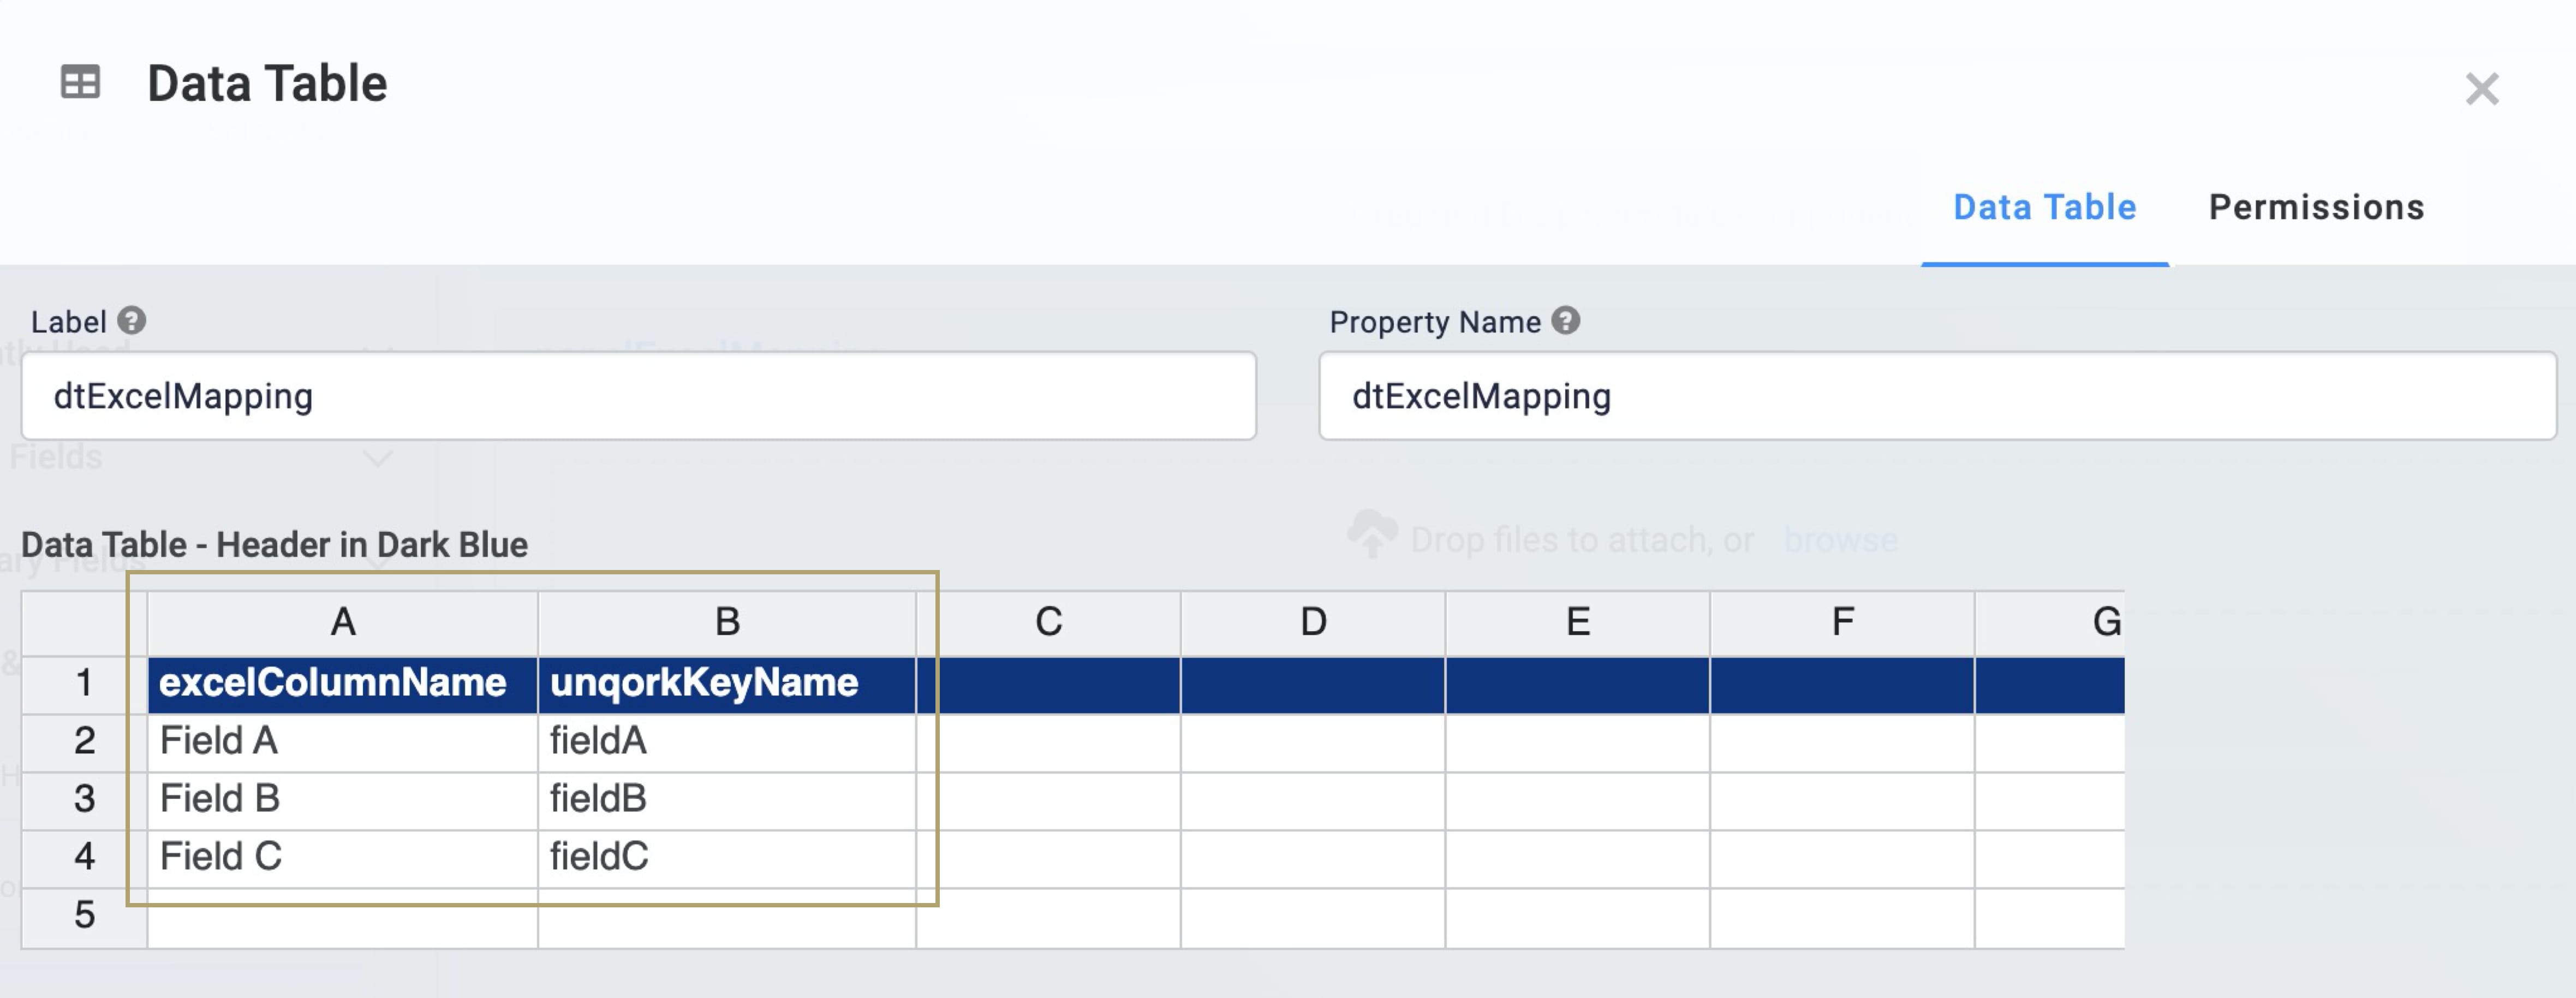
You can keep this as is or change it to something that works better for you. Notice that the key names are in camel case (stylized as camelCase). This makes the column names of your Excel files play nicely with Unqork.
From there, the Data Workflow maps the file and data table together and outputs to your excelOutput Hidden component. This data saves to Unqork's database, which means you can reference it to build a dashboard.
Customizing the Snippet
The Excel CSV Upload snippet is ready-to-use, so you don't need any extra configuration to make it work. But, after adding the snippet to your module, you can customize it. For example, say you want to display an uploaded file's information in a dashboard. All you do is add and configure a ViewGrid component. This creates a dashboard in Express View for your end-users.
For this example, you'll build a quick dashboard. This displays contact information from the uploaded CSV files. To do this, you'll add and configure a ViewGrid component. Let's get started.
Here's how the completed functionality looks in Express View: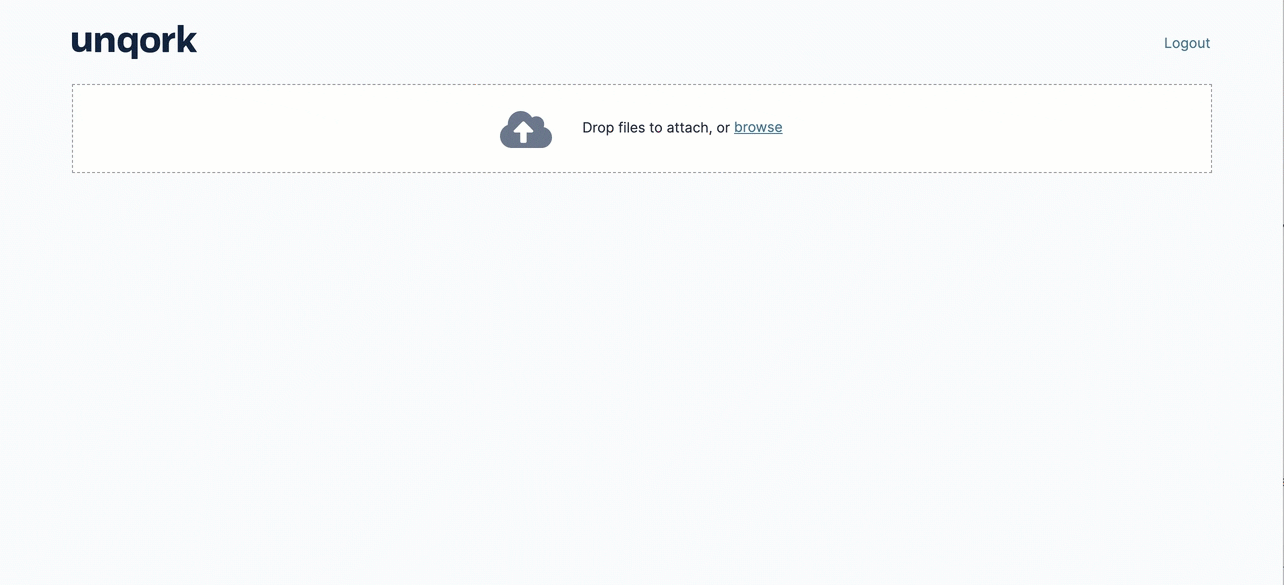
Configuring the ViewGrid
The driving force of this configuration is the ViewGrid component. This is what displays a dashboard in your module in Express View.
Drag and drop a ViewGrid component onto your canvas, placing it below the Hidden component.
In the Label field, enter Contacts.
In the Property Name field, enter gridContacts.
In the Action field, enter null. This removes the action button from your dashboard.
In the Inputs table, enter the following:
ID
Required
excelOutput
No (unchecked)
In the Display table, enter the following:
ID
Formula
Heading
fieldA
Name
fieldB
Phone
fieldC
Location
Click Save.
Save your module.
Now, if you preview your module and upload an Excel or CSV file, the dashboard populates with that file's information.
Removing the Snippet
You might want to remove a snippet from your application. Here, you'll learn how to remove the snippet from your module. Then, you'll learn how to uninstall the snippet from your environment.
Remove the Snippet from Your Module
To remove the Excel CSV Upload and Mapping snippet:
In the Module Builder, hover over the panelExcelMapping Panel.
A 5-button toolbar displays above the component on hover-over.
Using the toolbar, click the
.jpg) (Remove) button.
(Remove) button.Save your module.
Remove the Snippet from Your Environment
Use the Unqork Template Library to remove unused snippets. To uninstall a snippet from your environment:
At the top right of the Unqork Designer Platform, click Library or Templates.
Find the snippet you want to uninstall.
Click the ellipsis (...) in the snippet's tile header.
Click Uninstall Template.
Click Yes, Uninstall in the confirmation modal.
You can visit the Marketplace and reinstall the snippet at any time.
What if you have an existing application built using this snippet and then uninstall the snippet from your environment? No problem. Your existing application remains unaffected. Also, your application doesn't have any ties to the snippet. So, let's say you reinstall a newer version of the snippet in the future. You can rest assured that the installation doesn't impact your existing application.