Overview
The Verify Equal Values snippet uses a Data Workflow component to compare all values in an object or an array (the snippet includes configuration for both). If all the values are equal, the snippet returns a value of True. If any values aren’t equal, it returns False.
The snippet uses sample data, but you can easily connect your own data source or bring in data from an API. The snippet also includes a UI section for Express View to show you how the logic works: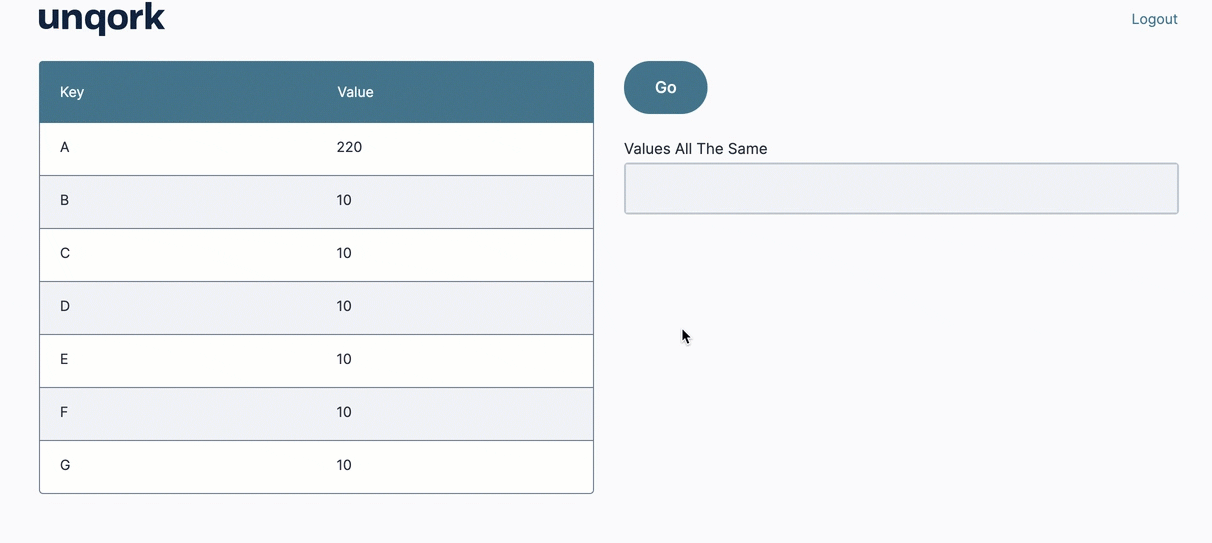
And here's how the array section looks in the Module Builder: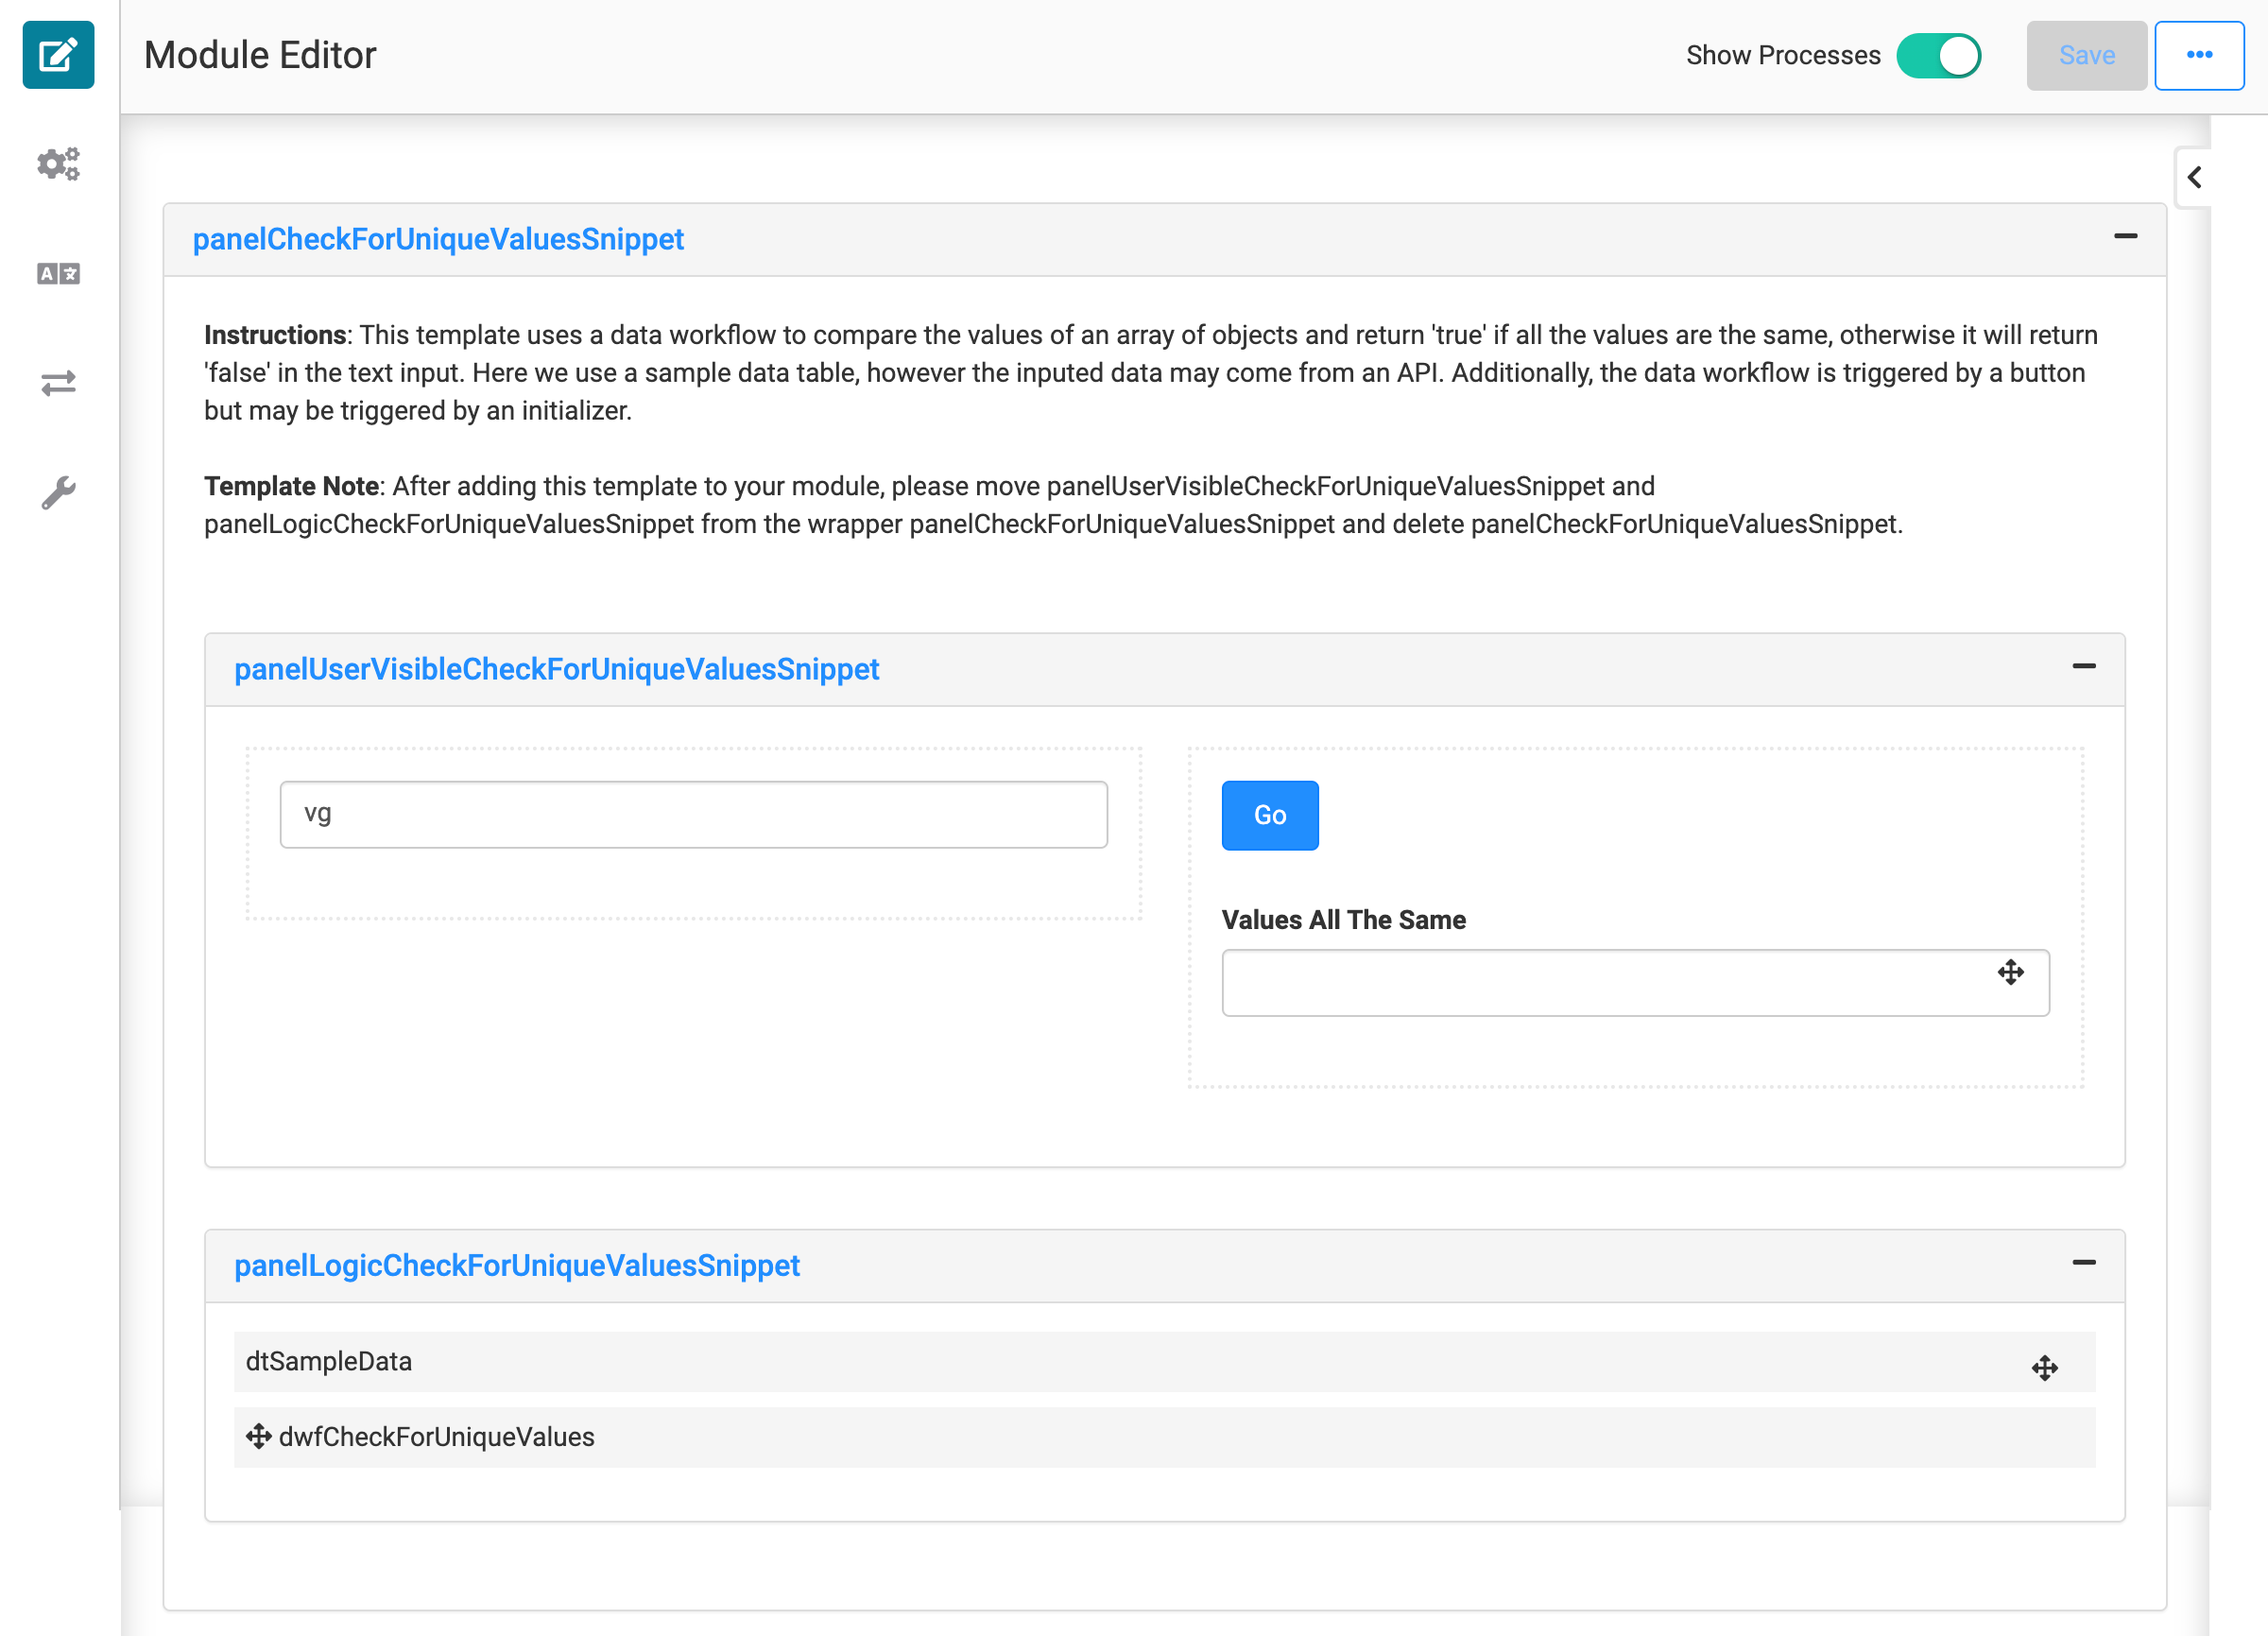
How the Snippet Works
There are 2 large Panels in this snippet. One holds the array version of the configuration (panelCheckForUniqueValueSnippet) and the other holds the object version (panelCheckSingleObjectForUniqueValueSnippet).
Both versions work similarly. The end-user clicks the Go button, which triggers the Data Workflow. The Data Workflow verifies whether all the values in the input are the same. It then outputs the True or False result to a Text Field component.
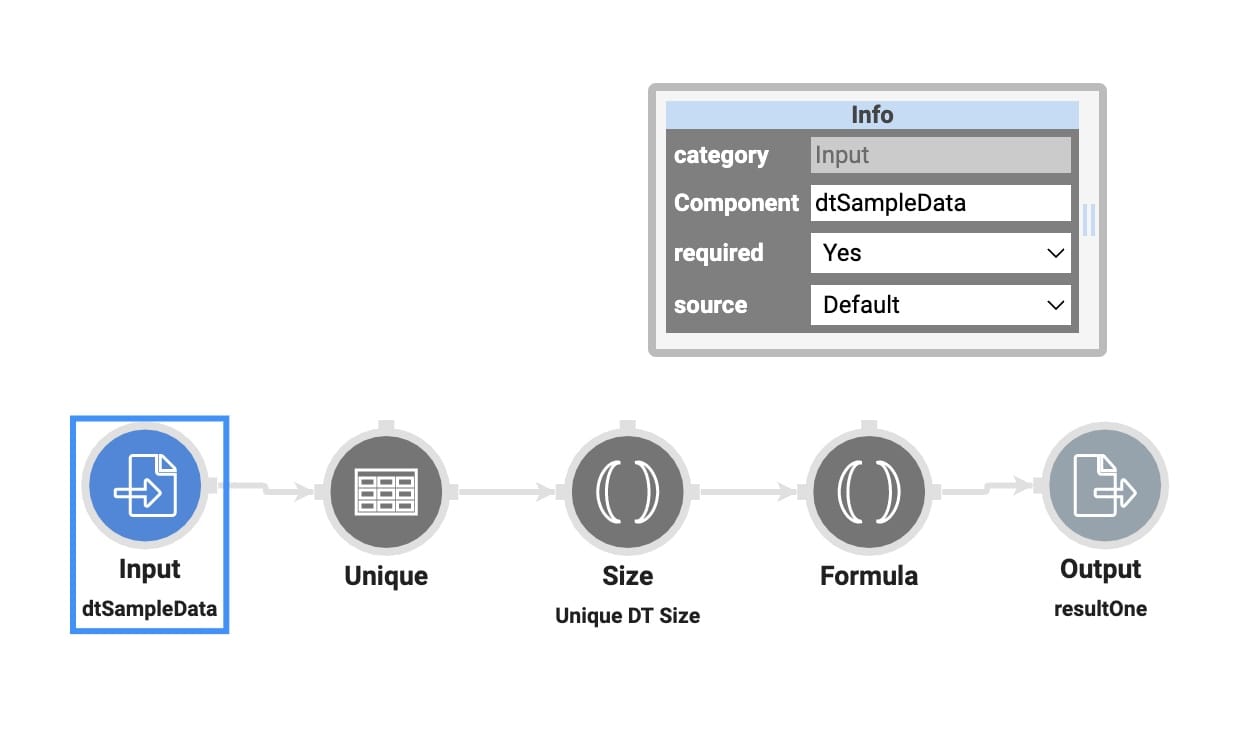
The Array Version
The array version uses a Data Table as its sample data. dwfCheckForUniqueValues is the component that verifies the values.
This version also contains the ViewGrid that shows you the data on the front-end.
The Object Version
This version differs because you need to create an object from scratch to test the functionality. To do this, the sampleObject Hidden component contains a JSON string. dwfSampleObject turns that string into an object. dwfCheckValues is the component that verifies the values. 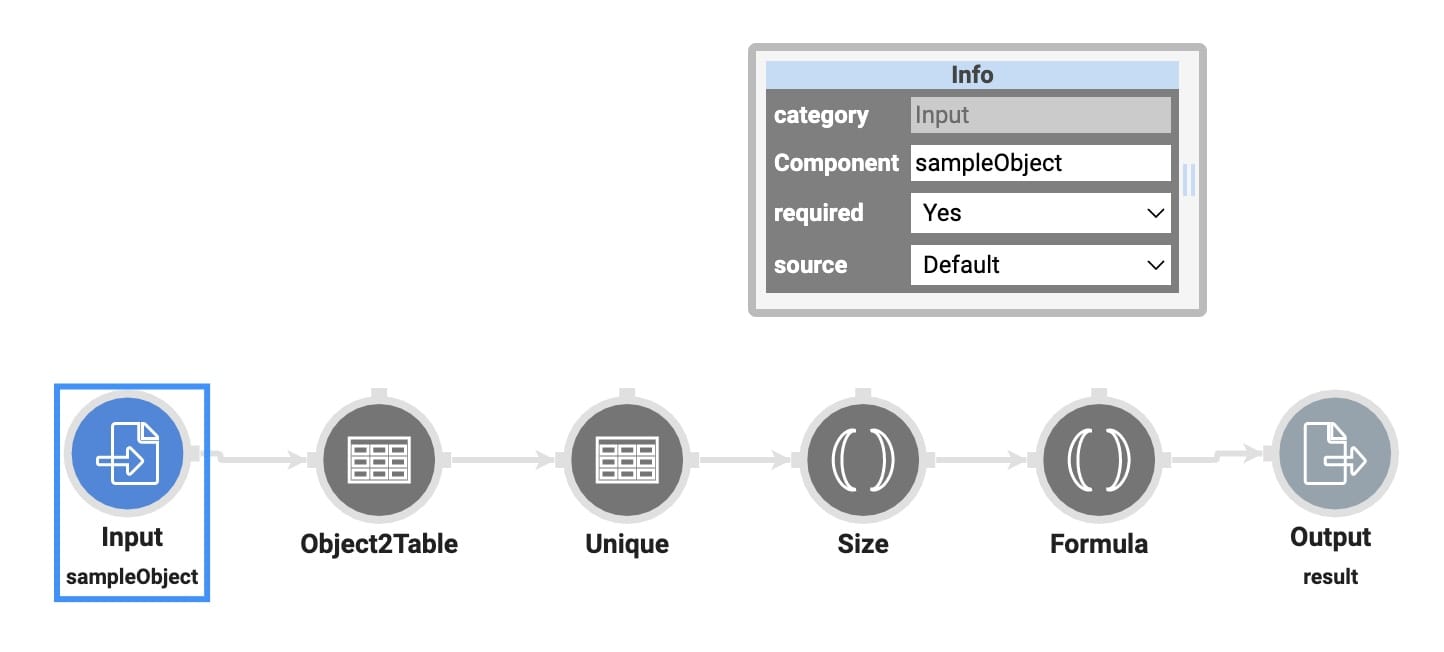
Setting Up the Snippet
The main thing to keep from this snippet is the Data Workflow, which checks the values. All other components can be reconfigured or deleted. To set up this snippet:
Decide whether you need the object or array version of the snippet.
Remove the panelCheck... for the version you aren’t using.
Move the two interior Panels (panelUser... and panelLogic...) out of the panelCheck... Panel.
Remove panelCheck... from your module.
Add your own data source as the input in the Data Workflow.
Delete the components holding the placeholder data.
Delete any additional components you aren't using.
By default, the Data Workflow is triggered by the Button component. But if you want the data to output automatically, you can use an Initializer with a New Submission Trigger Type.