Services Administration
Overview
The Services Administration page enables users to create, view, edit, and delete external API APIs (application programming interfaces) are a set of protocols and definitions developers use to build and integrate application software. APIs act as the connective tissue between products and services. or authentication services. Examples of external services include Google Places API, Twilio API, OAuth2 Authentication Grants, and GPG Encryption/Decryption.
WSRBAC (workspace role-based access control) controls access to functions of Services Administration page. For more information on what roles can access and edit Services Administration data, view the Creator Role Administration article.
To learn how to add a service to the environment, view our Administration Services - How to: Add a Service article.
Navigating to a Service
After creating a service. Creators Also known as Unqork Users, or Designer Users; is anyone who is inside the Unqork platform. can access the service's management page to edit service info, workspace access, service type, and more.
To access and edit a service from the Services Administration page:
| 1. | In the Services Administration list, navigate to the service you want to view or edit. |
| 2. | In the Actions column, click Manage. |
| 3. | Select Open. The service page displays. |
| 4. | At the top right of the page, click  Edit. Edit. |
Service Settings
Service Info
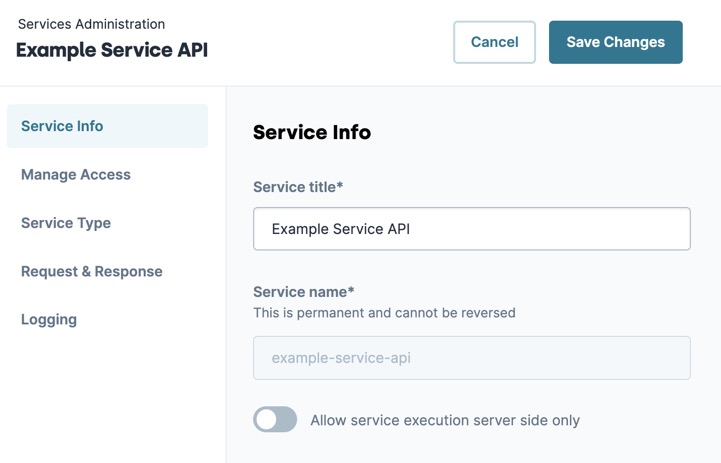
The Service Info section lets you name the service, and choose whether it's only available for server-side execution.
| Setting | Description |
|---|---|
|
Service Title* |
Enter the name of the service. A descriptive title helps other Creators understand the service. *This field is required. |
|
Service Name* |
The permanent system-name for the service. This value is for reference and cannot be changed. |
|
Allow Service Execution Server Side Only |
Set to (ON) to prevent the service from being used in modules with the Server-Side Execution Only setting set to (OFF). When set to (ON), the service is configurable in non server-side modules, but it does not function in Express View. |
Manage Access
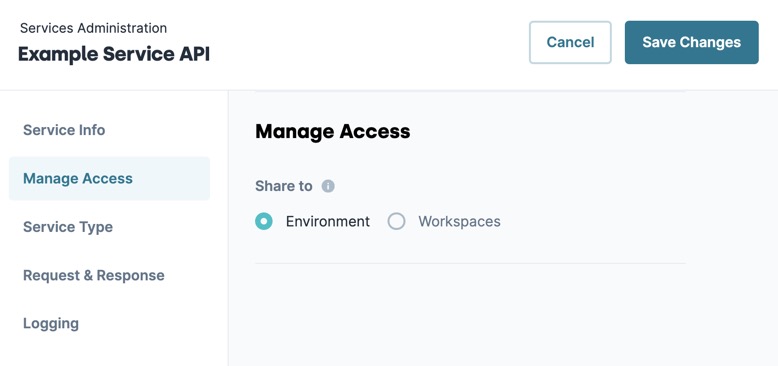
The Manage Access section controls if the environment or specific workspaces can use the service.
| Setting | Description |
|---|---|
|
Share to |
Grant service access to the environment, or select one or more workspaces where you want to share the service. Removing Environment or Workspaces access to a service breaks configurations using that service in the removed workspaces. |
Service Type
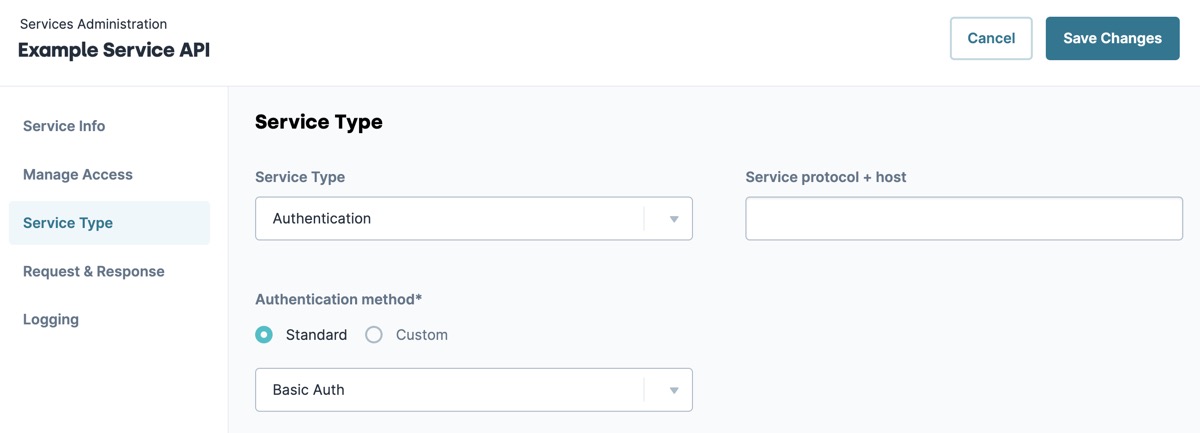
Use the Service Type section to set up the service connection.
| Setting | Description |
|---|---|
|
Service Type |
Specify the type of service you want to connect. The service type controls what settings are available for the authentication method. Service types include:
|
|
Service Protocol + Host |
Enter the service's endpoint to connect to Unqork. For example, https://places.googleapis.com/v1/places/ |
|
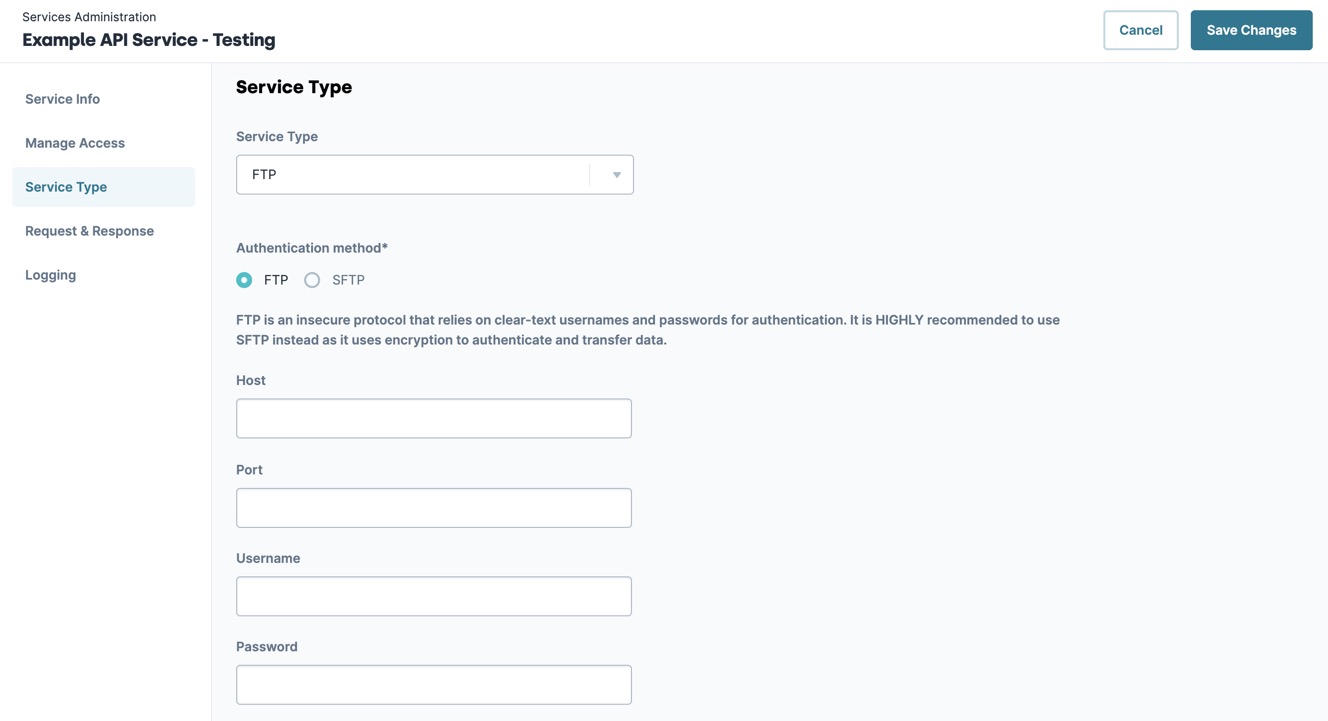
Authentication Method* |
The Authentication Method depends on the selected Service Type. |
Service Types
Unqork offers three service types: Authentication, Encryption, and FTP.
To learn how to set up external APIs in detail, visit our How to: Setup External APIs article.
Authentication Service Type Settings
Creators can set up access to dozens of services using the Authentication Service Type. Refer to each service's API access documentation to see which authentication method they use, and what keys must be obtained to access.
Client Secrets, passwords, and other service information are encrypted and stored in the local database.
Using the menu below, select a service to discover its settings:
|
No AuthenticationNo Authentication provides support for SOAP Digital Signatures. To learn how to set up SOAP Digital Signatures, view our Enabling Soap Digital Signatures article in the Doc Hub. |

Request & Response
The Request and Response settings provide request headers, body, and response headers. Use these headers and body to provide required or additional information in the HTTP request made to the service. Values in these fields send with every request.
Request Headers
Request headers provide context about an HTTP request. They help define caching, authentication, and session state.
Request Body
Use the request body for create and update operations (POST, PUT, PATCH). The request body contains the resources to be created or updated.
Services might use the Request Body field in a GET request to define the data retrieved from a service.
Allowed Response Headers
Specify what header names will return in the HTTP response.
Logging
Logging service requests provides Creators with additional information on when and how a service is used.
To access and understand service logs, view our Understanding Service Logs article in the Doc Hub.
| Setting | Description |
|---|---|
|
Capture Request and Response Bodies |
Set to (checked) to enable logging for this service. |
|
Retention Days (defaults to 30 days) |
Enter a value to retain services for longer or less than 30 days. |
|
PagerDuty Service Key (for optional alerting) |
Enter a service key to integrate service logs with PagerDuty. To learn more about PagerDuty API keys and service, view the following documentation: https://support.pagerduty.com/docs/pagerduty-agent-integration-guide#send-an-event-to-pagerduty. |
Logging Resources
