Creator (User) Administration is where you'll add, edit, and delete your Creator users. Creator users can help build and maintain applications in your Unqork environment. They can also access other Designer tools, including document templates and services. When adding a Creator user, you'll also assign Creator roles to each person. Creator roles help you set all the specific permissions for your Creator users.
You'll manage users and roles separately for Express View and Designer tools. To manage your Creator users, you'll use Creator (User) Administration and Creator Role Administration. To manage your Express end-users, you'll use Express User and Express Role Administration. Express users are the end-users who:
Exclusively test your applications in the Express View of development environments.
Only interact with your production applications on the front-end.
Adding a Creator User
If you want a user to have access to your Designer tools, you'll add them as a Creator user. We call these users Creators for short. You'll set permissions for your Creators by assigning Creator roles.
Some Creators also have full access to Express View. But an Express user can never access Designer tools.
To add a Creator user:
Click the Settings drop-down at the top right of the Unqork Designer Platform.
Click Administration.
Under Creator Permissions, select Creator (User) Administration.
Click the Add Creator button.
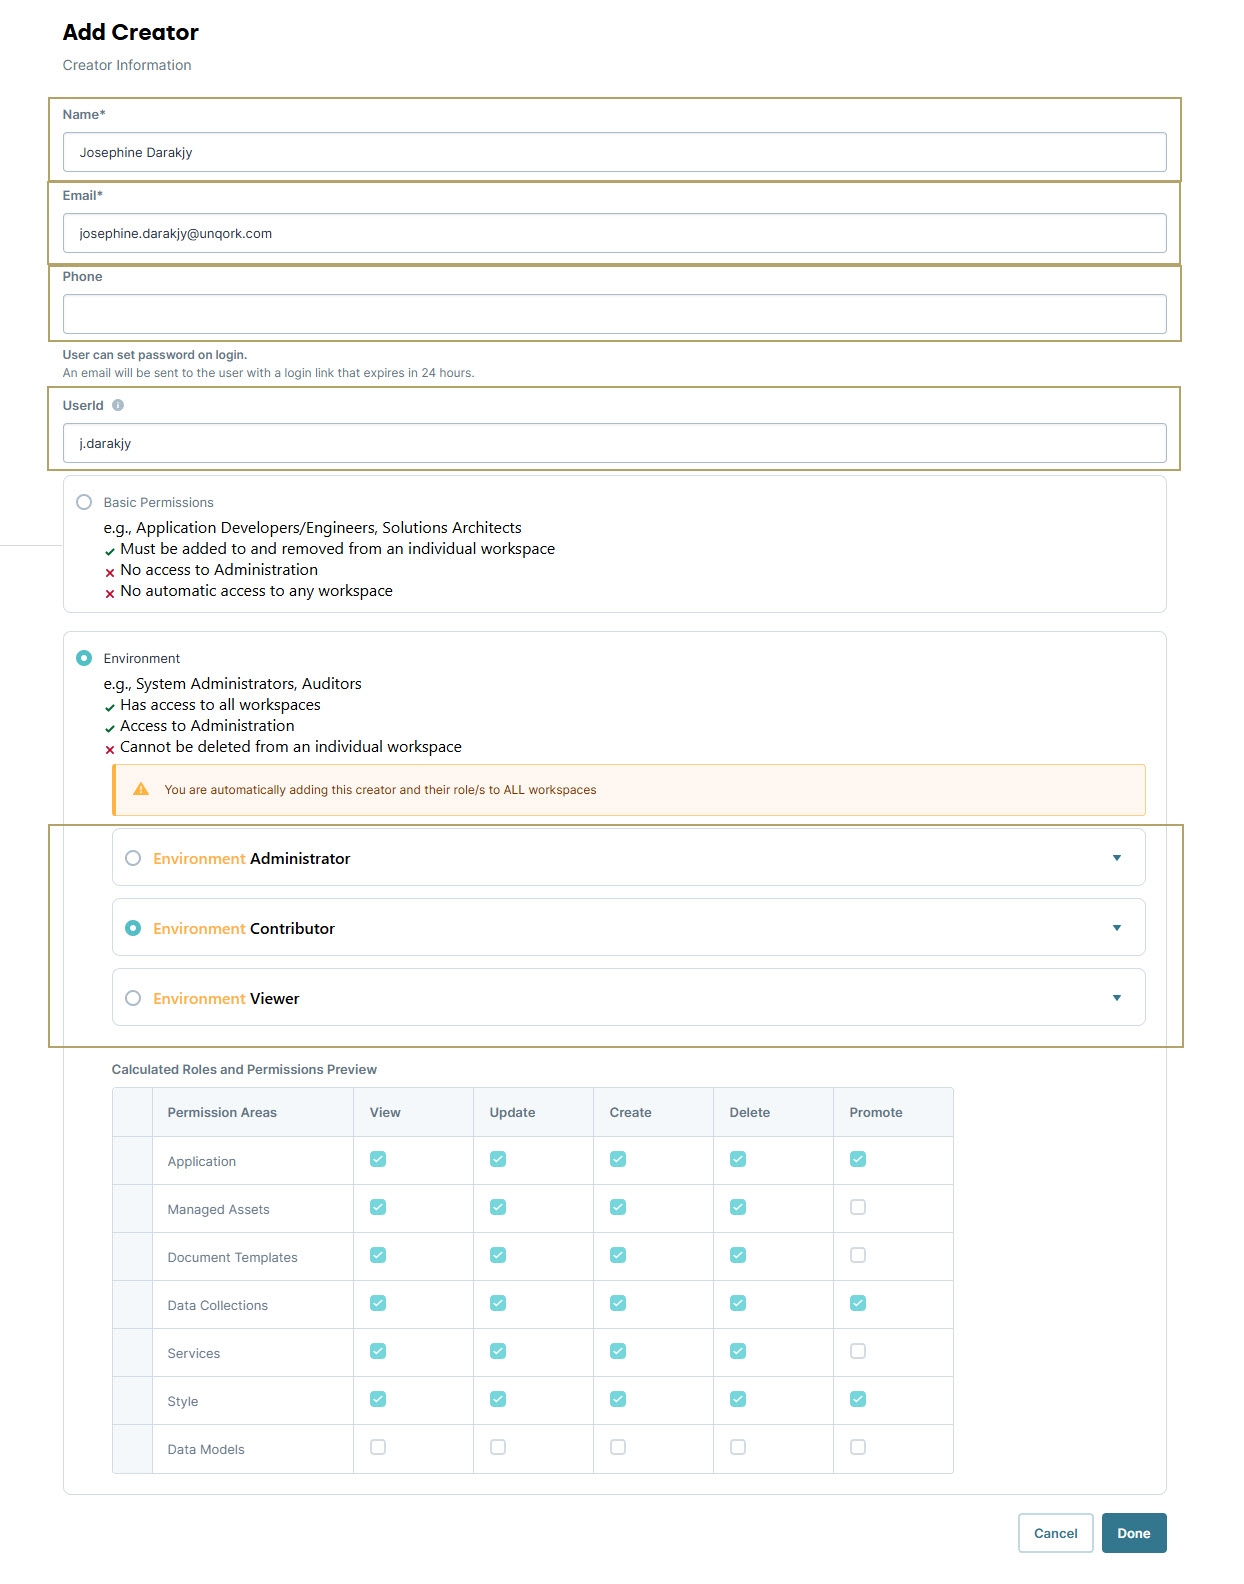
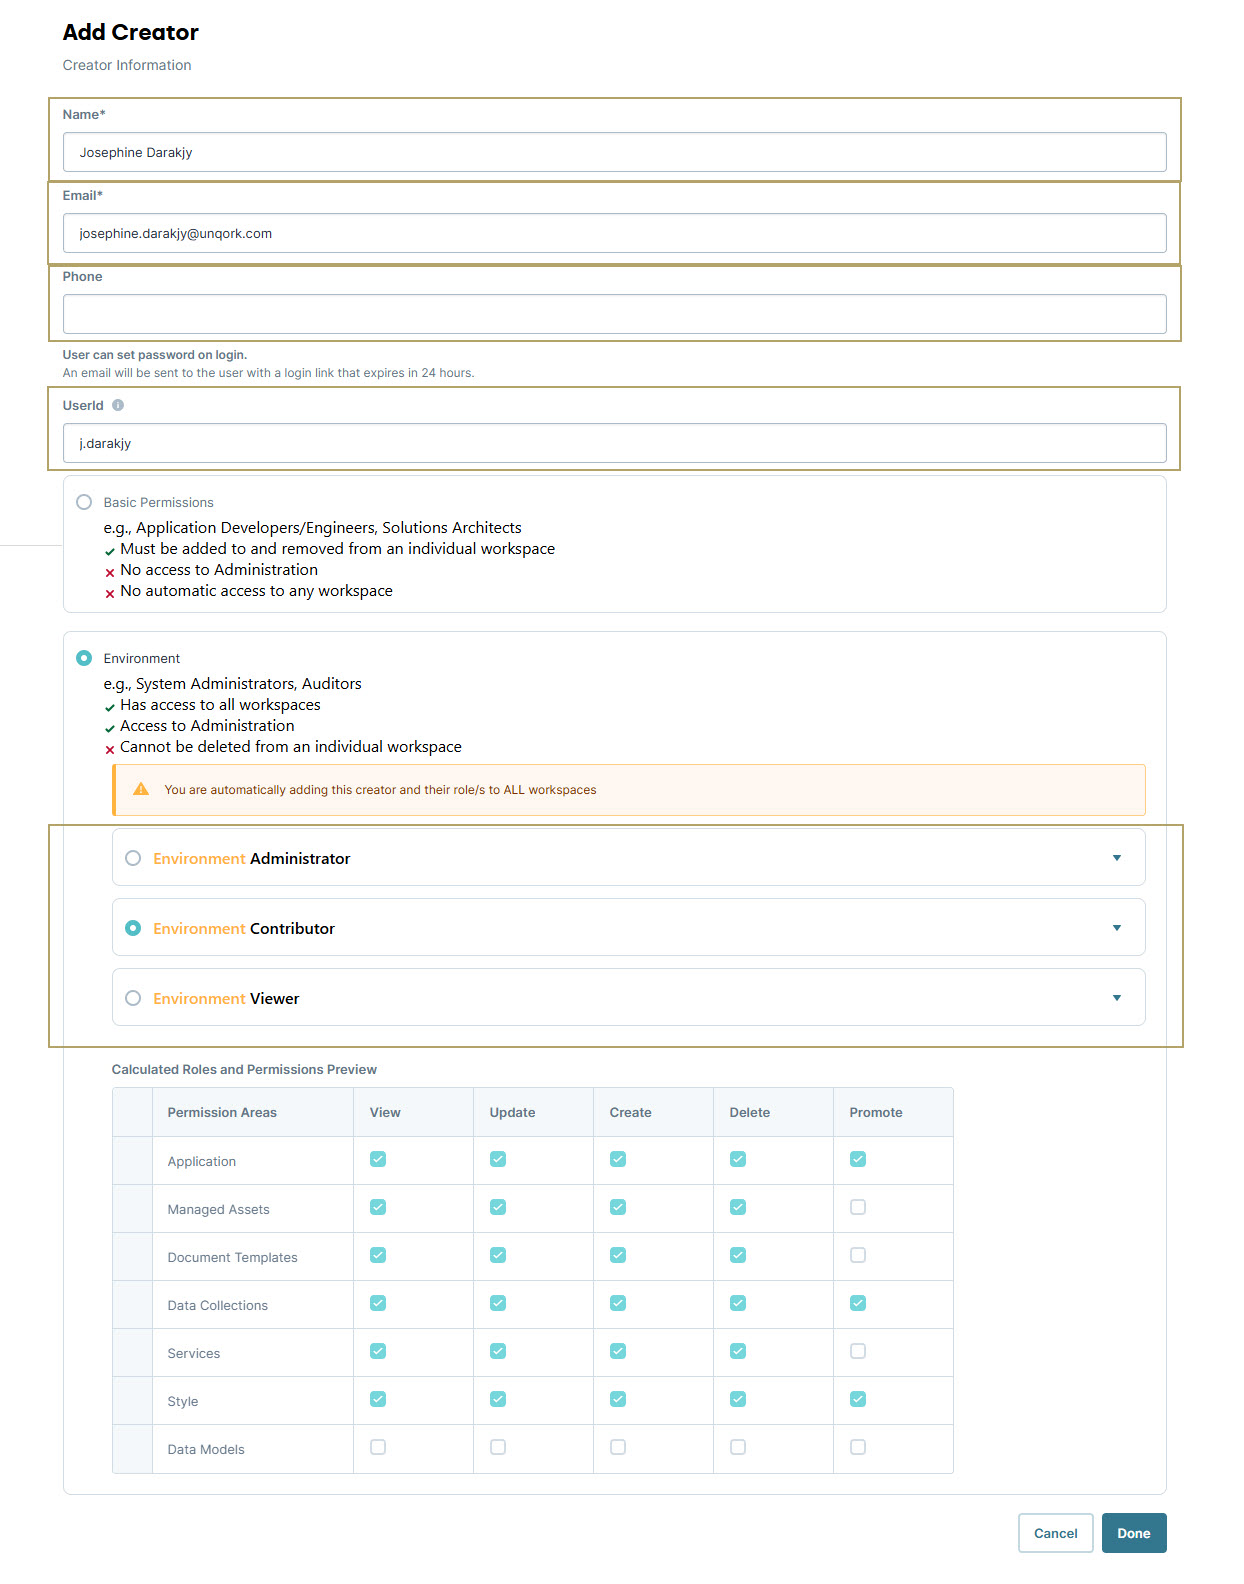
Enter the Creator user's Name and Email. The phone number field is optional.
You can only add an email address to the system once, tied to a single user.
Use the Temporary Password field to set a password. Or, leave the field blank, and Unqork will assign one.
Passwords must be at least 8 characters with an uppercase and lowercase letter, a number, and a symbol.
Enter a unique User ID. Or, leave the field blank, and Unqork will assign one.
Once assigned, the User ID is permanent. This is important to keep in mind if you want all User IDs to follow a specific format.
Select one or more roles for the Creator user. Once you select the role, you'll see a preview of that role's permissions.
You can create and assign custom roles later under Creator Role Administration.
Each Unqork environment includes four default Creator roles:
Role
Description
Administrator
Known as the super-user role. Lets the Creator user set up new user credentials and view, update, create, or delete:
Applications
Themes
Reference Data Collections
Services
Document Templates
Managed Assets
The Administrator role is the only role with access to manage:
Workspaces
Express Permissions
Creator Permissions
Environment Administration
Client Tracker Administration
Email Template Administration
Single Sign-On (SSO) Management
Client Tracker Administration
Global Variables Administration
Console Log Administration
Certificate Management
Start Node Administration
PrivateLink Administration
API Access Management
Contributor
The standard role for Creators. You can modify the Contributor role to increase or restrict Creator access to the environment.
Viewer
The Viewer role is for users who need to view, but not modify, elements in a workspace. You can edit the Viewer role to increase or restrict access to the environment.
By default, the Viewer role can view all permission areas, but does not have create, update, delete, or promote access.
Basic
The initial role for Creators. New users with the Basic role do not have access to workspaces or environment settings. Administrators can assign Basic role users to view or edit individual workspaces.
To learn more about assigning Basic role users to workspaces, view our Workspaces Role-Based Access Control article.
Click Done.
By default, the new Creator user receives an email with their login details from no-reply@unqork.com. You can deselect Notify the Creator by e-mail of their temporary password to disable this notification.
Searching for a Creator User
You may want to check on a Creator user's password status or make edits to their Creator roles. First, you'll have to find and access your Creator user.
To search for a Creator user:
Click the Settings drop-down at the top right of the Unqork Designer Platform.
Click Administration.
Under Creator Permissions, select Creator (User) Administration.
Select a Search By filter from the Search drop-down. This lets you search by Email, Name, Phone, Creator Role, and User ID.
Enter the Creator user's information in the search bar, then click Search (starts with).
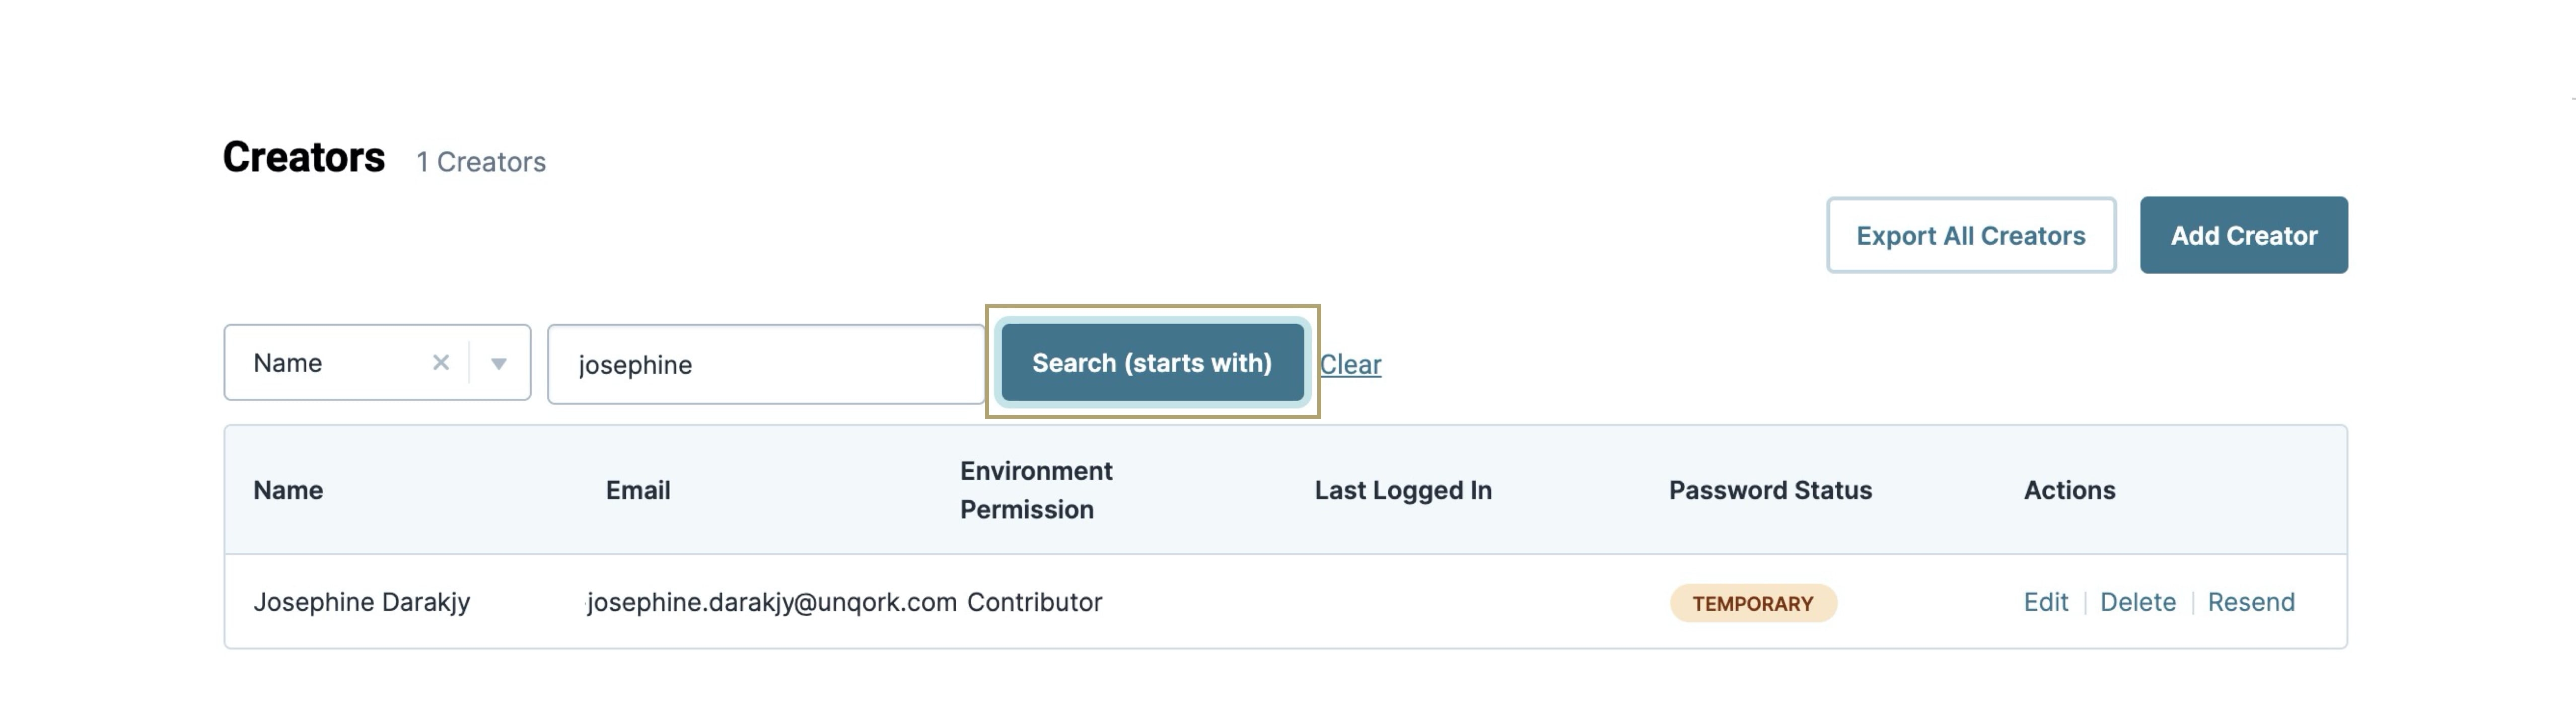
The search function uses "starts with" to find results. For example, to find Art Venere by name, you'd search for "Art", not "Venere".

Editing a Creator User
You can make edits to your Creator user at any time. You can update their name and phone number, and add or delete Creator roles. User IDs and emails remain the same. If a user needs a different User ID or email, you'll delete and re-add the user again with the new information.
After modifying a Creator user, the user receives an email notifying them that a change has been made to their profile.
To edit a Creator user:
Click the Settings drop-down at the top right of the Unqork Designer Platform.
Click Administration.
Under Creator Permissions, select Creator (User) Administration.
Using the search bar at the top of the screen, find the Creator user you want to edit.
Under the far-right Actions column, click Edit.
The Edit Creator page lets you edit the Creator user's Name, Phone, and Creator Roles.
After making your changes, click Done at the bottom of the page.
Revoking Access for a Creator User
Revoking a user's access means they'll no longer have access to the platform. You can re-grant them permission to access the platform again in the future.
To revoke a Creator user's access:
Click the Settings drop-down at the top right of the Unqork Designer Platform.
Click Administration.
Under Creator Permissions, select Creator (User) Administration.
Using the search bar at the top of the screen, find the Creator user you want to revoke.
Under the far-right Actions column, click Edit.
Click Revoke Access at the bottom of the Edit Creator page.
Click Revoke Access in the confirmation modal.
Restoring Revoked Access for a Creator User
You can re-grant permission to a Creator user with revoked access.
To revoke a Creator user's access:
Click the Settings drop-down at the top right of the Unqork Designer Platform.
Click Administration.
Under Creator Permissions, select Creator (User) Administration.
Using the search bar at the top of the screen, find the Creator user you want to restore access to.
Under the far-right Actions column, click Edit.
Click Restore Access at the top of the Editor Creator page.
Click Restore Access in the confirmation modal.
Deleting a Creator User
If you no longer want a user to access your applications' Designer tools, you can delete their Creator user account.
To delete a Creator user:
Click the Settings drop-down at the top right of the Unqork Designer Platform.
Click Administration.
Under Creator Permissions, select Creator (User) Administration.
Using the search bar at the top of the screen, find the Creator user you want to delete.
Under the far-right Actions column, click Delete.
Click Delete in the confirmation modal.
When you delete a Creator user, they'll also lose their permissions in Express View. If you'd like the user to have access to Express but not Designer, add them under Express User Administration.
Resending a Creator User's Temporary Password
When you add a new Creator user, they receive an email with login information and a temporary password. This password expires in 7 days. If needed, you can resend the email with the temporary password.
To resend a Creator user's temporary password:
Click the Settings drop-down at the top right of the Unqork Designer Platform.
Click Administration.
Under Creator Permissions, select Creator (User) Administration.
Use the search bar at the top of the screen to find the Creator user.
You can check the Password Status column at any time. If the Creator user has set a custom password, the word CONFIRMED displays. If the user still needs to set a custom password, the word TEMPORARY displays. If the Password Status is TEMPORARY, an option to Resend appears under the Actions column.
Under the far-right Actions column, click Resend.
Click Resend in the confirmation modal.
The Creator user gets an email with their new temporary password. This email comes from no-reply@unqork.com. After their first login, Unqork asks new users to create a custom password.
Unlock Creator Users
When Creator Users exceed their maximum login attempts, they are temporarily locked out of their accounts. Admins can unlock Creator User accounts early using the Creator User administration screen.
To learn more about User Account Lockout settings, visit our Environment Administration article.
To unlock a Creator User account:
Click the Settings drop-down at the top right of the Unqork Designer Platform.
Click Administration.
Under Creator Permissions, select Creator (User) Administration.
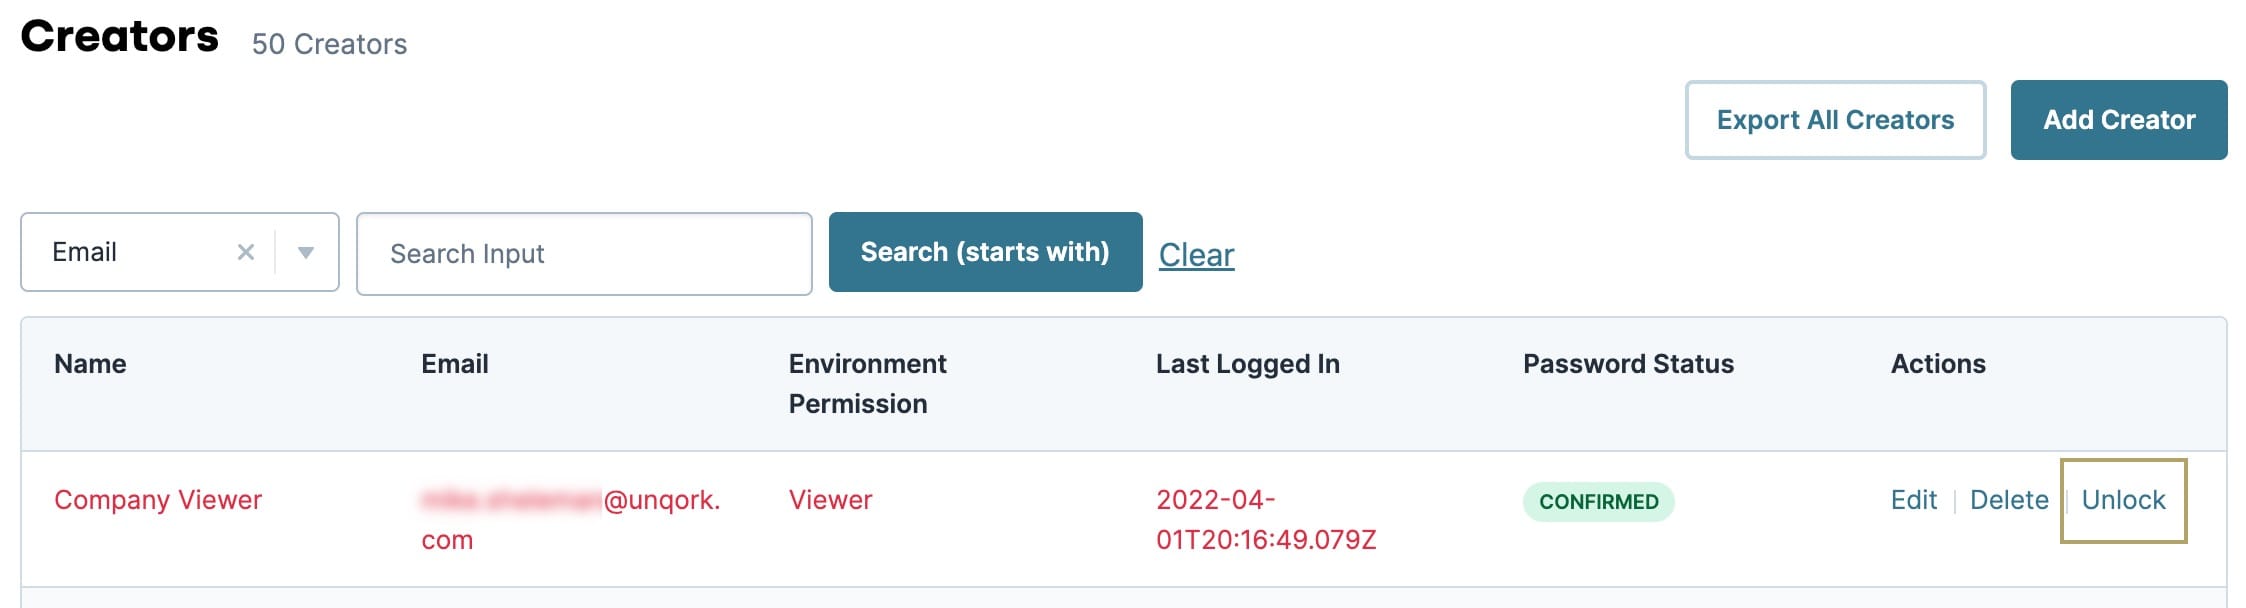
Use the search bar at the top of the screen to find the Creator User.
Under the Actions column, click Unlock.
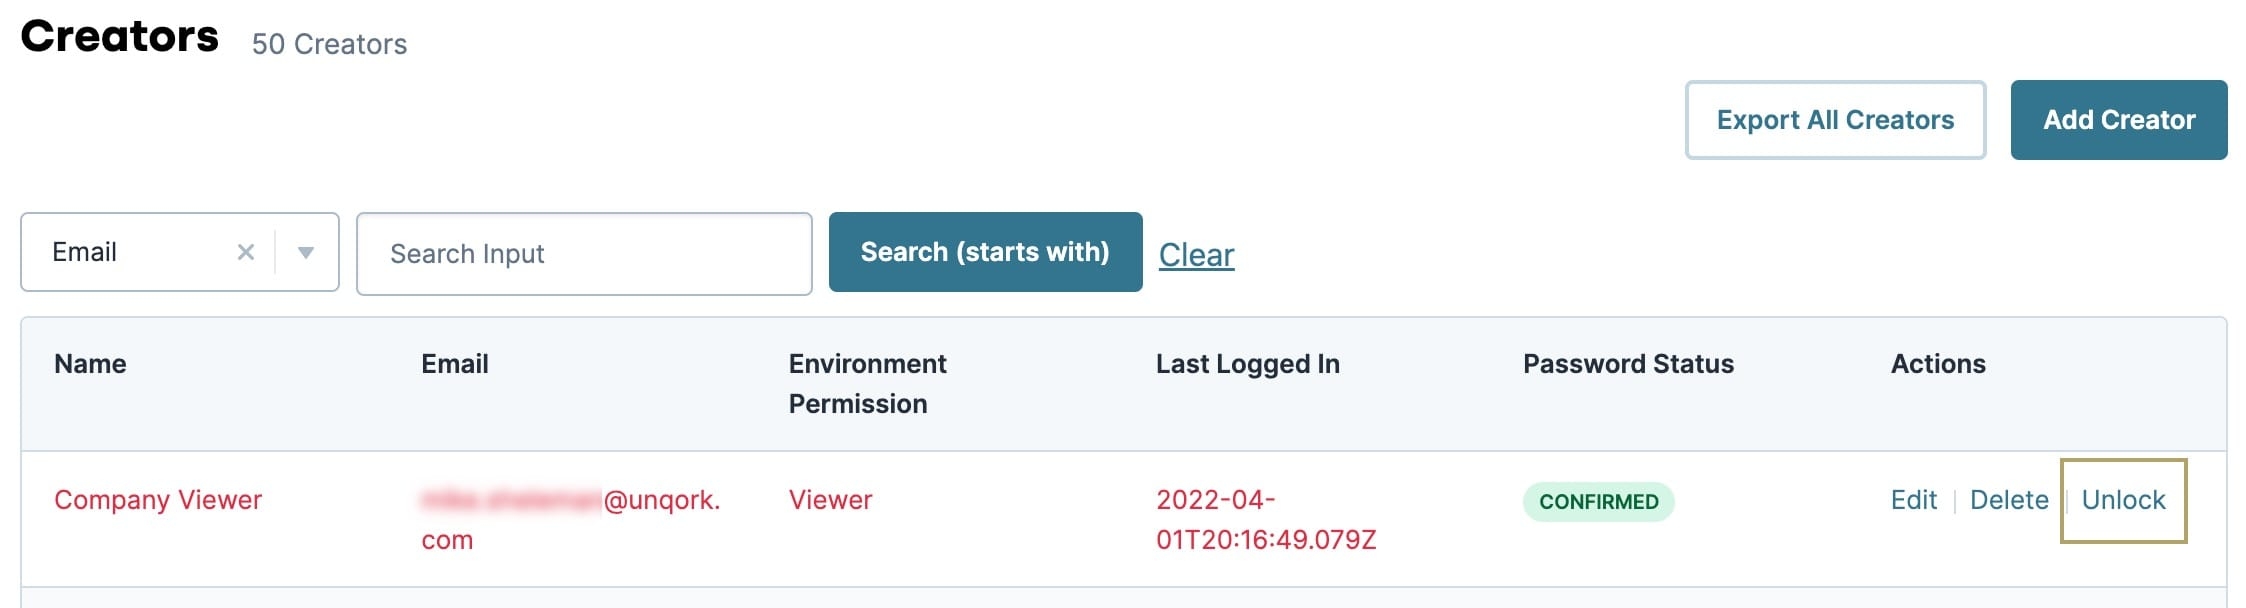
If the lockout duration has passed, the user's account unlocks. This removes the Unlock option from the list of available actions on that User's account.
Click Yes in the confirmation modal. A green chyron displays at the top of the page indicating a successful unlock.
Notify the user that their account is unlocked.
Exporting a List of All Creator Users
You can also export a list of all Creator users to a CSV (comma-separated value) file. You can open the file in any CSV editor, such as Excel. The file includes a table with the following column headers:
userId
name
email
phone
creatorRoles
isDeleted (TRUE/FALSE)
created
passwordStatus
To export a list of all your Creator users:
Click the Settings drop-down at the top right of the Unqork Designer Platform.
Click Administration.
Under Creator Permissions, select Creator (User) Administration.
Click Export All Creators at the top of the Creator User list.
Check your Downloads folder for the creatorUsers.csv file.