The Express User Administration page provides a single location for administrators to view, add, and manage Express View end-users (also known as Express Users). From the Express User Administration page, administrators control what Express Users can access in Express View by assigning groups and roles to end-users. Groups are created in Express Group Administration, and roles are created in Express Role Administration.
To set up and assign user roles for the Module Builder and Unqork Platform, view our Creator (User) Administration and Creator Role Administration articles.
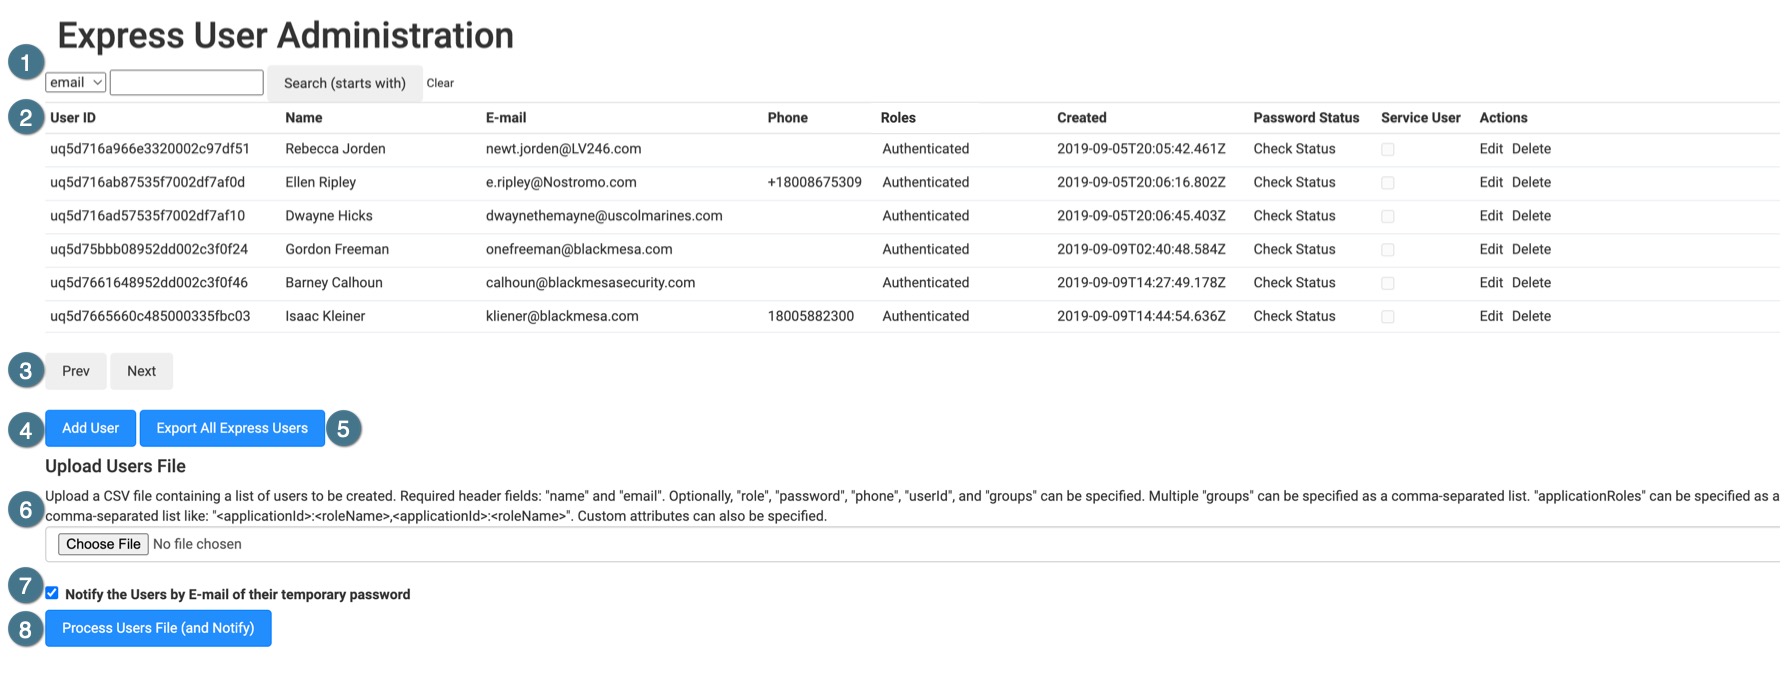
Navigating the Express User Administration Page
# | Setting | Description |
|---|---|---|
1 | Search Bar | Search for Express Users by their email, name, phone, roles, or User ID. To sort the Express User List alphabetically, select a column name from the drop-down, leave the search field blank, and click Search (starts with). After searching for a user, click the Clear button to remove search parameters and refresh the page. |
↳ | email ▾ (Search By drop-down) | Use the Search By drop-down to specify the Express User column the search function uses. Search options include:
|
Search Field | Enter a value to search for. Leave the Search Field blank to alphabetically sort the list using the Search By value.
| |
Clear | Clears the values from the search bar and refreshes the Express User List using the default values. | |
Search (starts with) | Click this button to use the Search By and Search Field values to filter the Express User List. | |
2 | Express User List | Contains a paginated list of Express Users in the environment. This list shows important information about each user, including their User ID, email, roles, password status, and options to modify their record. |
↳ | User ID | Displays the Express User's ID (identification number). User IDs can be a custom value set during Express User account creation or a randomly assigned value. Random User IDs begin with the letters uq, followed by a randomized value. For example: uq5bf44ae98eab5e002ef8d484. User IDs are permanent and cannot be modified. |
Name | The name of the Express User. Express User names can be changed using the Edit button. This field is required when creating or editing an Express User account. | |
The email of the Express User. The email value can be changed using the Edit button. This field is required when creating or editing an Express User account.
| ||
Phone | The phone number of the Express User. The phone number value can be changed using the Edit button. This field is optional. | |
Roles | The Express role assigned to the end-user. Express Roles are created using the Express Role Administration page. Users can have multiple roles assigned to their account. This field is required when creating or editing an Express User account.
| |
Created | The creation date and time of the Express account. Time is displayed in the Zulu time format. | |
Password Status | Displays the Express User account's current password status.
| |
Actions | The Actions column provides options for modifying an Express User account. Actions include:
| |
3 | Express User List Navigation Buttons | Express User Lists with more than 50 users are paginated into pages. Click the Prev or Next buttons to display the next or previous 50 users. |
4 | Add User | Opens the Add User page.
|
5 | Export All Express Users | Click this button to create and download a CSV file that contains the entire Express User List with additional columns that include the User Last Modified date and Last Login fields. |
6 | Upload Users File | When creating large batches of new users, Administrators can define all Express User accounts in a CSV file and upload it using the Choose File button |
7 | Notify the Users by E-Mail of their Temporary Password | When using the Upload Users File setting, checking this box notifies users of their temporary password by email. |
8 | Process Users File (and Notify) | After uploading a CSV file to the Upload Users File section, click this button to process the New Users file. |
Adding Express Users in Bulk
You can also add your Express Users in bulk by uploading a CSV (comma-separated values) file.
At a minimum, your spreadsheet must have the following column headers:
name
email
The email address cannot be more than 64 characters. Consecutive periods, quotes, and special characters, like
"(),:;<>@[]\,are not supported.
Unqork also supports the following optional column headers, spelled in camelCase as shown:
userId
Omit the userId column from the CSV file if you plan to use random User IDs assigned by Unqork. You can't have assigned and randomly-assigned users in the same CSV file.
password
phone
roles
expressRoles: Specify multiple roles by comma-separating them. For example, Administrator,Authenticated.
applicationRoles: To specify Application Roles, use this format: <applicationId>:<roleName>. To specify multiple Application Roles, use a comma-separated list.
groups: Specify multiple groups by comma-separating them.
If no groups are specified in the CSV file, omit the groups column from the file.
Here's an example of how the column headers might look:

To add Express Users in bulk:
At the top right of the Unqork Designer Platform, click the Settings ▾ drop-down.
Click Administration.
Under Express Permissions, select Express User Administration.
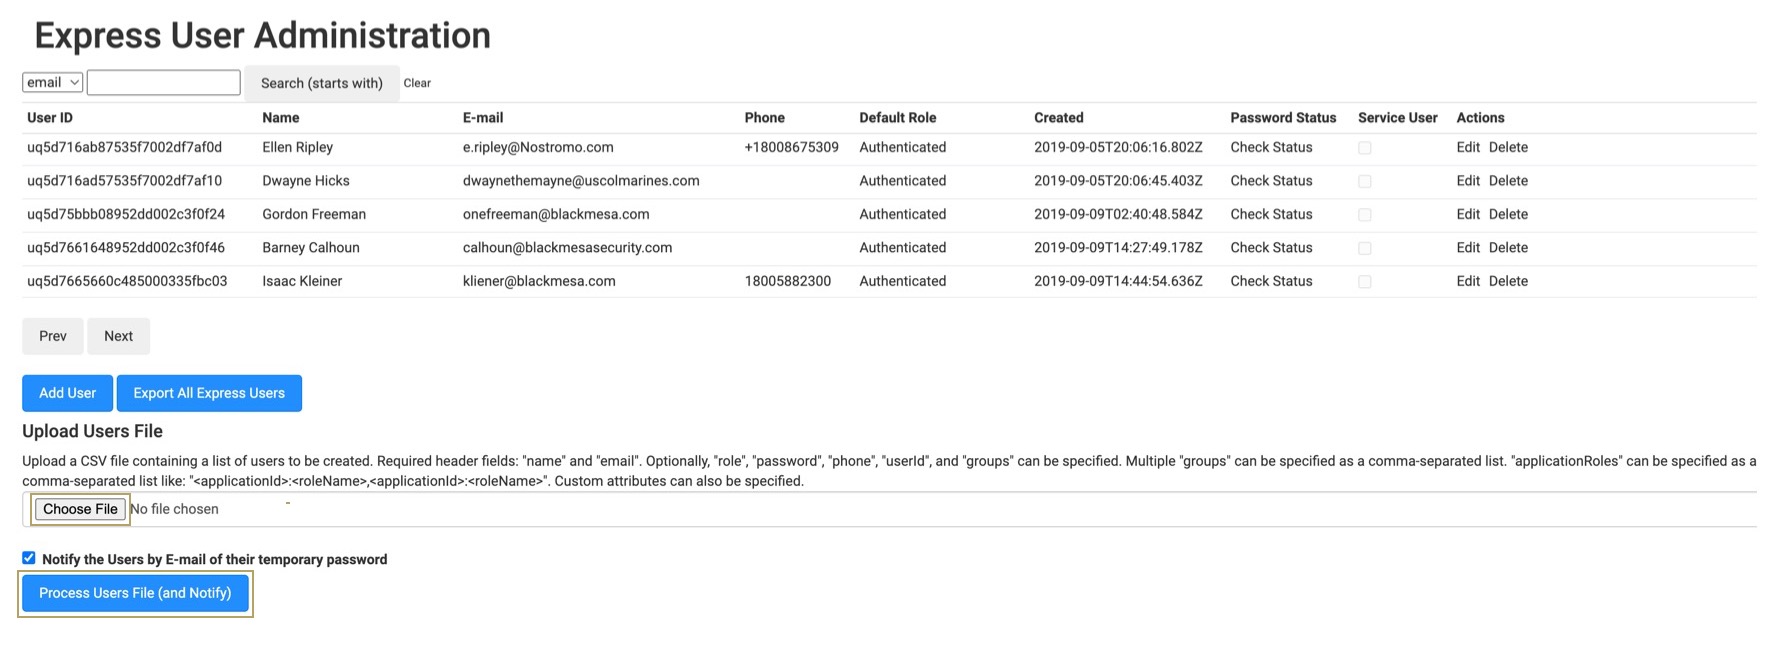
Scroll to the Upload Users File section below the Express User list.
Click Choose File and upload your .CSV file.
Click Process Users File (and Notify).
By default, new users get a notification email with their login details from no-reply@unqork.com. Uncheck Notify the Users by E-mail of Their Temporary Password to disable this action.
If there are any errors in your spreadsheet, a notification pops up with a list of the errors. Take note of the errors and click the OK button. Once you make and save the adjustments to your spreadsheet, upload it again.
Converting an Express Administrator to a Creator Administrator
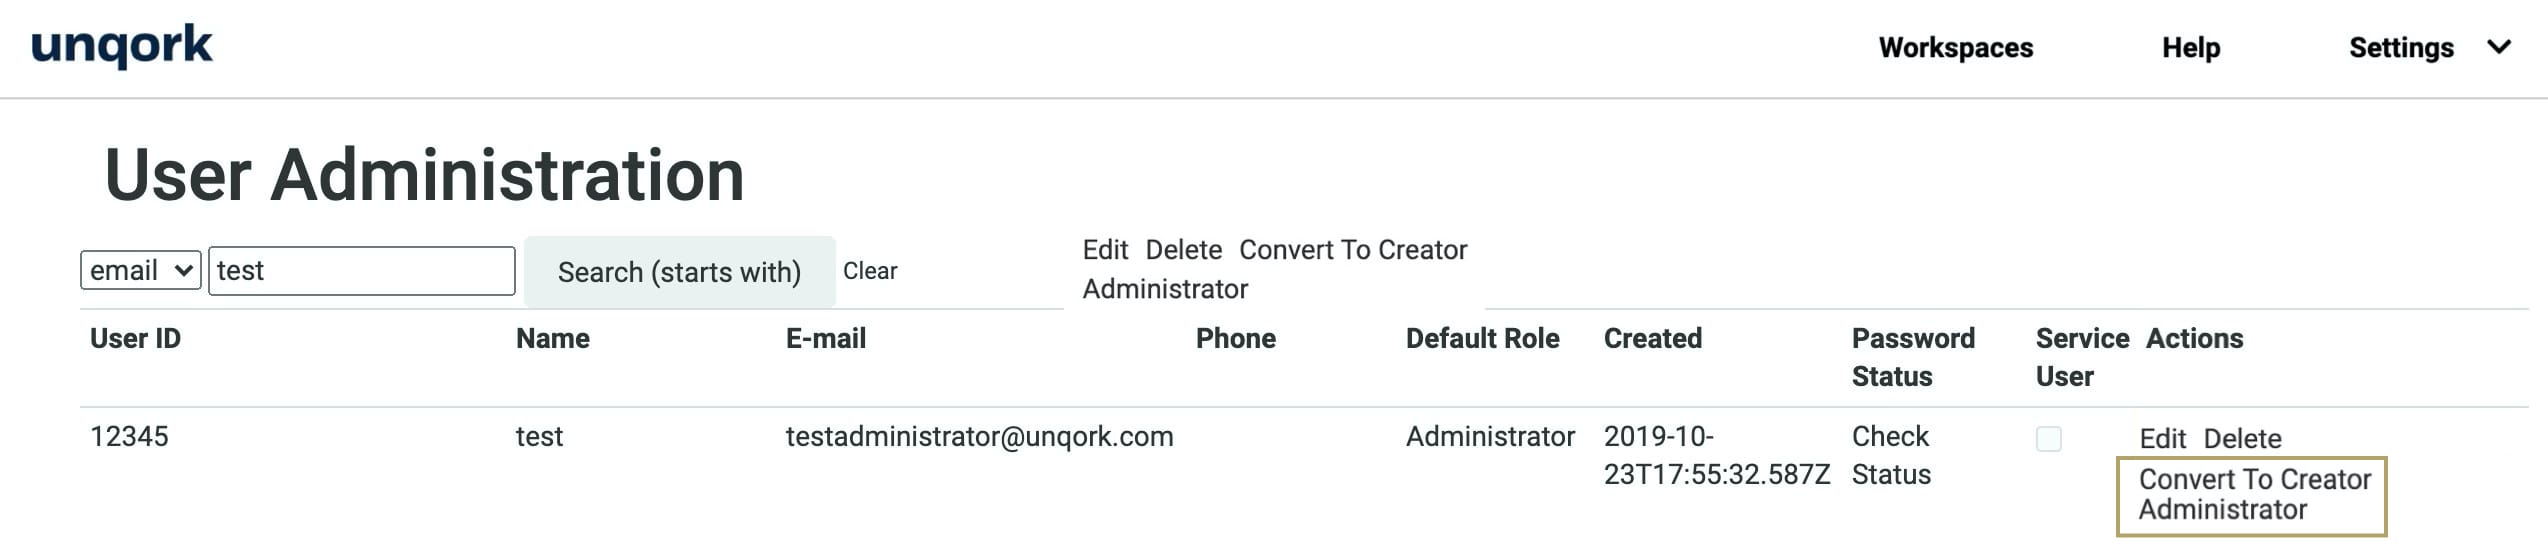
Let's say your Express User has Administrator permissions. When you access Express User Administration, you see an extra option for that Express User. You'll see the option to Convert To Creator Administrator in the Actions column. Clicking this link changes your Express Administrator to a Creator Administrator.
To convert your Express Administrator to a Creator Administrator:
At the top right of the Unqork Designer Platform, click the Settings ▾ drop-down.
Click Administration.
Under Express Permissions, select Express User Administration.
Using the search bar at the top of the screen, find the Express User you want to convert.
Under the far-right Actions column, click Convert To Creator Administrator.
Once you click the convert link, Unqork removes your user from Express User Administration. You'll now manage your converted Creator user in Creator (User) Administration.
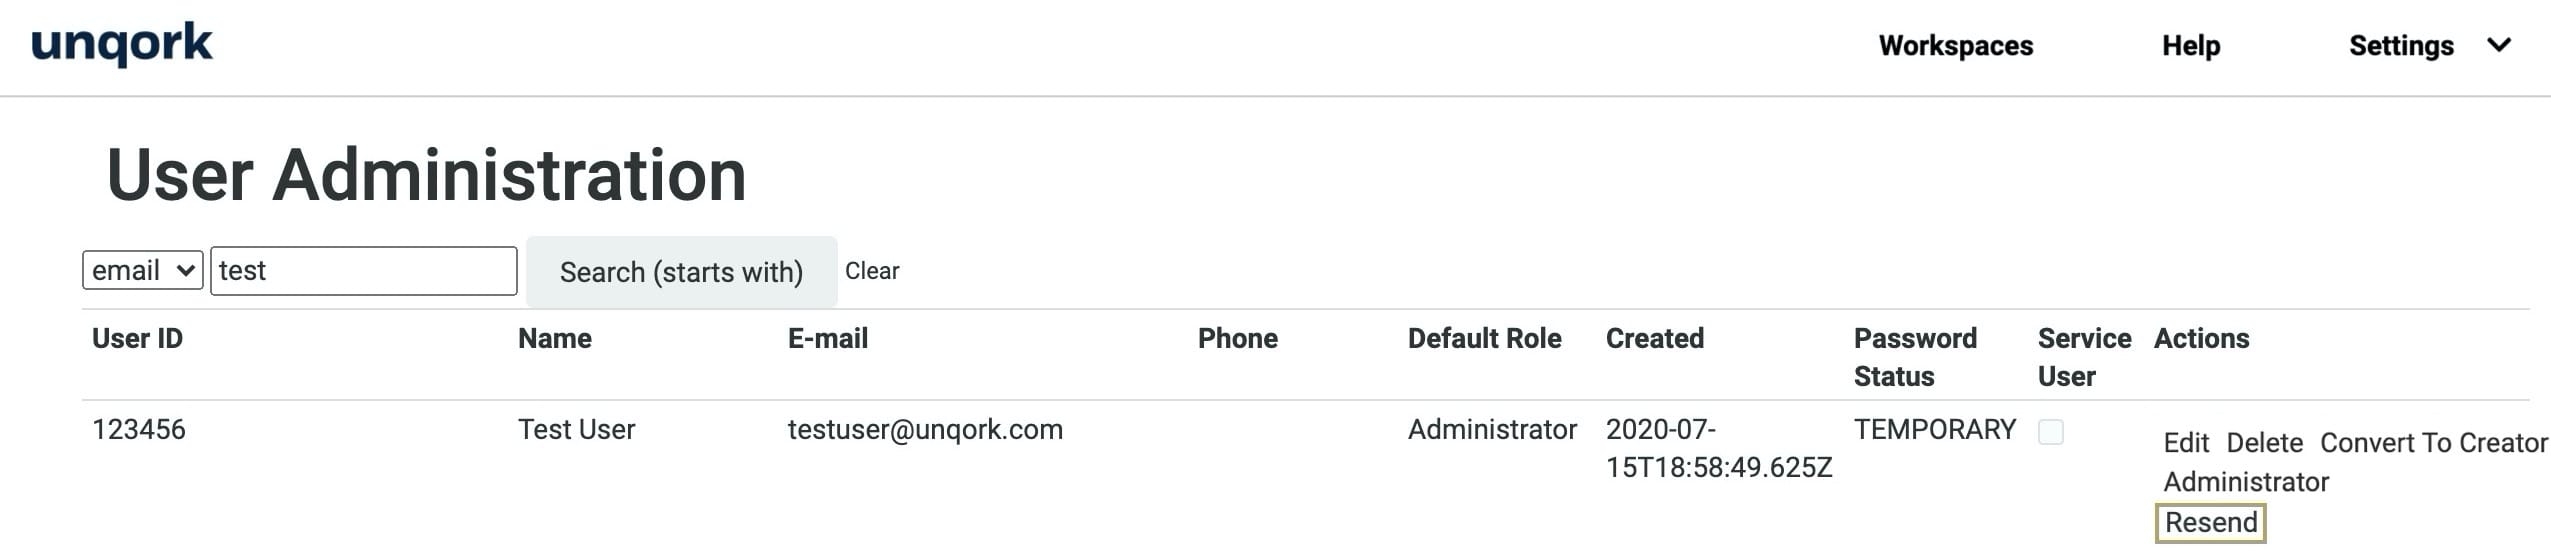
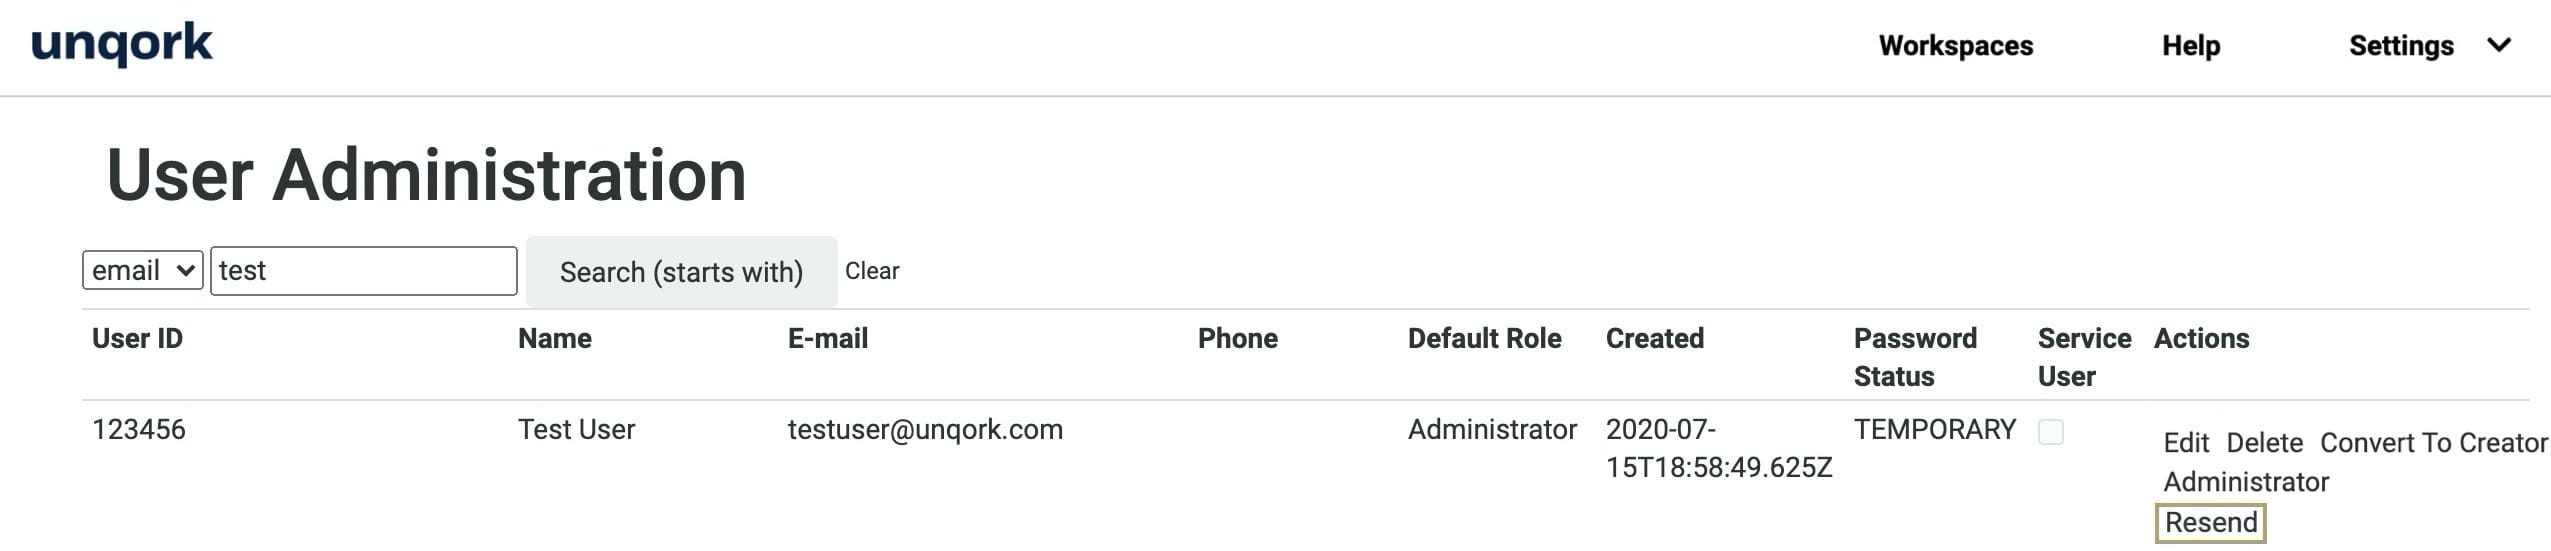
Resending a Temporary Password
When you add a new user, they receive an email with login information and a temporary password. This password expires in 7 days. If it expires, you can resend the email with a temporary password.
To resend an Express User's temporary password:
At the top right of the Unqork Designer Platform, click the Settings ▾ drop-down.
Click Administration.
Under Express Permissions, select Express User Administration.
Use the search bar at the top of the screen to find the Express User.
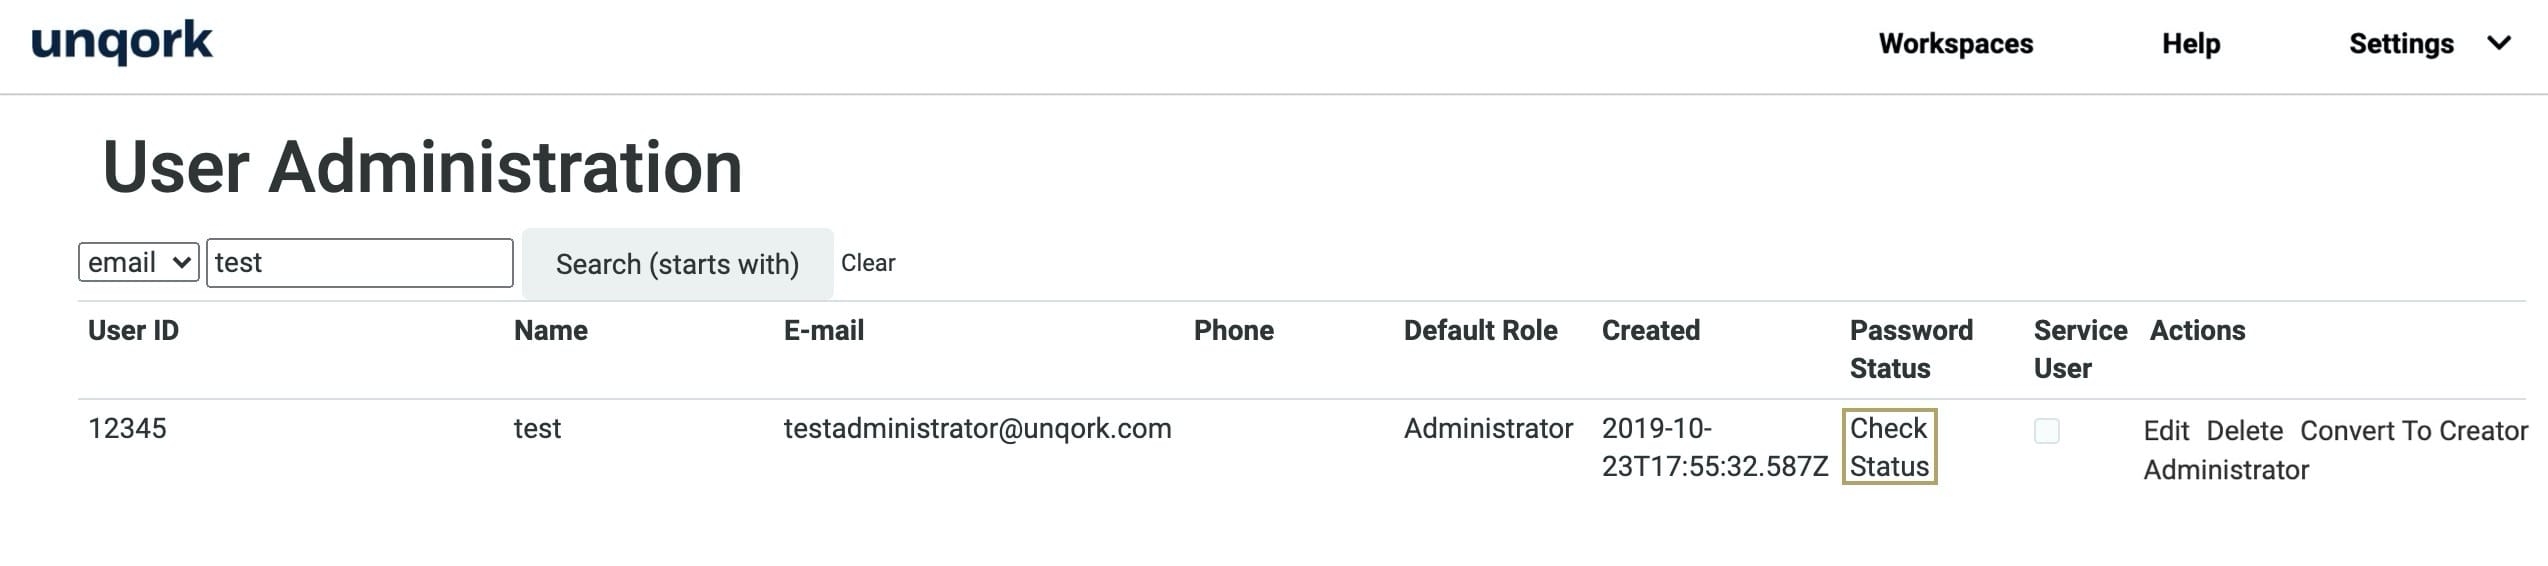
Under the Password Status column, click Check Status.
If the user has set a custom password, the word OK displays. If the user still needs to set a custom password, the word TEMPORARY displays.
If the Password Status is TEMPORARY, an option to Resend appears under the Actions column. Click Resend.
Click OK in the verification modal.

Your Express User gets an email with their new temporary password from no-reply@unqork.com. After their first login, Unqork asks new users to create a custom password.
Exporting a List of All Express Users
You can also export a list of all Express Users to a CSV file. You can open the file in any CSV editor, like Excel. The file includes a table with the following column headers:
userId
email
phone
name
roles
expressRoles
groups
applicationRoles
created
modified
lastLogin
isServiceUser (TRUE/FALSE)
If you use Custom Attributes, a column displays with the Custom Attribute Name as the header. In each user row, you can see their Custom Attribute details.
To export a list of all Express Users:
At the top right of the Unqork Designer Platform, click the Settings ▾ drop-down.
Click Administration.
Under Express Permissions, select Express User Administration.
Click Export All Express Users.
The users.csv file saves to your default downloads location on your computer.
After modifying an Express user, the user receives an email notifying them that a change has been made to their profile.