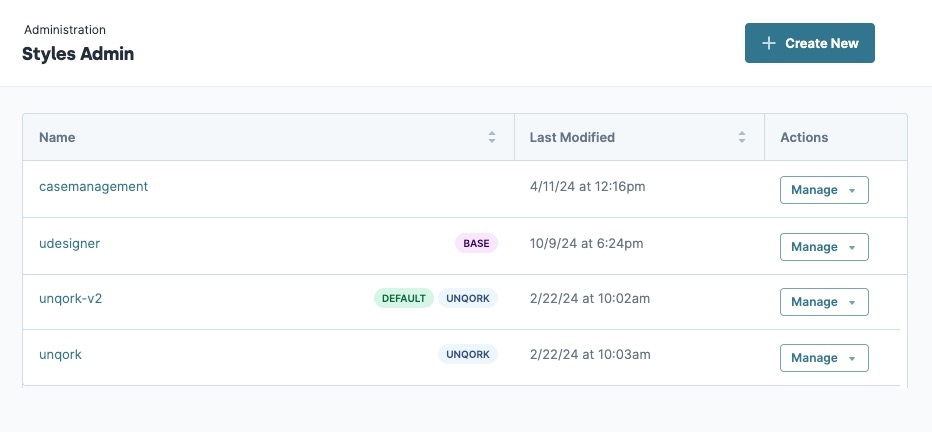
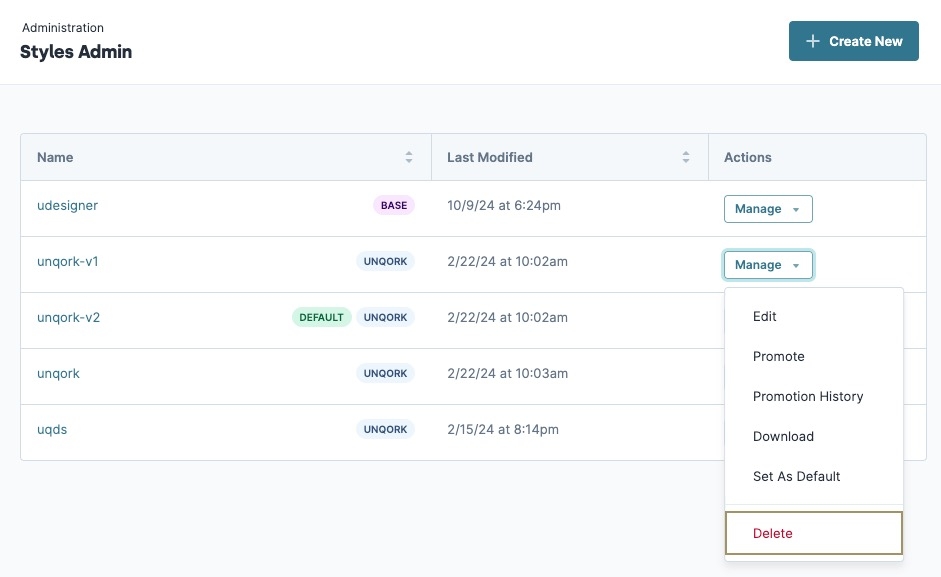
Administrators use the Style Administration page to create, edit, preview, download, delete, and specify the default CSS style sheet for an Unqork application.
Unqork's Style Team can style your environment with custom CSS. Please contact your Unqork representative for more information.
This article is a brief description of the features you find in Style Administration. For more detail on creating styles, uploading stylesheets, managing assets, and promoting styles, view our CSS Upload article.
Access the Style Administration Page
At the top right of the Unqork Designer Platform homepage, click Administration.
Under Environment, click Style Administration. The Style Administration page displays.
Modifying Styles
Click on the tabs below to learn more about modifying styles on the Style Administration page:
Finding Your Default Style
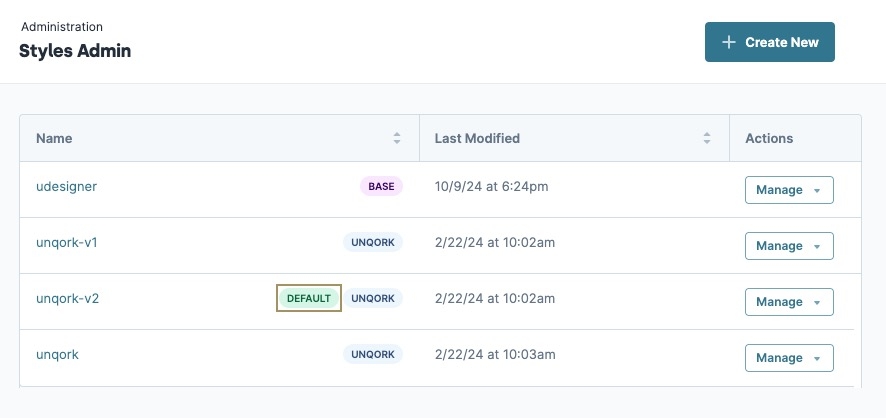
Your application includes a few default styles and at least one custom style option. You can have as many styles as you want. Each time Unqork adds a new style to your environment, it displays in the Style Administration. You can select any style when viewing your application in Express View, but only one style can be the default.
From the grid, you can see the DEFAULT style for your environment:
You can also view your active style in the Environment Administration page. Once there, under General, you'll find your active Environment Style.
Changing Your Default Style
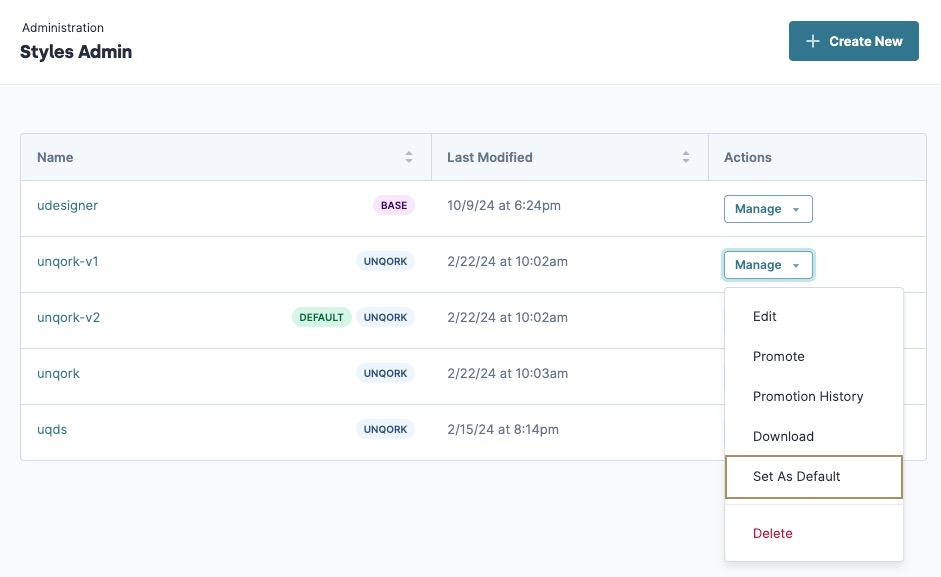
With Style Administration, you can easily set another style as the default.
To change the default style:
Create a Style
While your environment comes with prebuilt Unqork styles, you can also create your own. Style Administration lets you select a base style from your environment and upload your own stylesheet.
To create a style:
At the top-right corner of the Styles Administration page, click + Create New.
In the Name field, enter a name for your style. This is a required field.
In the Description field, enter an optional style description.
From the Base Style drop-down, select a style from your environment to base your new style on.
In the Stylesheet field, drag and drop a stylesheet from your computer. Or, browse your computer for a stylesheet. This is a required field.
Select Set as Default Style if you want to make this style the default.
Click Create.
To learn more about creating styles, view our CSS Upload article.
Editing a Style
Style promotions and updates are not instantaneous. You might experience a delay before changes go into effect.
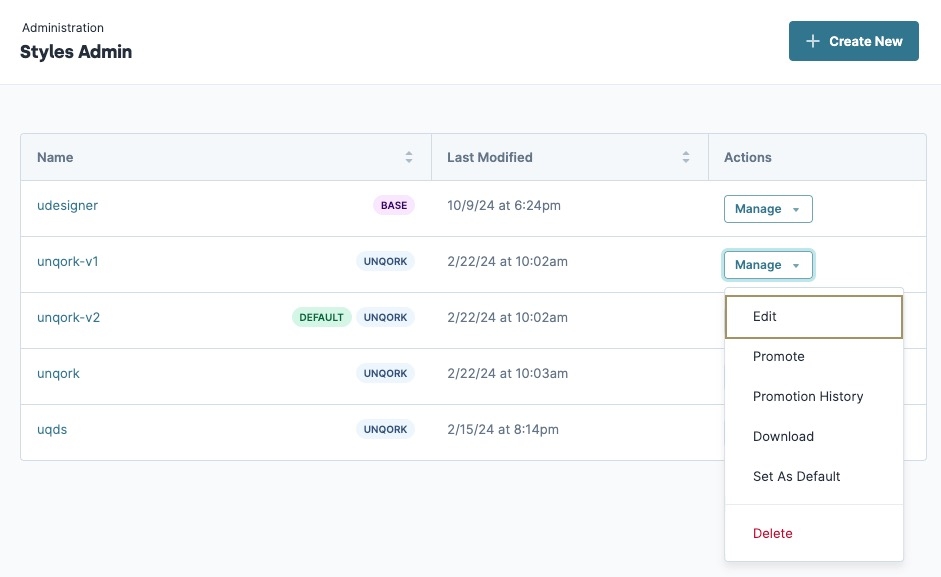
To edit a style:
In the styles list, navigate to a style.
From the Manage ▾ drop-down, select Edit. The Styles Details page displays.
Style Details Page
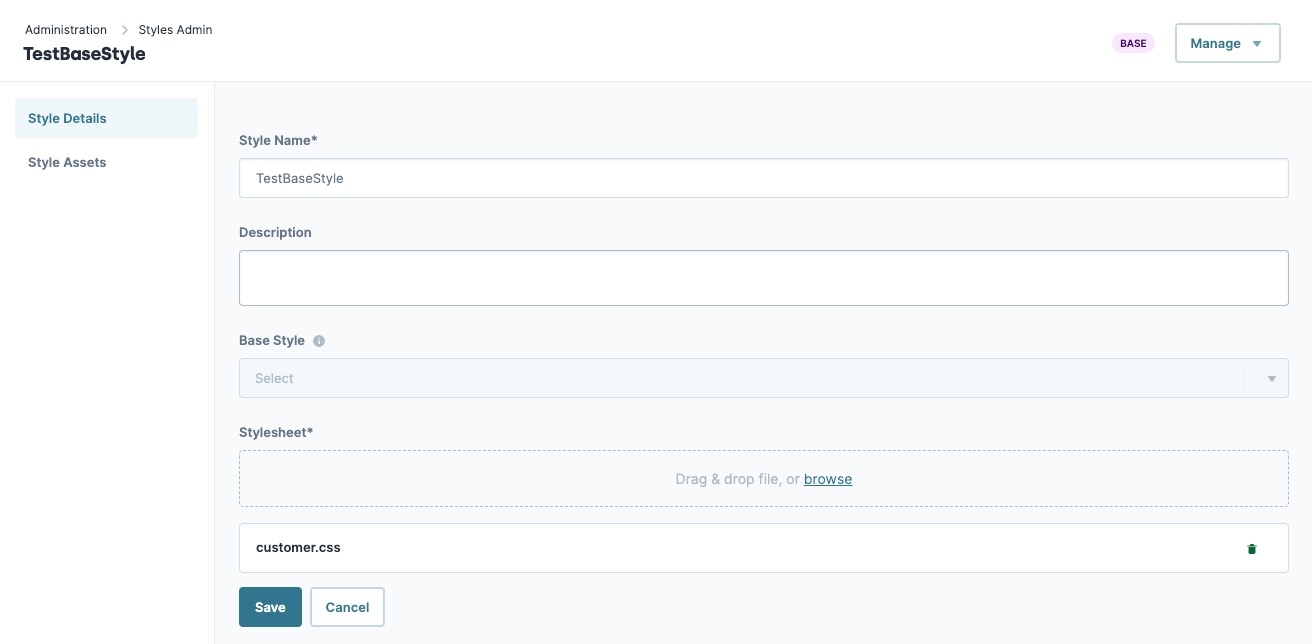
The Style Details page lets you add a description, select a new base style, and add or remove stylesheets. Once you're finished, click Save.
The Manage ▾ drop-down in the top-right corner also lets you promote this style, view its promotion history, download the style's stylesheet, set it as the default style, or delete it.
You cannot edit the Style Name after the style has been created.
Style Assets Page
The Style Assets page lets you upload assets from your computer by clicking Upload or the ![]() (plus) icon. You can also click the
(plus) icon. You can also click the ![]() (folder) icon to create folders to better organize your assets.
(folder) icon to create folders to better organize your assets.
By default, you cannot add or edit assets to predefined Unqork style. Unqork styles are designated by an
Unqorktag on the Style Administration page.
One of the best use cases for using Style Assets is adding a company favicon that displays on your browser tabs.
Click the
 (folder) icon and name it images.
Ensure the folder name is lowercase or the icon will not work correctly.
Click Create.
In the Images folder, upload your
favicon.icoasset.
To learn more about managing assets, view our CSS Upload article.
Previewing Your Application Style
Once you create an application style, you can preview it from your workspace or application page. These instructions assume you've already created an application in your workspace.
For more information on navigating an application, view our Navigating an Application article.
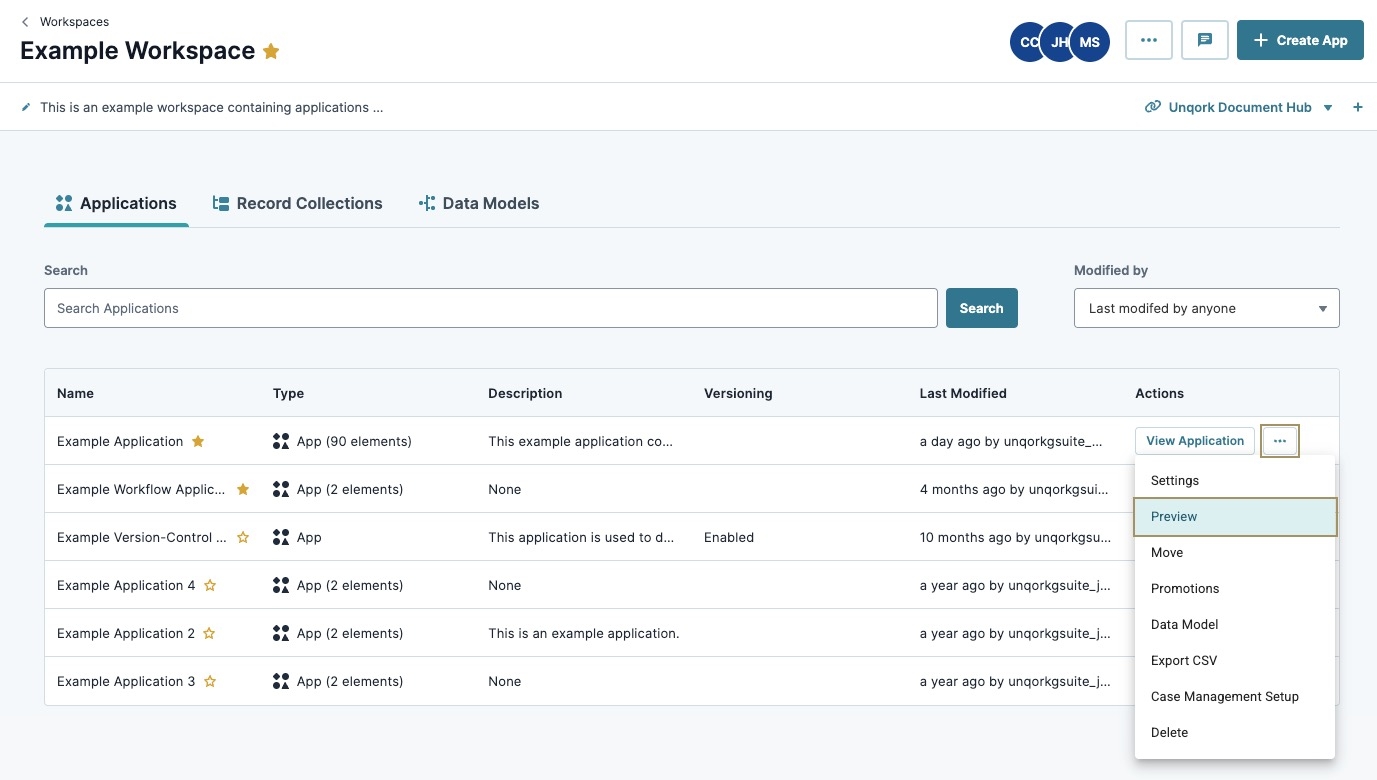
Preview an Application From the Workspace Page
To preview your application from the workspace page:
In the applications list, navigate to the application you want to preview.
Under the Actions column, click the
.png) (ellipsis) button.
(ellipsis) button.Select Preview.
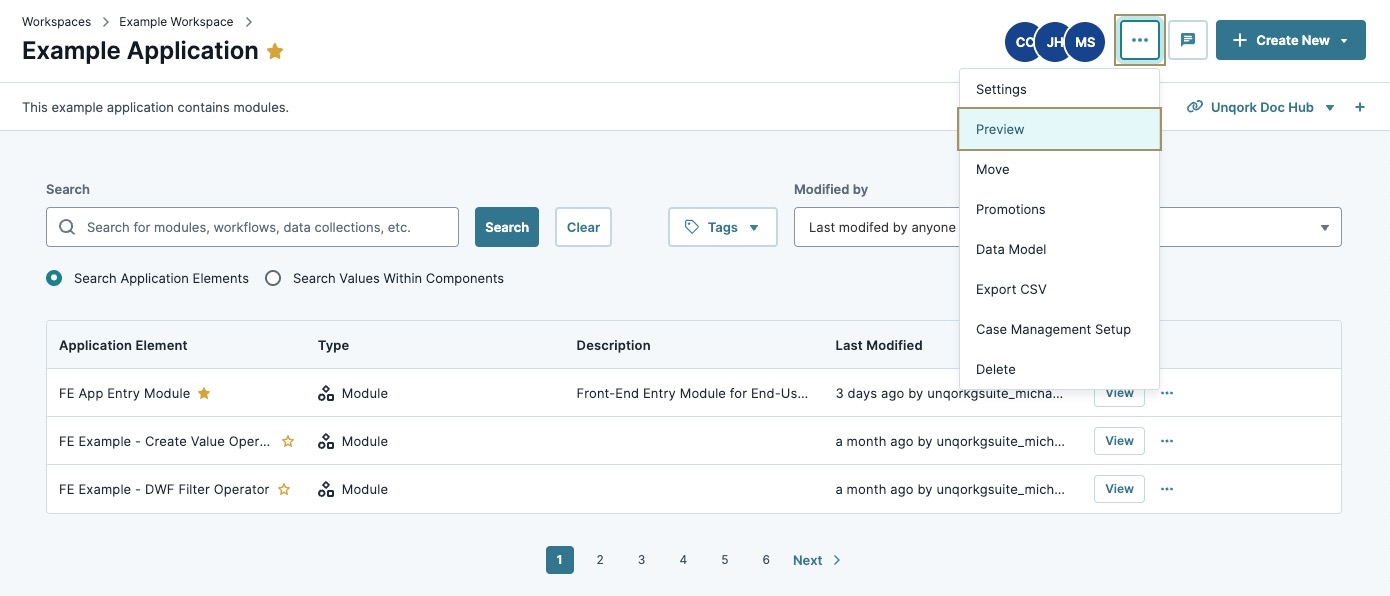
Preview an Application From The Application Page
To preview your application from the application page:
Promoting a Style
When promoting your applications from one environment to another, you must also promote your styles. Be mindful when promoting an application and its styles. Unqork shares styles across applications. Consider how promoting your style might affect other applications in your target environment.
Style promotions and updates are not instantaneous. You might experience a delay before changes go into effect.
Below is a list of Unqork's available environment levels, their order in the environment sequence, and descriptions of each:
# | Environment Level | Description | Codebase |
|---|---|---|---|
1 | Staging | Where Unqork Creators configure applications. This non-production environment level is meant for test data only. This level is where you create and update configurations before promoting to QA for testing. Staging is an internal environment level and part of Unqork's cloud infrastructure. Staging offers both a Designer and Express View interface.
| Staging |
2 | Quality Assurance (QA) | Where Unqork Creators test and verify processes, artifacts, and ensure applications are built using best practices. QA is an internal environment level and part of Unqork's cloud infrastructure. QA offers both a Designer and Express View interface.
| QA |
3 | User Acceptance Testing (UAT) | Where the Creators and end-users can view the latest build. Use this environment level to test your application's end-user experience. This non-production environment hosts test data only. UAT is an internal environment level and part of Unqork's cloud infrastructure. UAT offers both a Designer and Express View interface.
| UAT |
4 | Production | This is the live application and the only environment level where end-users can access it. This level is also the only environment level to store live client data.
| Production |
Additional environments can also include Pre-Production (Pre-Prod) environment levels. Pre-Prod environments use the Production codebase. The progression order is Staging, QA, UAT, Pre-prod, and Production. Client leads decide the number of environments to use when developing a customer application.
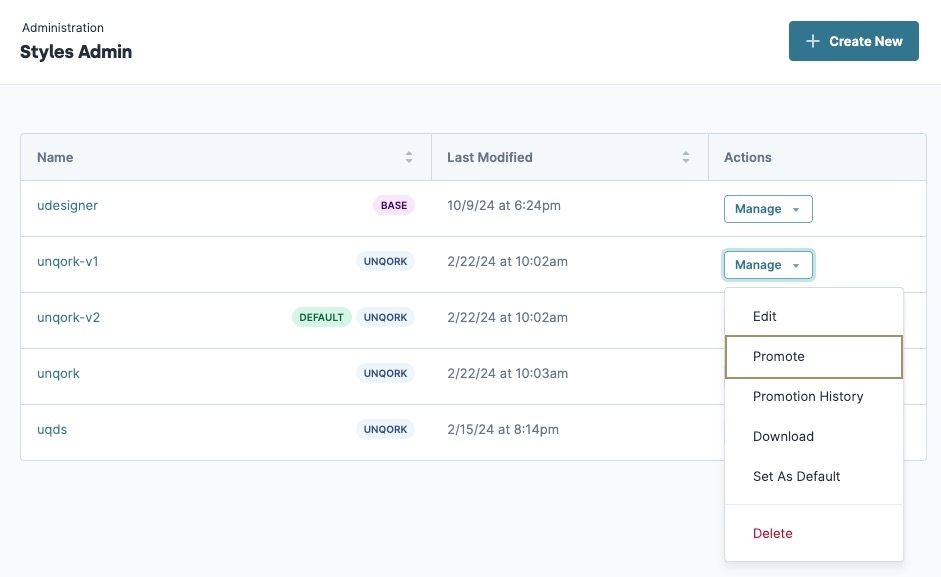
To promote a style:
In the styles list, navigate to the style you want to promote.
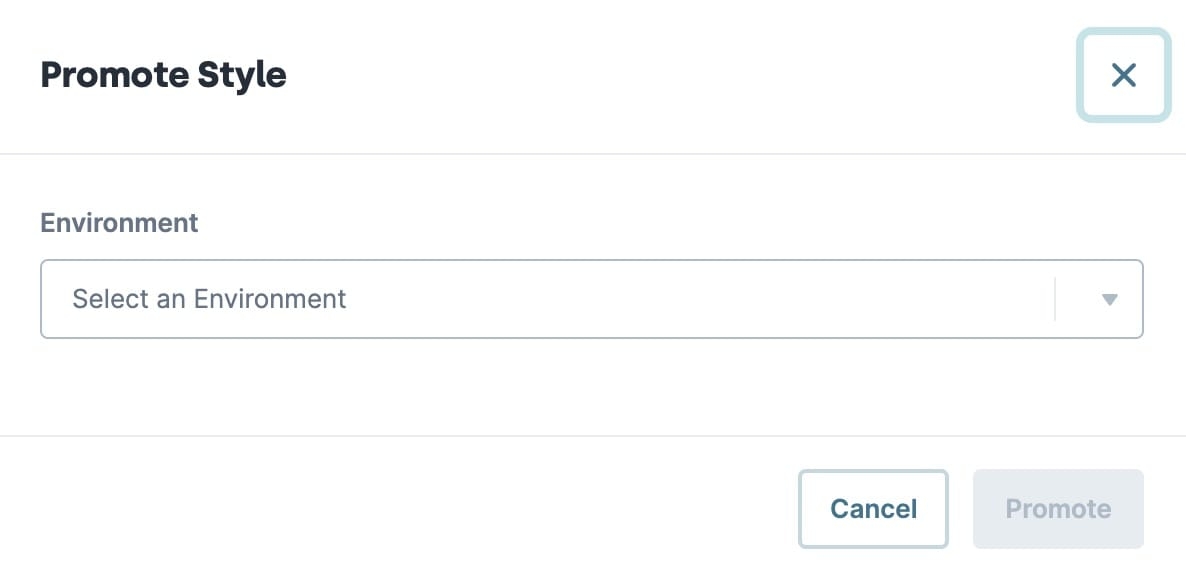
From the Manage ▾ drop-down, select Promote. The Promote Style modal displays.
From the Environment drop-down, enter or select the environment where you want to promote your style.
Click Promote.
Promotion History
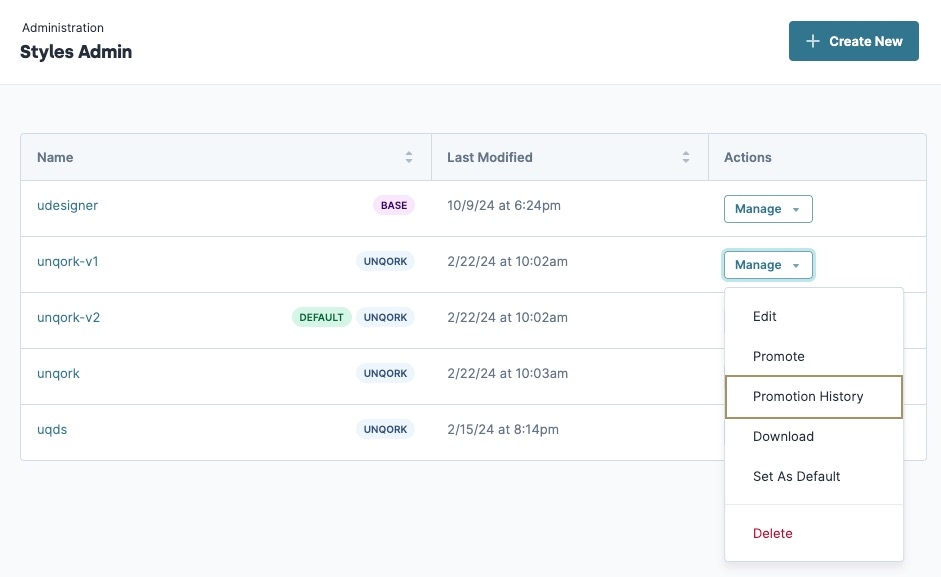
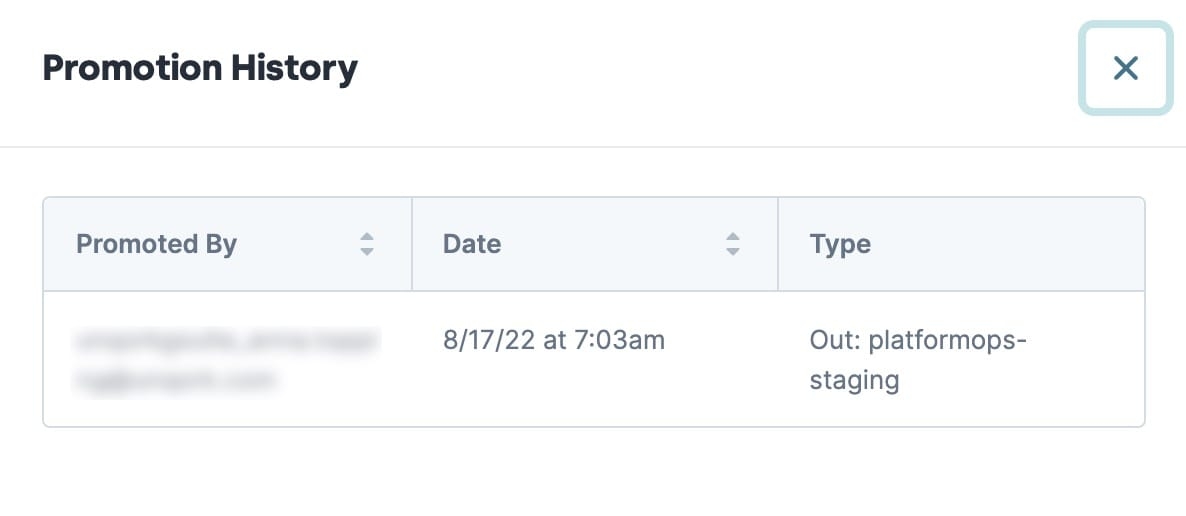
After promoting a style to another environment, you can view the promotion history. Promotion History provides information like the user who promoted the style, the date and time of promotion, and the environment level where it was promoted.
To view the Promotion History for a style:
Downloading a Stylesheet
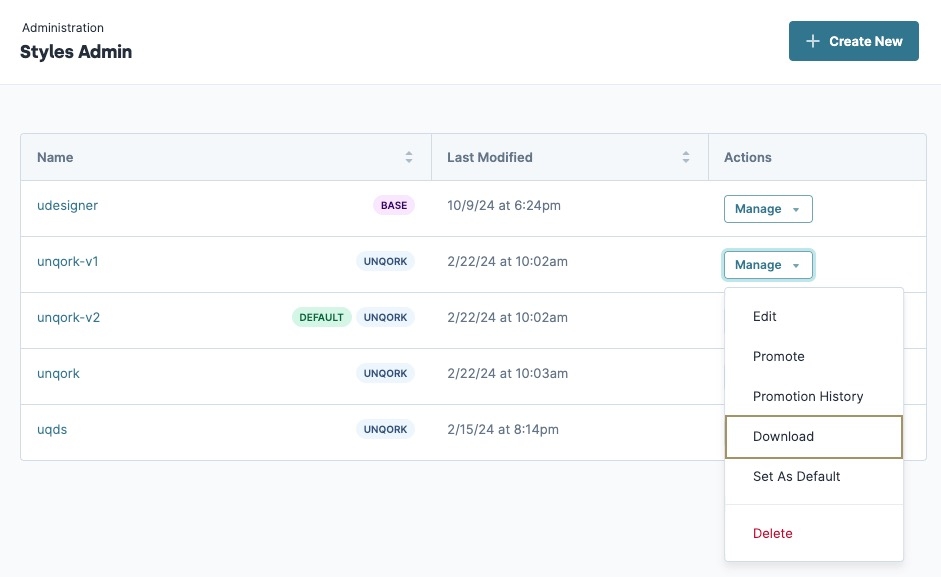
Style Administration lets you download the stylesheet of a specific style to your computer. The stylesheet automatically downloads to your computer's Downloads folder.
To download a stylesheet:
Deleting a Style
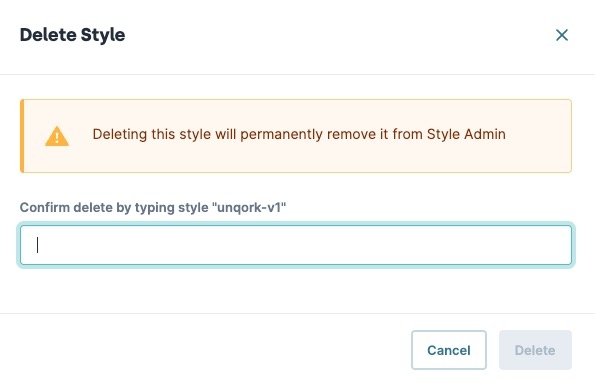
As you create and modify styles, you might need to delete obsolete ones from your environment.
To delete a style:
