PDF Template Administration
Overview
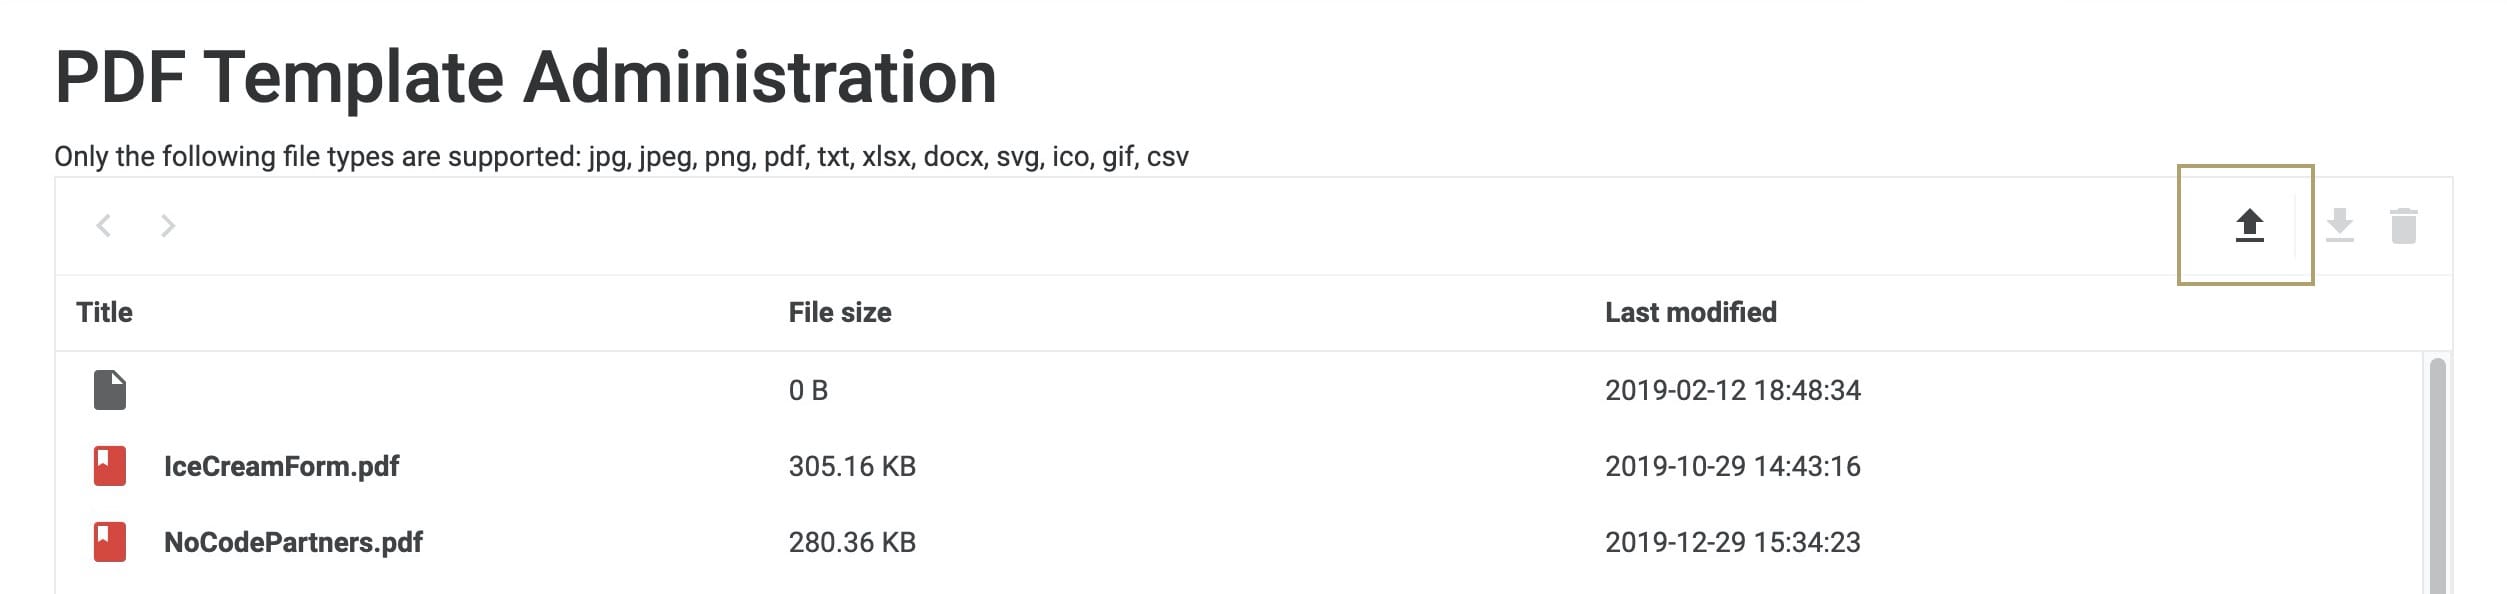
The PDF Template Administration page displays a list of all PDFs uploaded to your environment. You can also replace, remove, and download PDFs from the PDF Template Administration page. Upload PDFs to reference them in modules and create mappable templates for use in Express View.
What You'll Learn
In this article, you'll learn how to:
Creating a PDF Template
Start by creating a PDF Template in Adobe Acrobat.
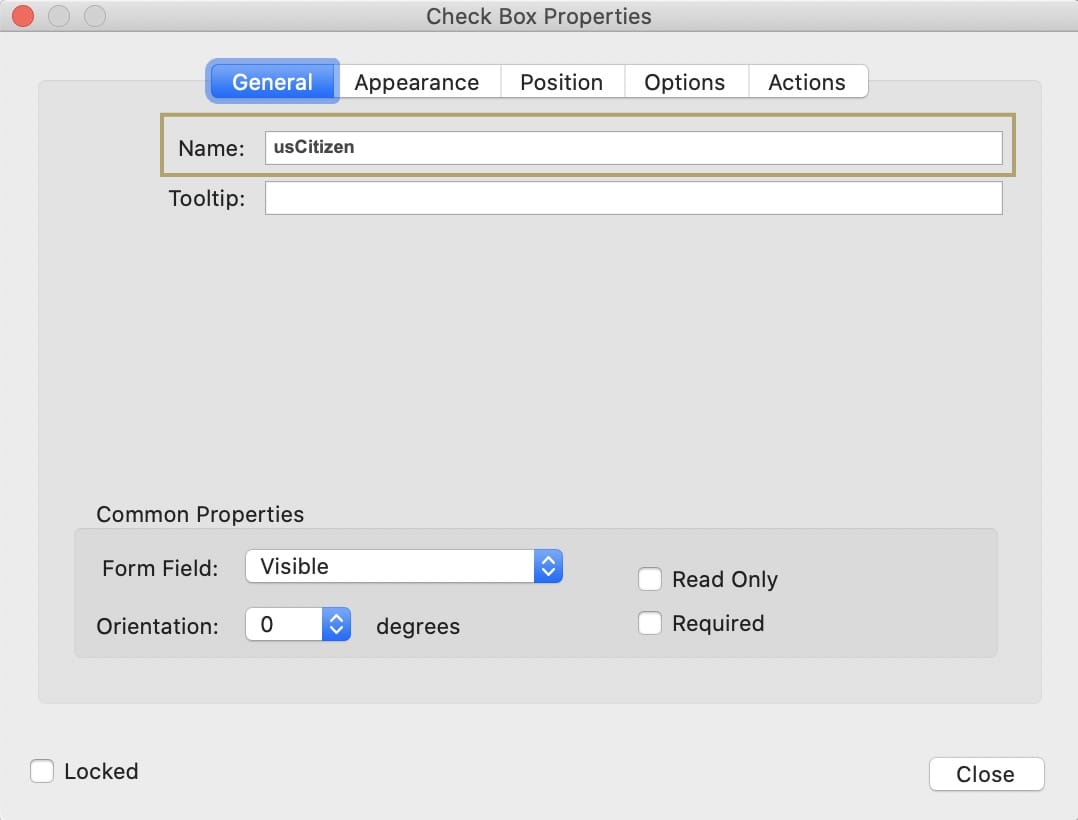
The Name of each field in your PDF Template must correspond to the Property ID of a component in your module. Where Names and Property IDs mismatch, mapping won't work.
To create a PDF Template:
| 1. | Use the Prepare Form feature in Adobe Acrobat to design the look of your PDF. |
| 2. | Match each PDF Template field's Name to the Property ID of its corresponding Unqork component. |
| 3. | Save your PDF template. |
Uploading a PDF Template
PDF Template Administration is where you store your mapped PDF template files. Once uploaded, you can reference PDF templates from your modules. Later, you'll learn how to use a DataMapper component to transform information in your module to PDF.
To upload your PDF template to PDF Template Administration:
| 1. | At the top right of the Unqork Designer Platform, click the Settings drop-down. |
| 2. | Click Administration. |
| 3. | Under Integration, select PDF Template Administration. |
| 4. | Click the  (Upload) button, located at the top right of the PDF Template list. (Upload) button, located at the top right of the PDF Template list. |
You can add files of any size, there is no restriction.
| 5. | Navigate to and select your file for upload. |
| 6. | Click Open. Your uploaded file displays in the PDF Template list. |
Replacing a PDF Template
You can upload a new version of your PDF template if it changes. The uploaded file replaces the original file in the PDF Template Administration list. After upload, the Last Modified column of the PDF Template Administration list shows the updated date/time.
To replace your PDF template:
| 1. | At the top right of the Unqork Designer Platform, click the Settings drop-down. |
| 2. | Click Administration. |
| 3. | Under Integration, select PDF Template Administration. |
| 4. | In the PDF Template list, navigate to the file you want to replace. |
| 5. | Select the file. |
| 6. | Click the (Upload) button. |
| 7. | Navigate to and select your file for upload. |
| 8. | Click Open. |
| 9. | At the File Exists message, click Confirm. |
Clicking Cancel stops the process and returns you to the PDF Template list.
Removing a PDF Template
You can remove files from the PDF Template list. If you remove a mapped PDF template, the mapping no longer works. Remove or replace the mapping in the DataMapper component before removing the file.
| 1. | At the top right of the Unqork Designer Platform, click the Settings drop-down. |
| 2. | Click Administration. |
| 3. | Under Integration, select PDF Template Administration. |
| 4. | In the PDF Template list, navigate to the file to remove. |
| 5. | Select the file. |
| 6. | Click the  (Remove) button, located at the top right of the list. (Remove) button, located at the top right of the list. |
| 7. | At the Remove message, click Confirm. The file no longer appears in the PDF Template Administration list. |
Clicking Cancel stops the removal process and returns you to the PDF Template list.
Downloading a PDF Template
When promoting a module, secondary files a ren't promoted. When you promote modules, add PDF templates to each environment. To do this, download the PDF template from the original environment, then upload it to the new environment.
To download your PDF file:
| 1. | At the top right of the Unqork Designer Platform, click the Settings drop-down. |
| 2. | Click Administration. |
| 3. | Under Integration, select PDF Template Administration. |
| 4. | In the PDF Template list, navigate to the file to download. |
| 5. | Select the file. |
| 6. | Click the  (Download) button, located at the top right of the list. (Download) button, located at the top right of the list. |
| 7. | Locate your file in your Downloads folder. |
Referencing a PDF Template in a Module
Now that you've created and uploaded a PDF Template to your environment, build the module form that enables the end-user to fill the PDF template.
This configuration assumes you already have a module saved with a title, and a PDF template saved and uploaded to PDF Template Administration.
What You'll Need
For this configuration, you'll need:
- 1 Panel component
- 3 Text Field components
- 1 Plug-In component
- 1 Decisions component
- 1 Hidden component
- 1 Button component
Configure the Panel Component
Start by adding a Panel component to your module. The Panel component will house all your other components to keep them organized.
| 1. | In the Module Builder, drag and drop a Panel component onto your canvas. |
| 2. | Click Save. |
Configure the Text Field Components
Add the 3 Text Field components. These fields will collect some simple information about the end-user. For this example, assume the Property IDs of each Text Field corresponds to the Name of a field in a PDF template.
When configuring your own use case, match your module's fields to the field Names in your PDF template.
| 1. | In the Module Builder, drag and drop 3 Text Field components into your Panel component. |
| 2. | Complete the Property ID and Label Text fields for each component as follows: |
|
Property ID |
Label Text |
|---|---|
|
firstName |
First Name |
|
lastName |
Last Name |
|
occupation |
Occupation |
| 3. | Save each component as you add it. |
Configure the Plug-In Component
The Plug-In component pulls the information from your Text Field components and matches it to your PDF Template.
| 1. | Drag and drop a Plug-In component onto your canvas. |
| 2. | In the Property ID and Canvas Label Text fields, enter plugGeneratePdf. |
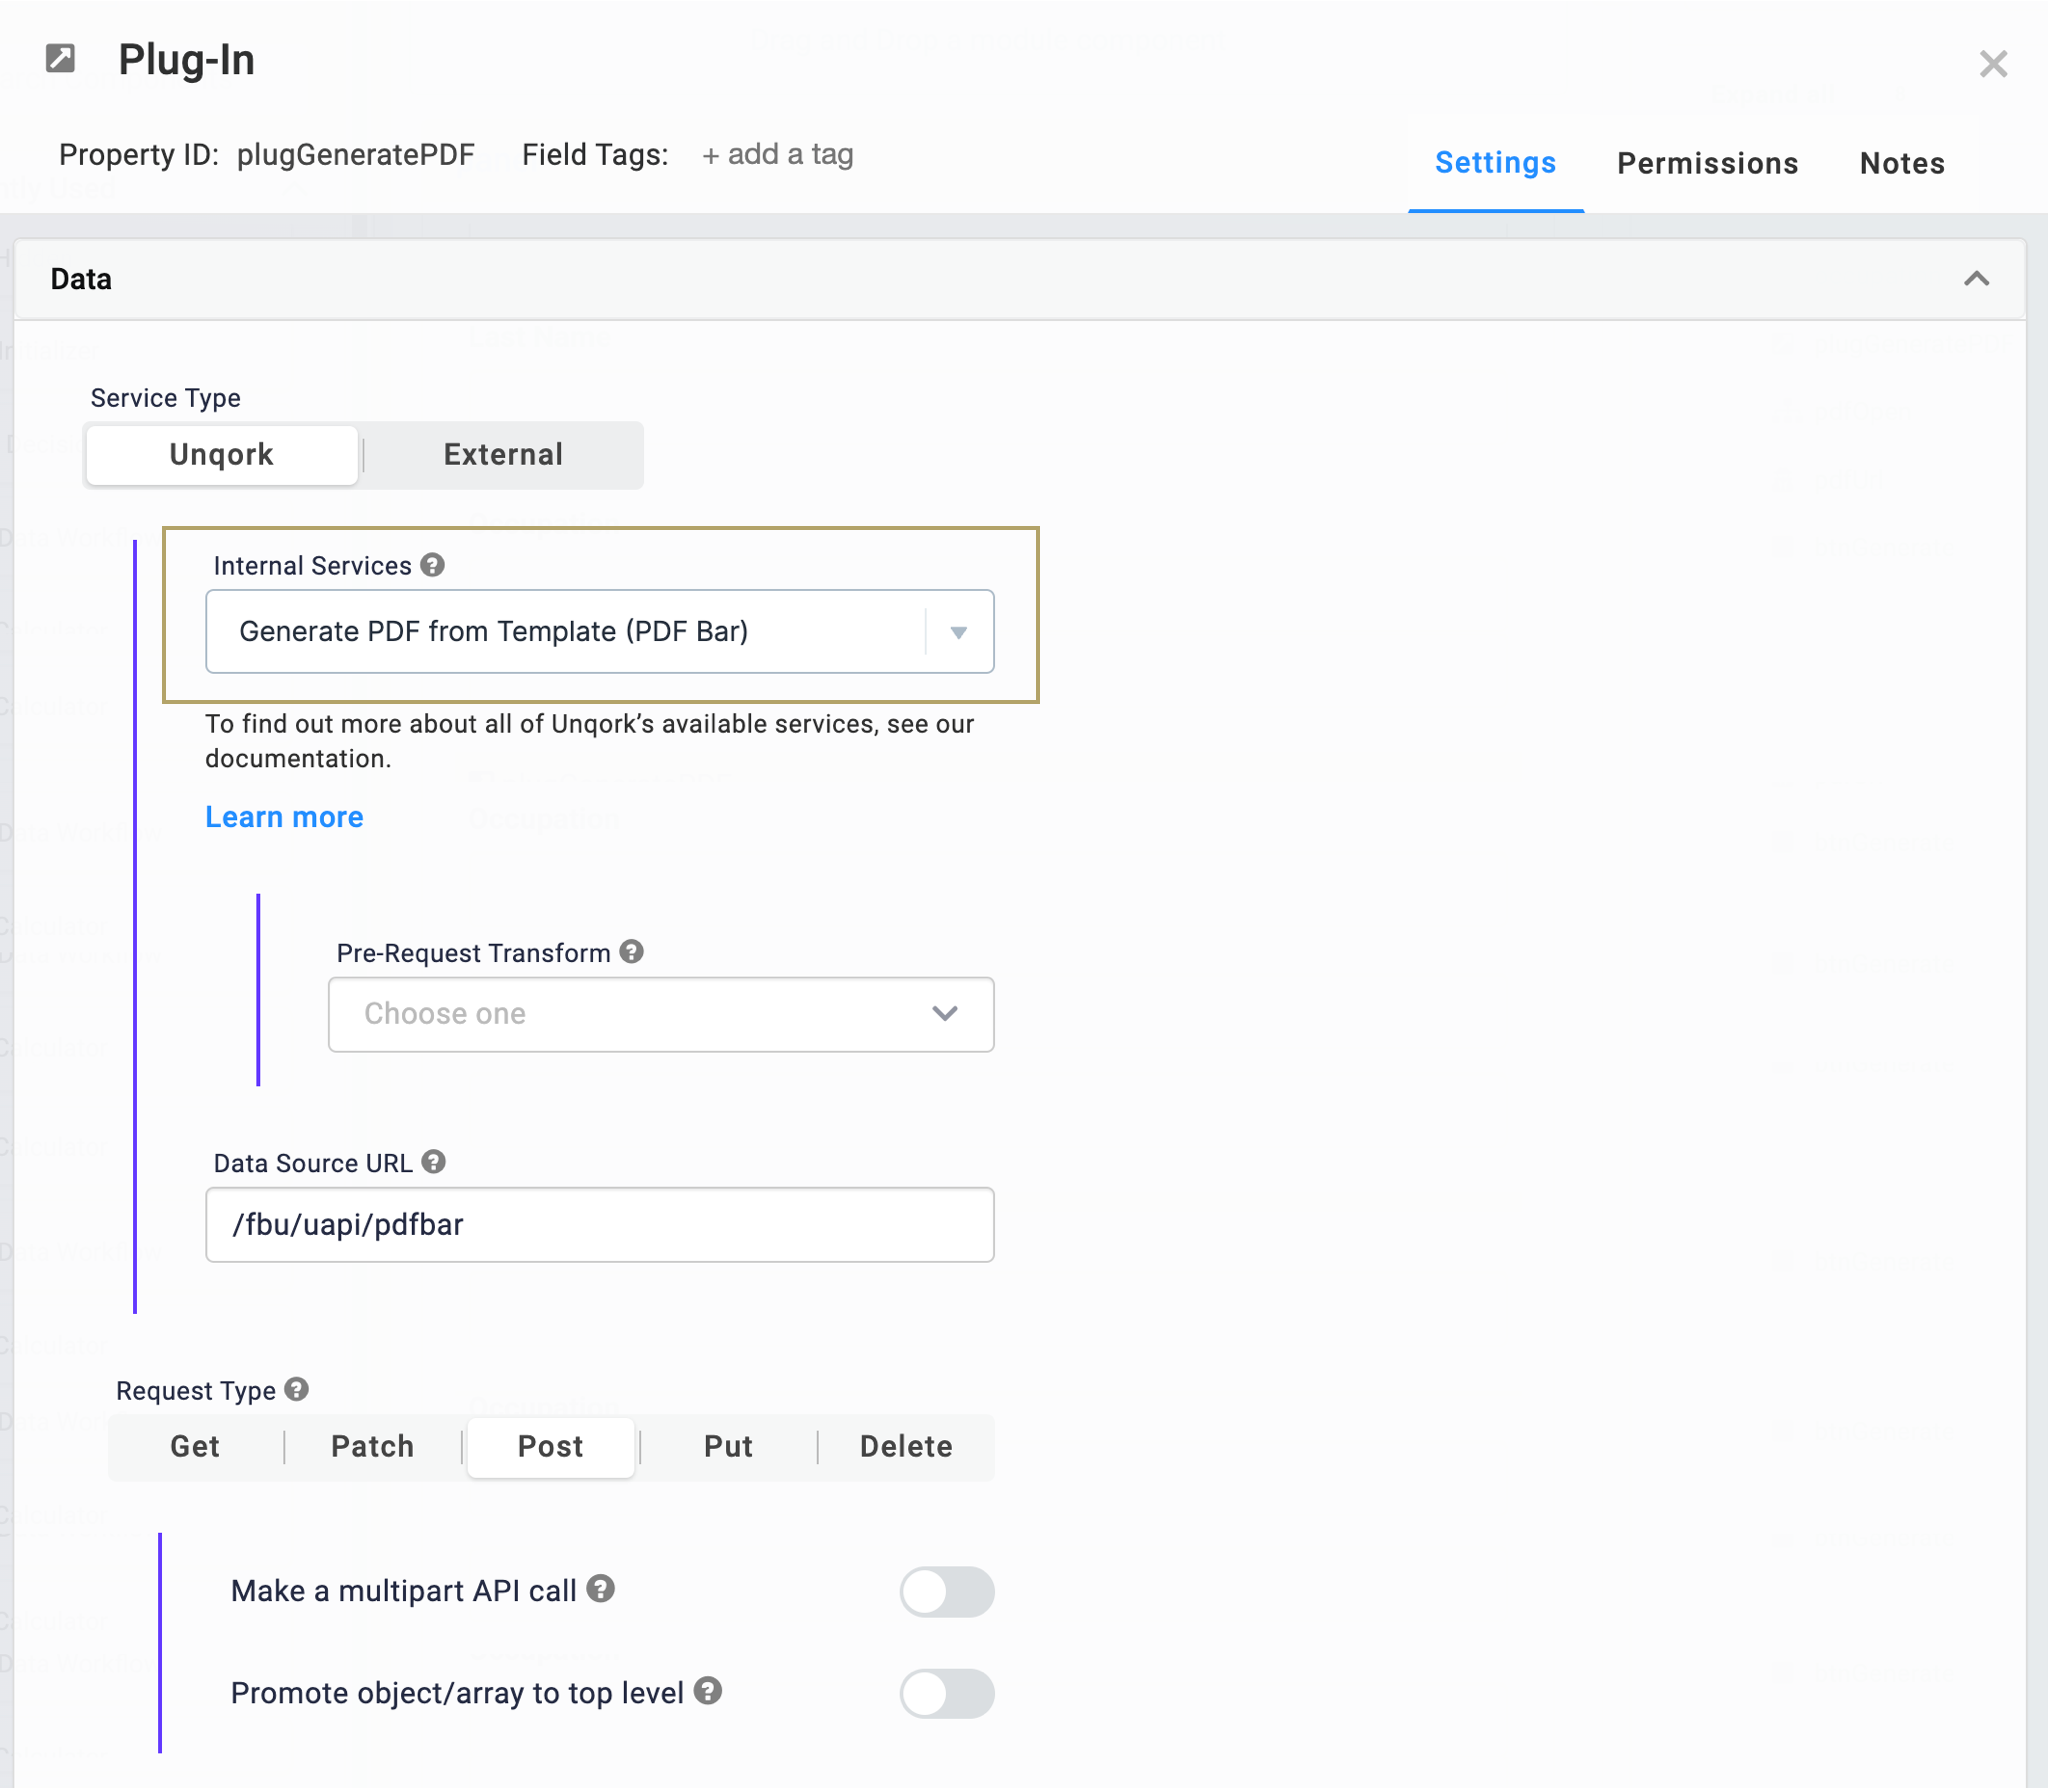
| 3. | From the Internal Services drop-down, select Generate PDF from Template (PDF Bar). This populates the Data Source URL and changes the request type to POST. |
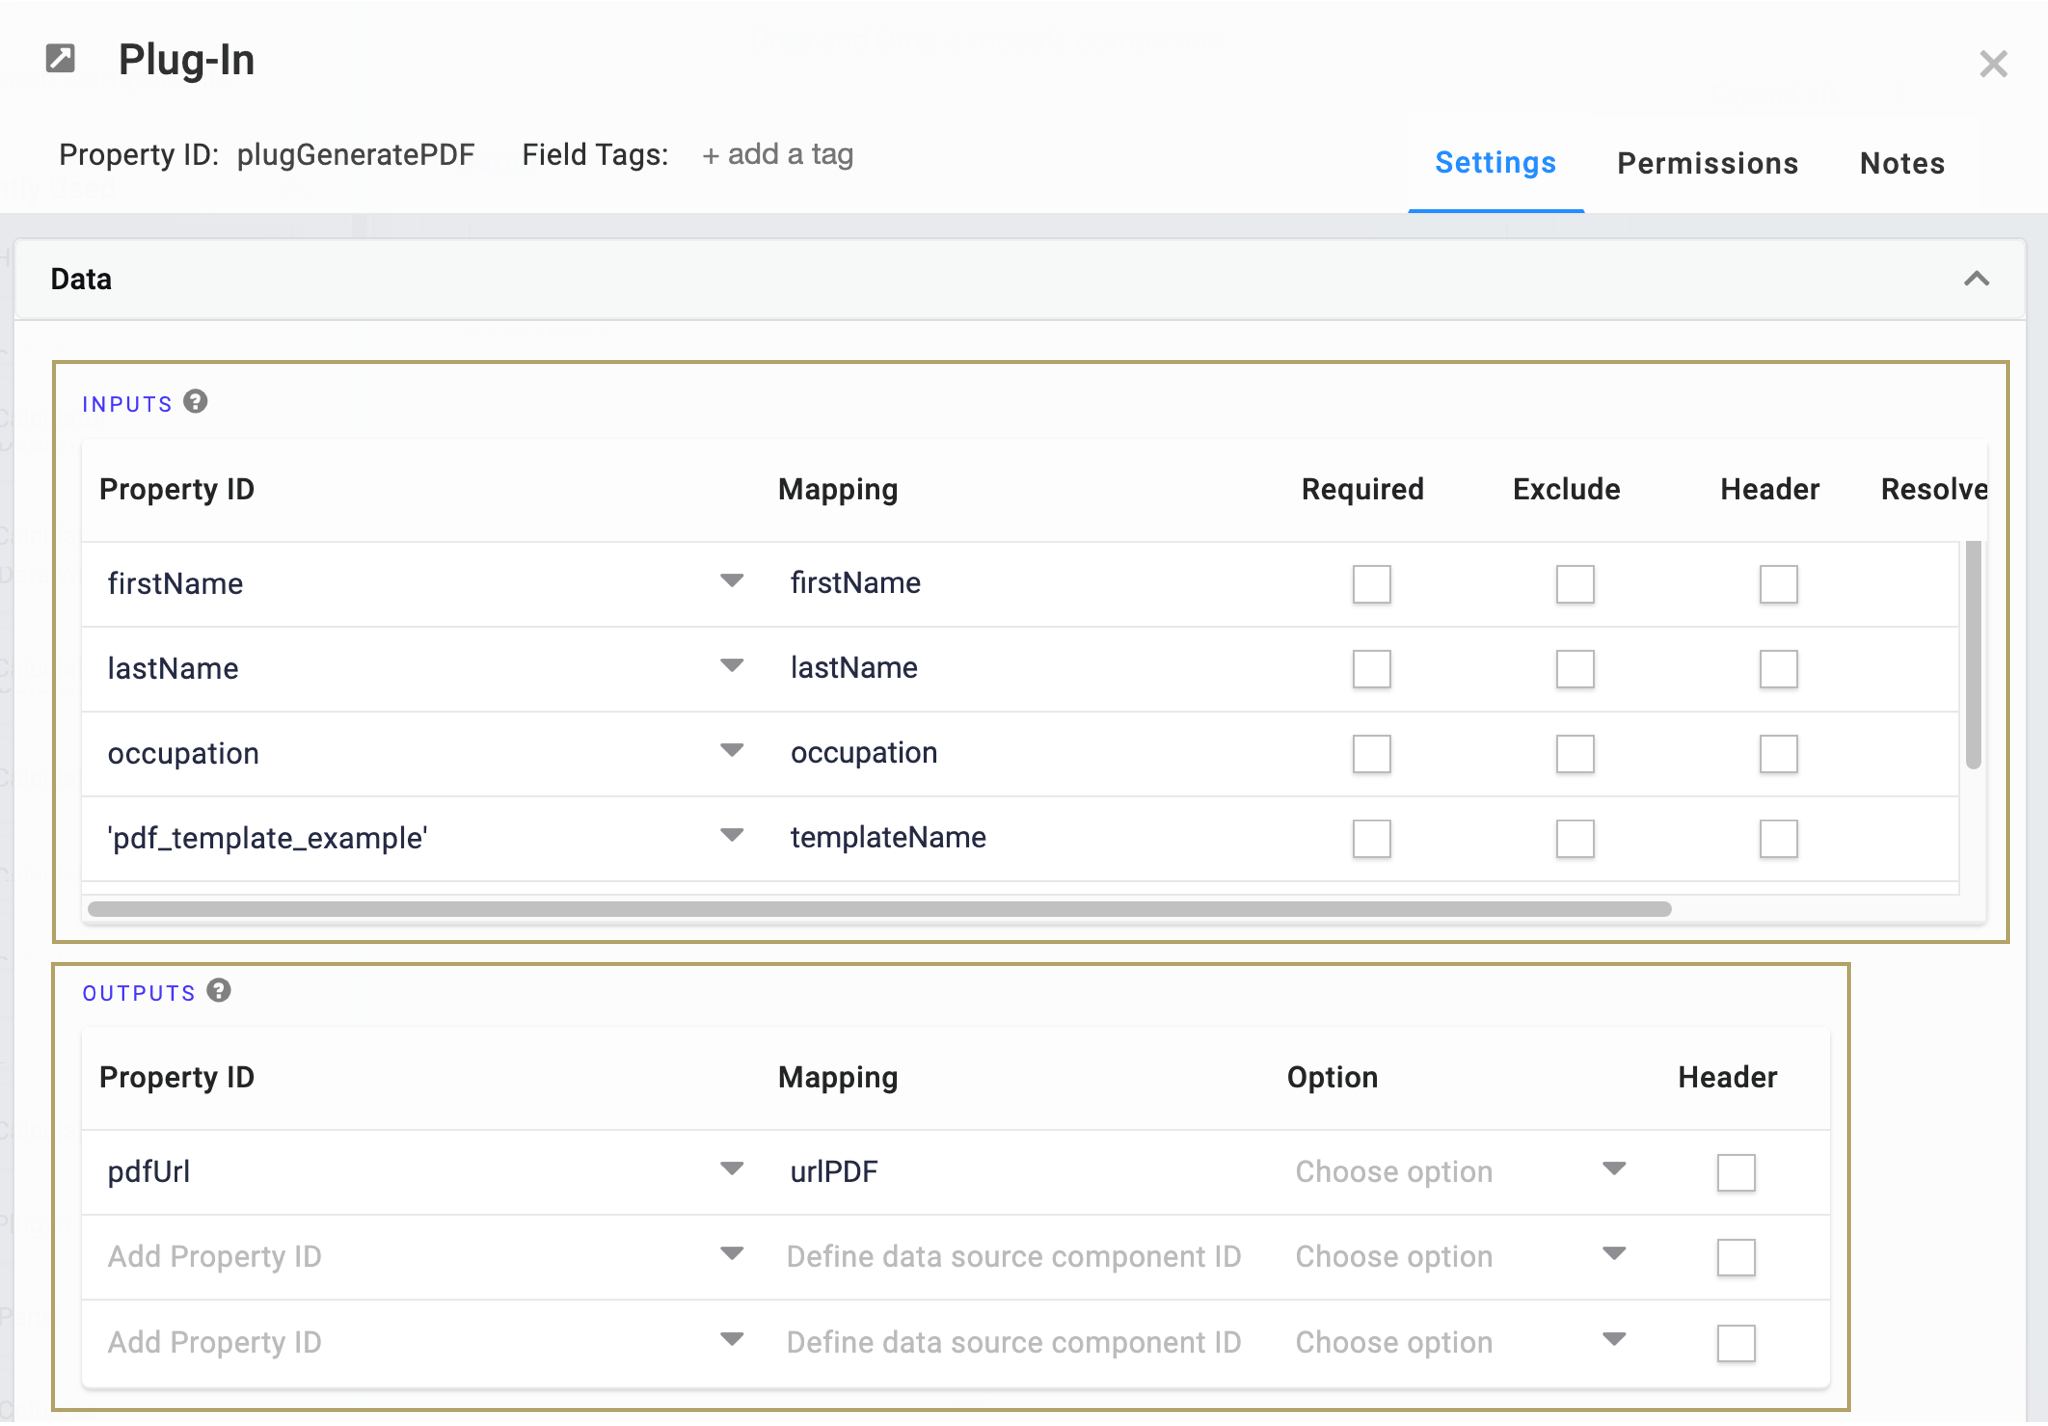
| 4. | In the Inputs table, enter the following: |
|
Property ID |
Mapping |
|---|---|
|
firstName |
firstName |
|
lastName |
lastName |
|
occupation |
occupation |
|
'pdf_template_example' |
templateName |
This example uses the pdf_template_example.pdf template from the Training environment. If you're using your own template, replace the pdf_template_example in the Property ID field with the name of the PDF template uploaded to PDF Template Administration.
| 5. | In the Outputs table, enter the following: |
|
Property ID |
Mapping |
Option |
|---|---|---|
|
pdfUrl |
urlPDF |
Replace |
urlPDF is the Cloud Storage URL for the generated PDF. Here, you're mapping the URL to pdfUrl, which is the Property ID of the Hidden component you'll set up next. The Hidden component stores the URL of the generated PDF.
| 6. | Under the Actions Panel, in the Post Trigger field, enter rulePdf. |
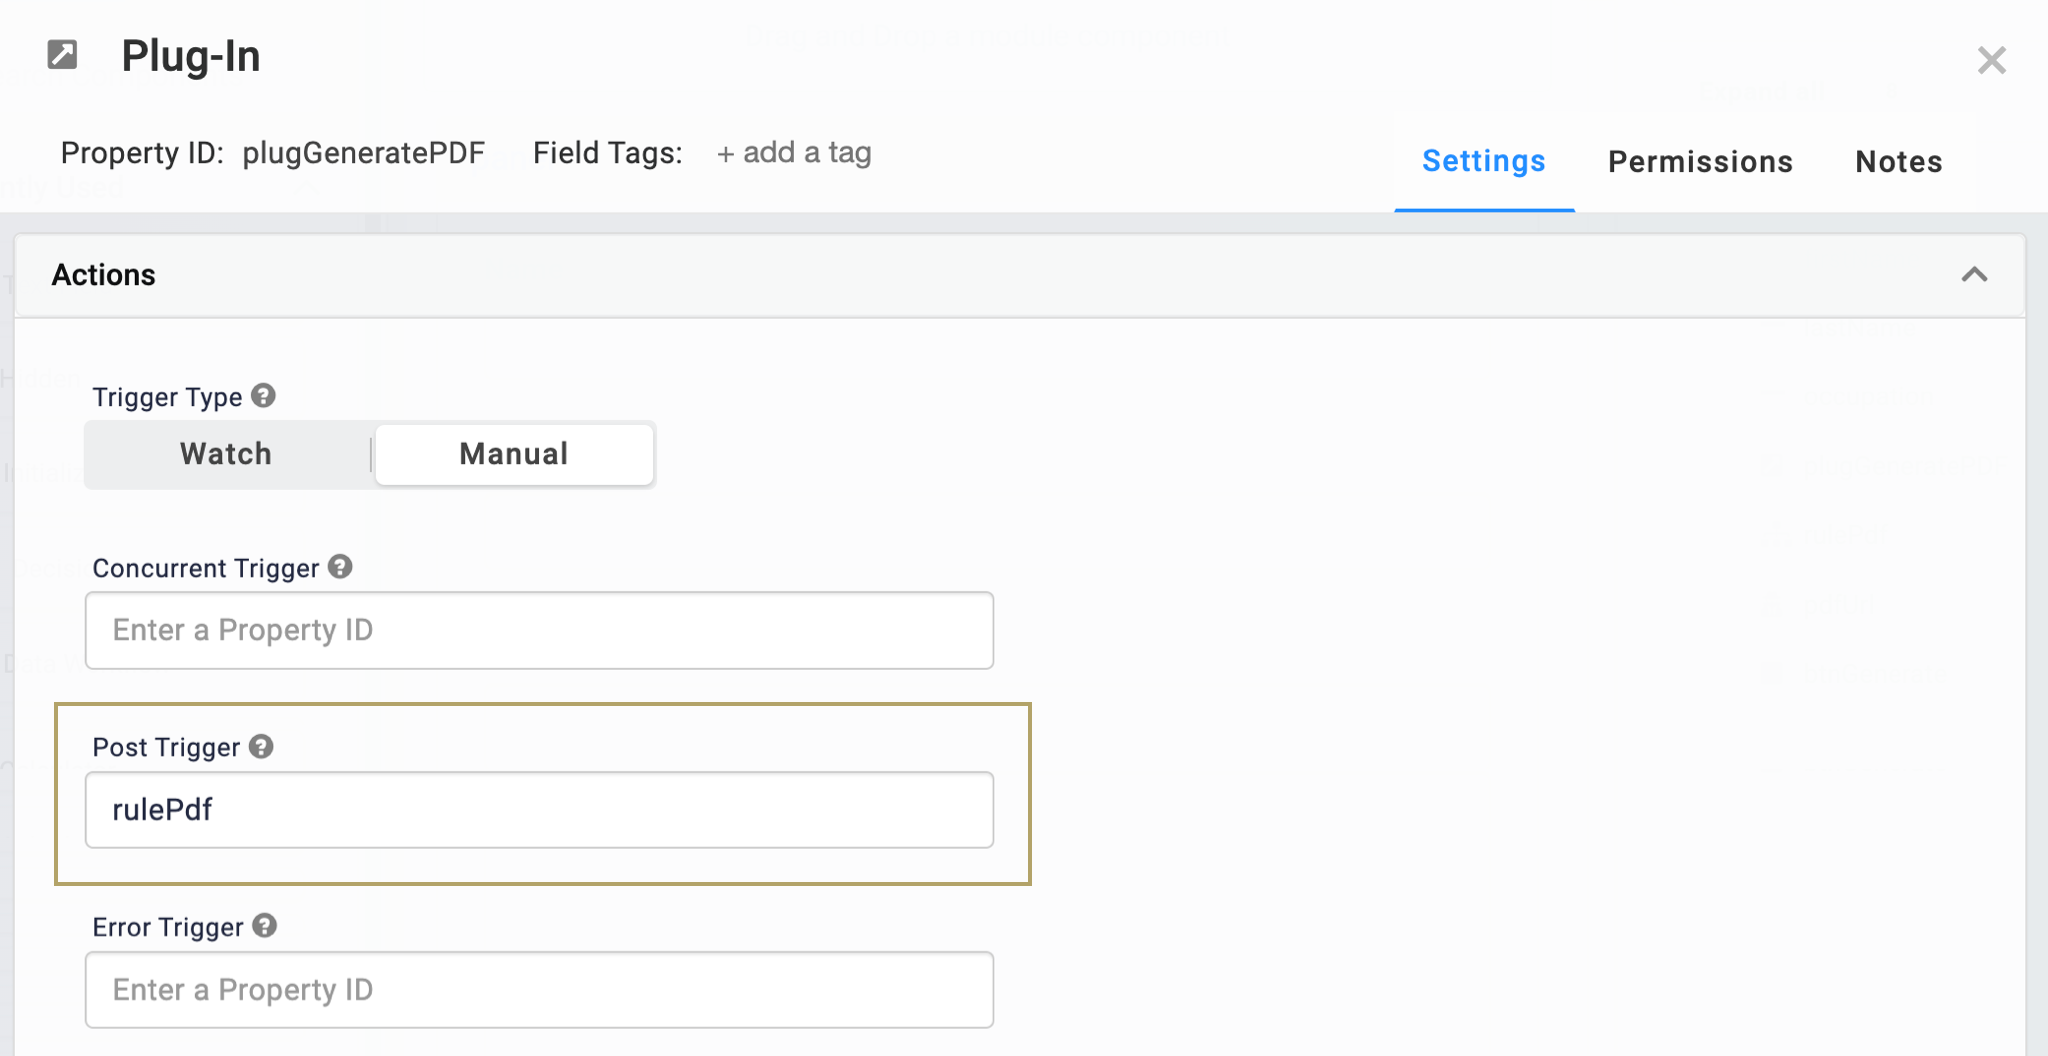
| 7. | Click Save. |
Configure the Hidden Component
Here you'll add the Hidden component that stores the URL for the generated PDF.
| 1. | Drag and drop a Hidden component onto the canvas. |
| 2. | In the Property ID and Canvas Label Text fields, enter pdfUrl. |
| 3. | Set the Store Data in Database toggle to ON. |
| 4. | Click Save. |
Configure the Decisions Component
Next, set up the Decisions component. When a new URL populates in the pdfUrl Hidden component, the Decisions components opens that URL in a new tab.
| 1. | Drag and drop a Decisions component onto your canvas. |
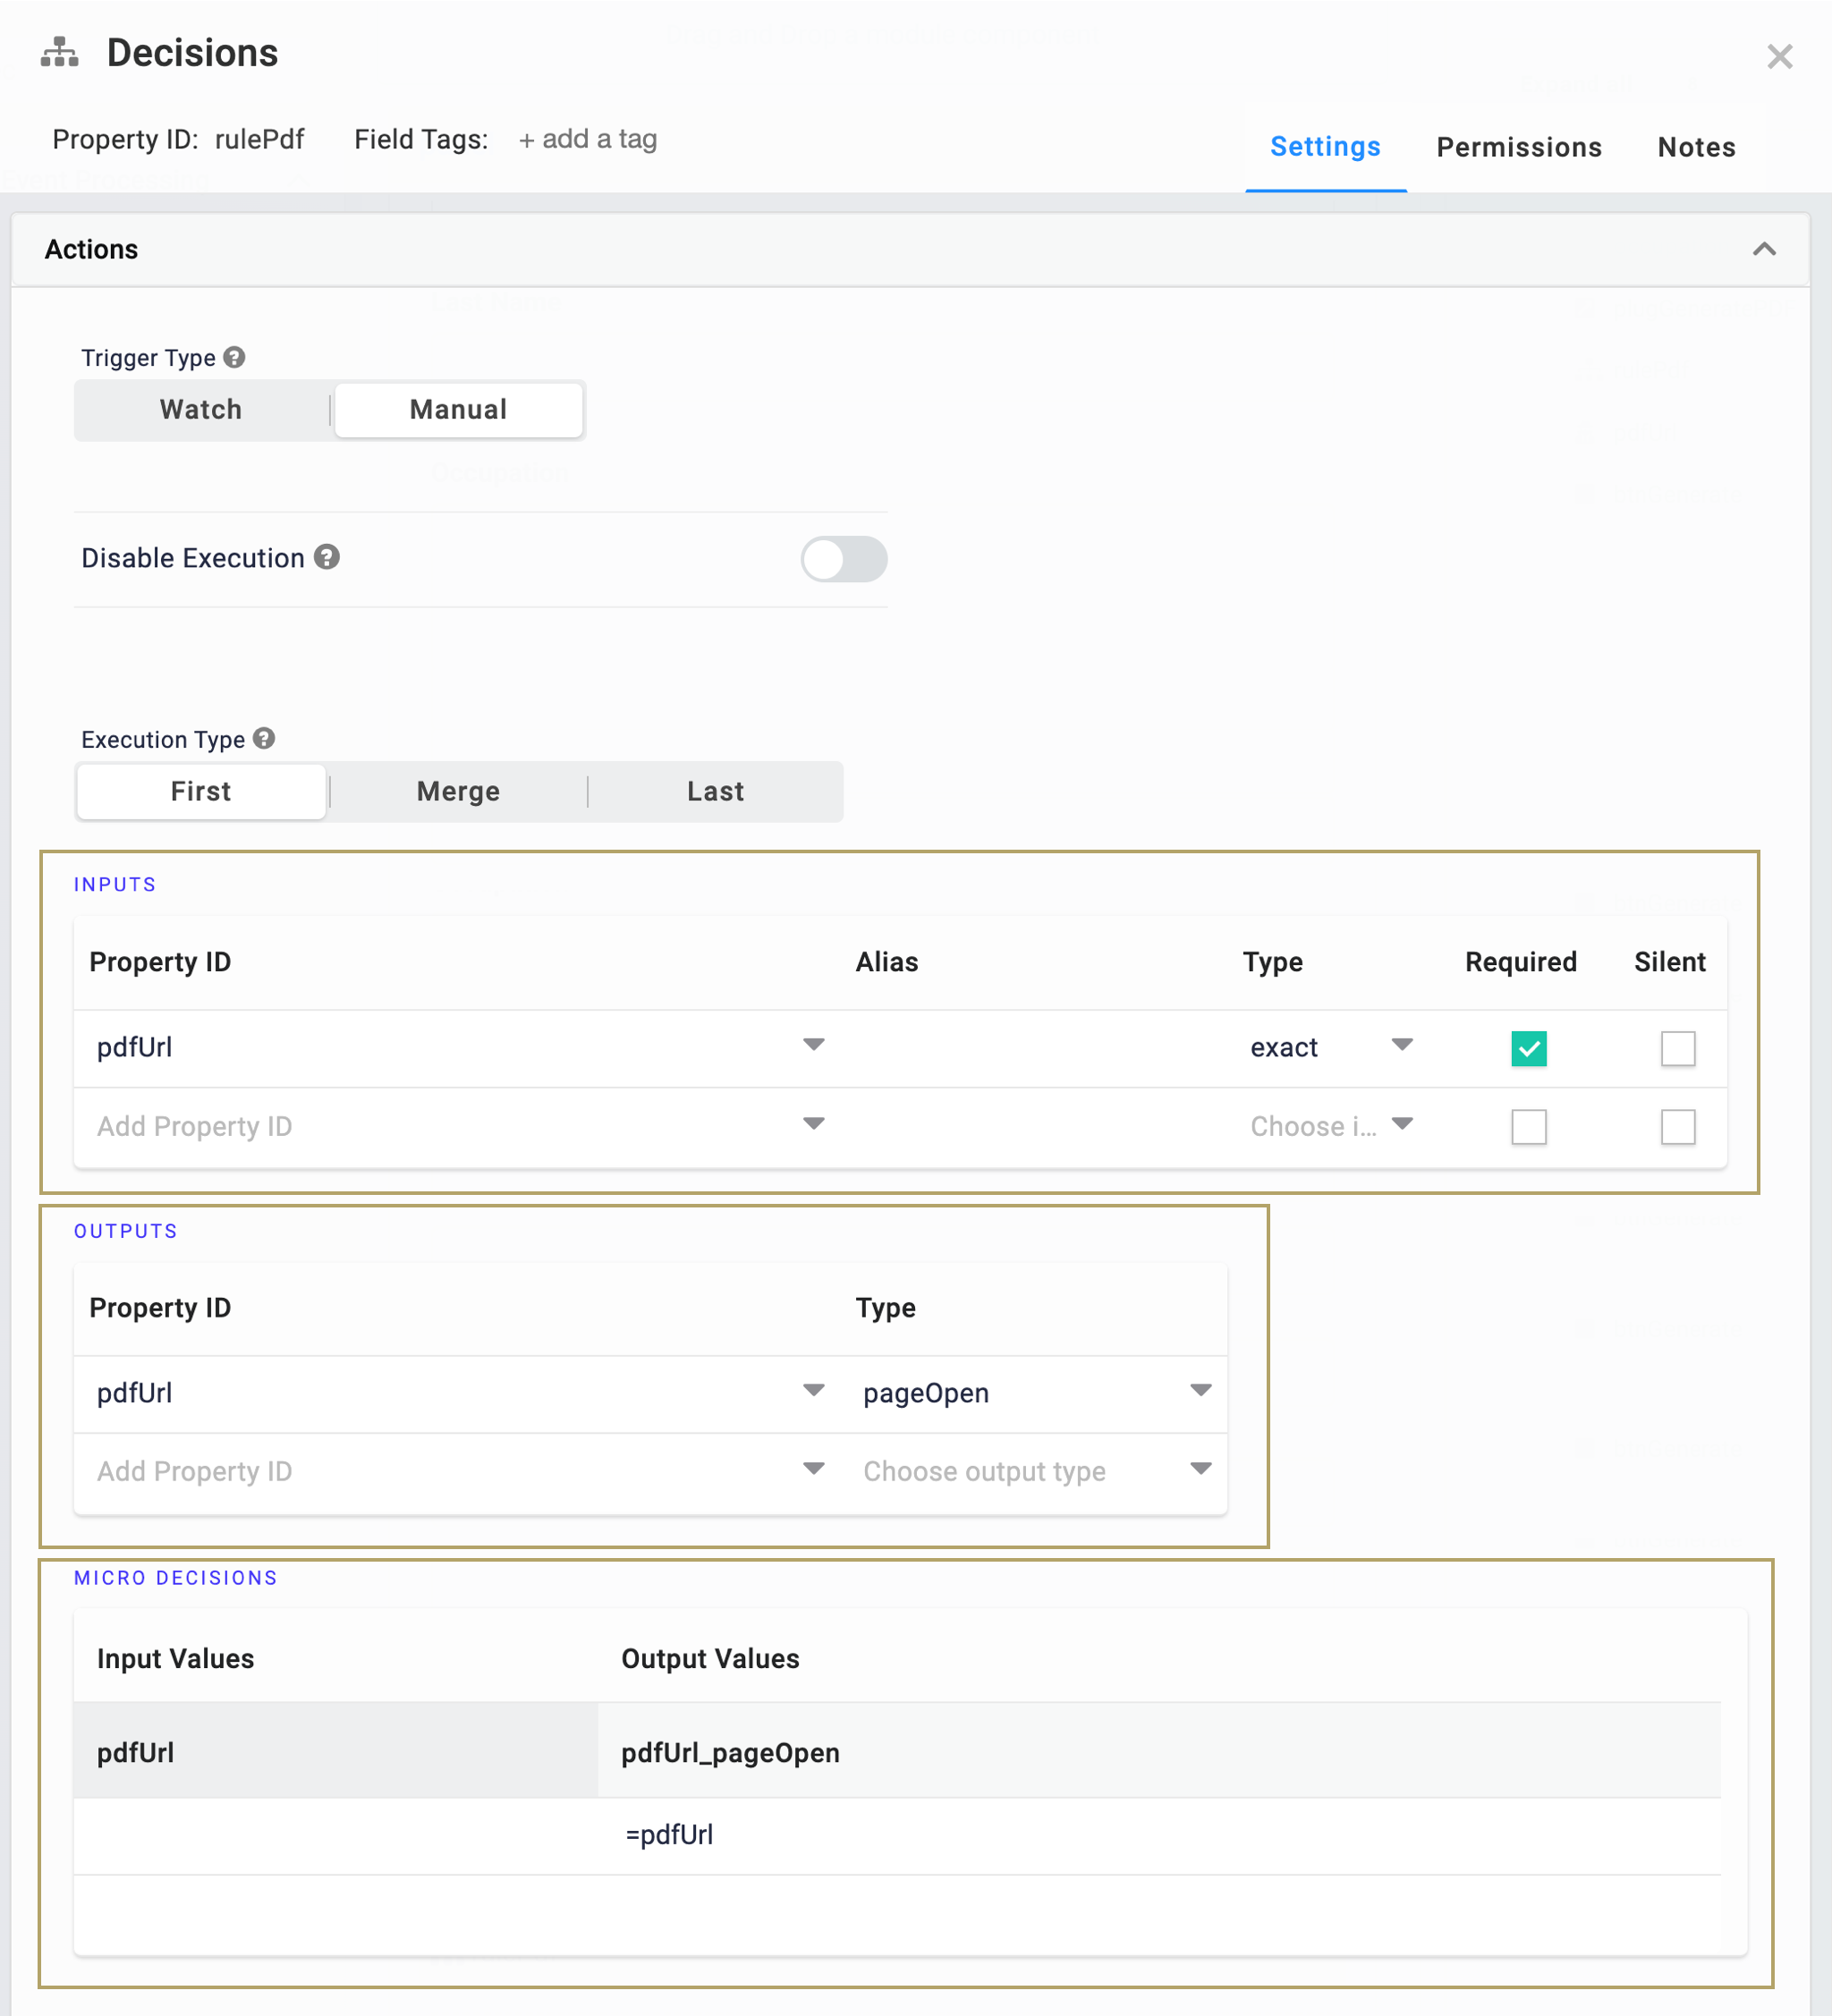
| 2. | In the Property ID and Canvas Label Text fields, enter rulePdf. |
| 3. | In the Inputs table, enter the following: |
|
Property ID |
Type |
Required |
|---|---|---|
|
pdfUrl |
exact |
Yes (selected) |
| 4. | In the Outputs table, enter the following: |
|
Property ID |
Type |
|---|---|
|
pdfUrl |
pageOpen |
An Output Type of pageOpen opens the URL in a new tab. To open the URL in the same tab, select an Output Type of page.
| 5. | In the Micro Decisions table, enter the following: |
|
pdfUrl |
pdfUrl_pageOpen |
|---|---|
|
|
=pdfUrl |
| 6. | Click Save. |
Configure the Button Component
Finally, add a Button component to kick off the PDF creation process. This Button triggers the plugGeneratePdf Plug-In component on button-click.
| 1. | Drag and drop a Button component onto your canvas. |
| 2. | In the Property ID field, enter btnGenerate. |
| 3. | In the Label Text field, enter Generate PDF. |
| 4. | From the Action Type, select Event. |
| 5. | In the Trigger on Click field, enter plugGeneratePdf. |
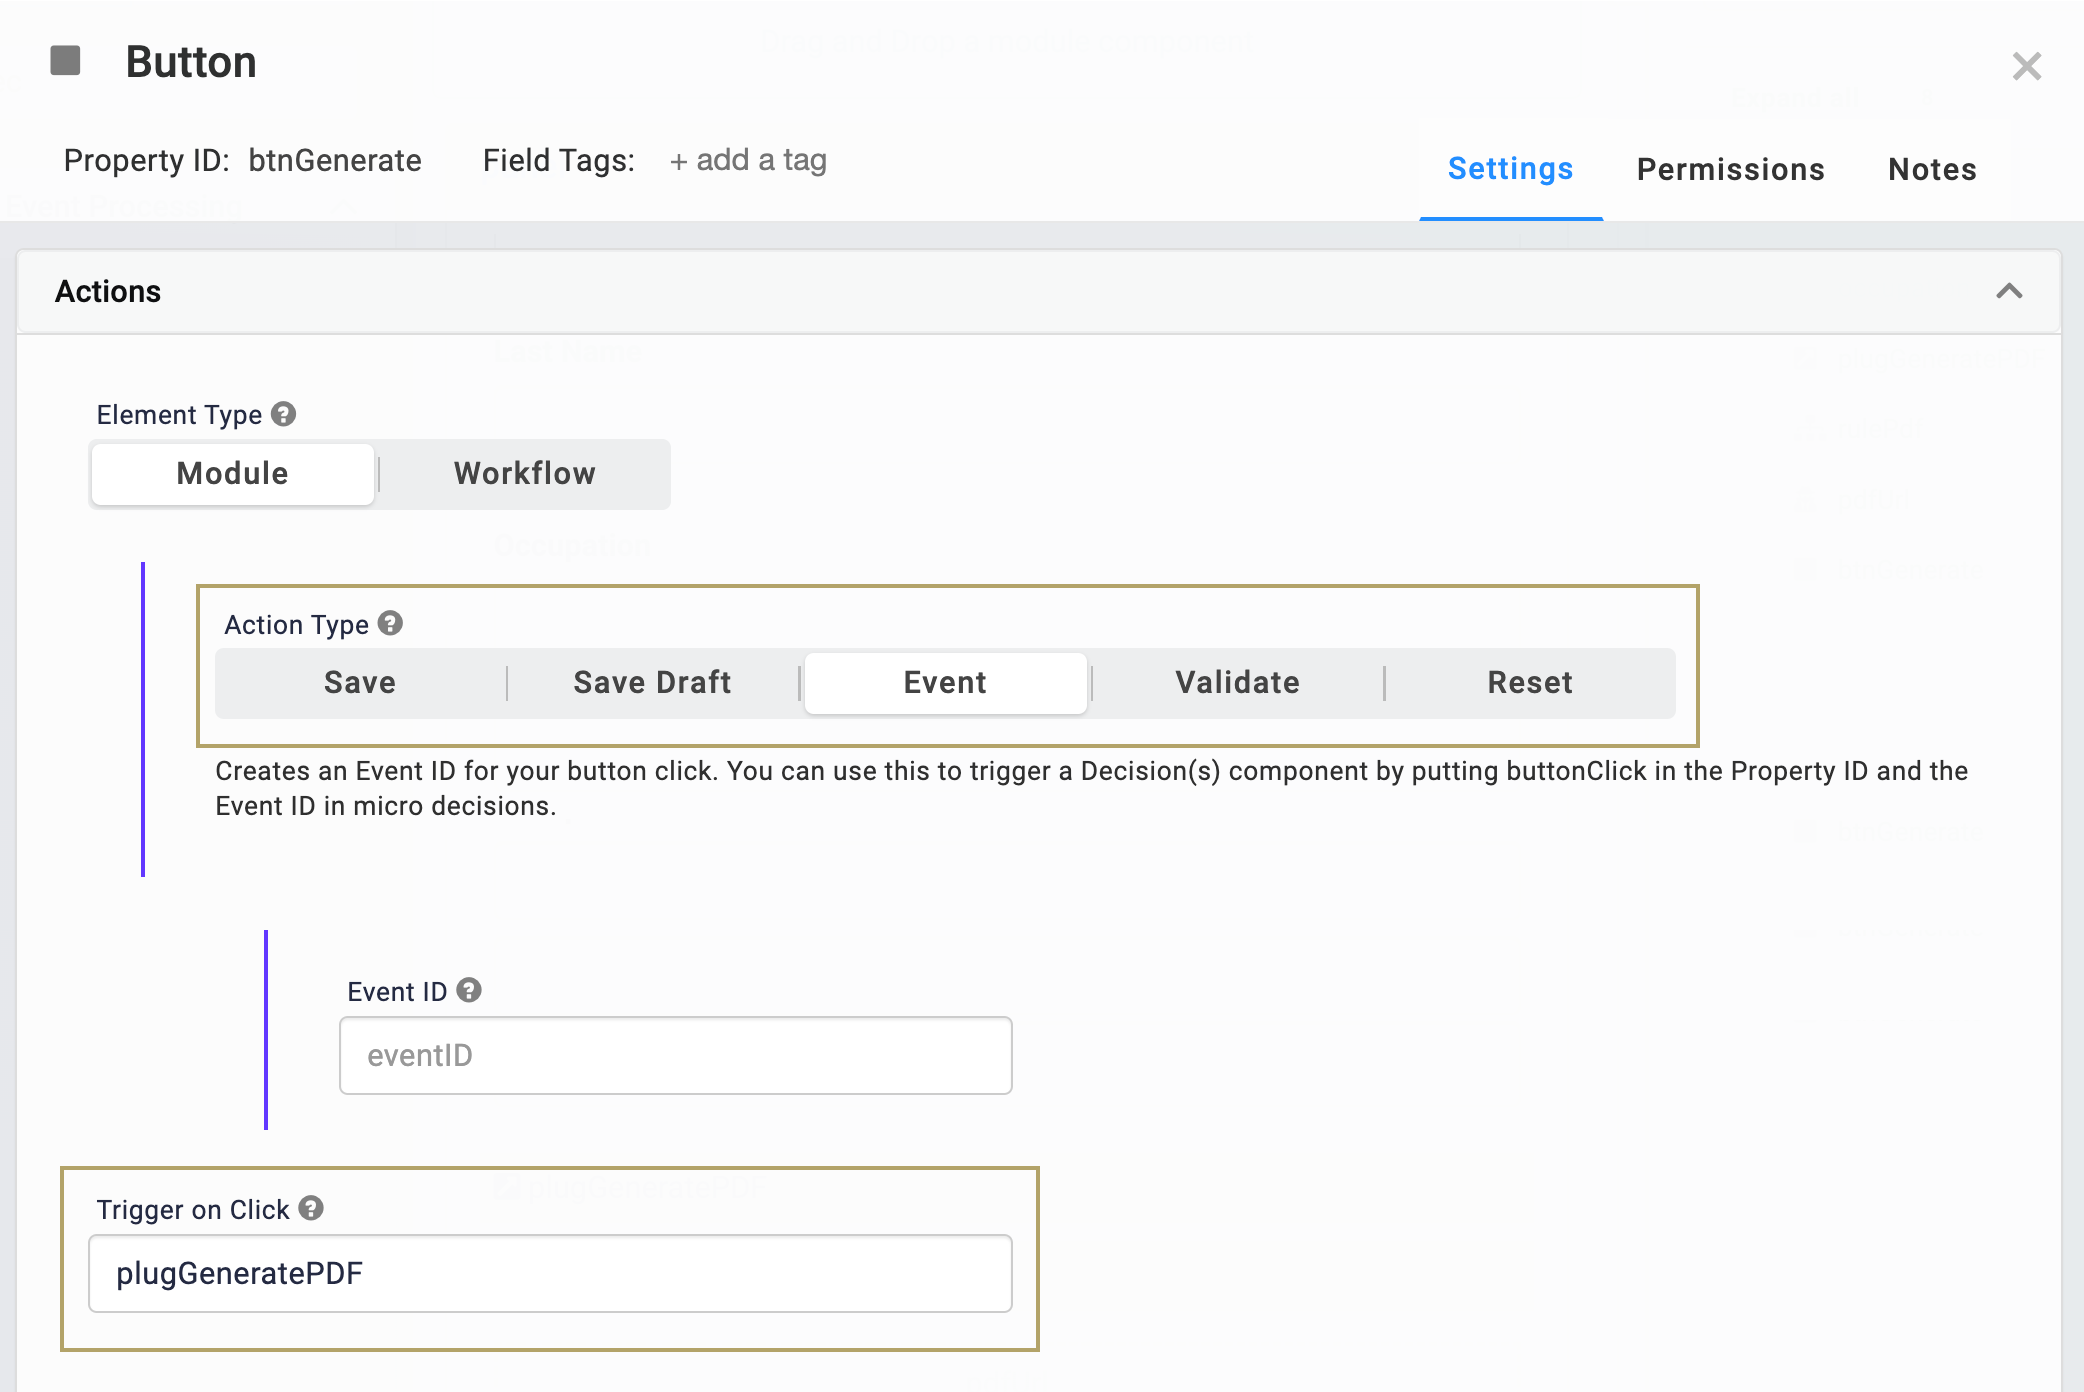
| 6. | Click Save. |
| 7. | Save your module. |
This is the result in Express View:

