About this Configuration Guide
Using this guide, you'll explore how the SFTP (secure file transfer protocol) Upload template works. You'll learn how to install the template to your environment and how to build an application from it. Plus, you'll see how to customize your application to fit your needs.
To learn more about using SFTP at Unqork, search Secure File Transfer Protocol (SFTP) Integration in our In-Product Help.
And here's a high-level overview of the modules:
Title | Element Type | Description |
|---|---|---|
SFTP: List Files UI | Module | This front-end module lists all your uploaded files. This dashboard also lets you download your files or delete them from the SFTP server. |
SFTP: Upload File Template | Module | This front-end module lets you select a file directory and file to upload to your SFTP server. The module also has built-in validation to ensure your file directory exists and the file is acceptable for upload. |
SFTP: List Files (API) | Module | This API module calls the SFTP directory and creates a list of your files using a File Storage component. |
SFTP: Write File from URL (API) | Module | This API module uses a Calculator to create the file path for your uploaded file. Then, a Plug-In posts the file's data URL as a multi-part API call. The Plug-In does this to combine various data types into a single object request. The Plug-In outputs the file's S3 (Simple Storage Service) location. Finally, a second Plug-In gets this object URL and writes it to your SFTP server using a File Storage component. |
SFTP | Service | This is an external service that lets you interact with your SFTP server. |
All images used in this guide are for illustrative purposes only. Images are subject to change without notice. All images are correct at the time of publication.
Overview
The SFTP Upload template is simple module-based template for uploading files to an SFTP server. An SFTP setup makes use of a protected directory on an SFTP server you connect to using a username and password. Storing files to an SFTP directory is crucial when dealing with sensitive information. This template validates files and directories and then writes those files to your SFTP server.
This is a module integration template. So, if you build an application from this template, you'll also see an SFTP service (integration) added to your environment. Even though there isn't an external integration partner, we still consider this an integration template. Set up your environment's new SFTP service to connect with your own SFTP server.
Features
With this template, you can upload files to an SFTP server.
Requirements
To use this template, you must have an SFTP server and credentials.
Adding the Template
Before you can build an application from this template, you must install the template to your environment. Then, you can visit your Library and build an application from your new template.
Adding the Template to Your Environment
To add the template to your environment:
Click Marketplace at the top right of the Unqork Designer Platform.
You can also access the Marketplace at any time by visiting https://marketplace.unqork.io.
Enter SFTP Upload in the Search the Marketplace field.
Click the SFTP Upload tile.
Click Install to Environment.
Click Install Template.
If you aren't logged in, you'll see a field for Environment URL and a Login button. Enter your environment's URL where you want to install the template. For example: [environmentname.unqork.io]. Click the Login button. Then, return to step 4 and click Install to Environment again. Follow the remaining steps as listed.
Now, you can now use your newly installed template to create an application!
Creating an Application from the Template
After you add the template to your environment from Marketplace, you can use it to create an application. This template creates a module-type application with an SFTP service.
Click Library at the top right of the Unqork Designer Platform.
Find the SFTP Upload template tile.
Click Create App from Template.
Choose the destination workspace from the Workspace drop-down. This is where your application lives once created.
Enter your unique App Name. The App Path auto-fills as you type your App Name.
If you want a different App Path, enter it in the App Path field.
Select a preview style from the Style drop-down. A style specifies your application’s appearance in Express View. If left blank, your application uses your environment's default style.
You'll notice the App Type and App Entrypoint are grayed out. The template automatically takes care of these for you.
Click Create App.
The application opens in the workspace you specified. You'll land on the Modules tab of your application, which lists all modules of this template.
Your new application looks something like this:
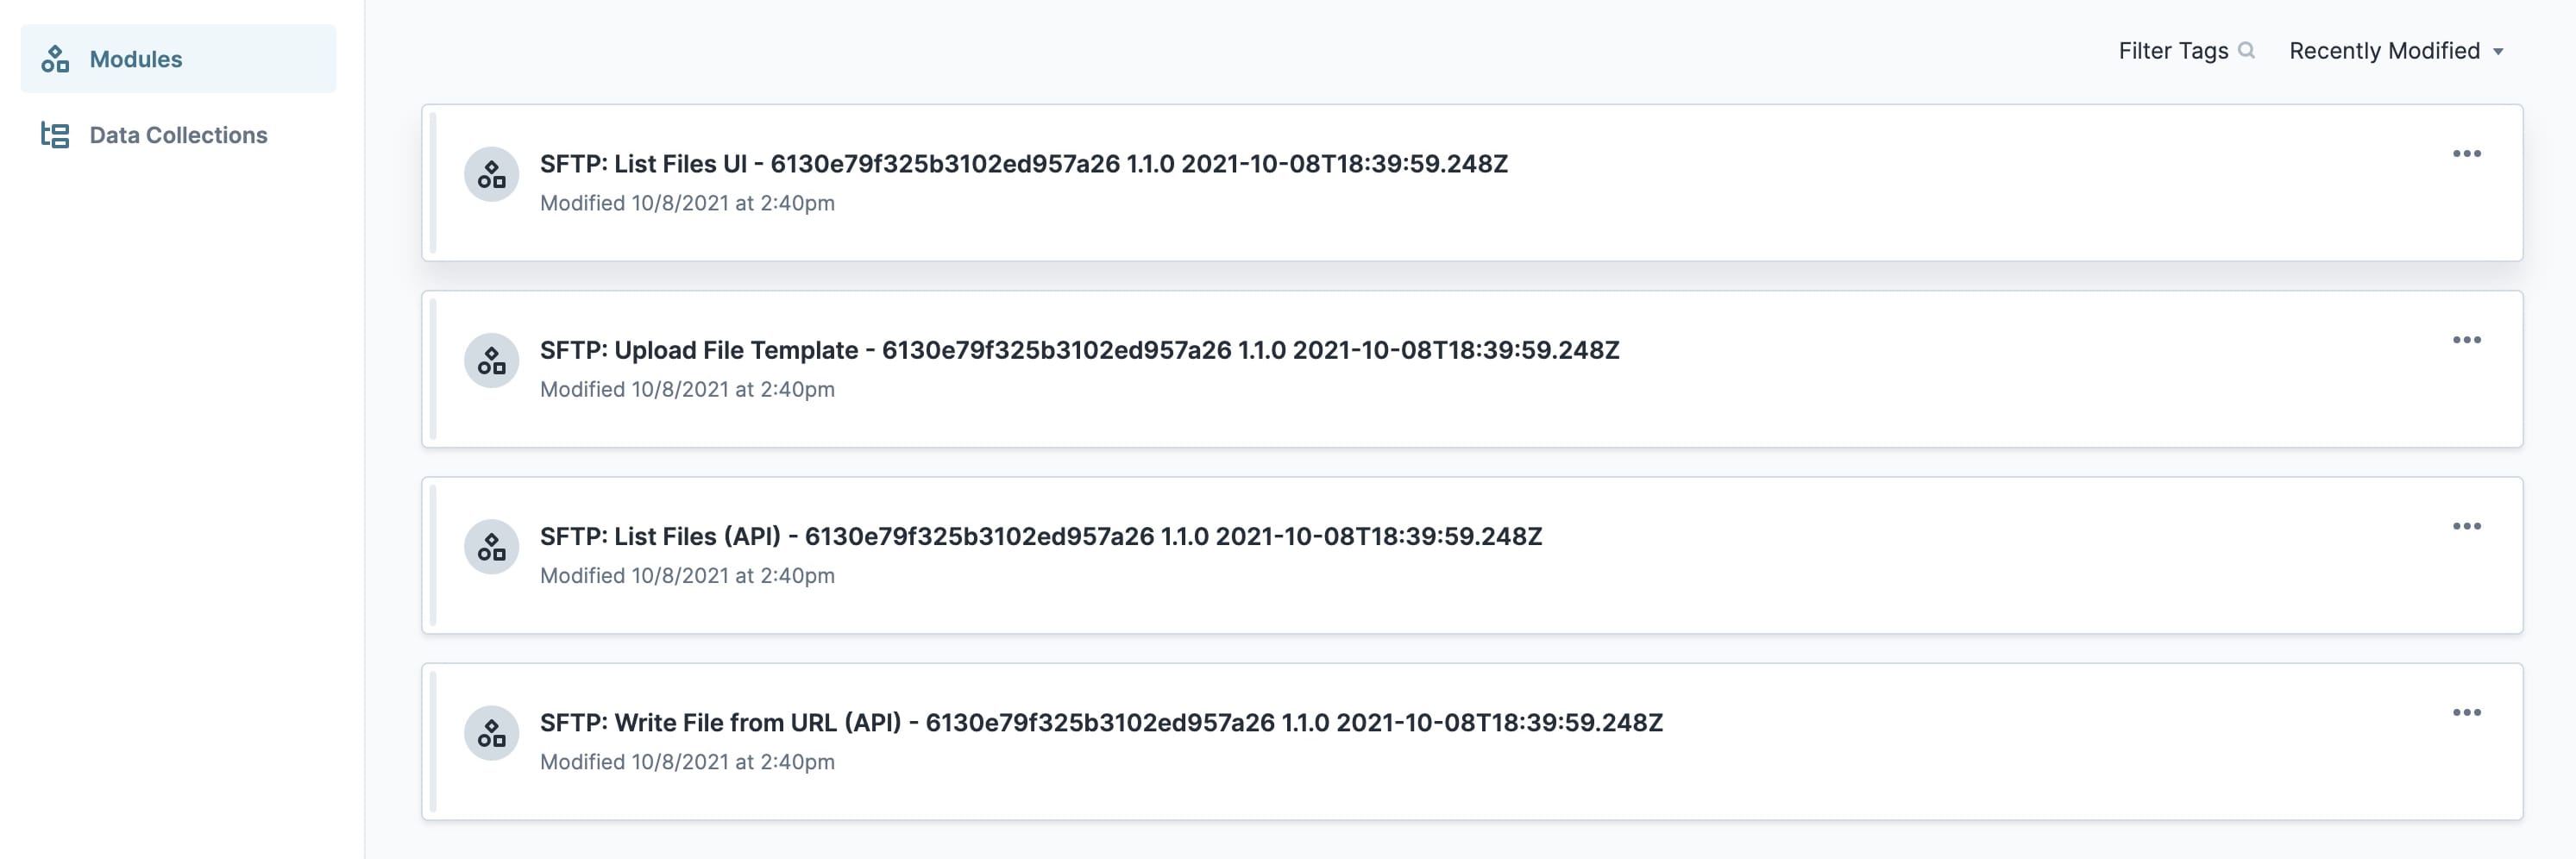
When you create an application from the template, your module names automatically include the template ID and a time stamp. This is to prevent any duplicate module paths. You can change module names and module paths at any time. Any service or workflow you create with your template also has a template ID and time stamp.
When you create an application from this template, you'll see a new service added to your Services Administration. This service connects to your SFTP server. You'll need to update it with your company's credentials. You'll learn how to link your environment to your SFTP server in the Configuring the Template section.
Here's an example of an SFTP service in Services Administration:

How the Template Works
The SFTP Upload template is a simple setup. After setting up SFTP integration, use the template to upload files to a designated SFTP directory. The template also provides you with a front-end dashboard so you can view a list of all your uploaded files.
How the SFTP Service Works
The SFTP service allows Unqork to connect to your SFTP server. Think of it like a telephone line that lets Unqork communicate with your SFTP server.
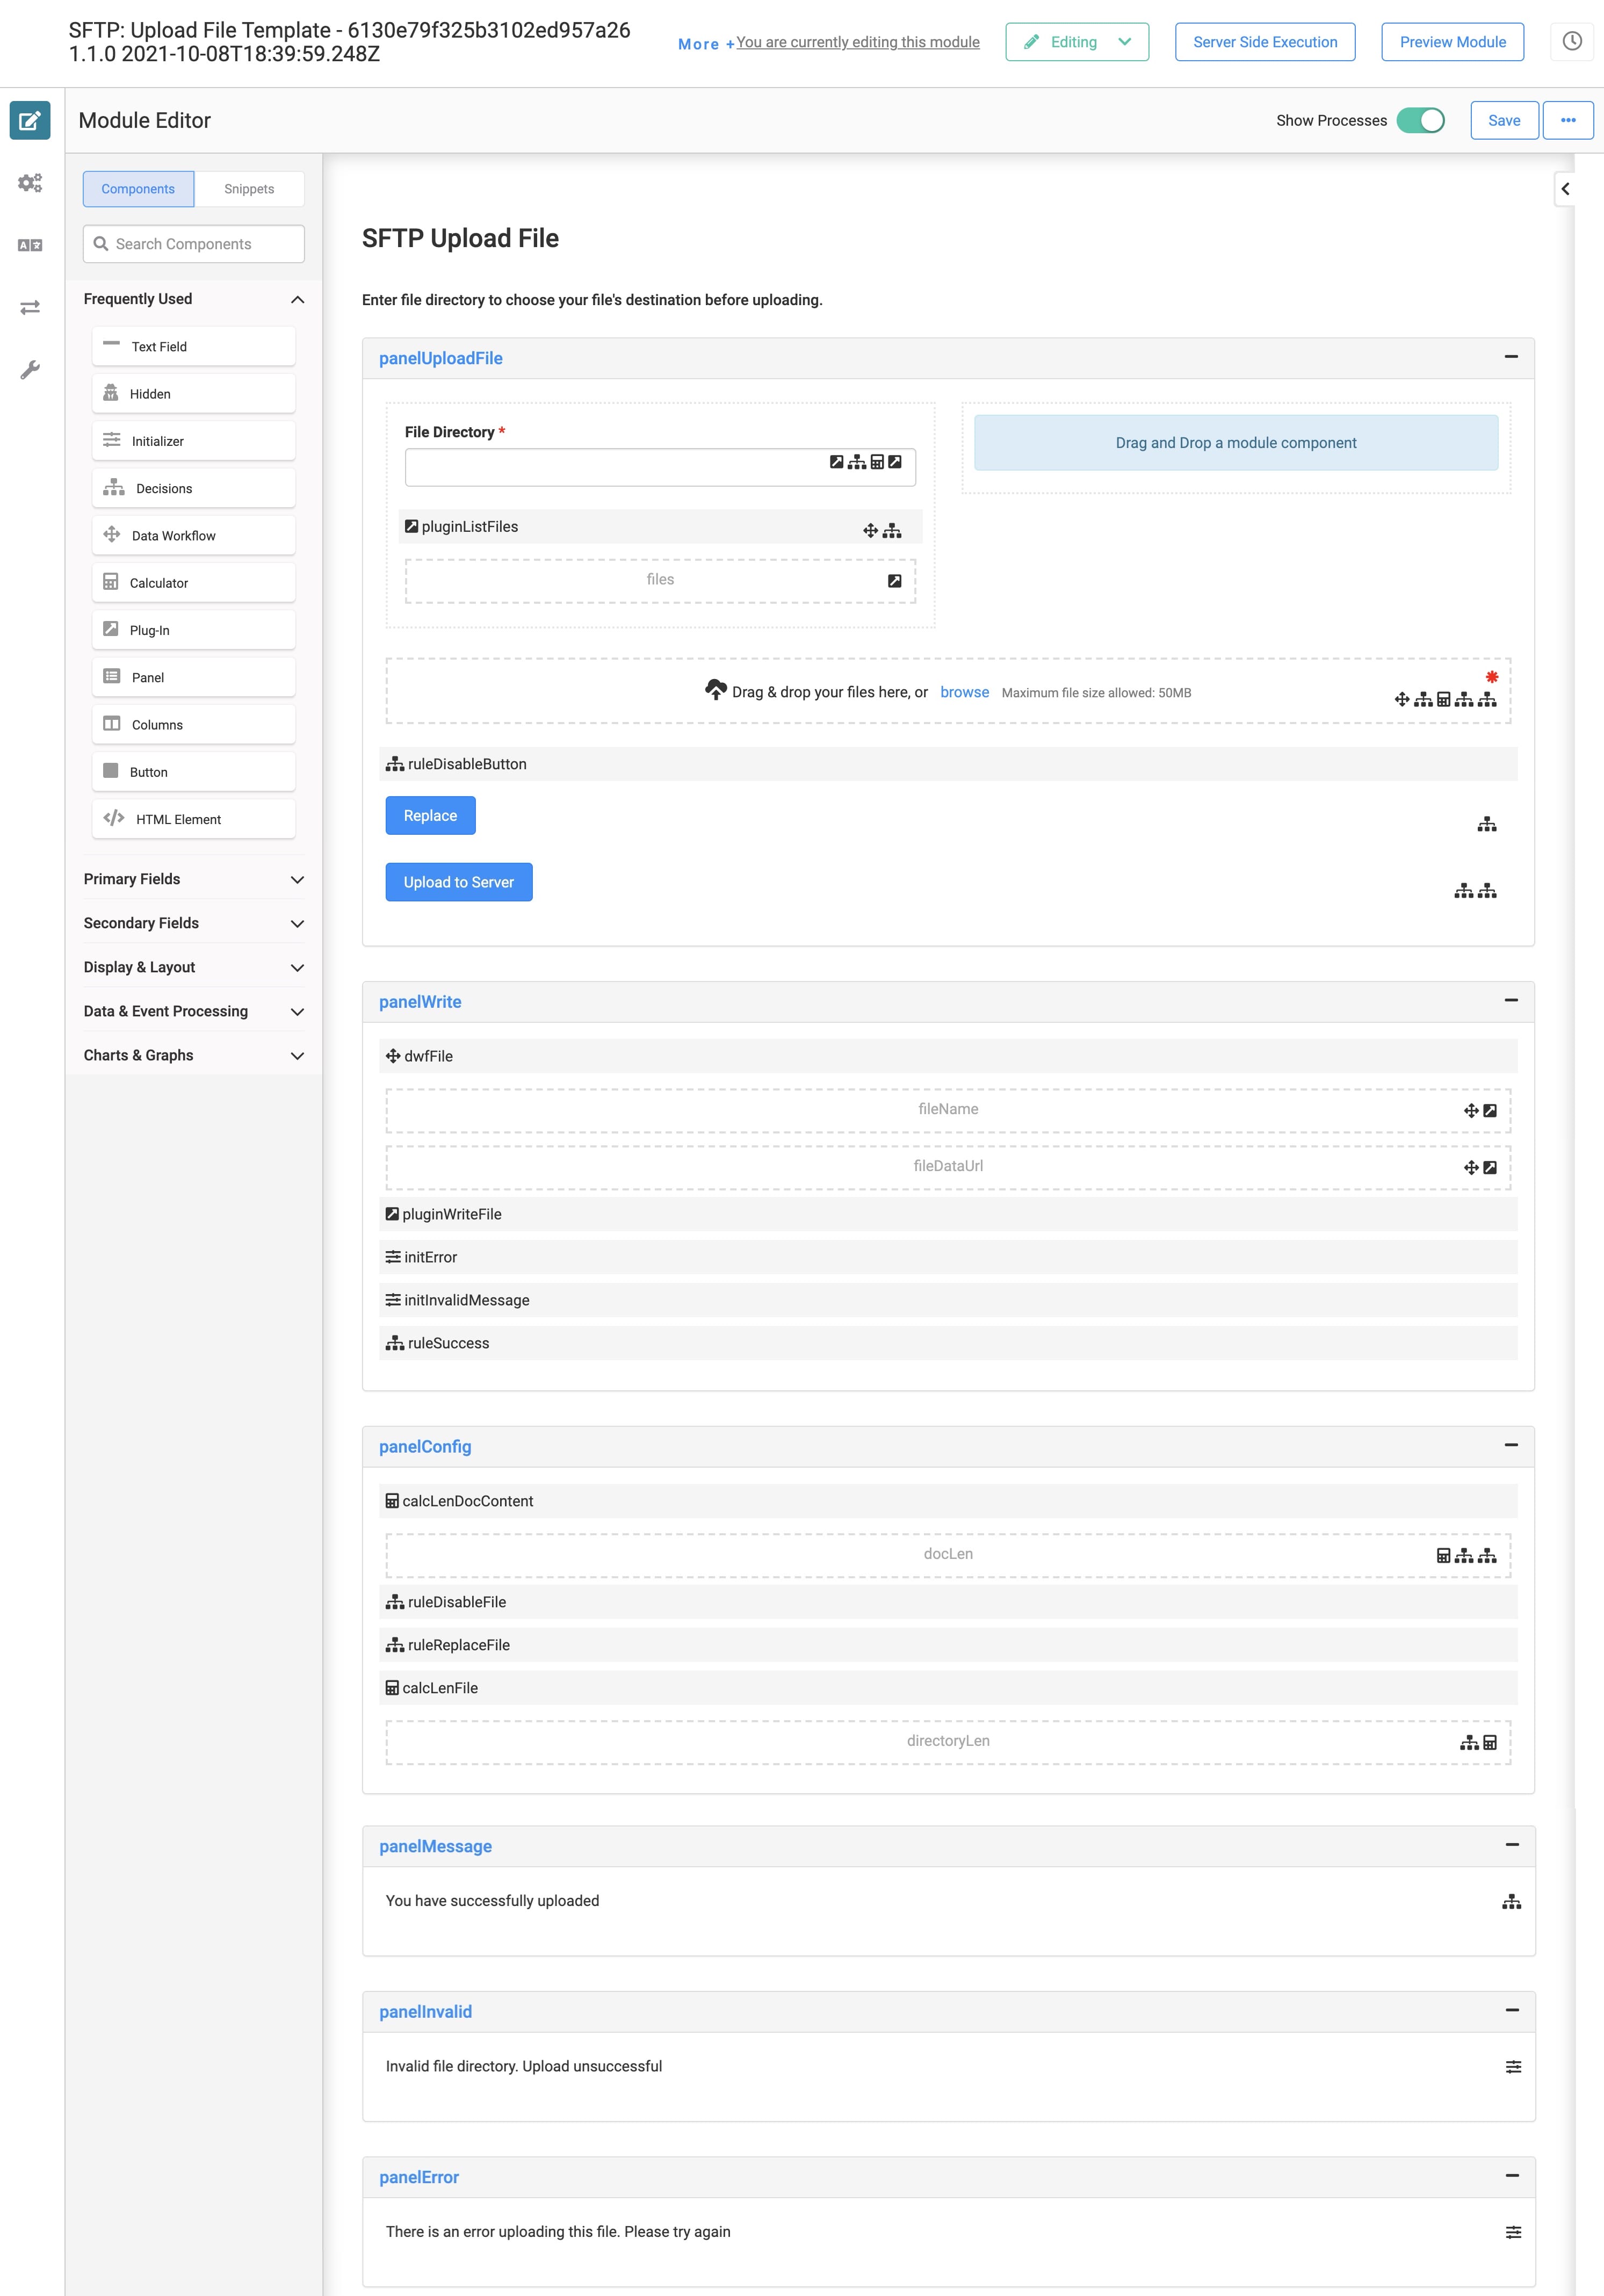
How the SFTP: Upload File Template Module Works
This module is the entry point to the template. This module requires you to enter the directory where you want to upload your file. Then you can drag-and-drop a file into the File component. This front-end module lets you add new files or ones you want to overwrite. In the latter case, the module replaces the existing file with the updated one.
These are the acceptable file types you can upload to your SFTP server: .xls, .xlsx, .doc, .docx, .ppt, .pptx, .jpeg, .jpg, .png, .gif, .pdf, .csv, .rtf, .dot, .mp3, .mp4, .zip, .bmp, .msg, .txt.
The module also validates the data and triggers the SFTP: List Files (API) and SFTP: Write File from URL (API) modules. Click the Upload to Server or Replace button, depending on if your file is new or an update of previous file.
Be sure you don't try to upload a file that's larger than 50 megabytes.
Here's how it looks in the Module Builder:
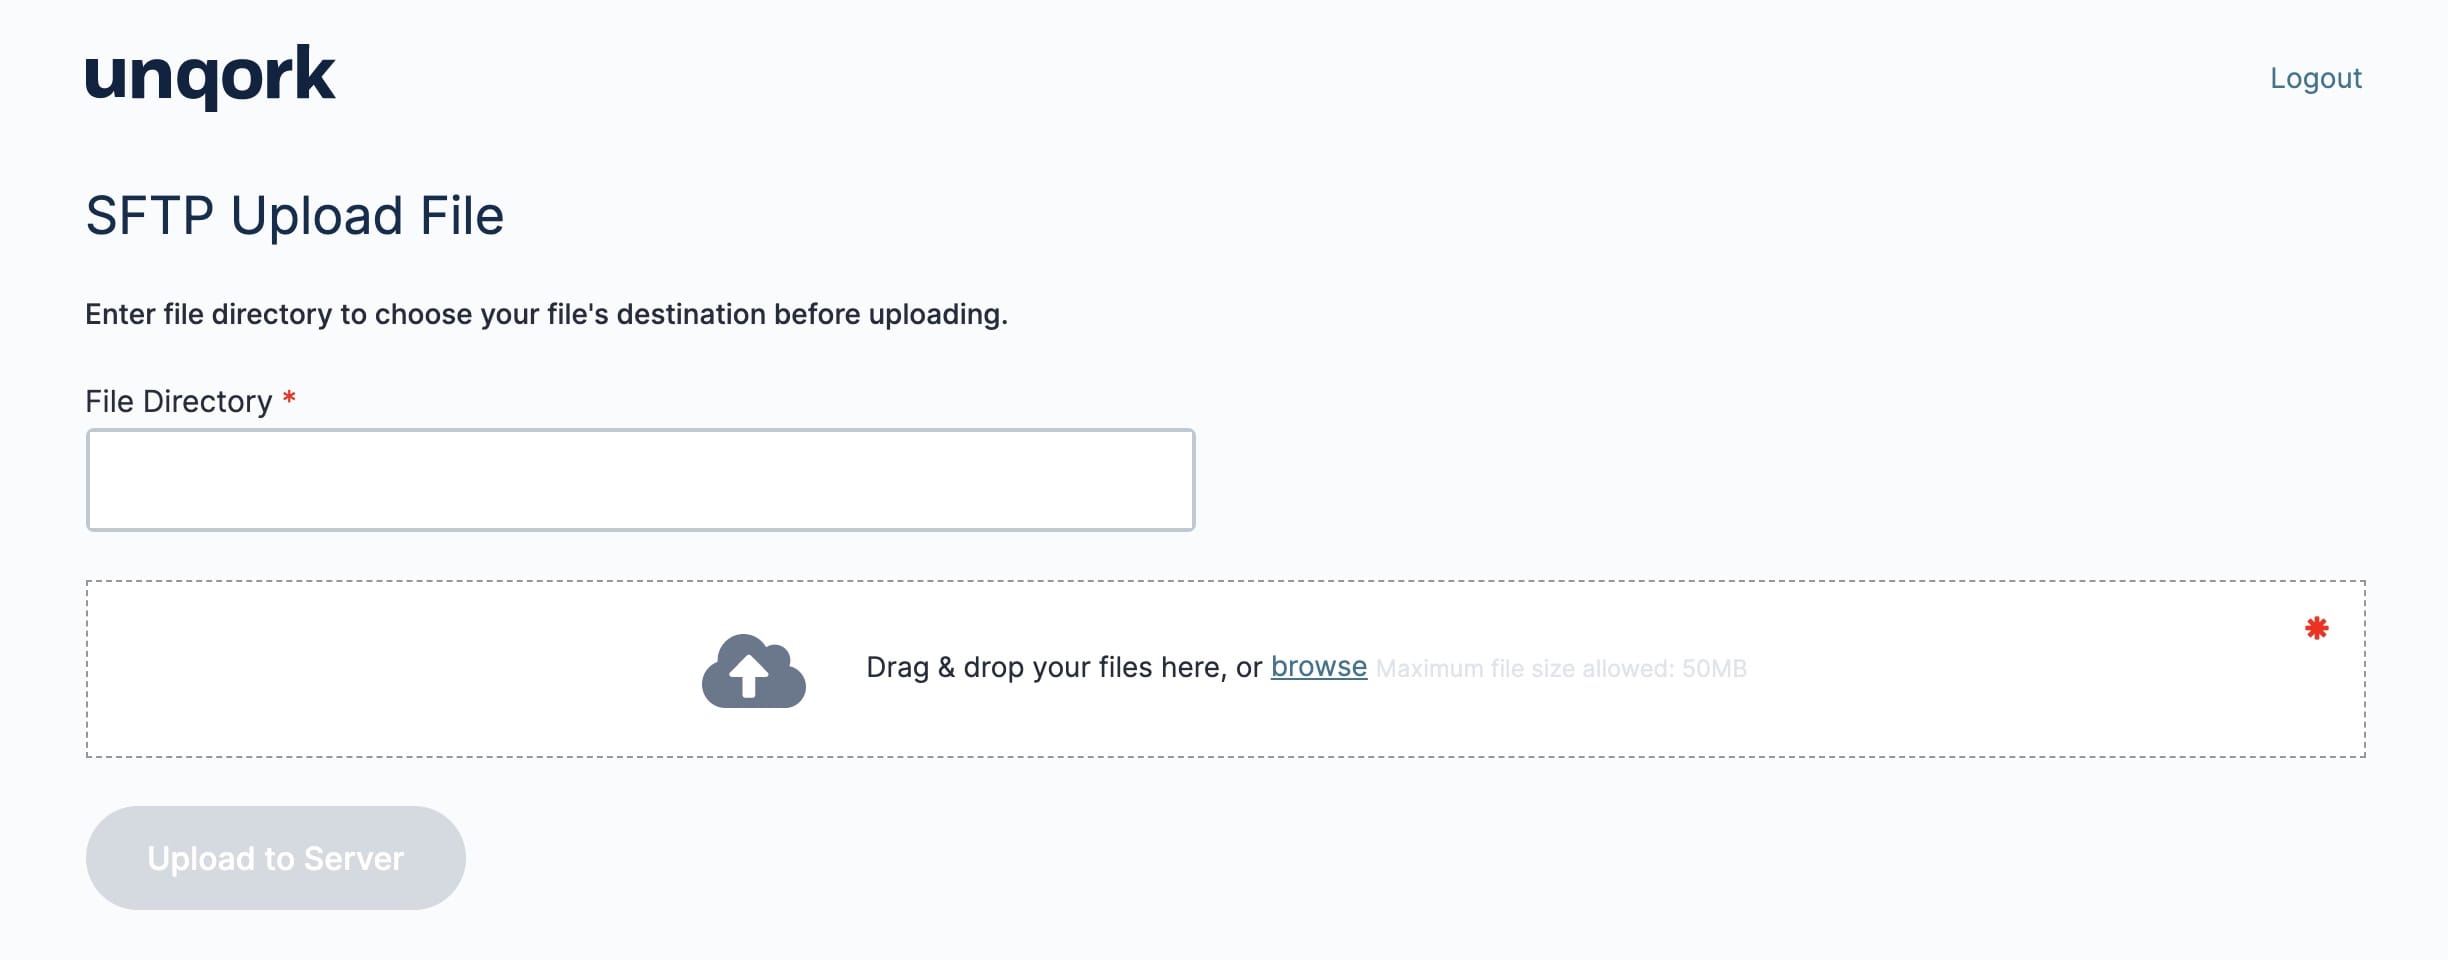
Here's how it looks in Express View:
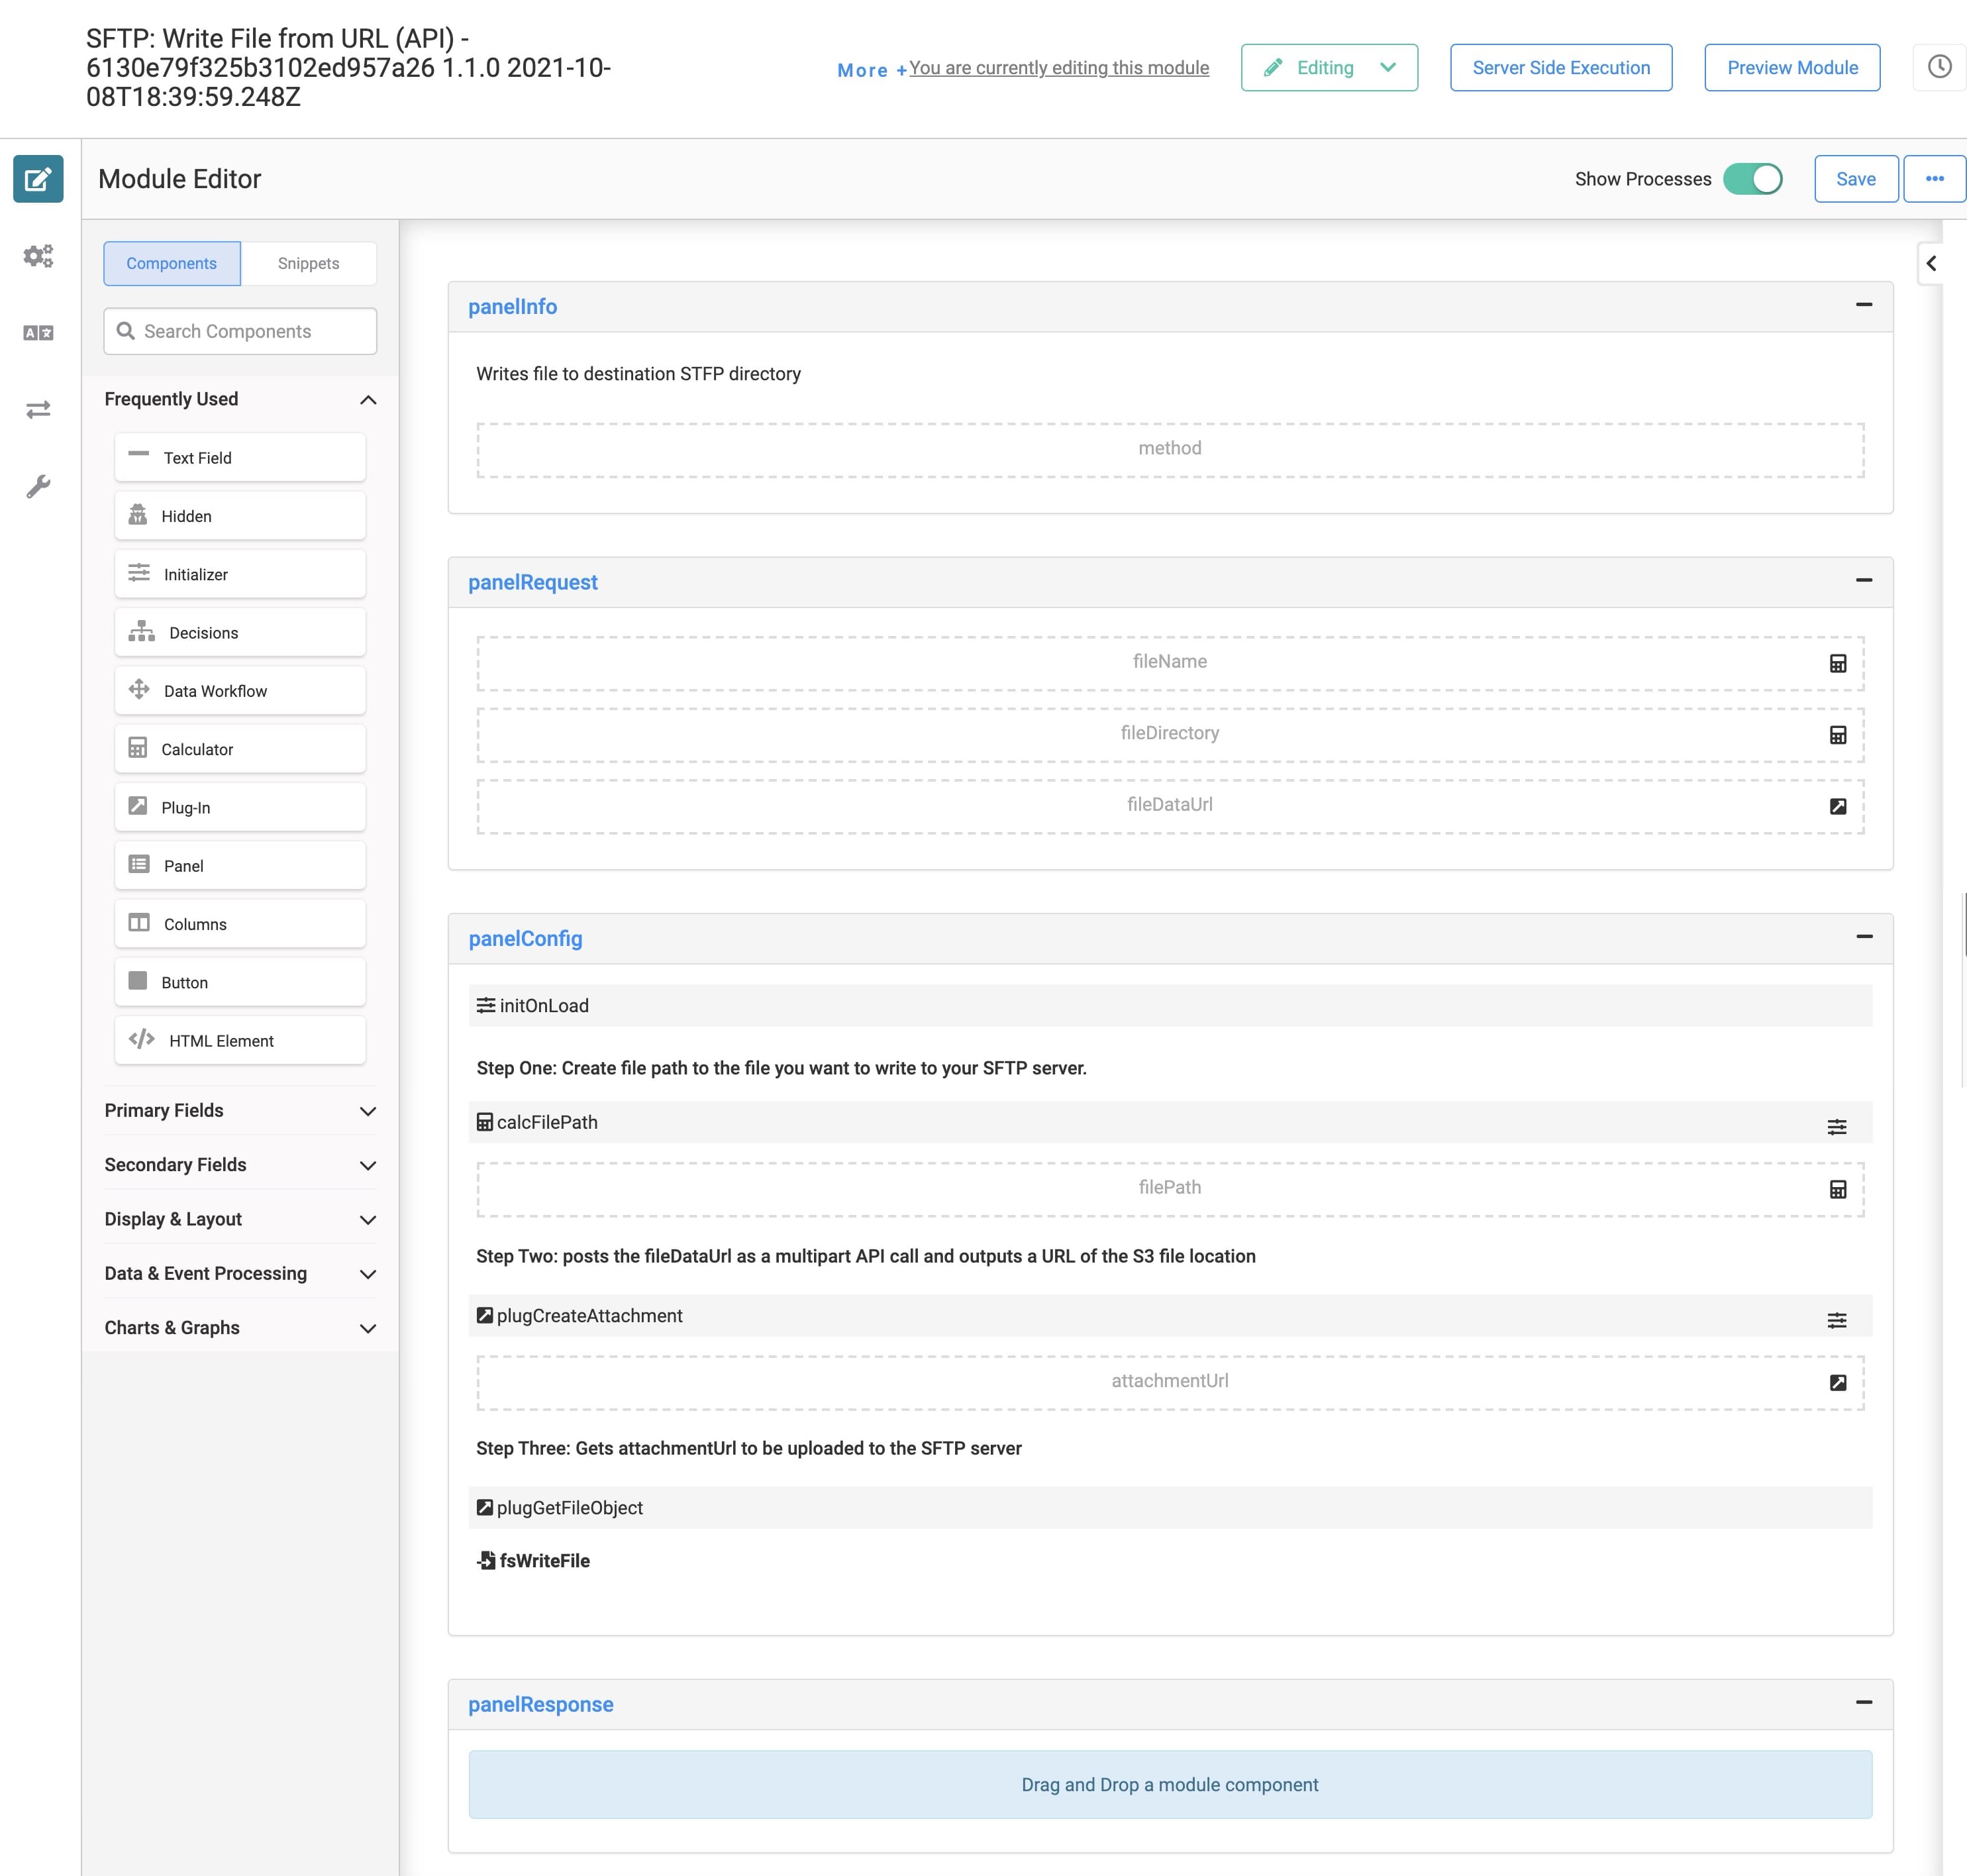
How the SFTP: Write File from URL (API) Module Works
This module writes your file to your chosen SFTP directory. It uses a Calculator to validate the file name and its chosen directory. It concatenates the information to obtain the full file path. Then, it stores it in a Hidden component. A Plug-In posts the file's data URL as a multi-part API call and outputs and outputs it as a base64 data URL. The Plug-In then writes the file to your SFTP server using a File Storage component.
Here's how it looks in the Module Builder:
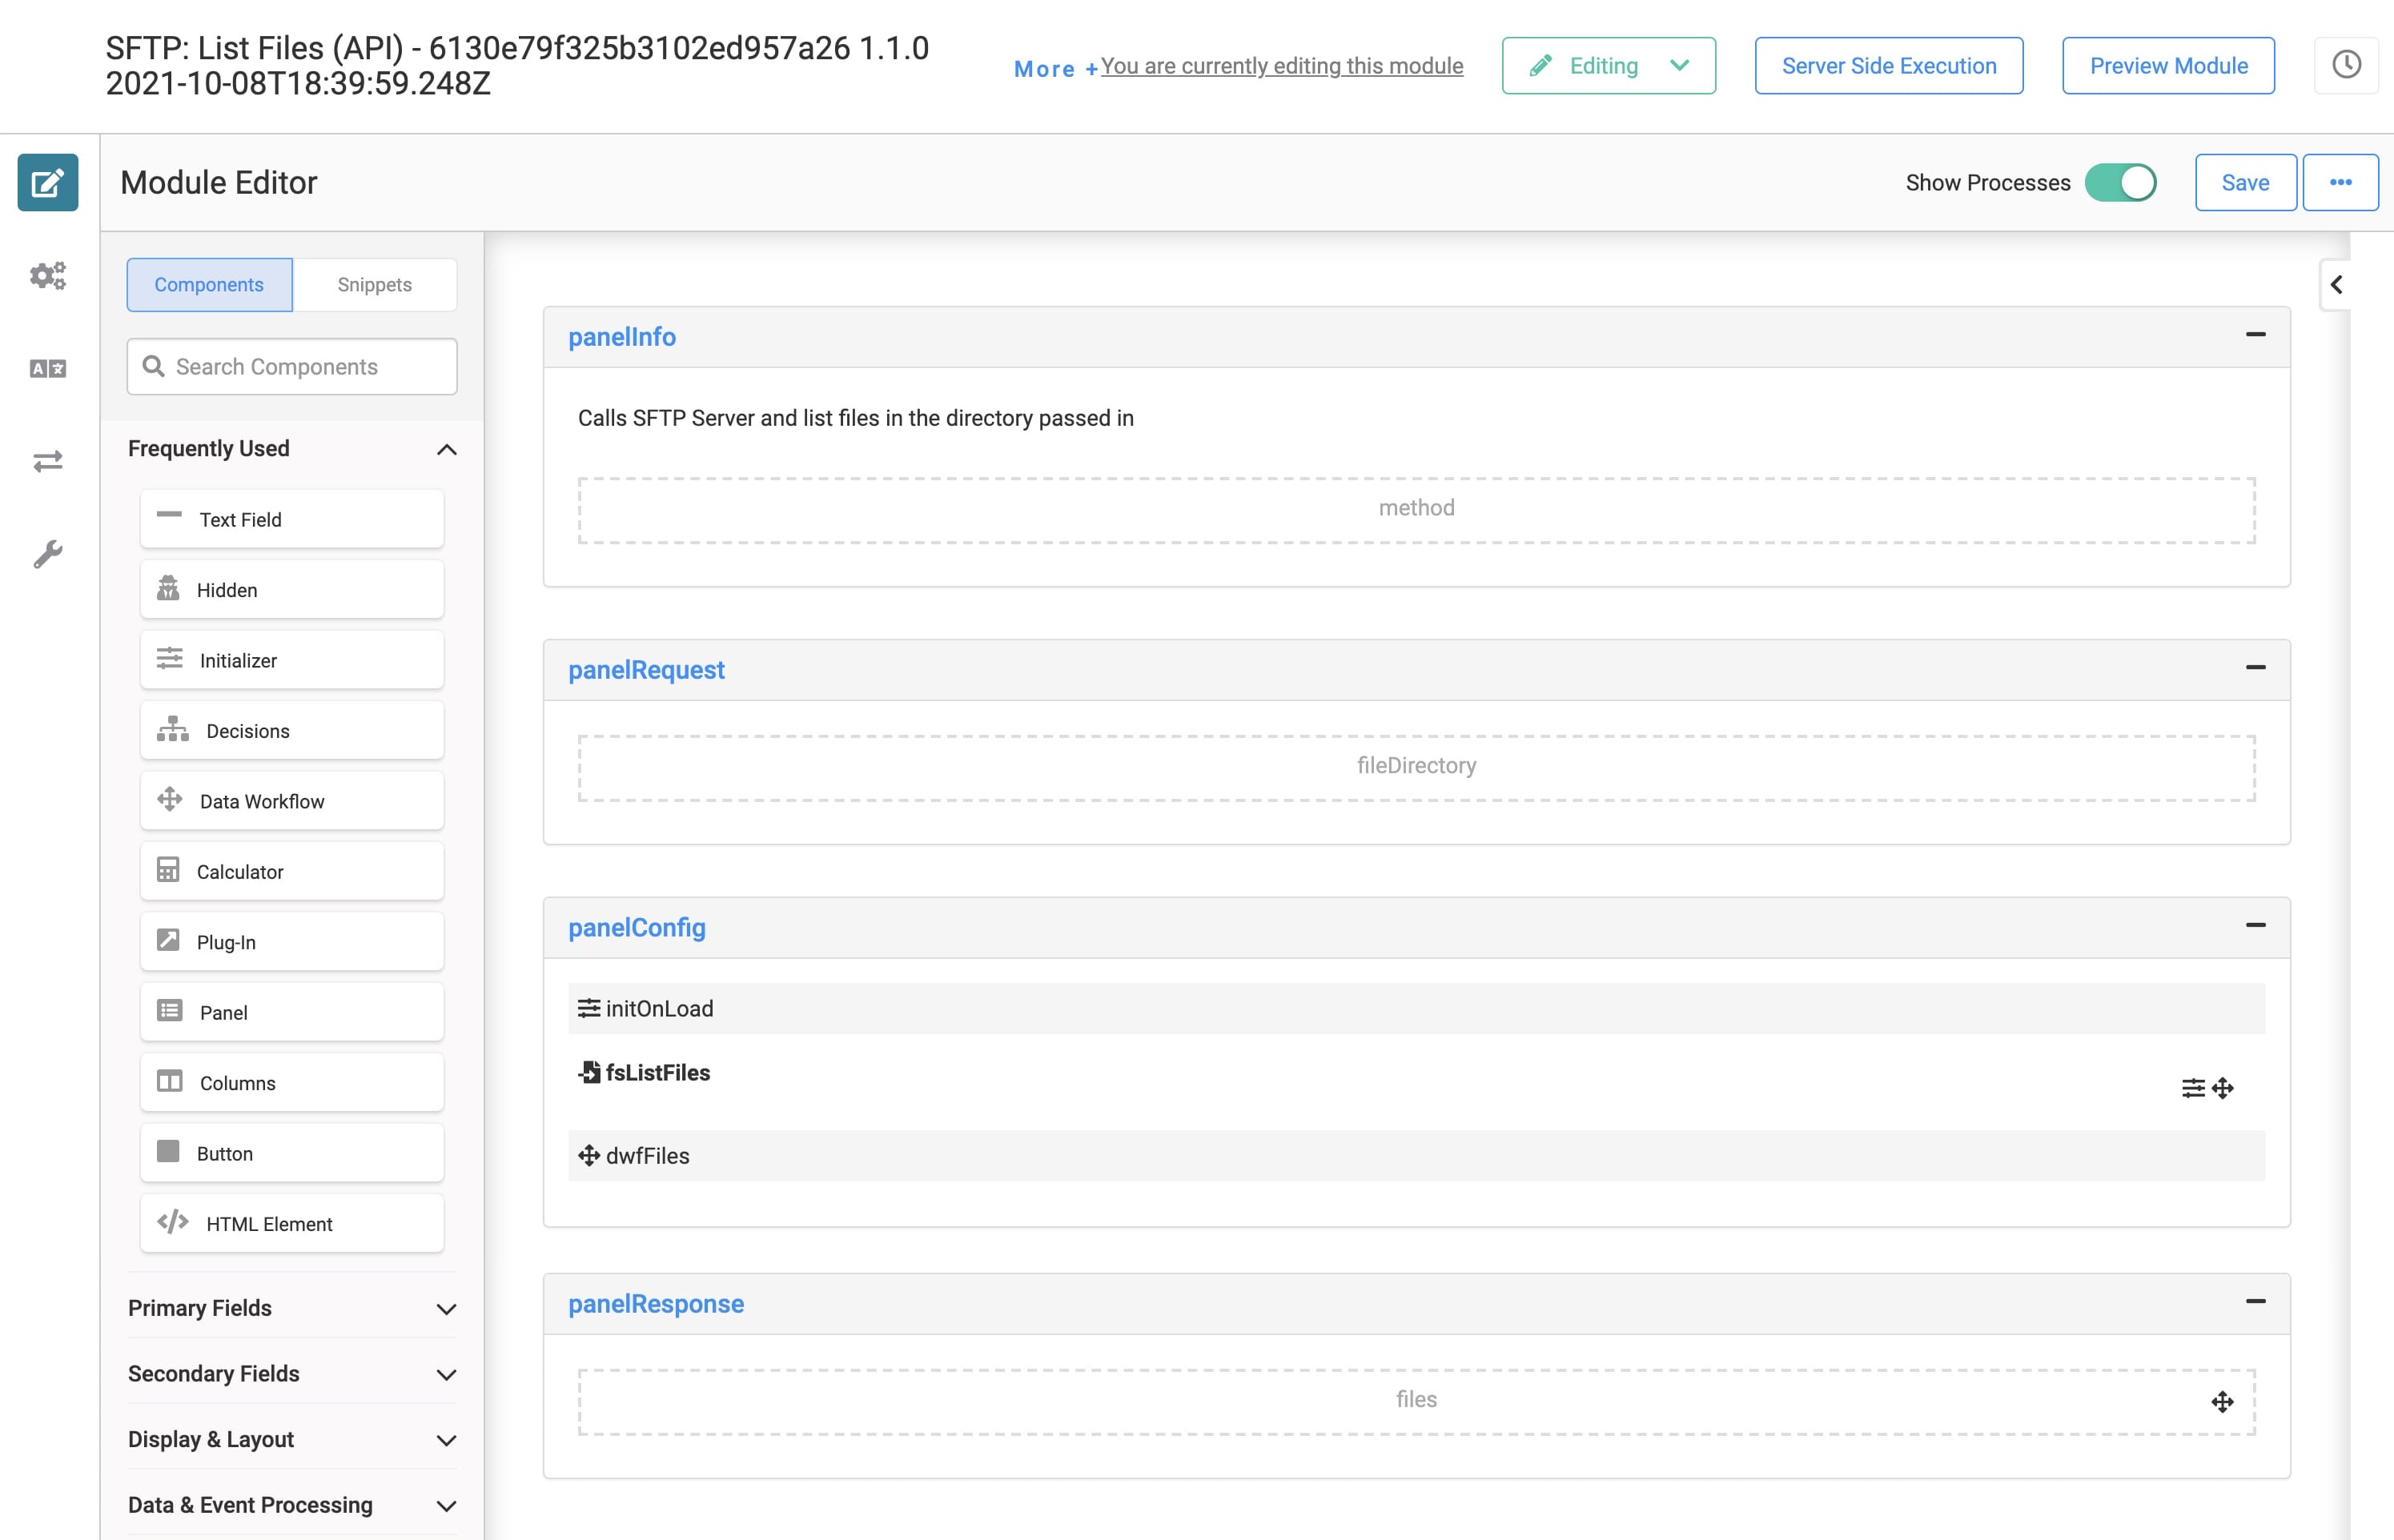
How the SFTP: List Files (API) Module Works
When you upload a file using the SFTP: Upload File Template module, a Plug-In triggers the SFTP: List Files (API) module. This module gets the files from the SFTP file directory and lists them on the SFTP: List Files UI module.
Here's how it looks in the Module Builder:
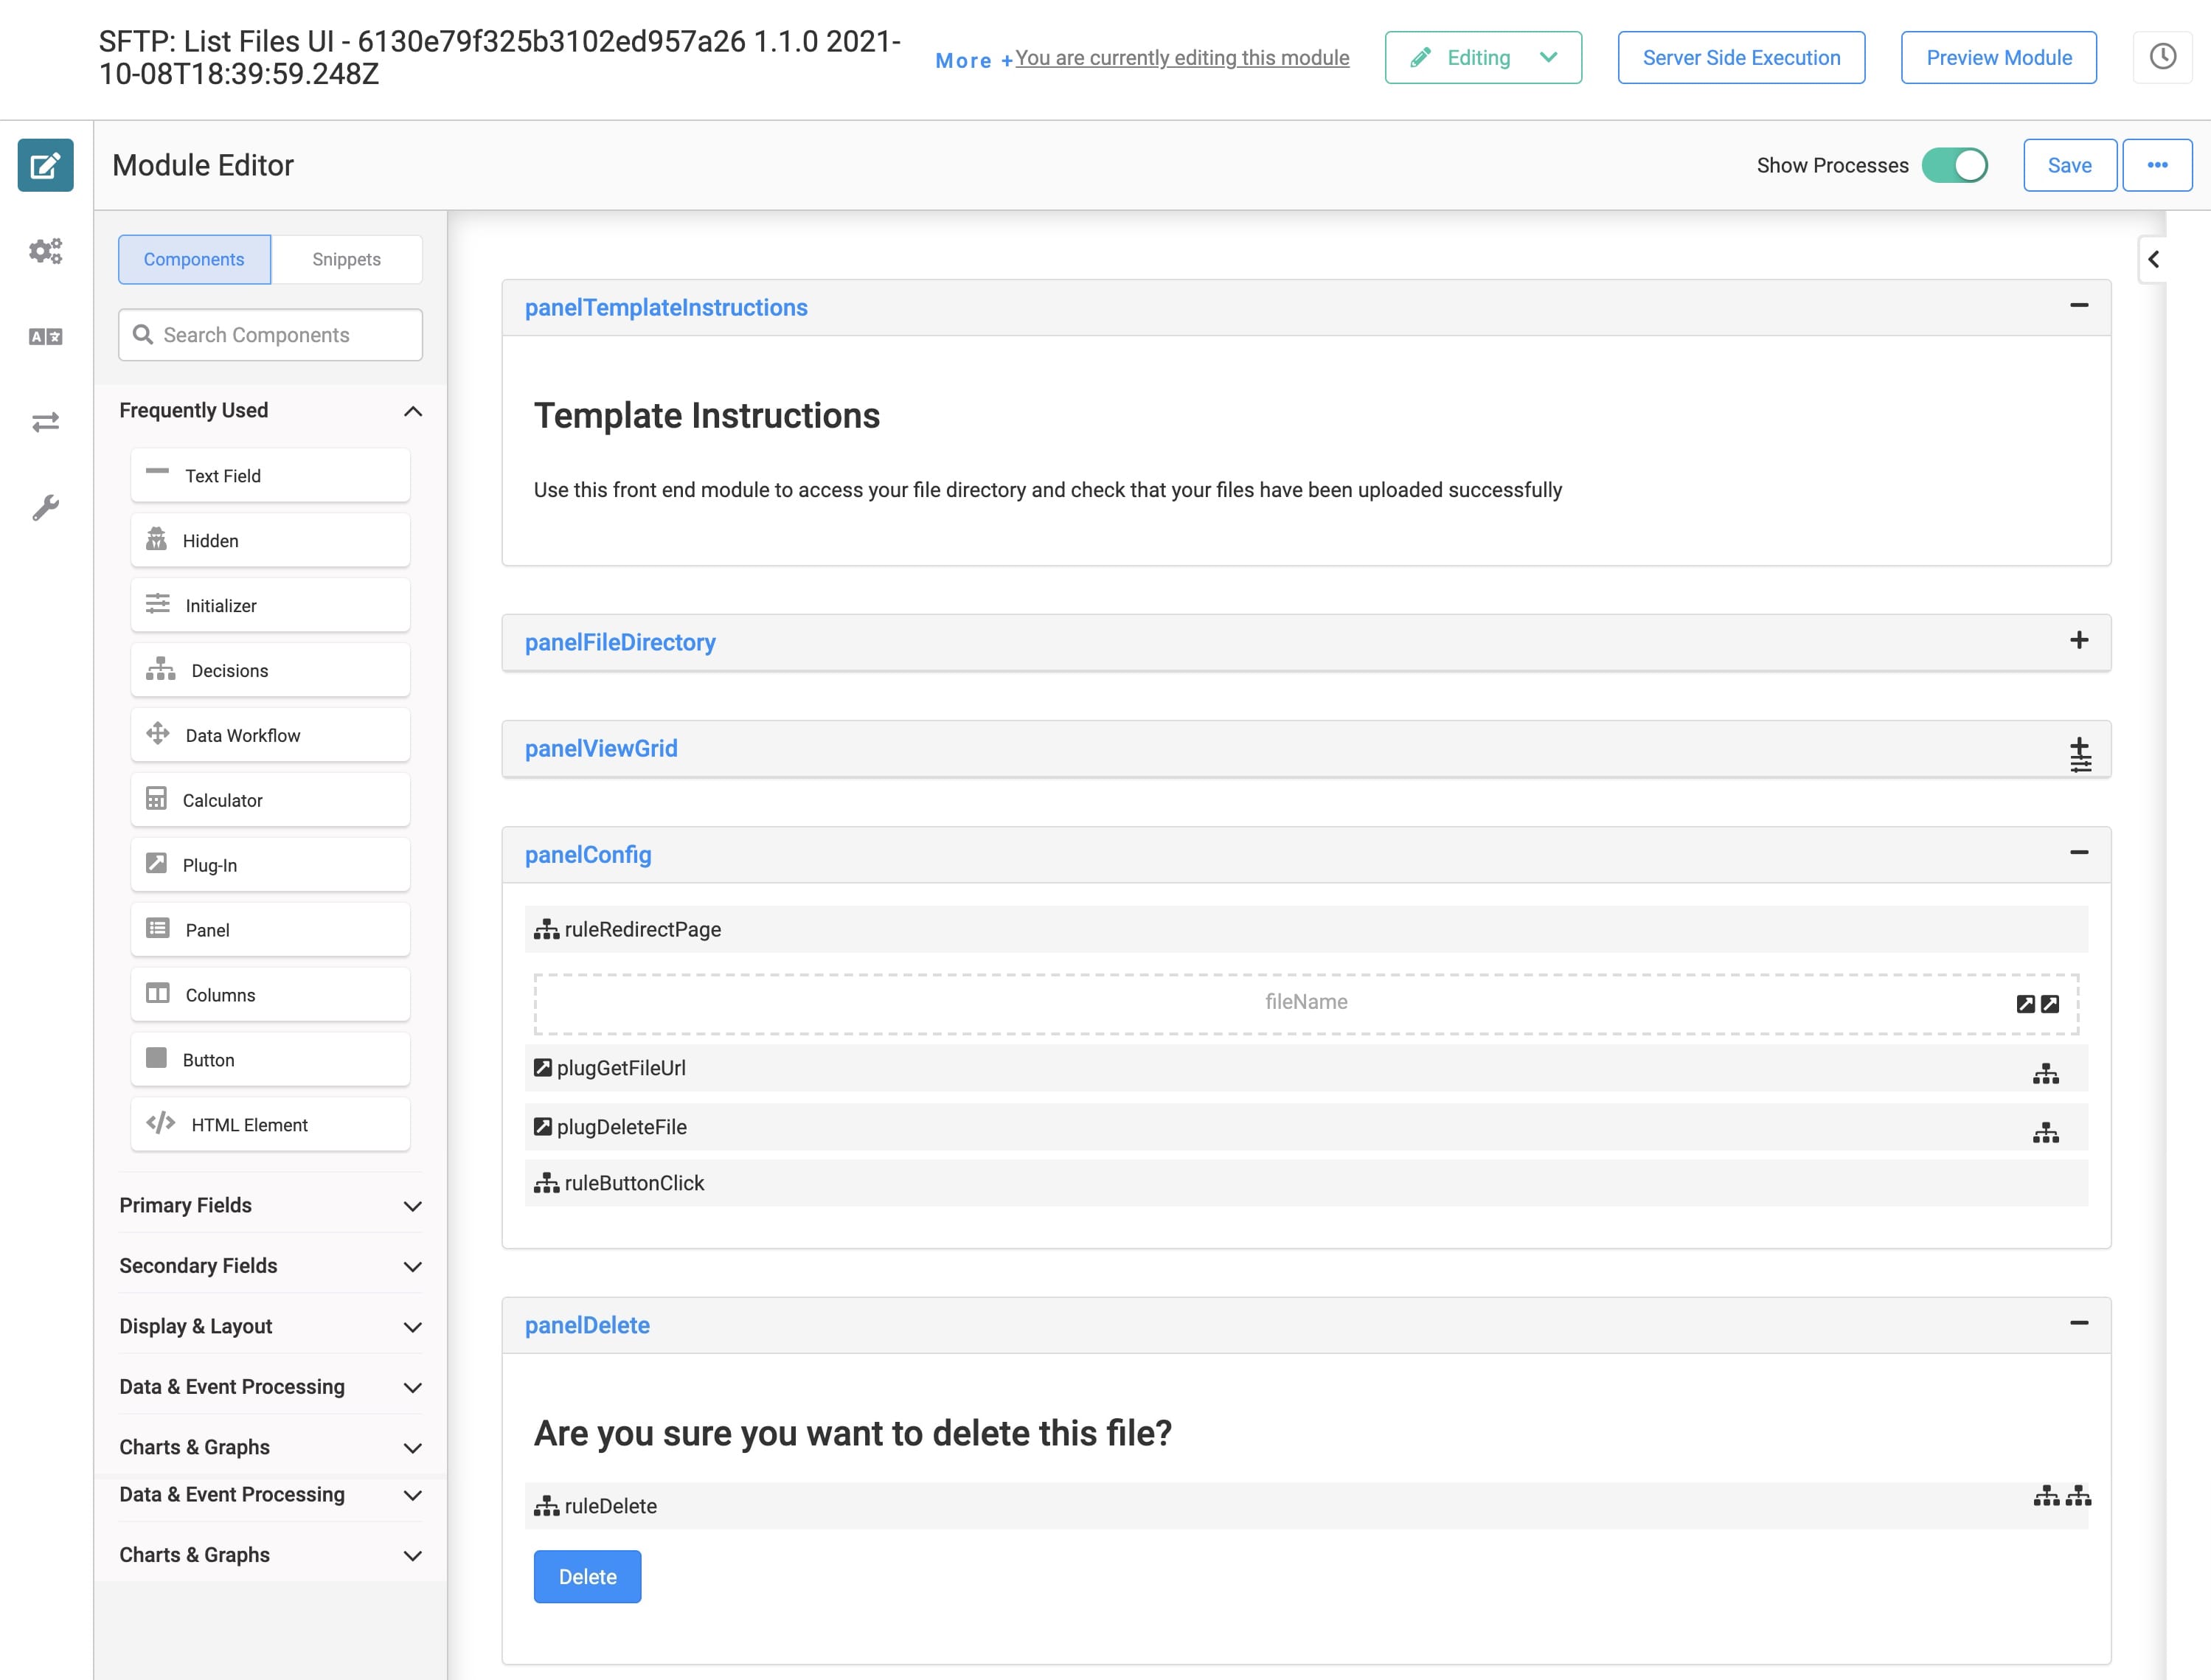
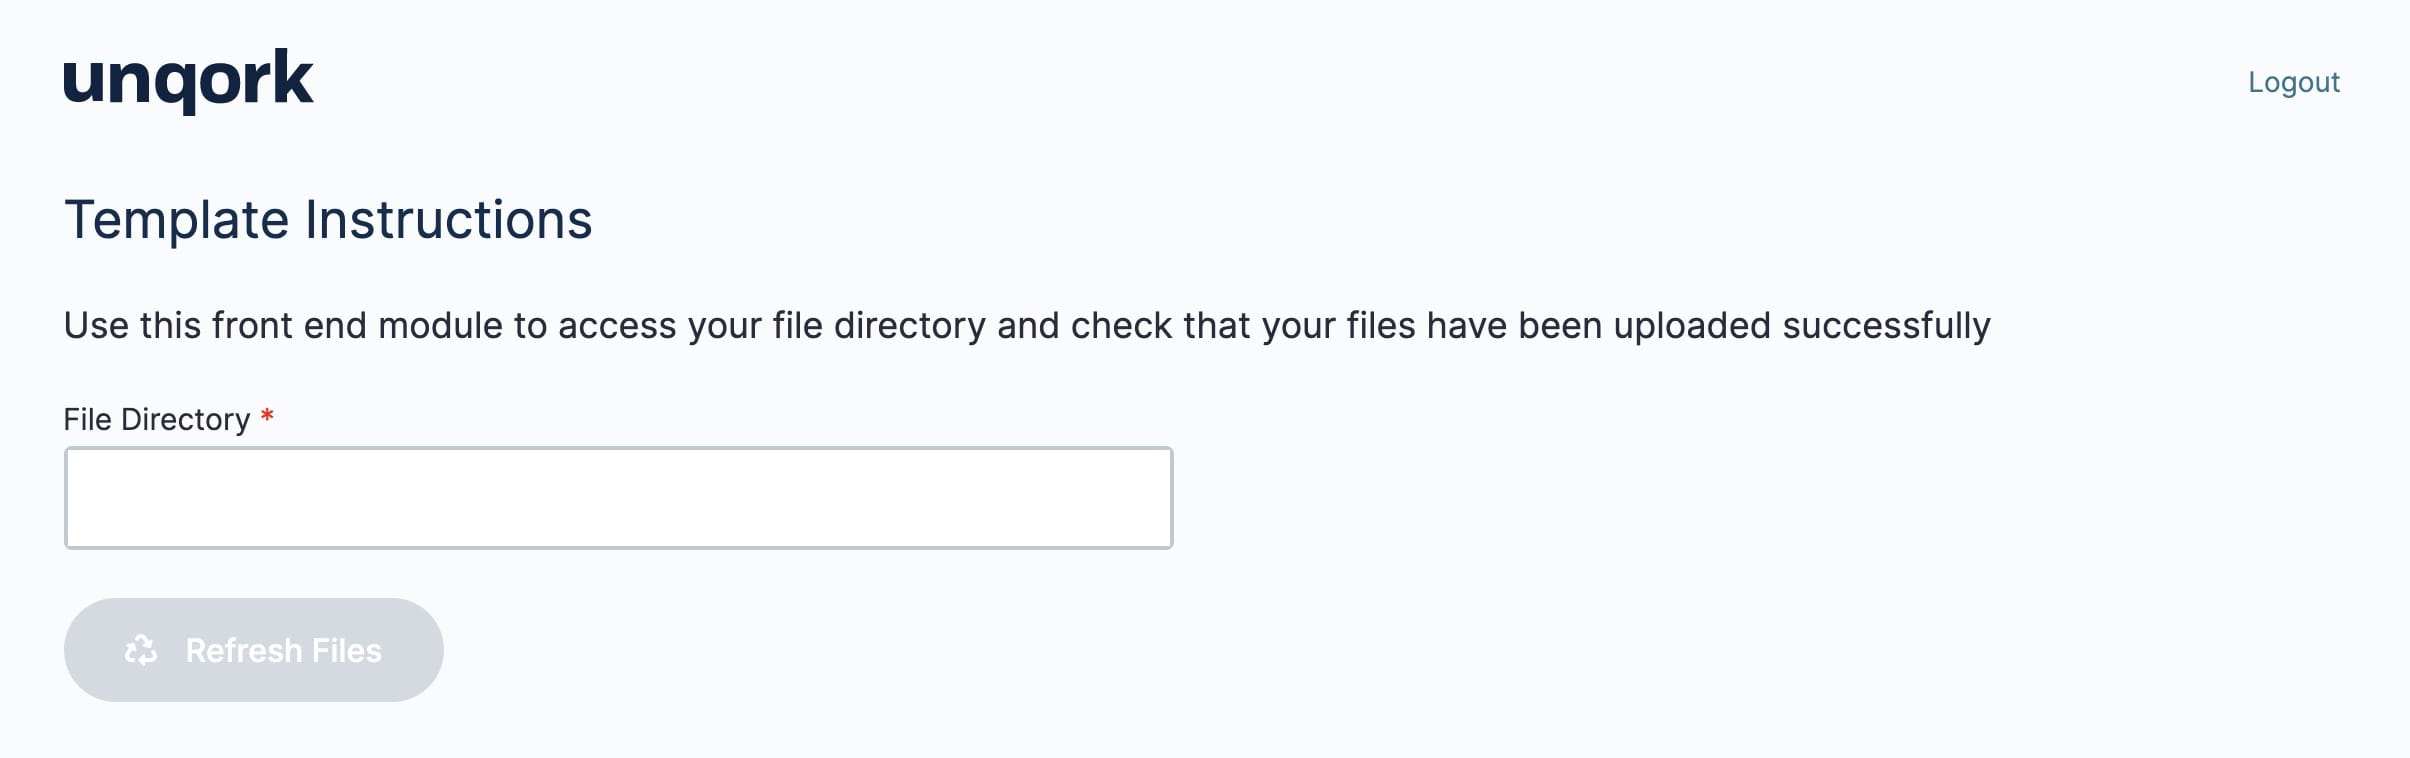
How the SFTP: List Files UI Module Works
The SFTP: List Files UI module is a front-end module that lets you display all files uploaded to an SFTP directory. A Plug-In executes the SFTP: List Files (API) module and retrieves the list of files from the SFTP directory. A second Plug-In then displays the files on a dashboard. The dashboard also lets you download or delete any of the files.
Here's how it looks in the Module Builder:
Here's how it looks in Express View:
Configuring the Template
The first step to integrating your template is setting up your SFTP service in Services Administration.
To access Services Administration:
Click the Settings drop-down at the top right of the Unqork Designer Platform.
Click Administration.
Under Integration, select Services Administration.
Next, you'll need to find and update the SFTP service with your Host, Username, and Password information:
Scroll to the bottom of your Active Services list.
Click your SFTP service.
The title is something like this: SFTP - 6010a38832f428025f42a2a7 1.0.2 2021-02-21T18:07:08.252Z. What if your environment has more than one SFTP service? Here's a trick. Look for the service with the same template ID and time stamp as your template's modules.
Scroll to the top of the page.
Enter your Host.
Enter your Username.
Enter your Password.
Enter your Private Key.
Select the Capture request & response bodies checkbox if you want to capture this information.
Enabling this box logs the details (bodies) of the call's request and response. If you have a failed API call, the log's request body and response body give you information on why the call failed. Or, maybe the API request was successful, but the data sent wasn't handled correctly. The request body and response body show you the details of your calls. The service logs save to Unqork's database. You can query the logs at any time.
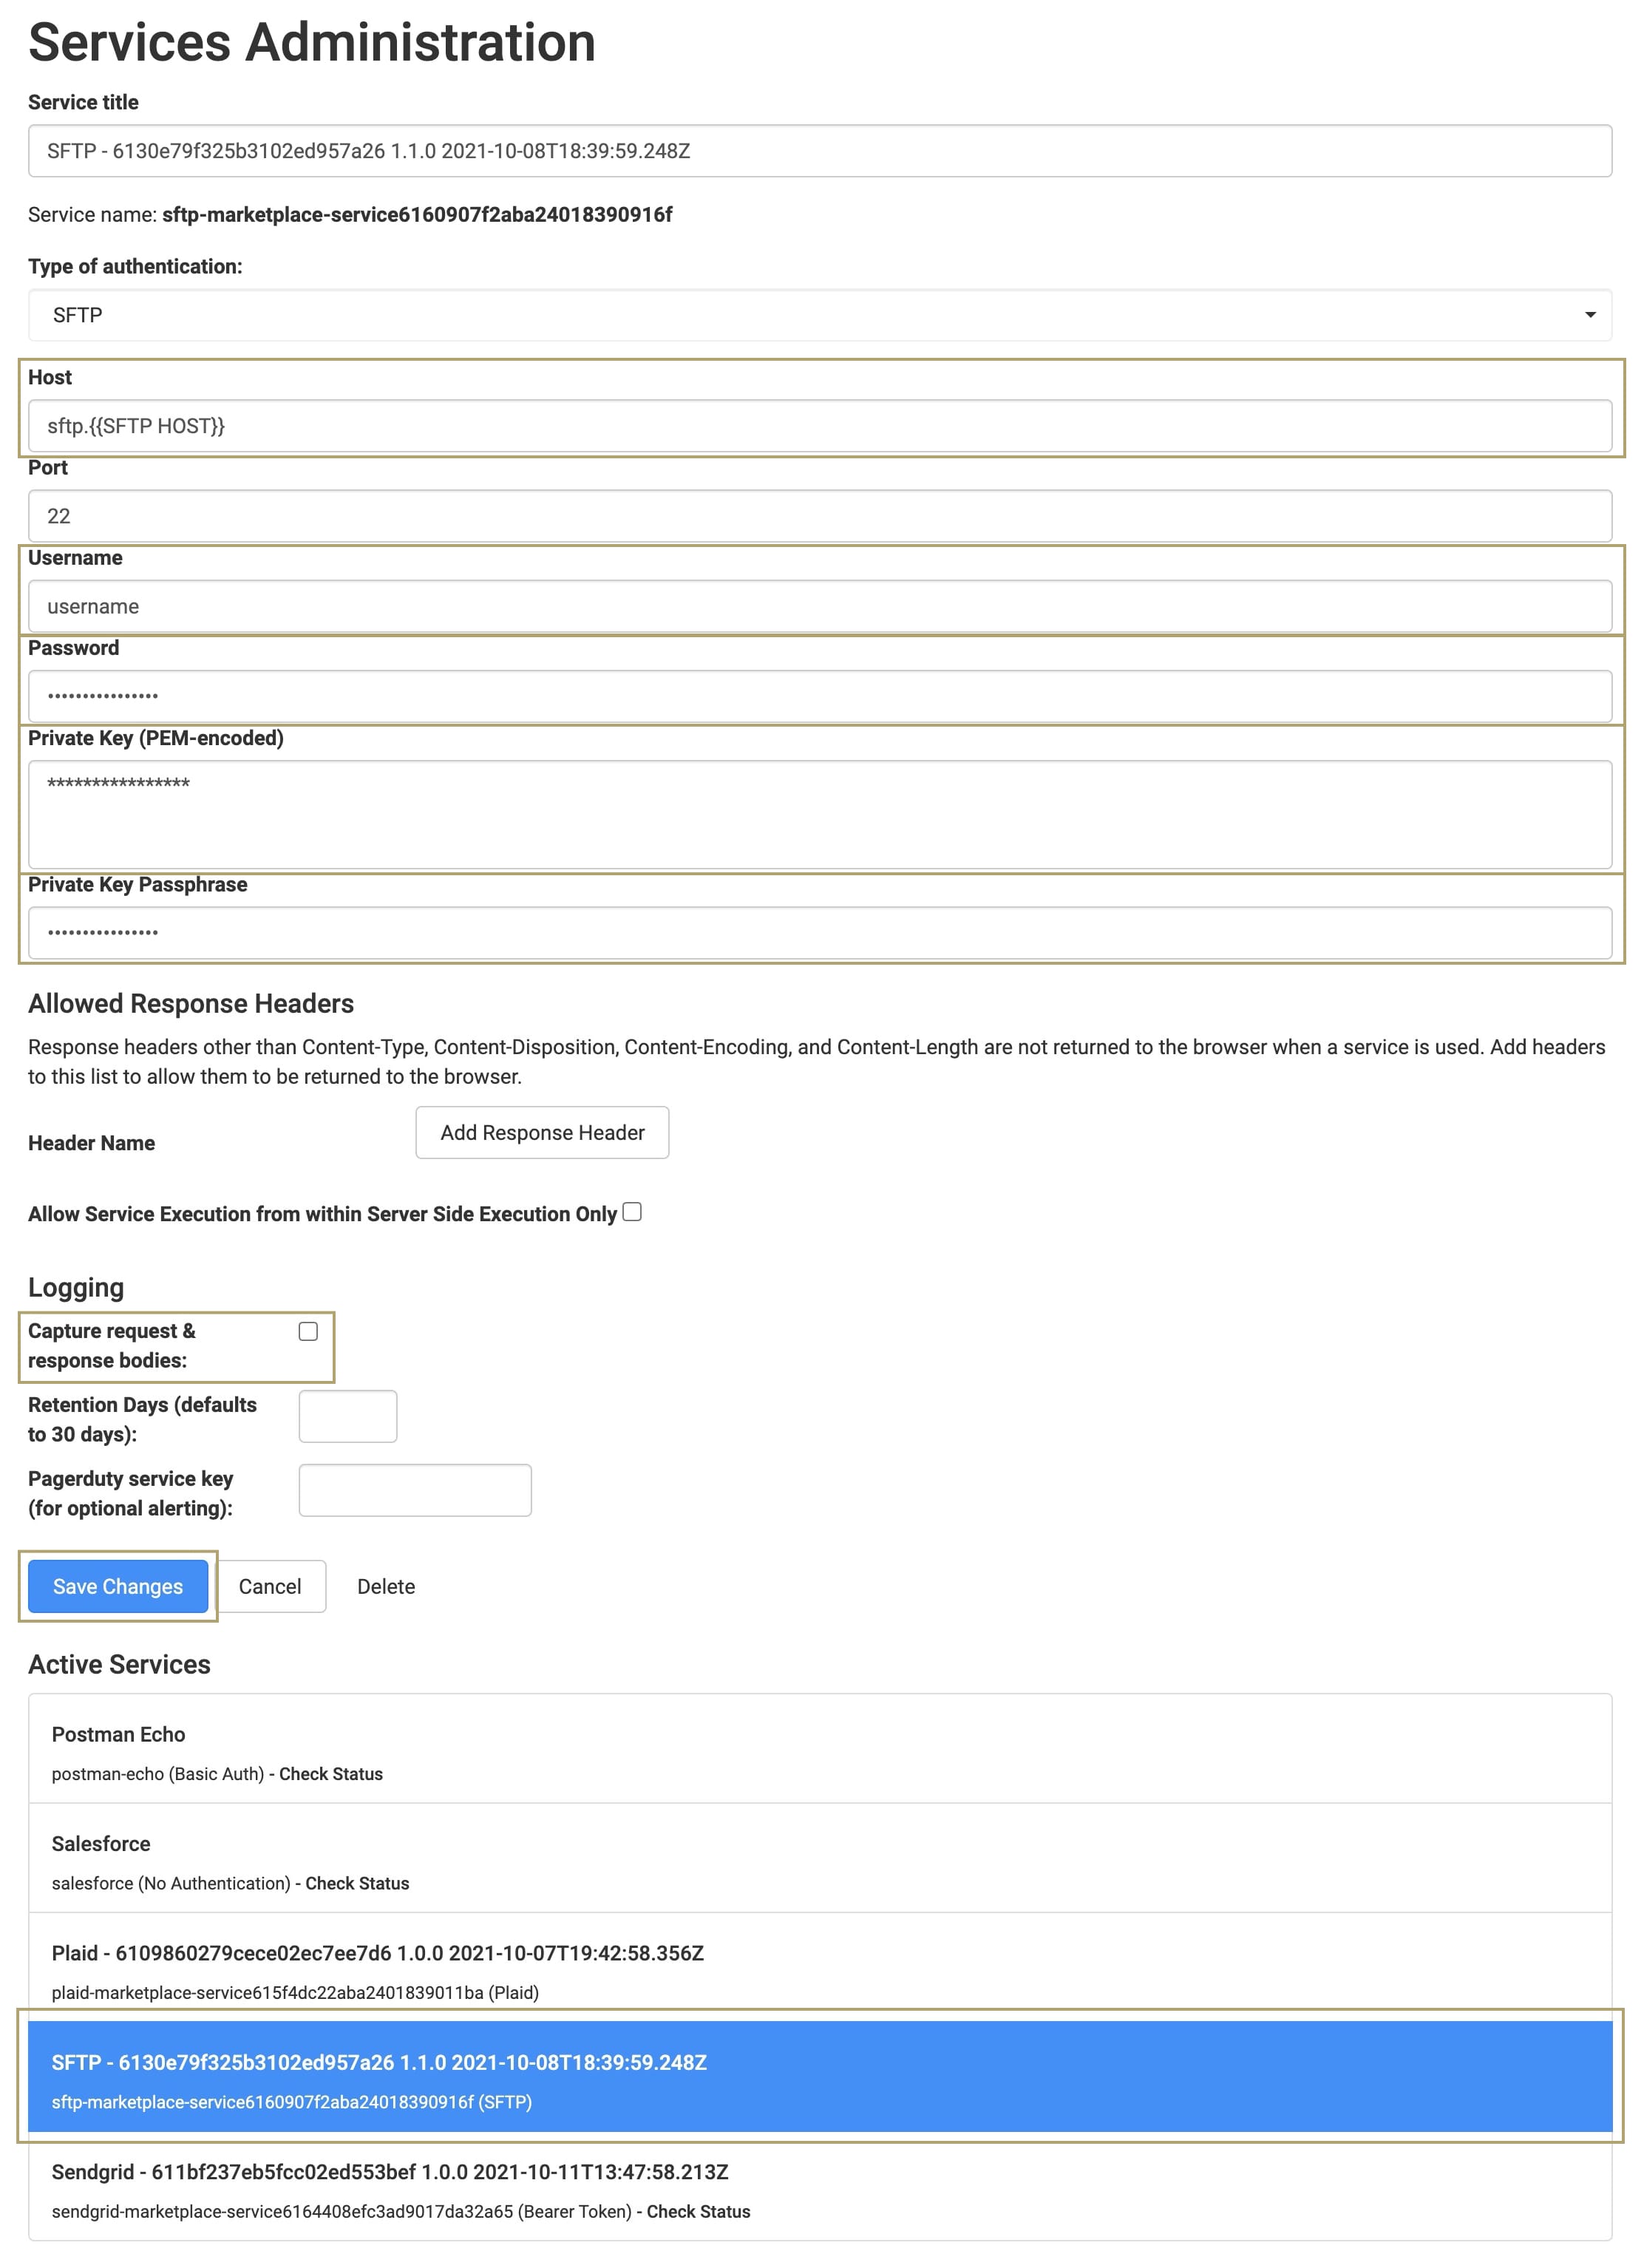
Click Save Changes.
Testing the Template
Now that you have everything set up, give the template a try. To test out the template:
Open the SFTP: Upload File module in Express View.
Enter your SFTP file directory into the File Directory field.
Drag-and-drop a file from your computer into the File field. You'll see the file name, file type, and file size display on the dashboard.
Click Upload.
If successful, you redirect to a new page with a success message. Now, let's use the SFTP: List Files UI module to confirm your file stores to the SFTP server.
To view all files in your SFTP server:
Open the SFTP: List Files UI module in Express View.
Enter the file directory in the File Directory field.
Click Refresh Files.
The dashboard populates with all the files stored in your SFTP server. You can click the Download button to download the file to your computer's Downloads folder. Or you can click the file's Delete button to remove it from the SFTP server.
Removing the Template
What if you no longer need this template or the application you built from it? There are 2 parts to removing this template. First, you'll uninstall it from your environment. Then you'll delete the application you created from the template. These steps are easy, and you can do them in any order.
Removing the Template from Your Environment
You might need to clean your environment and remove unused templates. The Unqork Library makes this easy. To uninstall a template from your environment:
At the top right of the Unqork Designer Platform, click Library.
Find the template to uninstall.
Click the ellipsis (...) in the template tile header.
Click Uninstall Template.
Click Yes, Uninstall in the confirmation modal.
You can visit the Marketplace and reinstall the template at any time.
What if you have an existing application built from this template and then uninstall the template from your environment? Your existing application remains unaffected. Also, it no longer has any ties to the template. So, let's say you reinstall a newer version of the template in the future. You can rest assured that the installation doesn't impact your existing application.
Deleting Your Application
If you no longer need the application you created from your template, you can delete it. To delete your application:
Navigate to the Apps tab from an open workspace.
Find the application to delete.
Click the ellipsis (...) in the app tile header.
Click Delete.
Retype the provided text.
Click Yes, Delete.
Removing the SFTP Service from Your Environment
To remove your SFTP service from your environment:
Click the Settings drop-down at the top right of the Unqork Designer Platform.
Click Administration.
Under Integration, select Services Administration.
Scroll down and select the SFTP service you want to delete from the Active Services list.
Click the Delete link. You’ll find this above the Active Services list.
At the Delete message, click OK.
At the Success message, click OK.