Managed Assets Administration is where you store static media files used in your application. A static media file can refer to anything from your corporate logo to a supporting image. Once uploaded and linked to your module, these media files show in Express View.
The Unqork Designer Platform accepts these file types: JPG, JPEG, PNG, PDF, TXT, XLSX, DOCX, SVG, ICO, GIF, and CSV. You can add media files of any size; there’s currently no restriction.
Creating Folders and Sub-folders
A good way to organize your media files is to use folders and sub-folders.
To add a folder:
Click the Settings ▾ drop-down at the top right of the Unqork Designer Platform.
Click Administration.
Under Assets, select Managed Assets Administration.
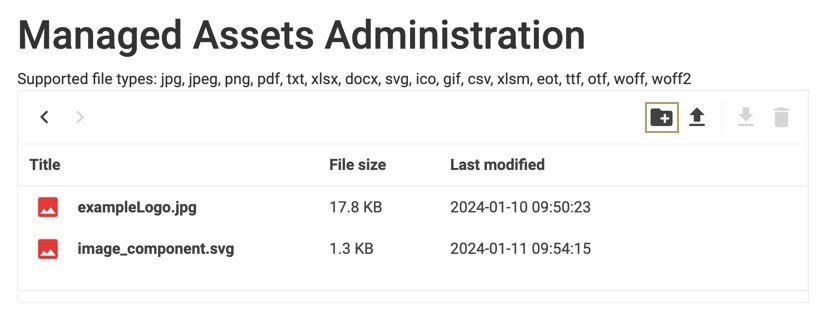
Click the
 (Create Folder) icon, located at the top of the Managed Assets list.
Enter a unique name for your folder.
Click Create. Your new folder displays in the Managed Assets list.
Clicking Cancel stops the process and returns you to the Managed Assets list.
Double-click the folder name to open it. Once opened, you can upload your media files.
To return to the top-level Managed Assets list, click the
 (Back) icon at the top left of the list.
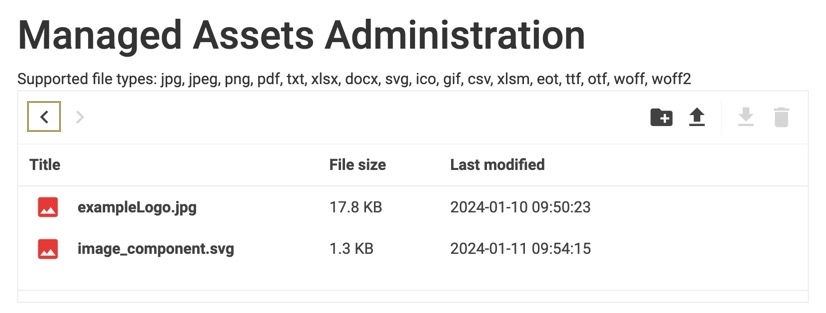

Uploading a Media File
Uploading your media files makes them available on the Managed Assets Administration list. Once uploaded, you can use these files during the application-building process.
To upload a media file, continue as follows:
Click the Settings ▾ drop-down at the top right of the Unqork Designer Platform.
Click Administration.
Under Assets, select Managed Assets Administration.
Click the
 (Upload) button, located at the top right of the list.
Navigate to and select your file for upload.
Files types that are not supported do not display for selection. Remember, Unqork accepts these digital file types: JPG, JPEG, PNG, PDF, TXT, XLSX, DOCX, SVG, ICO, GIF, and CSV.
Click Open. Your uploaded file displays in the Managed Assets list.
Replacing a Media File
After uploading a media file, you can reupload the file if it changes.
To replace a media file:
Click the Settings ▾ drop-down at the top right of the Unqork Designer Platform.
Click Administration.
Under Assets, select Managed Assets Administration.
In the Managed Assets list, navigate to your original media file.
Select the file.
Click the
(Upload) button, located at the top right of the list.Navigate to and select your file for upload.
Click Open.
At the File Exists message, click Confirm.
Clicking Cancel stops the process and returns you to the Managed Assets Administration list.
The uploaded file replaces your original file in the Managed Assets Administration list. The Last Modified column now shows the current date/time.
Removing a Media File
You can also remove media files from the Managed Assets Administration list. If you remove a file referenced in an application, the reference no longer works. You must remove or replace the reference in the application before removing the file.
To remove a media file:
Click the Settings ▾ drop-down at the top right of the Unqork Designer Platform.
Click Administration.
Under Assets, select Managed Assets Administration.
In the Managed Assets list, navigate to the file to remove.
Select the file.
Click the
 (Remove) button, located at the top right of the list.
At the Remove message, click Confirm. The file no longer displays in the Managed Assets list.
Clicking Cancel stops the process and returns you to the Managed Assets list.
Downloading a Media File
When you promote your module, your associated media files are not promoted. As you promote applications, you’ll need to add the media files to each environment. To do this, you’ll download the files from the original environment and upload to the new environment.
To download a media file:
Click the Settings ▾ drop-down at the top right of the Unqork Designer Platform.
Click Administration.
Under Assets, select Managed Assets Administration.
In the Managed Assets list, navigate to the file to download.
Select the file.
Click the
 (Download) button, located at the top right of the list.
Locate the file in your Downloads folder.
To reupload the files to the new environment, return to Uploading Media Files.
Retrieving Managed Assets With a Plug-In Component
To retrieve a file from Managed Assets, use a Plug-In component:
In the Module Builder, drag and drop a
 Plug-In component onto the canvas
In the Property IDfield, enter plugGetAsset.
In the Canvas Label Text field, enter
plugGetAsset.In the Data Service Type field, enter: {{data.getEnv.REMOTE_ROOT}}assets/[filePathAndName.jpg]. Replace [filePathAndName.jpg] with the folder path and image file. For example, {{data.getEnv.REMOTE_ROOT}}assets/Enablement/exampleLogo.jpg.

Click Save.

Use a Button to Trigger the Plug-In component to retrieve the asset:
Drag and drop a
.png) Button component onto the canvas.
Button component onto the canvas.In the Property ID field, enter btnGetAsset.
In the Label Text field, enter
Get Asset.From the Button component navigation panel, click
.png) Actions.
Actions.Under Action Type, click Event.
In the On Click field, enter or select
plugGetAsset.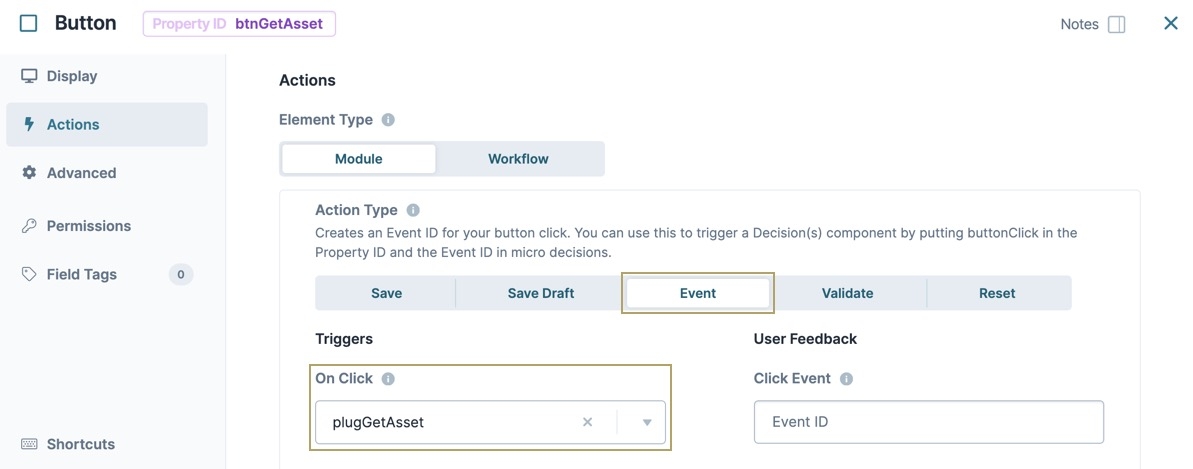
Click Save & Close.
Save your module.

Preview the module and click the Get Asset button to retrieve the Managed Asset. Inspect the page and use the Angular command to view the submission data.
To learn how to inspect a module submission and run the angular command, view our Viewing Submission Data in the DevTools Console article.
Using the example above to retrieve a JPG image, the data structure looks like the following:

Labs
Here are examples of how to access and use a Managed Asset: https://training.unqork.io/#/form/65aa8a1db8bc1e37b2b730f2/edit