The Decisions component is an event component for logic-based if/then scenarios. For example, if your end-user selects radio button A, then show field B. Or, if your end-user types value X, then display pop-up Y.
Three inputs drive the Decisions component:
Input component: What drives the action. Any component works here, including Buttons, Radio Buttons, or Text Fields. The Decisions references the Property ID of the input component.
Output component: What reacts to the action. Again, any component works, including Panels and Field-Groups containing multiple components. The Decisions references the Property ID of the output component.
Decisions component: The Decision itself. You can configure the interaction between the inputs and outputs using Micro Decisions. You can set the input and output behavior by selecting the Type for each. The Micro Decisions table is where you'll set if/then rules using your defined inputs and outputs. Inputs display in the left columns of the Micro Decisions table. The column headers match the Input components' Property IDs. Outputs display in the right columns and are named using a concatenation of their ID and Type.
You can find the Decisions component in the Data & Events Processing group to the left of the Module Builder.
What You'll Learn
After completing this article, you’ll know when to use a Decisions component, how to configure its settings, and how to use it in a module.
About the Configuration Window
To learn more about general component settings and those that display when a component is associated with Data Models, view our General Component Settings article.
Display Panel
Field Text
Setting | Description |
|---|---|
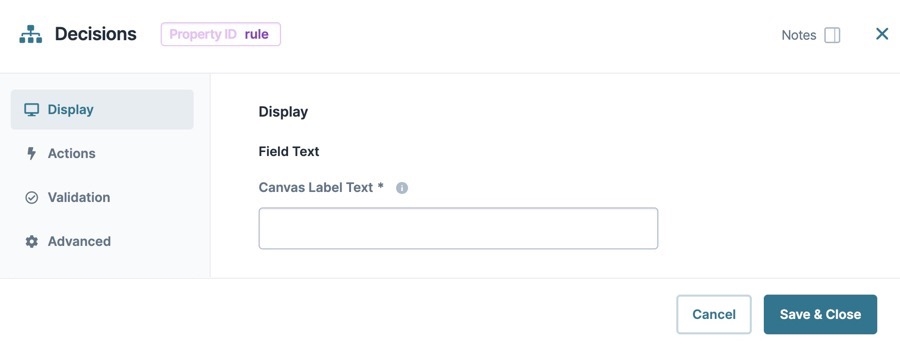
Canvas Label Text | A component’s Label Text indicates the purpose of the corresponding field or component. For non-input components, the Label Text isn't end-user facing, and only appears in the Module Builder. User-friendly labels make your module more accessible. Keep labels short and descriptive (a word or two) using title case. For longer entries, use sentence case.
|
Actions Panel
Triggers
Setting | Description |
|---|---|
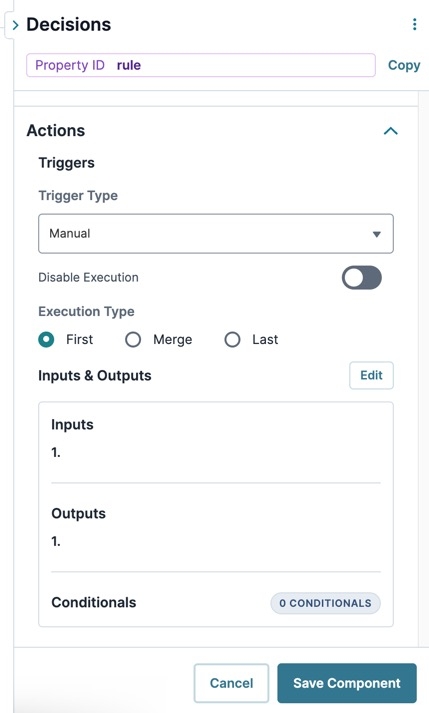
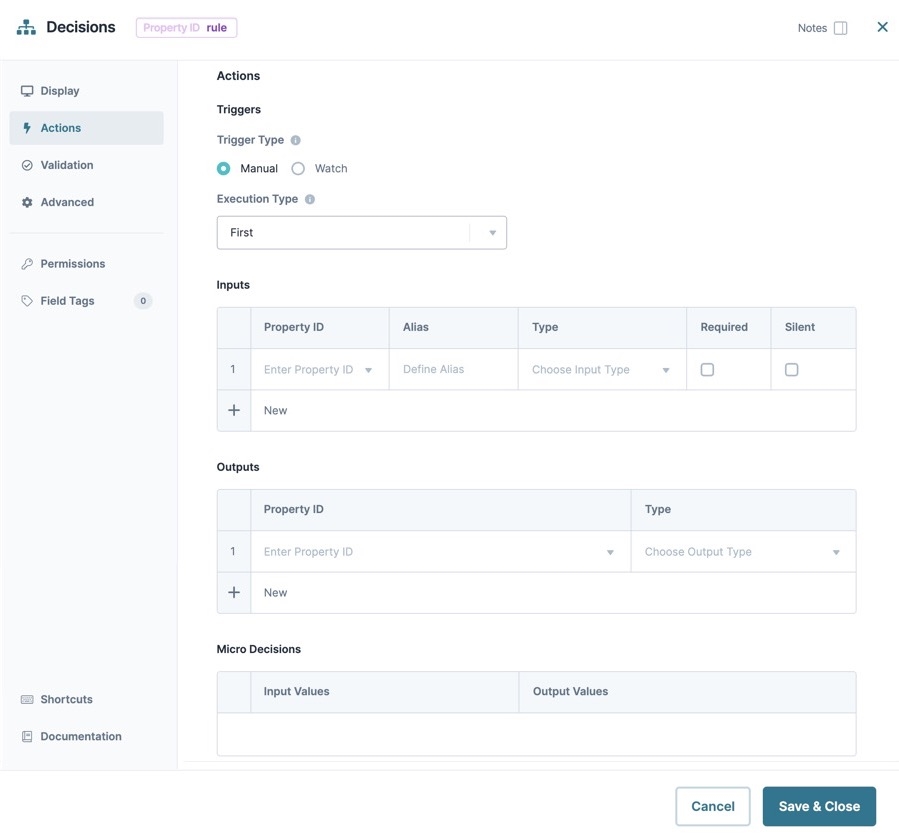
Trigger Type | This setting provides the following options:
|
Execution Type | When executing a rule, the Decisions component runs through each Conditional (top to bottom) to set the output. For clarity, assume that you have six configured Conditionals. The third and fifth Conditionals fulfill the Decisions component's conditions to determine a match. The following Execution Types set the Decision component's behavior:
|
Inputs
Setting | Description |
|---|---|
Source | The Source column is where you enter inputs that your logic component references. Examples of supported inputs include:
|
Alias | To simplify the configuration, give each component an alias. An easy approach is to assign each component a different letter of the alphabet. For example, A, B, C. |
Type | The following input types are available for your selection:
|
Required | Set an input to Required when it must have a value before triggering the Decision. |
Silent | "Silent" stands for "Silent Watcher". If Silent is selected and the Trigger Type is set to Watch, the Decisions component won't trigger if that input's value changes. This setting lets you use the input data as a Micro Decision without triggering the component if that data changes.
|
Outputs
Setting | Description |
|---|---|
Source | For your logic component to recognize an output, you must enter the destination component's Property ID(s). The Property ID entered must match the Property ID of the component that acts as the output. Remember, use camel case without spaces or punctuation. |
Type | Set the type of Output process to run. Discover available Output types in our Logic Components: Input & Output Types article. |
Conditionals
The Conditionals table in UDesigner replaces the Micro Decisions table from Classic Designer. They are functionally the same.
The Conditionals table is where you set if/then rules using your defined inputs and outputs. Inputs display in the left columns of the Conditionals table. The column headers match the Input components' Property IDs. Outputs display in the right columns and are named using a concatenation of their ID and Type.
The Conditionals table begins in an empty state until Inputs and Outputs are implemented.
Setting | Description |
|---|---|
Input Values | Shows a column for each input component. The component's Property ID serves as the header for the column. Using the firstrow, enter the trigger value the logic component uses when triggering the output.
|
Output Values | Shows a column for each output component. A concatenation of the component's Property ID and the Type serves as the header for each column. Using first row onward, define the behavior based on the Type. For example, _visible: yes/no. |
Advanced Panel
Set Execution
Setting | Description |
|---|---|
Set Execution | Select if and what is executed when this component triggers. |
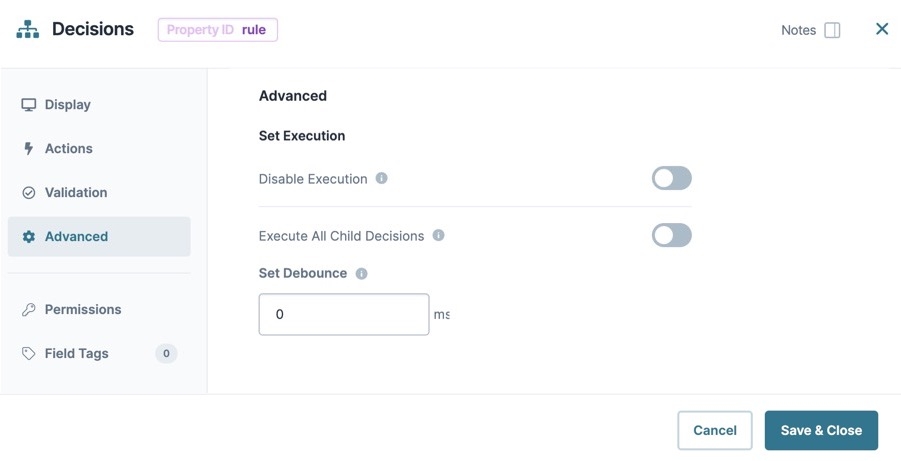
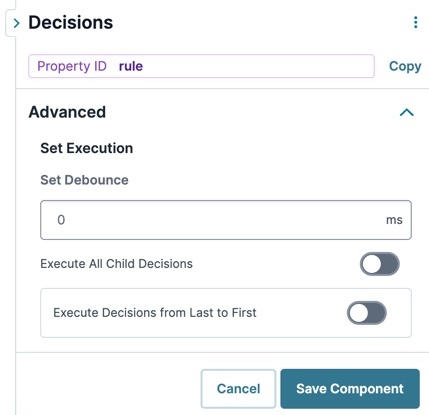
Disable Execution | If Disable Execution is set to By default, this setting is set to |
Execute All Child Decisions | When set to By default, Execute All Child Decisions is set to |
Execute Decisions From Last To First | Reverses the trigger order of child decisions. When set to |
Set Debounce | The number of milliseconds that pass before the form loads this component. For larger modules, increasing the debounce value prevents the Decisions component from triggering before all components load in. |
Adding a Decisions Component
In this scenario, you'll show a follow-up question when an end-user answers No to "Are you a citizen of the United States?" These instructions assume that you have an open module saved with a title.
Configure the Radio Buttons Component
This component asks the end-user if they're a citizen of the United States. If the end-user answers Yes, this is the end of the process. If the end-user answers No, the process continues. This Radio Button is the input for your Decisions component's if/then rule.
Drag and drop a
 Radio Buttons component onto your canvas.
In the Property ID field, enter citizenCheck.
In the Label Text field, enter
Are you a citizen of the United States?.Click
.png) Data.
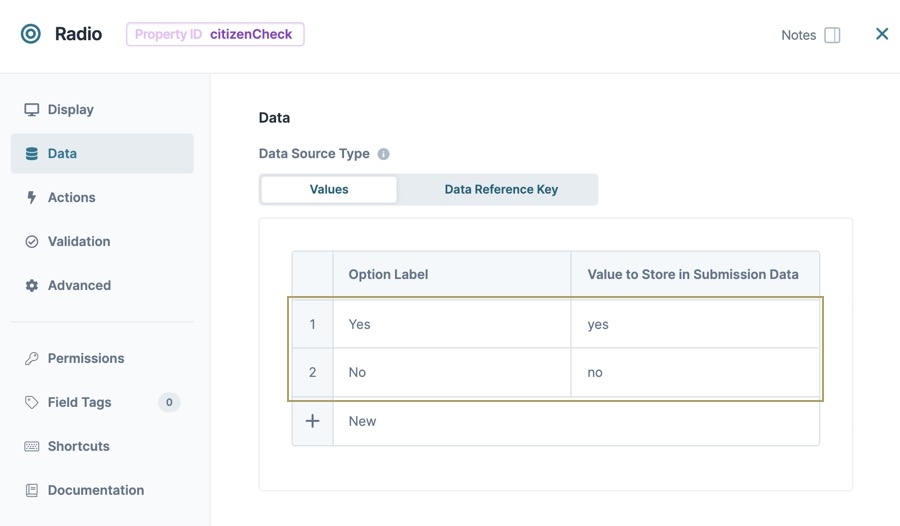
Data.Complete the Values table as follows:
Option Label
Value to Store in Submission Data
1
Yes
yes
2
No
no
From the component's configuration window, click
.png) Actions.
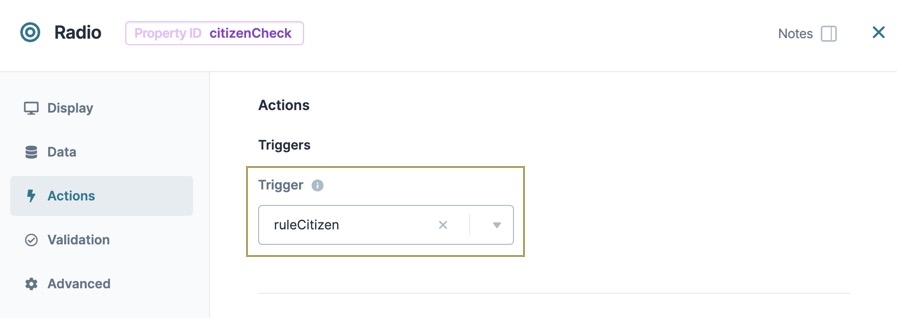
Actions.In the Trigger field, enter
ruleCitizen. You'll set up this component in a later step.Click Save Component.
Configure the Text Field Component
This component stays hidden until the end-user answers No to the question. After selecting No, the Text Field displays, and the end-user can add their country of citizenship. This Text Field is the output for your Decisions component's if/then rule.
Drag and drop a
.png) Text Field component onto your canvas, placing it below the citizenCheck
Text Field component onto your canvas, placing it below the citizenCheck  Radio Buttons component.
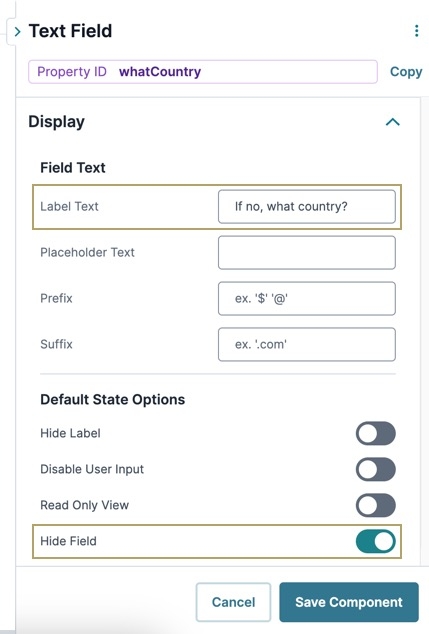
In the Property ID field, enter whatCountry.
In the Label Text field, enter
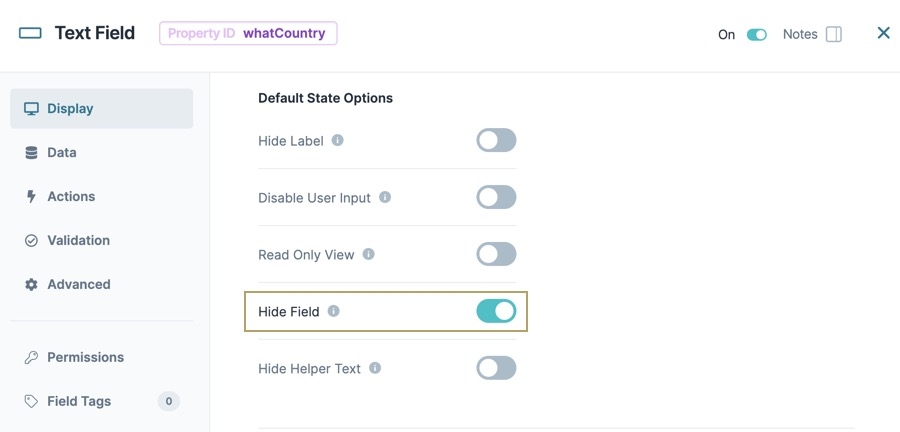
If no, what country?.Under Default State Options, set Hide Field to
 (ON).
(ON).Click Save Component.
Configure the Decisions Component
Your Decisions component holds the logic behind your if/then rule. In this example, if the end-user selects No in the Radio Buttons component, then the Text Field component displays.
Drag and drop a Decisions component onto your canvas, placing it below the whatCountry Text Field component.
In the Property ID field, enter ruleCitizen.
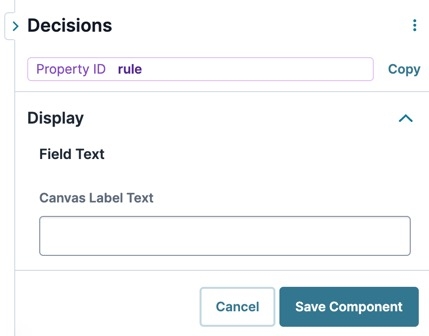
In the Canvas Label Text field, enter
ruleCitizen.Navigate to the Decisions component's Actions settings.
Next to Inputs & Outputs, click Edit.
Complete the Inputs table as follows:
Source
Alias
Type
1
areYouACitizen
exact
Setting an output Type of exact lets you use exact values in the Micro Decisions table. Exact is a good option because there are only two possible values from the Radio Buttons component: yes and no.
Complete the Outputs table as follows:
Source
Type
1
whatCountry
visible
Setting an output Type of visible lets you hide or display the field referenced in the Property ID column. So, your Text Field displays or hides based on the end-user's Radio Buttons selection. You'll set this up in the Micro Decisions table.
Under the Conditionals table, click the Add New Row button two times. This creates a two row table using the Inputs and Outputs values as headers.
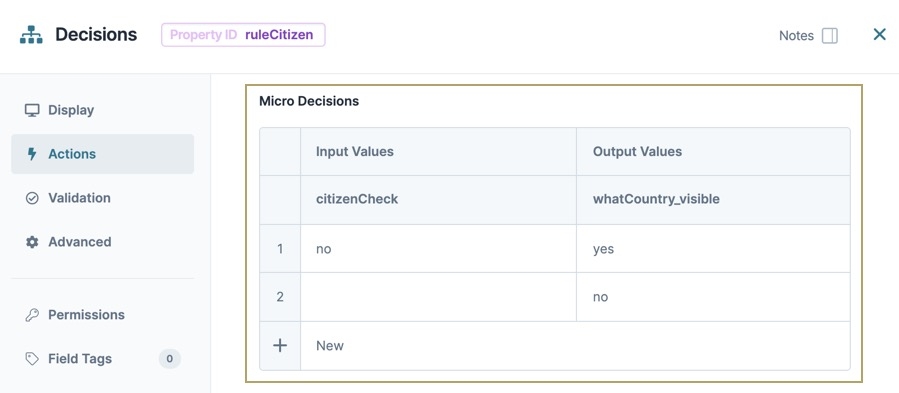
Complete the Conditionals table table as follows:
citizenCheck
whatCountry_visible
no
yes
no
Click Save Component.
Save your module.
Preview your module in Express View, and test it out:
The Decisions component is an event component for logic-based if/then scenarios. For example, if your end-user selects radio button A, then show field B. Or, if your end-user types value X, then display pop-up Y.
Three inputs drive the Decisions component:
Input component: What drives the action. Any component works here, including Buttons, Radio Buttons, or Text Fields. The Decisions references the Property ID of the input component.
Output component: What reacts to the action. Again, any component works, including Panels and Field-Groups containing multiple components. The Decisions references the Property ID of the output component.
Decisions component: The Decision itself. You can configure the interaction between the inputs and outputs using Micro Decisions. You can set the input and output behavior by selecting the Type for each. The Micro Decisions table is where you'll set if/then rules using your defined inputs and outputs. Inputs display in the left columns of the Micro Decisions table. The column headers match the Input components' Property IDs. Outputs display in the right columns and are named using a concatenation of their ID and Type.
Here are some real-world examples of when to use a Decisions component:
After the end-user determines they are not a U.S. citizen, a Country of Citizenship field displays so they can select a country.
Showing state-specific question labels based on an end-user selecting their state of residence.
Adjusting a maximum loan amount based on your end-user's calculated credit score.
Displaying a field with the click of a button.
You can find the Decisions component in the Data & Events Processing group to the left of the Module Builder.
What You'll Learn
After completing this article, you’ll know when to use a Decisions component, how to configure its settings, and how to use it in a module.
About the Configuration Window
To learn more about general component settings and those that display when a component is associated with Data Models, view our General Component Settings article.
Display Panel
Setting | Description |
|---|---|
Canvas Label Text | A component’s Label Text indicates the purpose of the corresponding field or component. For non-input components, the Label Text isn't end-user facing, and only appears in the Module Builder. User-friendly labels make your module more accessible. Keep labels short and descriptive (a word or two) using title case. For longer entries, use sentence case.
|
Actions Panel
Setting | Description |
|---|---|
Trigger Type | This setting provides the following options:
|
Execution Type | When executing a rule, the Decisions component runs through each Conditional (top to bottom) to set the output. For clarity, assume that you have six configured Conditionals. The third and fifth Conditionals fulfill the Decisions component's conditions to determine a match. The following Execution Types set the Decision component's behavior:
|
Inputs
Setting | Description |
|---|---|
Property ID | The Source column is where you enter inputs for your logic component to reference. Examples of supported inputs include:
|
Alias | To simplify the configuration, give each component an alias. An easy approach is to assign each component a different letter of the alphabet. For example, A, B, C. |
Type | The following input types are available for your selection:
|
Required | Set an input to Required when it must have a value before triggering the Decision. |
Silent | "Silent" stands for "Silent Watcher". If Silent is selected and the Trigger Type is set to Watch, the Decisions component won't trigger if that input's value changes. This setting lets you use the input data as a Micro Decision without triggering the component if that data changes.
|
Outputs
Setting | Description |
|---|---|
Source | For your logic component to recognize an output, you must enter the destination component's Property ID(s). The Property ID entered must match the Property ID of the component that acts as the output. Remember, use camel case without spaces or punctuation. |
Type | The following output types are available for your selection:
Set the type of Output process to run. Discover available Output types in our Logic Components: Input & Output Types article. |
Micro Decisions
Setting | Description |
|---|---|
Input Values | Shows a column for each input component. The component's Property ID serves as the header for the column. Using the firstrow, enter the trigger value the logic component uses when triggering the output.
|
Output Values | Shows a column for each output component. A concatenation of the component's Property ID and the Type serves as the header for each column. Using first row onward, define the behavior based on the Type. For example, _visible: yes/no. |
Validation Panel
Unit Testing
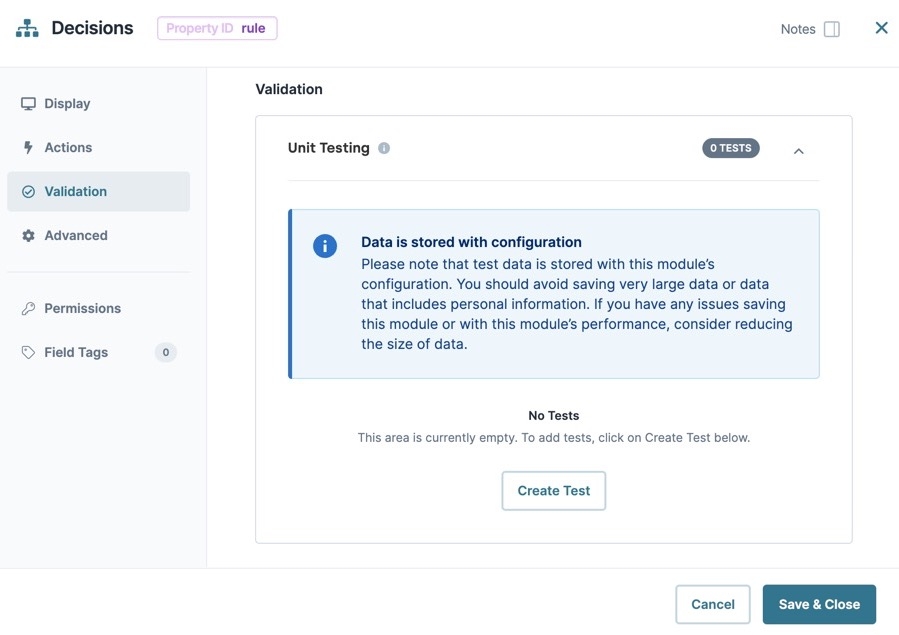
The Unit Testing tool lets you test that your Decisions component works as expected. Enter the data you want to test in the Input table and the results of the test show in the Output table. This is a good way to catch logic errors early.
To get started, click Create Test to create a new test.
Setting | Description |
|---|---|
| Collapses or opens the Unit Testing panel. |
Refresh Fields | Updates all Input fields to reflect changes on the canvas. |
Run All Tests | Runs all added tests with the Input values entered. |
| Additional Unit Testing settings. |
| Makes a copy of an existing test. |
| Removes an existing test. |
Run Test | Runs the test with the Input values entered. |
Input Table | Use this table to enter the information you want to test. If you have multiple inputs and want to skip testing certain inputs, leave the Value column blank. |
Input | Automatically populates all components listed in the Decisions component’s Inputs table. |
Label | Automatically populates the label of the connected Input component. |
Value | Enter example data in this column that you want to test.
|
JSON | Select this checkbox when you enter a Value that's written in JSON. This can be an object, array, number, or Boolean (true/false) value. |
Output Table | This table displays the results of your test. |
Output | Automatically populates all components listed in the Decisions component's Outputs table. |
Label | Automatically populates with the label of your connected Output component. |
Expected | Enter the outcome you expect from the test you run. You can use this to compare the expected result with the actual result.
|
Actual | The result from the test you ran. |
JSON | Select this checkbox when your result must display in JSON. This can be an array, string, or object. |
After you create a unit test, test the decisions. The Unit Testing feature populates the Input, Label, and Output fields based on the configuration of your Decisions component. You only need to complete the Value and Expected fields. When you click Run Test, you can confirm the Expected results match the Actual results.
To learn more about the Testing Tool, view our Unqork Testing Tool article.
Advanced Panel
Setting | Description |
|---|---|
Set Execution | Select if and what is executed when this component triggers. |
Disable Execution | If Disable Execution is set to By default, this setting is set to |
Execute All Child Decisions | When set to By default, Execute All Child Decisions is set to |
Execute Decisions From Last To First | Reverses the trigger order of child decisions. When set to |
Set Debounce | The number of milliseconds that pass before the form loads this component. For larger modules, increasing the debounce value prevents the Decisions component from triggering before all components load in. |
Adding a Decisions Component
In this scenario, you'll show a follow-up question when an end-user answers No to "Are you a citizen of the United States?" These instructions assume that you have an open module saved with a title.
In this configuration, you need the following components:
1 Radio Buttons component
1 Text Field component
1 Decisions component
Configure the Radio Buttons Component
This component asks the end-user if they're a citizen of the United States. If the end-user answers Yes, this is the end of the process. If the end-user answers No, the process continues. This Radio Button is the input for your Decisions component's if/then rule.
Drag and drop a
 Radio Buttons component onto your canvas.
In the Property ID field, enter citizenCheck.
In the Label Text field, enter Are you a citizen of the United States?.
Click
.png) Data.
Data.Complete the Values table as follows:
Option Label
Value to Store in Submission Data
1
Yes
yes
2
No
no
From the component's configuration window, click
.png) Actions.
Actions.In the Trigger field, enter ruleCitizen. You'll set up this component in a later step.
Click Save & Close.
Configure the Text Field Component
This component stays hidden until the end-user answers No to the question. After selecting No, the Text Field displays, and the end-user can add their country of citizenship. This Text Field is the output for your Decisions component's if/then rule.
Drag and drop a
.png) Text Field component onto your canvas, placing it below the citizenCheck
Text Field component onto your canvas, placing it below the citizenCheck  Radio Buttons component.
In the Property ID field, enter whatCountry.
In the Label Text field, enter If no, what country?.
Under Default State Options, set Hide Field to
.png) (ON).
(ON).Click Save Component.
Configure the Decisions Component
Your Decisions component holds the logic behind your if/then rule. In this example, if the end-user selects No in the Radio Buttons component, then the Text Field component displays.
Drag and drop a
.png) Decisions component onto your canvas, placing it below the whatCountry
Decisions component onto your canvas, placing it below the whatCountry .png) Text Field component.
Text Field component.In the Property ID and the Canvas Label Text fields, enter ruleCitizen.
Click
.png) Actions.
Actions.Complete the Inputs table as follows:
Property ID
Alias
Type
1
areYouACitizen
exact
Setting an output Type of exact lets you use exact values in the Micro Decisions table. Exact is a good option because there are only two possible values from the Radio Buttons component: yes and no.
Complete the Outputs table as follows:
Property ID
Type
1
whatCountry
visible
Setting an output Type of visible lets you hide or display the field referenced in the Property ID column. So, your Text Field displays or hides based on the end-user's Radio Buttons selection. You'll set this up in the Micro Decisions table.
Complete the Micro Decisions table as follows:
Input Values
Output Values
citizenCheck
whatCountry_visible
1
no
yes
2
no
Click Save & Close.
Save your module.
Preview your module in Express View, and test it out:



.jpg)
.png)
