The Initializer component is one of Unqork's core logic components. Initializers trigger operations based on an end-user's interaction with components and modules. Initializer component can be set up to trigger an operation with each new module submission.
While similar, Initializers and Decisions differ in how they handle inputs. A Decisions component relies on specific input values (if an end-user responds yes to a question, the Decision triggers). Initializers, on the other hand, trigger on actions (such as a button-click or a new submission on a page).
To trigger an operation based on an action instead of a value, use the Initializer component.
The Initializer component is in the Data & Event Processing group to the left of the Module Builder.
What You'll Learn
After completing this article, you’ll know when to use an Initializer component, how to configure its settings, and how to use it in an Unqork application.
About the Configuration Window
To learn more about general component settings and those that display when a component is associated with Data Models, view our General Component Settings article.
Display Panel
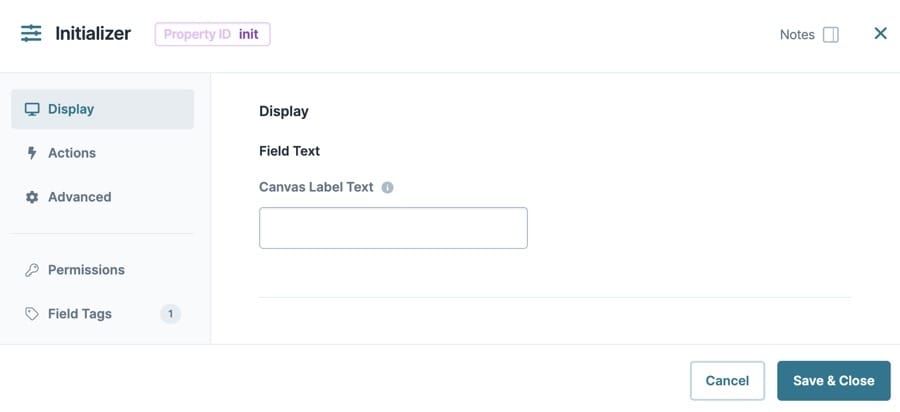
Field Text
Setting | Description |
|---|---|
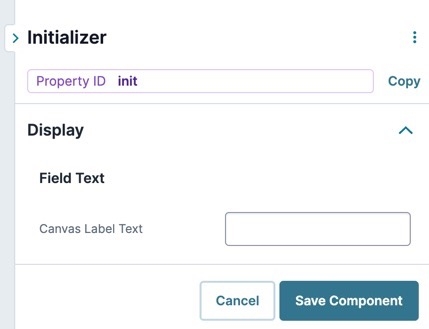
Canvas Label Text | Label Text conveys what the input component is and what information it displays. Enter the purpose of the corresponding component or field. User-friendly labels make your module more accessible. Keep labels short and descriptive (a word or two) using title case. For longer entries, use sentence case. |
Actions Panel
Triggers
Setting | Description |
|---|---|
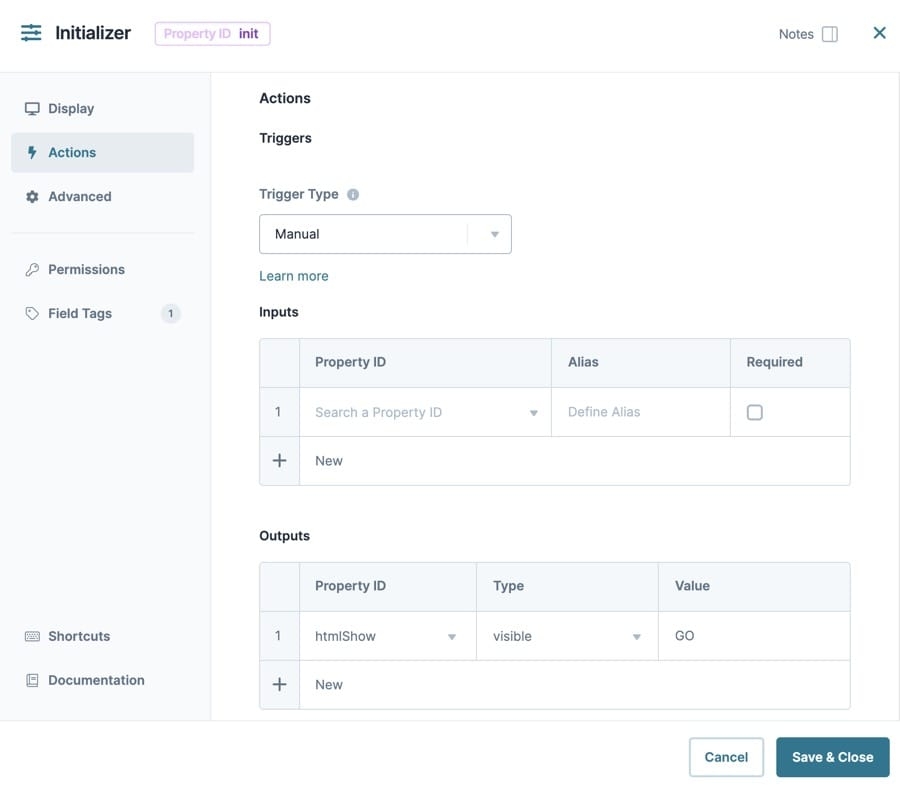
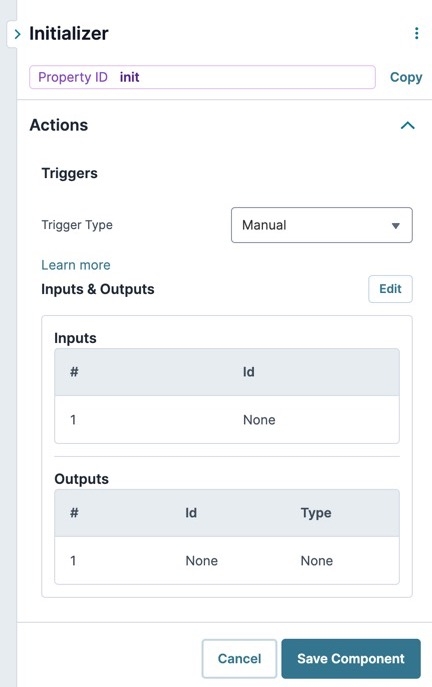
Trigger Type | A drop-down menu showing the following options:
|
Inputs Table
The Inputs table is for inputting components that trigger the Initializer component.
Setting | Description |
|---|---|
Source | The Source (Enter Property ID) column is where you enter inputs that your logic component references. Examples of supported inputs include:
|
Alias | To simplify the configuration, give each component an alias. An easy approach is to assign each component a different letter of the alphabet. For example, A, B, C. |
Required | If By default, this setting is ☐ (unchecked). |
Delete Input | Deletes the row from the Inputs table. This action is not reversible. |
Outputs Table
The Outputs table is for outputting components and actions you want the Initializer component to perform.
Setting | Description |
|---|---|
Source | For your logic component to recognize an output, you must enter the destination component's Property ID(s). The Property ID entered must match the Property ID of the component that acts as the output. Remember, use camel case without spaces or punctuation. |
Type | The Outputs Type drop-down contains a list of possible actions. When the Initializer triggers, the output type actions against the Source. For example, if your Source is a Text Field and the output type is set to Clear, then the Text Field's value clears when the Initializer triggers.
|
Value | Supporting text or values that work in conjunction with the Output Type selected. If the Type requires custom text (PopMessage or PopError, for example), enter the text here. Otherwise, if the Type needs a yes, no, or GO Value (for example, Required or Trigger), enter that here. |
Delete Output | Deletes the row from the Outputs table. This action is not reversible. |
Advanced Panel
Set Execution
Setting | Description |
|---|---|
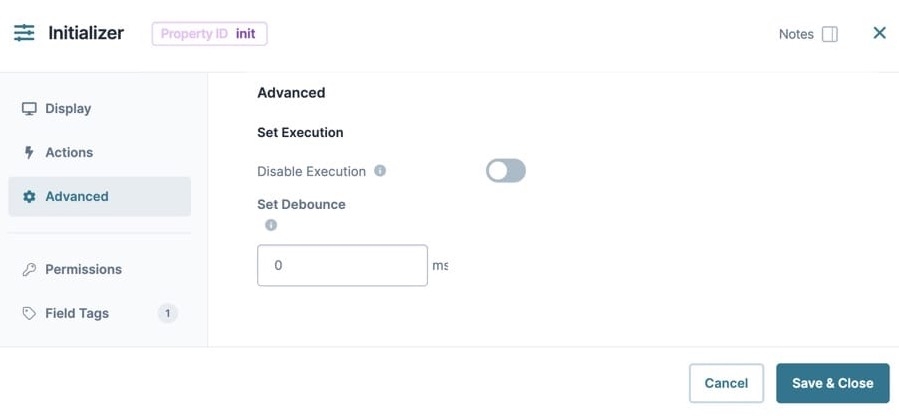
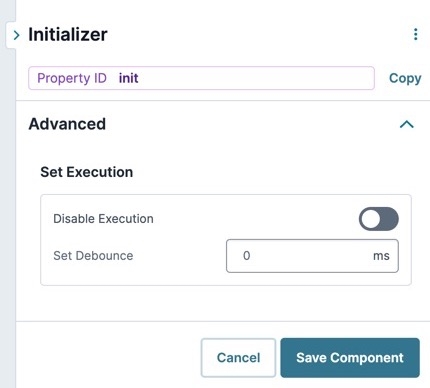
Disable Execution | If Disable Execution is set to By default, this setting is set to |
Set Debounce | The number of milliseconds that pass before the module loads this component. This is useful if you have a large module and you load several components at the same time.
|
 Adding an Initializer Component
In this example, you'll learn how to set up an Initializer component without configuring the Input table. Instead of referencing the Input table, your Initializer watches for new submissions. With each new submission, your Initializer fires the value yes to a series of Radio Buttons.
These instructions assume that you have an open module saved and with a title.
What You Need
For this configuration, you need the following components:
2 Radio Buttons components
1 Initializer component
Configure the Radio Buttons Components
Start your configuration by adding two Radio Buttons components. These Radio Buttons serve as the output location for the Initializer component.
The first Radio Buttons component asks the end-user if they completed an application. The second Radio Buttons component asks the end-user if the application was completed less than a month ago.
In the Module Builder, drag and drop two
.png) Radio Buttons components onto your canvas.
Radio Buttons components onto your canvas.In the Property ID and Label Text fields, enter the following:
Property ID
Label Text
fillOut
Did you fill out this application yourself?
startDate
Was this application started less than one month ago?
For each Radio Buttons component, complete the Values table as follows:
Property ID
Label Text
fillOut
Did you fill out this application yourself?
startDate
Was this application started less than one month ago?
Click Save Component for each Radio Buttons component as you complete it.
Configure the Initializer Component
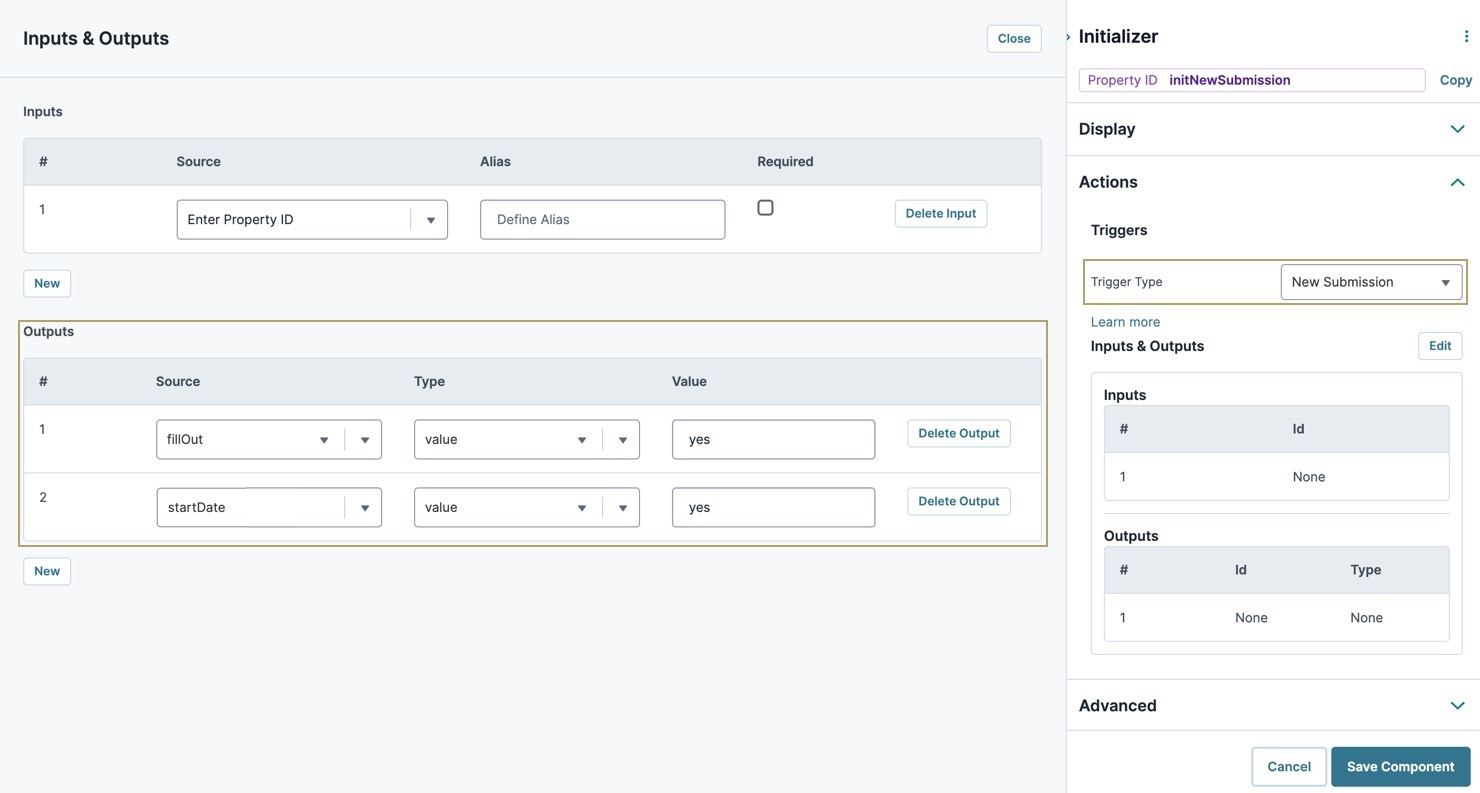
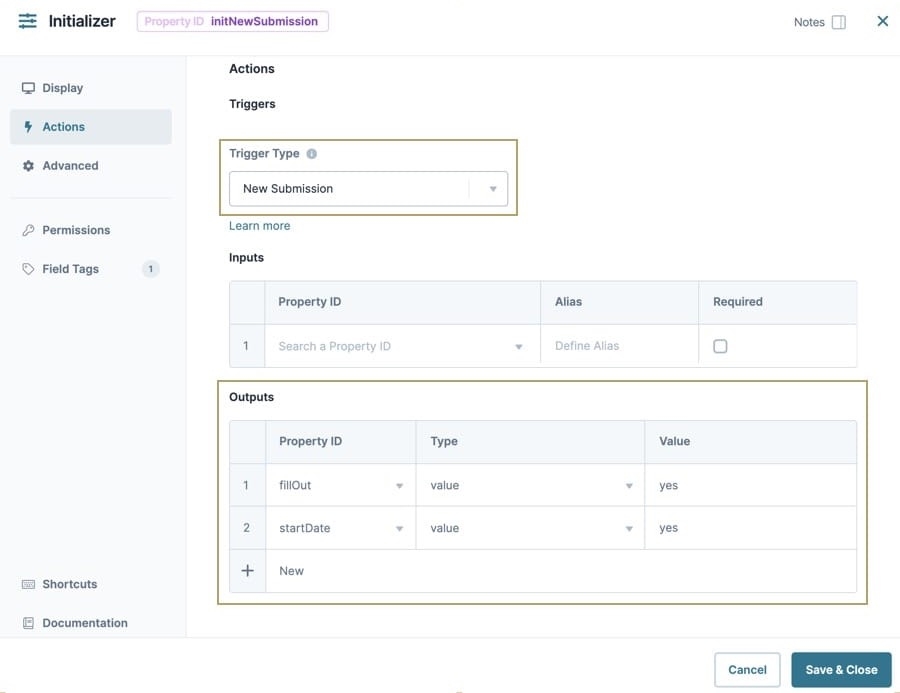
The Initializer component, once triggered, pushes the value yes to each Radio Buttons component. The Initializer component triggers as soon as the module loads. This trigger action occurs based on the selection of the New Submission Trigger Type.
In the Module Builder, drag and drop an Initializer component onto your canvas, placing it above your Radio Buttons components.
In the Property ID field, enter initNewSubmission.
In the Canvas Label Text field, enter
Yes to All.Set the Trigger Type as New Submission.
In the Outputs table, set the following: a
#
Source
Type
Value
1
fillOut
value
yes
2
startDate
value
yes
Click Save Component.
Save your module.
Once configured, click Preview to open your module in Express View. Here's how your module displays:
The Initializer component is one of Unqork's core logic components. Initializers trigger operations based on an end-user's interaction with components and modules. Initializer component can be set up to trigger an operation with each new module submission.
Here are some real-world examples of when to use an Initializer component:
Auto-completing fields when an end-user opens a page or clicks a button.
Triggering a Plug-In component in a remote execute module.
Triggering the creation of a time-stamp on a module submission.
While similar, Initializers and Decisions differ in how they handle inputs. A Decisions component relies on specific input values (if an end-user responds yes to a question, the Decision triggers). Initializers, on the other hand, trigger on actions (such as a button-click or a new submission on a page).
To trigger an operation based on an action instead of a value, use the Initializer component.
The Initializer component is in the Data & Event Processing group to the left of the Module Builder.
What You'll Learn
After completing this article, you’ll know when to use an Initializer component, how to configure its settings, and how to use it in an Unqork application.
About the Configuration Window
To learn more about general component settings and those that display when a component is associated with Data Models, view our General Component Settings article.
Display Panel
Setting | Description |
|---|---|
Canvas Label Text | Label Text conveys what the input component is and what information it displays. Enter the purpose of the corresponding component or field. User-friendly labels make your module more accessible. Keep labels short and descriptive (a word or two) using title case. For longer entries, use sentence case. |
Actions Panel
Triggers
Setting | Description |
|---|---|
Trigger Type | A drop-down menu showing the following options:
|
Inputs Table
The Inputs table is for inputting components that trigger the Initializer component.
Setting | Description |
|---|---|
Property ID | The Source column is where you enter inputs for your logic component to reference. Examples of supported inputs include:
|
Alias | To simplify the configuration, give each component an alias. An easy approach is to assign each component a different letter of the alphabet. For example, A, B, C. |
Required | If By default, this setting is ☐ (unchecked). |
Outputs Table
The Outputs table is for outputting components, and actions you want the Initializer component to perform.
Setting | Description |
|---|---|
Property ID | For your logic component to recognize an output, you must enter the destination component's Property ID(s). The Property ID entered must match the Property ID of the component that acts as the output. Remember, use camel case without spaces or punctuation. |
Type | The Outputs Type drop-down contains a list of possible actions. When the Initializer triggers, the output type actions against the Property ID. For example, if your Property ID references a Text Field and the output type is set to Clear, then the Text Field's value clears when the Initializer triggers.
|
Value | Supporting text or values that work in conjunction with the Output Type selected. If the Type requires custom text (PopMessage or PopError, for example), enter the text here. Otherwise, if the Type needs a yes, no, or GO Value (for example, Required or Trigger), enter that here. |
Advanced Panel
Set Execution
Setting | Description |
|---|---|
Disable Execution | If Disable Execution is set to By default, this setting is set to |
Set Debounce | The number of milliseconds that pass before the module loads this component. This is useful if you have a large module and you load several components at the same time.
|
Adding an Initializer Component
In this example, you'll learn how to set up an Initializer component without configuring the Input table. Instead of referencing the Input table, your Initializer watches for new submissions. With each new submission, your Initializer fires the value yes to a series of Radio Buttons.
These instructions assume that you have an open module saved and with a title.
What You Need
For this configuration, you need the following components:
2 Radio Buttons components
1 Initializer component
Configure the Radio Buttons Components
Start your configuration by adding two Radio Buttons components. These Radio Buttons serve as the output location for the Initializer component.
The first Radio Buttons component asks the end-user if they completed an application. The second Radio Buttons component asks the end-user if the application was completed less than a month ago.
In the Module Builder, drag and drop two
.png) Radio Buttons components onto your canvas.
Radio Buttons components onto your canvas.In the Property ID and Label Text fields, enter the following:
Property ID
Label Text
fillOut
Did you fill out this application yourself?
startDate
Was this application started less than one month ago?
For each Radio Buttons component, complete the Values table as follows:
Option Label
Value to Store in the Submission Data
Yes
yes
No
no
Save & Close each Radio Buttons component as you complete it.
Configure the Initializer Component
The Initializer component, once triggered, pushes the value yes to each Radio Buttons component. The Initializer component triggers as soon as the module loads. This trigger action occurs based on the selection of the New Submission Trigger Type.
In the Module Builder, drag and drop an Initializer component onto your canvas, placing it above your
.png) Radio Buttons components.
Radio Buttons components.In the Property ID field, enter initNewSubmission.
In the Canvas Label Text field, enter Yes to All.
Set the Trigger Type as New Submission.
In the Outputs table, set the following:
Property ID
Type
Value
1
fillOut
value
yes
2
startDate
value
yes
Click Save & Close.
Save your module.
Once configured, click Preview to open your module in Express View. Here's how your module displays:
Resources
Modify the Initializer component using the toolbar settings.
Set up Checkbox Options to be "true" using an Initializer component.
Validate fields in a Panel component with an Initializer component.

.png)

