The Nest By operator creates a nested table (array of objects) in a connected parent table. Nesting arrays allows you to group rows by a shared parent key. Rows with the same parent key value are combined, and the remaining fields are nested under a specified child name key.
You'll configure the operator with a parent key that'll remain un-nested for each row. Then, you’ll provide a child name key where your new nested array will exist. This configuration lets you group rows of data by a parent key value. For example, you can nest by a parent key that has the same value across multiple rows. All rows with the same parent key value group into one row. The remaining fields nest as individual rows in the same child name array.
Keys that are not consistent across all arrays will be dropped, which can result in data loss.
You'll find the Nest By operator under the Table Operators group to the left of the Data Workflow canvas.
About the Info Window
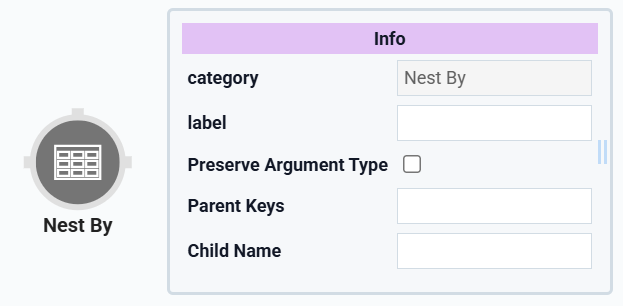
Here's a breakdown of each setting in the Nest By operator’s Info window:
Setting | Description |
|---|---|
Category | Grayed out and non-adjustable setting indicating the operation type. |
Label | Sets the label for your operator, displaying below the operator on your Data Workflow canvas. This field is optional, but set a label if you use more than one of the same operator type. A label helps you identify your operators without opening any Info windows. |
Preserve Argument Type | When selected, this setting ensures the argument data type is respected when the operator executes. |
Parent Keys | The Parent Key is how you'll group your information. The nested array will contain as many rows as keys share the Parent Key value. All rows with the same Parent Key value will group into one row. All values except the Parent Key will nest as an array under the Child Name you configure for the operator. You can also provide more than one Parent Key. This means that rows must match both keys to become nested. |
Child Name | This is the key name of the nested array that you're creating. You'll see this Child Name carried through into the DevTools Console. Without a Child Name, it's difficult to find your nested array in the DevTools Console. |
Adding a Nest By Operator
In this example, you'll use the Nest By operator to group by the duplicate account numbers in your Data Table component. That way, you can set the table's account number as the operator's key.
These instructions assume you have a module open, saved, and titled.
Configure the Data Table Component
First, you'll set up a Data Table component with a list of customers, account values, and account numbers.
In the Module Builder, drag and drop a Data Table component onto your canvas.
In the Property ID field, enter
dtAccountInfo.In the data table, enter the following:
#
accountNumber
firstName
lastName
accountValue
1
12345
Josephine
Darakjy
543891
2
12346
Lenna
Paprocki
1000000
3
12346
Sage
Wieser
1000000
4
12347
Abel
Maclead
7432572
5
12348
Ernie
Stenseth
5000000
6
12349
Valentine
Gillian
5439294
7
12346
Dyan
Oldroyd
17890
8
12347
Fatima
Saylors
19578
9
12347
Willow
Kusko
54389
You purposely added duplicate information to show the power of the Nest By operator.
.png)
4. Click on Save Component.
Configure the Button Component
To trigger the Data Workflow, you'll add a Button component.
Drag and drop a Button component onto your canvas, placing it below your
dtAccountInfoData Workflow component.In the Property ID, enter
btnNestByNumber.In the Label Text field, enter
Nest by Account Number.From the Action Type drop-down, select Event.
In the Triggers On Click field, enter
dwfNestByNumber..png)
Click Save Component.
Configure the Data Workflow Component
Now, you'll set up your Data Workflow to input and nest the data from your Data Table component.
Drag and drop a Data Workflow component onto your canvas, placing it below your
btnNestByNumberButton component.In the Property ID and Canvas Label Text fields, enter
dwfNestByNumber..png)
Configure the Input Operator
Drag and drop an Input operator onto your Data Workflow canvas.
Configure the operator's Info window as follows:
Setting
Value
Category
Input
Component
dtAccountInfo
Required
No
Source
Default
Configure the Nest By Operator
Drag and drop a Nest By operator onto your Data Workflow canvas.
Configure the operator's Info window as follows:
Setting
Value
Category
Nest By
Label
Nest by accountNumber
Parent Keys
accountNumber
Child Name
account
Connect the output port (right) of the
dtAccountInfoInput operator to the input port (left) of theNest by accountNumberNest By operator.
Configure the Console Operator
Drag and drop a Console operator onto your Data Workflow canvas.
Configure the operator's Info window as follows:
Setting
Value
Category
Console
Label
Nest by Account Number
Connect the output port (right) of the
Nest by accountNumberNest By operator to the input port (left) of theNest by accountNumberConsole operator.Click on Save Component.
Save your module.
Here's how the completed example looks in the Module Builder:
.png)
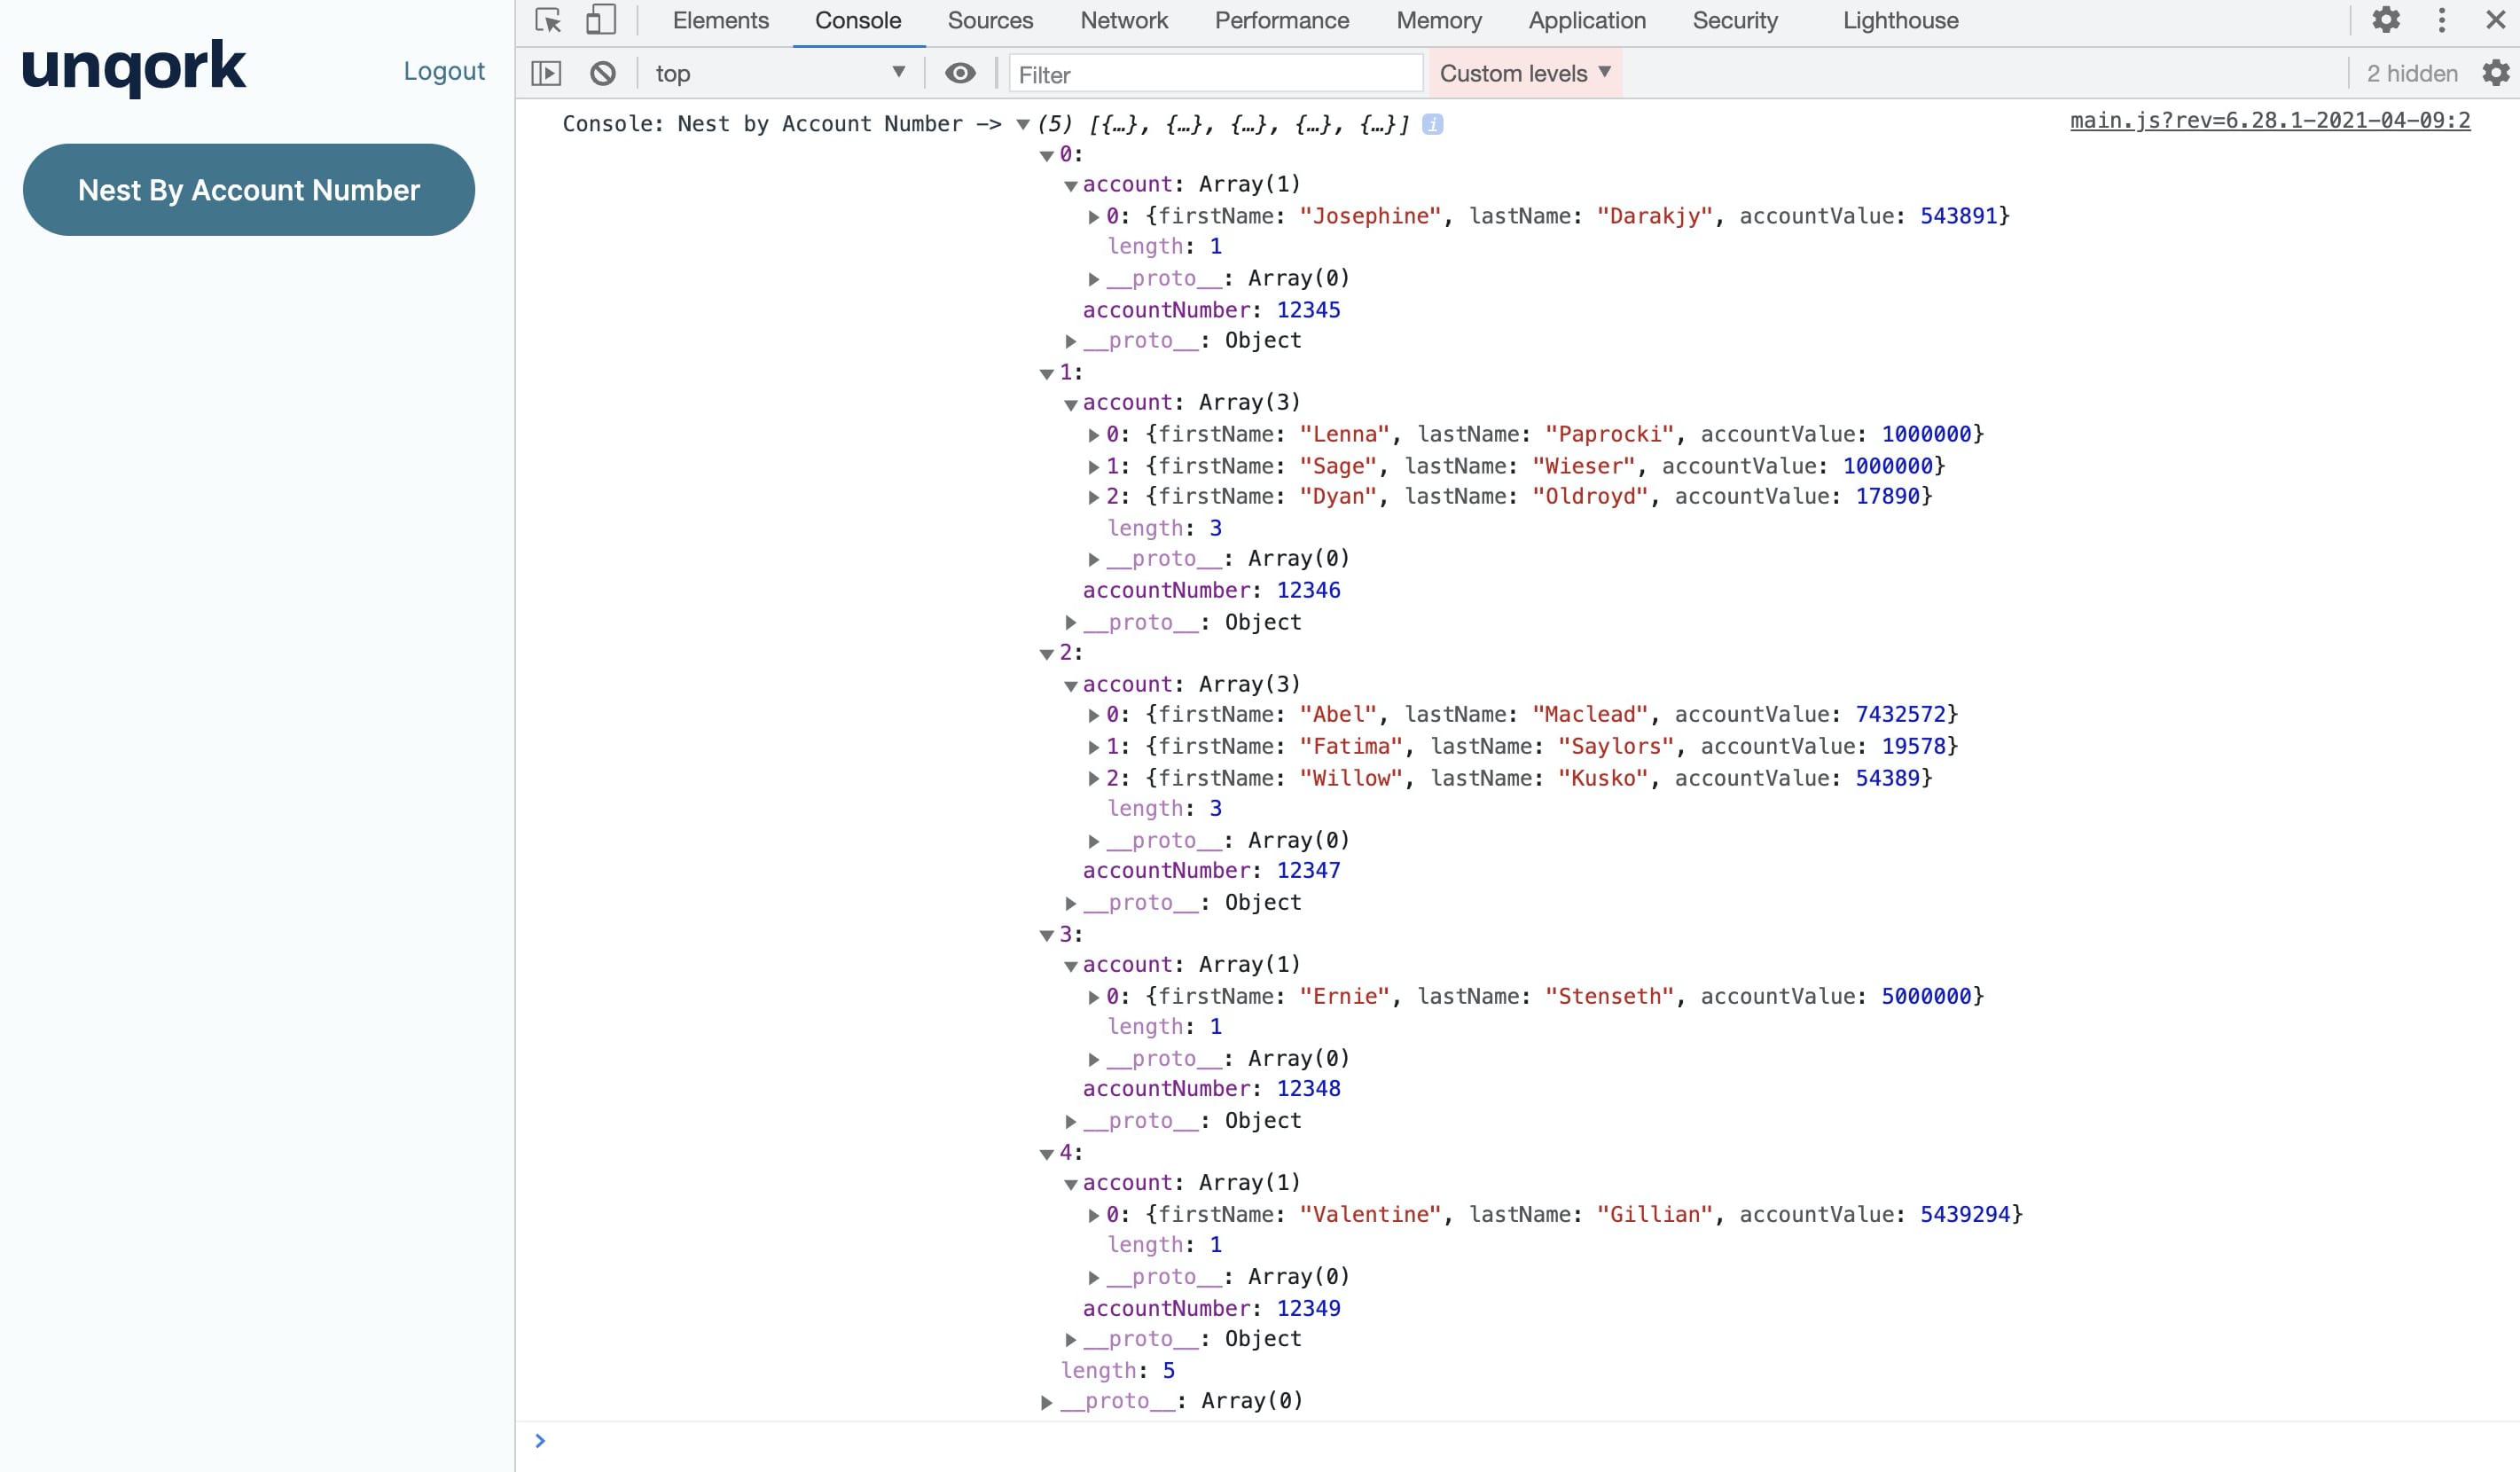
Preview your module in Express View, and open the DevTools Console. Click the Nest By Account Number button, and you'll see the nine table rows grouped into five rows. Each new array now has the child name of the account. You can also see that these new arrays are nested by accountNumber.

 The Nest By operator creates a nested table (array of objects) in a connected parent table. Nesting arrays allows you to group rows by a shared parent key. Rows with the same parent key value are combined, and the remaining fields are nested under a specified child name key.
You'll configure the operator with a parent key that'll remain un-nested for each row. Then, you’ll provide a child name key where your new nested array will exist. This configuration lets you group rows of data by a parent key value. For example, you can nest by a parent key that has the same value across multiple rows. All rows with the same parent key value group into one row. The remaining fields nest as individual rows in the same child name array.
Keys that are not consistent across all arrays will be dropped, which can result in data loss.
You'll find the Nest By operator under the Table Operators group to the left of the Data Workflow canvas.
About the Info Window
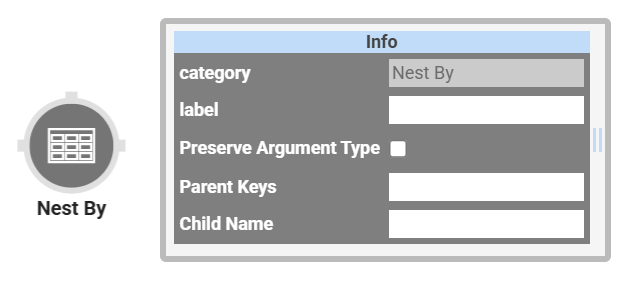
Here's a breakdown of each setting in the Nest By operator’s Info window:
Setting | Description |
|---|---|
Category | Grayed out and non-adjustable setting indicating the operation type. |
Label | Sets the label for your operator, displaying below the operator on your Data Workflow canvas. This field is optional, but set a label if you use more than one of the same operator type. A label helps you identify your operators without opening any Info windows. |
Preserve Argument Type | When selected, this setting ensures the argument data type is respected when the operator executes. |
Parent Keys | The Parent Key is how you'll group your information. The nested array will contain as many rows as keys share the Parent Key value. All rows with the same Parent Key value will group into one row. All values except the Parent Key will nest as an array under the Child Name you configure for the operator. You can also provide more than one Parent Key. This means that rows must match both keys to become nested. |
Child Name | This is the key name of the nested array that you're creating. You'll see this Child Name carried through into the DevTools Console. Without a Child Name, it's difficult to find your nested array in the DevTools Console. |
Adding a Nest By Operator
In this example, you'll use the Nest By operator to group by the duplicate account numbers in your Data Table component. That way, you can set the table's account number as the operator's key.
These instructions assume you have a module open, saved, and titled.
Configure the Data Table Component
First, you'll set up a Data Table with a list of customers, account values, and account numbers.
In the Module Builder, drag and drop a Data Table component onto your canvas.
In the Label and Property Name fields, enter
dtAccountInfo.In the Data Table, enter the following:
#
accountNumber
firstName
lastName
accountValue
1
12345
Josephine
Darakjy
543891
2
12346
Lenna
Paprocki
1000000
3
12346
Sage
Wieser
1000000
4
12347
Abel
Maclead
7432572
5
12348
Ernie
Stenseth
5000000
6
12349
Valentine
Gillian
5439294
7
12346
Dyan
Oldroyd
17890
8
12347
Fatima
Saylors
19578
9
12347
Willow
Kusko
54389
You purposely added duplicate information to show the power of the Nest By operator.
.jpg)
Click Save.
Configure the Button Component
To trigger the Data Workflow, you'll add a Button component.
Drag and drop a Button component onto your canvas. Place your Button component below the
dtAccountInfoData Table component.In the Property ID, enter
btnNestByNumber.In the Label Text field, enter
Nest by Account Number.Set the Action Type as Event.
In the Triggers On Click field, enter
dwfNestByNumber..png)
Click Save.
Configure the Data Workflow Component
Now, you'll set up your Data Workflow to input and nest the data from your Data Table component.
Drag and drop a Data Workflow component onto your canvas, placing it below your
dtAccountInfoData Table component.In the Canvas Label Text and Property Name fields, enter
dwfNestByNumber..png)
Configure the Input Operator
Drag and drop an Input operator onto your Data Workflow canvas.
Configure the operator's Info window as follows:
Setting
Value
Category
Input
Component
dtAccountInfo
Required
No
Source
Default
Configure the Nest By Operator
Drag and drop a Nest By operator onto your Data Workflow canvas.
Configure the operator's Info window as follows:
Setting
Value
Category
Nest By
Label
Nest by accountNumber
Parent Keys
accountNumber
Child Name
account
Connect the output port (right) of the
dtAccountInfoInput operator to the input port (left) of theNest by accountNumberNest By operator.
Configure the Console Operator
Drag and drop a Console operator onto your Data Workflow canvas.
Configure the operator's Info window as follows:
Setting
Value
category
Console
label
Nest by Account Number
Connect the output port (right) of the
Nest by accountNumberNest By operator to the input port (left) of theNest by accountNumberConsole operator.Click Save.
Save your module.
Here's how the completed use case will look in the Module Builder:
.png)
Preview your module in Express View, and open the DevTools Console. Click the Nest By Account Number button, and you'll see the nine table rows grouped into five rows. Each new array now has the child name of the account. You can also see that these new arrays are nested by accountNumber.
