EnvironmentAdministration lets administrators customize environment-related settings. For example, you can set up performance tracking, customize the site name, or set password requirements.
Environment Levels in Unqork
Environment levels (or stages) in Unqork support each phase of building and rendering applications. As customer applications advance through development, they generally pass through the following levels:
UAT is an internal environment level and part of Unqork's cloud infrastructure. UAT offers both a Designer and Express View interface.
This non-production environment level hosts test data only.
UAT
4
Production
This is the live application and the only environment level where end-users can access it. This level is also the only environment level to store live client data.
Following SDLC best practices, development should never take place in Production.
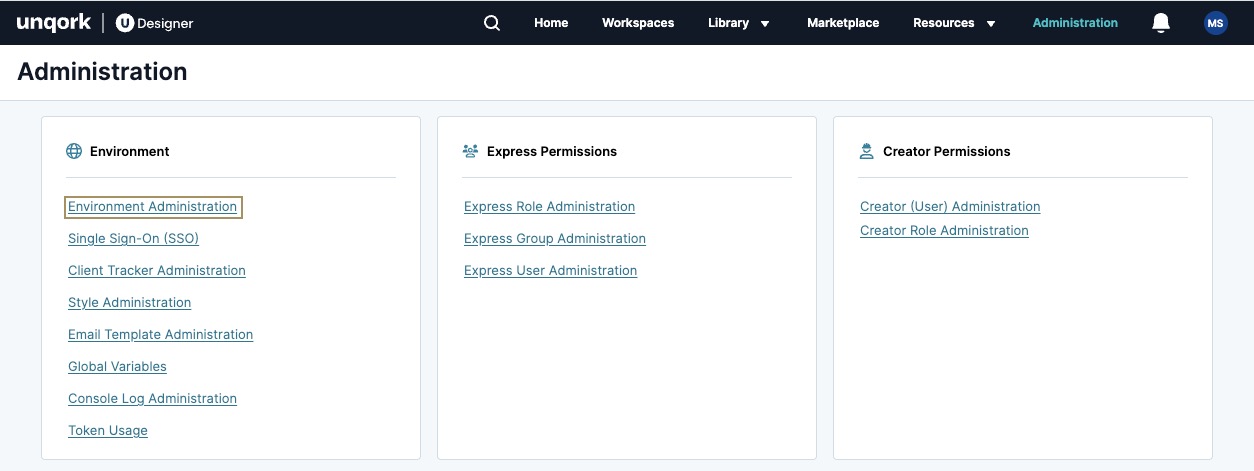
At the top right of the Unqork Designer Platform, click Administration.
2.
Under Environment, select EnvironmentAdministration.
After accessing the page, you'll see various settings and options you can use to customize your environment. The remainder of this article navigates you through these settings and how to use them.
Save changes to the EnvironmentAdministration page by clicking the Save Changes button.
General
This section focuses on the general settings you can use to customize your environment. These settings include creating a site name, enabling custom login and logout modules, and determining if you want to capture all request and response bodies.
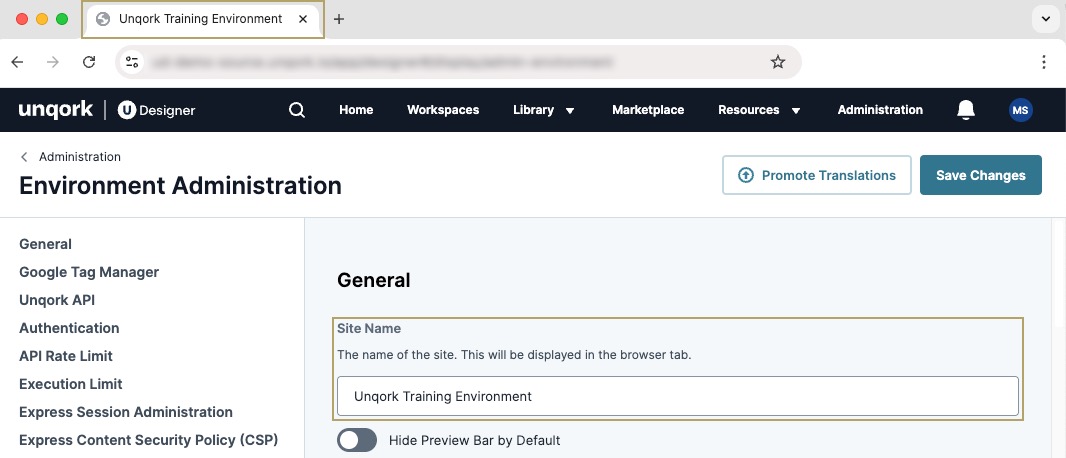
Site Name
In the Site Name field, enter the name you want to display. After setting up a site name, it displays in your browser tab.
Viewing or testing the application on a mobile device. The preview bar can take up space on a mobile screen. Hiding it can improve navigation.
PagerDuty Key
You can use PagerDuty integration to receive alerts about server-side execution failures. When configured, PagerDuty sends alerts when errors occur in your Unqork application, and provides details in the Unqork service logs.
To use the PagerDuty integration, you must have a PagerDuty account.
When setting up the service, select Use our API Directly and Events API v2. PagerDuty generates an API key you can use in Unqork.
3.
In the EnvironmentAdministration page's PagerDuty Key field, enter your API key.
4.
At the top of the page, click Save Changes.
You can also set up PagerDuty alerts for individual services in your application. To learn more, view our Services Administration article.
Environment Style
Displays the current Express Viewenvironment style. Administrators can change the style in the Style Administration page.
Discover how to change the environment style in our Style Administration article
Display Custom Login/Logout Settings for Applications
Enable this setting to connect or disconnect login and logout modules to applications. Disable the setting to prevent login and modules from being connected or disconnected to applications.
Remote execution, also called server-side execution, is a best practice for application security. Users with Designer access can see server-side execute logs at the following endpoint: https://{your-environment}.unqork.io/fbu/uapi/logs/services?type=remoteExecute.
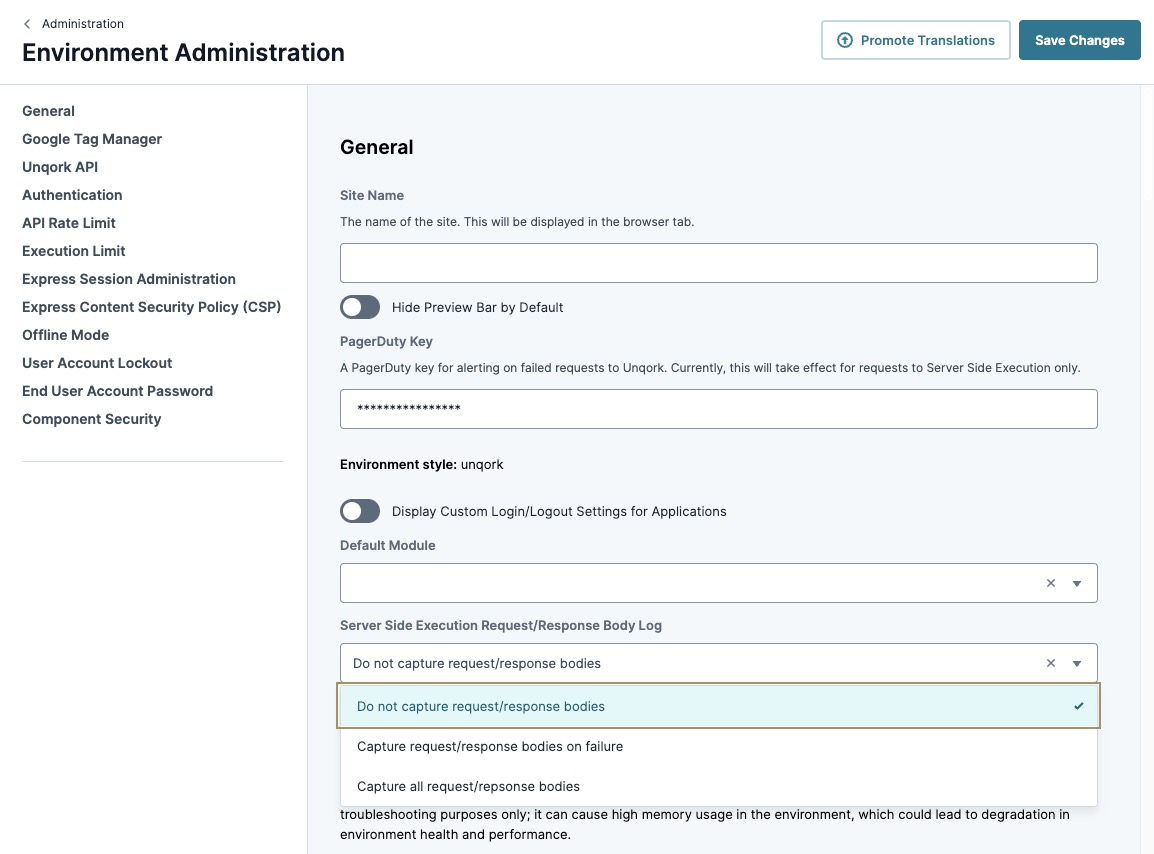
The Server Side Execution Request/Response Body Log setting lets you choose what the log captures. You can select one of the following options:
Do not capture request/response bodies.
Capture request/response bodies on failure.
Capture all request/response bodies.
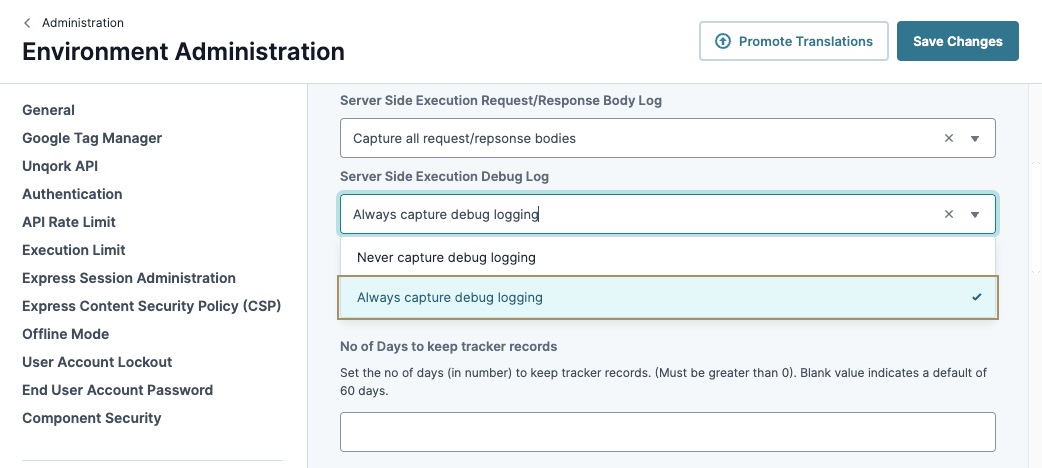
Server-Side Execution Request/Response Debug Log
The Server-Side Execution Debug Log setting captures server-side execution requests and lets you enable debug logging in your environment.
You can select one of the following options:
Never capture debug logging (default).
Always capture debug logging.
Enabling this feature might degrade application environment health and performance over time.
For more tips on using the Server-Side Execution Debug Log setting, view the Best Practices section of this article.
You can leave this field blank to store records for 60 days.
Google Tag Manager
Unqork supports integration with Google Tag Manager containers for Google Analytics tag configurations. You can use tags for several purposes, including:
Another solution for running different tags in different Unqork environments is to create one Tag Container for each Unqork environment. Then, add the environment-specific Container ID to each environment's EnvironmentAdministration page.
When you create a new Tag Container, Google Tag Manager prompts you to copy and paste the Tag Manager Snippet Script to every page of your website. Unqork performs this step for you. You only need to add the Container ID to your environment once.
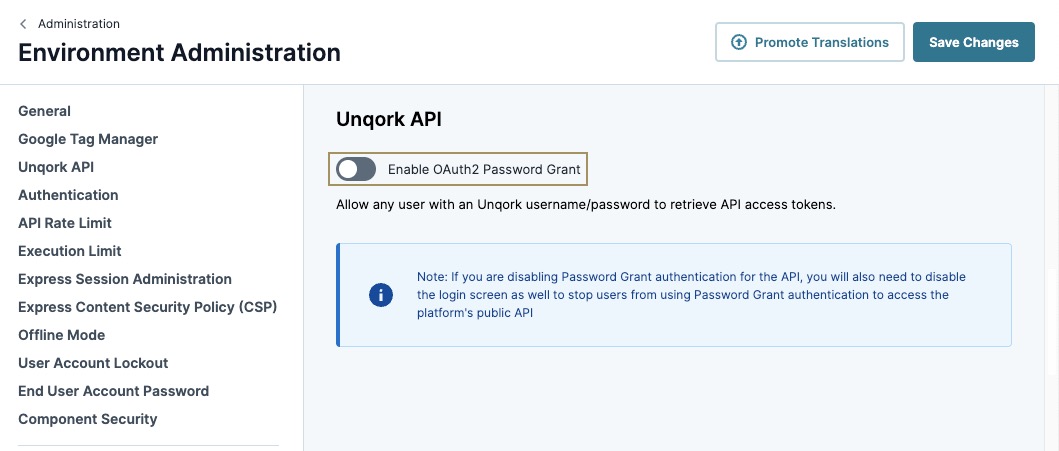
By enabling OAuth2 Password Grant in EnvironmentAdministration, your Unqork users can obtain an access token using their login credentials to make API calls.
Authentication
This section focuses on the authentication settings you can use to customize your environment. These settings include username and password requirements, anonymous user access, and SAML and OIDC configuration.
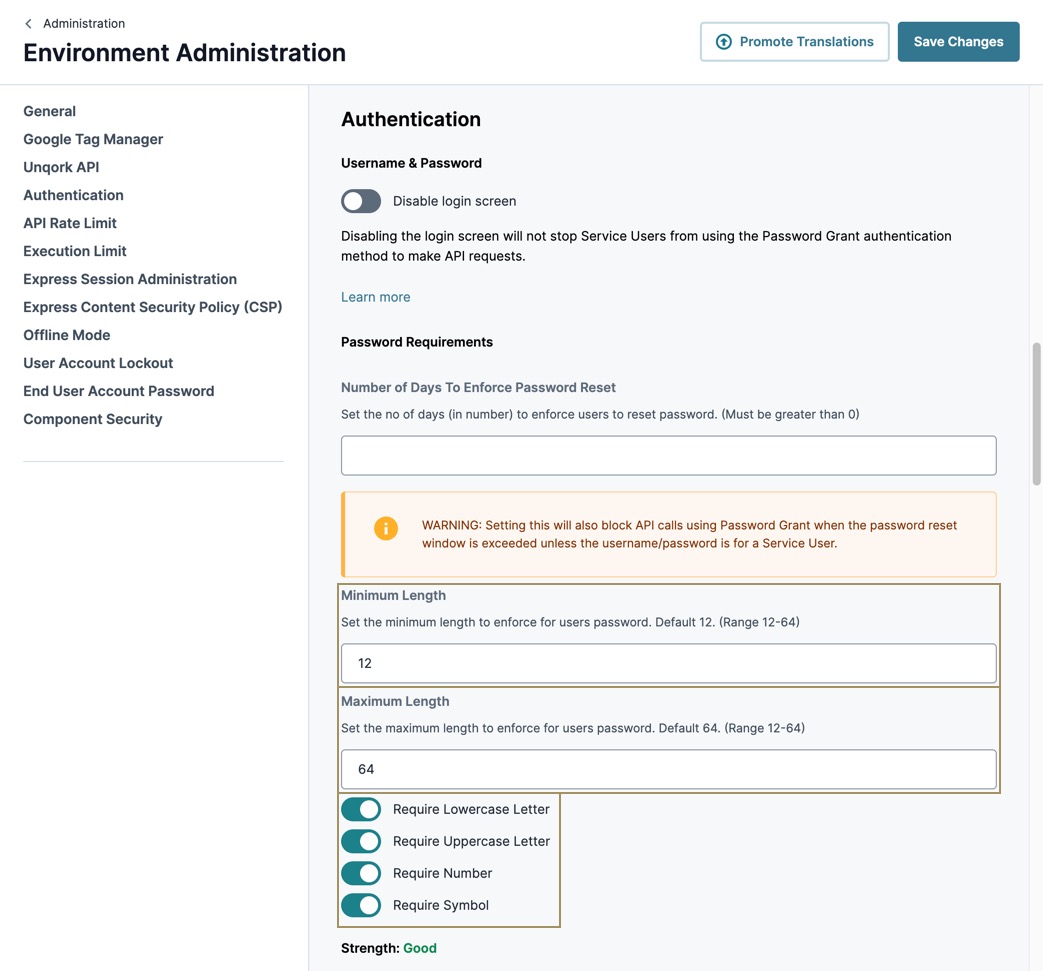
These settings let you disable your environment's login page, enforce password resets, and configure specific character and character length requirements when users create a password.
Enabling the Disable Login Screen setting still displays the login screen, but users entering their credentials are shown a modal informing them that the login screen is disabled.
Password Requirements
To customize your environment's password requirements, use the following settings in this section. Then, save your changes.
Set the minimum numerical character length for an end-user's password. Character length cannot be less than 8. By default, this value is set to 8.
Maximum Length
Set the maximum numerical character length for an end-user's password. Character length cannot exceeds 64. By default, this value is set to 64.
Require Lowercase Letter
Set to (ON) to require end-user's password to have at least one lowercase letter.
Require Uppercase Letter
Set to (ON) to require end-user's password to have at least one uppercase letter.
Require Number
Set to (ON) to require end-user's password to have at least one integer.
Require Symbol
Set to (ON) to require end-user's password to have at least one symbol.
Password reset rules do not apply to Service users. Service users can create user credentials for API calls and authorizations. Service users access server-side logic instead of the front-end of your application. Password reset rules only apply to regular Express end-users.
Strength
The strength indicator informs administrators how secure their password settings are. There are two levels of indication:
Good: The environment password settings follow security guidelines.
Weak: An improvement can be made, review the warning callout below the Strength setting for more details.
An execution limit is the number of retries a component or Workflow node attempts in a server-side execution. This setting is a helpful defense mechanism built into each environment.
Server-side execution requests have a two-minute timeout. If the module being executed has a configuration containing a larger number of components or Workflow node executions, it might timeout if the execution limit is too high.
Execution limits (or looping limits) prevent infinite loops in the form of two looping limit settings:
Looping Limit for Component Execution: The looping limit specific to component executions. By default, this value is set to 100 retries.
Looping Limit for Workflow Node Execution: The looping limit specific to Workflow node executions. By default, this value is set to 100 retries.
If your end-user leaves their device unattended while remaining logged in, this setting prevents someone from obtaining your end-user's token and using it indefinitely.
To customize your environment's session requirements, use the following settings in this section. Then, save your changes.
Setting
Description
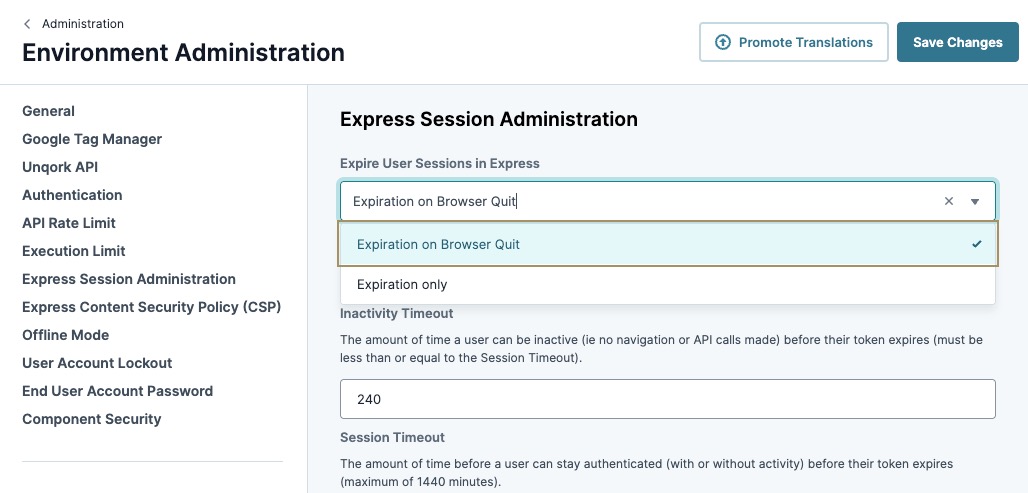
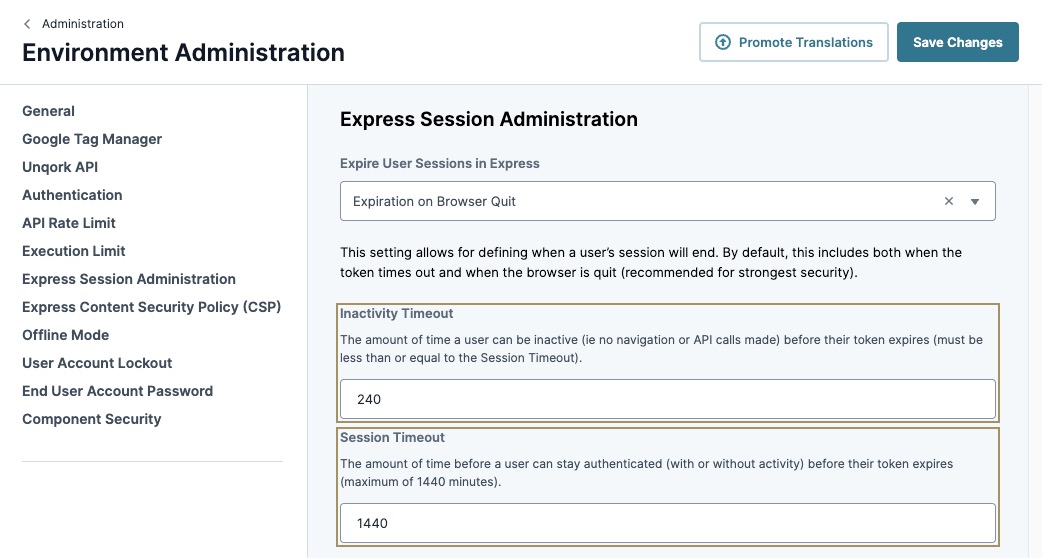
Expire User Sessions in Express
This drop-down menu provides you with opinions exclusive to Express sessions:
Expiration on Browser Quit: Unqork ends an end-user's session when they exit their browser. It's a best practice to use this option for the strongest security.
Expiration Only: Unqork ends an end-user's session when their token expires.
Inactivity Timeout
The amount of time an user can stay inactive in Designer and Express before their token expires. This value must be less than or equal to the Session Timeout.
The minimum time value is 5 minutes and the maximum is 1440 minutes (24 hours).
Session Timeout
The amount of time an user can remain logged into Designer and Express (with or without activity) before their token expires, in minutes.
Express Content Security Policy (CSP)
Content Security Policy (CSP) is a security standard that informs the browser to allow or block loading content for a given site. For example, let's say you set up an iframe in your Unqork application that displays content from another site. You can use CSP to inform the browser that it's safe to load content from that site in your Unqork application. By default, Unqork environments have strict CSP settings. These settings help protect against threats, like data injection attacks. Only hostnames added to your CSP settings can load content into or out of your Unqork application.
You can set up the following CSP directives in EnvironmentAdministration:
Directive
Description
Frame Source List (frame-src)
The frame-src directive lists the frames that can be embedded in Unqork, and identifies the sources that can load <frame> and <iframe> elements.
To allow multiple sources, use a comma-separated list.
Frame Ancestor List (frame-ancestors)
The frame-ancestors directive lists the frames that can embed Unqork, and identifies the sources where <frame>, <iframe>, <object>, <embed>, and <applet> elements can load. For example, to set up an iframe in Unqork that displays content from another site, add the site's hostname (or domain name) to the Frame Ancestor list.
Issues arise if a source has its own CSP directives or an X-Frame-Options header that conflicts with your CSP directives. For example, the site you try to load content from might block framing. Adding the site's hostname to your Frame Ancestor List does not override the source site's restrictions. If a frame does not work as expected, verify that the source's CSP and X-Frame-Options do not conflict with your directives.
Object Source List (object-src)
The object-src directive lists which sources can load <object>, <embed>, and <applet> elements.
The Cross-Origin Resource Sharing (CORS) setting lets you indicate a domain other than your environment domain where you can permit the loading of resources. In Unqork, this setting is helpful when using the Embedded User Interface (UI) feature.
To allow multiple domains, use a comma-separated list.
Enable the Module Builder's Cache this Module to Allow for Offline Access setting.
User Account Lockout
The User Account Lockout settings control how many login attempts CreatorsAlso known as Unqork Users, or Designer Users; is anyone who is inside the Unqork platform. can make before they are locked out of the Unqork Designer Platform. Administrators can specify maximum attempts in a specific time frame, including the lockout duration after exceeding the maximum attempt. After a Creator's account is locked, they receive an email informing them of their account status.
Administrators can unlock user accounts earlier using the Creator (User) Administration page. To learn more about unlocking user accounts, visit our Creator (User) Administration article.
Setting
Description
Maximum Number of User Login Attempts
The number of failed login attempts allowed before a user’s account is locked. You can enter a numerical value between 2 and 10.
By default, the value is 5.
User Account Lockout Duration
The amount of time a user's account remains locked, in minutes. You can enter a numerical value between 5 and 120.
By default, the value is 30.
User Login Attempt Duration
The total amount of time between failed login attempts before the user is locked out of their account, in minutes. For example, using all default settings, a user can attempt to log in 5 times over the course of 30 minutes. If a user attempts to log in a sixth time in those 30 minutes, they are locked out of their account.
Enter a numerical value between 5 and 120.
By default, the value is 30.
End User Account Password
The Express User Account Password setting controls password creation for new Express users. Administrators can create passwords for new Express users, or let Express users create their own passwords. To improve environment and application security, you'll use the Let User Set Password on Login setting. After making changes, save them.
The Choose Password setting is only available in older environments.
Setting
Description
Let User Set Password on Login (Recommended)
Users can set their own Express account password. An email is sent to the user with a login link directing them to create a new password. This link expires 24 hours after generation.
Choose Password (Deprecated)
Administrators manually set the password when creating or resetting Express user accounts.
To increase environment security, we recommend avoiding this option.
When debugging, enable Always Capture Debug Logging to capture logs for troubleshooting. Then, disable the setting once the debugging is completed.
Enable OAuth2 Password Grant
Disable the Enable OAuth2 Password Grant setting for all users. Create a dedicated Express Service user for API access. Disabling this setting prevents phishing attacks and increases security for users.
Password Requirements
Enforce a strong password policy in all environments. A weak password is vulnerable to brute-forcing or password spraying attacks.
In the Minimum Length field, set a minimum password length of at least 12 characters.
Select the Require Lowercase Letter, Require Uppercase Letter, Require Number, and Require Symbol settings to improve password security.
Enforce a strong session management policy by making the following changes to the Session Administration setting section:
1.
From the Expire User Sessions in Express drop-down, select Expiration on Browser Quit. By selecting this option, you set all browser cookies to session cookies. Once the browsing session ends, your browser automatically deletes the session cookies.
2.
Set your Inactivity Timeout and Session Timeout to a lower number. Setting a shorter amount of time for the session to timeout increases security, reducing the likelihood and amount of time a malicious actor can use a stolen session.