Overview
The login module is the first page end-users see when logging in to your application. You can set up your login page to verify end-user credentials or use an SSO authentication service. You can create this page in its own module during the application creation process. Or, you can connect it to your application later. The login module is optional and not required to build your application in the Unqork Designer Platform.
Login and Logout modules are only available when viewing at the Application level.
Enabling a Login Module
On the Environment Administration page, you can enable custom login modules based on application needs. Enable the setting to connect or disconnect login modules to applications. Disable the setting to prevent login modules from being connected or disconnected from applications.
To enable an existing login module:
At the top of the Unqork Designer Platform, click Administration.
Under Environment, select Environment Administration.
Navigate to the General settings section of Environment Administration.
Set Enable Custom Login/Logout Modules to (checked).
At the bottom of the page, click Save Changes.
Login modules do not display in Express View when you disable this setting. Disabling the custom login module setting reverts all affected applications back to the default login screen for the environment.
Creating and Connecting a Login Module to an Existing Application
In your application's workspace, you can create and connect a new login module to a new or existing application.
Create and Connect a Login Module to a New Application
Create and connect a login module during the application creation process. This method names the login module and connects it to the new application for you.
To create and connect a login module when creating a new application:
Navigate to your workspace and click + Create App.
In the Create App pop-up modal, complete the required application information.
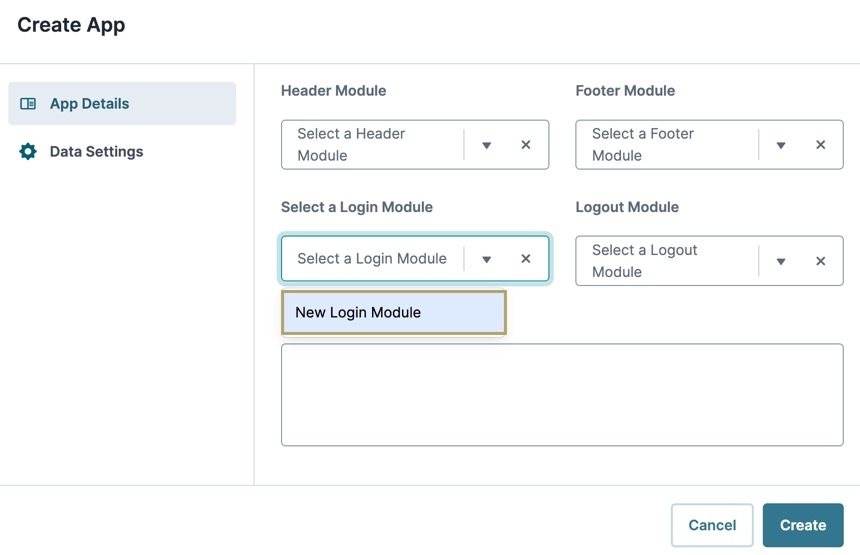
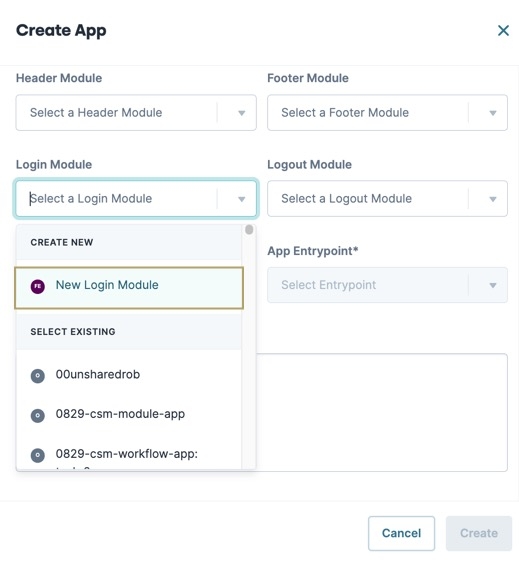
From the Login Module drop-down, select New Login Module.
Click Create.
Login modules created in the Create App pop-up modal are named after the application and end with the text "Login". For example, Acme Corp Login.
From here, open the module and customize your login screen. Here are a few ideas of components you can add to begin:
Text FieldComponent: Create a user name field for login credentials.
ButtonComponent : Create a call to action for your end-users to click after inserting their credentials.
Connect a Login Module to an Existing Application
If you already have a login module, you connect it to your application.
To connect a login module at the Application level:
Navigate to the application that contains your login module.
At the top of the page, click ··· (options).
Select Settings.
From the Login Module drop-down, enter or select the login module.
Click Save & Close.
Previewing a Login Module
It's important to note that all modules you plan to have navigate to using your login module must exist in the same application. Otherwise, you'll receive a 403 error.
To preview the login module at the Application level:
Navigate to the application that contains your login module.
At the top of the page, click ··· (options).
Select Preview. The application displays on a new page with the login module present at the top.
To successfully preview your login module, you must preview it at the Application level. Otherwise, you must manipulate the browser URL to consider any redirects. The URL looks like the following: https://www.{your-environment}.io/app/{appPath}#/display/{{moduleId}}/{{submissionId}}/{{moduleId}}.
Disconnecting a Login Module
If you decide you do not want a login module in your application anymore, you can remove it.
To disconnect a login module at the Application level:
Navigate to the application that contains your login module.
At the top of the page, click ··· (options).
Select Settings.
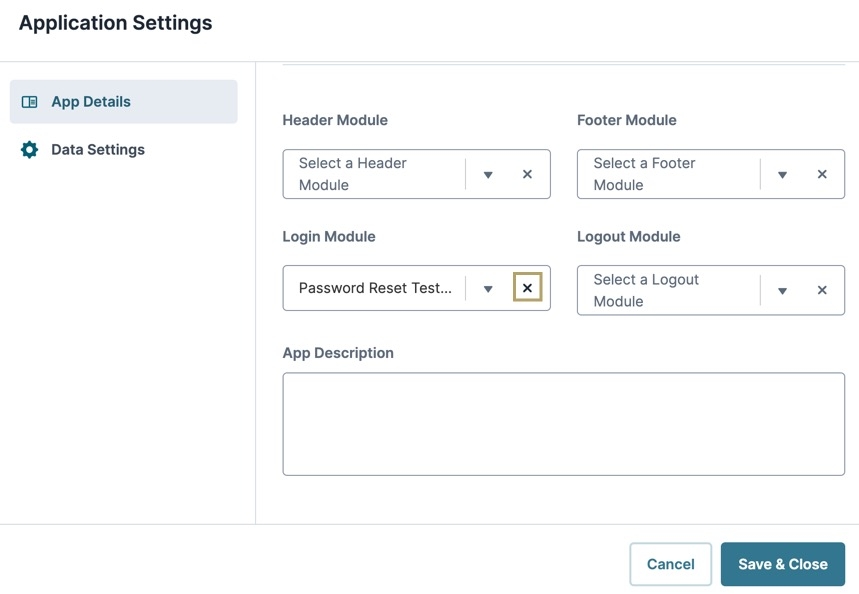
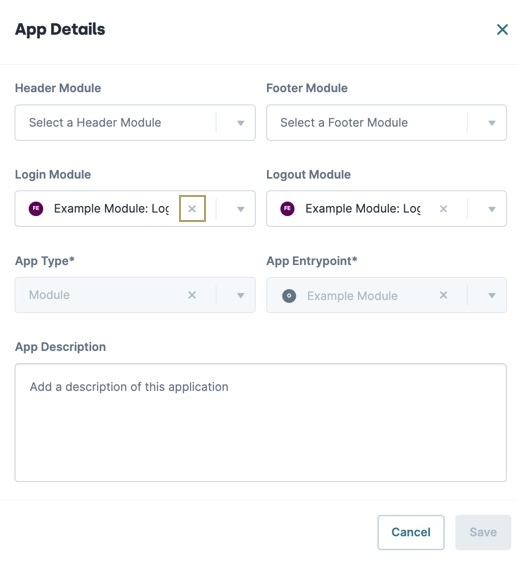
From the Login Module drop-down, click the X next to the login module’s name.
Click Save & Close.
Disconnecting a login module does not delete it.
Resources
Overview
The login module is the first page end-users see when logging in to your application. You can set up your login page to verify end-user credentials or use an SSO authentication service. You can create this page in its own module during the application creation process. Or, you can connect it to your application later. The login module is optional and not required to build your application in the Unqork Designer Platform.
Login and Logout modules are only available when viewing at the Application level.
Enabling a Login Module
On the Environment Administration page, you can enable custom login modules based on application needs. Enable the setting to connect or disconnect login modules to applications. Disable the setting to prevent login modules from being connected or disconnected from applications.
To enable an existing login module:
At the top right of the Unqork Designer Platform, click the Settings ▾ drop-down.
Select Administration.
Under Environment, select Environment Administration.
Navigate to the General settings section of Environment Administration.
Set Enable Custom Login/Logout Modules to (checked).
At the bottom of the page, click Save Changes.
Login modules do not display in Express View when you disable this setting. Disabling the custom login module setting reverts all affected applications back to the default login screen for the environment.
Creating a Login Module
Create and connect a login module during the application creation process. This method names the login module and connects it to the new application for you.
To create and connect a login module when creating a new application:
Navigate to your workspace and click + Create App.
In the Create App pop-up modal, complete the required application information.
From the Login Module drop-down, select FENew Login Module.
Click Create.
Login modules created in the Create App pop-up modal are named after the application and end with the text "Login". For example, Acme Corp Login.
From here, open the module and customize your login screen. Here are a few ideas of components you can add to begin:
Text FieldComponent: Create a user name field for login credentials.
Protected FieldComponent: Create a masked field for users to input their password.
ButtonComponent : Create a call to action for your end-users to click after inserting their credentials.
The Unqork Marketplace offers a Login Moduletemplate containing everything you need to set up a login page.
Connecting a Login Module to an Application
On an existing application's App Settings page, you can connect a login module.
To connect a login module to your application:
Navigate to your workspace and locate your application tile.
Click the ellipsis (···) menu.
Select
.png) Settings.
Settings.From the Login Module drop-down, enter or select a login module.
Click Save.
Creating a Login Module Library Element
You can also create a login module as a Library Element before connecting it to your application. By adding your module to the Library, you can share it with all your applications.
To create a login module Library Element for your application:
At the top right of the Unqork Designer Platform, click the Library ▾ drop-down.
Select Library Elements.
Click + Create New.
In the Module Name field, enter a name for your module.
To easily locate your login module later, begin the module name with Login. For example, Login: Acme Corp.
Click Create.
Previewing a Login Module
It's important to note that all modules you plan to have navigate to using your login module must exist in the same application. Otherwise, you'll receive a 403 error. The following image shows you how to preview a module at the Application level:
To successfully preview your login module, you must preview it at the Application level. Otherwise, you must manipulate the browser URL to consider any redirects. The URL looks like the following: https://www.{your-environment}.io/app/{appPath}#/display/{moduleId}/{submissionId}/{moduleId}.
Disconnecting a Login Module
If you decide you don’t want a login module in your application anymore, you can remove it.
To remove a login module from an application:
Navigate to your workspace and locate your application.
Click the ellipsis (···) menu.
Select
.png) Settings.
Settings.From the Login Module drop-down, click the X next to the login module’s name.
Click Save.

.jpg)


.jpg)
