Inclusive Gateway Join Node
Overview
The Inclusive Gateway Join node is one half of the Inclusive Gateway set of nodes, along with the Inclusive Gateway Split node.
When you use an Inclusive Gateway Split node in your workflow, you must also use an Inclusive Gateway Join node. The Inclusive Gateway Join node has two jobs:
-
Pausing the workflow until all parallel tasks that split from the Inclusive Gateway Split node are complete.
-
Merging together each state of the submission before the submission can progress through the rest of the workflow.
To learn more about the Inclusive Gateway Split node, search Inclusive Gateway Split Node in our In-Product Help.
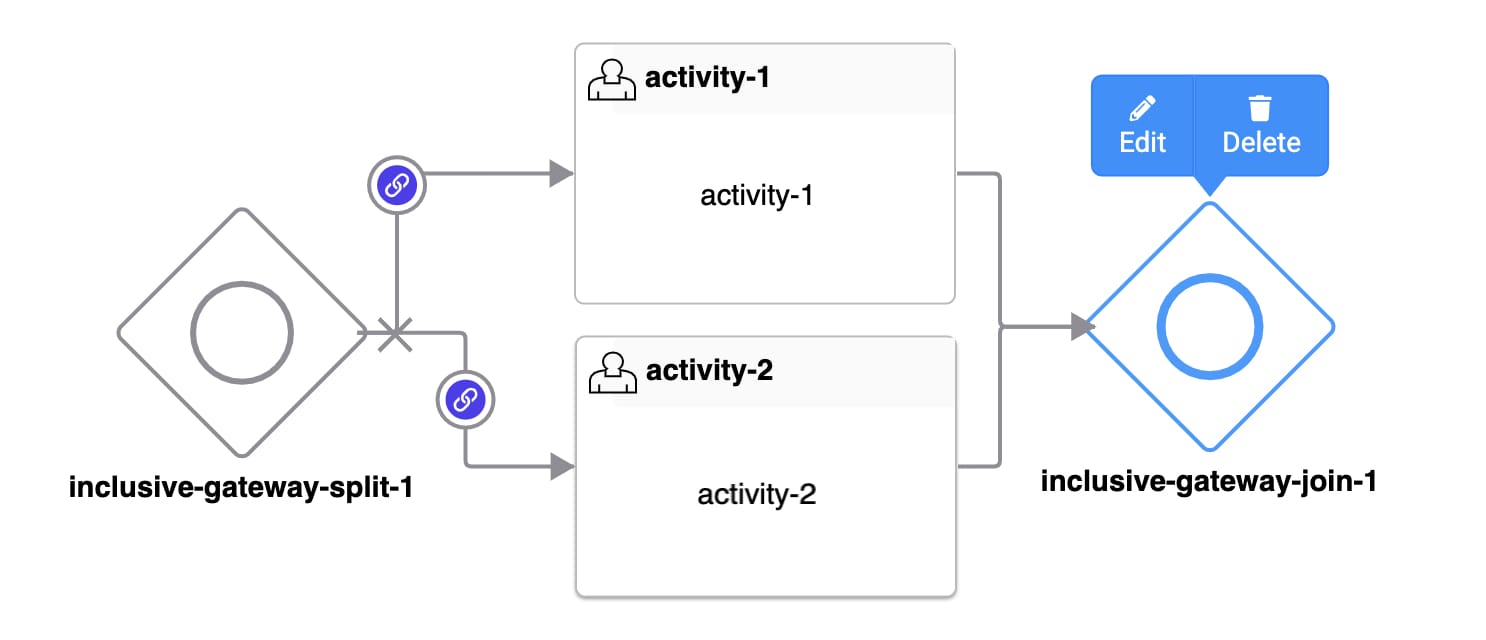
It's important that all paths that split from a given Inclusive Gateway Split node reconnect at the same Inclusive Gateway Join node. For example, you can't connect a Handoff or End node to a task or path that splits from an Inclusive Gateway Split node. You also can't connect paths that split from the same Inclusive Gateway Split node to several Inclusive Gateway Join nodes. These rules ensure your workflow can't reach an endpoint while multiple states of the same submission exist.
Inclusive Gateway Join Node Settings
After adding an Inclusive Gateway Join node to your workflow, select it to open a Settings Menu. This menu displays as a blue menu bar, either above or below the node itself. The menu has the following options:
| Setting | Description |
|---|---|
|
Edit Button |
Opens the Edit Inclusive Gateway Join window. From there, you can configure settings relating to the Inclusive Gateway Join node. |
|
Delete Button |
Removes the node from the workflow. |
Edit Inclusive Gateway Join Window Description
Clicking the Edit button displays the Edit Inclusive Gateway Join window.

The following settings are available in the Edit Inclusive Gateway Join window:
| Setting | Description |
|---|---|
|
Label |
The name applied to the node. By default, the Label displays as inclusive-gateway-join-1. This label is optional and displays below the node once set. Labels should be user-friendly and well associated with the role of the node. |
|
Close Button |
Closes the Edit Inclusive Gateway Join window. |
Inclusive Gateway Join Links
Your Inclusive Gateway Split node splits the workflow submission's path, depending on simple logic. When you connect an Inclusive Gateway Join node's output port to another node, the connector becomes an Inclusive Gateway Join link. Inclusive Gateway Split links look like a directional arrow.
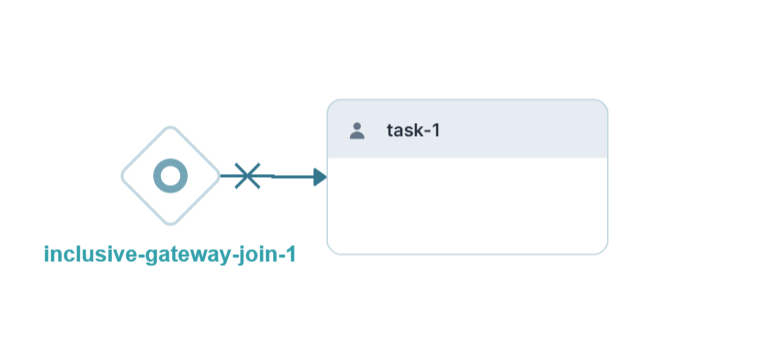
You'll notice that the Inclusive Gateway Join link has an X icon along the link. This icon represents the navigation restrictions related to a parallel process. When your end-user proceeds down an Inclusive Gateway Split link, they're entering a parallel process. End-users End-users, also known as Express Users, are the individuals accessing an application through Express View. In most cases, end-users are the customers using the product. can't exit that parallel process or enter a new parallel process using the Previous button or Direct Navigation. This helps maintain the integrity of the workflow submission while multiple states exist.
These navigation restrictions also affect Inclusive Gateway Join links. The workflow only moves along an Inclusive Gateway Join link after all parallel processes are complete. So, end-user End-users, also known as Express Users, are the individuals accessing an application through Express View. In most cases, end-users are the customers using the product.s can't navigate back into tasks that are part of a now-complete parallel process.
Inclusive Gateway Join Link Settings Menu
Selecting an Inclusive Gateway Join link opens a Settings Menu. This menu displays as a blue menu bar, above the link indicator. The menu has the following options:
| Setting | Description |
|---|---|
|
Edit Button |
Opens the Edit Inclusive Gateway Split Join window. From there, you can configure settings relating to the Inclusive Gateway Split link. |
|
Delete Button |
Removes the link from the workflow. |
Edit Inclusive Gateway Join Link Window Description
Clicking the Edit button displays the Edit Inclusive Gateway Join Link window.
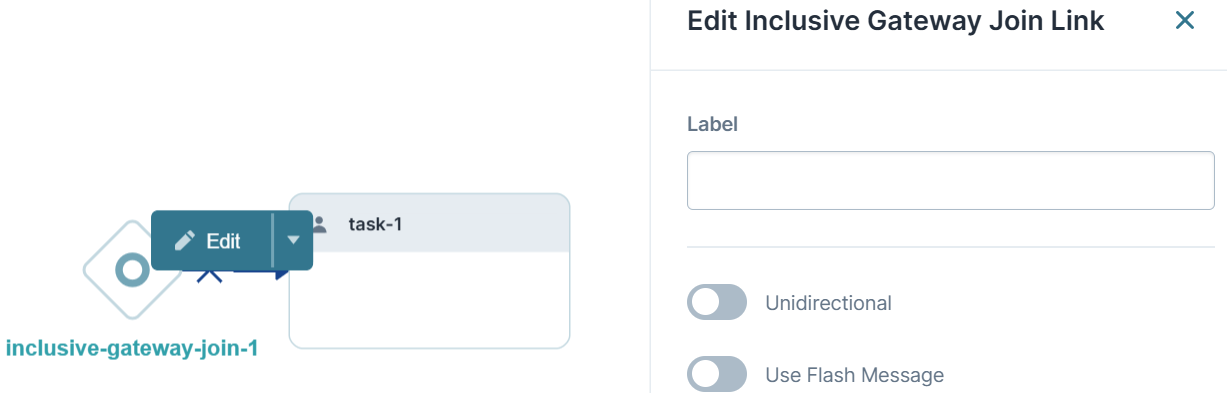
The following settings are available in the Edit Inclusive Gateway Join Link window:
| Setting | Description |
|---|---|
|
Label |
The name applied to the link. This label is optional and displays below the link once set. Labels should be user-friendly and well-associated with the role of the node. |
|
Unidirectional |
Sets the link one-way. End-users cannot navigate back through a unidirectional link. The link has a single arrowhead when the Unidirectional toggle is (OFF). The link has a double arrowhead when the Unidirectional toggle is (ON). By default, the Unidirectional toggle is (OFF). |
|
Use Flash Message |
When set to ON, you can create a flash message for this link. Flash Messages are alerts that display at the top of the workflow in Express View. They show when an end-user navigates past a link that has a Flash Message enabled. By default, the Use Flash Message setting is (OFF). |
|
Flash Message |
This setting displays when the Use Flash Message setting is (ON). Enter a custom flash message for the alert. |
|
Make Flash Message Dismissible |
This setting displays when the Use Flash Message setting is (ON). When set to (ON), your end-user can manually dismiss the flash message. To dismiss the flash message, end-users can click the X button on the flash message. When set to (OFF), the Flash Message disappears on its own. This setting is not currently working as intended. Flash Messages remain on-screen until manually dismissed. |
|
Message Status |
This setting displays when the Use Flash Message setting is (ON). Select a message status for your flash message. The message status affects the styling of your flash message. The drop-down options are:
|
Adding an Inclusive Gateway Join Node
You'll always use an Inclusive Gateway Join node alongside an Inclusive Gateway Split node. To learn how to configure a workflow that uses both nodes, see the Inclusive Gateway Split Node article in our In-Product Help.
Changing an Inclusive Gateway Join Node's Settings
Let's look at how to make changes to a saved Inclusive Gateway Join node.
| 1. | Select your Inclusive Gateway Join node. |
| 2. | Click the Edit button. |
| 3. | Using the Edit Inclusive Gateway Join window, make changes to the node's settings as needed. |
| 4. | Click Save Workflow. |
Deleting an Inclusive Gateway Join Node
It's simple to delete an Inclusive Gateway Join node from your workflow. Remember, all links that split from an Inclusive Gateway Split node must merge into an Inclusive Gateway Join node.
| 1. | Select your Inclusive Gateway Join node. |
| 2. | Click the Delete button. |
| 3. | Click Save Workflow. |
