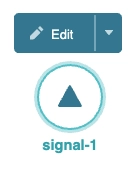
A Signal node alerts the current end-user that a swimlane change is occurring, and they cannot take any more actions. After a Signal node triggers, another role or user must take over the next steps in their workflow swimlane.
You can add any number of Signal nodes to a workflow, and each includes a single input port for connection to one or more other nodes. The Signal node also offers an output port for connection to the next node.
You'll find the Signal node in the list of nodes to the left of the Workflow Builder.
Settings Menu Description
Let's explore the node's Settings Menu. This menu displays as a blue menu bar, either above or below the node, when you select the node itself. This node has these Settings Menu options:

Setting | Description |
|---|---|
Edit | Takes you to the Edit Signal Event drawer, where you can configure settings relating to the Signal node. |
Delete | This button removes the node from the workflow. |
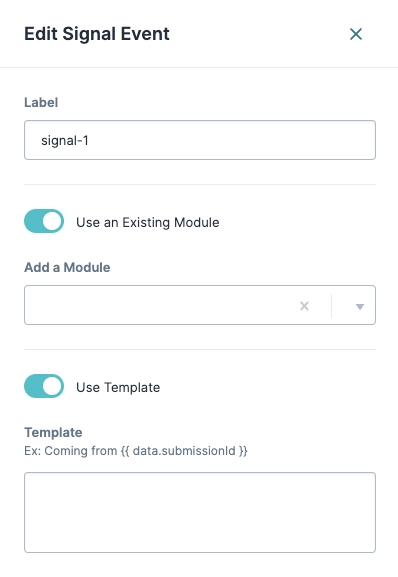
Edit Signal Event Drawer Description
The following settings are available in the Edit Signal Event drawer:

Setting | Description | |
|---|---|---|
Label | The name applied to the node. By default, the Label displays as Labels should be user-friendly and well-associated with the role of the node. | |
Use an Existing Module | Lets you select a hand-off module when your end-user reaches the Signal node. By default, the Use an Existing Module toggle is set to | |
↳ | Add a Module | When the Use an Existing Module toggle is set to |
Use Template | Lets you add a template message that displays when your end-user reaches the Signal node. By default, the Use Template toggle is set to | |
↳ | Template | When the Use Template toggle is set to The Template field accommodates HTML or Nunjucks. |
X (Close) | Closes the Edit Signal drawer, returning your focus to the pool. | |
Adding a Signal Node
Open your workflow and configure any necessary nodes. Then, add a Signal node between two nodes in your process.
Drag and drop a Signal node into the Authenticated swimlane.
Click Edit.
In the Label field, enter a name for your node.
If using a custom module as part of the signaling process, set Use an Existing Module to
 (ON).
(ON).From the Add a Module drop-down, select a module.
If you do not see your module, ensure it's shared to your workspace. You can also add it directly into the application.
If using the template to set a custom hand-off message, set Use Template to
 (ON).
(ON).In the Template field, enter the custom message using HTML or Nunjucks.
Click X (Close).
Connect the output port (right) of your previous node to the input port (left) of the Signal node.
Connect the output port (right) of your Signal node to the input port (left) of the next node in your workflow process.
Click X (Close).
Click Save....
Click Save.