The Message node sends a custom email or text message (SMS) as part of your workflow. This feature is ideal for sending confirmations or notifications that can be styled using Nunjucks. These messages are sent using traditional email or Twilio. Twilio lets you configure your workflow to automatically send text messages. When your workflow completes, your recipient receives an email or SMS based on your selection.
Here are some real-world examples of the Message node automation:
Confirm receipt of a submission.
Submission approval or denial.
Notification of missing information.
You can also use the Message node to reference any persistent data from an earlier point in the workflow. That way, you can use it as an alternative to a message-sending service like SendGrid.
Here are two ways to configure this scenario:
Creating a workflow submission using a Plug-In component. Then, you can reference that submission using a Message node.
Retrieving existing submission data from a schema module. Then, you can use that data to create a workflow submission and reference it with a Message node.
For this method to work, data must be persistent from one screen to the next in your workflow.
The Message node is never the first node in your workflow. It has an input port and an output port used to connect to other nodes. But you can have several Message nodes in a single workflow.
You'll find the Message node in the list of nodes to the left of the Workflow Builder.
Similar Workflow Nodes
There are various ways to send messages with a workflow. Let's take a look at how these different messaging nodes differ.
Message node: Sends an email or text message to a recipient.
Error node: Reroutes a task in the Automated swimlane when an error occurs.
Signal node: Displays a message to the end-user at a specified point in the process.
Settings Menu Description
Let's explore the node's Settings Menu. This menu displays as a blue menu bar, either above or below the node, when you select the node itself. This node has these Settings Menu options:
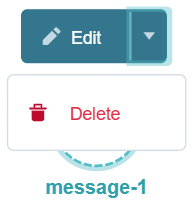
Setting | Description |
|---|---|
Edit | Takes you to the Edit Message Event window, where you can configure related settings. |
Delete | Removes the node from the workflow. |
Edit Message Event Window Description
Click the Edit button to display the Edit Message Event window.
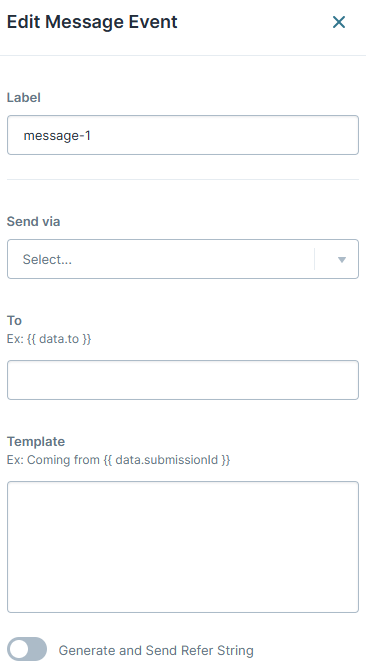
Setting | Description |
|---|---|
Label | The name of your node. By default, the Label displays as Define your labels by associating them with the role of the node. |
Send via | Displays the following method to send outgoing messages:
|
To | What to enter in the To field depends on the Send via selection you made.
|
Cc | Enter the email address of your secondary recipient or the address to copy on your email. |
Bcc | Enter the email address to blind copy on your email. |
From Name | Enter your sender’s name here. This is a required field. |
Reply To | Enter your sender’s email address. If you want your end-user to be able to reply to your message, enter a valid email address. If not, consider a no-reply@domain.com address. You can customize the default From email as part of your environment’s setup. |
Subject | Enter a subject line for your message. This is a required field. |
Template | Lets you set a template for the outgoing message. This template uses plain text, HTML, or Nunjucks templating language. |
Generate and Send Refer String | When enabled, you see the Refer String TTL (Time to Live) and Refer String Redirect Target settings. If your end-user is communicating over SMS or email, there’s a chance they’re not logged into Unqork. When you enable the setting, you can send a link to your end-user. Using this link, your end-user can access Unqork. By default, the Generate and Send Refer String toggle is set to |
You can only add up to 50 email addresses per workflow message node. This includes the combined total of addresses used in the To, Cc, and Bcc fields. You can organize the recipients in any way as long as it’s not more than 50 total.
Adding a Message Node
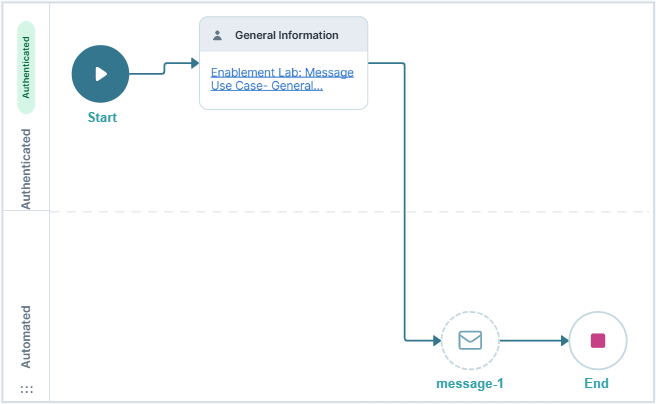
Create a simple workflow with a Start, Task, Message, and End nodes to send an email. The Task node calls a General Information module, which lets your end-user submit their data. Then, the Message node sends a confirmation receipt email.
These instructions assume you set up your module and have a new workflow ready.
Configure the Start Node
Drag and drop a Start node to the Authenticated swimlane.
Click Edit.
In the Label field, enter
Start.Click X (Close).
Configure the Task Node
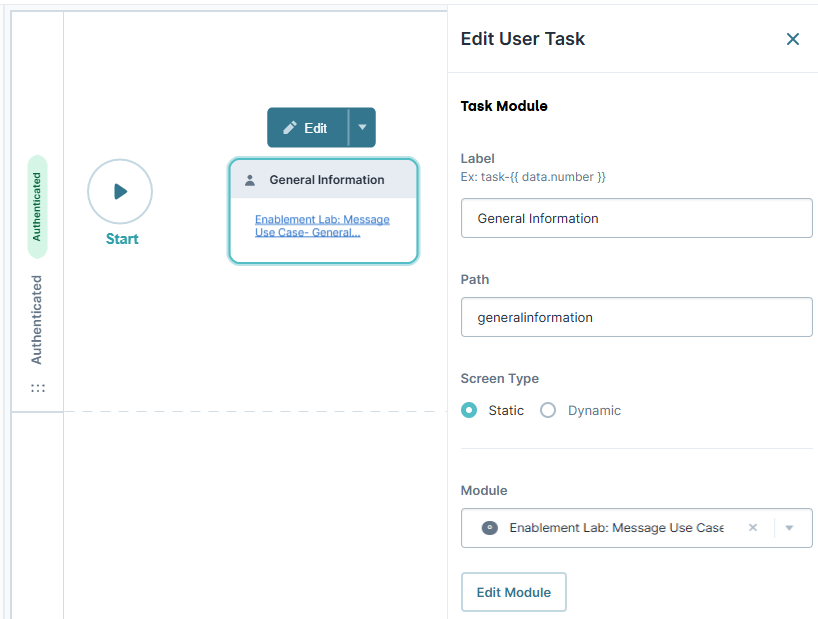
Add a Task node to connect to your General Information module. Using this module, you can collect basic information from your end-user.
Drag and drop a Task node to the Authenticated swimlane.
Click Edit.
In the Label field, enter
General Information.From the Module drop-down, select the Enablement Lab: Message Use Case- General Information module.
Click X (Close).
Connect the output port (right) of the Start node to the input port (left) of the Task node.
Configure the Message Node
Next, add a Message node to send a confirmation email to your end-user acknowledging receipt of their basic information.
Drag and drop a Message node to the Authenticated swimlane.
Position the node at the point where you need the message. In this use case, that's after the submission of an end-user's basic information. So, position your Message Node after the Task Node.
Click Edit.
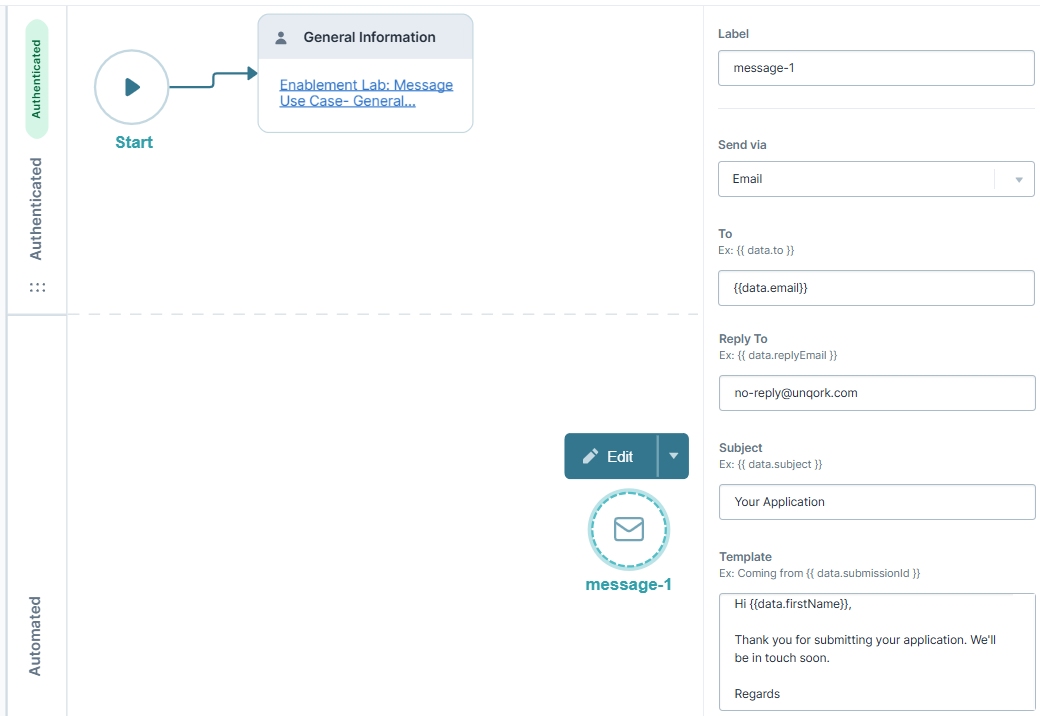
From the Send via drop-down, select Email.
In the To field, enter
{{data.email}}.The
{{data.email}}syntax references the value your end-user enters in the Email field of the General Information module.In the From Name field, enter
Unqork.In the Reply To field, enter
no-reply@unqork.com.In the Subject field, enter
Your Application.In the Template field, enter the following:
Hi {{data.firstName}}, Thank you for submitting your application. We'll be in touch soon. Regards{{data.firstName}}references the value your end-user enters in the First Name field of the General Information module.Click X (Close).
Connect the output port (right) of the
General InformationTask node to the input port (left) of themessage-1Message node.
Configure the End Node
Drag and drop an End node to the Authenticated swimlane.
Click Edit.
In the Label field, enter
End.Click X (Close).
Connect the output port (right) of the
message-1Message node to the input port (left) of theEndEnd node.Click Save...
Click Save.
Here's how your completed workflow looks:
Preview your workflow and complete the required fields in the General Information module. Send the test email to yourself. After clicking Next, you see the Thank you! This submission is complete. message. Check your email account for the email.
