The Timed Event node triggers specific actions when a task or sub-process doesn't complete in a specified time. Once the workflow reaches a Task or Sub-Process node, the Timed Event node begins tracking the time spent on that task.
Examples of when you would use the Timed Event node include:
A Customer Support Specialist (CSS) needs to complete a response to a ticket within four hours after it enters their queue. After two hours, they receive an email reminding them to complete their work in two hours. After three hours, the customer support specialist and their manager receive an email. When the four hours expire, the workflow reassigns the task for the manager to complete.
A user begins signing up for coverage but leaves the site before completing it. After three days, they receive an email from marketing to complete the form.
It's important to note that:
You cannot add a Timed Event node to an Automated swimlane. But it can trigger a node that exists in the Automated swimlane.
You can add Timed Event nodes onto a Sub-Process node. The countdown timer starts if the optional condition is true and when the workflow navigates to any node in the Sub-Process node.
Settings Menu Description
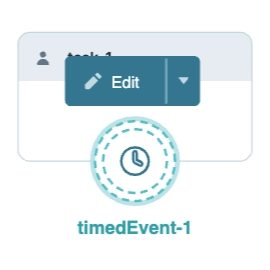
Let's explore the node's Settings Menu. This menu displays as a blue menu bar, either above or below the node, when you select the node itself. This node has these Settings Menu options:

Setting | Description |
|---|---|
Edit | Takes you to the Edit Timed Event drawer, where you can configure related settings. |
Delete | Removes the node from the workflow. |
Edit Timed Event Drawer Description
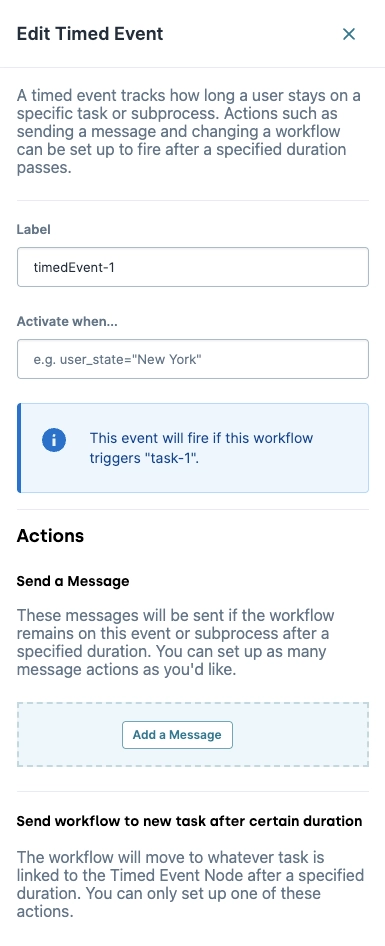
The following settings are available in the Edit Timed Event drawer:

Setting | Description |
|---|---|
Label | The name of the node. By default, the Label displays as Define your labels by associating them with the role of the node. |
Activate When... | By default, a Timed Event node activates when the workflow reaches its associated step. You may also define a Boolean validation of the submission data to trigger the Timed Event node. For example, if |
Actions | A Timed Event node can take two different types of actions. These include sending an email message and sending the workflow to a new task. |
Send a Message | You can define an unlimited number of email messages that can be sent if the workflow doesn’t complete the task or sub-process after a specified amount of time. Each message can have a delivery method, receiver, subject, content, and duration.
|
Send Workflow to New Task After Certain Duration | By linking a task or sub-process to the Timed Event node, your workflow moves on to that task after a specified time if the associated task or sub-process isn't completed. Once you link a task to the Timed Event Node, you can edit the link to define a label and time before the workflow moves on to that specified task. While you can define unlimited email messages sent using a Timed Event node, you can only assign a single workflow change. That way, the Timed Event is no longer valid once the workflow moves the new task. |
Close (X) | Closes the Edit Timed Event drawer, returning your focus to the pool. |
Add a Message Modal
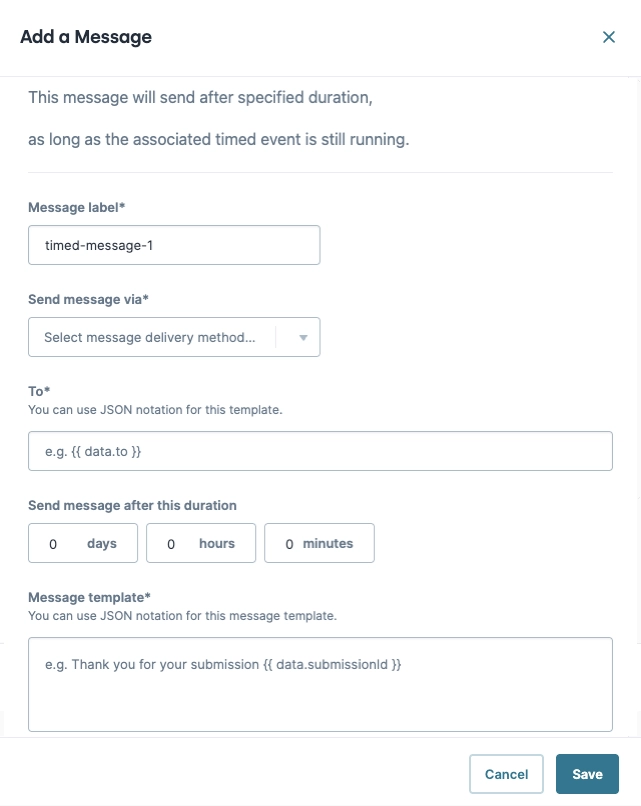
Clicking on the Add a Message button displays the Add a Message modal. These settings are similar to the Message Node in function, and sending messages requires a service integration like Twilio.

Setting | Description |
|---|---|
Message Label | Enter a Subject header for this message. |
Send Message Via | Select a service for sending this message. Additional fields might display depending on the type of service selected. For example, selecting the Email service displays the Subject field.
|
To | Enter a value. Depending on the service, this value might be an email address, a phone number, or Creators can use a dynamic value from their application. For example, |
Send Message After This Duration | Specify the days, hours, and minutes before the message is sent. By default, messages are sent immediately after the node triggers. |
Message Template | Enter a message. Messages support dynamic values, for example, |
Demonstration of a Timed Event Node
In this example, set up a workflow for a CSS support ticket intake process.
It consists of three swimlanes:
Authenticated: Where the end-user can submit a support ticket.
Administrator: Where the CSS gets assigned the ticket to complete the ticket.
Automated: Where the workflow assigns the ticket to the CSS. And where the workflow validates if the ticket was completed on time.
Because critical (P1 - High) tickets should be resolved on time, a Timed Event node will send various email messages based on the following configuration:
The CSS receives a reminder email if the critical ticket isn't resolved in two hours.
If the critical ticket isn't resolved in three hours, the CSS receives another reminder email, and their manager receives an email that the ticket isn't resolved.
If the critical ticket isn't resolved in four hours, it is reassigned to the manager.
If the CSS tries to complete the ticket after four hours, they receive an error message. This error message confirms that the task is no longer available because it has been reassigned to the manager.
This demonstration is for illustrative purposes only and cannot be replicated due to Training environment security.
Configure the Authenticated Task Node
First, add a Task node to the Authenticated swimlane. This first Task node lets your end-user submit a support ticket.
Drag and drop a Task node into the Authenticated swimlane.
Click Edit.
In the Label field, enter
Ticket Details.From the Module drop-down, enter or select
SLA Reporting: Ticket Details.Click X (Close).
Connect the output port (right) of the Start node to the input port (left) of the
Ticket DetailsTask node.You'll connect the remaining Task node at a later time.
Configure the Administrator Task Nodes
Add two Task nodes to the Administrator swimlane. Both Task nodes use the same SLA Reporting: Ticket Summary module. The first Task node lets the CSS select the ticket (In Progress). You'll associate the Timed Event node with this Task node later. The second Task node provides a ticket summary after completing the ticket (Complete).
Drag and drop two Task nodes into the Administrator swimlane.
Click Edit and configure each Task node as follows:
#
Label
Path
Module
1
Ticket - In Progress
ticketinprogress
SLA Reporting: Ticket Summary
2
Ticket - Complete
ticketcomplete
SLA Reporting: Ticket Summary
After editing each Task node, click X (Close).
You'll connect these Task nodes at a later time.
Configure the Automated Task Nodes
Next, add three Task nodes to the Automated swimlane. The first Task node contains an API module that assigns the submitted ticket to the CSS. If the CSS completes the ticket in four hours, they navigate to the second Task node, which confirms the ticket is complete. If the CSS doesn't complete the ticket in four hours, they navigate to the third Task node. At this point, they can't complete the task because it is reassigned to the manager. You'll connect the Timed Event node to this third Task node later.
Drag and drop a Task node into the Automated swimlane.
Click Edit and configure each Task node as follows:
Automated Tasks display a different drawer when compared to User Tasks. For this example, the Select Task Type is set to Script.
Label
Path
Module
Assignment
assignment
SLA Reporting: Assignment
Met SLA
metsla
SLA Reporting: Met SLA
Missed SLA
missedsla
SLA Reporting: Missed SLA
After editing each Task node, click X (Close).
Connect the output port (right) of the
Ticket DetailsTask node to the input port (left) of theAssignmentTask node.Connect the output port (right) of the
AssignmentTask node to the input port (left) of theTicket- In ProgressTask node.Connect the output port (right) of the
Ticket - In ProgressTask node to the input port (left) of theMet SLATask node.Connect the output port (right) of the
Met SLATask node to the input port (left) of theTicket - CompleteTask node.
Configure the Timed Event Node
Add a Timed Event node onto the Ticket - In Progress Task node to configure the four-hour completion window. This configuration only applies to critical tickets submitted by your end-user. You'll then connect its output to the Missed SLA Task node to reassign the ticket if it's not completed in four hours. You'll also set up three emails to be sent by the Timed Event node at specific times.
For the email messages, use your email address for each to test the Timed Event.
Drag and drop a Timed Event node onto the
Ticket - In ProgressTask node.Click Edit.
In the Label field, enter
Timed Event - Critical.Click Add a Message. The Add a Message modal displays.
In the Message Label, enter
Reminder: Complete Support Ticket.From the Send Message Via drop-down, select Email.
In the Subject field, enter
Reminder: Complete Support Ticket.In the To field, enter your email address. This email address represents the email address of the CSS.
In the Send Message After This Duration section, set the Hours field to
2.In the Message Template field, enter
Please complete the support ticket in two hours..Click Save.
Repeat steps four through ten two more times using the following information:
#
Message Label
Send Message Via
Subject
To
Send Message After This Duration
Message Template
1
Reminder: Complete Support Ticket
Email
Reminder: Complete Support Ticket
Your email address (CSS)
3 hours
Please complete the support ticket in one hour.
2
Notice: Incomplete Support Ticket
Email
Notice: Incomplete Support Ticket
Your email address (Manager)
4 hours
Your CSS has yet to complete the support ticket. They have one hour to complete the ticket.
Click Save after completing each message.
Configure the Timed Event Link
Set up the Timed Event link between the Timed Event - Critical Timed Event node and the Missed SLA Task node.
Connect the output port (bottom) of the
Timed Event - CriticalTimed Event node to the input port (left) of theMissed SLATask node.Click Edit.
In the Label field, enter
4 Hours.In the Duration of Timer section, set the Hours field to
4.The duration must be greater than or equal to the durations set for the node's messages. Once the workflow moves onto a new task, the Timed Event is no longer valid and cannot send messages.
Click X (Close).
Configure the End Node
Finally, configure an End node to finish the workflow after the CSS completes the ticket.
Drag and drop an End node into the Administrator swimlane.
Click Edit.
In the Label field, enter
End.Connect the output port (right) of the
Ticket - CompleteTask node to the input port (left) of theEndEnd node.Click X (Close).
Click Save....
Click Save.
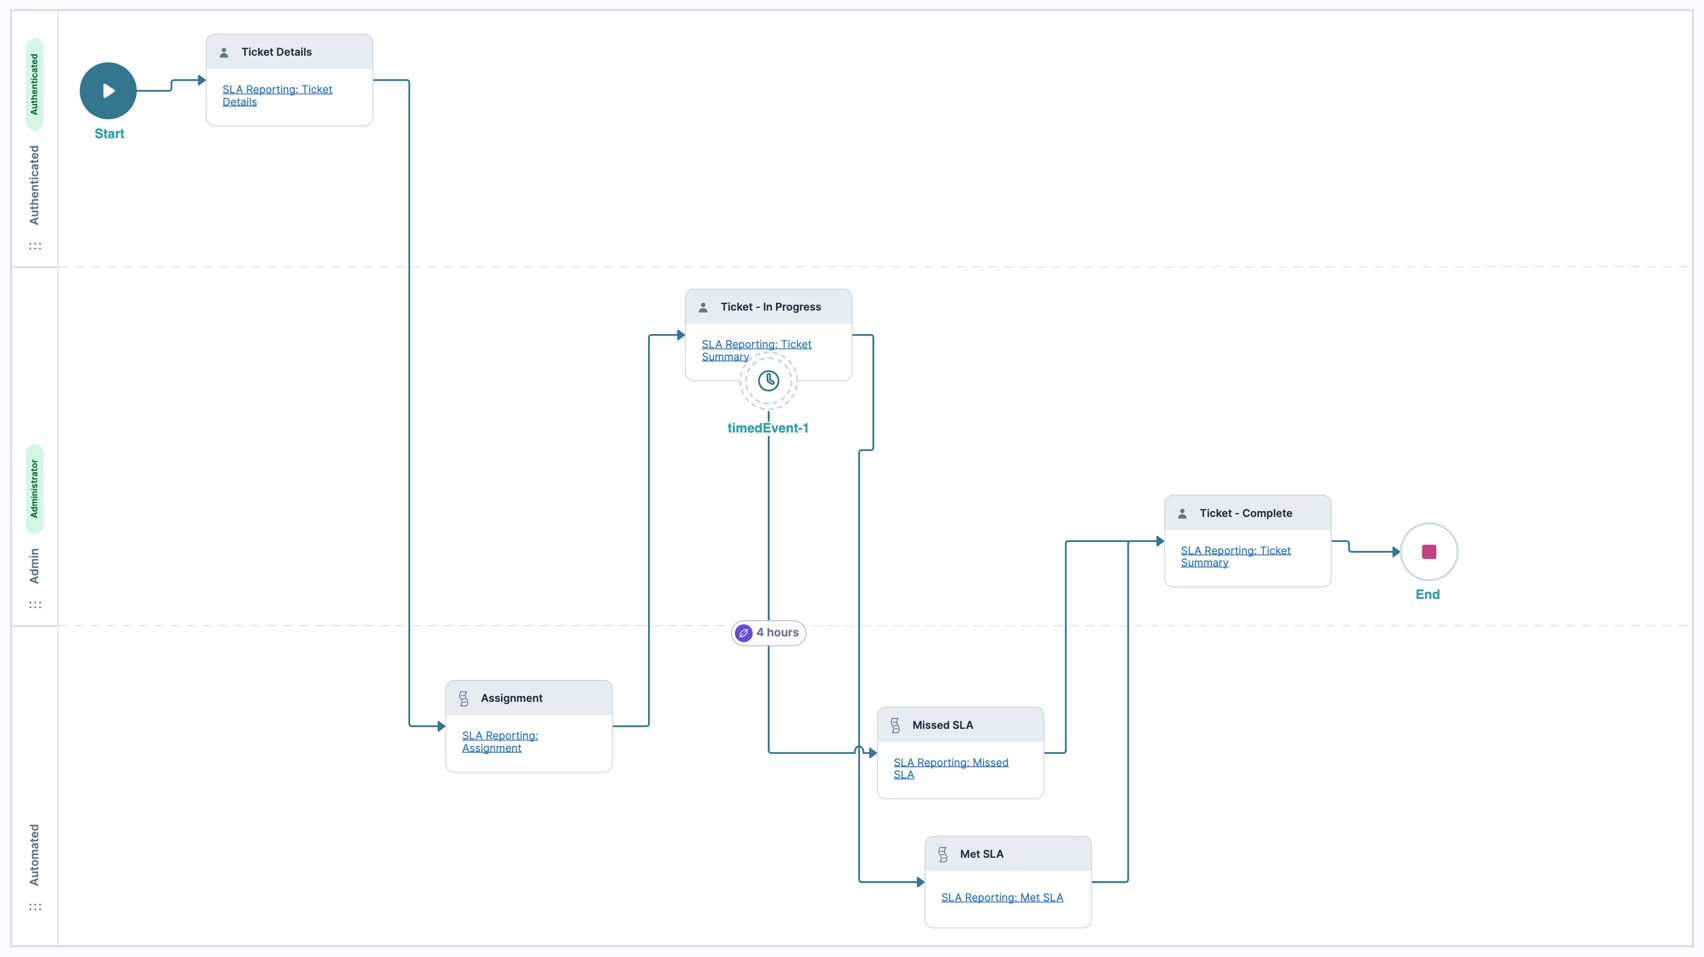
Your completed workflow looks like the following:
Testing Your Timed Event
Test the Timed Event in Express View. Preview your workflow.
In the top-right of the page:
Click Show.
From the Preview As drop-down, select Authenticated.
In the Summary* and Description* fields, enter some test information.
From the Team* drop-down, select an option.
From the Severity* drop-down, select P1 - High. Remember, the Timed Event only works for the P1 - High priority tickets.
Click Next.
After the new page loads, from the Preview As drop-down, select Administrator. Do not click Next. In two hours, you'll receive the first email. In three hours, you'll receive the other two emails. After four hours, click Next. An error message displays because the task is no longer available and has been reassigned to the manager.
For a faster test, change the message and node durations to one minute.
