Workflow Settings let you manage your workflow application, and include the following:
Workflow Info
Express-User Navigation
Canvas Settings
Custom Messaging
Save and Exit
Other
It's important to note that these settings are workflow-specific. To enable settings to other workflows, open each workflow in the Workflow Builder and configure the settings individually.
Accessing Workflow Settings
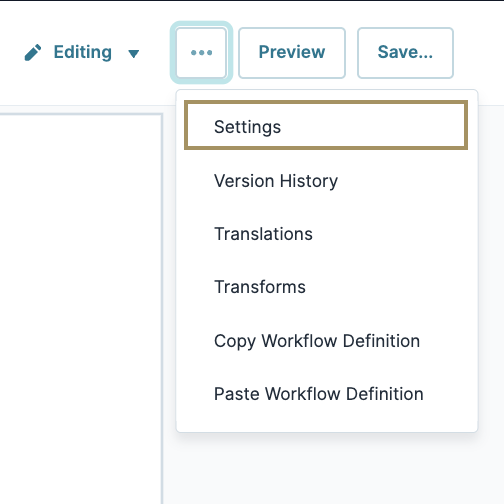
To access Workflow Builder Settings:
After accessing the settings modal, click on the following tabs to see more information on each setting section:
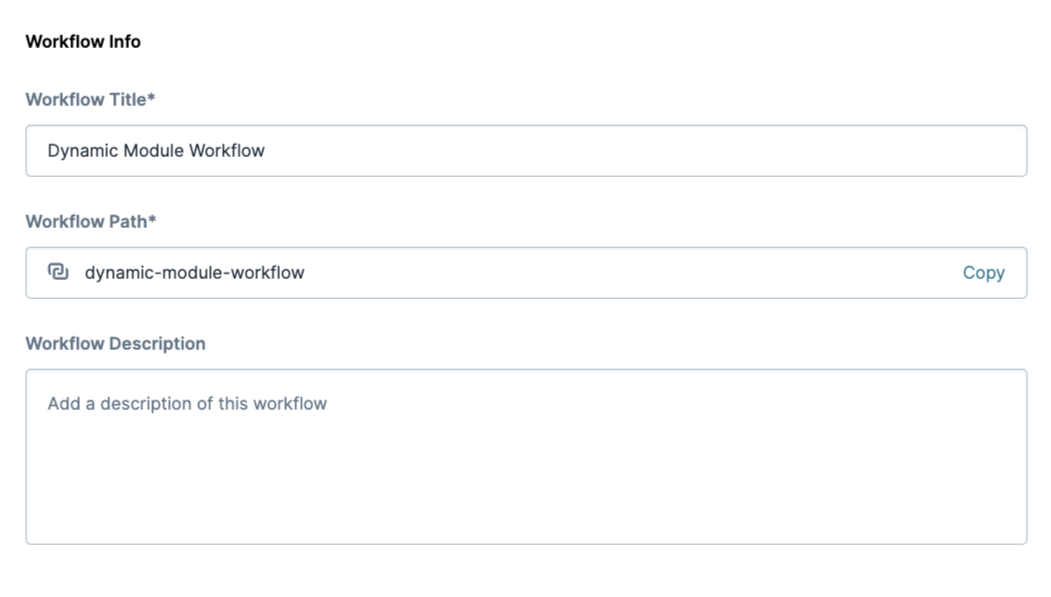
This section explores the Workflow Info section of the Workflow Settings modal. After making adjustments to the modal, click Save.
Setting | Description |
|---|---|
Workflow Title* | Use this field to change your Workflow's title. It's important to note that the Workflow Path doesn't adjust automatically when you change the Workflow Title. When changing the Workflow Title, ensure it's unique to avoid issues with your other environment Workflows. A value in the Workflow Title field is required to save changes. |
Workflow Path* | Use this field to change your Workflow's path. Adjust the Workflow Path as you see fit, but ensure it's unique to avoid issues with your other environment Workflows. To the right of the field, there's an option to copy your Workflow Path. Click Copy to copy the workflow path value to your clipboard. A value in the Workflow Path is required to save changes. |
Workflow Description | Add a workflow description in this field to to make it easier to onboard team members or hand off projects. |
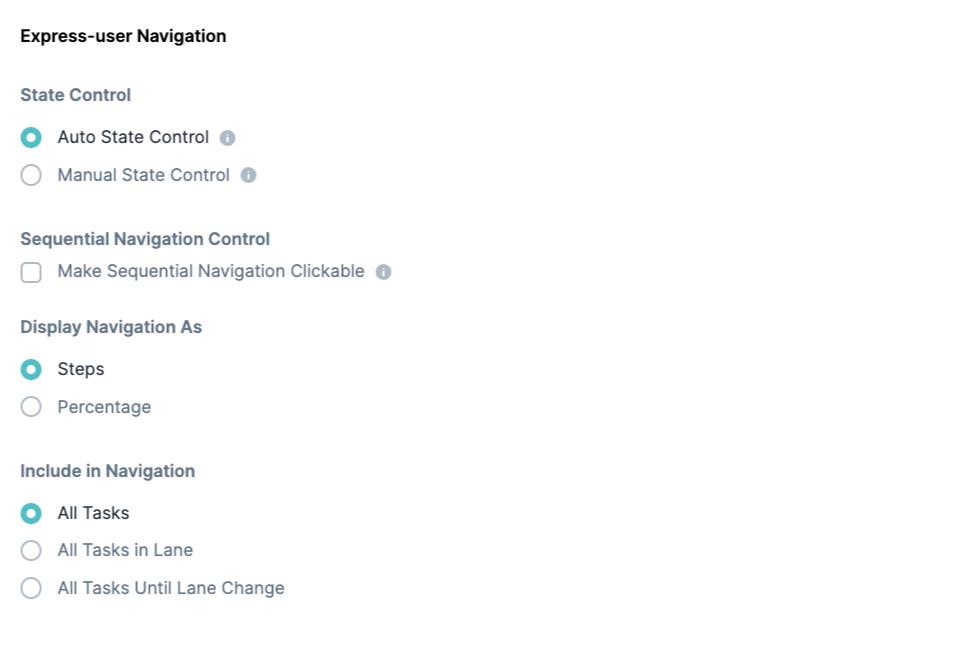
This section explores the Express-User Navigation section of the Workflow Settings modal. After making adjustments to the modal, click Save.
Setting | Description |
|---|---|
State Control | State Control is how your end-user interacts with your workflow. It gives you the option to restrict or give freedom to end-user navigation. Regardless of your option, Next and Previous buttons display in Express View. End-Users can use these buttons to move to the next task, or a previous one. The State Control setting contains the following options:
|
Sequential Navigation Control | This setting controls how the end-user navigates the tasks of your workflow. An end-user can navigate freely without using the Next and Previous buttons, or any other navigation buttons.
Sequential Navigation Control contains the following setting:
When unselected, your end-user must carry out tasks sequentially. An end-user must use the Next and Previous buttons to navigate your workflow.
By default, this checkbox is clear. |
Display Navigation As | This setting determines the completion path your end-user must follow in Express View. You can choose to display progress as steps or use a progress bar.
|
Include in Navigation | The following options determine how tasks display to the end-user in Express View. The options include:
|
This section explores the Canvas Settings section of the Workflow Settings modal. After making adjustments to the modal, click Save.
Setting | Description |
|---|---|
Enable Manual Layout | By default, the Workflow Builder organizes all configured nodes on the Workflow Builder canvas. When this toggle is set to
By default, this toggle is set to |
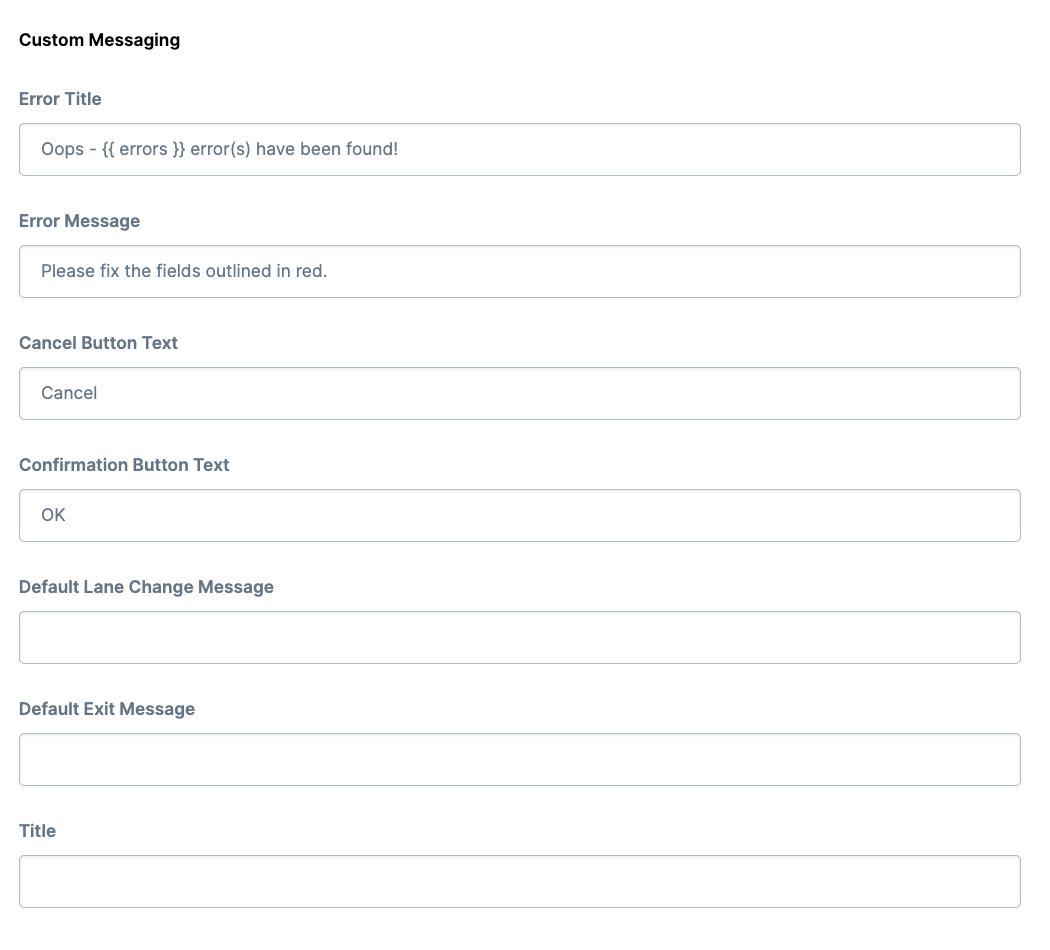
This section explores the Custom Messaging section of the Workflow Settings modal. After making adjustments to the modal, click Save.
Setting | Description |
|---|---|
Error Title | When your end-user saves an invalid entry, an error message displays. Use this field to create a title for that error message. By default, the Error Title displays as: Oops - {{ errors }} error(s) have been found! In this case, {{ errors }} represents the count of errors returned. |
Error Message | When your end-user saves an invalid entry, they'll see an error message. Use this field to create a specific error message. By default, the message reads as: Please fix the fields outlined in red. |
Cancel Button Text | This field lets you set the button label text for the cancel button. This button displays in a pop-up when your end-user receives error validation. Or, it displays in a pop-up after clicking the Save and Exit button. On button-click, your end-user's updates clear. By default, this button label text displays as Cancel. |
Confirmation Button Text | This field lets you set the button label for the confirmation button. This button displays in a pop-up when your end-user receives error validation. Or, it displays in a pop-up after clicking the Save and Exit button. By default, this button label text displays as OK. |
Default Lane Change Message | Use this field to create a message that displays in a pop-up modal when an end-user navigates to a task where they don't have access. Your end-user sees this pop-up when they click the Next button. |
Default Exit Message | Use this field to create a message that displays after your end-user submits their final task. |
Title | Use this field to create a title for your workflow. End-users see this title when viewing your workflow in Express View. |
This section explores the Save and Exit section of the Workflow Settings modal. After making adjustments to the modal, click Save.

Setting | Description |
|---|---|
Enable Save and Exit Button | By default, this toggle is set to |
Setting | Description |
|---|---|
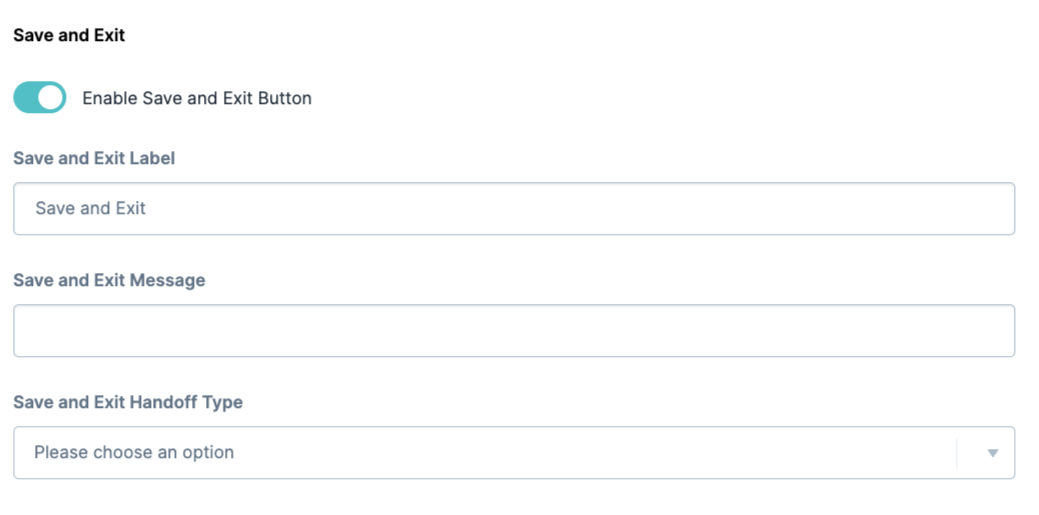
Enable Save and Exit Button | This setting lets you add a Save and Exit button to your workflow. When this toggle is set to |
Save and Exit Label | Use this field to create a label for your Save and Exit button. This button displays at the bottom of your page in Express View. By default, the button label text displays as Save and Exit. |
Save and Exit Message | Use this field to create a message that displays in a pop-up modal when your end-user clicks the Save and Exit button. Interactive Cancel and Confirmation buttons also display in the modal. If left empty, no pop-up modal displays on button-click. |
Save and Exit Handoff Type | After enabling the Enable Save and Exit toggle, you have three drop-down options to redirect your end-user:
|
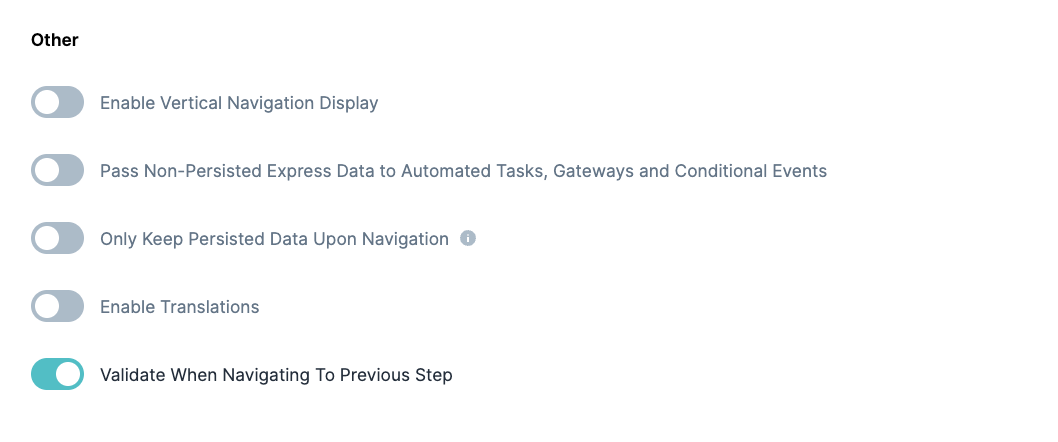
This section explores the Other section of the Workflow Settings modal. After making adjustments to the modal, click Save.
Setting | Description |
|---|---|
Enable Vertical Navigation Display | This setting lets you display navigation in vertical order. When set to
By default, this setting is set to |
Pass Non-Persisted Express Data to Automated Tasks, Gateways and Conditional Events | Non-persistent data refers to data that doesn't save to the Unqork database. Most components have Data Storage option that lets your automated tasks access and use unsaved data. When set to
By default, this setting is set to |
Only Keep Persisted Data Upon Navigation | This setting controls what data stores on the end-user's side when navigating between workflow pages. By default, data from all fields store on the end-user's side when navigating between pages. But, you might want the end-user's submission to keep persistent data on navigation. Or, in other words, to only hold on to data that ultimately stores in the database on submission. In this case, set the Only Keep Persisted Data Upon Navigation toggle to By default, this setting is set to |
Enable Translations | This setting lets you use language translations in your workflow. When set to (ON), translatable elements in your workflow auto-populate in the Workflow Builder's Translate table.
By default, this setting is set to |
Validate When Navigating to Previous Step | By default, end-users must complete required fields before moving to the next workflow page. Built-in validation ensures required fields are complete before end-users can move on. If the end-user returns to a previous page, the fields clear and they must complete them again before moving forward. When set to
By default, this setting is set to |
