Overview
Swimlanes set the responsibilities in your business process. Swimlanes are always contained by your pool (or workflow), representing one parallel of a process. Each swimlane communicates with other swimlanes in the same workflow. However, there are RBAC restrictions, so if you have invalid permissions for another swimlane, the submission ends. Your swimlanes show the tasks and responsibilities each department has and the interplay between them. So, your company (workflow) can have multiple departments (swimlanes) collaborating on a business process.
When to Use an Authenticated or Automated Swimlane
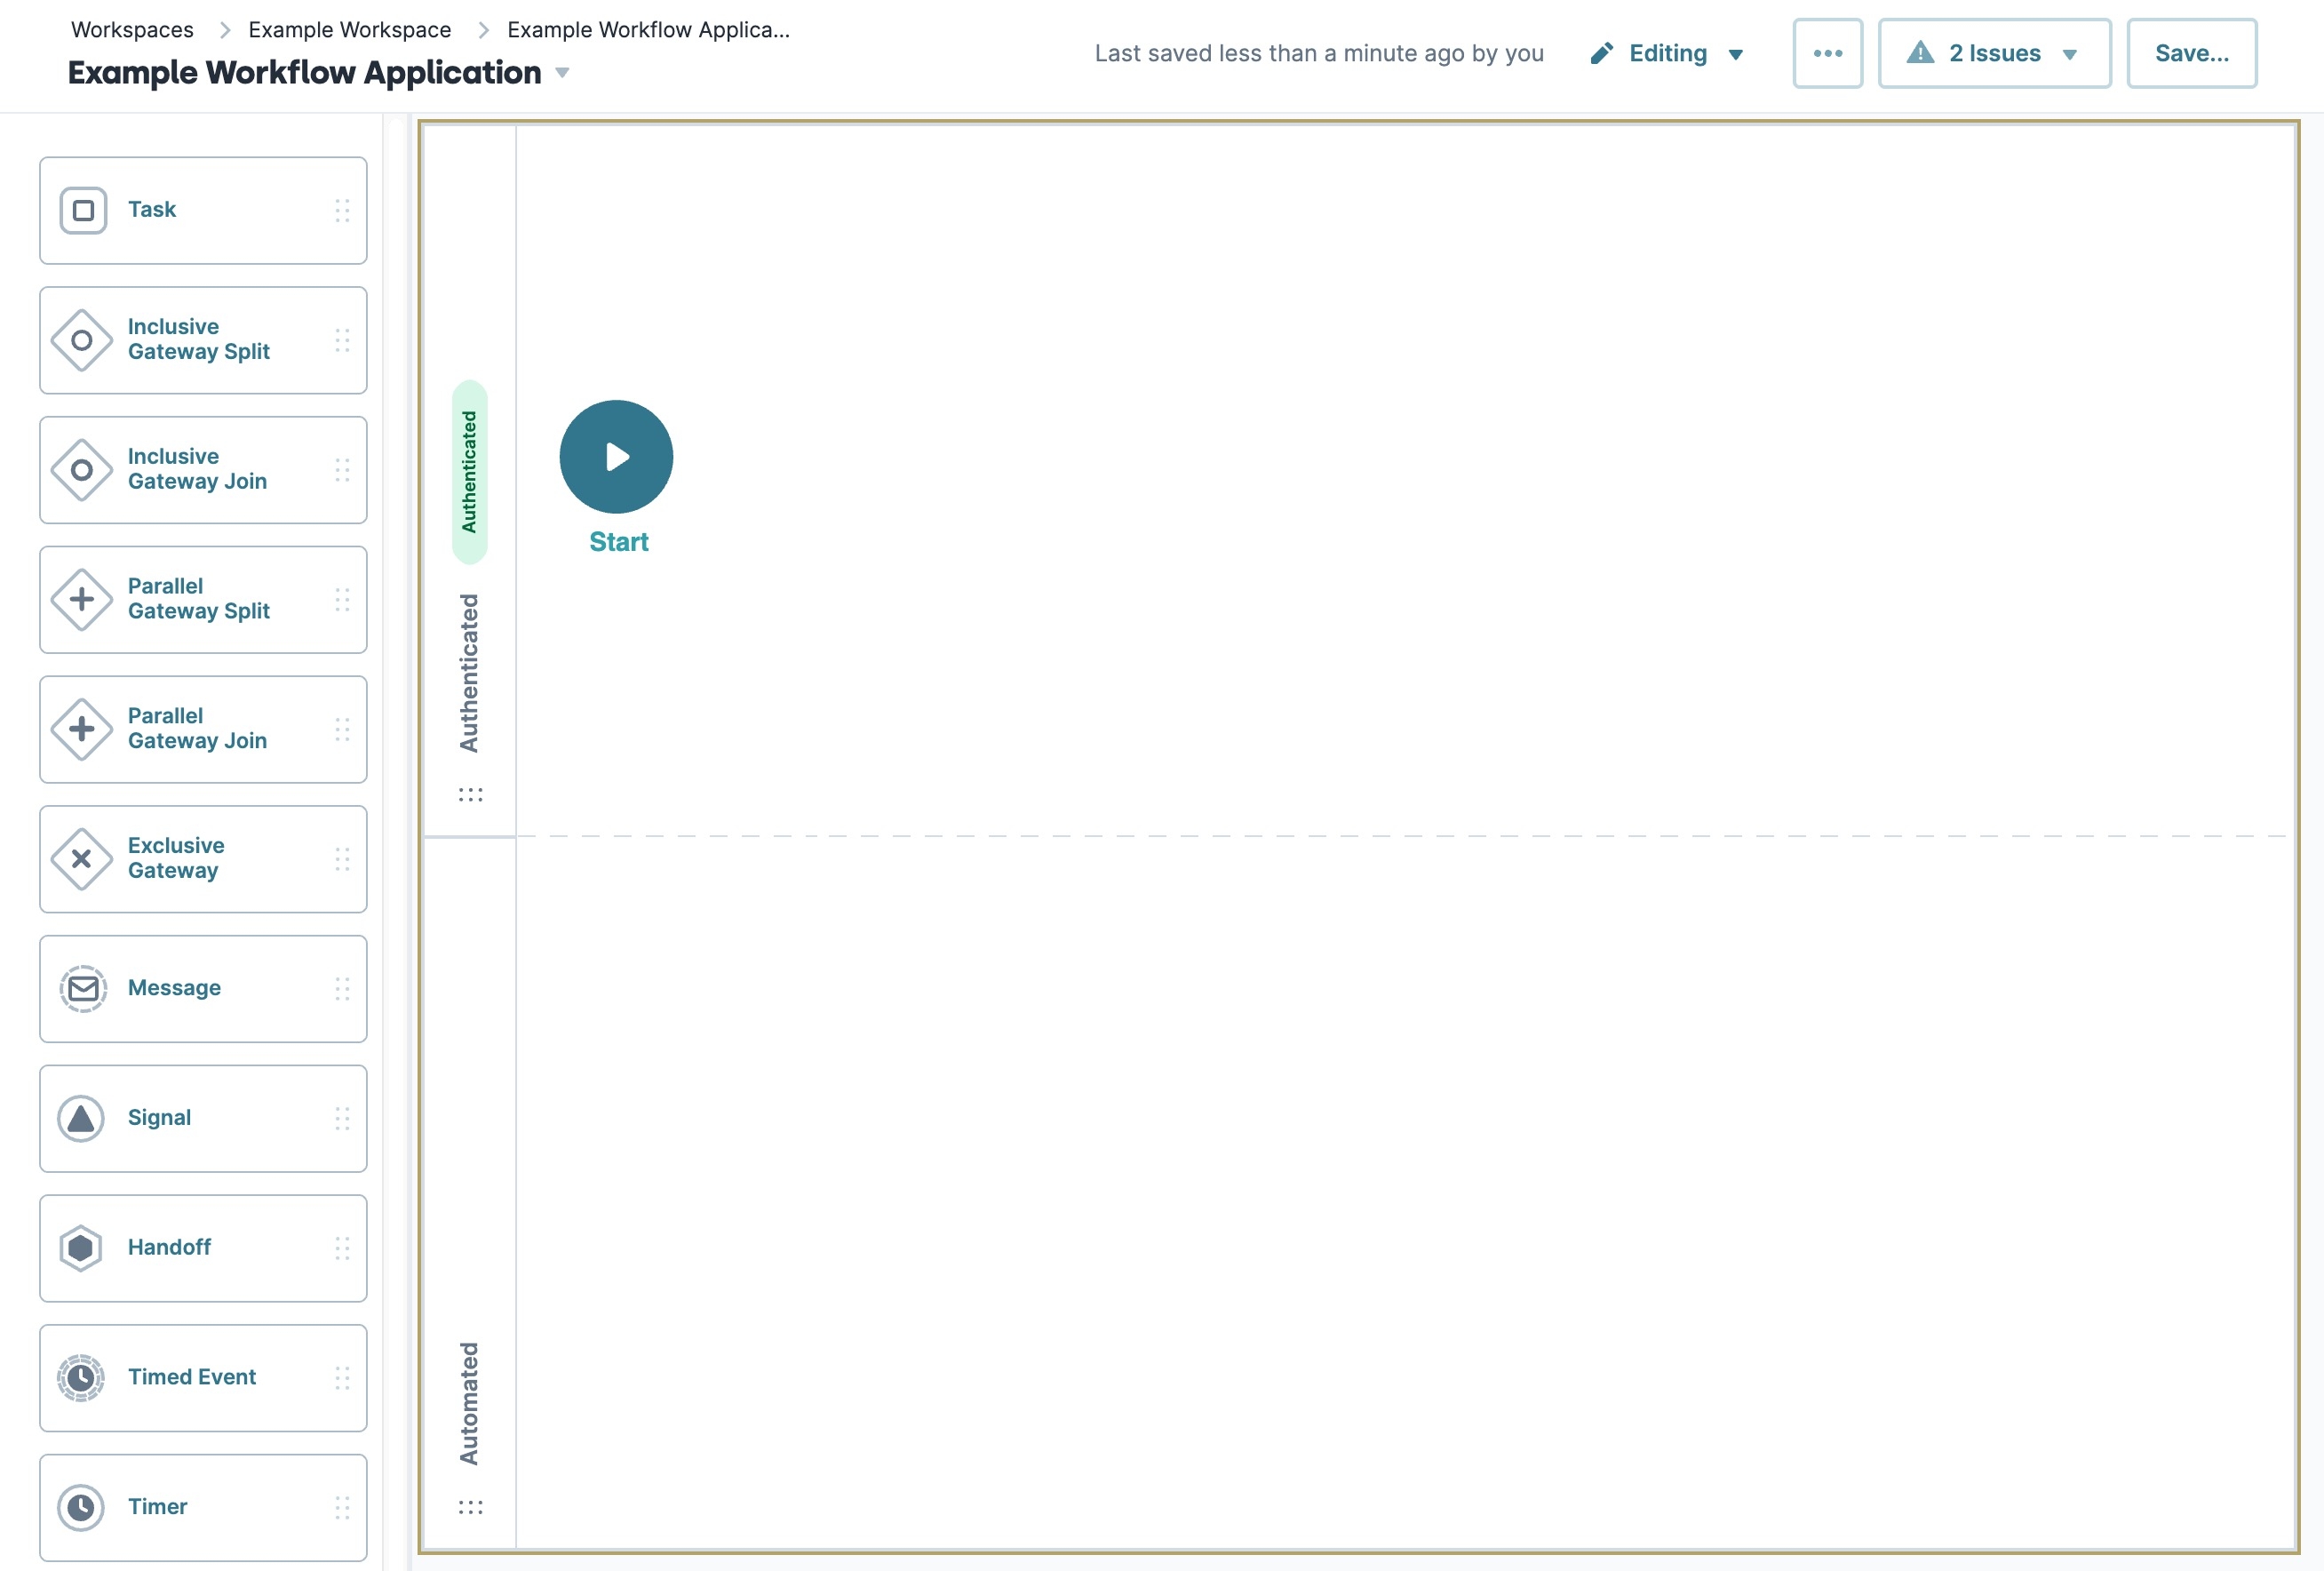
All new workflows contain two swimlane types: Authenticated and Automated.
Authenticated Swimlanes
Use the Authenticated swimlane to hold end-user tasks using the Task node. Your end-user can see and interact with these tasks when using your application. To ensure end-users can access and interact with these tasks, you must define roles and permissions. You can identify the role of a swimlane by looking at the header bar to the left of the swimlane. To view what roles have access, click the (Edit) button followed by Edit Roles & Permissions. Doing so takes you to the Express Role Administration page.
Automated Swimlane
By default, there is an Automated swimlane in your workflow. You can't edit or delete it, even if left empty. It's important to note that only one Automated swimlane is permitted in a workflow.
When you add a Task node to this swimlane, you'll set whether the node runs as a service or script-type task. Automated swimlanes run script and service-type tasks automatically. In the Automated swimlane, there's no end-user interaction.
Let's say your company uses an Unqork workflow to manage its employee's payroll. An Automated swimlane will run your script automatically, continuing the payroll process without interruption or interaction from the end-user.
Here's a preview of the default swimlanes in the Workflow Builder:
Navigating the Swimlane Settings Menu
Let's explore the swimlane's Settings Menu. These options display when you hover over the Authenticated swimlane's Header Bar. Swimlanes have these Settings Menu options:
Setting | Description |
|---|---|
(Add) | Adds a new swimlane to the top of the workflow pool. The swimlane's Label shows as New Lane for easy reference and location. |
(Remove) | Removes the swimlane from the workflow. |
(Edit) | Opens the Edit Lane window. This is where you configure the swimlane's settings, including which role has access. |
Edit Lane Window Description
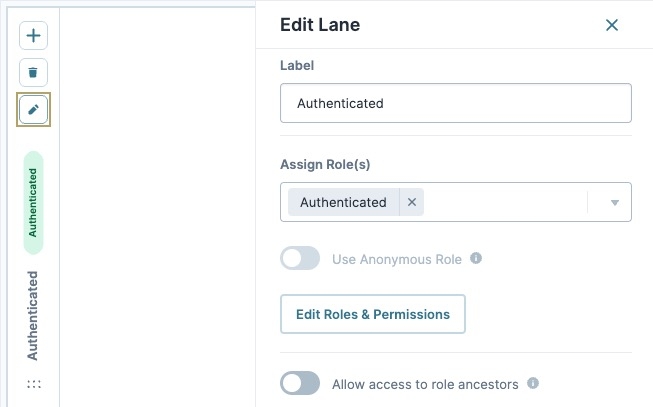
Click the (Edit) button to display the Edit Lane window.
And here's a breakdown of the available settings:
Setting | Description |
|---|---|
Label | Sets the name of your swimlane. By default, the Label displays as |
Assign Role(s) | Lets you select the role assigned to this lane. Roles determine end-user access. By selecting a role, you're giving a group of end-users permission to access this swimlane. The drop-down menu populates with the roles defined for your environment. If a role doesn't populate as expected, check Express Role Administration. |
Use Anonymous Role | When set to By default, this setting is set to |
Edit Roles & Permissions | Takes you to Express Role Administration. From Express Role Administration, you can add roles and permissions to your environment. |
Allow Access to Role Ancestors | When set to When set to All new workflows have this setting |
X (Close) | Closes the Edit Lane window, returning your focus to the pool. |
Adding an Authenticated Swimlane
To add an Authenticated swimlane:
Hover your mouse over the Header Bar of any swimlane.
Click (Add).
Click Save....
Click Save .
You can also add a swimlane by clicking the
+ Add Swimlane button. This button displays at the bottom right of the User swimlane. This adds a new Authenticated (user) swimlane after your Automated swimlane.
Modify an Authenticated Swimlane
Renaming an Authenticated Swimlane
Now, let's rename your swimlane. To change the name of the Authenticated swimlane:
Hover your mouse over the Header Bar of the swimlane.
Click (Edit).
Enter a new Label.
Ensure your label is user-friendly and well-associated with the role of your swimlane.
Click
X(Close).Click Save....
Click Save .
Repositioning an Authenticated Swimlane
You can also change the position of your Authenticated swimlane using workflow's drag-and-drop interface. To reposition a swimlane:
Hover your mouse over the Header Bar of the swimlane.
Drag and drop your swimlane up or down into a new position.
Click Save....
Click Save .
Assigning a Role to an Authenticated Swimlane
Now, let's assign your Authenticated swimlane a role. Remember, if your end-user is not part of the group assigned to that role, they cannot access your workflow. To assign a role:
Hover your mouse over the Header Bar of the swimlane.
Click (Edit).
From the Assign a Role drop-down, select a role.
To add or edit a role in your environment, click Edit Roles & Permissions. In Express Role Administration, you can add a new role or adjust existing roles as needed.
Click Save....
Click Save .
Deleting an Authenticated Swimlane
To remove an Authenticated swimlane:
Hover your mouse over the Header Bar of the swimlane.
Click (Remove).
Click Save....
Click Save .
You cannot remove a swimlane that is running Timer Start node. Stop any Timer Start nodes in the swimlane before you delete the swimlane.

