How to: Set Up an Unqork Application in 20 Minutes
Estimated Reading Time: 10 minutes
Overview
Welcome to Unqork, the first no-code enterprise application platform. In 20 minutes, you can create a simple insurance application. This app lets you sell a commercial policy to a small business for their automobiles. This build includes creating an Unqork Workflow and two modules.
The workflow controls the flow and logic of this example application. The two modules serve as a way for the end-user End-users, also known as Express Users, are the individuals accessing an application through Express View. In most cases, end-users are the customers using the product. to interact with your application. This interaction includes dynamically entering information into fields and selecting radio button options. Let's refer to these example modules as the Business Owner module and the Company module.
NOTE You need access to an Unqork environment to build your app. Once you have environment access, you can complete this build without writing a single line of code.
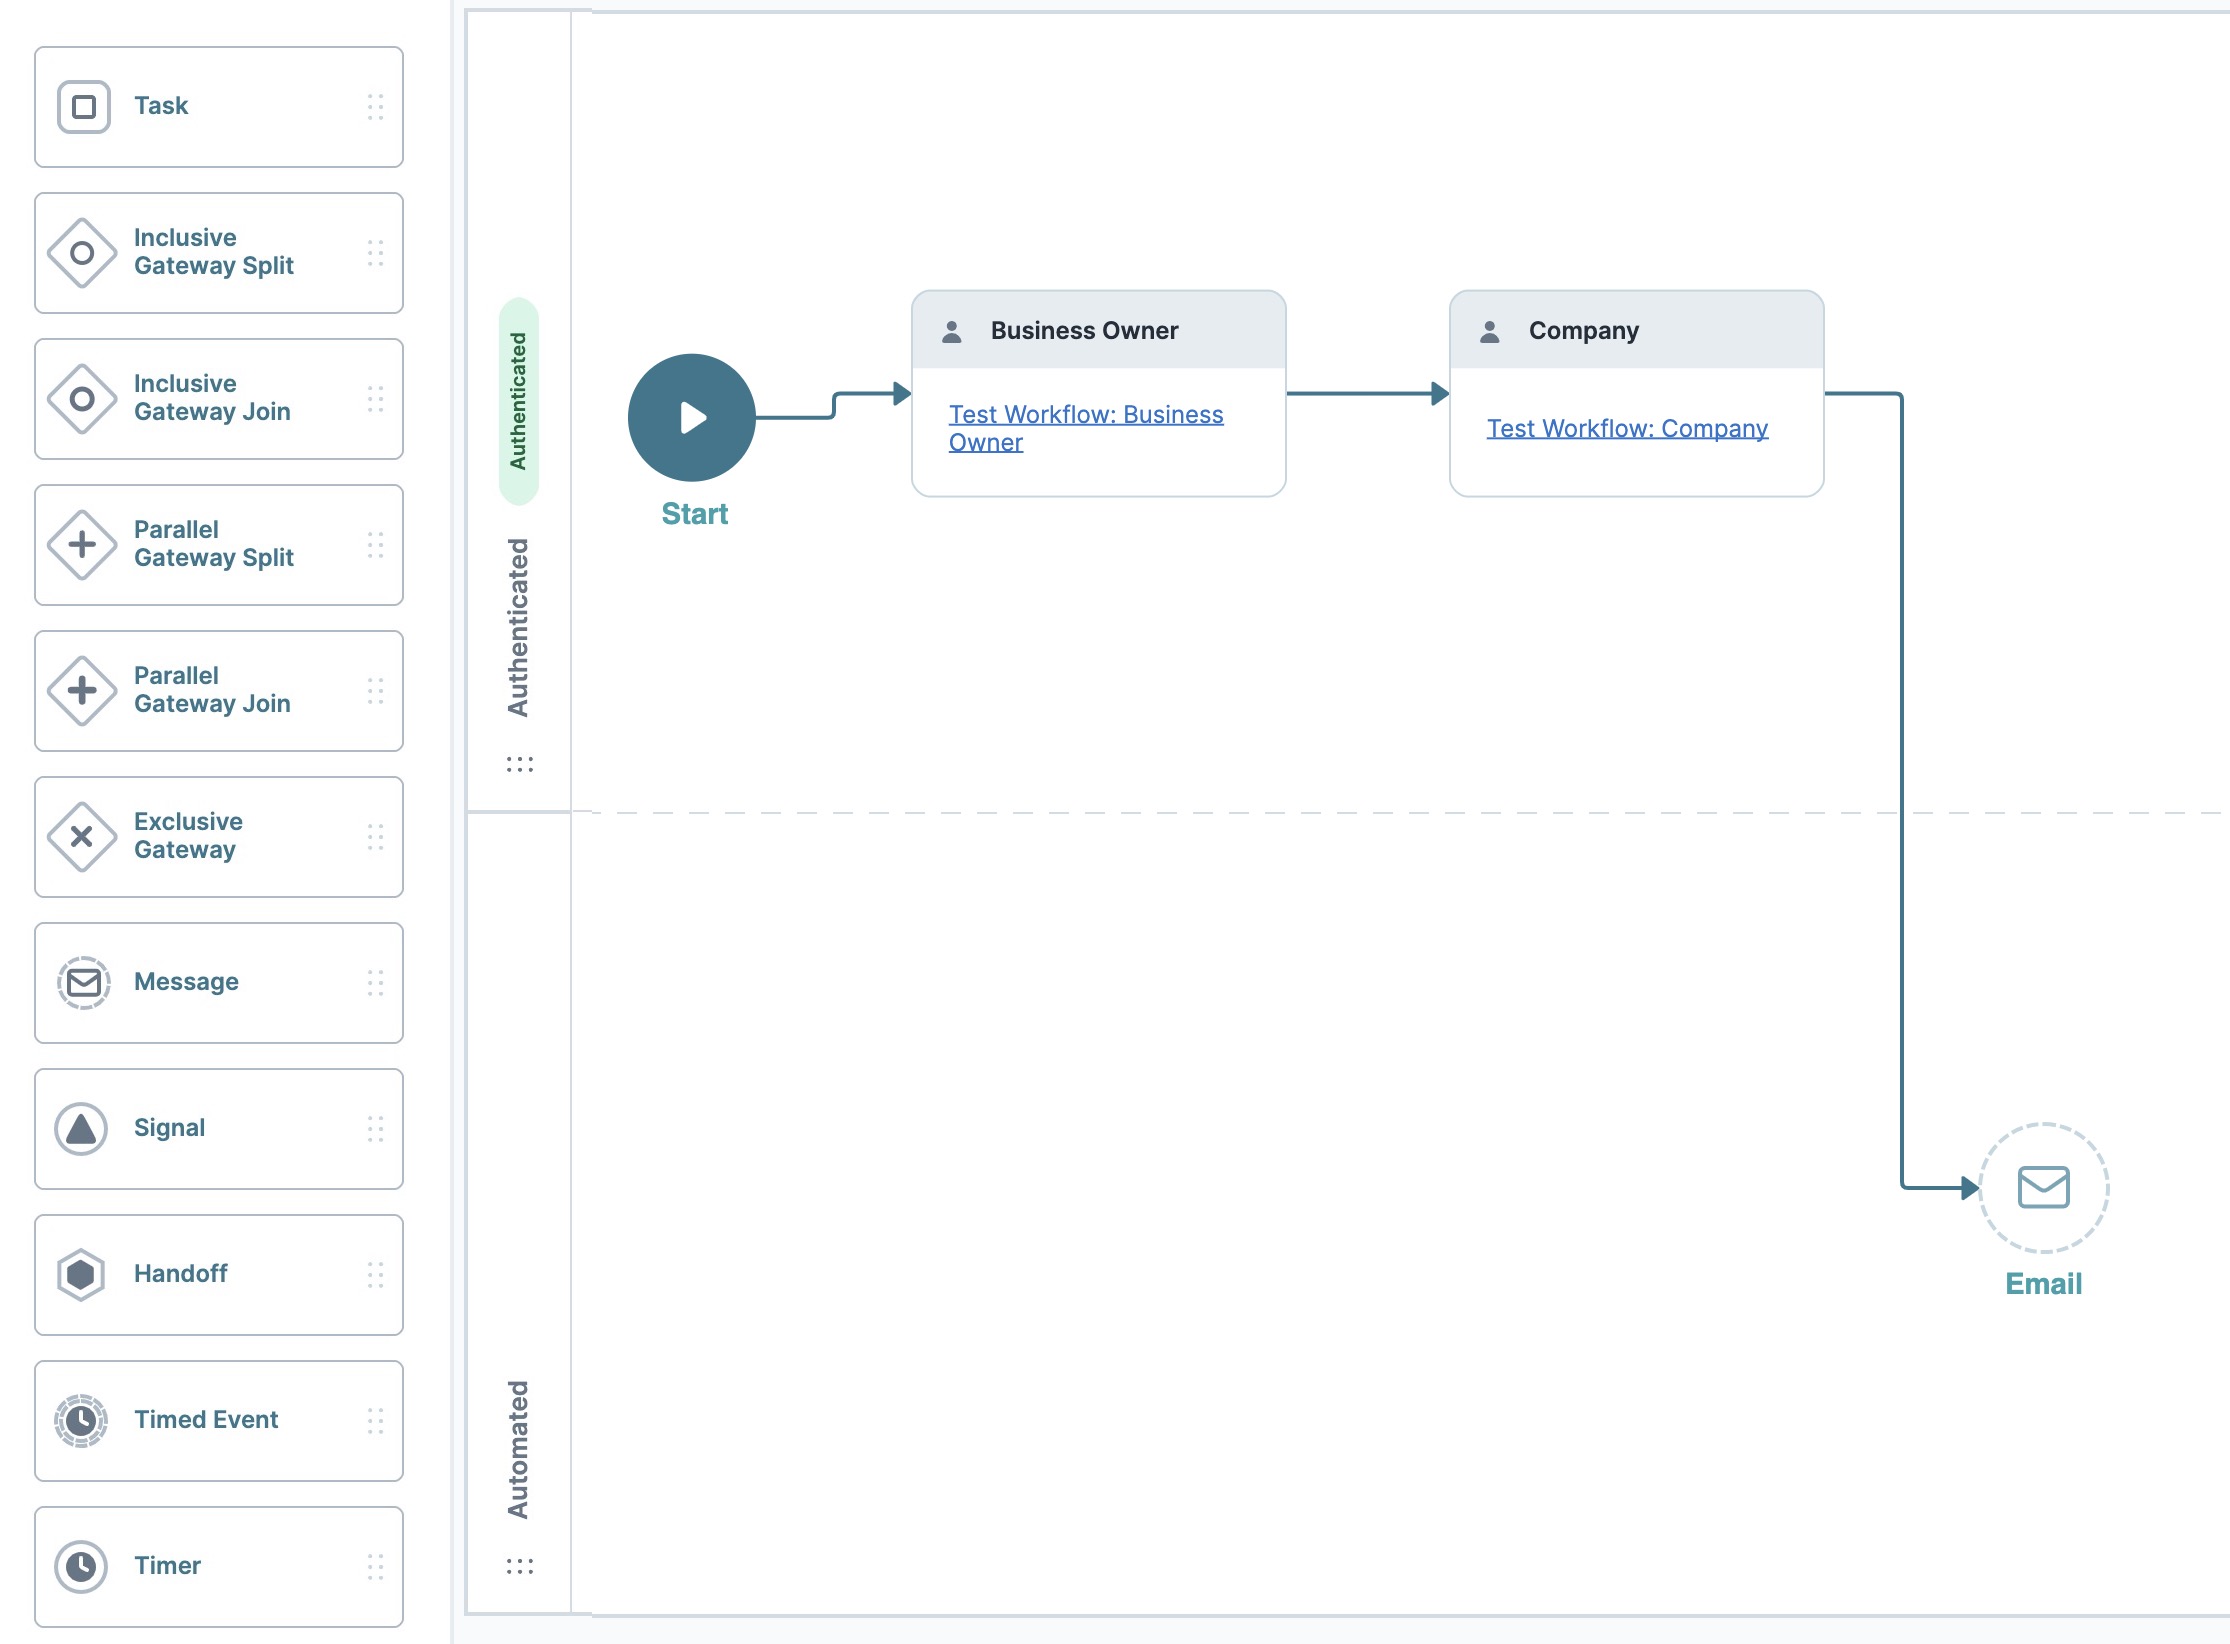
To create a workflow, use the Workflow Builder. Workflows let you build complex flows and logic with an easy, drag-and-drop interface. You can also map all the data points and user types in your application. By default, your workflow has two swimlanes: Authenticated and Automated. The Authenticated swimlane is for tasks driven by your end-user, like completing an online form. The Automated swimlane is for tasks that run automatically without end-user interaction. These tasks can be an email or text message sent automatically.
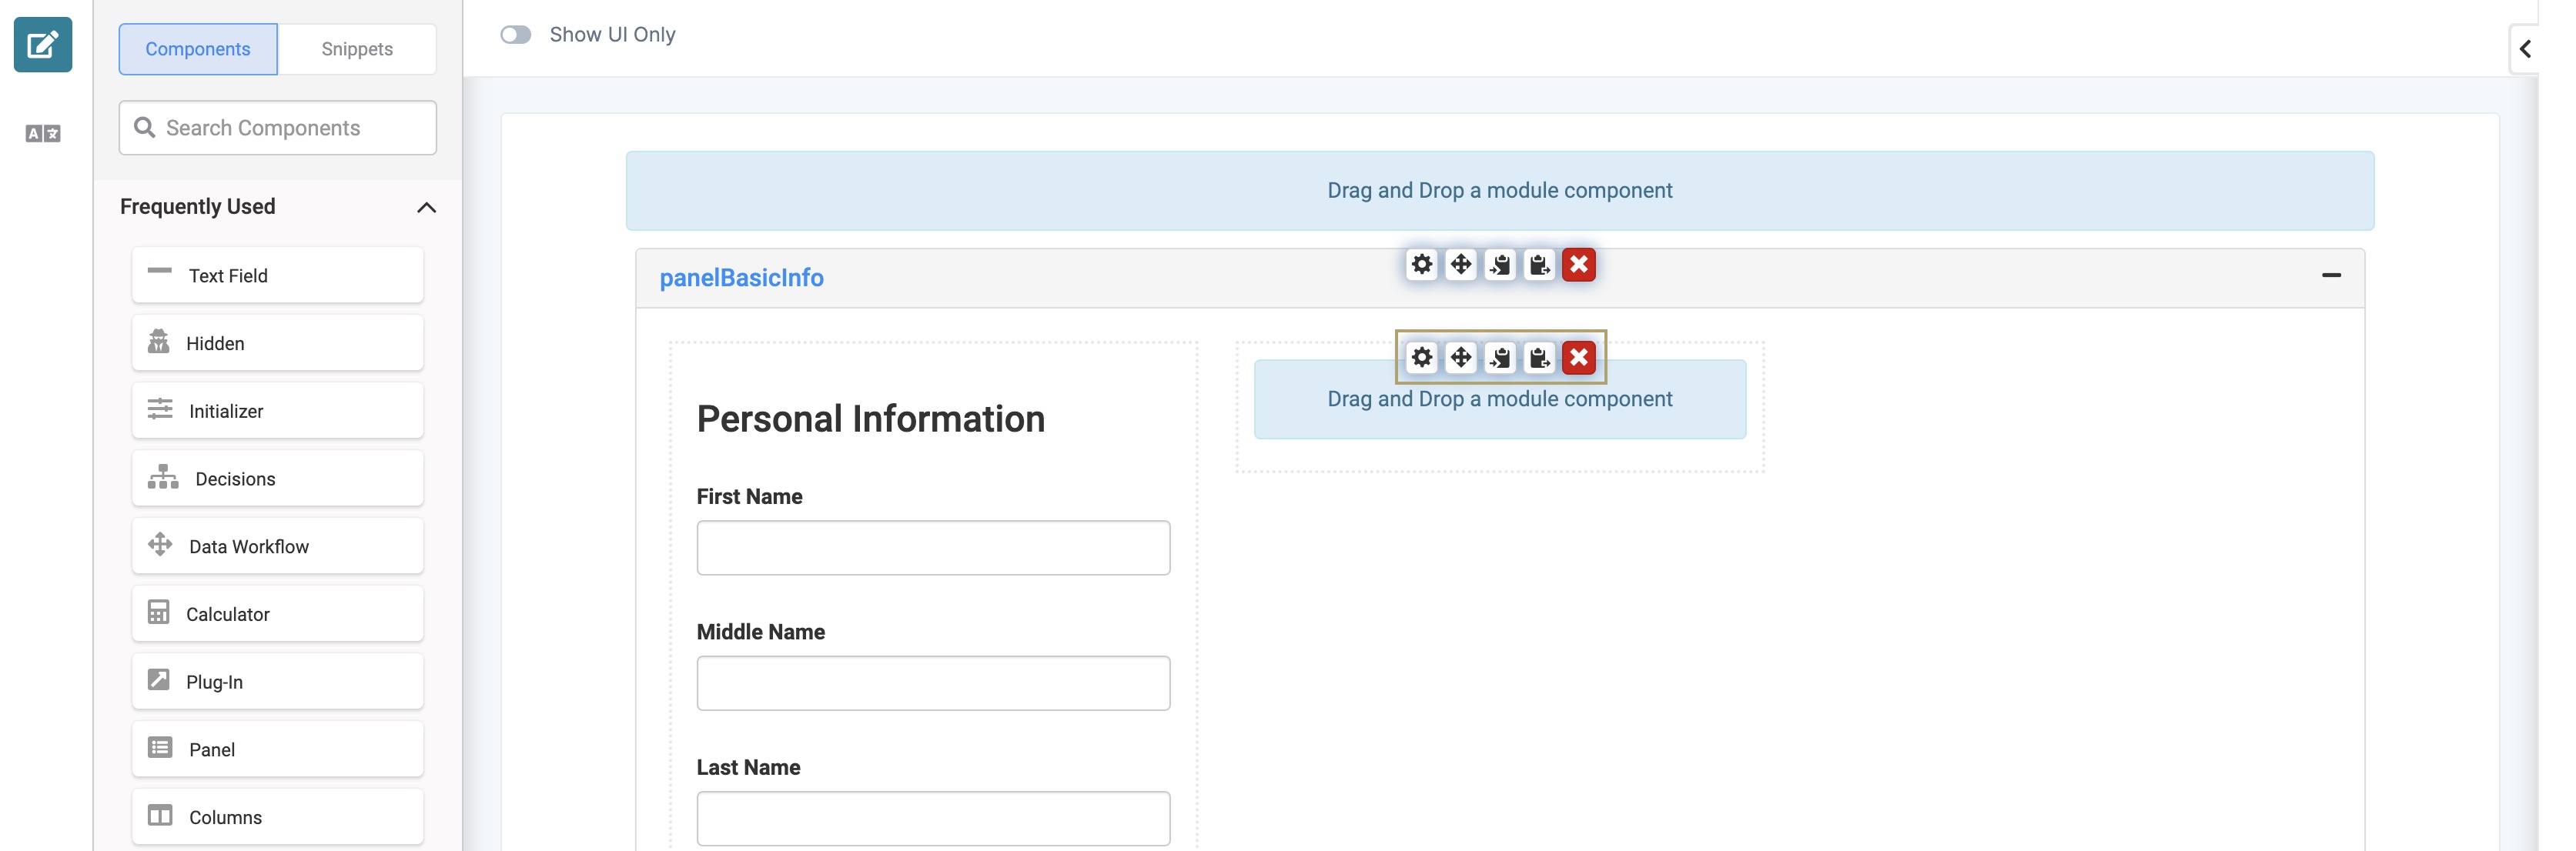
To create a module, use the Module Builder. Like the Workflow Builder, Unqork's Module Builder consists of simple, drag-and-drop functionality. On the left side of the Module Builder, you have a toolkit of components. These components can make API APIs (application programming interfaces) are a set of protocols and definitions developers use to build and integrate application software. APIs act as the connective tissue between products and services. (application programming interface) calls, perform logic, or let end-users dynamically enter data. You'll also find preconfigured snippets to help make your building experience faster and more convenient.
Here's a quick overview of the component groups:
| Component Group | Brief Description |
|---|---|
|
These are simple input fields, like the Text Field, Checkboxes, and Date Input components. |
|
|
These are more complex or specialized fields, like the Address Search, Email, and Button components. |
|
|
These components help with your module's organization. Examples include the Panel and Columns components. |
|
|
These are additional Display & Layout components focusing on the various Unqork grids. Examples include the Dynamic Grid, Freeform Grid, and Uniform Grid components. |
|
|
These components let you integrate logic into your applications without writing code. Examples include the Calculator, Decisions, and Initializer components. |
|
|
These components can visually display aggregated statistics for data. Examples include the Chart and KPI components. |
What You'll Learn
In this
Configuration
Creating a Workspace
Unqork lets you create your own virtual workspace. That way, your team can stay organized during the application development process. For this how-to guide, start by creating your workspace. Then, you can create applications in your workspace.
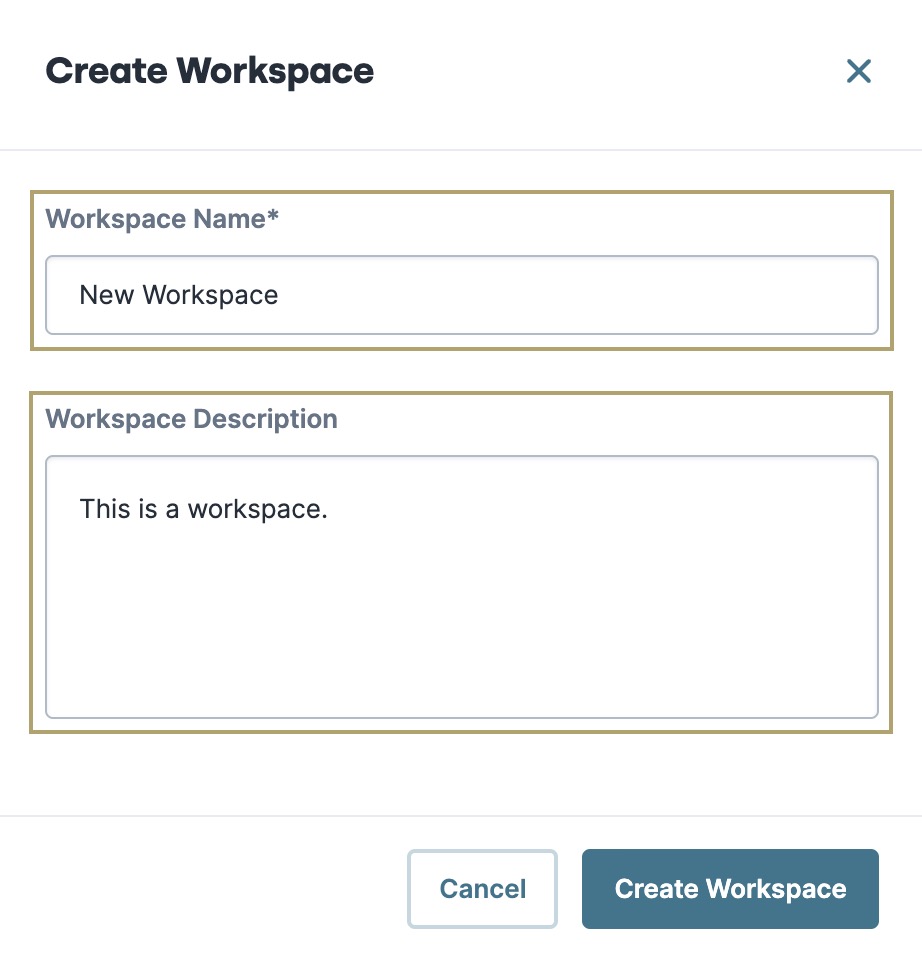
To create a new workspace:
| 1. | At the top of the Unqork Designer Platform, click Workspaces. |
| 2. | At the top right of the Workspaces homepage, click + Create Workspace. |
| 3. | In the Workspace Name* field, enter a unique workspace name. |
| 4. | (Optional) In the Workspace Description field, enter a description of your workspace. |
| 5. | Click Create Workspace. |
You are now at the Workspace Level and your new workspace tile displays on the page. Inside your workspace, you can create your own applications, and access any of your teammates' Library Elements.
Creating a Workflow-Type App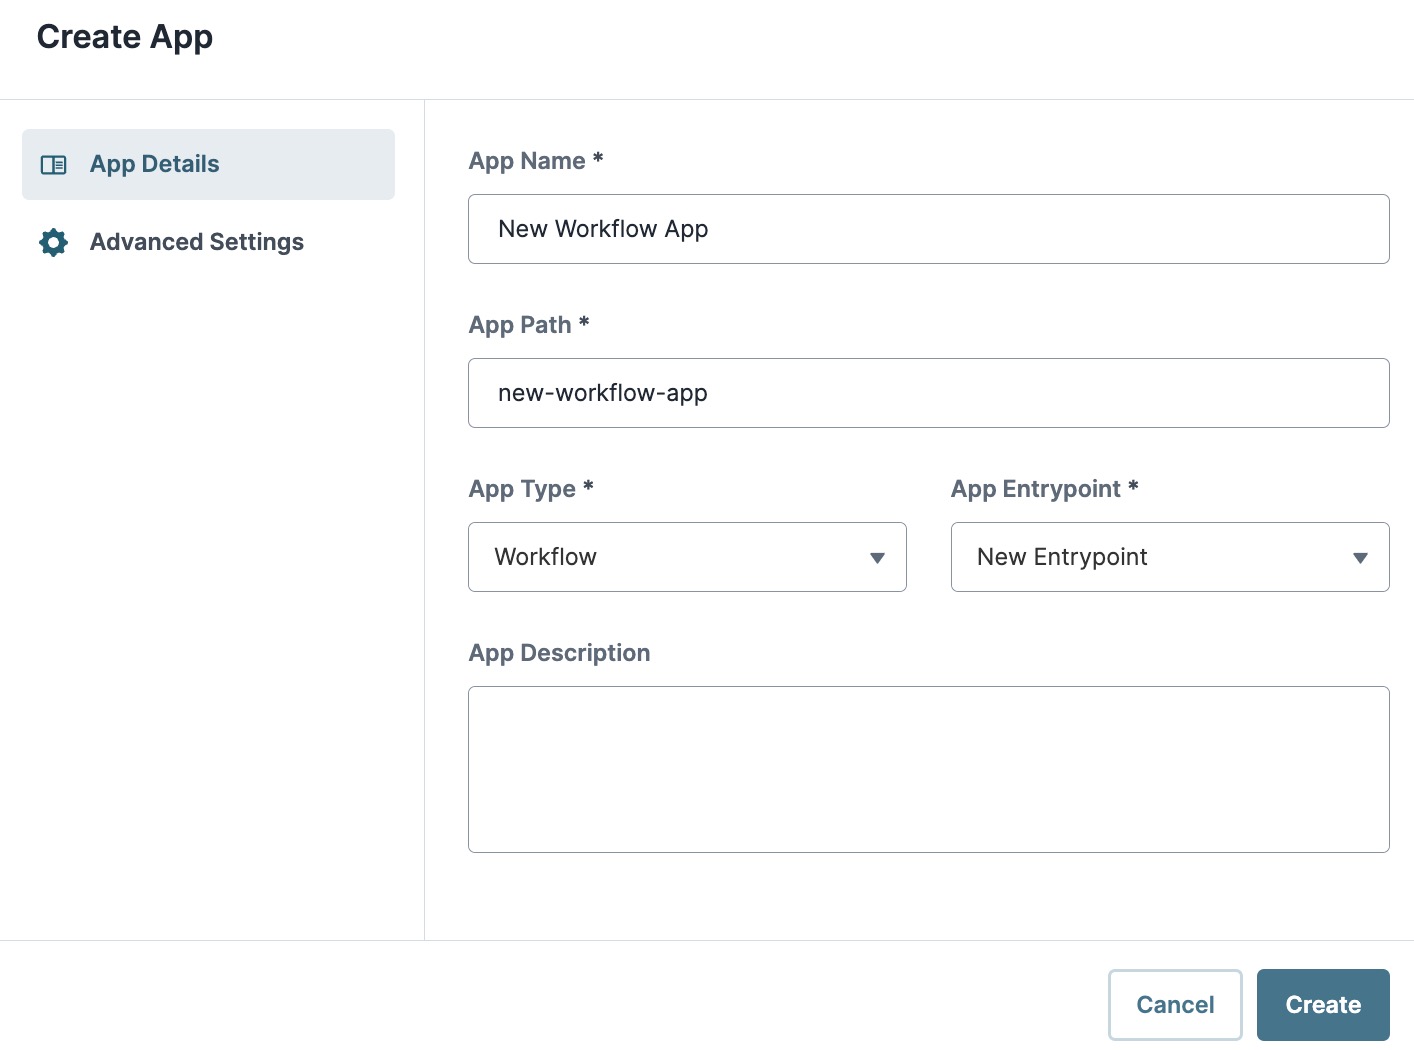
Next, create a workflow-type application where your insurance application will exist.
To create a workflow-type app:
| 1. | In your workspace, click + Create App. |
| 2. | In the App Name* field, enter a unique application name. The App Path* autopopulates for you. |
| 3. | From the App Type* drop-down, select Workflow. |
NOTE For workflow-type applications, the App Entrypoint is New Entrypoint by default.
| 4. | (Optional) In the App Description field, add a description of your application. |
NOTE There are other various options and settings when creating an application. But, for this how-to guide, we will ignore them and use the defaults.
| 5. | Click Create. |
You are now at the Application Level and your application displays on the page. When you create a workflow-type app, it also creates an Unqork Workflow inside the application. You can find it by selecting  Workflows to the left of the page. Click the workflow tile to open it in the Workflow Builder.
Adding the First Task Node
Start the application by creating a module that asks for information about the business owner. You'll create this module directly in a Workflow Task node..
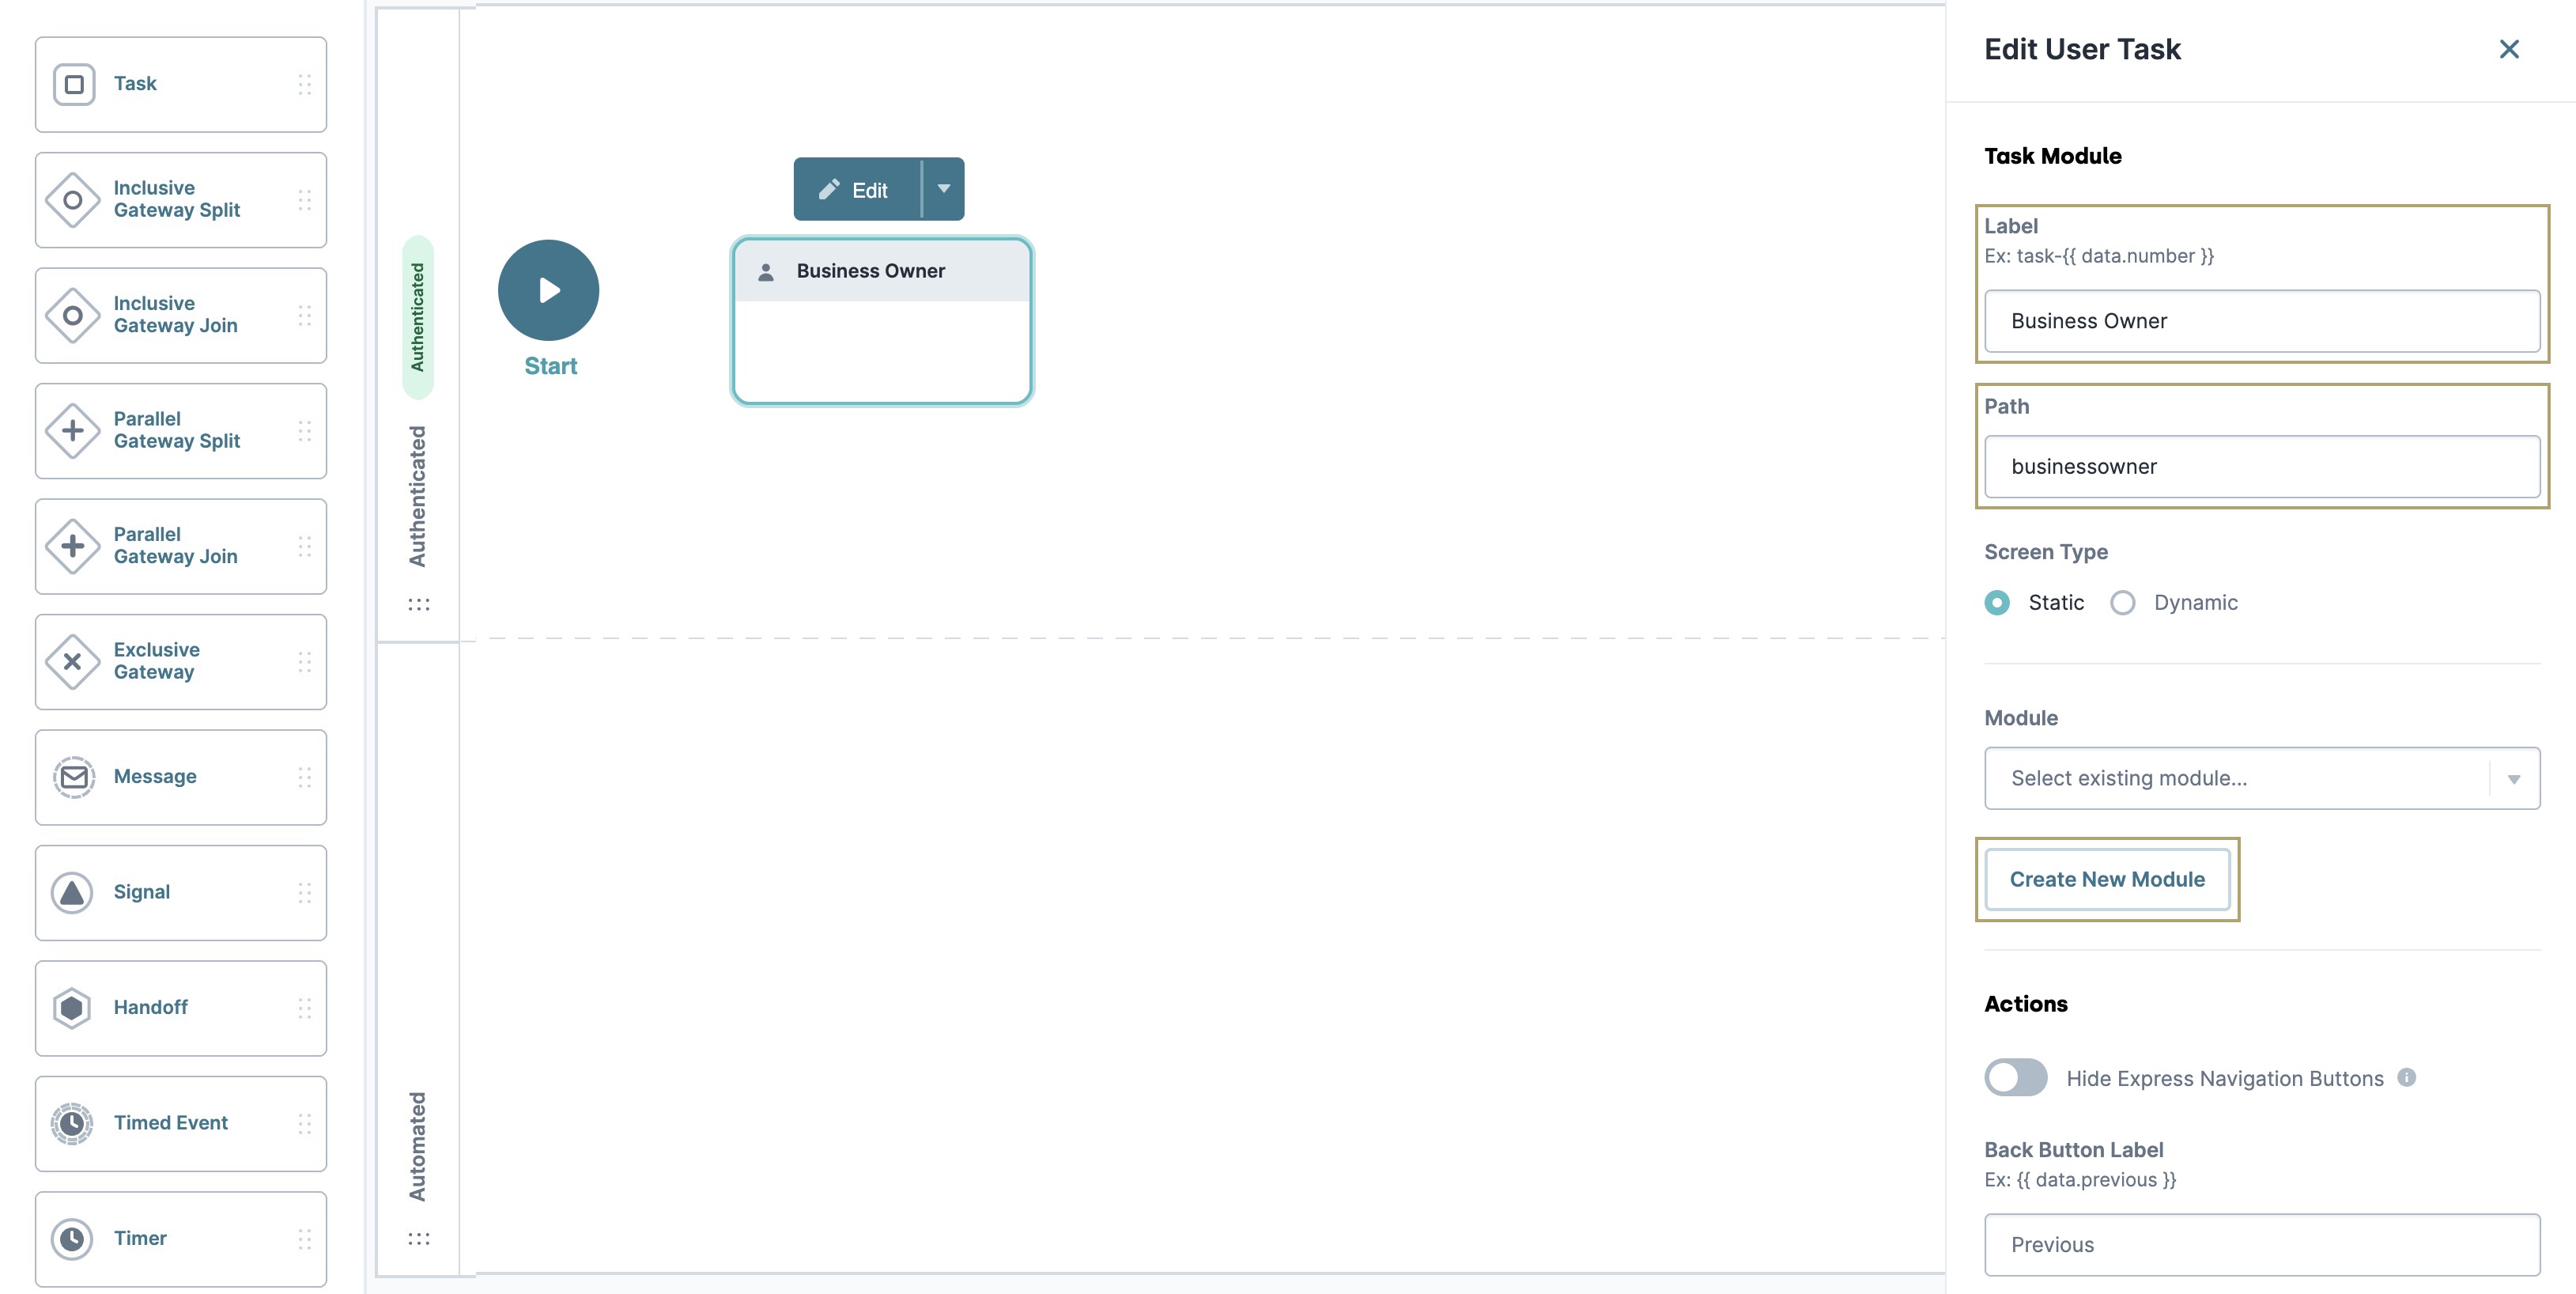
| 1. | In the Workflow Builder, drag and drop a |
| 2. | Click  Edit Edit |
| 3. | In the Label field, enter Business Owner. The Path autopopulates for you. |
| 4. | Click Create New Module. |
| 5. | (Optional) In the Module Title* field, enter a unique name for your module. |
| 6. | (Optional) In the Module Path* field, enter a unique path for your module. |
TIP It's best practice to create lowercase paths with no spaces.
| 7. | From the Module Type* drop-down, select FE Front-End. |
TIP To learn more about module types, view our Module Settings article.
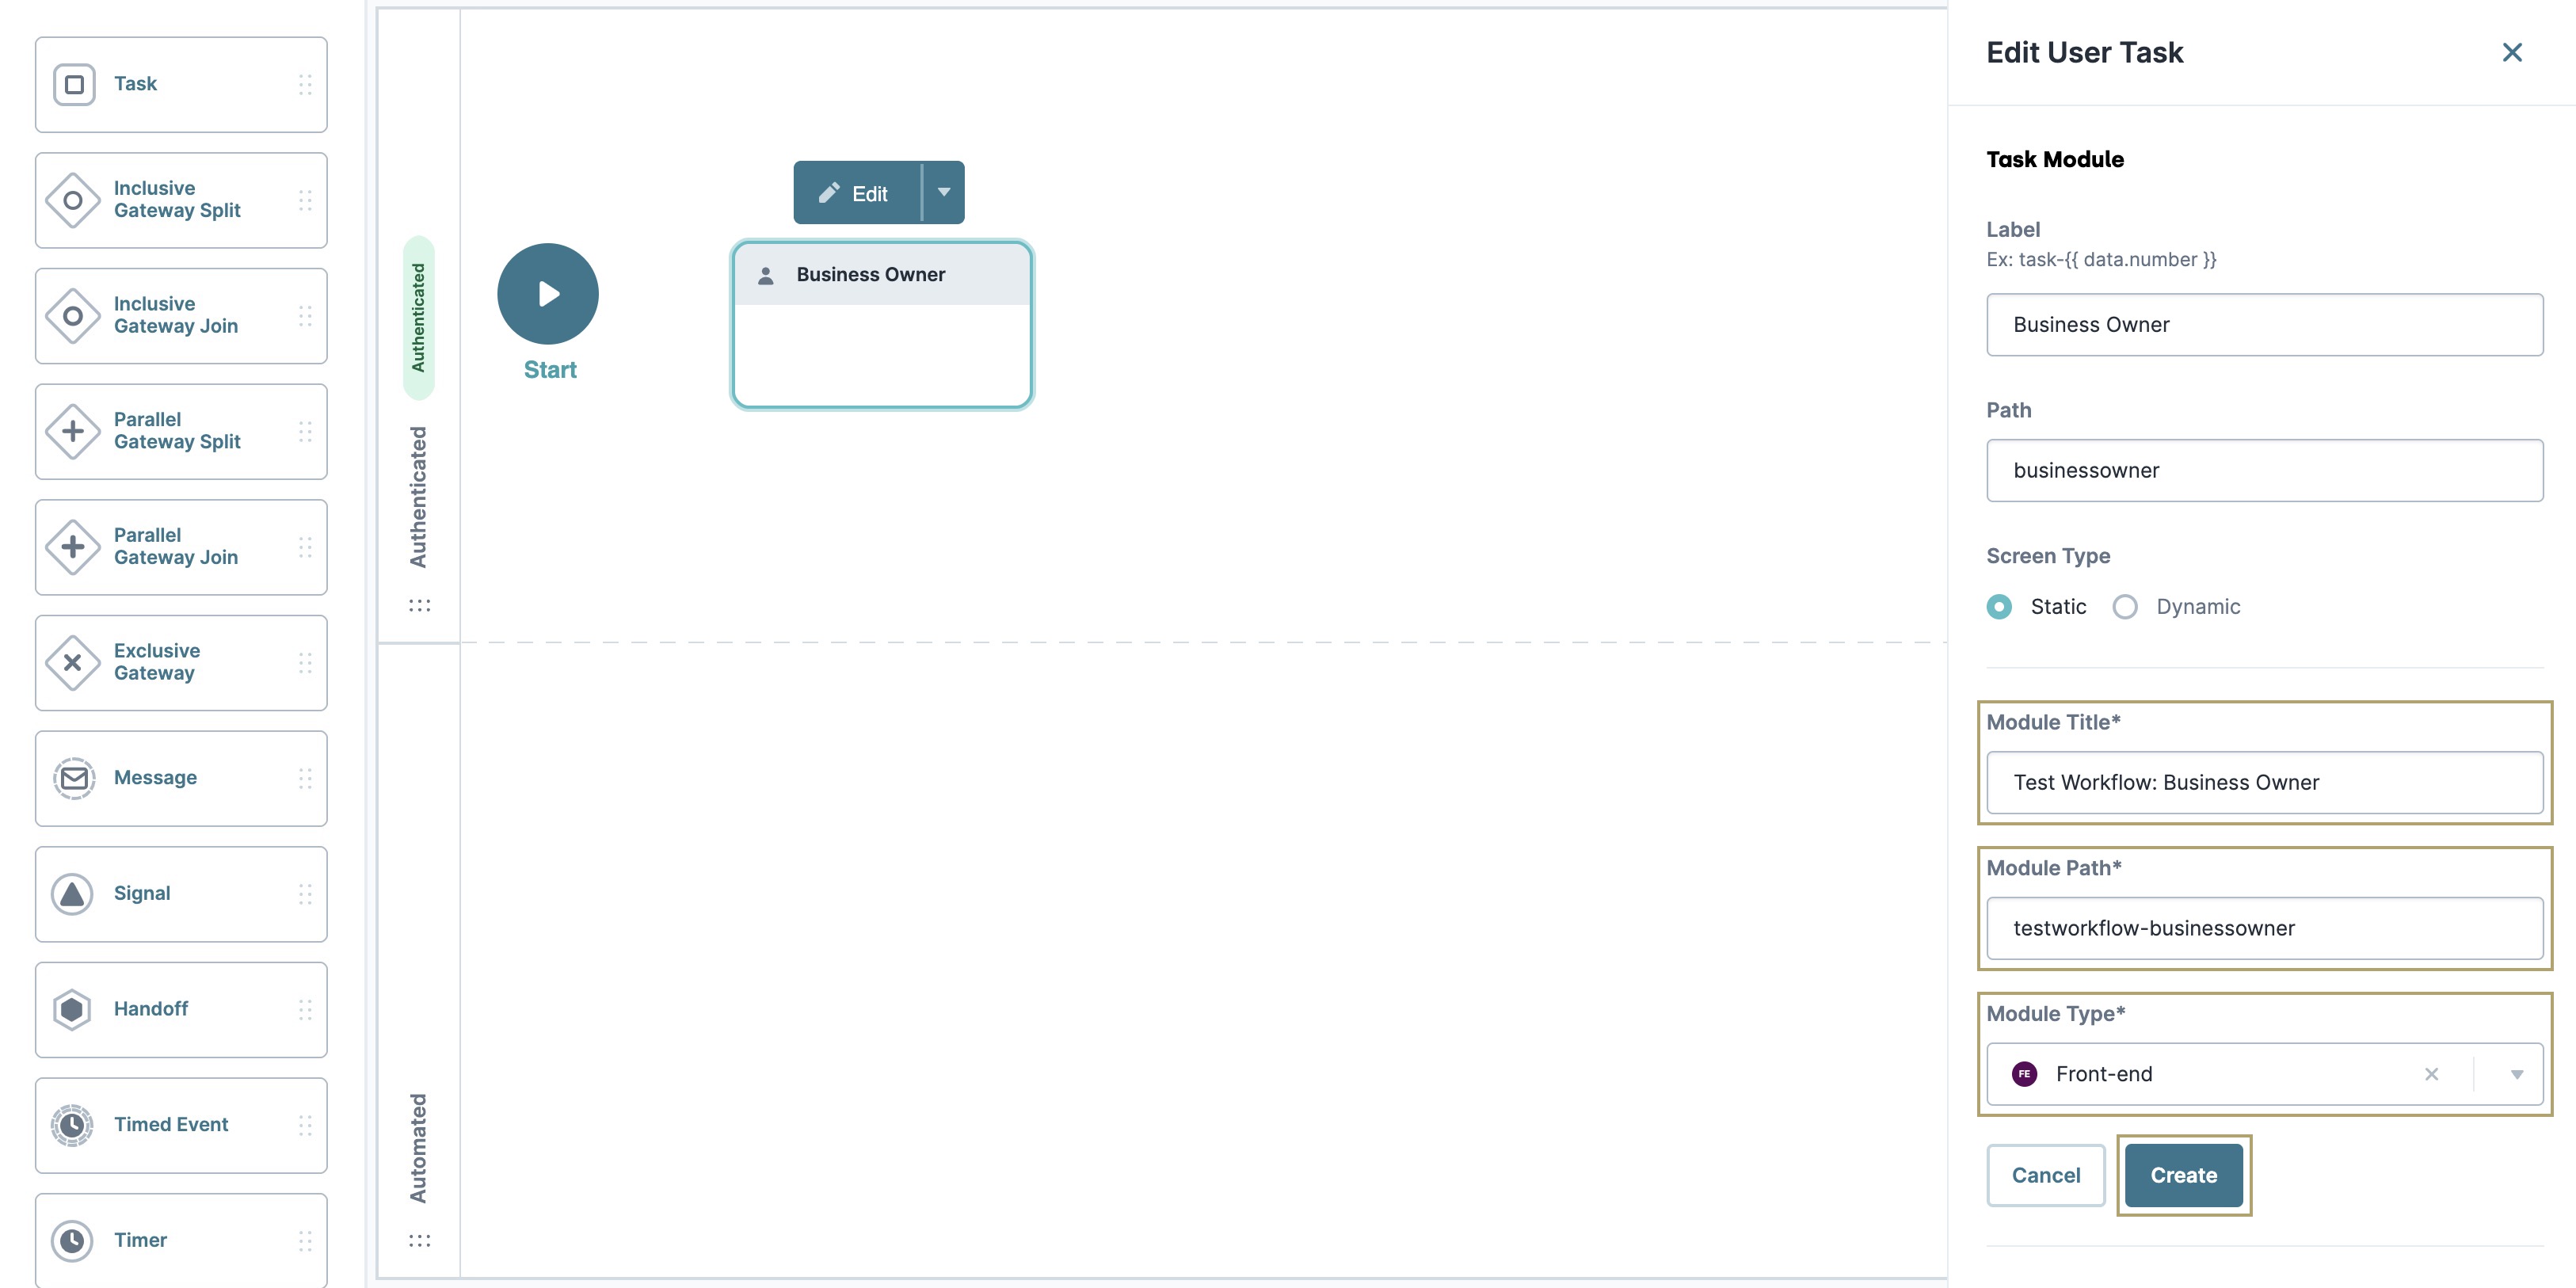
| 8. | Click Create. |
NOTE You'll configure this module in a bit. For now, create it and move on to the next step.
| 9. | Connect the output port (right) of the |
Adding the Second Task Node
Next, create another module using a Task node. This module asks for information about the business owner's company.
| 1. | Drag and drop a |
| 2. | Click Edit |
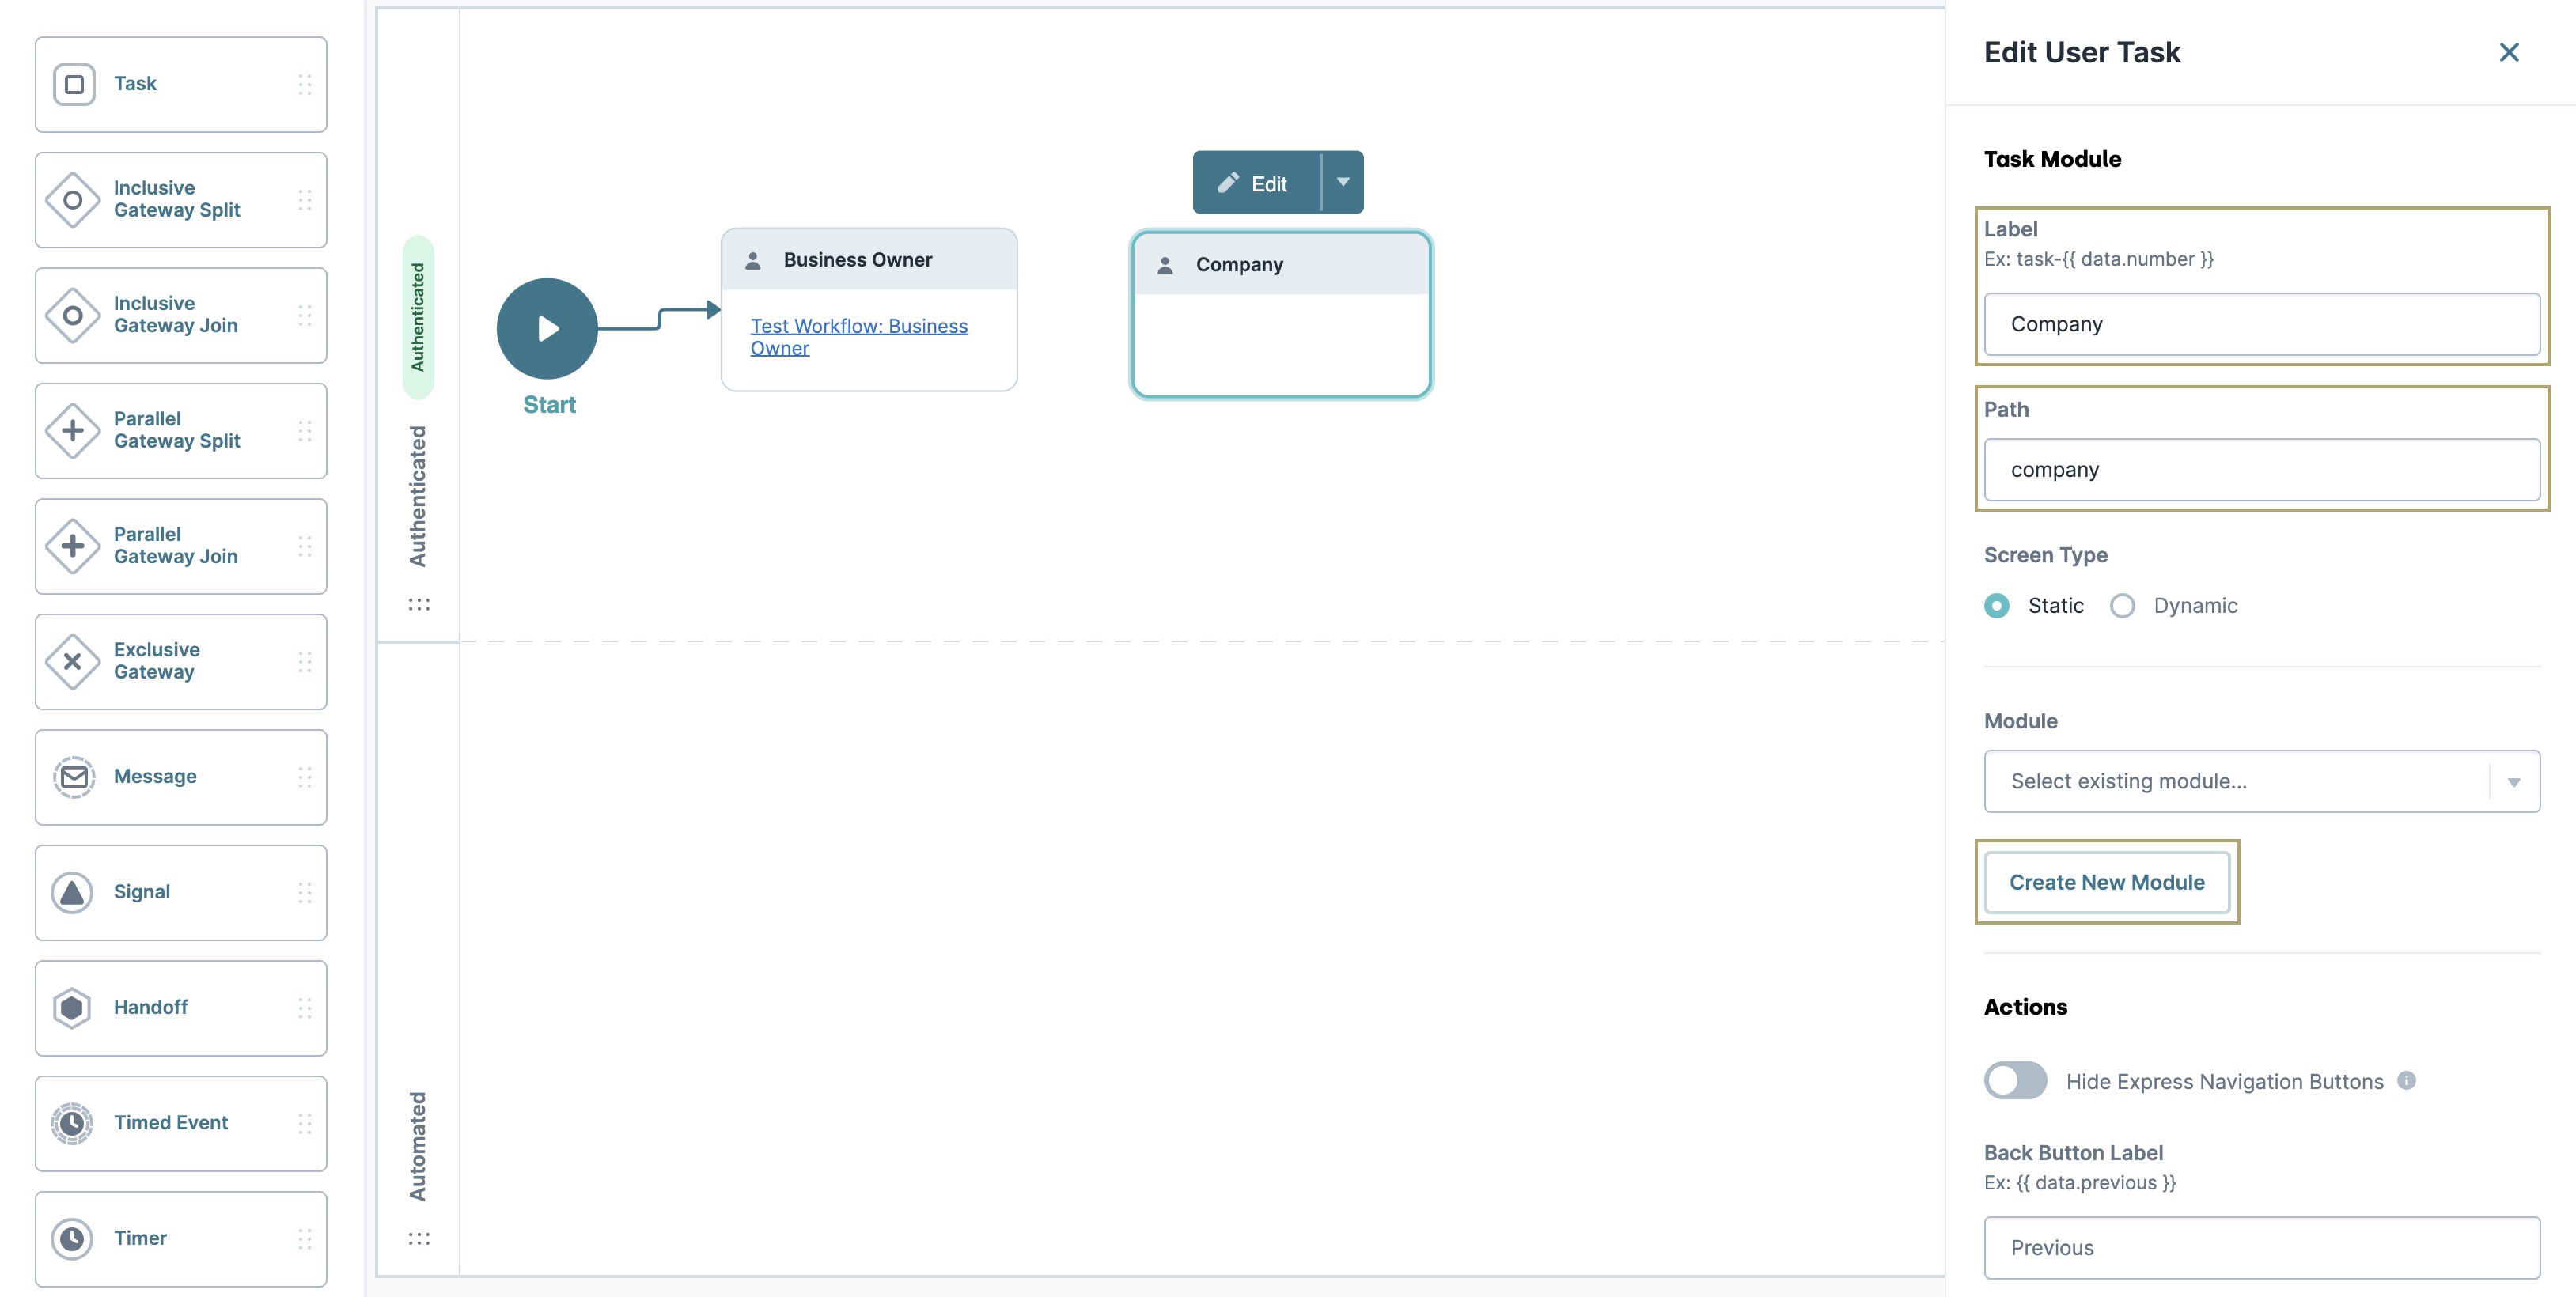
| 3. | In the Label field, enter Company. The Path autopopulates for you. |
| 4. | Click Create New Module. |
| 5. | (Optional) In the Module Title* field, enter a unique name for your module. |
| 6. | (Optional) In the Module Path* field, enter a unique path for your module. |
TIP It's best practice to create lowercase paths with no spaces.
| 7. | From the Module Type* drop-down, select FE Front-End. |
TIP To learn more about module types, view our Module Settings article.
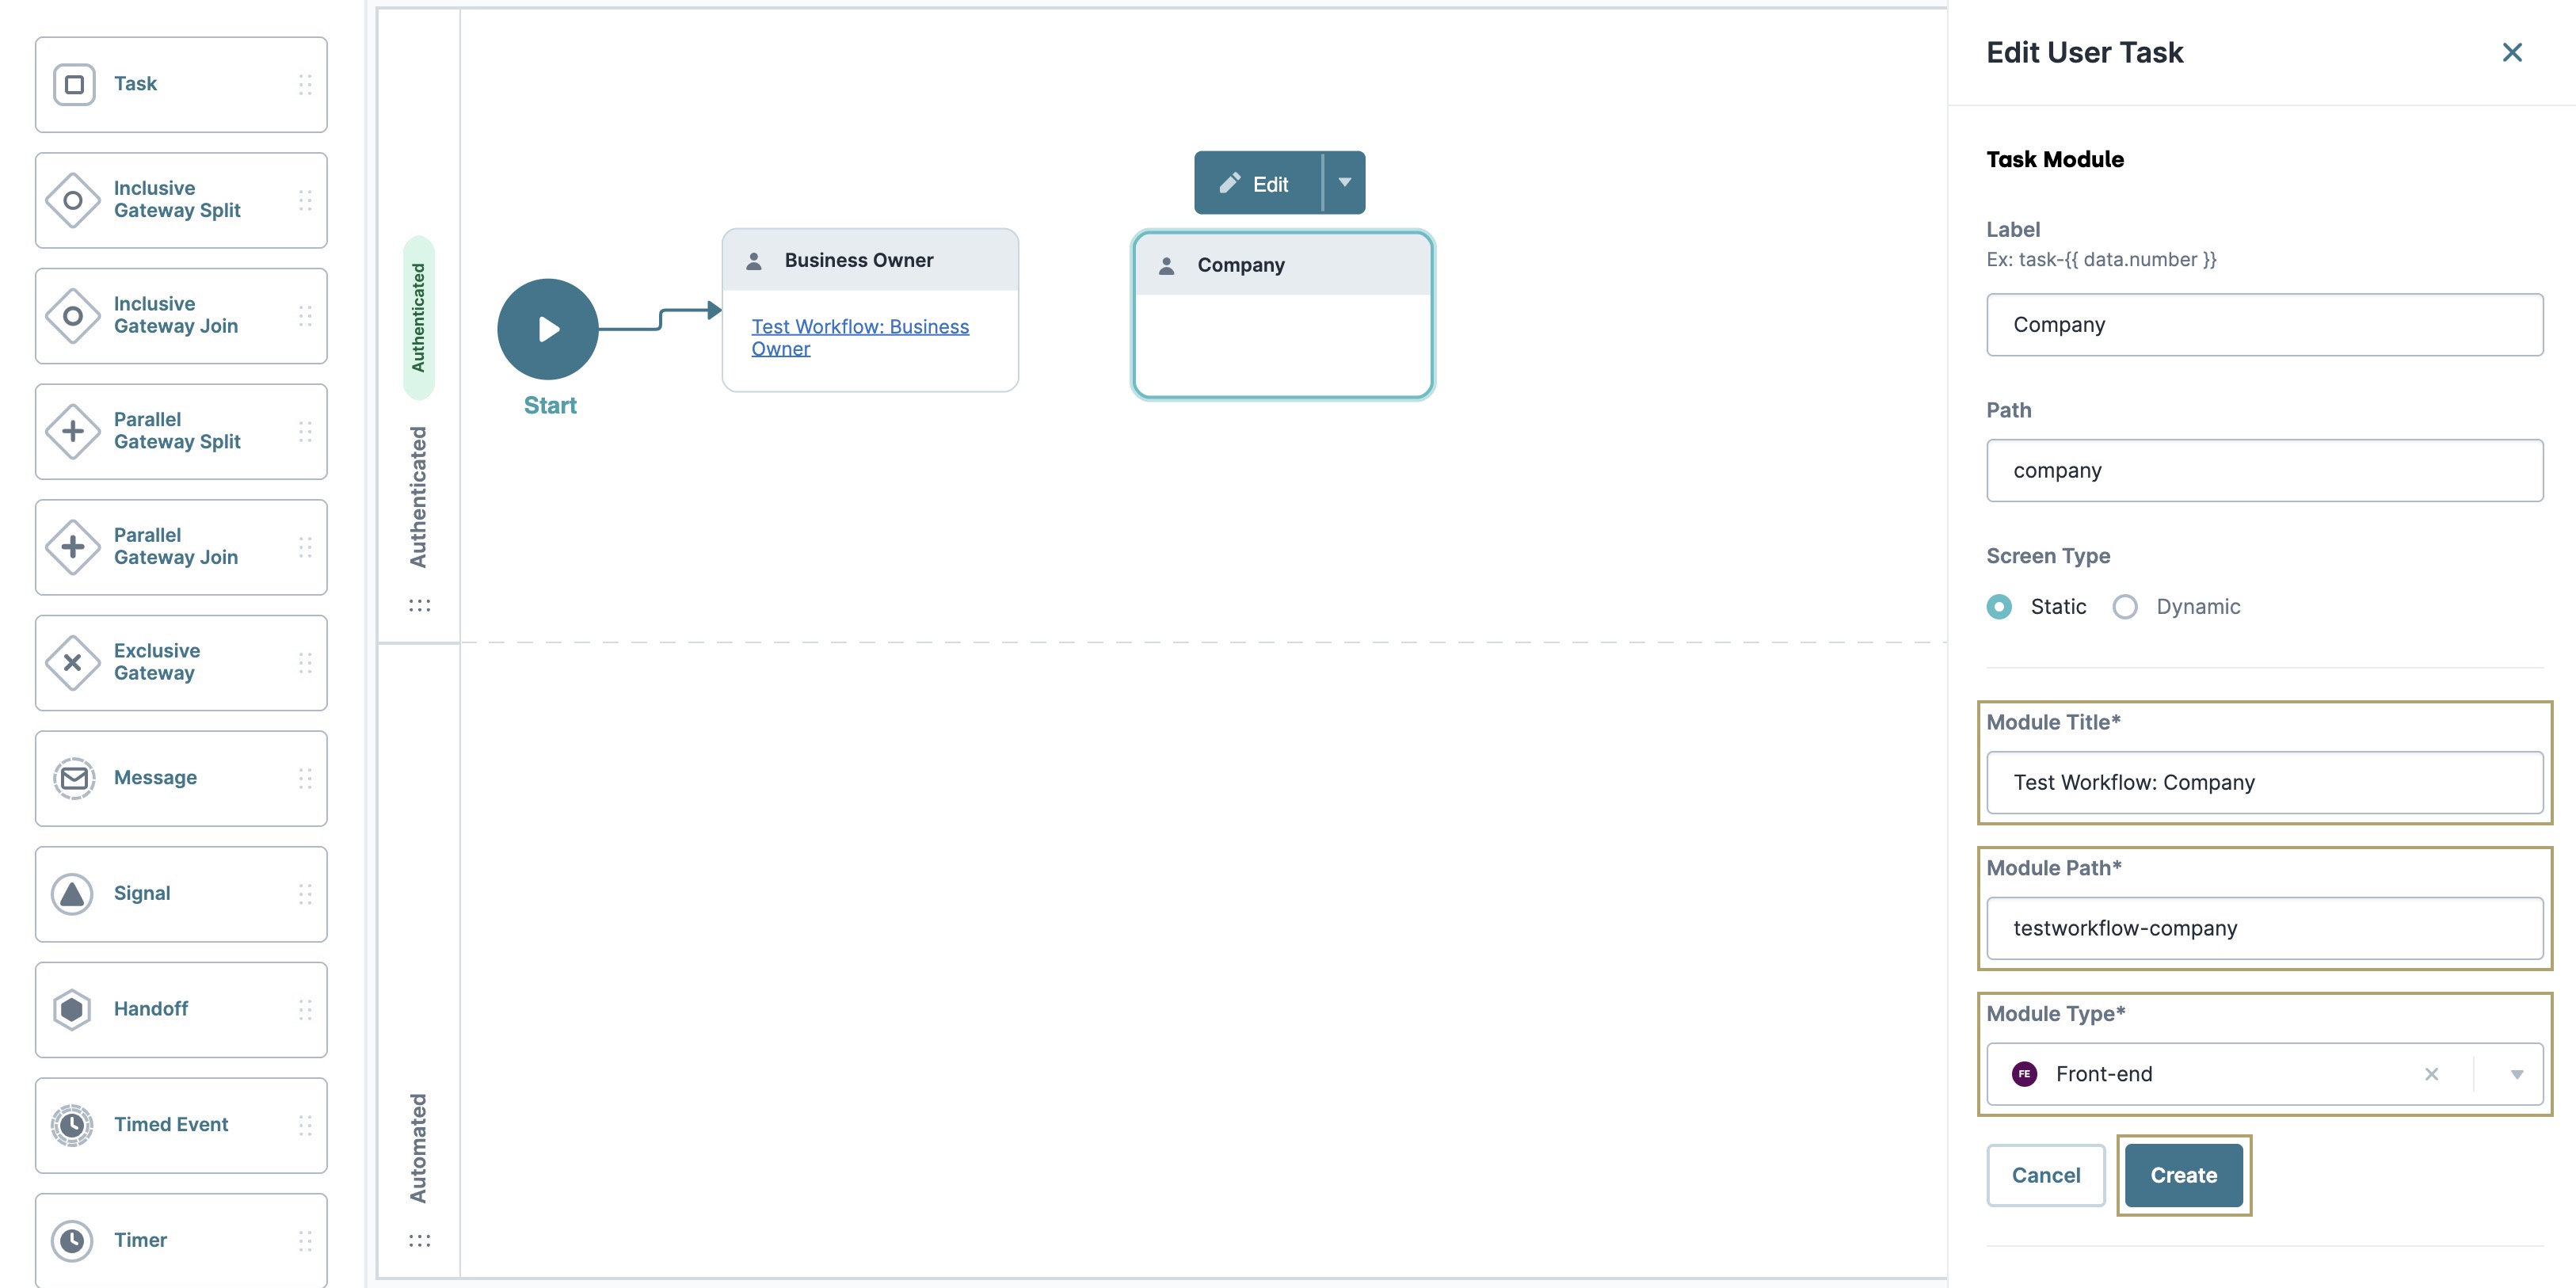
| 8. | Click Create. |
NOTE You'll configure this module in a bit. For now, create it and move on to the next step.
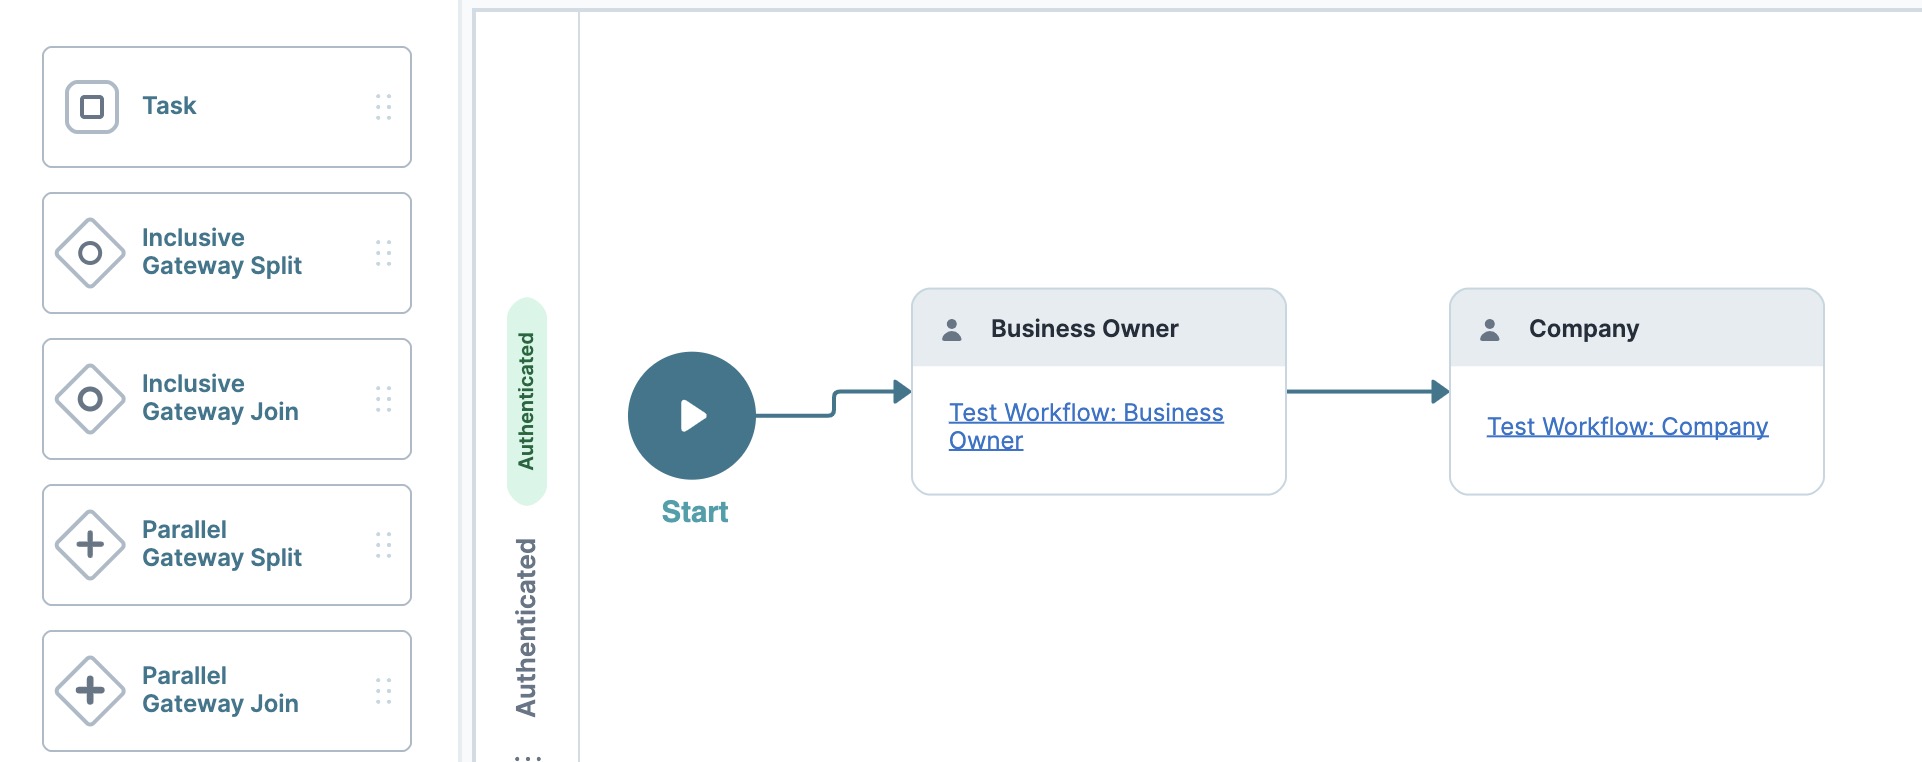
| 9. | Connect the output port (right) of the Business Owner |
Adding the Message Node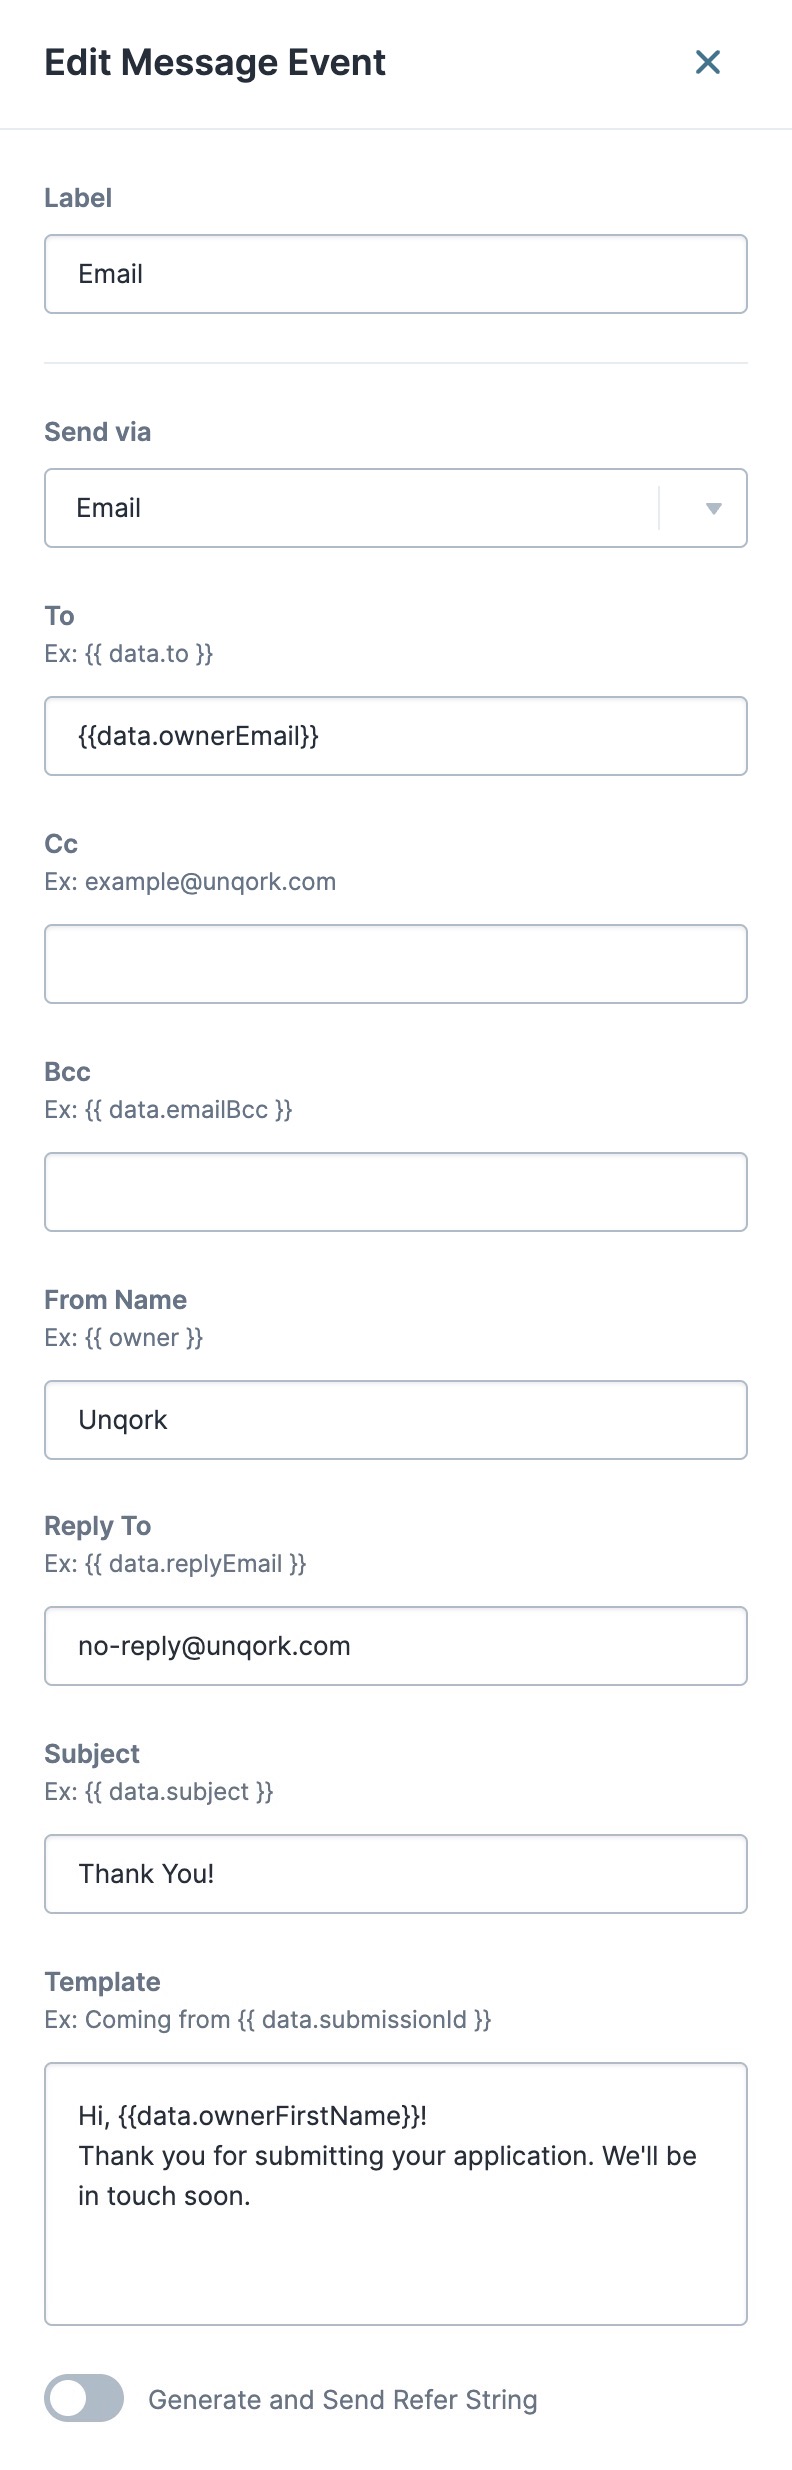
So far, your end-user (the applicant) completes the modules you added. Next, you'll automatically trigger a notification email to the applicant using the Message node in the Automated swimlane.
| 1. | Drag and drop a |
| 2. | Click Edit |
| 3. | In the Label field, enter Email. |
| 4. | From the Send via drop-down, select Email. |
| 5. | In the To field, enter {{data.ownerEmail}}. |
NOTE {{data.ownerEmail}} references the value your end-user enters in the Email field of the Business Owner module that you'll set up later.
| 6. | In the From Name field, enter Unqork, or a custom sender name. |
| 7. | In the Reply To field, enter no-reply@unqork.com, or a custom sender address. |
| 8. | In the Subject field, enter Thank you!. |
| 9. | In the Template field, enter the following: |
Hi, {{data.ownerFirstName}}!
Thank you for submitting your application. We'll be in touch soon.
NOTE {{data.driversLicenseFirstName}} references the value your end-user enters in the First Name field of the Business Owner module that you'll set up later.
| 10. | Connect the output port (right) of the Company |
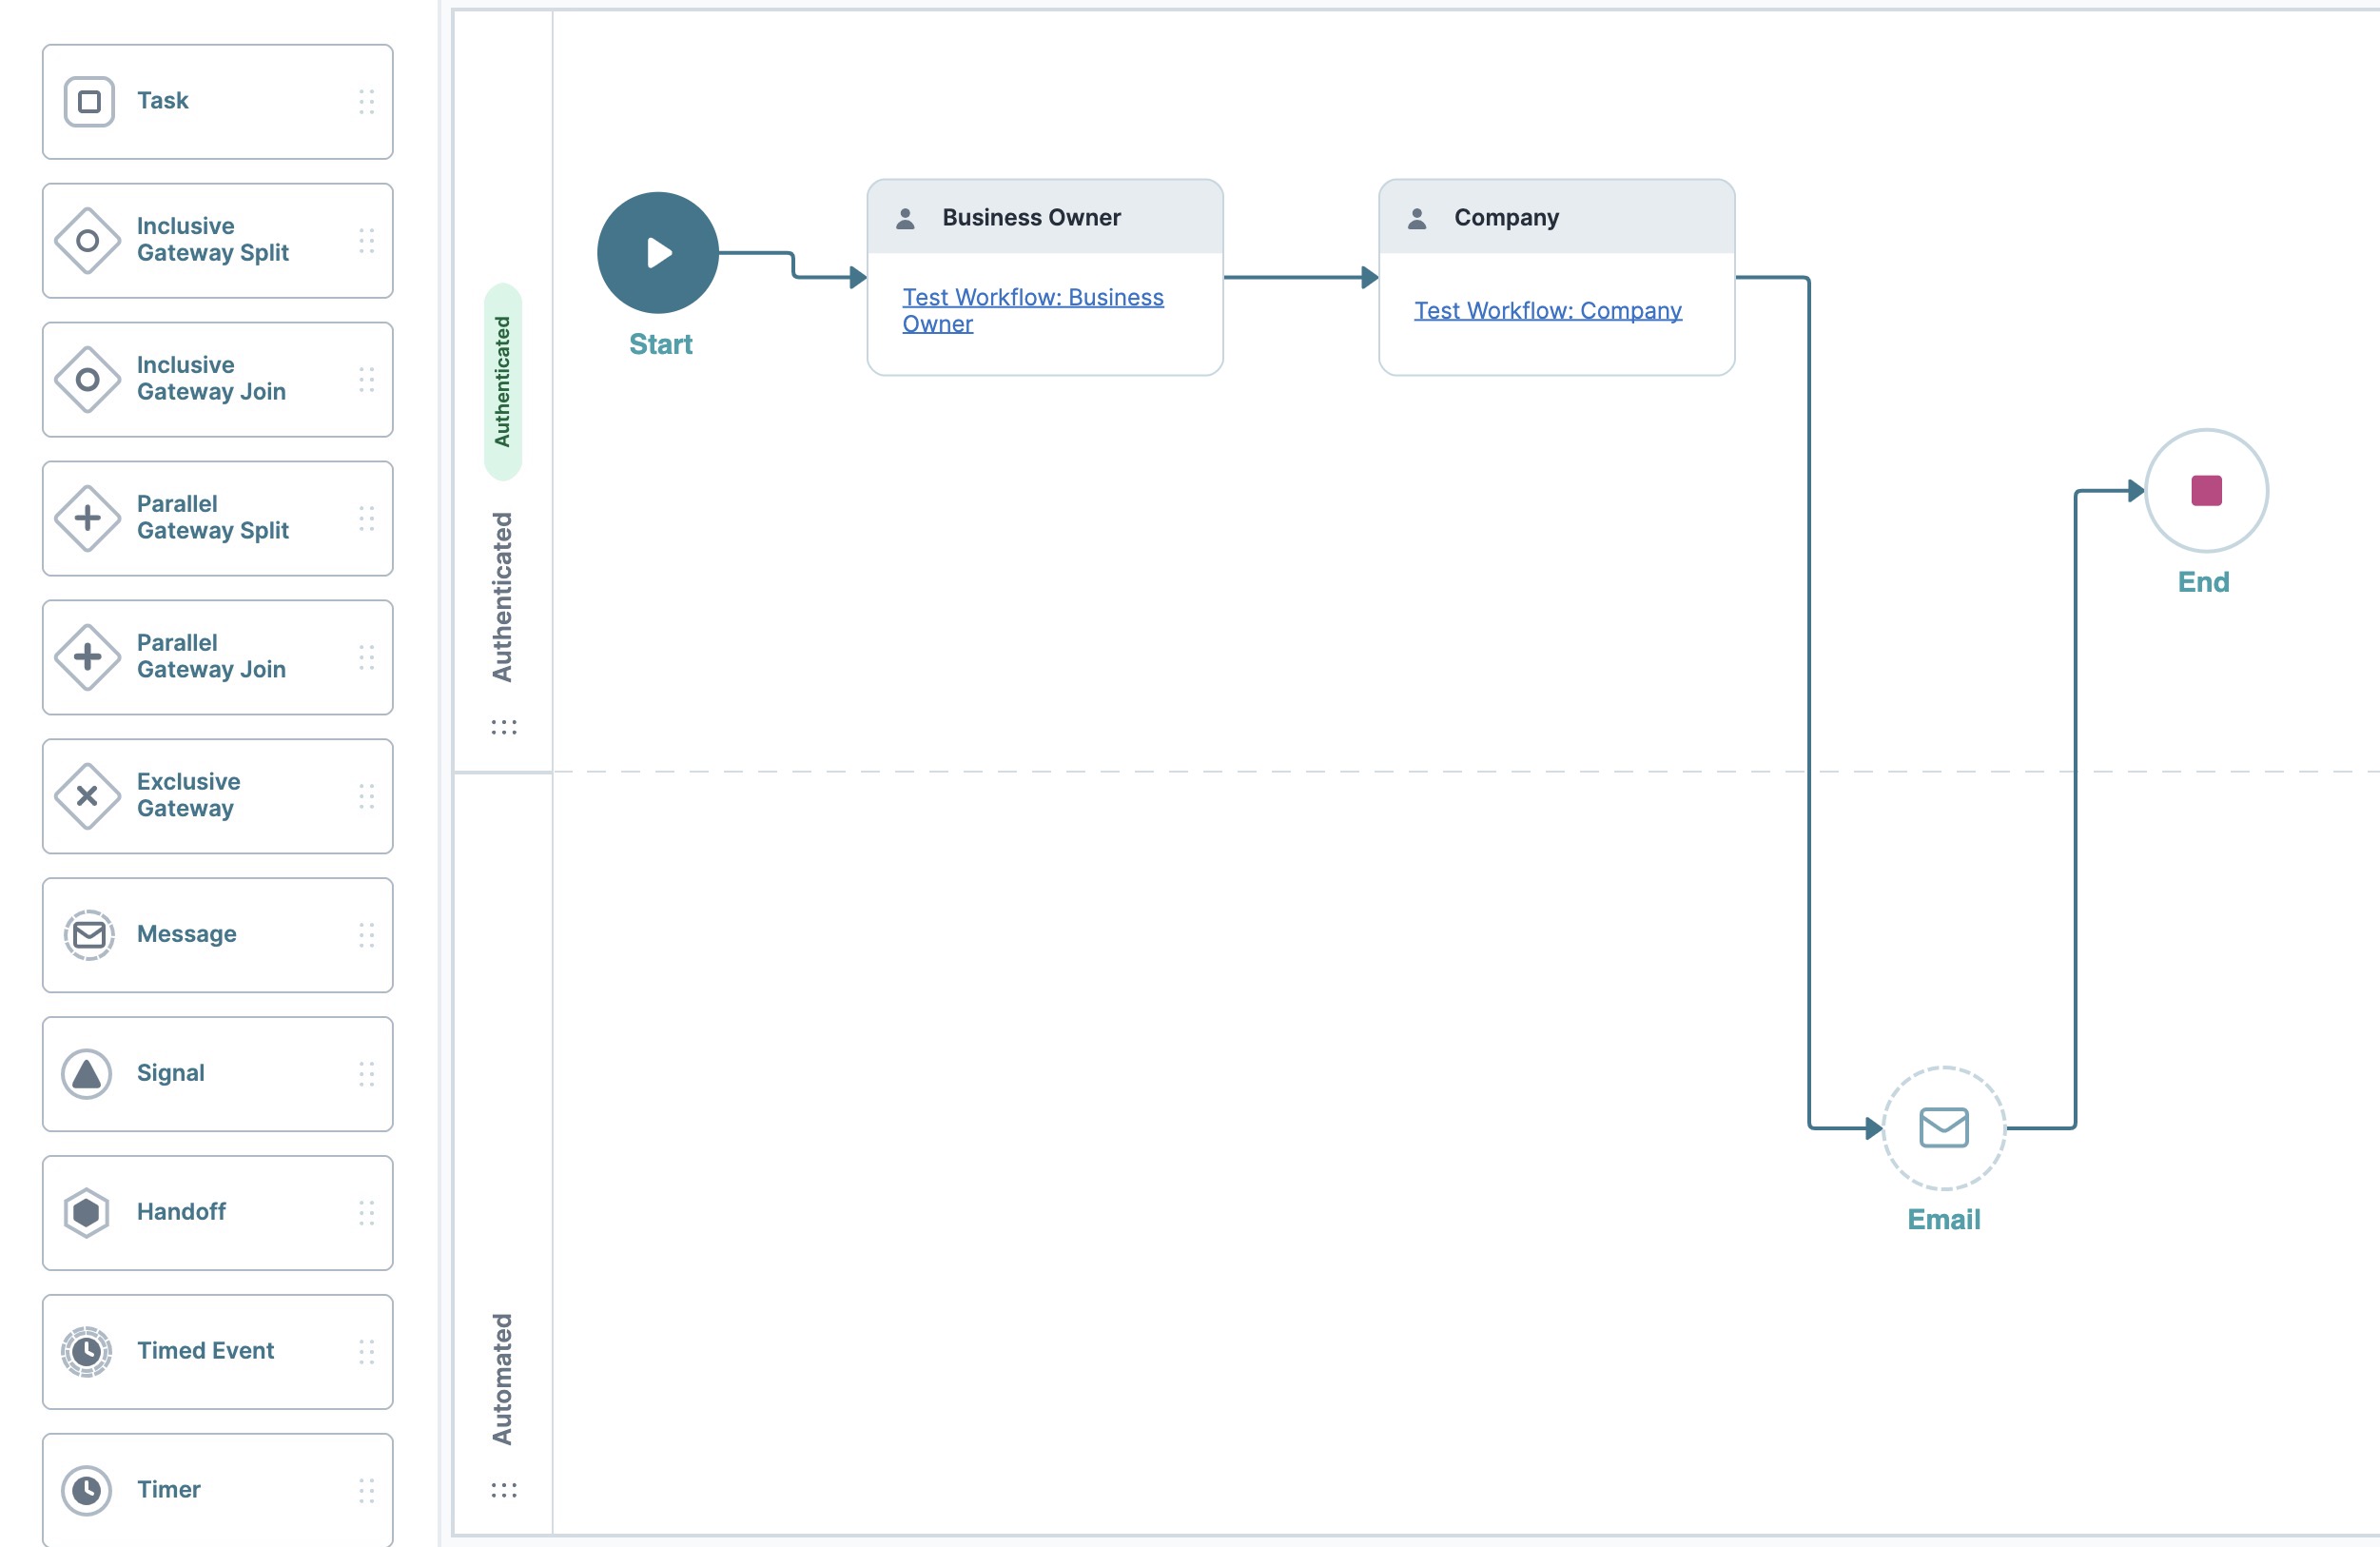
Adding the End Node
You just created your application flow. Now, complete the flow by adding an End node to the Authenticated swimlane.
| 1. | Drag and drop an |
| 2. | Click Edit |
| 3. | In the Label field, enter End. |
| 4. | Connect the output port (right) of the |
| 5. | Click Save.... |
| 6. | Click Save. |
Adding the Basic Information Questionnaire Snippet
To save time and effort, you can use one of Unqork's prebuilt snippets. Snippets are preconfigured, so all you have to do is drag and drop them onto your canvas. The Basic Information Questionnaire snippet includes dynamic fields where end-users can enter personal information.
First, open your Business Owner module from your workflow:
| 1. | In the Workflow Builder, click the hyperlink inside the Business Owner |
| 2. | Above the component tray in the Module Builder, click Snippets. |
| 3. | In the search bar, enter Basic Info. |
| 4. | Drag and drop the Basic Information Questionnaire snippet onto your canvas. |
Editing the Columns Component
Now, rearrange the snippet to make it wider, so it fits the screen:
| 1. | Inside the panelBasicInfo Panel component, hover over the  Columns component. Columns component. |
A 5-button toolbar displays above the component on hover-over.
| 2. | Click  (Settings). (Settings). |
| 3. | Under Formatting, click  (One Column). (One Column). |
| 4. | Click Save & Close. |
| 5. | Save your module. |
You've just created the first module in your workflow. At the top right of the Module Builder, click Preview to see how it looks to your end-user in Express View.
Adding the First Radio Buttons Component
Now that you finished the Business Owner module, it's time to open the Company module. You'll use the module for your applicant to add company information. For example, asking the applicant how long the company has been in business. First, you'll add some questions about the business using Radio Buttons components. Then, you'll use a Number and Decisions component to provide a risk score to the applicant.
First, open your Company module from your workflow.
| 1. | In the Workflow Builder, click the hyperlink inside the Company |
| 2. | In the Module Builder, drag and drop a |
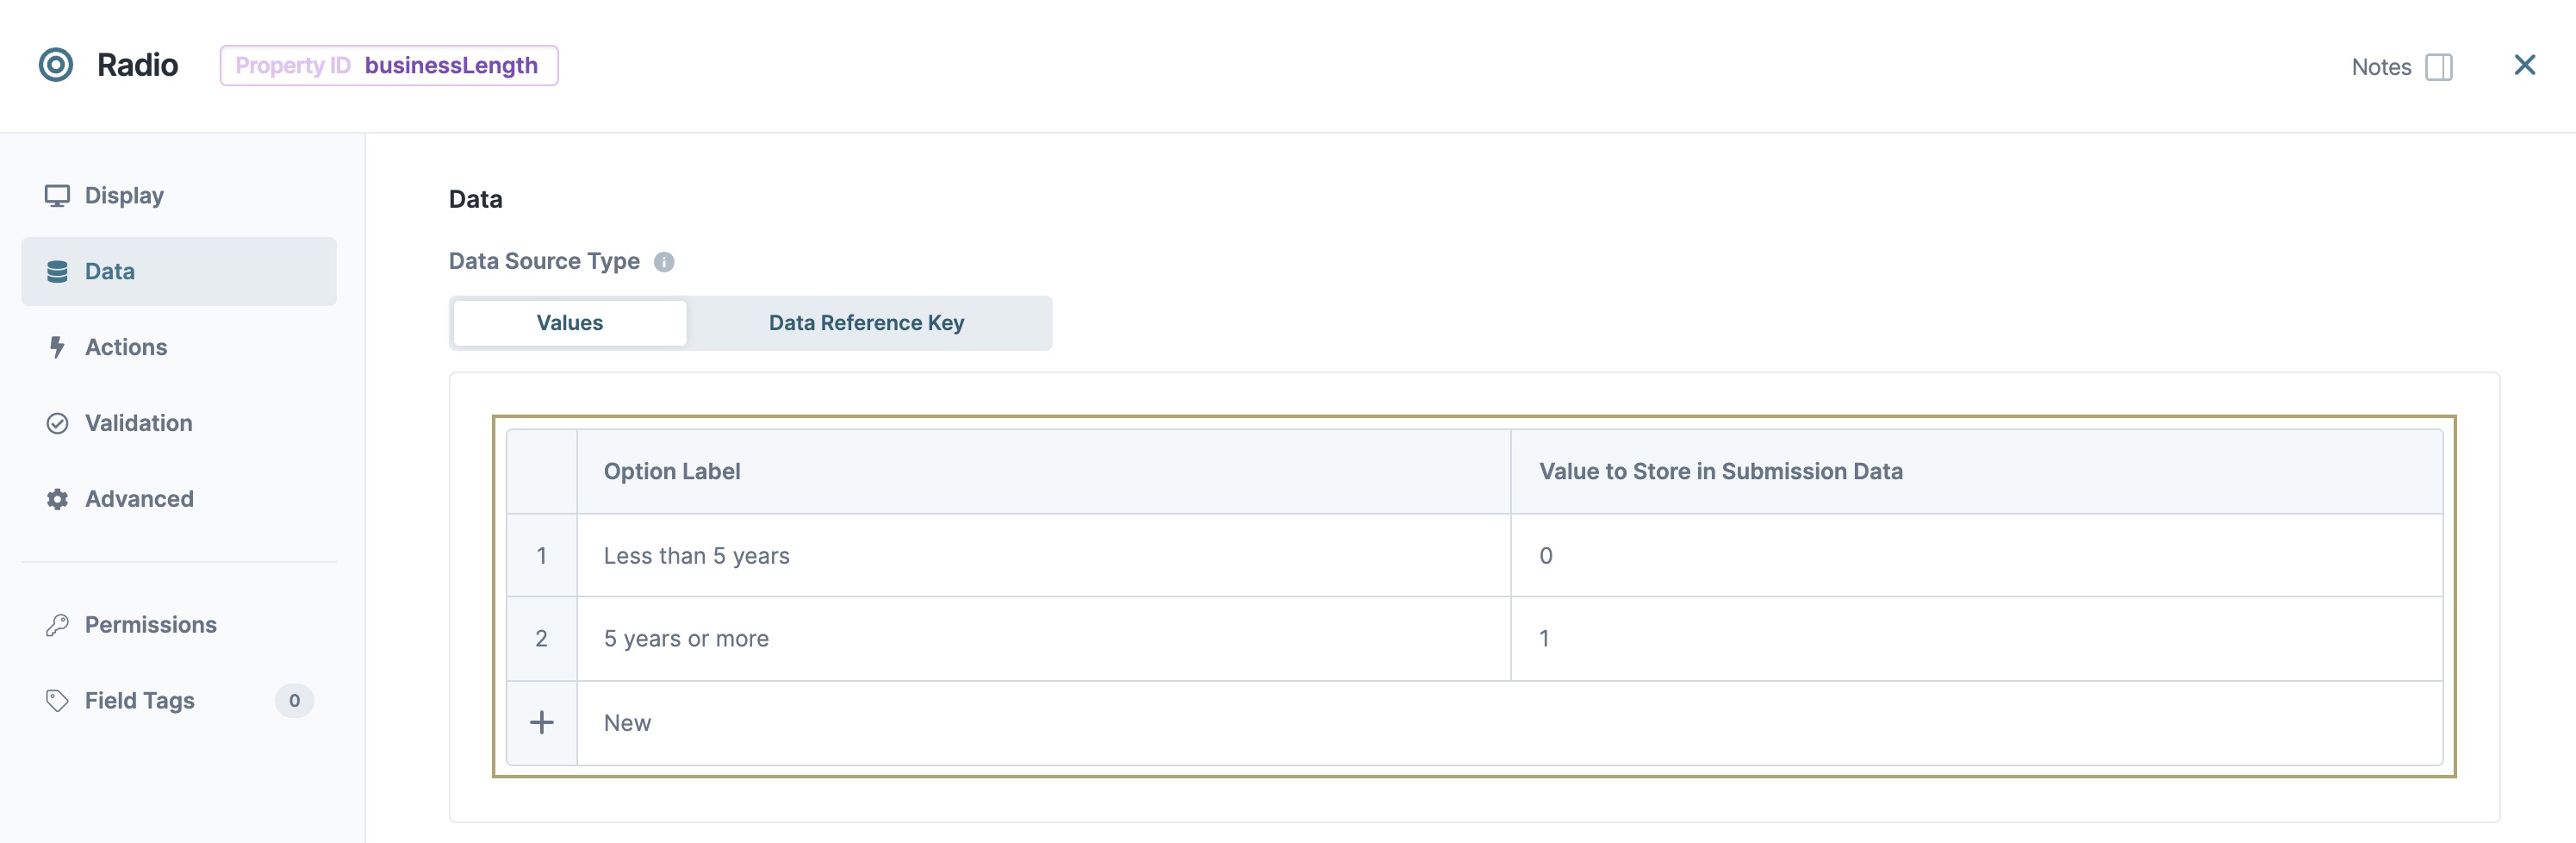
| 3. | In the Property ID A Property ID is the unique field ID used by Unqork to track and link components in your module. field, enter businessLength. |
| 4. | In the Label Text Label Text conveys what the input component is and what information it displays. Enter the purpose of the corresponding component or field. field, enter How long have you been in business?. |
| 5. | To the left of the component's configuration window, click |
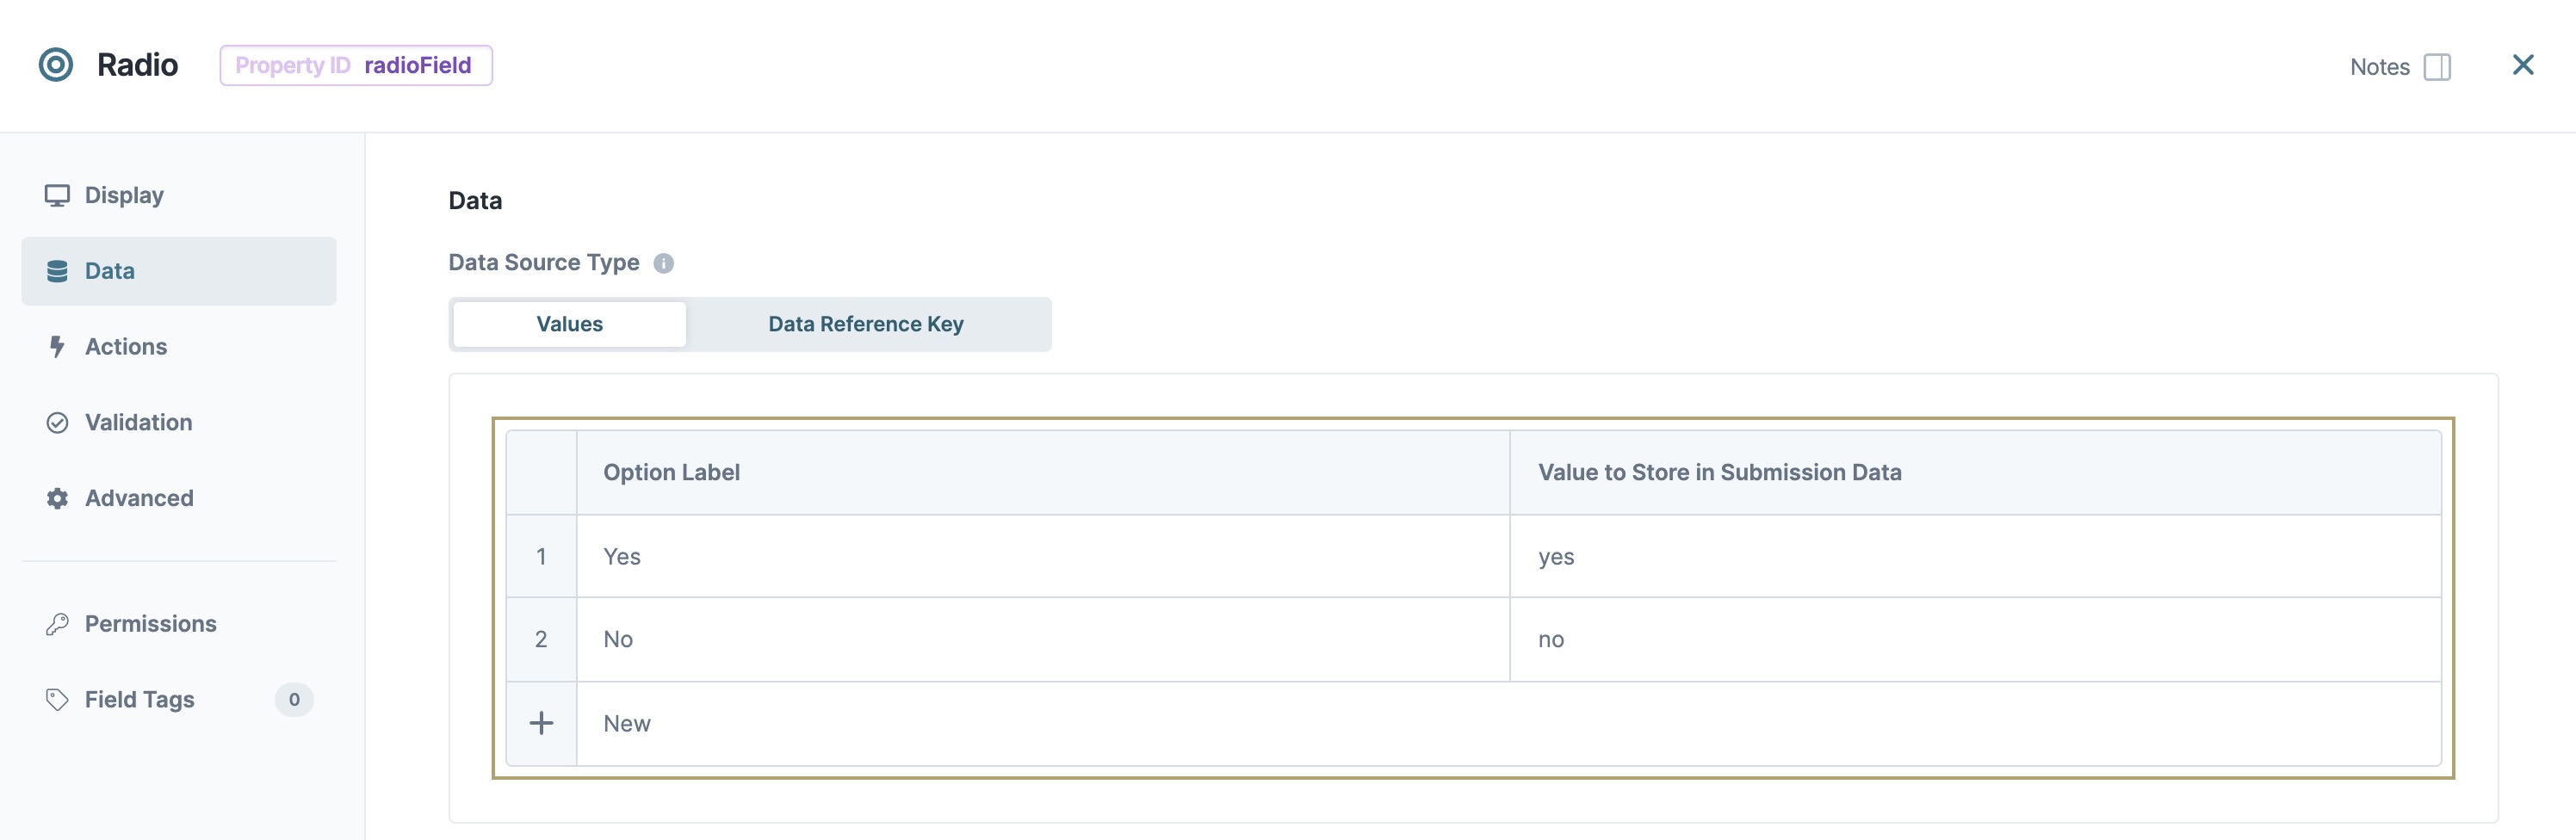
| 6. | Set your Option Label and Value to Store in Submission Data as shown below: |
| 7. | To the left of the component's configuration window, click |
| 8. | Set the Required toggle to (ON). |

| 9. | Click Save & Close. |
Adding the Second Radio Buttons Component
Next, add another question asking if the company filed a previous loss.
| 1. | Drag and drop a second |
| 2. | In the Property ID A Property ID is the unique field ID used by Unqork to track and link components in your module. field, enter previousLoss. |
| 3. | In the Label Text Label Text conveys what the input component is and what information it displays. Enter the purpose of the corresponding component or field. field, enter enter Have you filed a previous loss?. |
| 4. | To the left of the component's configuration window, click |
| 5. | Set your Option Label and Value to Store in Submission Data as shown below: |
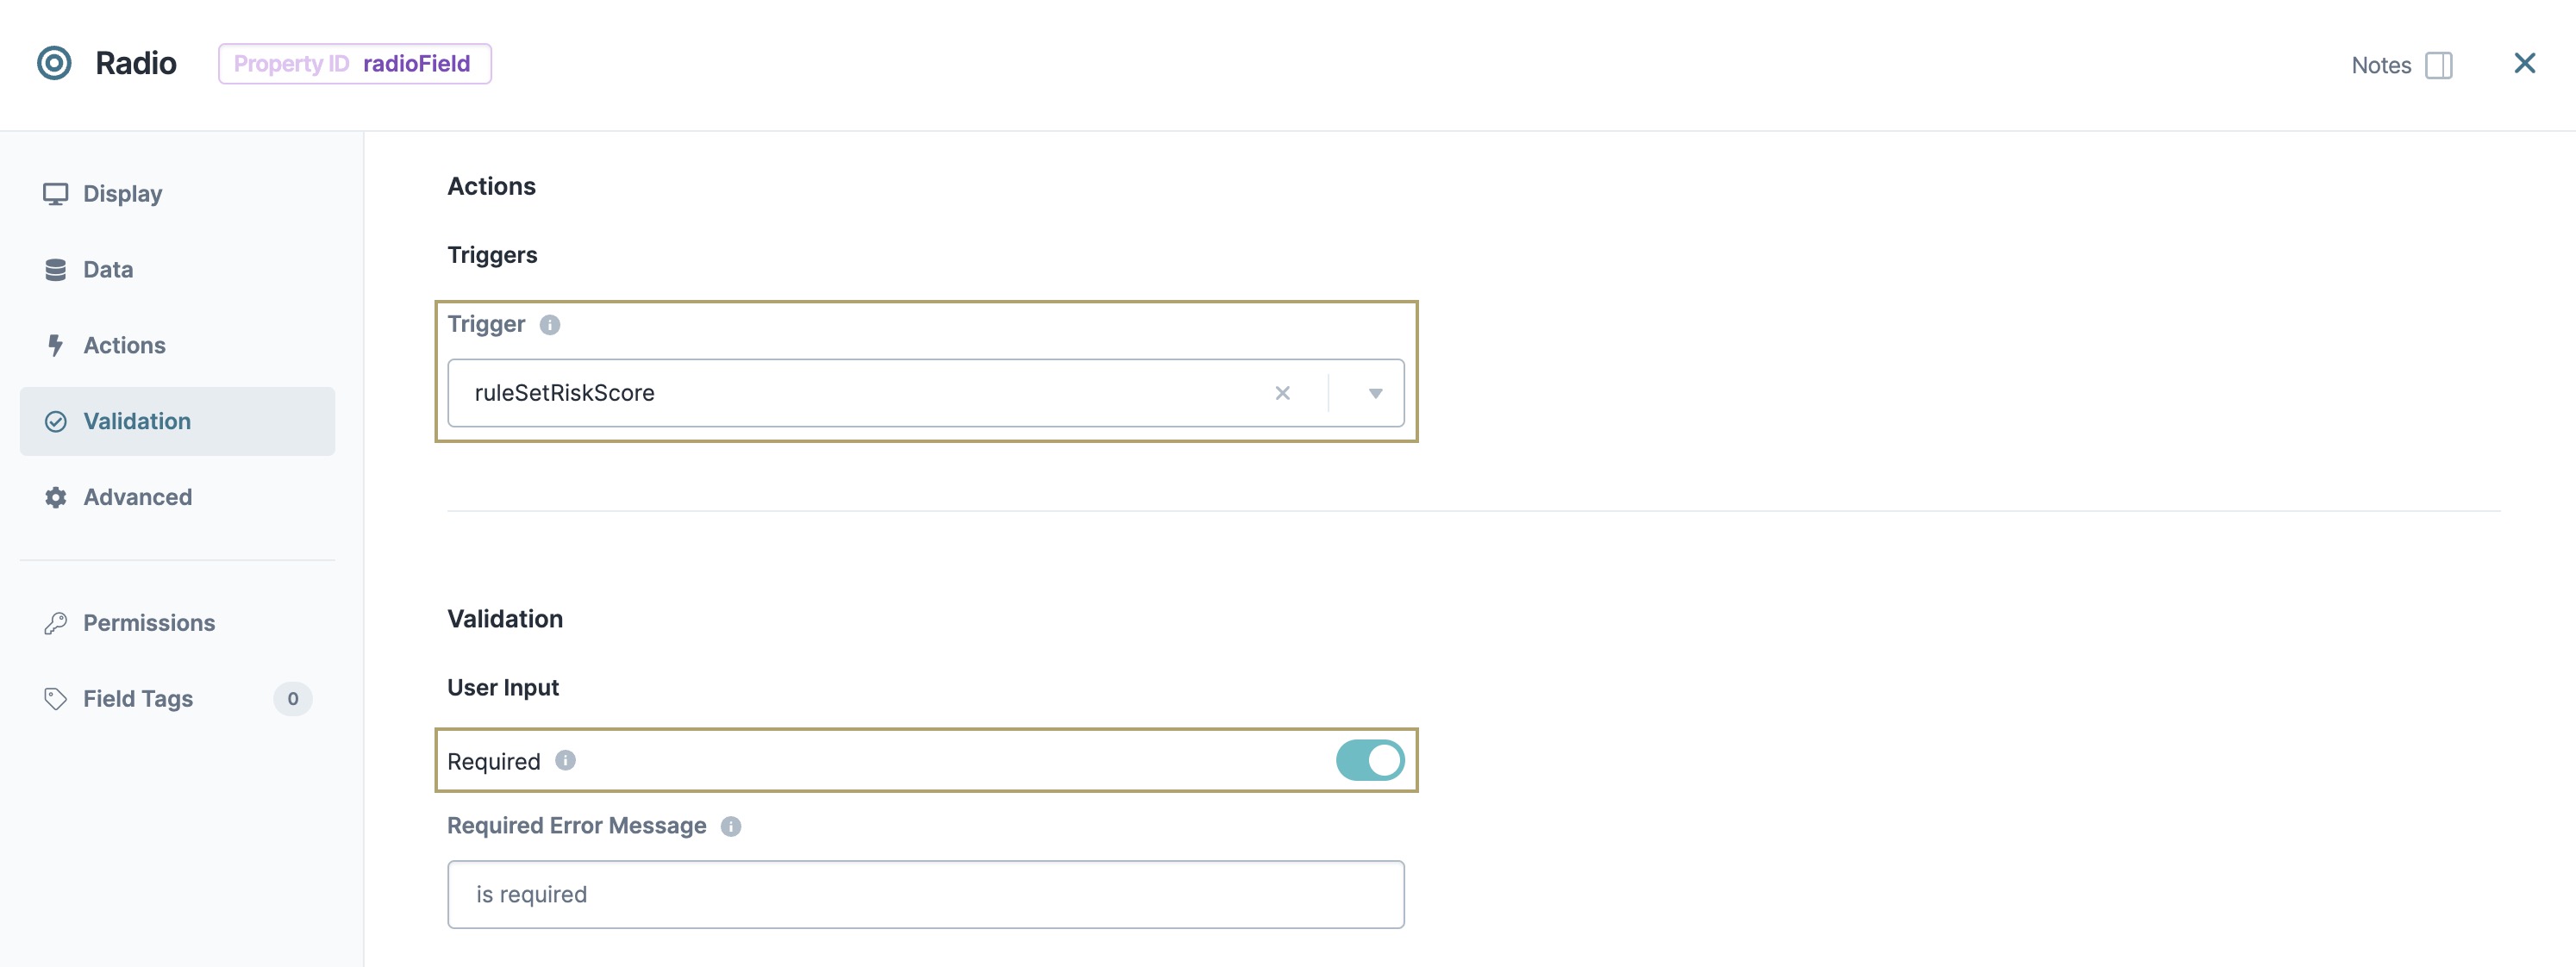
| 6. | To the left of the component's configuration window, click |
| 7. | In the Trigger field, enter ruleSetRiskScore. |
NOTE This is the Property ID of the Decisions component you'll set up next.
| 8. | To the left of the component's configuration window, click |
| 9. | Set the Required toggle to (ON). |
| 10. | Click Save & Close. |
Adding the Number Component
Based on the applicant's credit score and answers to these two questions, you'll provide them with a risk score. Use a Number component to display the score and a Decisions component to determine it.
| 1. | Drag and drop a  Number component onto the canvas, placing it below the previousLoss Number component onto the canvas, placing it below the previousLoss |
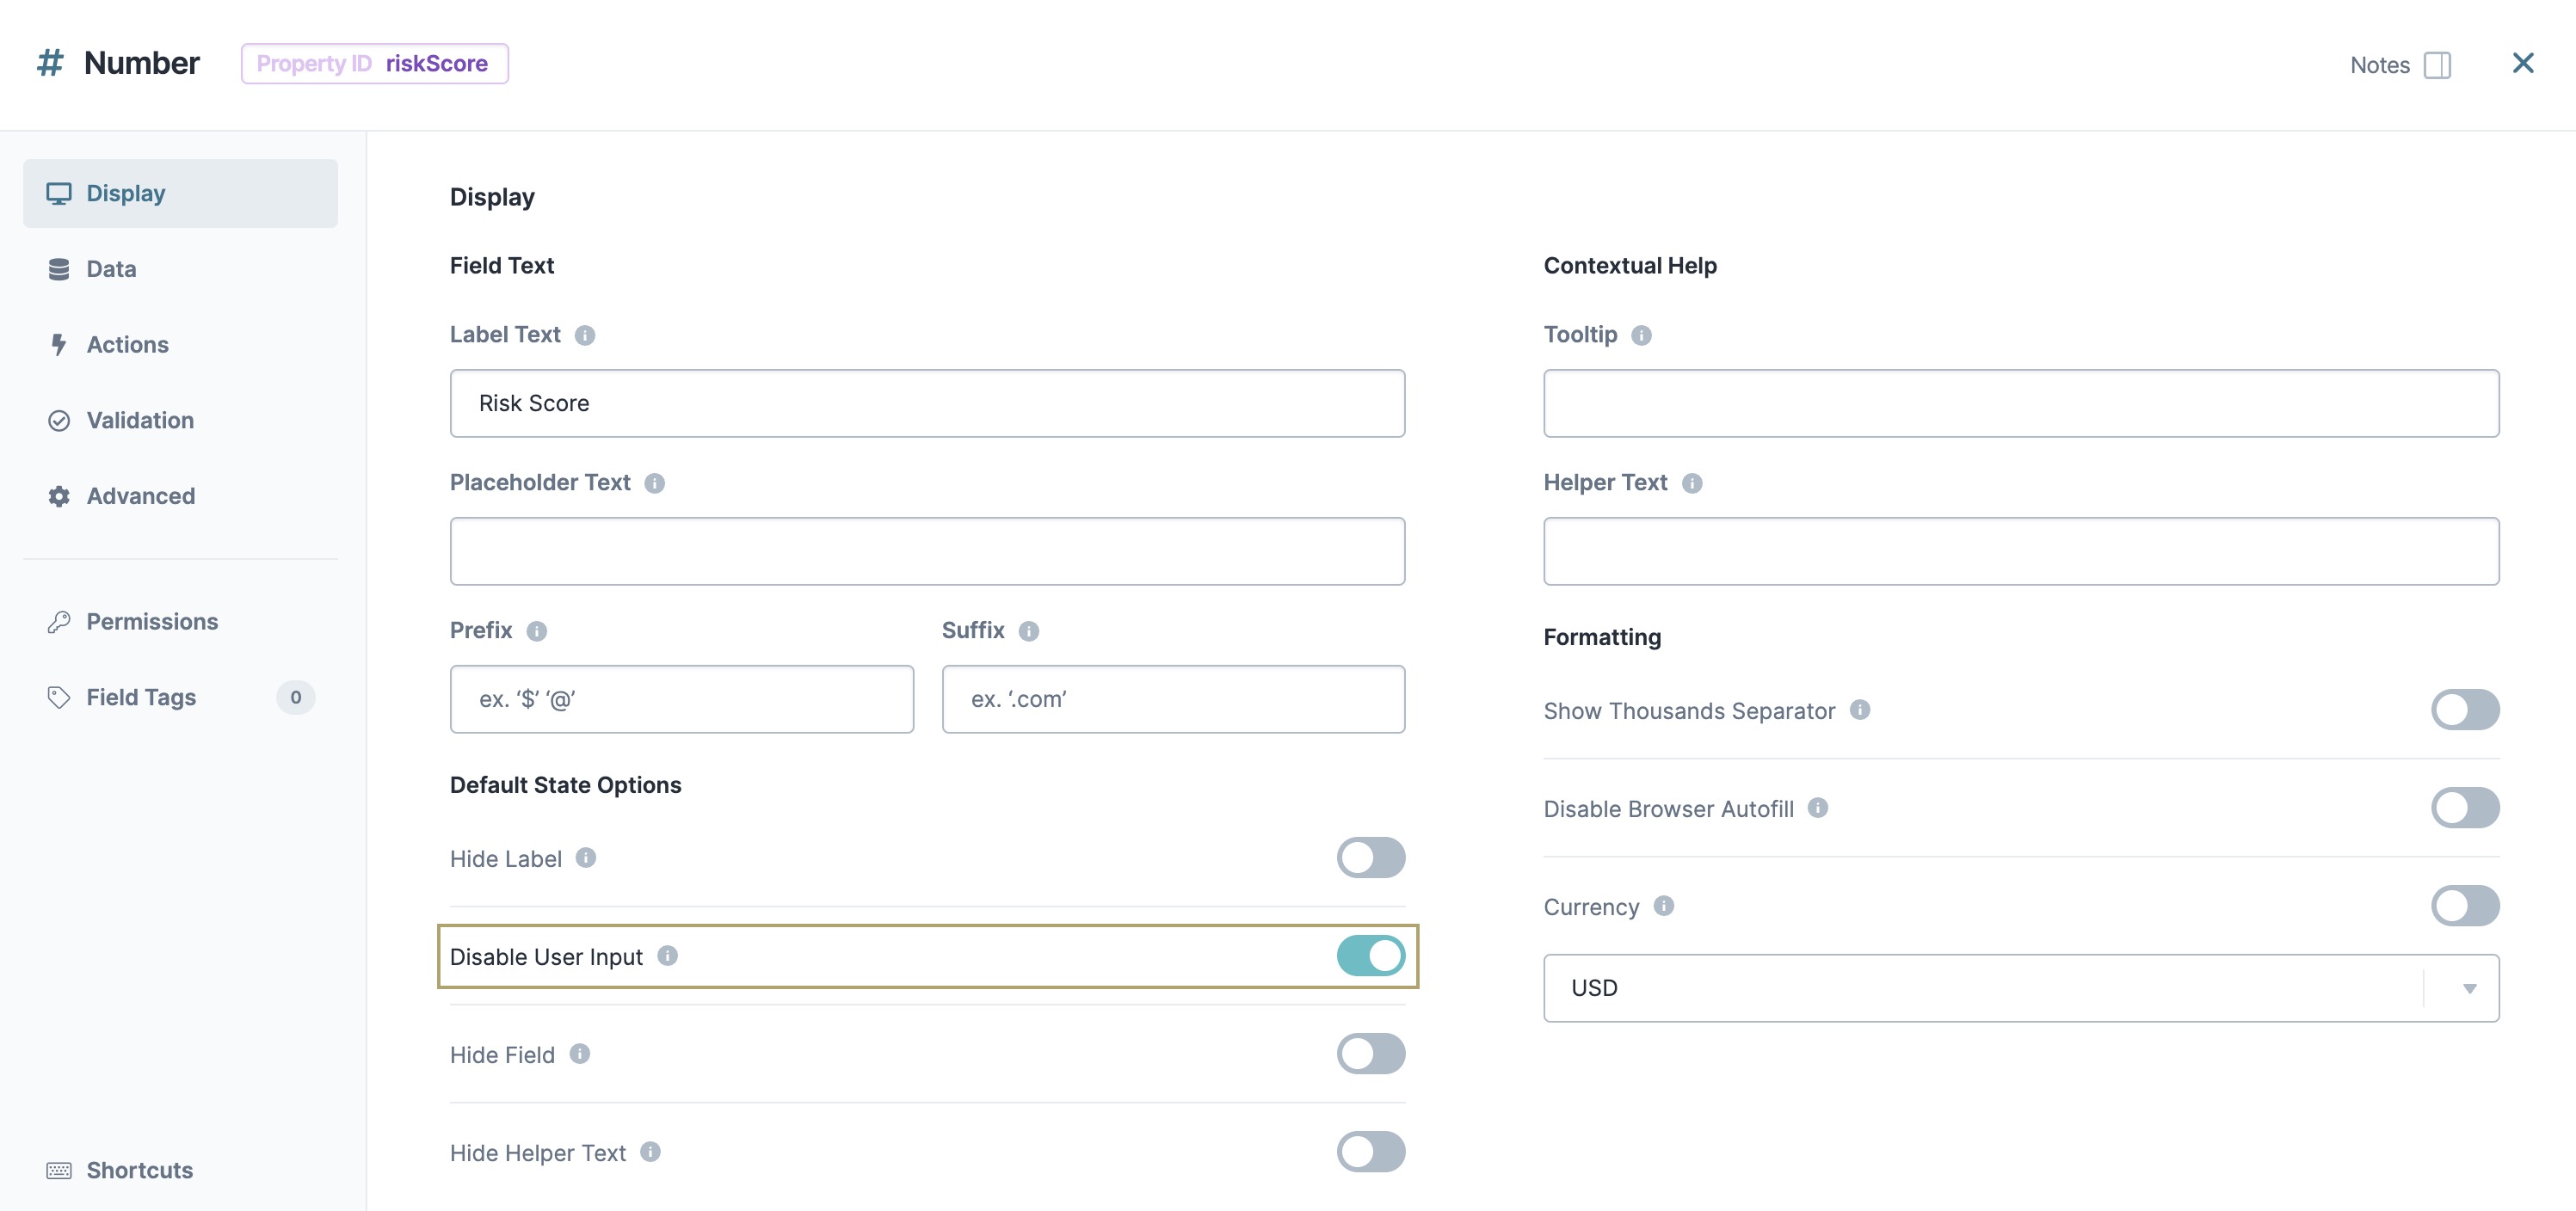
| 2. | In the Property ID A Property ID is the unique field ID used by Unqork to track and link components in your module. field, enter riskScore. |
| 3. | In the Label Text Label Text conveys what the input component is and what information it displays. Enter the purpose of the corresponding component or field. field, enter Risk Score. |
| 4. | Set the Disable User Input toggle to (ON). |
| 5. | Click Save & Close. |
Adding the Decisions Component
The Decisions component is a logic-based components used in if/then scenarios. This component tells your module what to do based on the specified inputs.
| 1. | Drag and drop a Number component. |
| 3. | To the left of the component's configuration window, click |
| 4. | In the Inputs table, enter the following: |
| Property ID | Type | Required |
|---|---|---|
|
businessLength |
exact |
|
|
previousLoss |
exact |
|
 (Yes)
(Yes)| 5. | In the Outputs table, enter the following: |
| Property ID | Type |
|---|---|
|
riskScore |
value |
| 6. | In the Micro Decisions table, enter the following: |
| BusinessLength | previousLoss | riskScore_value |
|---|---|---|
|
0 |
yes |
10 |
|
0 |
no |
8 |
|
1 |
yes |
7 |
|
1 |
no |
6 |
| 7. | Click Save & Close. |
| 8. | Save the module. |
Reviewing, Previewing, and Testing Your App
Now that you built your modules, it's time to test your application. Open your workflow and click Preview. You'll see that this application corresponds with the modules you created in your app.
| 1. | Fill out the information fields in the first module. |
TIP Make sure to at least fill out the First Name and Email fields so you can test out your Message node.
| 2. | Follow the process flow onto the next module and input company information. Based on how you answer these questions, you'll receive a risk score. |
| 3. | To submit your application, click Next. |
| 4. | Check your email inbox for the automated email. The workflow sends to the email address and name you entered in the first module. |
You created a fully functional application in 20 minutes. And, you did it all without a single line of code. Let's review what you set up.
You used the Micro Decisions table to set up rules to determine the risk score. Here's a summary of how this works:
-
If the end-user has been in business for less than 5 years, and has filed a previous loss, their risk score is 10.
-
If the end-user has been in business for less than 5 years, and hasn't filed a previous loss, their risk score is 8.
-
If the end-user has been in business for 5 years or more, and has filed a previous loss, their risk score is 7.
-
If the end-user has been in business for 5 years or more, and hasn't filed a previous loss, their risk score is 6.
Resources
