The process of creating a workflow is different from other app elements. A workflow can only exist inside a workflow-type app. When you add a workflow-type app, Unqork automatically creates a workflow. When you delete a workflow-type app, its attached workflow also gets deleted. A workflow is an app element tied to its application. So, you'll create and delete workflows the same way you create and delete apps.
Creating a Workflow
You can create workflow-type apps from a workspace. To add a new workflow, you'll first open a workspace. Then, you can create an app and add a workflow to it.
To create a workflow:
If you don't have an existing application, create one from your workspace environment.
To create a workflow-type application from the Workspaces page:
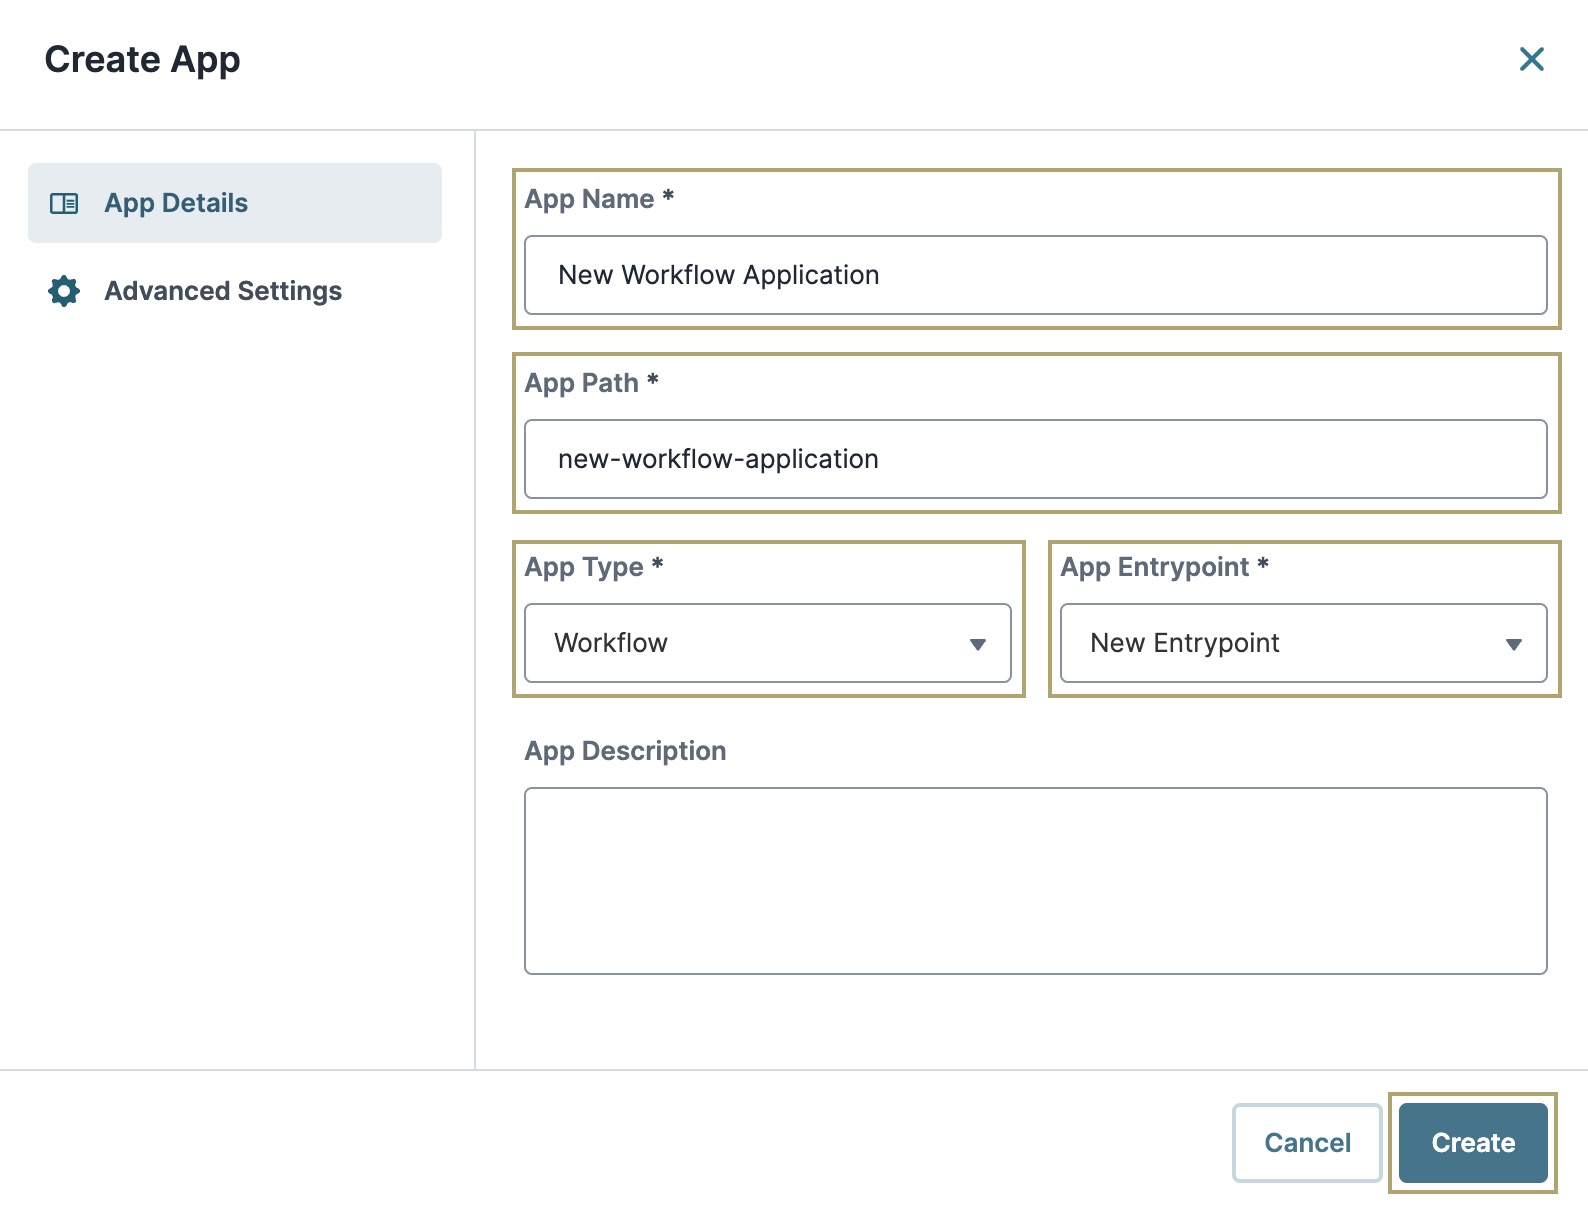
From your Workspace page, click +Create App.
Enter a unique App Name*. The App Path field populates automatically.
From the App Type* drop-down, select Workflow.
From the App Entrypoint* drop-down, select New Entrypoint.

In the App Description field, add a brief description of your workflow application.
Click Create.
To open the new workflow, click the workflow's tile.
Navigating the Workflow Element's Ellipsis Menu
Most workflow management takes place within the app. When you click the (ellipsis) on your workflow’s app element tile, a menu displays. Let's look at its settings:
Option | Description |
|---|---|
Settings | Lets you update the workflow name and path. |
Preview | Lets you preview your workflow in Express View. |
Unqork defines applications by their entrypoint module and submission ID value. Workflows have a defined entrypoint module and only one submission ID. You can only have one workflow per app. Also, you can't share or move workflows.
To connect your workflow to another app, consider using a handoff. Handoffs let you continue your workflow submission in other workflow- or module-type apps.
Previewing a Workflow
Previewing your workflows as you build them gives you a glimpse of what the end-user sees. Most workflow management takes place at the Workspace Level. But you can also preview your workflow at the Application Level from an open workflow app.
To preview a workflow at the Application Level:
Navigate to your workflow-type app.
From the
.png) (ellipsis) menu of the workflow's element tile, select Preview.
(ellipsis) menu of the workflow's element tile, select Preview.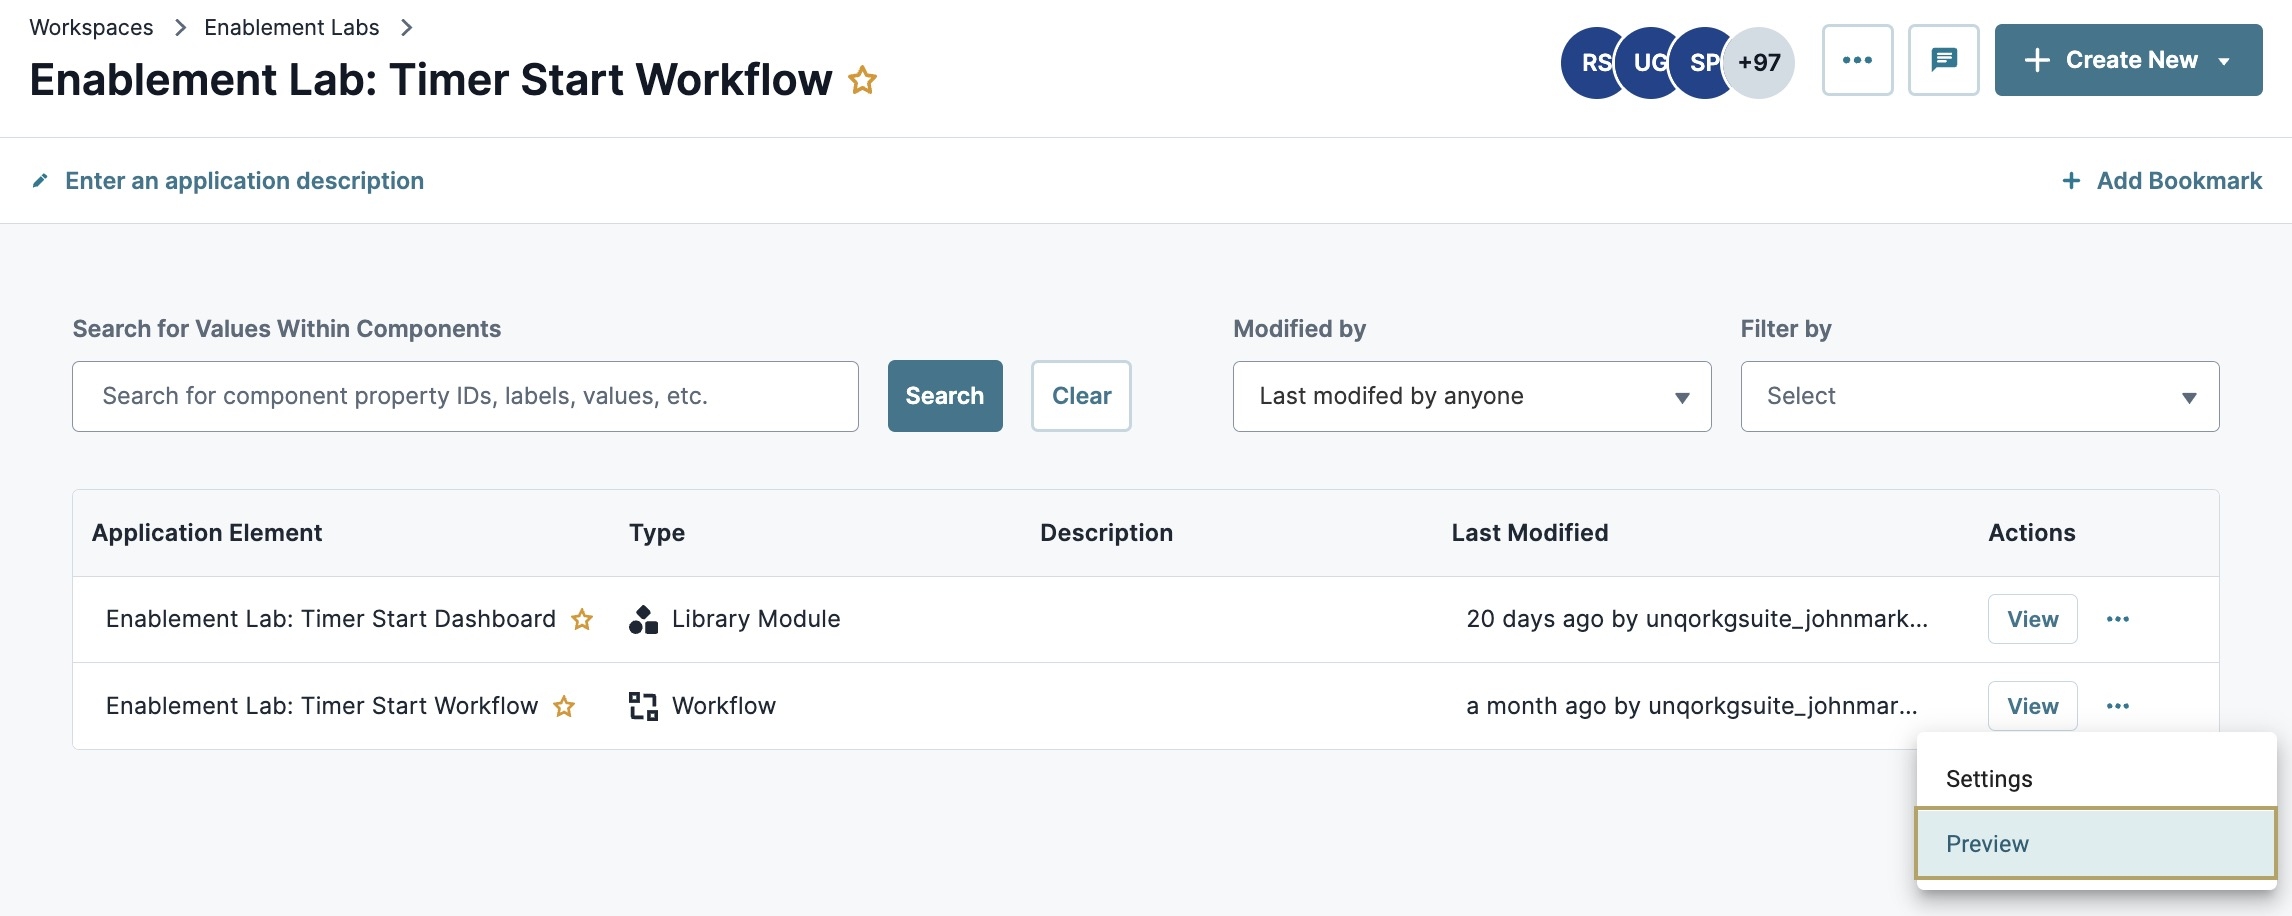

Deleting a Workflow
Remember, a workflow ties directly to its app. The steps for deleting a workflow are the same as deleting a workflow-type app.
To delete a workflow-type app:
From the workspace page, find the workflow-type application you want to delete.
From the
(ellipsis) menu of the workflow's element tile, select Delete.Retype the name of your app exactly.

Click Yes, Delete.
The process of creating a workflow is different from other app elements. A workflow can only exist inside a workflow-type app. When you add a workflow-type app, Unqork automatically creates a workflow. When you delete a workflow-type app, its attached workflow also gets deleted. A workflow is an app element tied to its application. So, you'll create and delete workflows the same way you create and delete apps.
Creating a Workflow
You can create workflow-type apps from a workspace. To add a new workflow, you'll first open a workspace. Then, you can create an app and add a workflow to it.
To create a workflow:
Click the + Create App button.
The Create App modal opens. This modal contains two tabs, App Info and Data Settings. The App Info tab shows by default. Data Settings are optional and offer a level of customization for your new app.
Enter a unique App Name.
Select a preview style from the Style drop-down. A style specifies your application’s appearance in Express View. If left blank, your preview uses the environment's default style.
From the App Type drop-down, select Workflow.
From the App Entrypoint drop-down, select New Entrypoint.
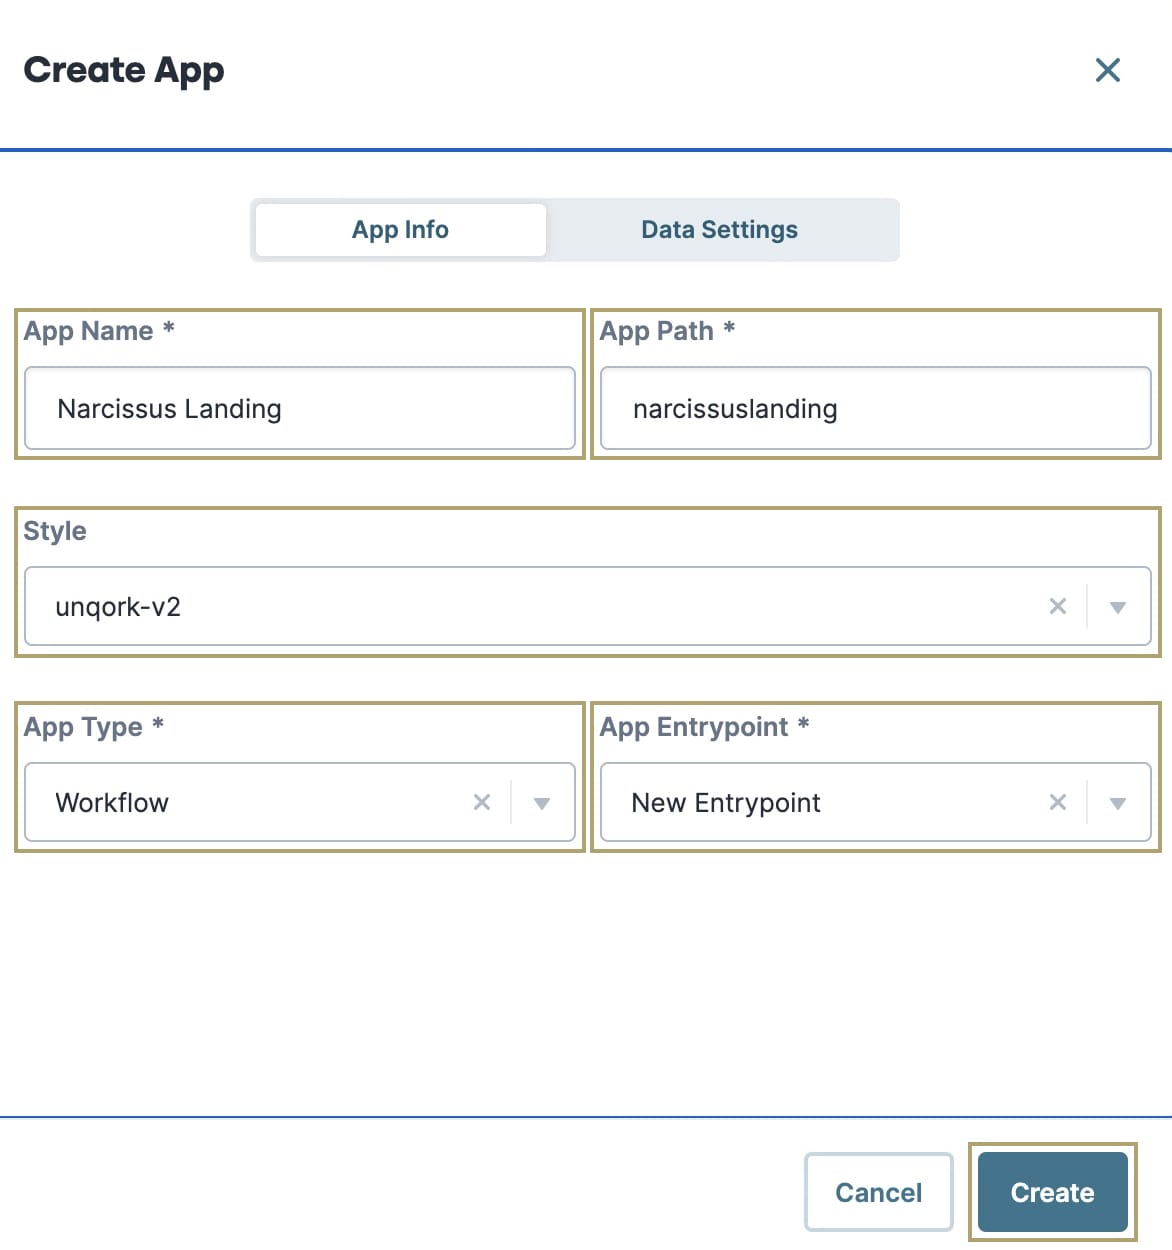
Click Create.
To open the new workflow, click the workflow's tile.
Navigating the Workflow Element's Ellipsis Menu
Most workflow management takes place within the app. When you click the (ellipsis) on your workflow’s app element tile, a menu displays. Let's look at its settings:
Option | Description |
|---|---|
Settings | Lets you update the workflow name and path. |
Preview | Lets you preview your workflow in Express View. |
Unqork defines applications by their entrypoint module and submission ID value. Workflows have a defined entrypoint module and only one submission ID. You can only have one workflow per app. Also, you can't share or move workflows.
To connect your workflow to another app, consider using a handoff. Handoffs let you continue your workflow submission in other workflow- or module-type apps.
Typically, you configure workflows to reference modules. For example, referencing modules with a Signal Start or Task node. To reference your module, it needs to exist in a workflow-type application.
What if you want to reference a module that exists in a completely different application? You can share that module to your workflow-type application. To share a module with your workflow's workspace, you need to add it to the Library.
To add a module to the Library at the Application level:
Locate and open the application that contains your referenced module.
On the module element tile, click the
(ellipsis) button. The Module's options menu displays.Select
.png) Share to Library.
Share to Library.From the Set Element Access & Usage drop-down, select either Share to Select Workspaces or Share to Environment.
Selecting Share to Environment will share the module to every workspace at that environment level.
With Share to Select Workspaces selected, select your workflow's workspace from the Share To column.
By default, the element automatically shares to the workspace in which it already exists. You cannot clear this selection. You can only select other workspaces to which you want to share the element.
Click Share.
Your module element is now shared with your workflow's workspace. Next, let's add it to the workflow's application.
To add a shared element to your workflow-type application:
Locate the workflow-type application whose workflow references your shared module element.
To the left of the page, select the
.png) Modules tab.
Modules tab.At the top right, click
.png) (Library).
(Library)..jpg)
Locate your shared module element and click Add.
.jpg)
The module that your workflow references is not a part of its application.
Duplicating Your Workflow-Type Applications
Now, let's duplicate your workflow applications. The only applications you can duplicate are workflow-type applications. If you could duplicate modules, the module ID changes, and all workflow references break. But when you duplicate a workflow-type application, all shared module elements carry over to the duplicate. Module IDs and paths don't change and your workflow works as normal. The duplicate also exists in the same workspace as the original application.
You can duplicate your workflow-type applications from the Workspace or Application Level. Let's look at both.
Duplicating Workflow-Type Applications at the Workspace Level
To duplicate a workflow-type application at the Workspace Level:
Navigate to the workspace holding your workflow-type app.
From the
(ellipsis) menu of the app's element tile, select Duplicate.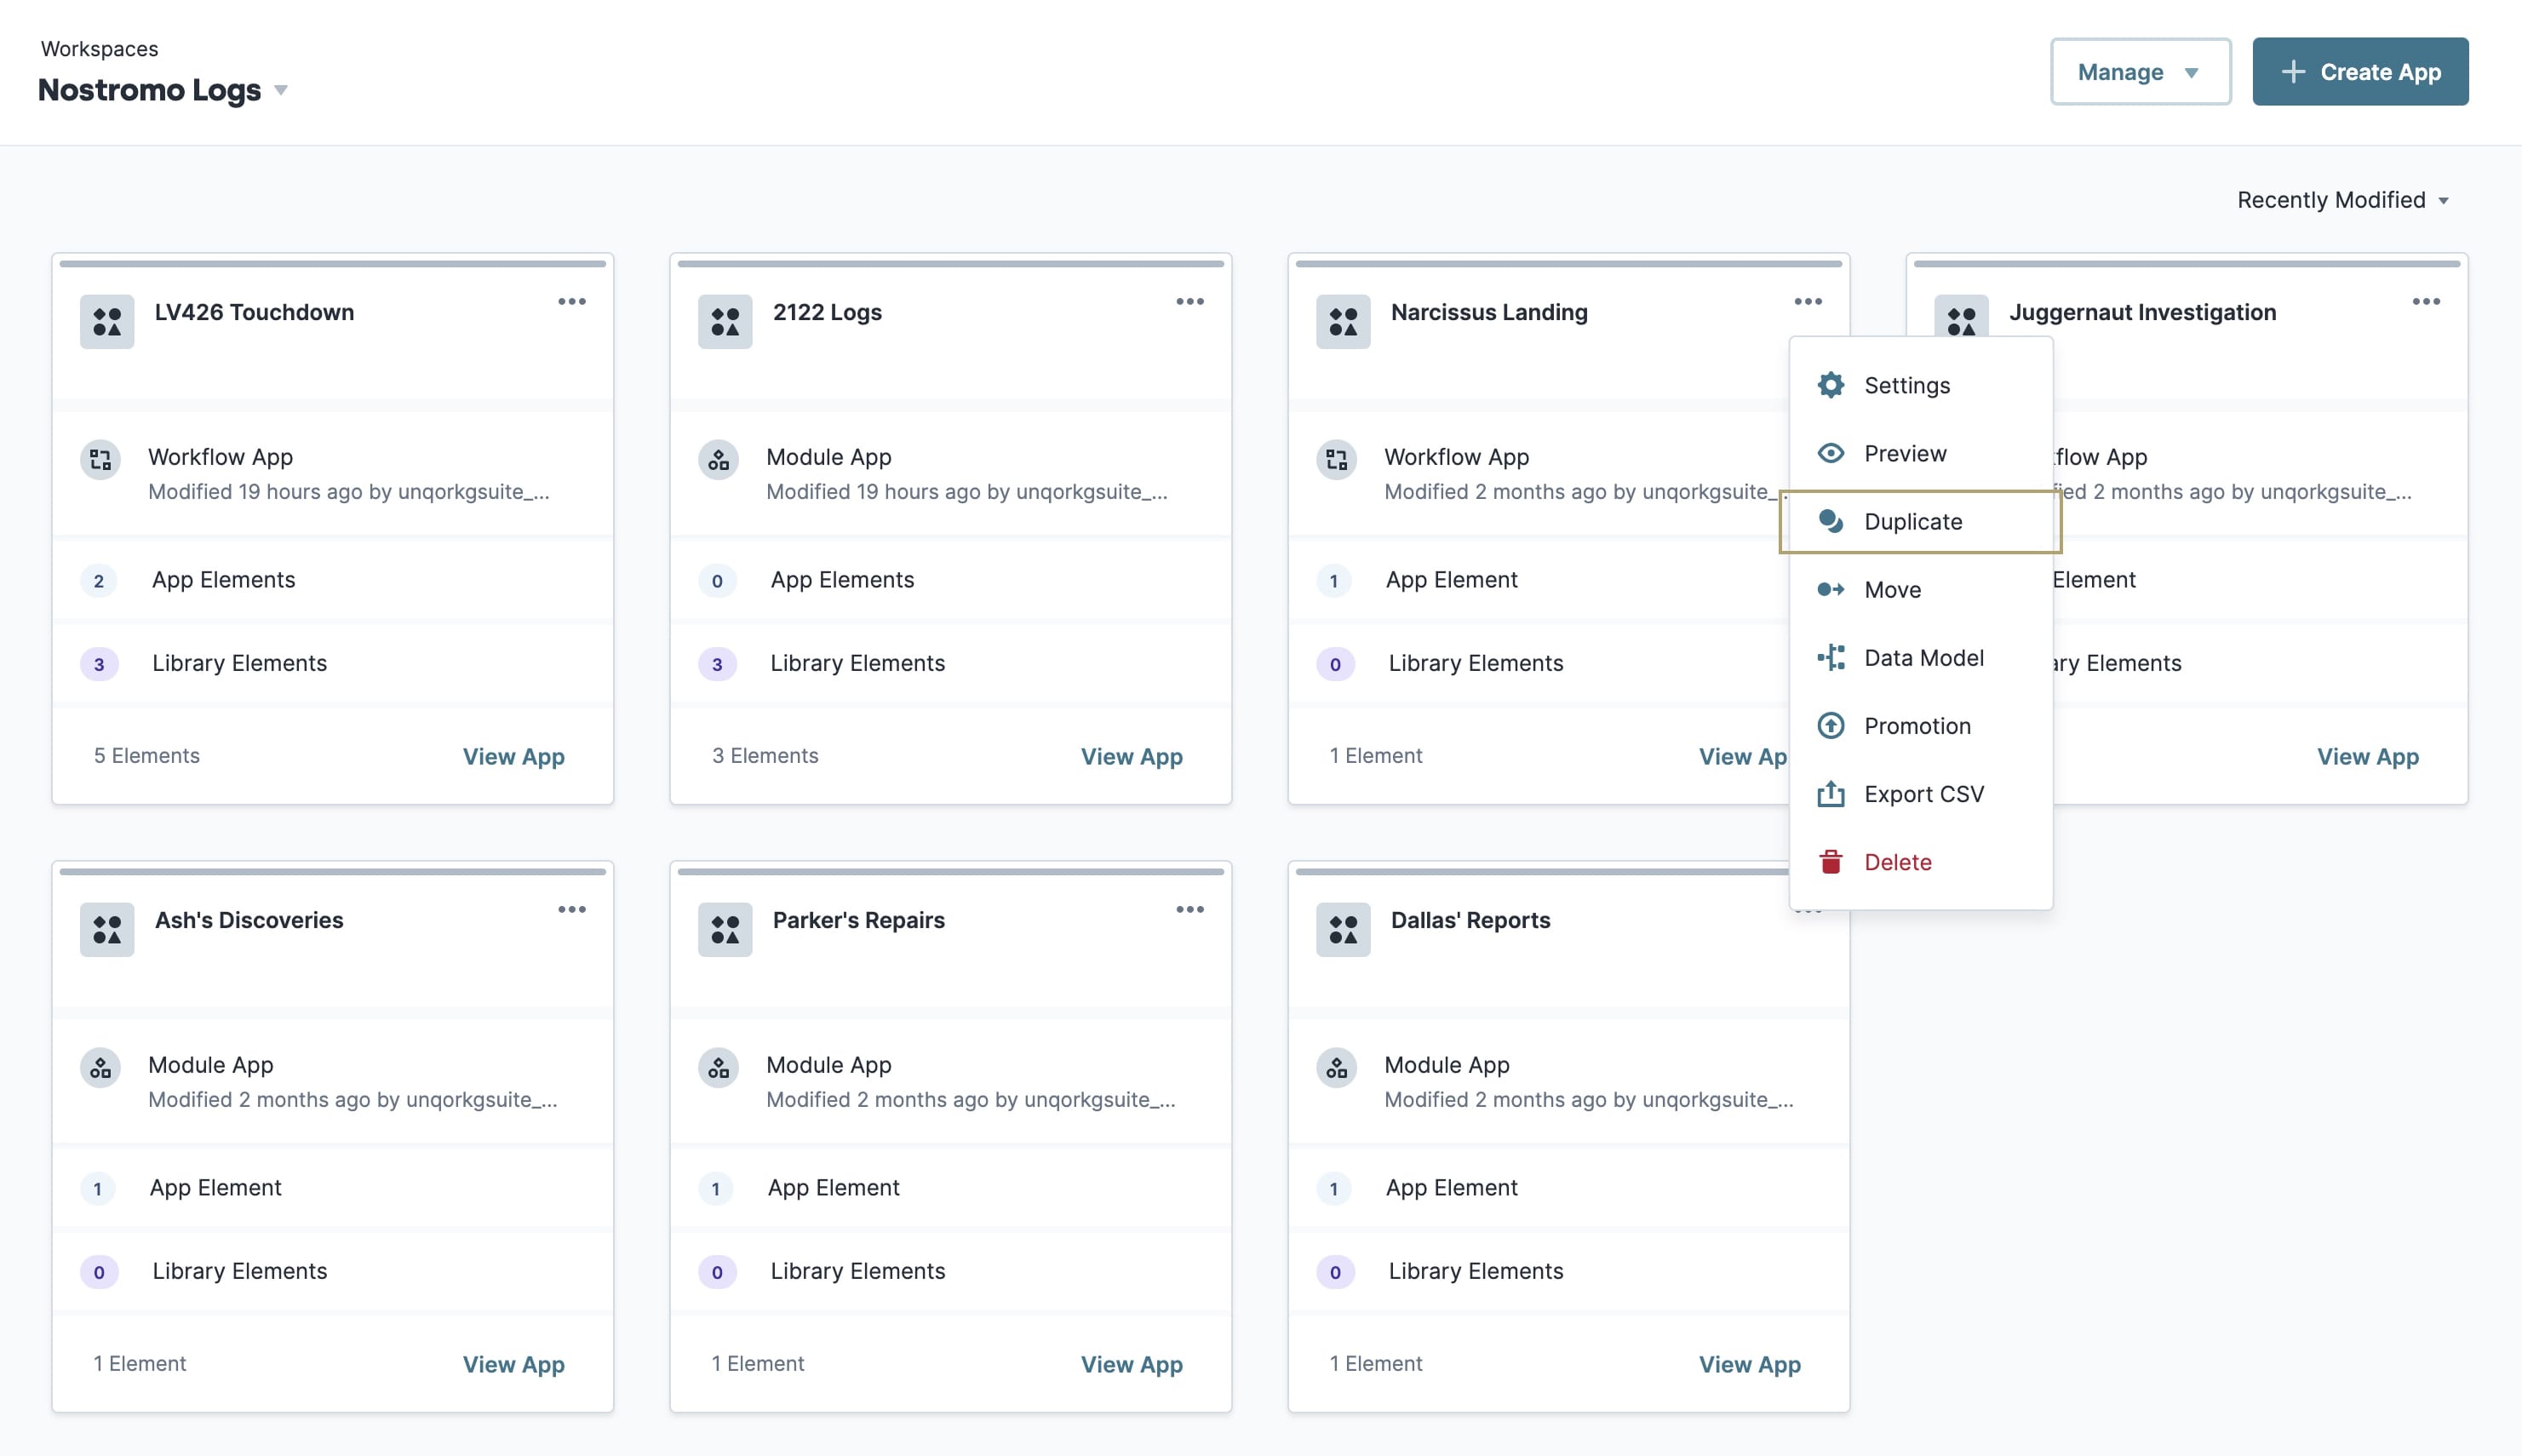
Click Duplicate in the pop-up modal.
A new tile displays in your workspace. The default name for the duplicated application is name-of-original-app (COPY) (MM/DD/YYY, time-of-creation).
To rename your workflow-type application:
From the
(ellipsis) menu of the app's element tile, select Settings.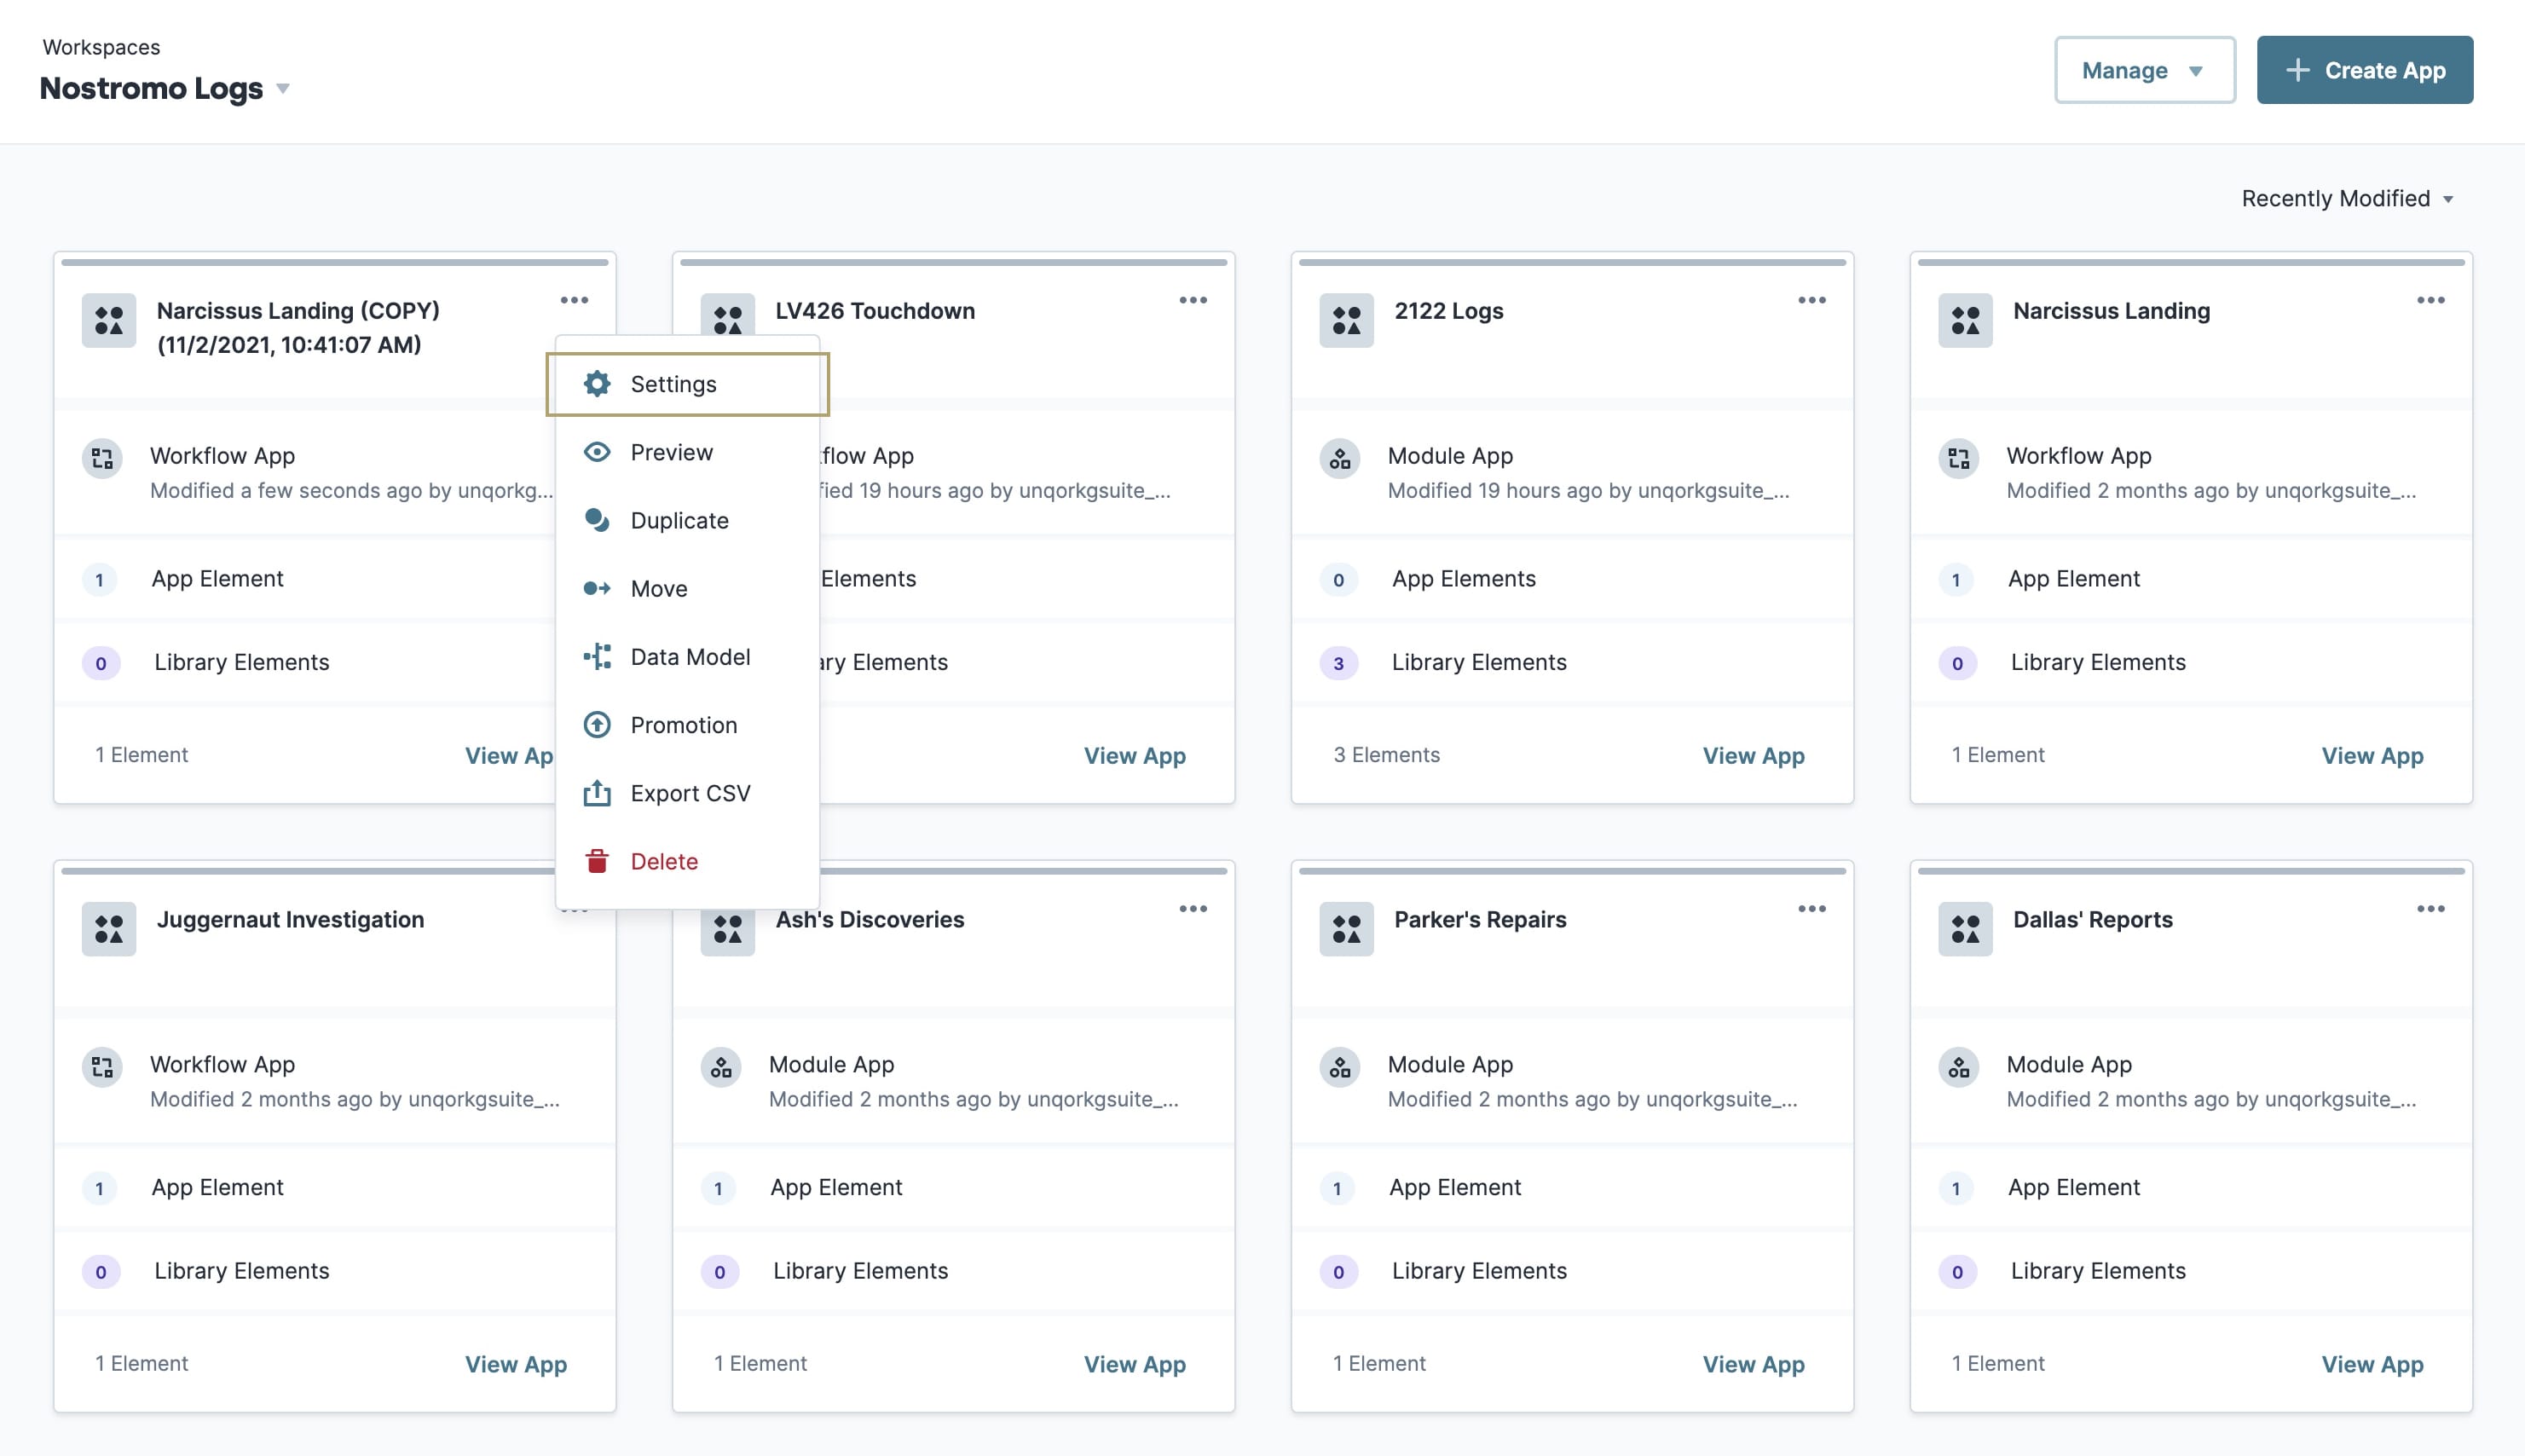
Enter a new Workflow Name in the Workflow Name field.
Enter a new Workflow Path in the Workflow Path field.
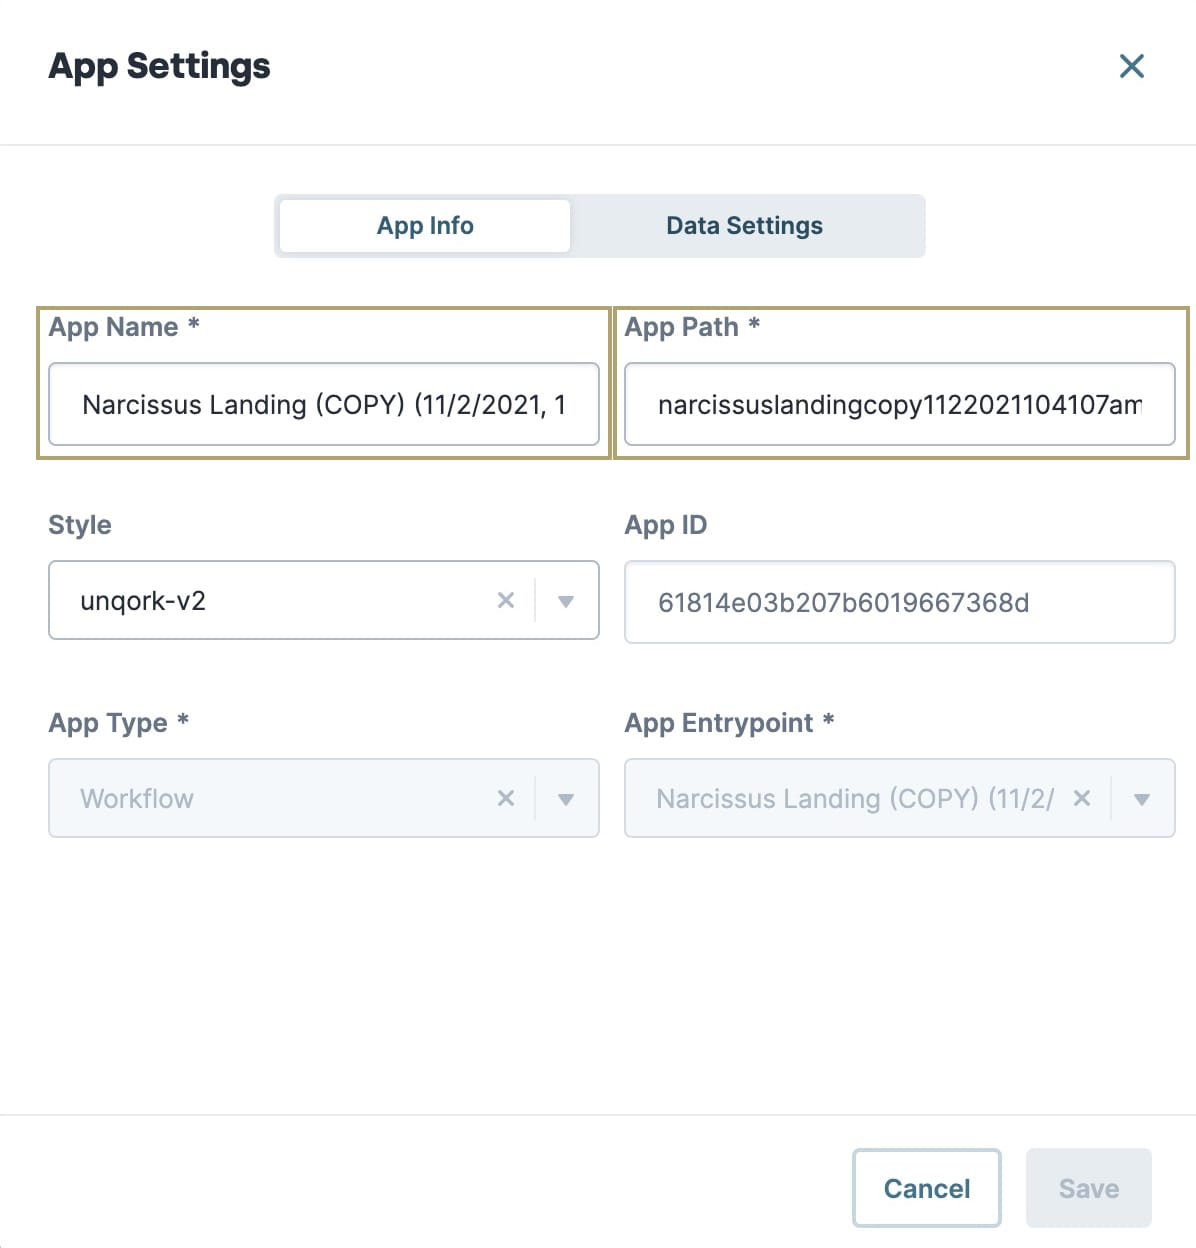
Click Save.
Duplicating Workflow-Type Applications at the Application Level
To duplicate workflow-type applications at the Application Level:
Navigate to the workspace holding your workflow-type app.
Open your workflow-type app.
From the Manage drop-down, select Duplicate.
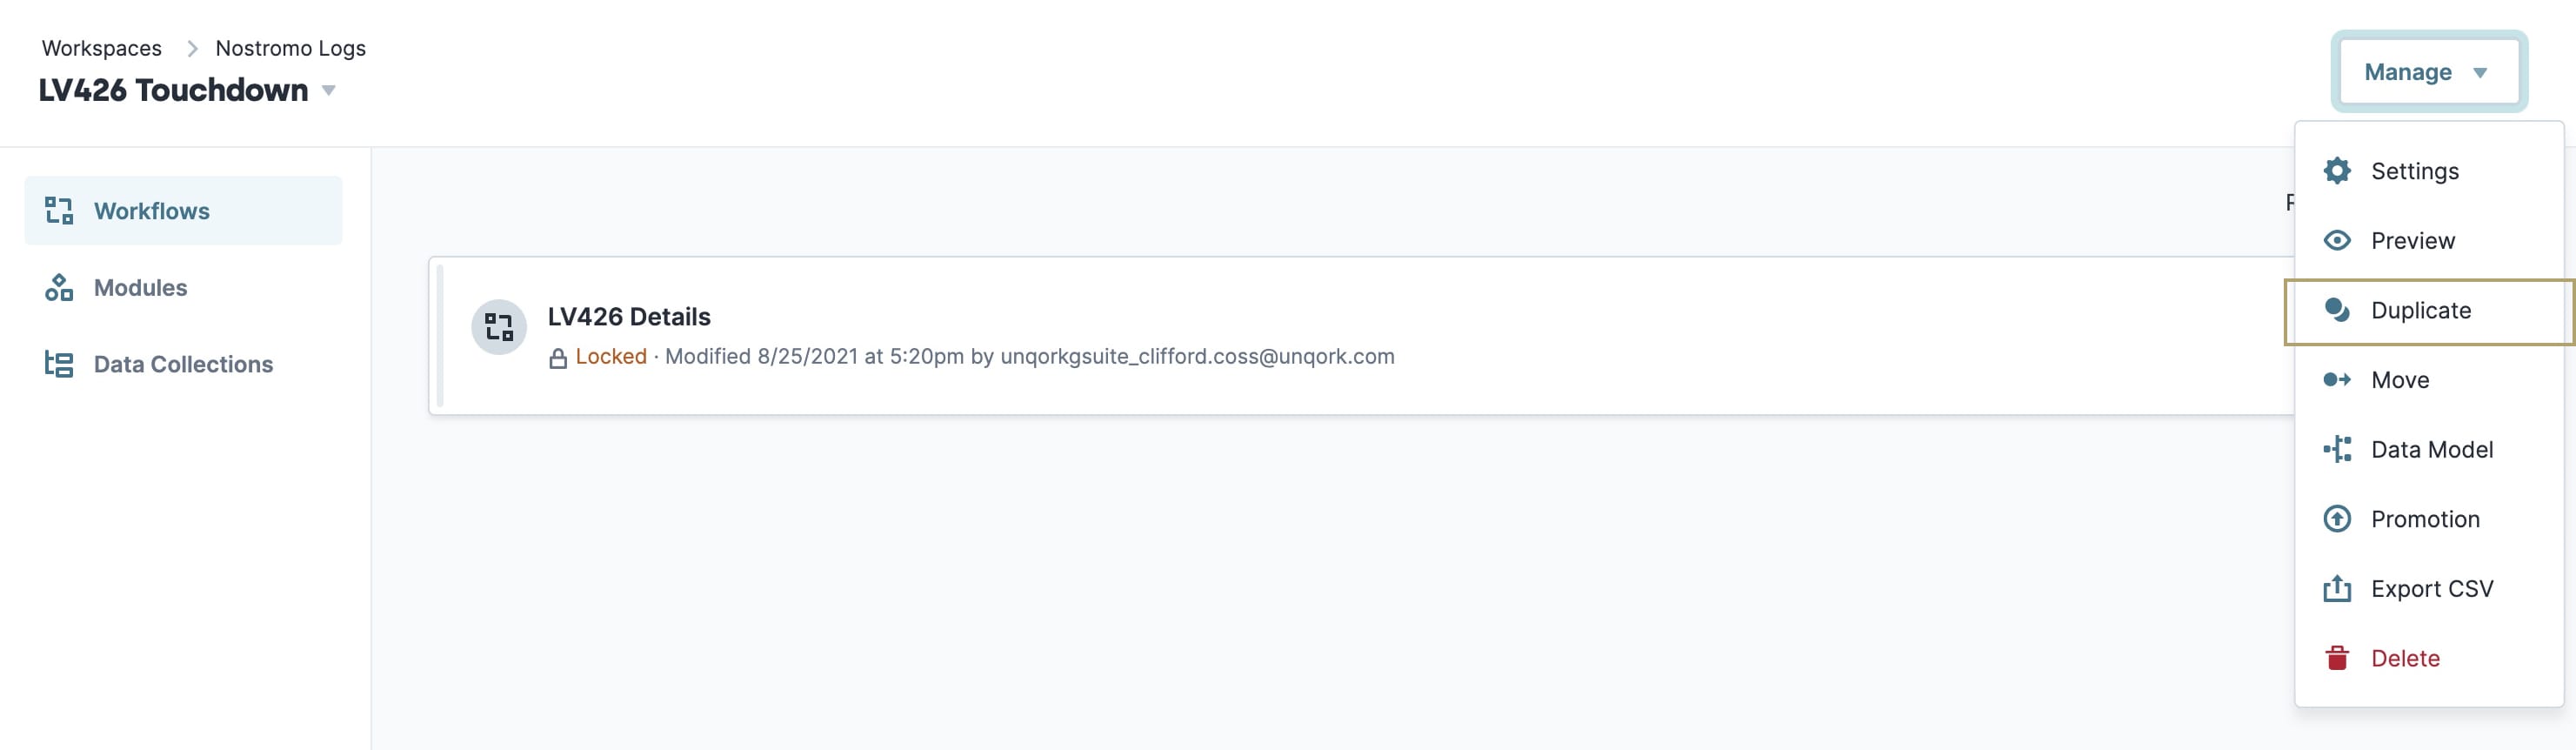
Click Duplicate in the pop-up modal.
Your new application opens immediately. The default name for the duplicated application is name-of-original-app (COPY) (MM/DD/YYY, time-of-creation). Similarly, your duplicated workflow has a default name of name-of-original-workflow (COPY) (MM/DD/YYY, time-of-creation).
To rename your workflow element:
From the
(ellipsis) menu of the workflow's element tile, select Settings.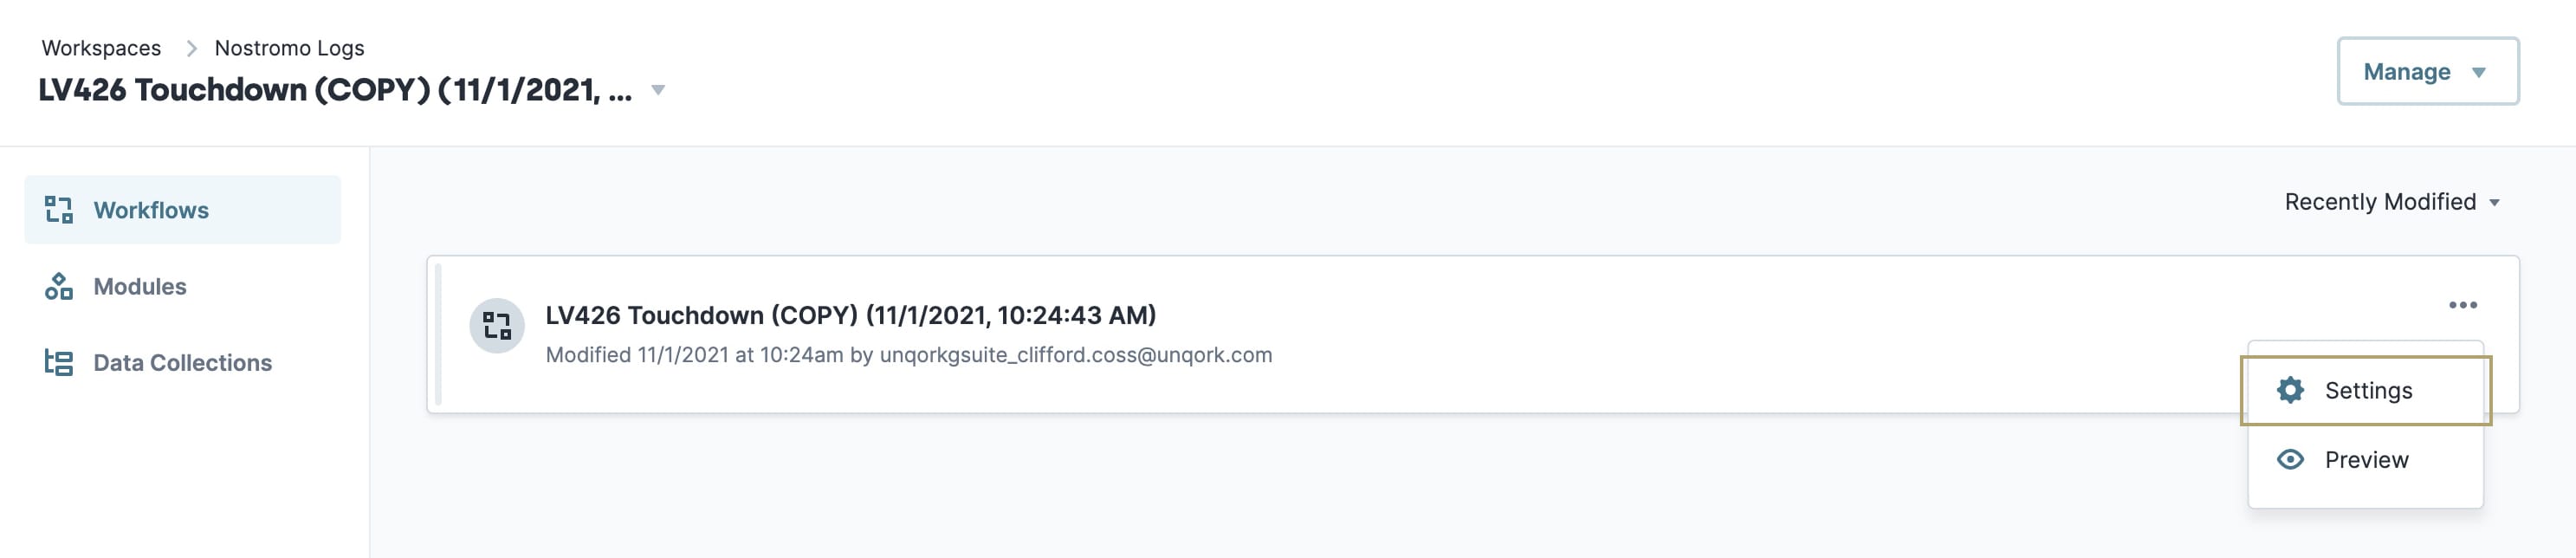
Enter a new Workflow Name in the Workflow Name field.
Enter a new Workflow Path in the Workflow Path field.
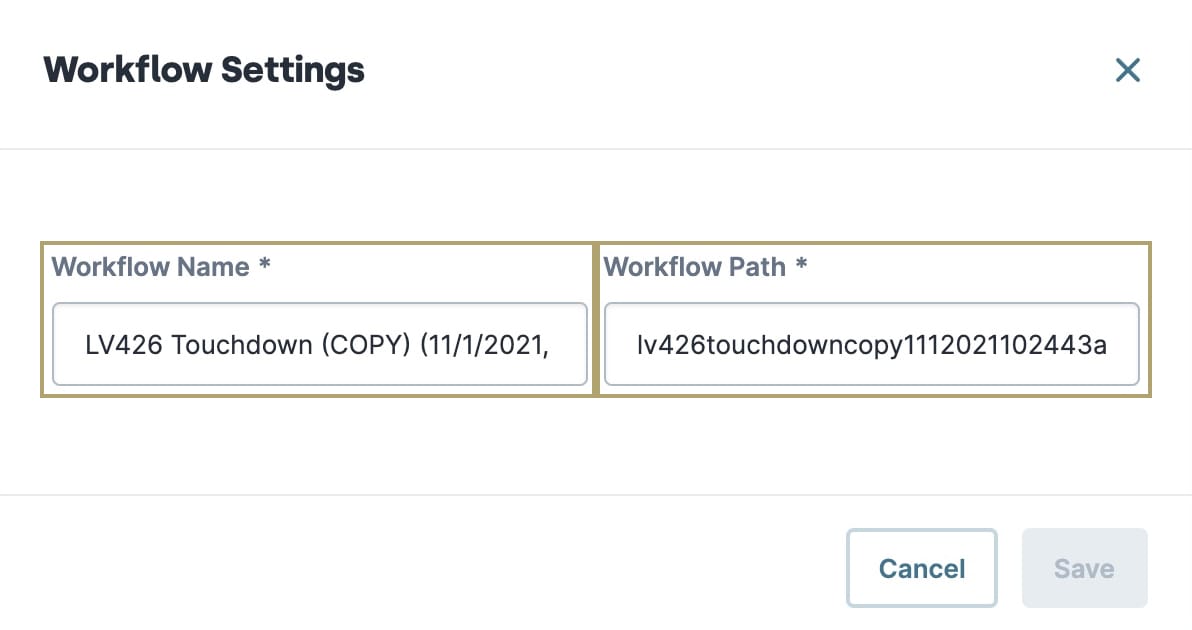
Click Save.
Previewing a Workflow
Previewing your workflows as you build them gives you a glimpse of what the end-user sees. Most workflow management takes place at the Workspace Level. But you can also preview your workflow at the Application Level from an open workflow app.
To preview a workflow at the Application Level:
Navigate to your workflow-type app.
From the
(ellipsis) menu of the workflow's element tile, select Preview.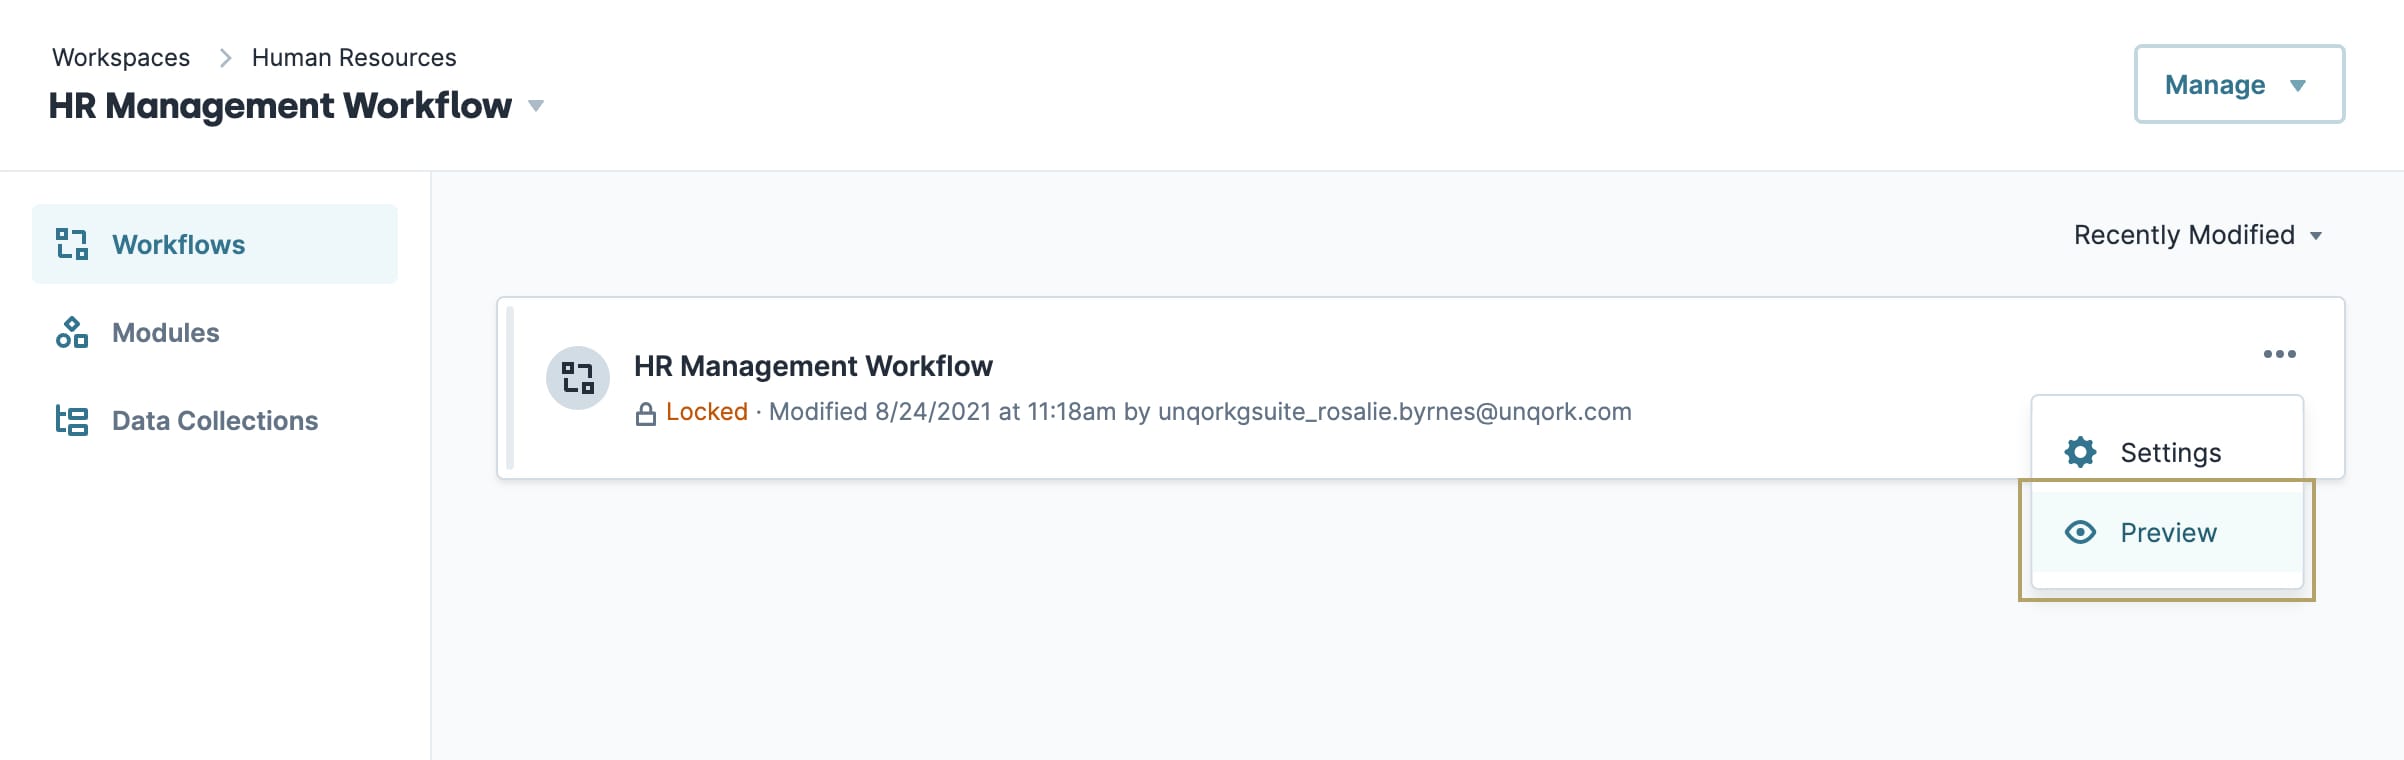
Deleting a Workflow
Remember, a workflow ties directly to its app. The steps for deleting a workflow are the same as deleting a workflow-type app.
To delete a workflow:
Find the workflow-type application you want to delete.
From the
(ellipsis) menu of the workflow's element tile, select Delete.Retype the name of your app exactly.
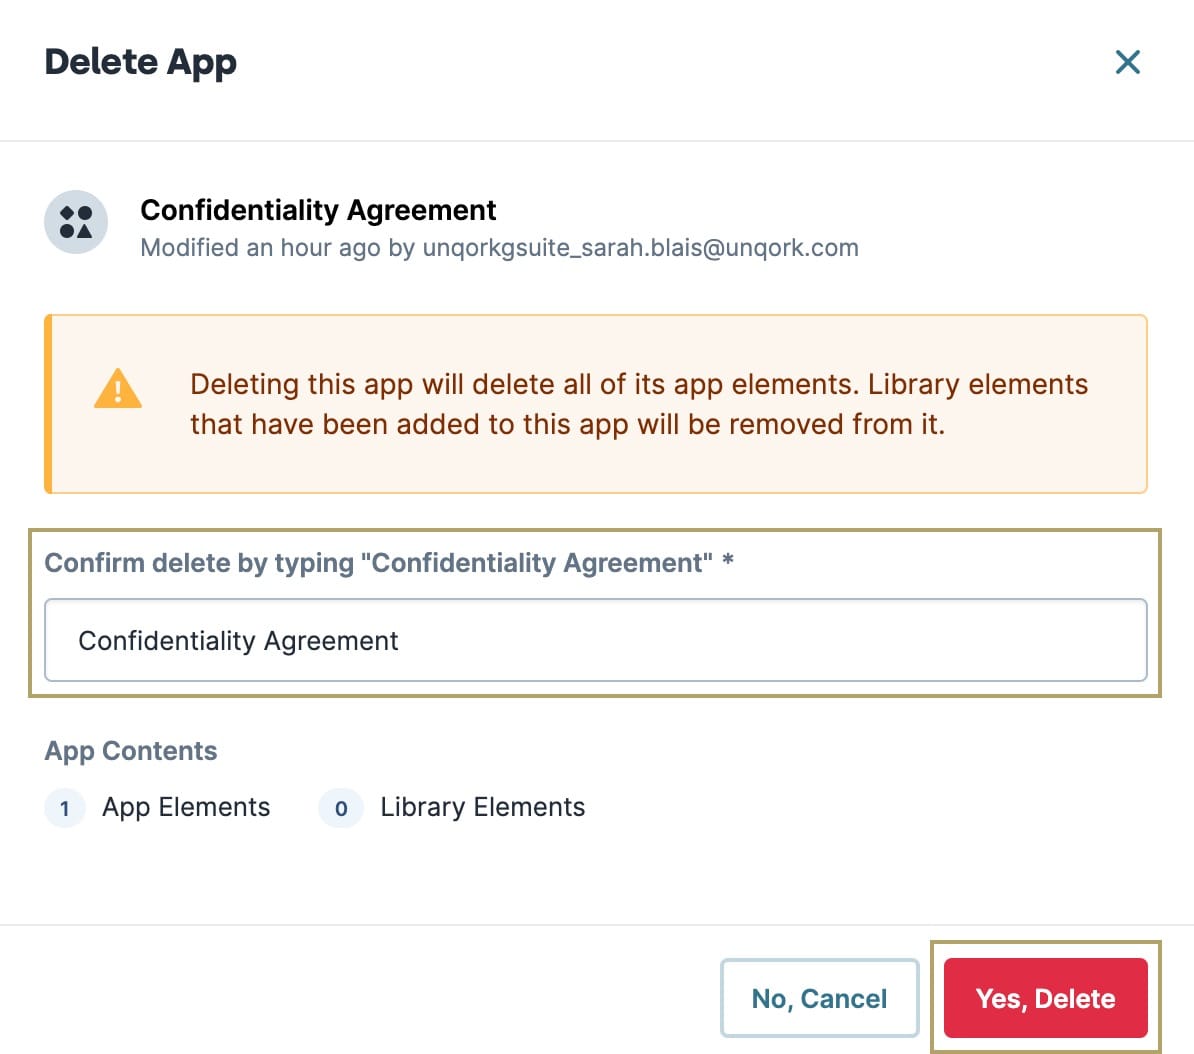
Click Yes, Delete.