Overview
The Merge operator offers various options for merging data. The operator also lets you control how data merges with its 2 input ports. This guide explores merging data with the operator's Inner feature. Like the Intersection feature, the Inner feature merges all data with matching keys. The difference is that one table's values add to the other table. In particular, the operator's lower input values add to the upper input table during the merge.
Let's say you have a Data Table that has insurance policyholders' names and their birthdates. Then, you have a second Data Table holding policyholders' names and their premiums. There are similar names in each table and some that are different. You want to merge all premiums to their respective policyholders and add them to the first table. To do this merge, you'll set up the operator's key as the policyholder name. After the merge, all values from the first table display in your new table. And, the premiums from the second table that correspond to their respective policyholders also display.
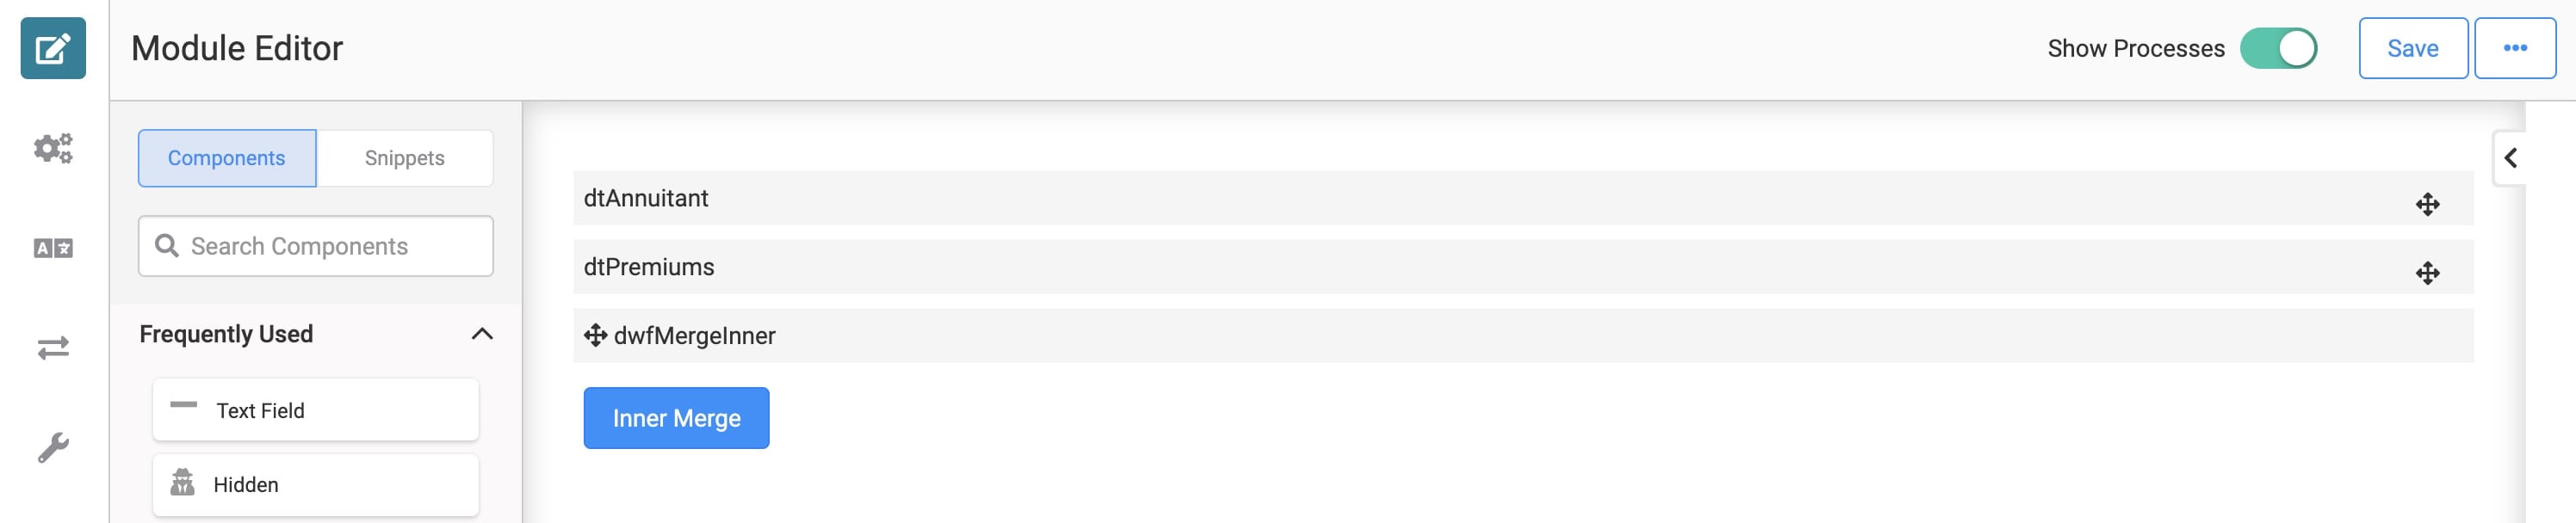
Here's how your module looks in the Module Builder:
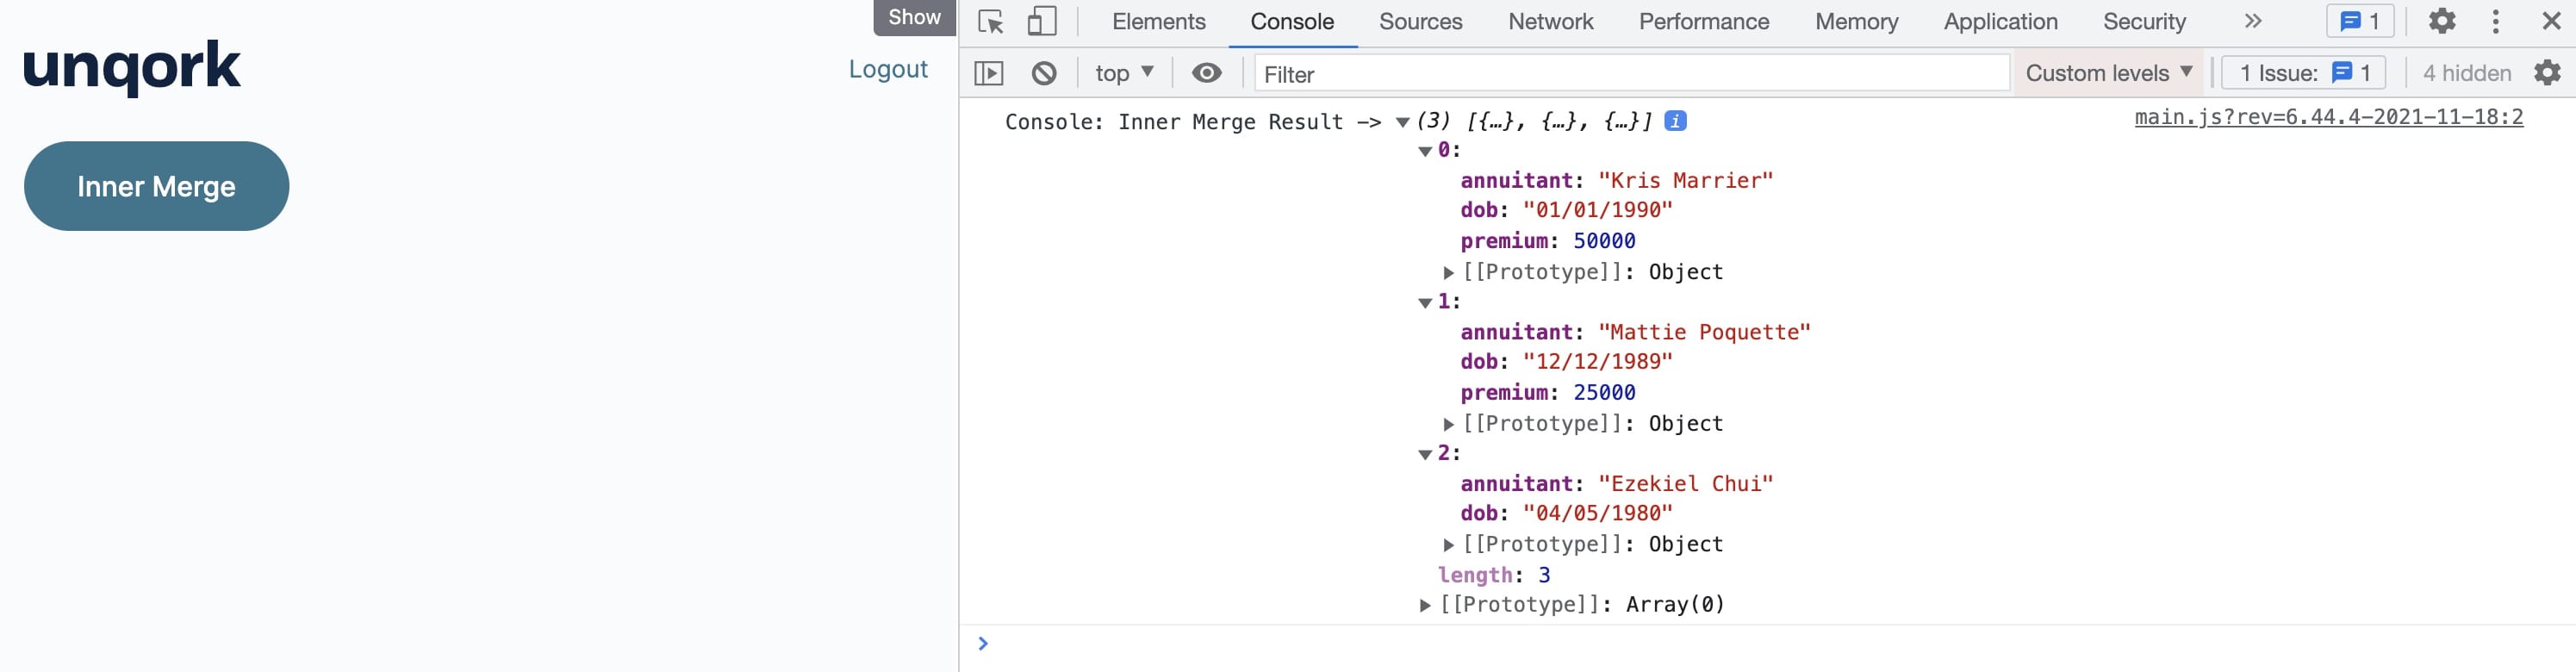
Here's how the completed how-to guide looks in Express View, including a peek at the DevTools Console:
What You'll Learn
In this how-to guide, you’ll learn to use the Merge operator's Inner feature.
What You Need
To set up the Merge operator's Inner feature, you need:
2 Data Table components
1 Button component
1 Data Workflow component
To set up your Data Workflow, you need:
2 Input operators
1 Merge operator
1 Console operator
These instructions assume you have a new module open, saved, and with a title.
Configuration
Configure the First Data Table Component
First, set up a Data Table with a list of annuitants and their dates of birth.
In the Module Builder, drag and drop a Data Table component onto your canvas.
In the Label and Property Name fields, enter dtAnnuitant.
In the data table, enter the following:
annuitant
dob
Kris Marrier
01/01/1990
Mattie Poquette
12/12/1989
Ezekiel Chui
04/05/1980
.jpg)
Click Save.
Configure the Second Data Table Component
Next, set up a Data Table with another list of annuitants and their insurance policy premiums. You can see that 2 of the names are the same and the other is different from the last Data Table.
Drag and drop a Data Table component onto your canvas. Place the second Data Table under the first one.
In the Label and Property Name fields, enter dtPremiums.
In the data table, enter the following:
annuitant
premium
Kris Marrier
50000
Mattie Poquette
25000
Willow Kusko
20000
.jpg)
Click Save.
Configure the Data Workflow Component
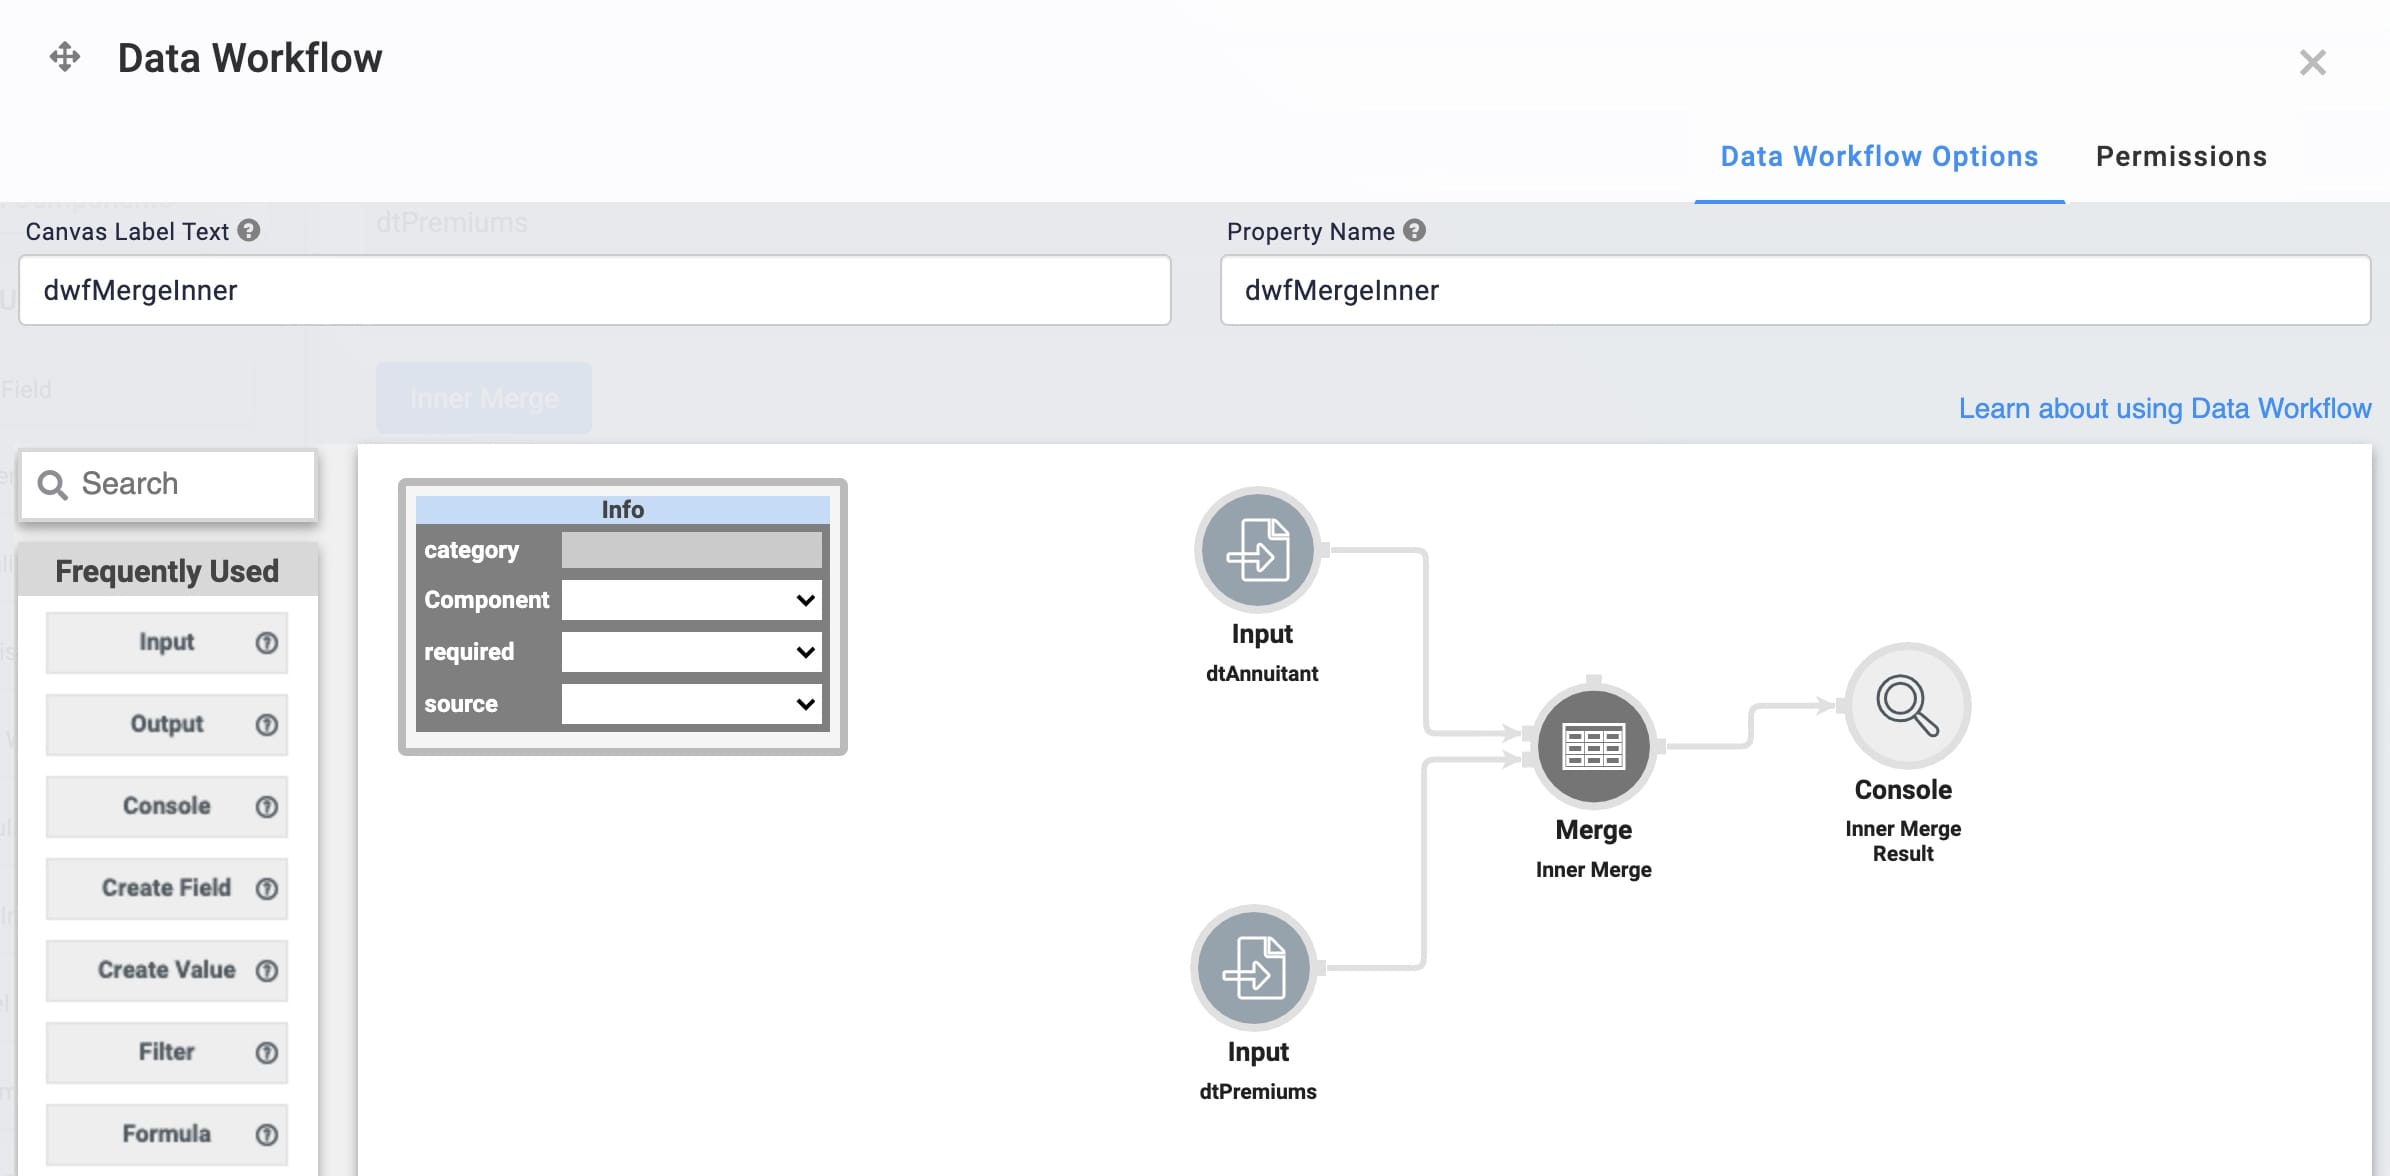
Next, set up the Data Workflow and configure the Merge operator. How you connect the operator's inputs becomes important when using the Inner feature. Every value in the upper input port displays in a new table. Only values from the lower input that match the upper input port's key display in the same table. For this how-to guide, input the dtAnnuitant Data Table into the upper input port. Then, input the dtPremiums Data Table into the lower input port. Finally, set the Merge Key as annuitant. This setting combines all data by matching annuitants from both Data Tables.
Drag and drop a Data Workflow component onto your canvas. Place your Data Workflow below your Data Table components.
In the Canvas Label Text and Property Name fields, enter dwfMergeInner.
Configure the First Input Operator
Drag and drop an Input operator onto your Data Workflow canvas.
Configure the Input operator's Info window as follows:
Setting
Value
Category
Input
Component
dtAnnuitant
Required
Yes
Source
Default
Configure the Second Input Operator
Drag and drop another Input operator onto your Data Workflow canvas.
Configure the Input operator's Info window as follows:
Setting
Value
Category
Input
Component
dtPremiums
Required
Yes
Source
Default
Configure the Merge Operator
Drag and drop a Merge operator onto your Data Workflow canvas.
Configure the Merge operator's Info window as follows:
Setting
Value
Category
Merge
Label
Inner Merge
Merge Type
Inner
Keep Flag
False
Renaming
Replace
Rows to Keep
First
Merge Key
annuitant
Connect the output port (right) of the dtAnnuitant Input operator to the upper input port (left) of the Merge operator.
Connect the output port (right) of the dtPremiums Input operator to the lower input port (left) of the Merge operator.
Configure the Console Operator
Lastly, add a Console operator so you can see the results using the DevTools Console.
Drag and drop a Console operator onto your Data Workflow canvas.
Configure the Console operator's Info window as follows:
Setting
Value
Category
Console
Label
Inner Merge Result
Connect the output port (right) of the Merge operator to the input port (left) of the Console operator.
Click Save.
Configure the Button Component
Finally, to trigger the Data Workflow, add a Button component.
Drag and drop a Button component onto your canvas. Place your Button component below your Data Workflow component.
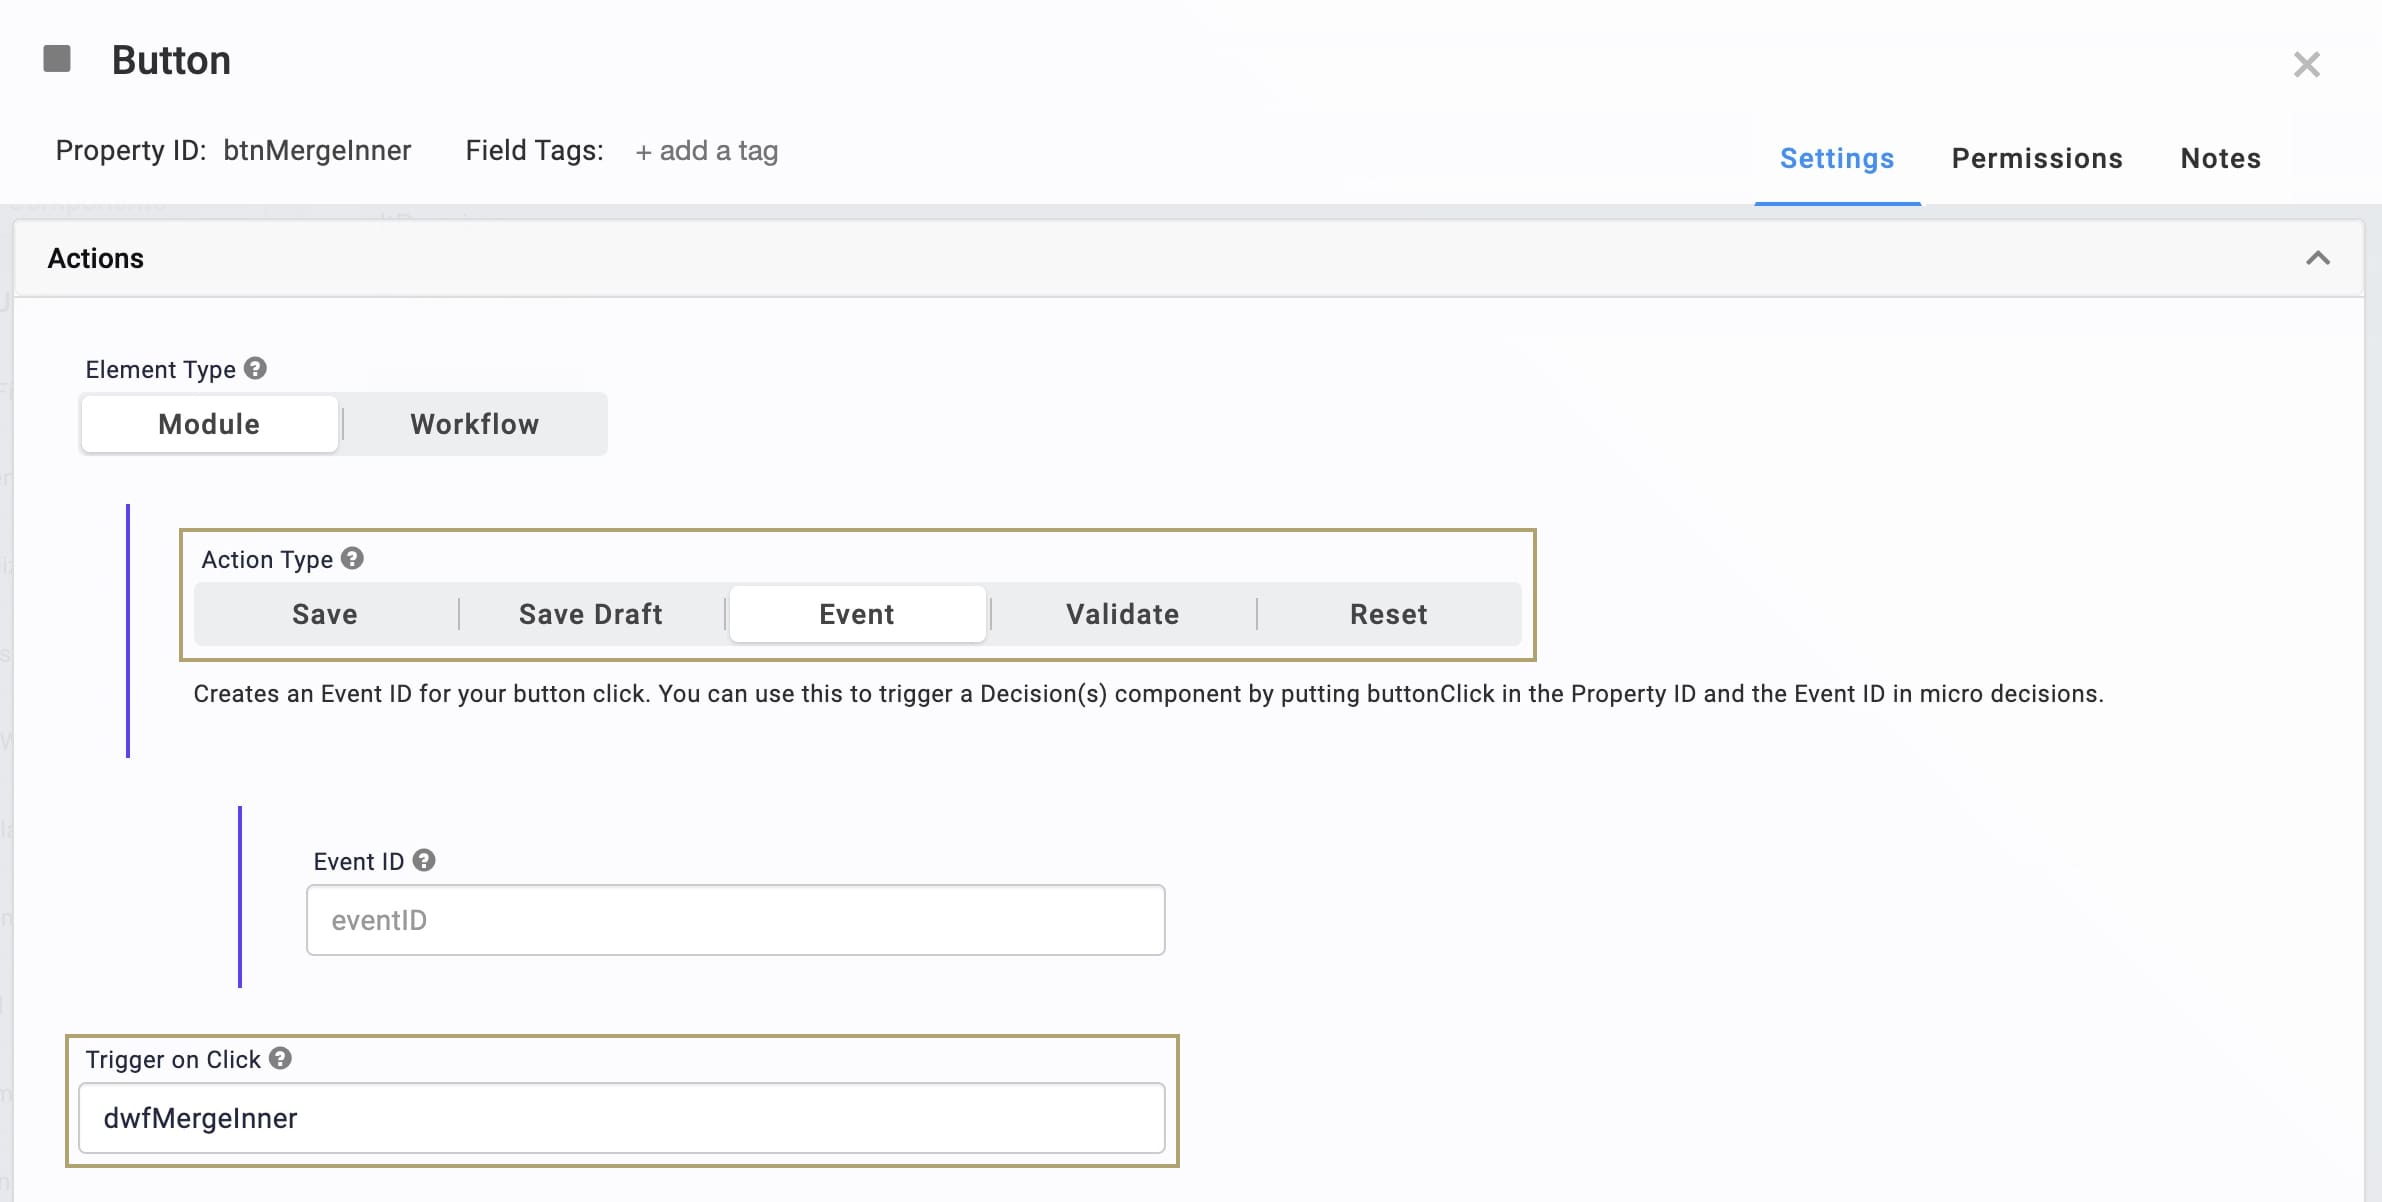
In the Property ID field, enter btnMergeInner.
In the Label Text field, enter Inner Merge.
Select Event as the Action Type.
In the Trigger on Click field, enter dwfMergeInner.
Click Save.
Save your module.
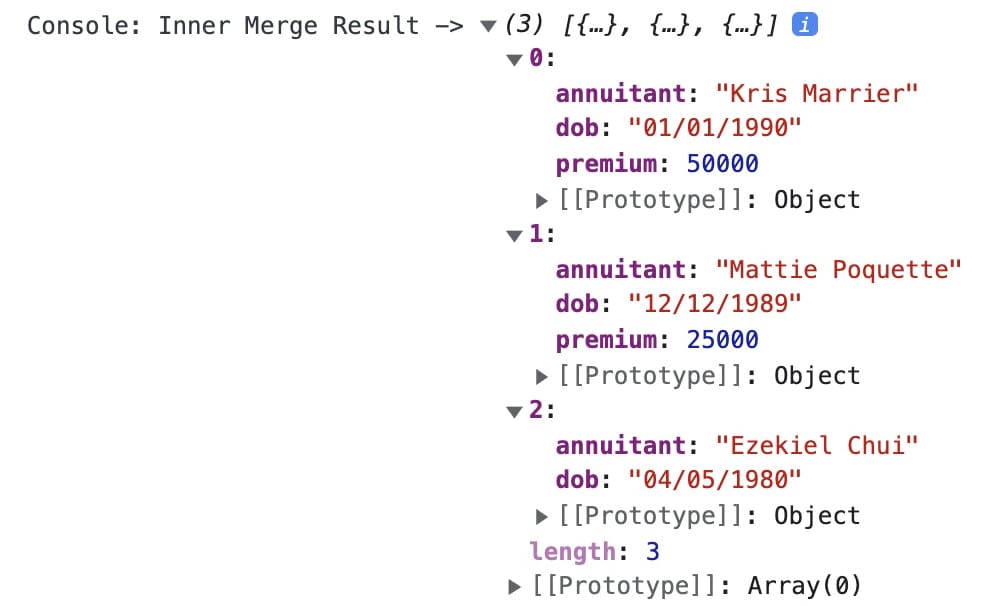
Now, preview your module in Express View and open the DevTools Console. Click the button to trigger the Data Workflow. You see Kris Marrier, Mattie Poquette, and Ezekiel Chui's names and birthdates. These are all values from the Merge operator's upper input. Then, you see Marrier and Poquette's premiums, but not Chui's. That's because the Inner feature only adds values with the same keys as the other table. Ezekial Chui and their premium don't exist in the Merge operator's lower input.
To give you a better understanding of the operator, switch the inputs of your Merge operator and trigger it again. The results are quite different from what you originally configured.