Nest By Operator: Nest by Child Name
Overview
Nesting arrays is a simple concept of stacking an array inside another array. You can think of it like Russian nesting dolls, where one doll fits inside a larger one. The largest doll is the parent, and the smaller ones are the children. You can use the Nest By operator to group or nest information by child name.
Typically, you'd group information using a key-value pair. The key could be the header of a table column, letting you group duplicate values together. Or, you could take all the rows in a Data Table and combine them into a single array. You might do this if you wanted to merge them into another table.
In this use case, you'll create a Data Table of information and nest all the rows into a single array. Let's take a look.
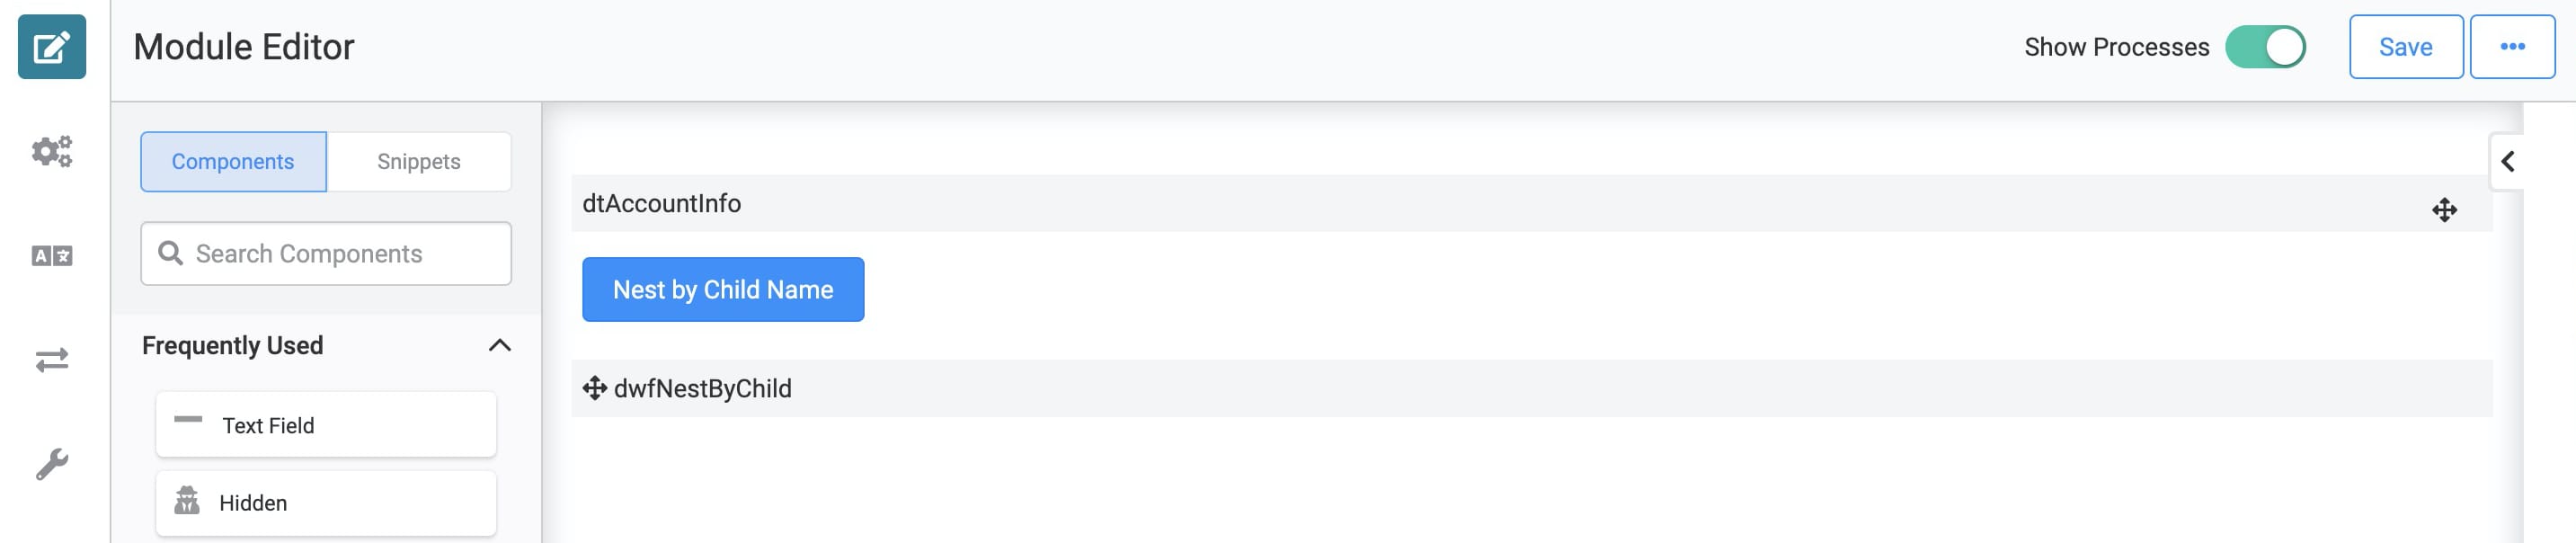
Here's how your module will look in the Module Builder:
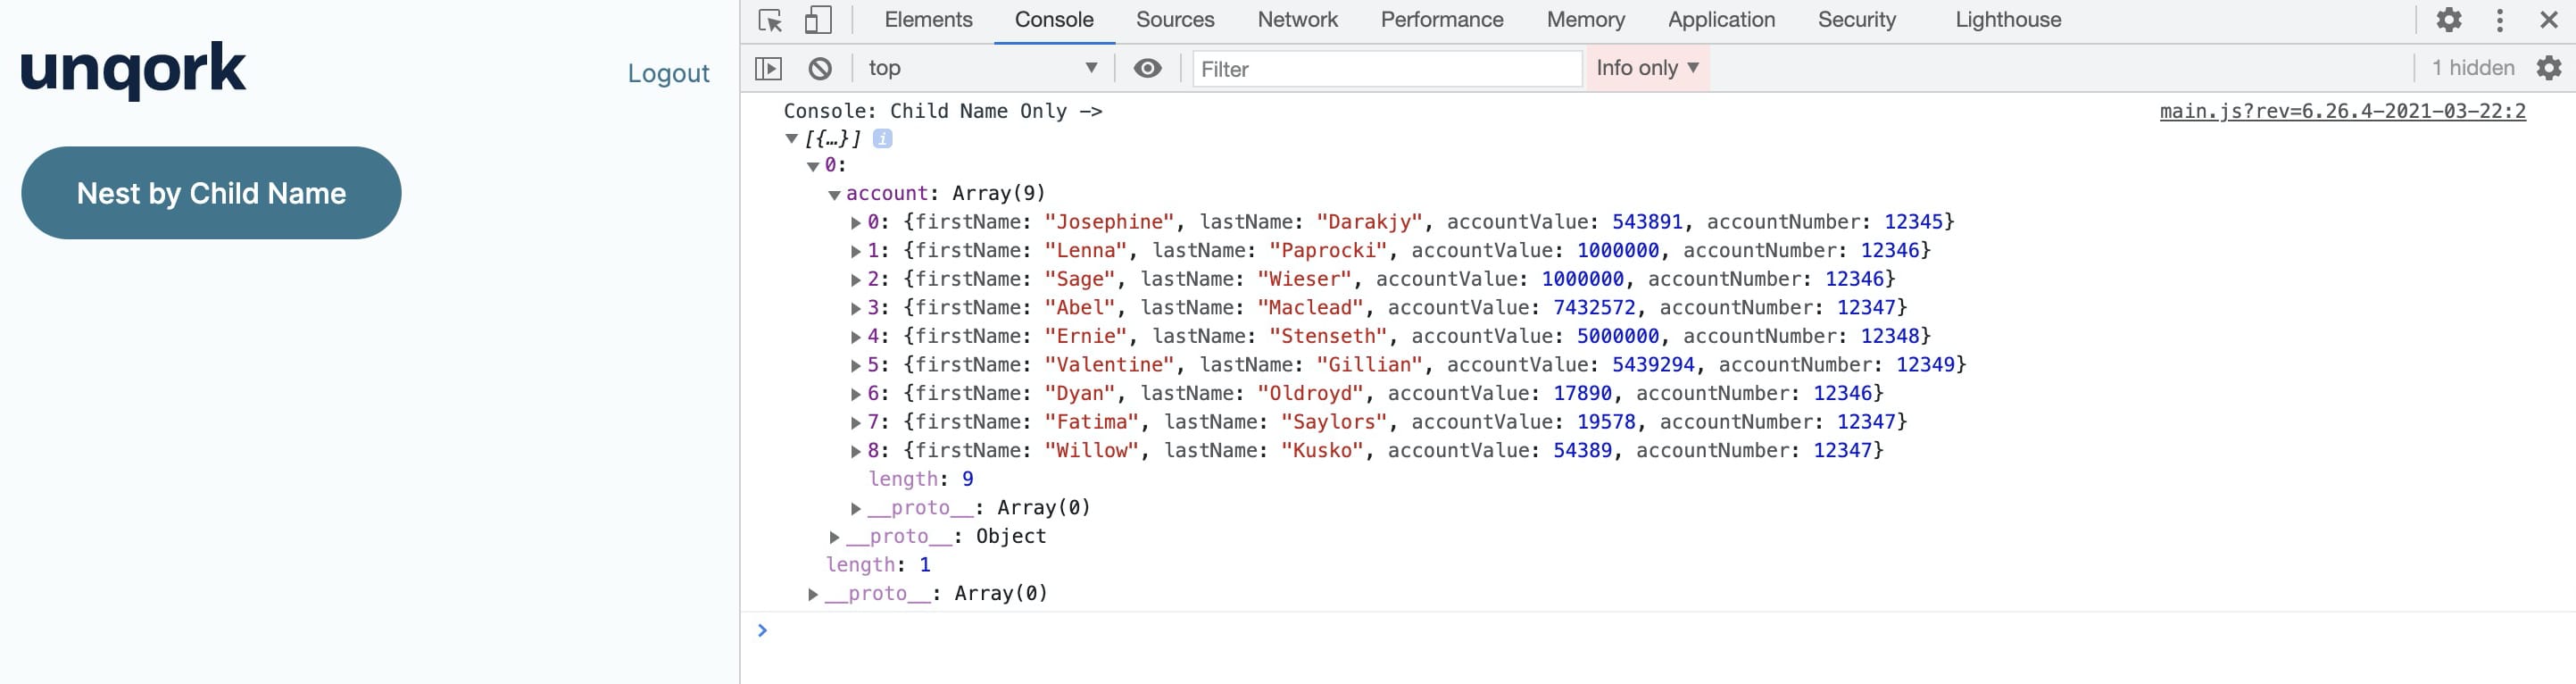
Here's how the completed use case will look in Express View, including a peek at the DevTools Console:
What You'll Learn
In this article, you'll learn how to use the Nest By operator to nest by child name.
What You'll Need
To set up this use case, you’ll need:
-
1 Data Table component
-
1 Button component
-
1 Data Workflow component
To set up your Data Workflow, you'll need:
-
1 Input operator
-
1 Nest By operator
-
1 Console operator
These instructions assume you have a new module open, saved, and with a title.
Configuration
Configure the Data Table Component
First, you'll set up a Data Table with a list of customers, account values, and account numbers.
| 1. | In the Module Builder, drag and drop a Data Table component onto your canvas. |
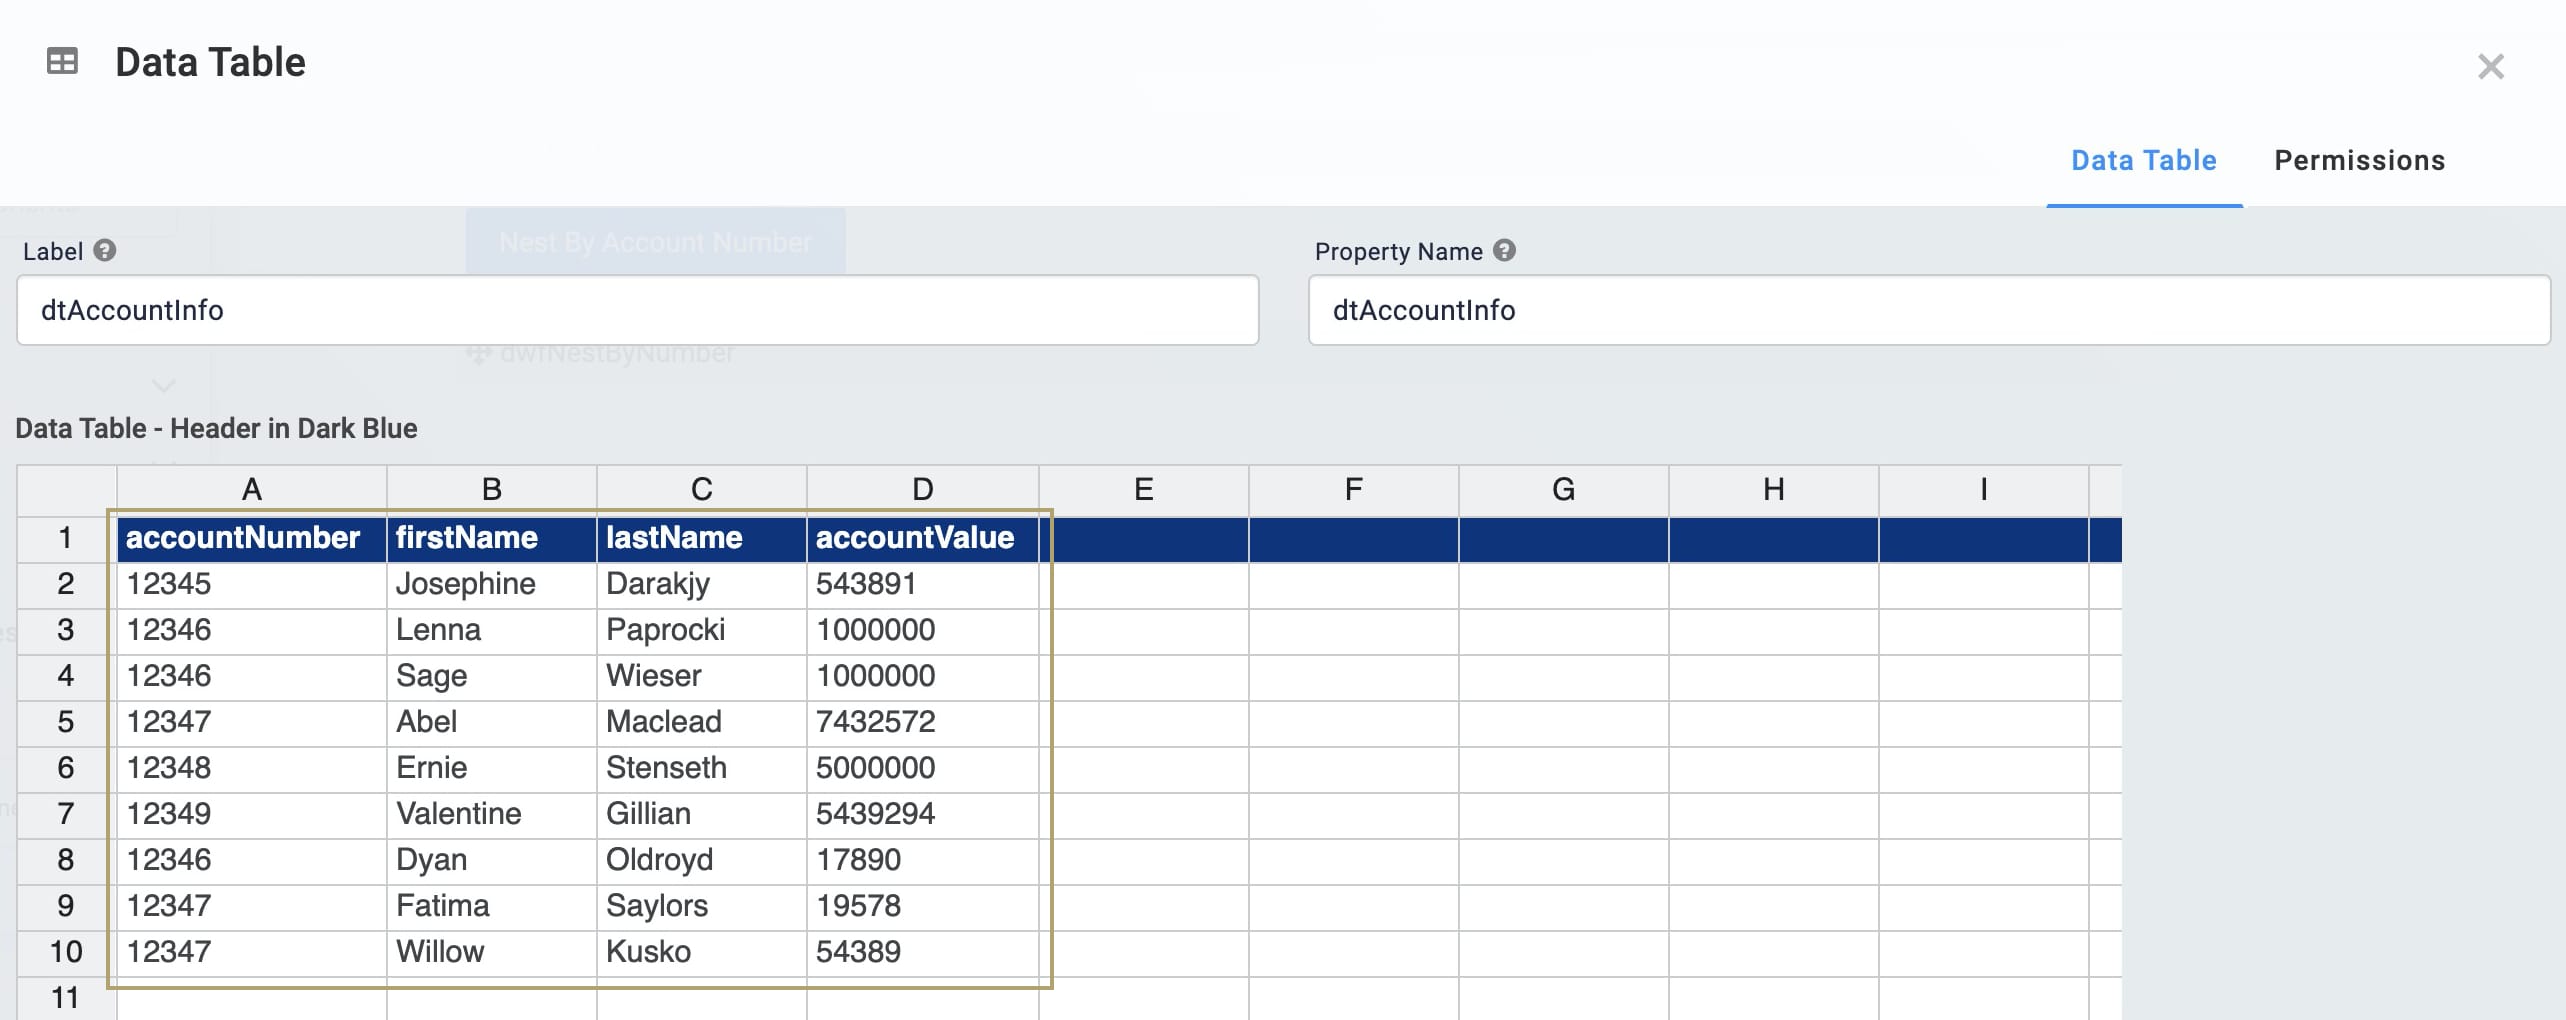
| 2. | Enter dtAccountInfo in the Label and Property Name fields. |
| 3. | In the data table, enter the following: |
|
accountNumber |
firstName |
lastName |
accountValue |
|---|---|---|---|
|
12345 |
Josephine |
Darakjy |
543891 |
|
12346 |
Lenna |
Paprocki |
1000000 |
|
12346 |
Sage |
Wieser |
1000000 |
|
12347 |
Abel |
Maclead |
7432572 |
|
12348 |
Ernie |
Stenseth |
5000000 |
|
12349 |
Valentine |
Gillian |
5439294 |
|
12346 |
Dyan |
Oldroyd |
17890 |
|
12347 |
Fatima |
Saylors |
19578 |
|
12347 |
Willow |
Kusko |
54389 |
You purposely added duplicate information to show the power of the Nest By operator.
| 4. | Click Save. |
Configure the Button Component
To trigger the Data Workflow, you'll add a Button component.
| 1. | Drag and drop a Button component onto your canvas. Place your Button component below your Data Table. |
| 2. | Enter btnNestByChild in the Property ID field. |
| 3. | Enter Nest by Child Name in the Label Text field. |
| 4. | Select Event as the Action Type. |
| 5. | Enter dwfNestByChild in the Trigger on Click field. |
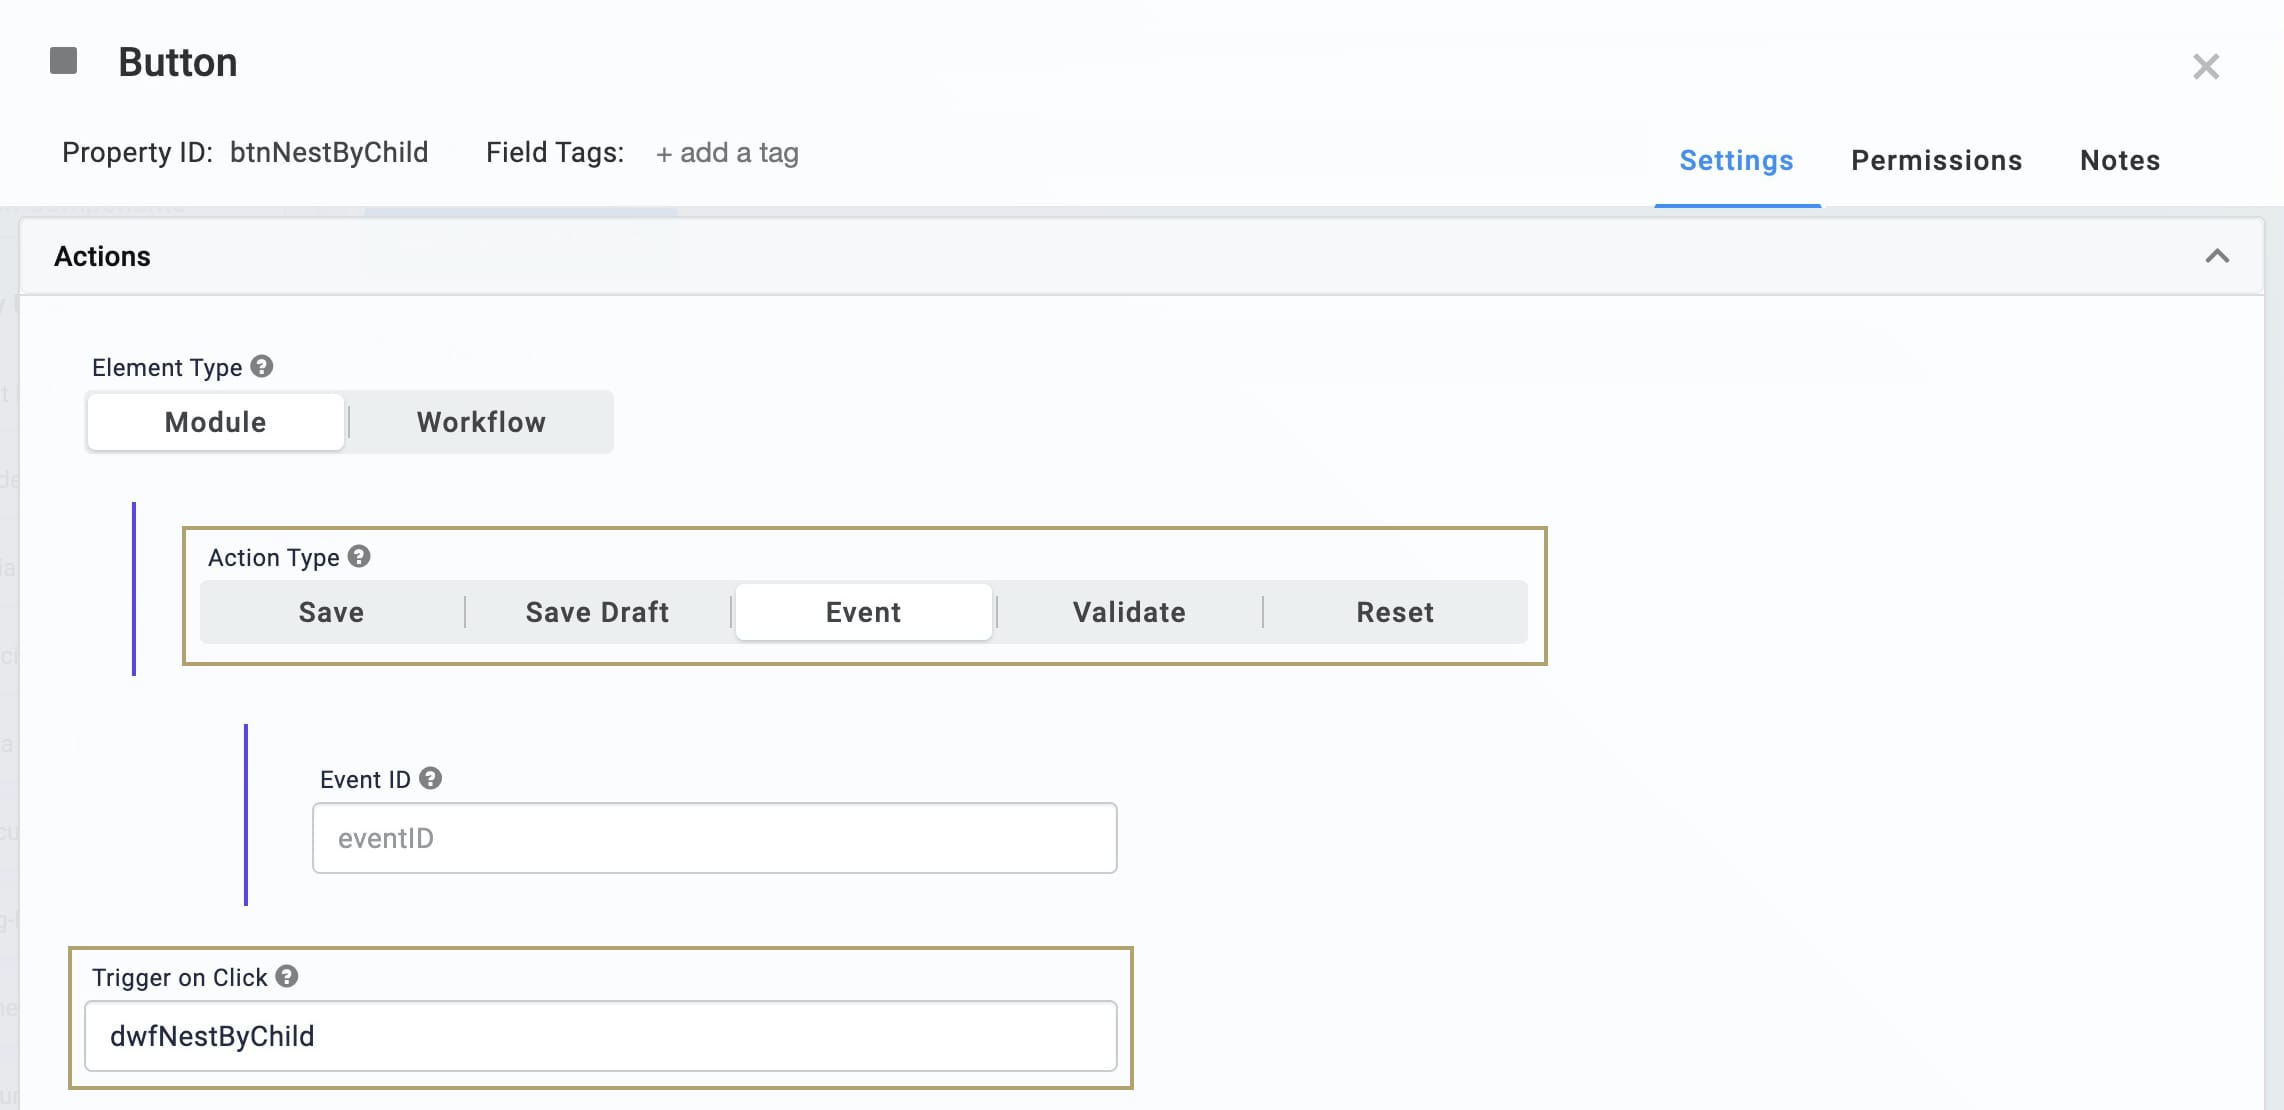
| 6. | Click Save. |
Configure the Data Workflow Component
| 1. | Drag and drop a Data Workflow component onto your canvas. Place your Data Workflow below your Button component. |
| 2. | Enter dwfNestByChild in the Canvas Label Text and Property Name fields. |
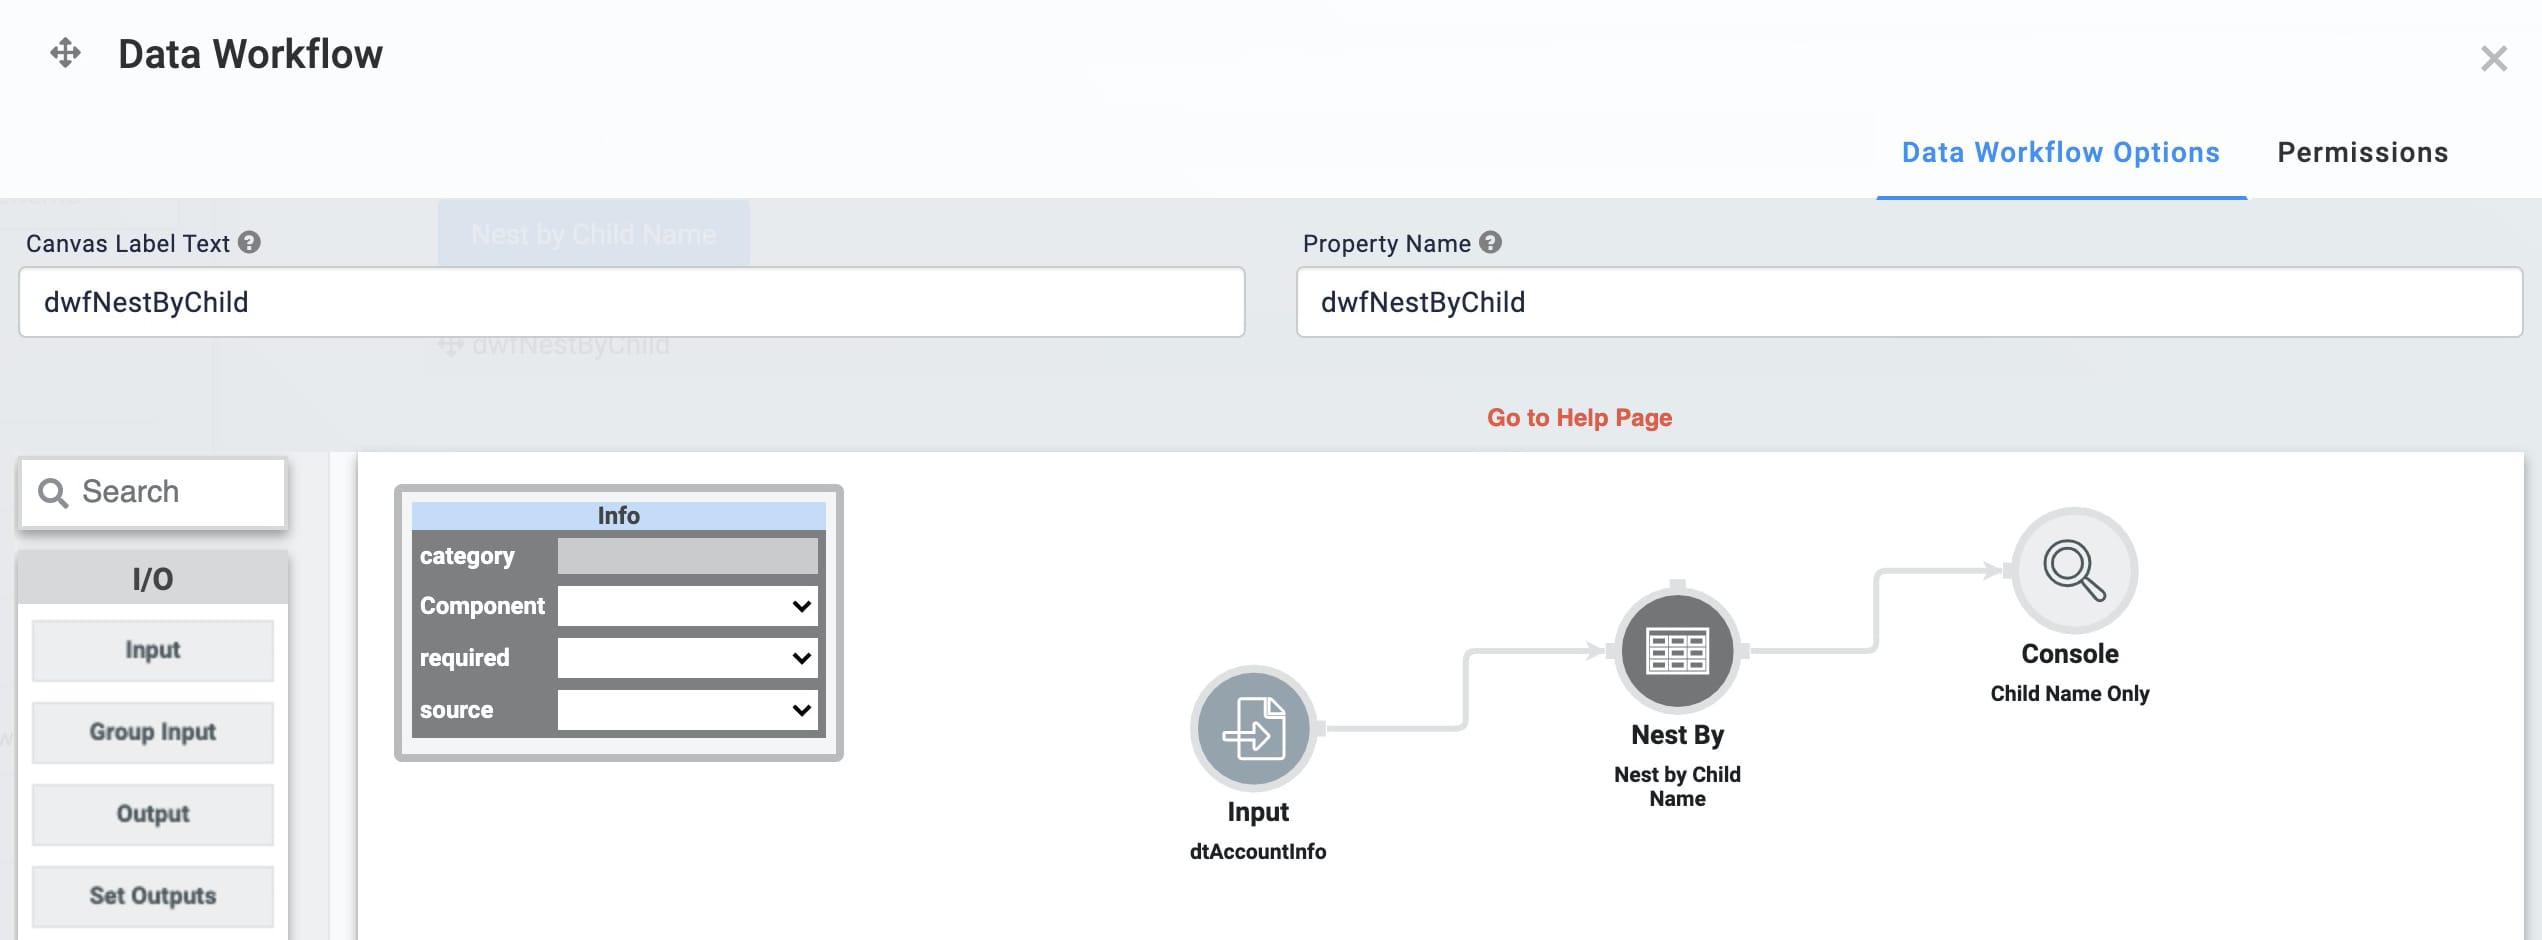
Configure the Input Operator
| 1. | Drag and drop an Input operator onto your Data Workflow canvas. |
| 2. | Configure the Input operator's Info window as follows: |
| Setting | Value |
|---|---|
|
Category |
Input |
|
Component |
dtAccountInfo |
|
Required |
No |
|
Source |
Default |
Configure the Nest By Operator
| 1. | Drag and drop a Nest By operator onto your Data Workflow canvas. |
| 2. | Configure the Nest By operator's Info window as follows: |
| Setting | Value |
|---|---|
|
Category |
Nest By |
|
Label |
Nest by Child Name |
|
Parent Keys |
|
|
Child Name |
account |
| 3. | Connect the output port (right) of the Input operator to the input port (left) of the Nest By operator. |
Configure the Console Operator
| 1. | Drag and drop another Console operator onto your Data Workflow canvas. |
| 2. | Configure the Console operator's Info window as follows: |
|
Setting |
Value |
|---|---|
|
Category |
Console |
|
Label |
Child Name Only |
| 3. | Connect the output port (right) of the Nest By operator to the input port (left) of the Console operator. |
| 4. | Click Save. |
| 5. | Save your module. |
Preview your module in Express View, and open the DevTools Console. Click your button, and you'll see all 9 of your table rows nested in a single array with account as the child name.
Lab
You can view this complete use case here: https://training.unqork.io/#/form/6054e86abfc0b3098fe7f1d6/edit.
