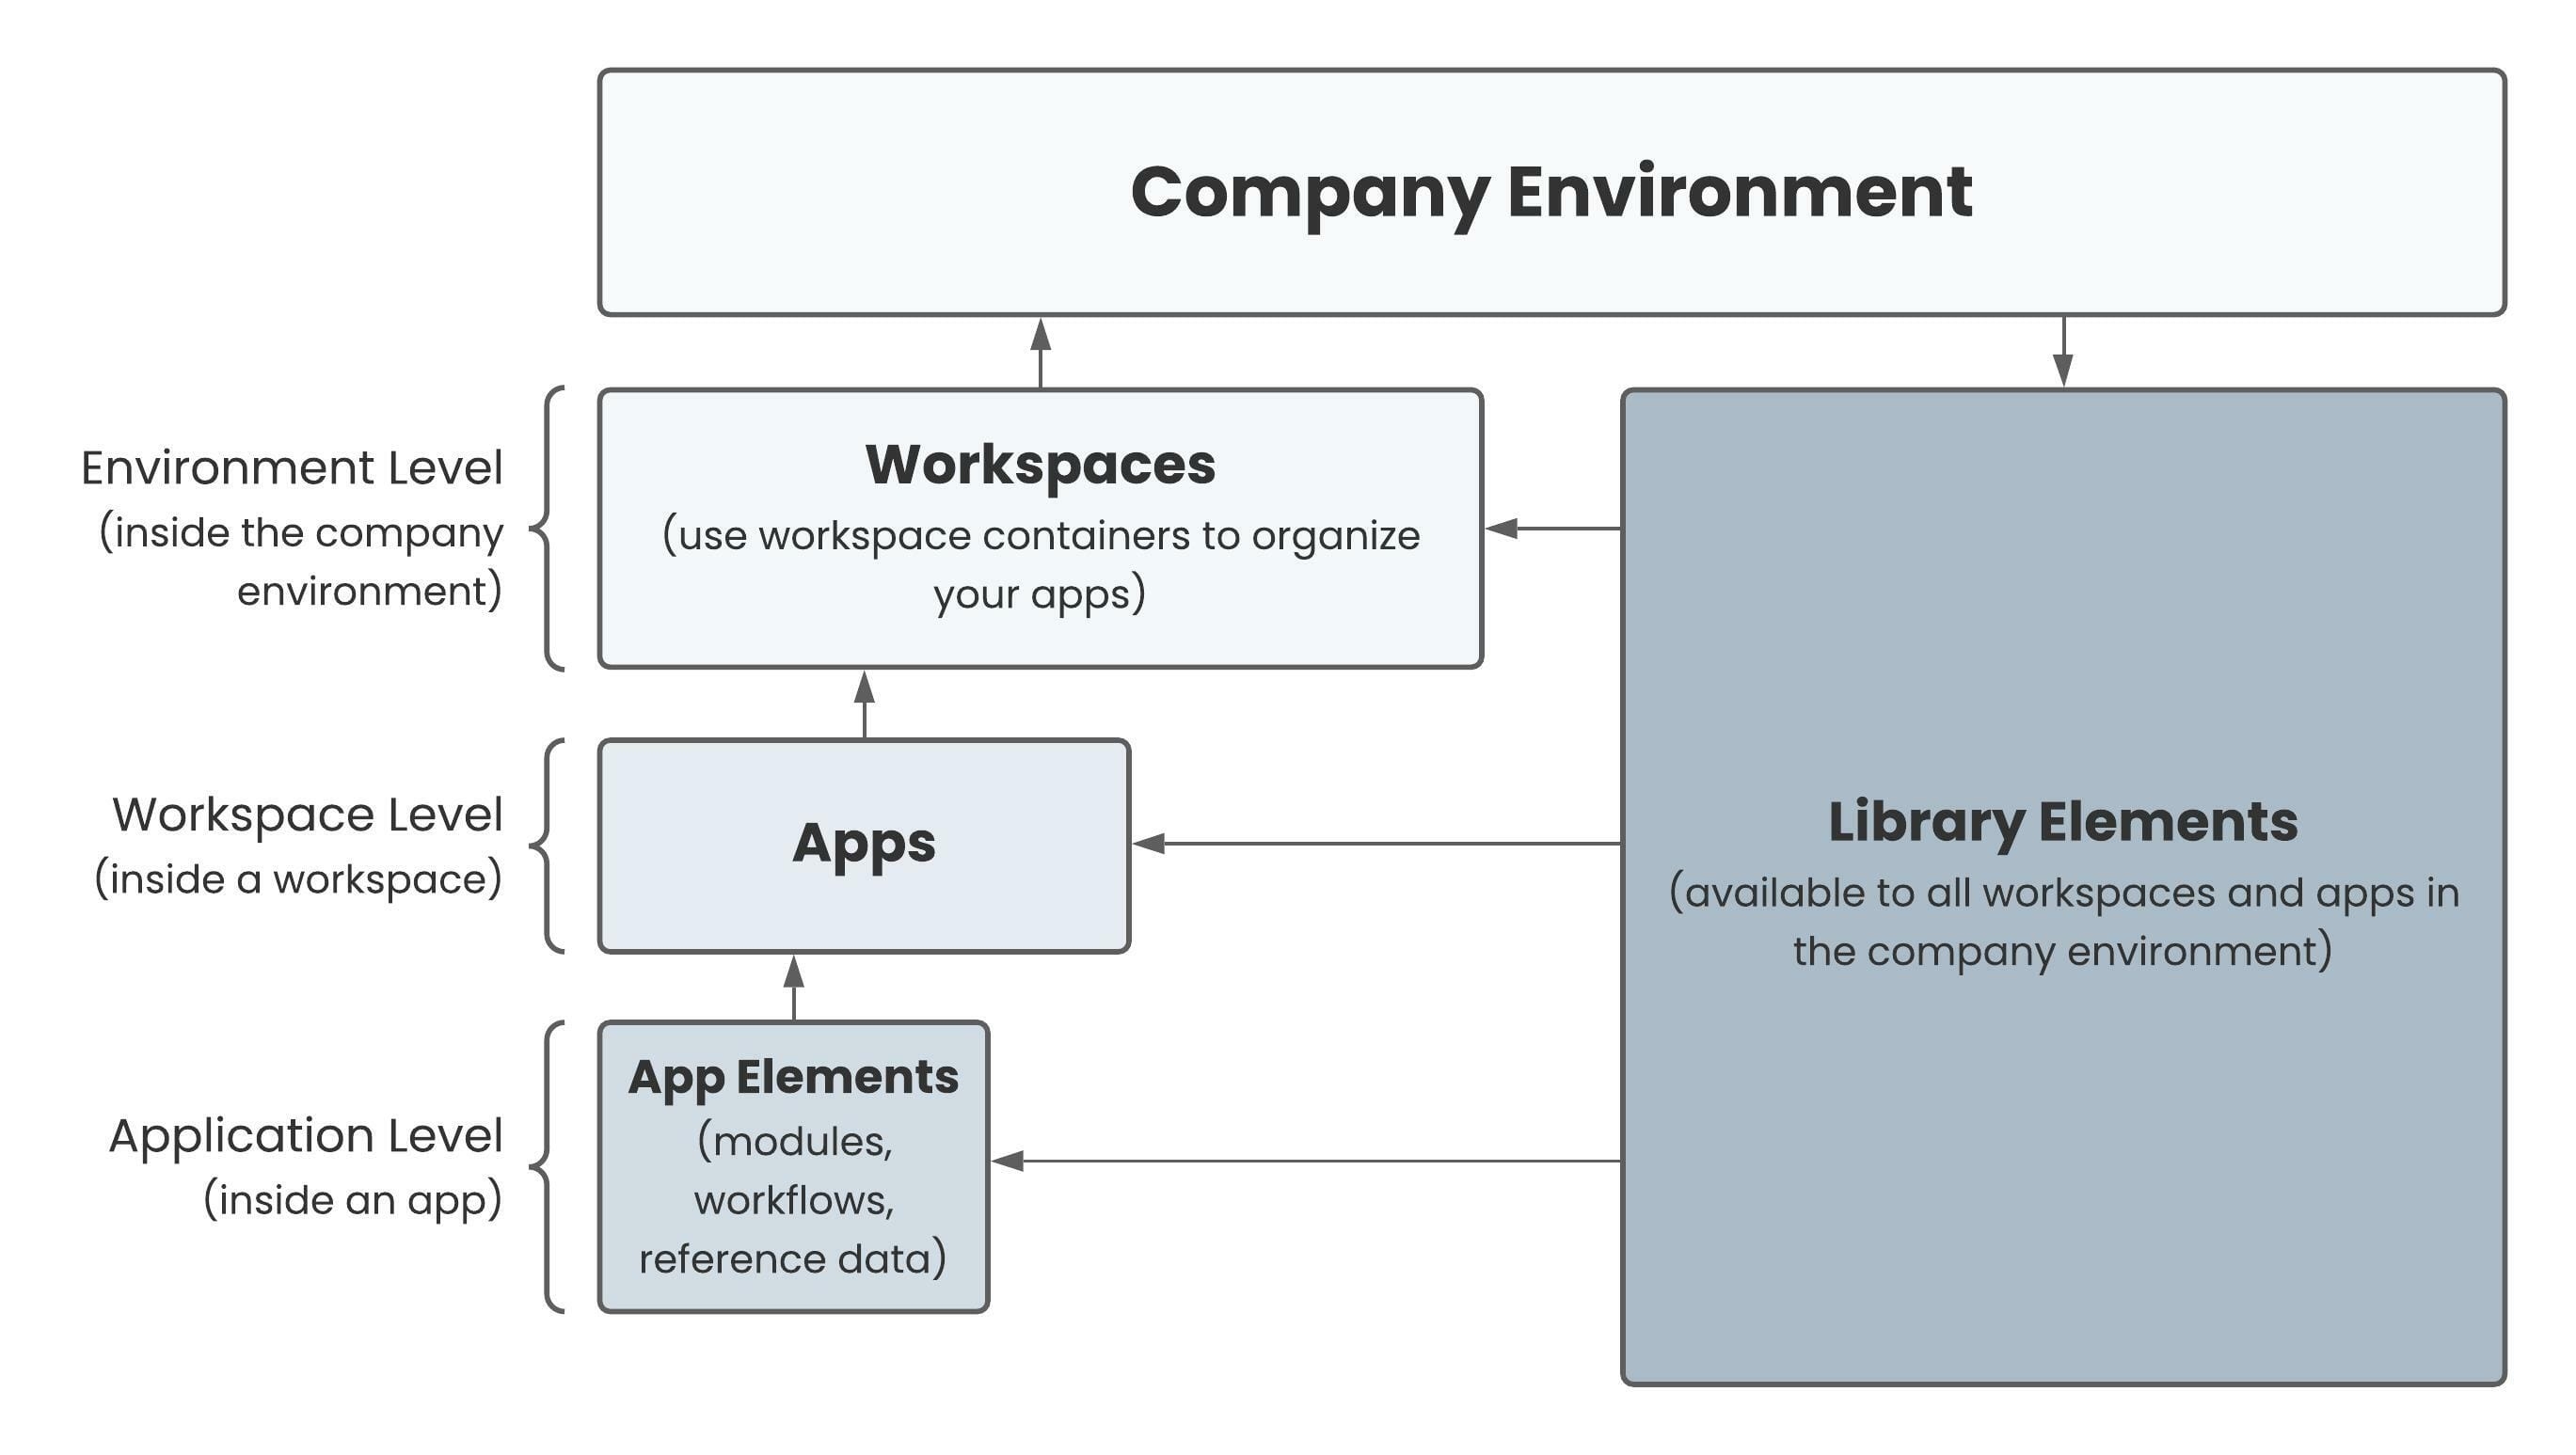
In UDesigner, you access and organize app elements in your application at the Application level. App elements include modules, workflows, and Data Collections. These elements are what you use to build apps. Inside your application, you can also connect shared elements to your application.
Here's where the Application Level is on the Workspaces map:
Once inside your app, you can open your app elements. Opening a workflow, module, or reference data opens the element in edit mode.
Application is also known as an app. You might see these terms used interchangeably across the Documentation Hub. Both words refer to an Unqork application.
Accessing an Application
Applications can be accessed from your homepage or in a workspace that contains the application.
Access an Application from the Homepage
If you recently worked on an application and want to return to it. Use the Recents tab on the homepage to access the application.
From the Udesigner homepage:
Navigate to the My Recents list.
In the row of the application you want to open, click View.
Access an Application from the Starred List
If you've starred an application, access it any time from your Homepage's Starred list. To start an application, click the ![]() (star) next to an application's name
(star) next to an application's name
From the Udesigner homepage:
Next to My Recents, click Starred.
In the row of the application you want to open, click View.
Navigating an Application
The Application page displays a list of modules and provides the option to view, edit, create, or delete modules in the workspace.
.png)
# | Setting | Description |
|---|---|---|
1 | Application Name | The application's name.
|
2 |
| Click to edit the application's name, description, and user permissions. |
3 | (Comments) | Opens the Comments panel for the application. |
4 | + Create New | Click this button to create a module or data collection in this application. |
5 | Application Description | Clicking this button opens a modal to modify the workspace description. |
6 | + Add Bookmark | Click to create hyperlink bookmarks for your team. |
7 | Search | Use this field to search for applications or record collections in your workspace. |
8 | Tags | Use this drop-down to filter the Application Elements table by elements with a specific tag. |
9 | Modified By | Sort applications and record collections by the following:
|
10 | Filter By | Filter by element type. You can filter by the following:
|
11 | Search Method | Set the search method to search for application elements or component values. After selecting an option, click the Search button to update the grid.
By default, this setting is set to Search Application Elements. |
Application Element / Values Location list | Displays the search results. From this list, you can view, star, edit settings, or delete an element from the application By default, the list is set to Application Element. | |
12 | Application Element | The name of the application or record collection in the workspace.
|
13 | Type | The element type. Elements can be Modules, Workflows, or Data Collections. |
14 | Description | The Creator's description of the application or record collection. |
15 | Last Modified | The last time the application or record collection was modified, and the user who made the change. |
16 | Actions | Lists the possible actions for the module or data collection. Actions include:
|
When you open an application, you're at the Application Level. This is where you'll access and organize app elements in your application. App elements include modules, workflows, and Data Collections. These elements are what you use to build apps. Inside your application, you can also connect shared elements to your application.
Here's where the Application Level is on the Workspaces map:
Once inside your app, you can open your app elements. Opening a workflow, module, or reference data opens the element in edit mode.
Application is also known as an app. You might see these terms used interchangeably across the Documentation Hub. Both words refer to an Unqork application.
Accessing an Application
To access the App level of Workspaces, you must first open a workspace.
Click Workspaces at the top right of the page.
Click the workspace name in the tile header of the workspace you want to access.
Click the app name in the tile header of the application you want to access.
You can also search for an app by clicking the (Search) icon in the navigation menu.
Navigating an App's Side Menu
Once inside your app, you can access and organize app elements. Depending on the type of app you selected, two or three tabs are visible in the menu to the left. For module-type apps, you'll see  Modules and
 ![]() Data Collections. For workflow-type apps, you'll see
Data Collections. For workflow-type apps, you'll see .png) Workflows,
Workflows,  Modules, and
 ![]() Data Collections.
Data Collections.
Setting | Description |
|---|---|
| Click this tab to display all workflows in your app. |
| Click this tab to display all modules in your app. This is the default page. |
| Click this tab to display all Data Collections in your app. |
Here's how the .png) Workflows page looks:
Workflows page looks:
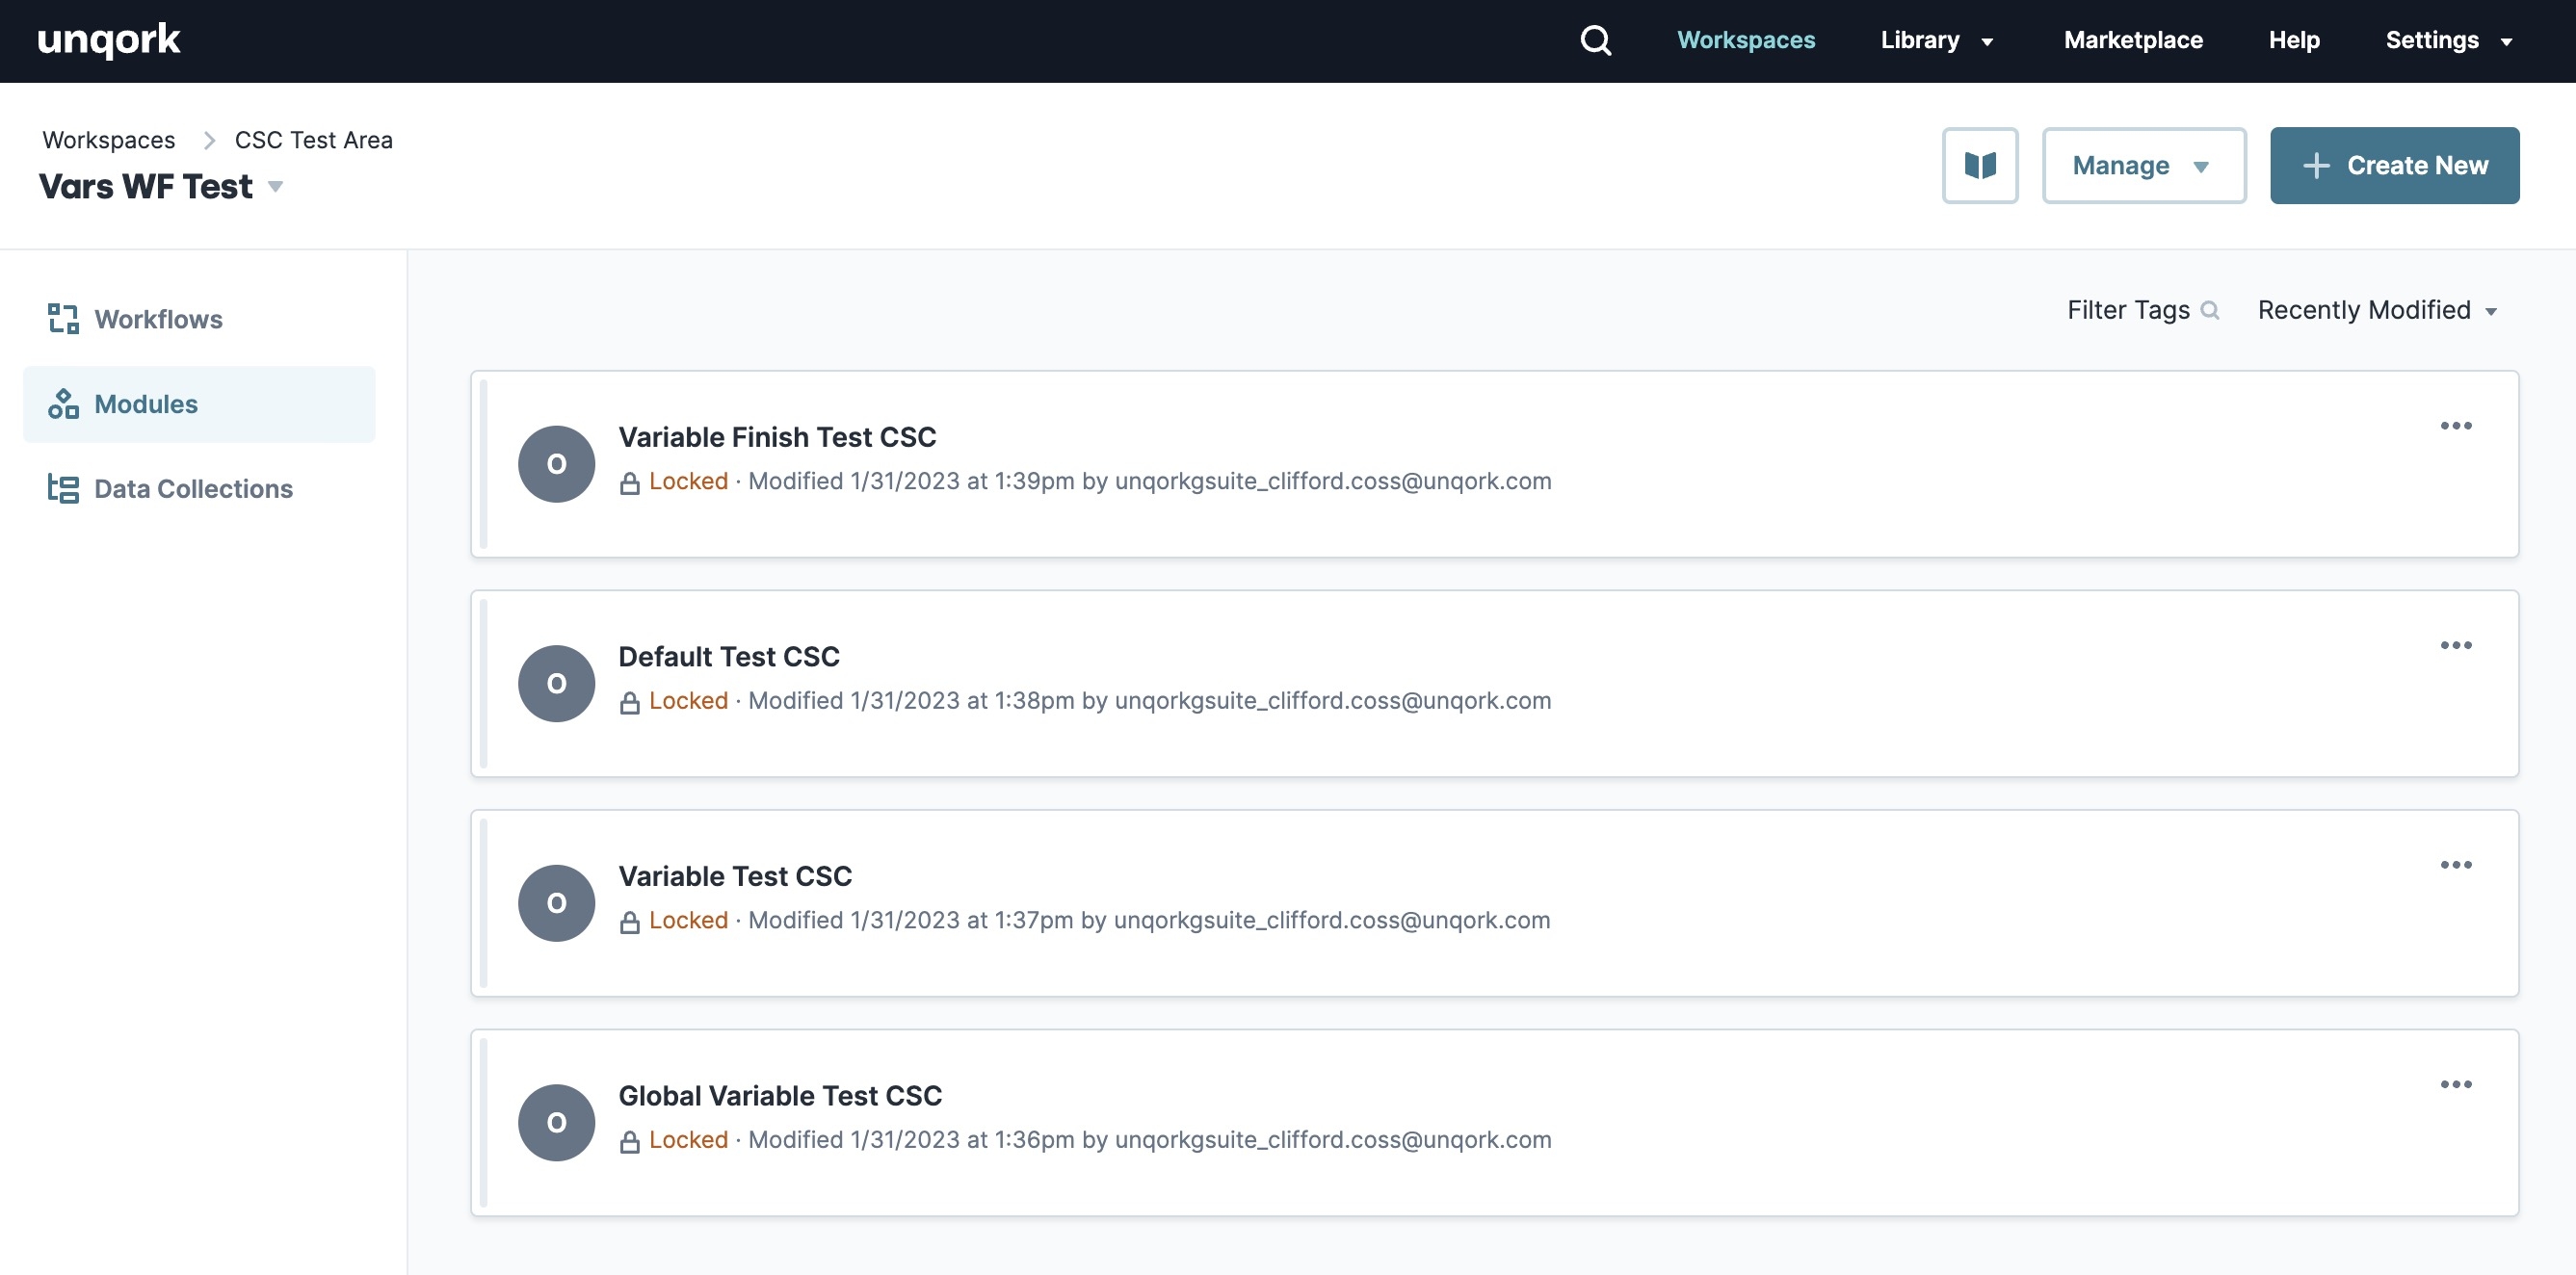
Here's how the  Modules page looks
Here's how the ![]() Data Collections page looks:
Data Collections page looks:
Navigating the App Level
Regardless if you access a module-type app, a workflow-type app, or your app's Data Collection, there are various actions you can take at the App Level. Here are descriptions of what you'll see inside your application:
Attribute | Description |
|---|---|
| Only available on the |
Manage ▾ | Use this drop-down to see a list of administrative actions you can perform on your application.
|
+ Create New | Create a new app element. Depending on what page you're on at the App Level, you can create a new workflow, module, or Data Collection. |
Filter Tags | Use this field to filter your app elements by the tags you created in your app elements.
|
Recently Modified | Choosing a drop-down option arranges your workspaces, apps, or app elements. You can arrange by Last Modified, Created Date, or Title. Choosing an option a second time reverses its order. You'll see an arrow icon next to your chosen Sort by option. The arrow icon points up (ascending order (A to Z)) or down (descending order (Z to A)) depending on your Sort by order. |
Element Tiles | Element tiles contain the following:
|
Element Tile Options
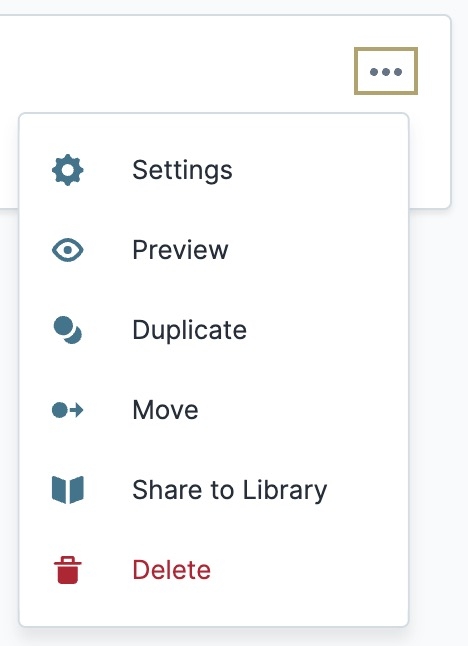
You can also perform specific actions on individual app element tiles. Each tile includes an ![]() (ellipsis) that lets you access the element's settings, share it to the Library, and so on. Options available are dependent on the element type.
(ellipsis) that lets you access the element's settings, share it to the Library, and so on. Options available are dependent on the element type.
Workflow Tiles
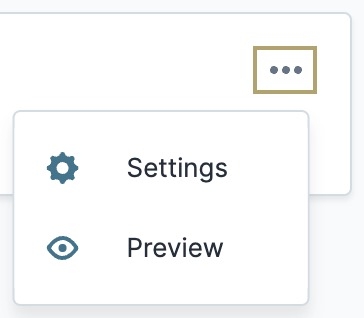
The following options are available when clicking the ![]() (ellipsis) button on workflow tiles:
(ellipsis) button on workflow tiles:
Option | Description |
|---|---|
Settings | Opens the App Settings modal where you can: Modify the App Name* and App Path*. Add or modify app styles. Add or modify Header Module, Footer Module, Login Module, and Footer Module. Add an App Description to make it easier to onboard team members or hand off projects. |
Preview | To preview your application from the workspace page:
To preview your application from the application page:
You can also view an application preview in Express View using the following application URL path: For example, an application named application-settings was created in the training environment. The moduleId of the application is 6517325819f7fec671368ff4 and has no submissionId. So, the Express View preview of this application uses the following URL: |
Module Tiles
The following options are available when clicking the ![]() (ellipsis) button on module tiles:
(ellipsis) button on module tiles:
Option | Description |
|---|---|
Settings | Opens the App Settings modal where you can: Modify the App Name* and App Path*. Add or modify app styles. Add or modify Header Module, Footer Module, Login Module, and Footer Module. Add an App Description to make it easier to onboard team members or hand off projects. |
Preview | To preview your module from the workspace page:
To preview your application from the application page:
You can also view an application preview in Express View using the following application URL path: For example, an application named application-settings was created in the training environment. The moduleId of the application is 6517325819f7fec671368ff4 and has no submissionId. So, the Express View preview of this application uses the following URL: |
Duplicate | Only available for module-type apps. All app elements in the original app are duplicated as a copy of the app. App elements duplicated include the module type and tags. Selecting this option displays a modal where you can change the module name and path, add a description, and select the module type. |
Move | Moves the application to a different workspace. Any shared elements in the app shared with both the original workspace and the destination workspace. |
Share to Library | Converts the app element into a shared element that you can use across various workspaces.
|
Delete | Deletes the application. |
Data Collections Tiles
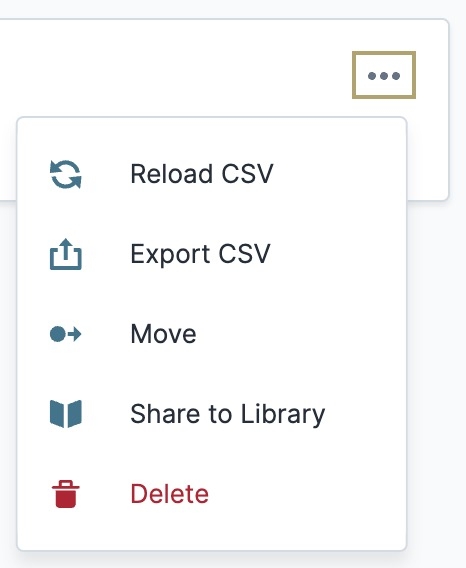
The following options are available when clicking the ![]() (ellipsis) button on Data Collection tiles:
(ellipsis) button on Data Collection tiles:
Option | Description |
|---|---|
| Lets you upload a new or modified CSV file to the Data Collection. It's important to note that uploading another CSV file will replace the existing one. Ensure the file won't break any application dependencies you might have. |
| Creates a CSV file of your application. The exported file contains the modules and the components in your app. |
| Moves the application to a different workspace. Any shared elements in the app shared with both the original workspace and the destination workspace. |
| Converts the app element into a shared element that you can use across various workspaces.
|
| Deletes the application. |


.png) Settings
Settings.png)
.png)
 Data Model
.png)
.png)
.png)
.png)
