When you access an application, you've accessed the Application level of your workspace. This level is where you manage the modules in a workspace's application. Modules are the building blocks for your applications. There are several ways to create, modify, and delete modules at the Application level.
To learn how to promote applications and app elements, view our Promoting Applications article.
Creating a Module
You can create modules in both module and workflow-type applications.
To create a module at the Application level:
Navigation to your application.
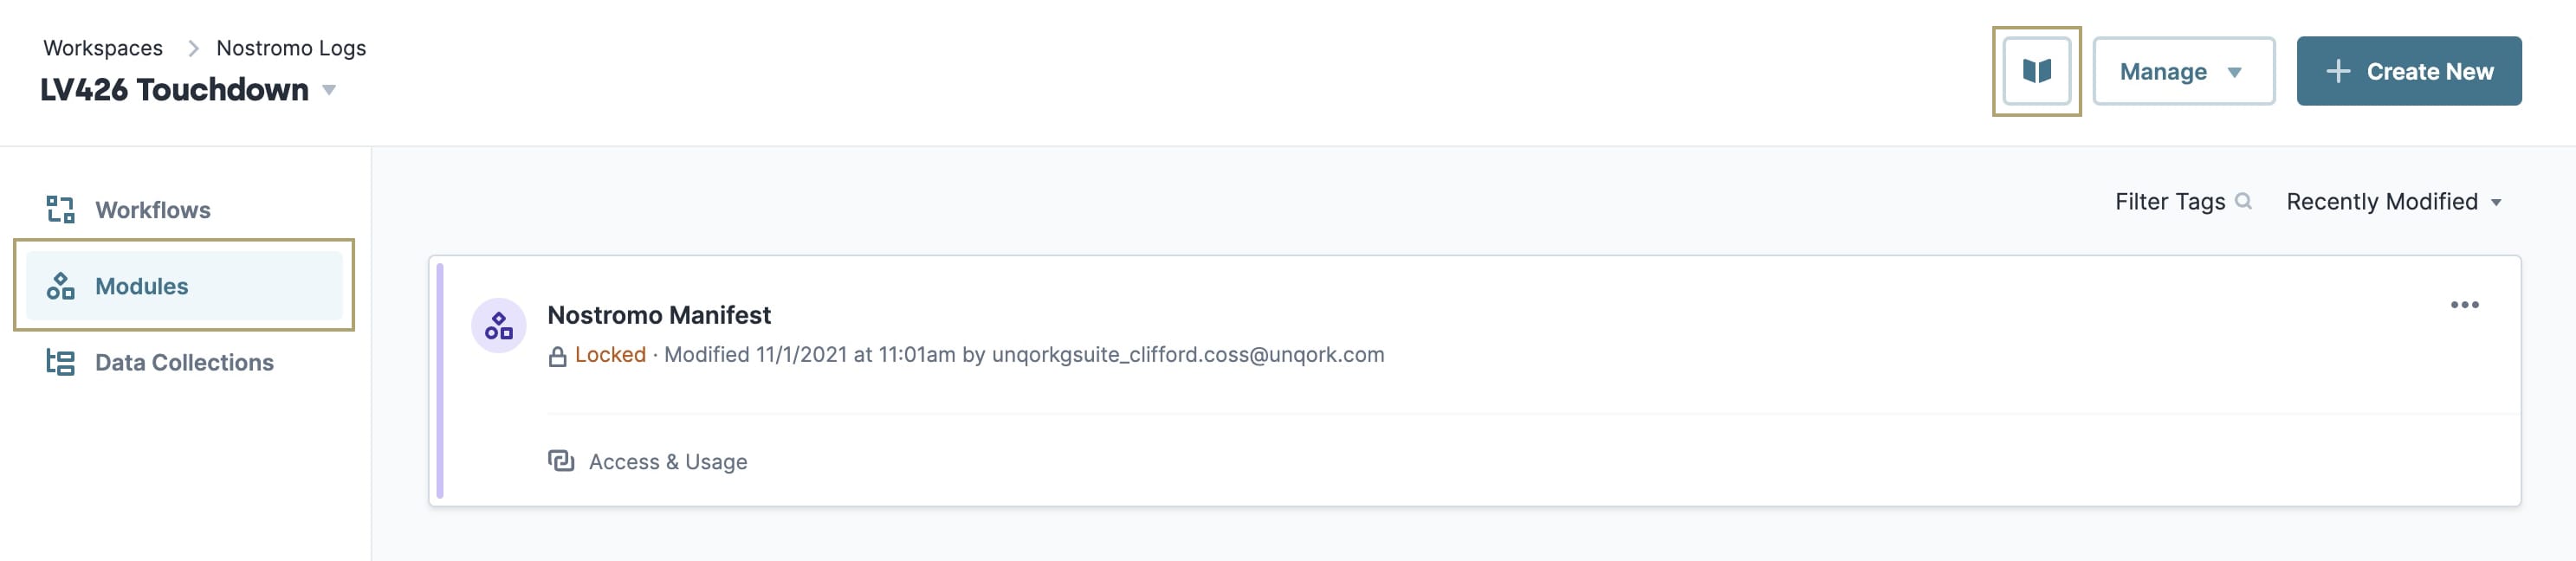
To the left of the Application page, select the
.png) Modules tab.
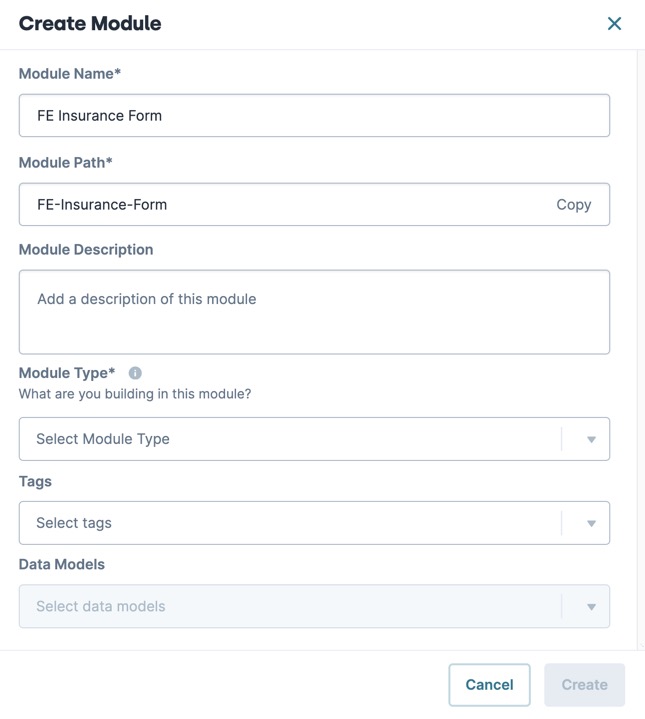
Modules tab.At the top right of the page, click + Create New. The Create Module modal displays.
In the Module Name* field, enter a unique name for your module. The Module Path* field populates using the Module Name value.
From the Module Type* drop-down, select API, Front-End, or Other.
To learn more about Module Types, view our What is a Module? article.
(Optional) In the Module Description field, describe the purpose of the module.
(Optional) From the Tags drop-down, select any tags you want to add.
Click Create.
Sharing a Module
Typically you configure workflows to reference modules. For example, referencing modules with a Signal Start or Task node. To reference your module, it needs to exist in a workflow-type application.
What if you want to reference a module that exists in a completely different application? You can share that module to your workflow-type application. To share a module to your workflow's workspace, you need to add it to the Library.
To add a module to the Library at the Application level:
Locate and open the application that contains your referenced module.
On the module element tile, click the ··· (ellipsis) button. The Module's options menu displays.
Select
.png) Share to Library.
Share to Library.From the Set Element Access & Usage drop-down, select either Share to Select Workspaces or Share to Environment.
Selecting Share to Environment will share the module to every workspace at that environment level.
With Share to Select Workspaces selected, select your workflow's workspace from the Share To column.
By default, the element automatically shares to the workspace in which it already exists. You cannot clear this selection. You can only select other workspaces to which you want to share the element.
Click Share.
Your module element is now shared to your workflow's workspace. Next, let's add it to the workflow's application.
To add a shared element to your workflow-type application:
Locate the workflow-type application whose workflow references your shared module element.
To the left of the page, select the
Modules tab.At the top right, click
.png) (Library).
(Library).
Locate your shared module element and click Add.
The module that your workflow references is not a part of its application.
Duplicating a Module
At some point, you might want to make a copy of the current version of your module. This action is a great when you want your new module to have the same configuration as an existing module.
You can only duplicate unshared modules.
Module IDs and module paths are always unique. When duplicating a module, the new module’s ID and path are different from the original. Be mindful of any other configurations referencing the original module's ID or path. If you want to reference the duplicate module, you must update the configuration.
To duplicate a module at the Application level:
Navigate to your application.
On the module element tile, click the ··· (ellipsis) button. The Module's options menu displays.
Select
.png) Duplicate.
Duplicate.
A new module element tile displays with a new module name and path.
Previewing a Module
Previewing your modules as you configure them gives you a glimpse of how your end-user will view it.
To preview a module in Express View at the Application level:
Navigate to your application.
On the module element tile, click the ··· (ellipsis) button. The Module's options menu displays.
Select
.png) Preview.
Preview.
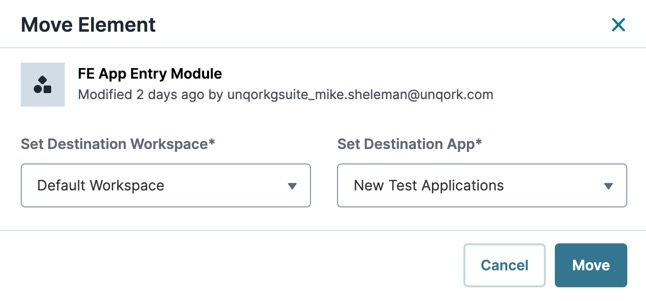
Moving a Module
You can move modules to other applications in your workspace. You can also move modules to applications in other workspaces shared with you. Once you move a module to an application, it becomes a part of that application. To manage your moved module, navigate to the destination application and select the. Click the Modules tab. Then, locate your module in its new location.
To move a module at the Application level:
Navigate to your application.
On the module element tile, click the ··· (ellipsis) button. The Module's options menu displays.
Select
.png) Move. The Move Element modal displays.
Move. The Move Element modal displays.From the Set Destination Workspace* drop-down, select a destination workspace.
From the Set Destination App* drop-down, select a destination application.
Click Move.
Entrypoint modules are tied to an application, so they must stay in their original module-type application.
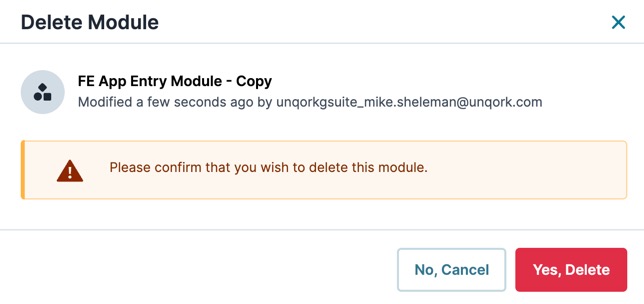
Deleting a Module
When a module is out-of-date or is no longer needed, delete it.
To delete a module at the Application level:
Navigate to your application.
On the module element tile, click the ··· (ellipsis) button. The Module's options menu displays.
Select
.png) Delete.
Delete.Click Yes, Delete.
If you try to delete an entrypoint module, you’ll receive an error message. To delete an entrypoint module, you must delete the entire module-type application.
When you access an application, you've accessed the Application level of your workspace. This level is where you manage the modules in a workspace's application. Modules are the building blocks for your applications. There are several ways to create, modify, and delete modules at the Application level.
To learn how to promote applications and app elements, view our Promoting Applications article.
Creating a Module
You can create modules in both module and workflow-type applications.
To create a module at the Application level:
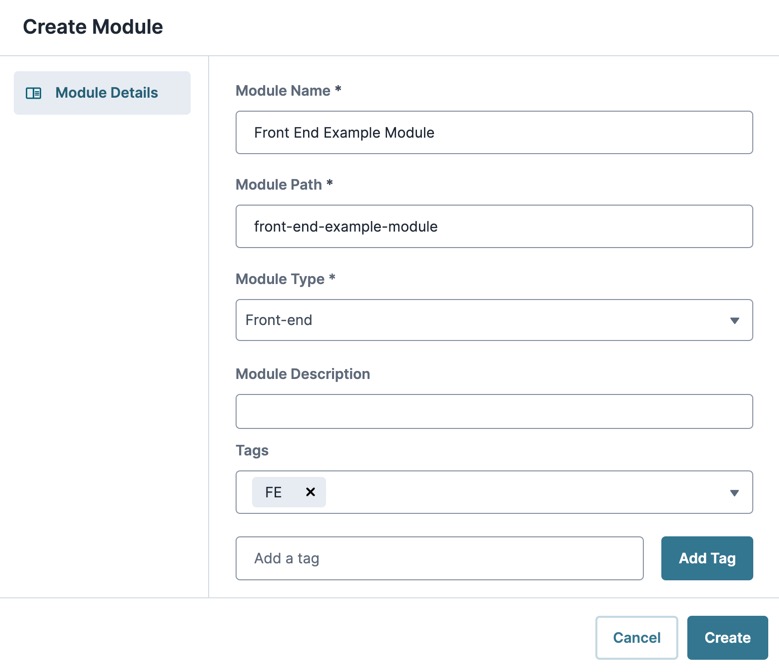
At the top right of the page, click the + Create New drop-down.
Select Module. The Create Module modal displays.
In the Module Name* field, enter a unique name for your module. The Module Path* field populates using the Module Name value.
From the Module Type* drop-down, select API, Front-End, or Other.
To learn more about Module Types, view our What is a Module? article.
(Optional) In the Module Description field, describe the purpose of the module.
(Optional) From the Tags drop-down, select any tags you want to add. Then click Add Tag.
Click Create.
Duplicating a Module
Duplicating a module makes a copy of the current module version. This action is helpful when you want your new module to have the same configuration as an existing module.
Module IDs and module paths are always unique. When duplicating a module, the new module’s ID and path are different from the original. Be mindful of any other configurations referencing the original module's ID or path. If you want to reference the duplicate module, you must update the configuration.
To duplicate a module at the Application level:
In the Application Elements list, navigate to the module you want to duplicate.
In the Actions column, click
.png) (ellipsis). A menu displays.
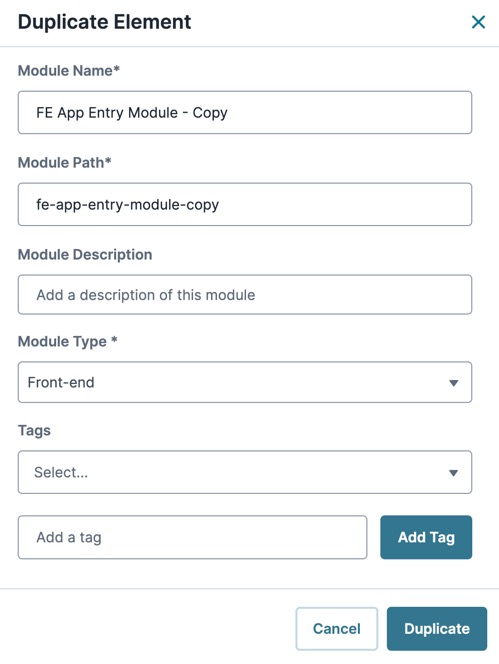
(ellipsis). A menu displays.Select Duplicate. The Duplicate Element modal displays.
(Optional) Enter new values in the Module Name, Module Path, Description, Module Type, and Tags fields.
Click Duplicate. The Application page refreshes, displaying the copied module in the Application Element list.
Previewing a Module
Previewing your modules as you configure them gives you a glimpse of how your end-user will view it.
To preview a module in Express View at the Application level:
In the Application Elements list, navigate to the module you want to preview.
In the Actions column, click
(ellipsis). A menu displays.Select Preview. A new page displays the module in Express View.
You might need to enter your credentials to access Express View.
Moving a Module
You can move modules to other applications in your workspace. You can also move modules to applications in other workspaces shared with you. Once you move a module to an application, it becomes a part of that application. To manage your moved module, navigate to the destination app. Click the Modules tab, and you'll find your module in its new location.
To move a module at the Application level:
In the Application Elements list, navigate to the module you want to move.
In the Actions column, click
(ellipsis). The Module's options menu displays.Select Move. The Move Element modal displays.
From the Set Destination Workspace* drop-down, enter or select a destination workspace.
From the Set Destination App* drop-down, enter or select the destination application.
Click Move.
Entrypoint modules are tied to an application and must stay in their original module-type application.
Deleting a Module
When a module is out-of-date or is no longer needed, delete it.
To delete a module at the Application level:
In the Application Elements list, navigate to the module you want to preview.
In the Actions column, click
(ellipsis). The Module's options menu displays.Select Delete. The Delete Module modal displays.
Click Yes, Delete.
To delete an entrypoint module, you must delete the entire module-type application.
To learn more about modifying modules, view our Module Settings article.