On January 10, 2023, this tool is scheduled for sunsetting. Sunsetting means:
Removing access to the UDLC homepage on existing environments.
Module Settings set to NO ACCESS on existing environments.
No longer included in the provisioning of new environments.
The Submission Revisions Dashboard tool lets you filter a specific submission ID and compare two revision changes at a time. They can also be revisions from the same submission ID or two different ones. You can also compare submission revisions from different modules or workflows, if you choose.
Once selected, you'll view the revision data on the Submission Revisions Diff page. On this page, you'll see the following for each submission ID you're comparing:
Revision ID
Submission ID
Module ID
Module path
Module title
Date last modified
User ID
Unqork Platform version at time of revision
Beyond this basic information, you'll also see:
The type of change made. This change could include the addition or removal of a component, or an edited property.
The updated Property ID.
The original value before the update.
The new value after the update.
Lastly, the Submission Revisions Dashboard features charts that include several KPI widgets. You can also export, print, or create PDFs from the two charts.
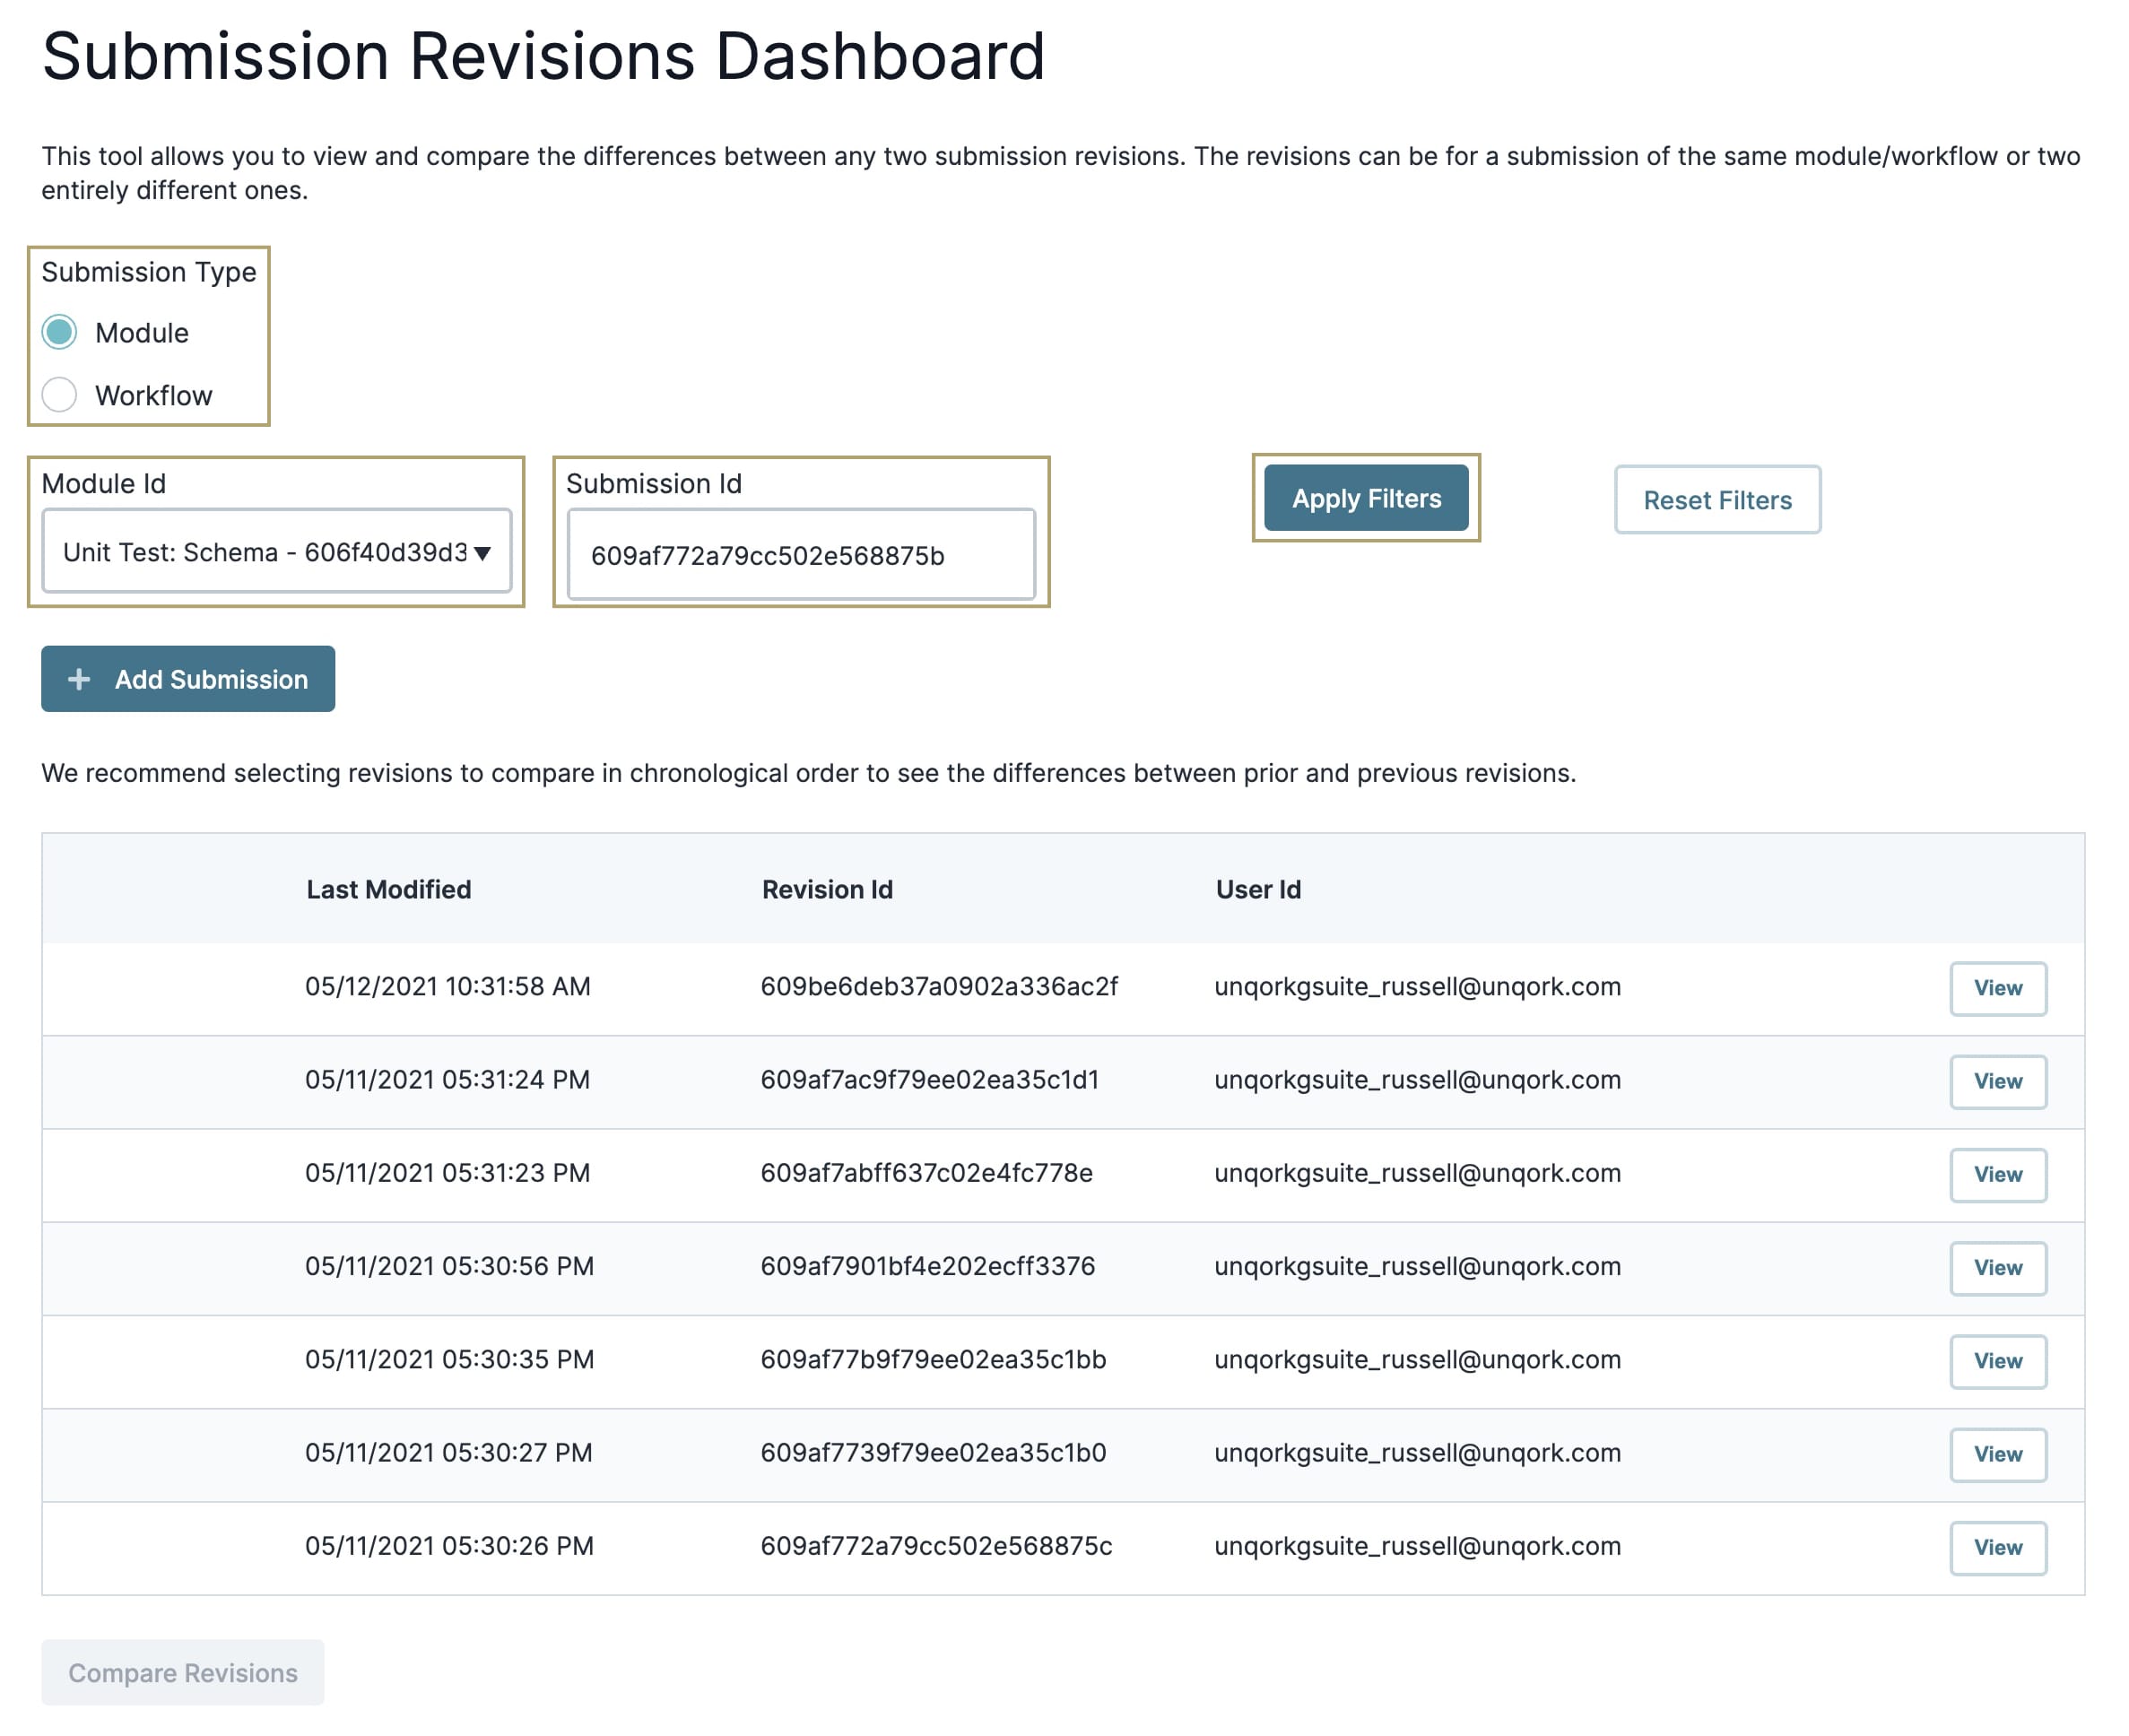
Filtering Module and Workflow Submissions
The first thing you'll do on the dashboard is select a Submission Type:
Module
Workflow
After choosing a Submission Type, you can filter for a specific submission. It's important to note that only modules that follow Unqork Schema Specifications display in the Module ID drop-down. You can manually enter the module ID in the field by clicking the Can't find your module? link below the drop-down.
For more information about Schema Specifications, view our Schema Docs Dashboard Tool article.
Filtering a Single Submission ID
To filter for a specific submission:
If you're looking for a module submission, select Module as the Submission Type. If you're looking for a workflow submission, select Workflow as the Submission Type.
From the Module ID or Workflow ID drop-down, select a module ID or workflow ID. The option is dependent on your choice in the first step.
In the Submission ID field, enter a submission ID.
If you don't know the specific submission ID, you can use the Schema Docs Dashboard tool to locate it. For more information, view our Schema Docs Dashboard Tool article.
Click Apply Filters.
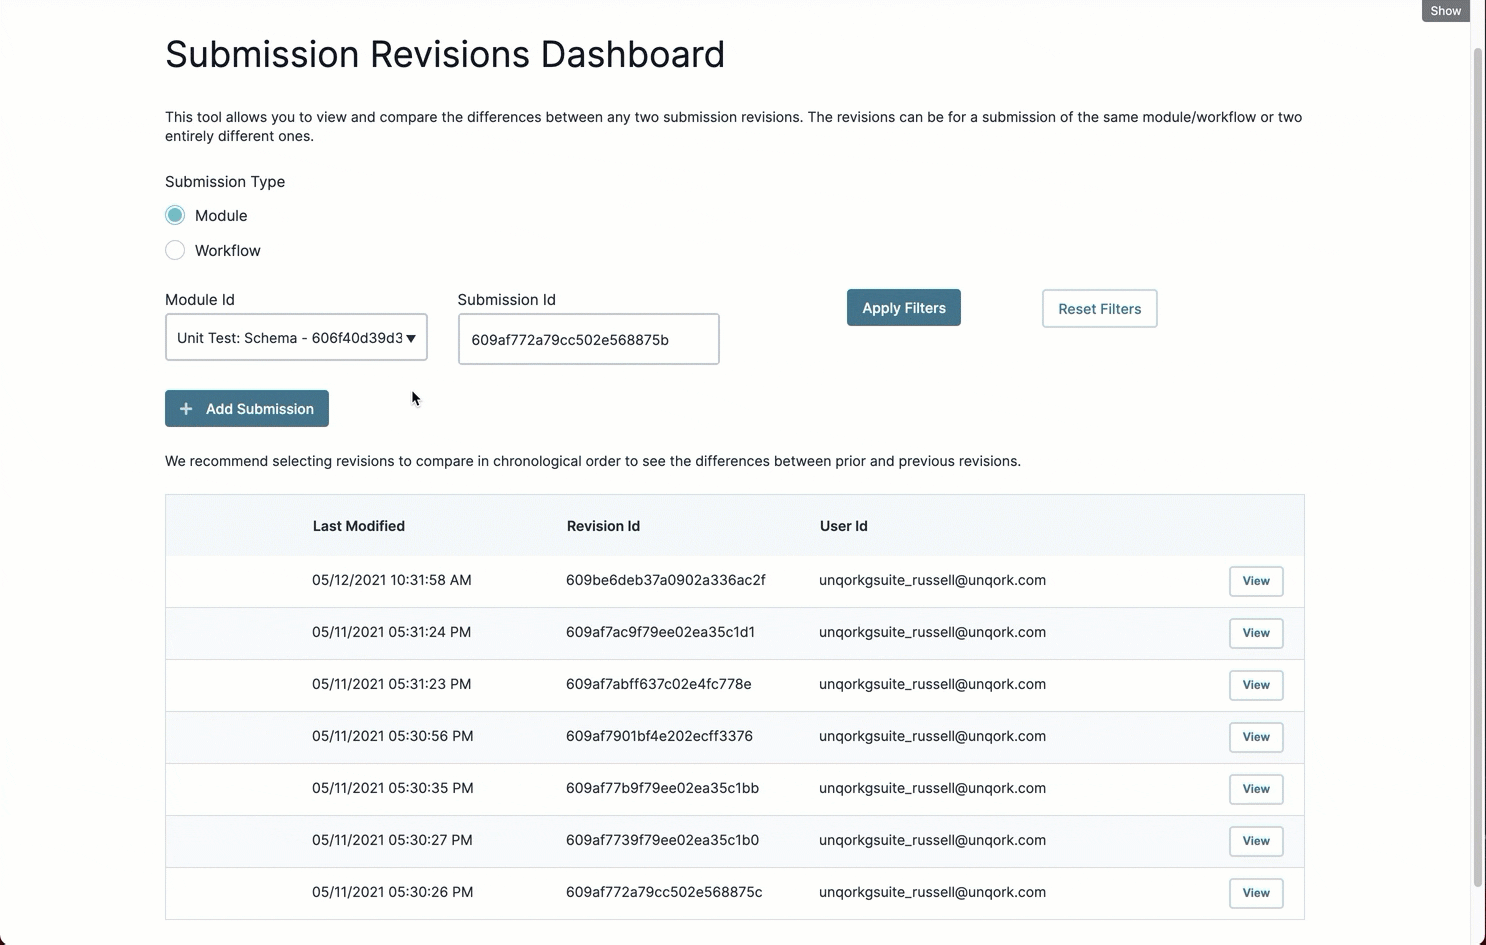
After you've applied your filters, a table displays all the submissions of your submission ID. Click the View button to the right of the submission to view the submission's raw JSON in your browser.
Filtering Two Submission IDs
The tool also lets you add a second submission ID to compare. To add another submission ID, click the + Add Submission button. Then you'll follow the same steps as before to select a new submission.
You can even choose to filter and compare submissions from two different modules or workflows. After you've applied your filters, two tables appear. The results of your first submission ID display on the left, and the results of your second submission ID are on the right.
To remove your second submission filter, click the X to the far right of the filter.
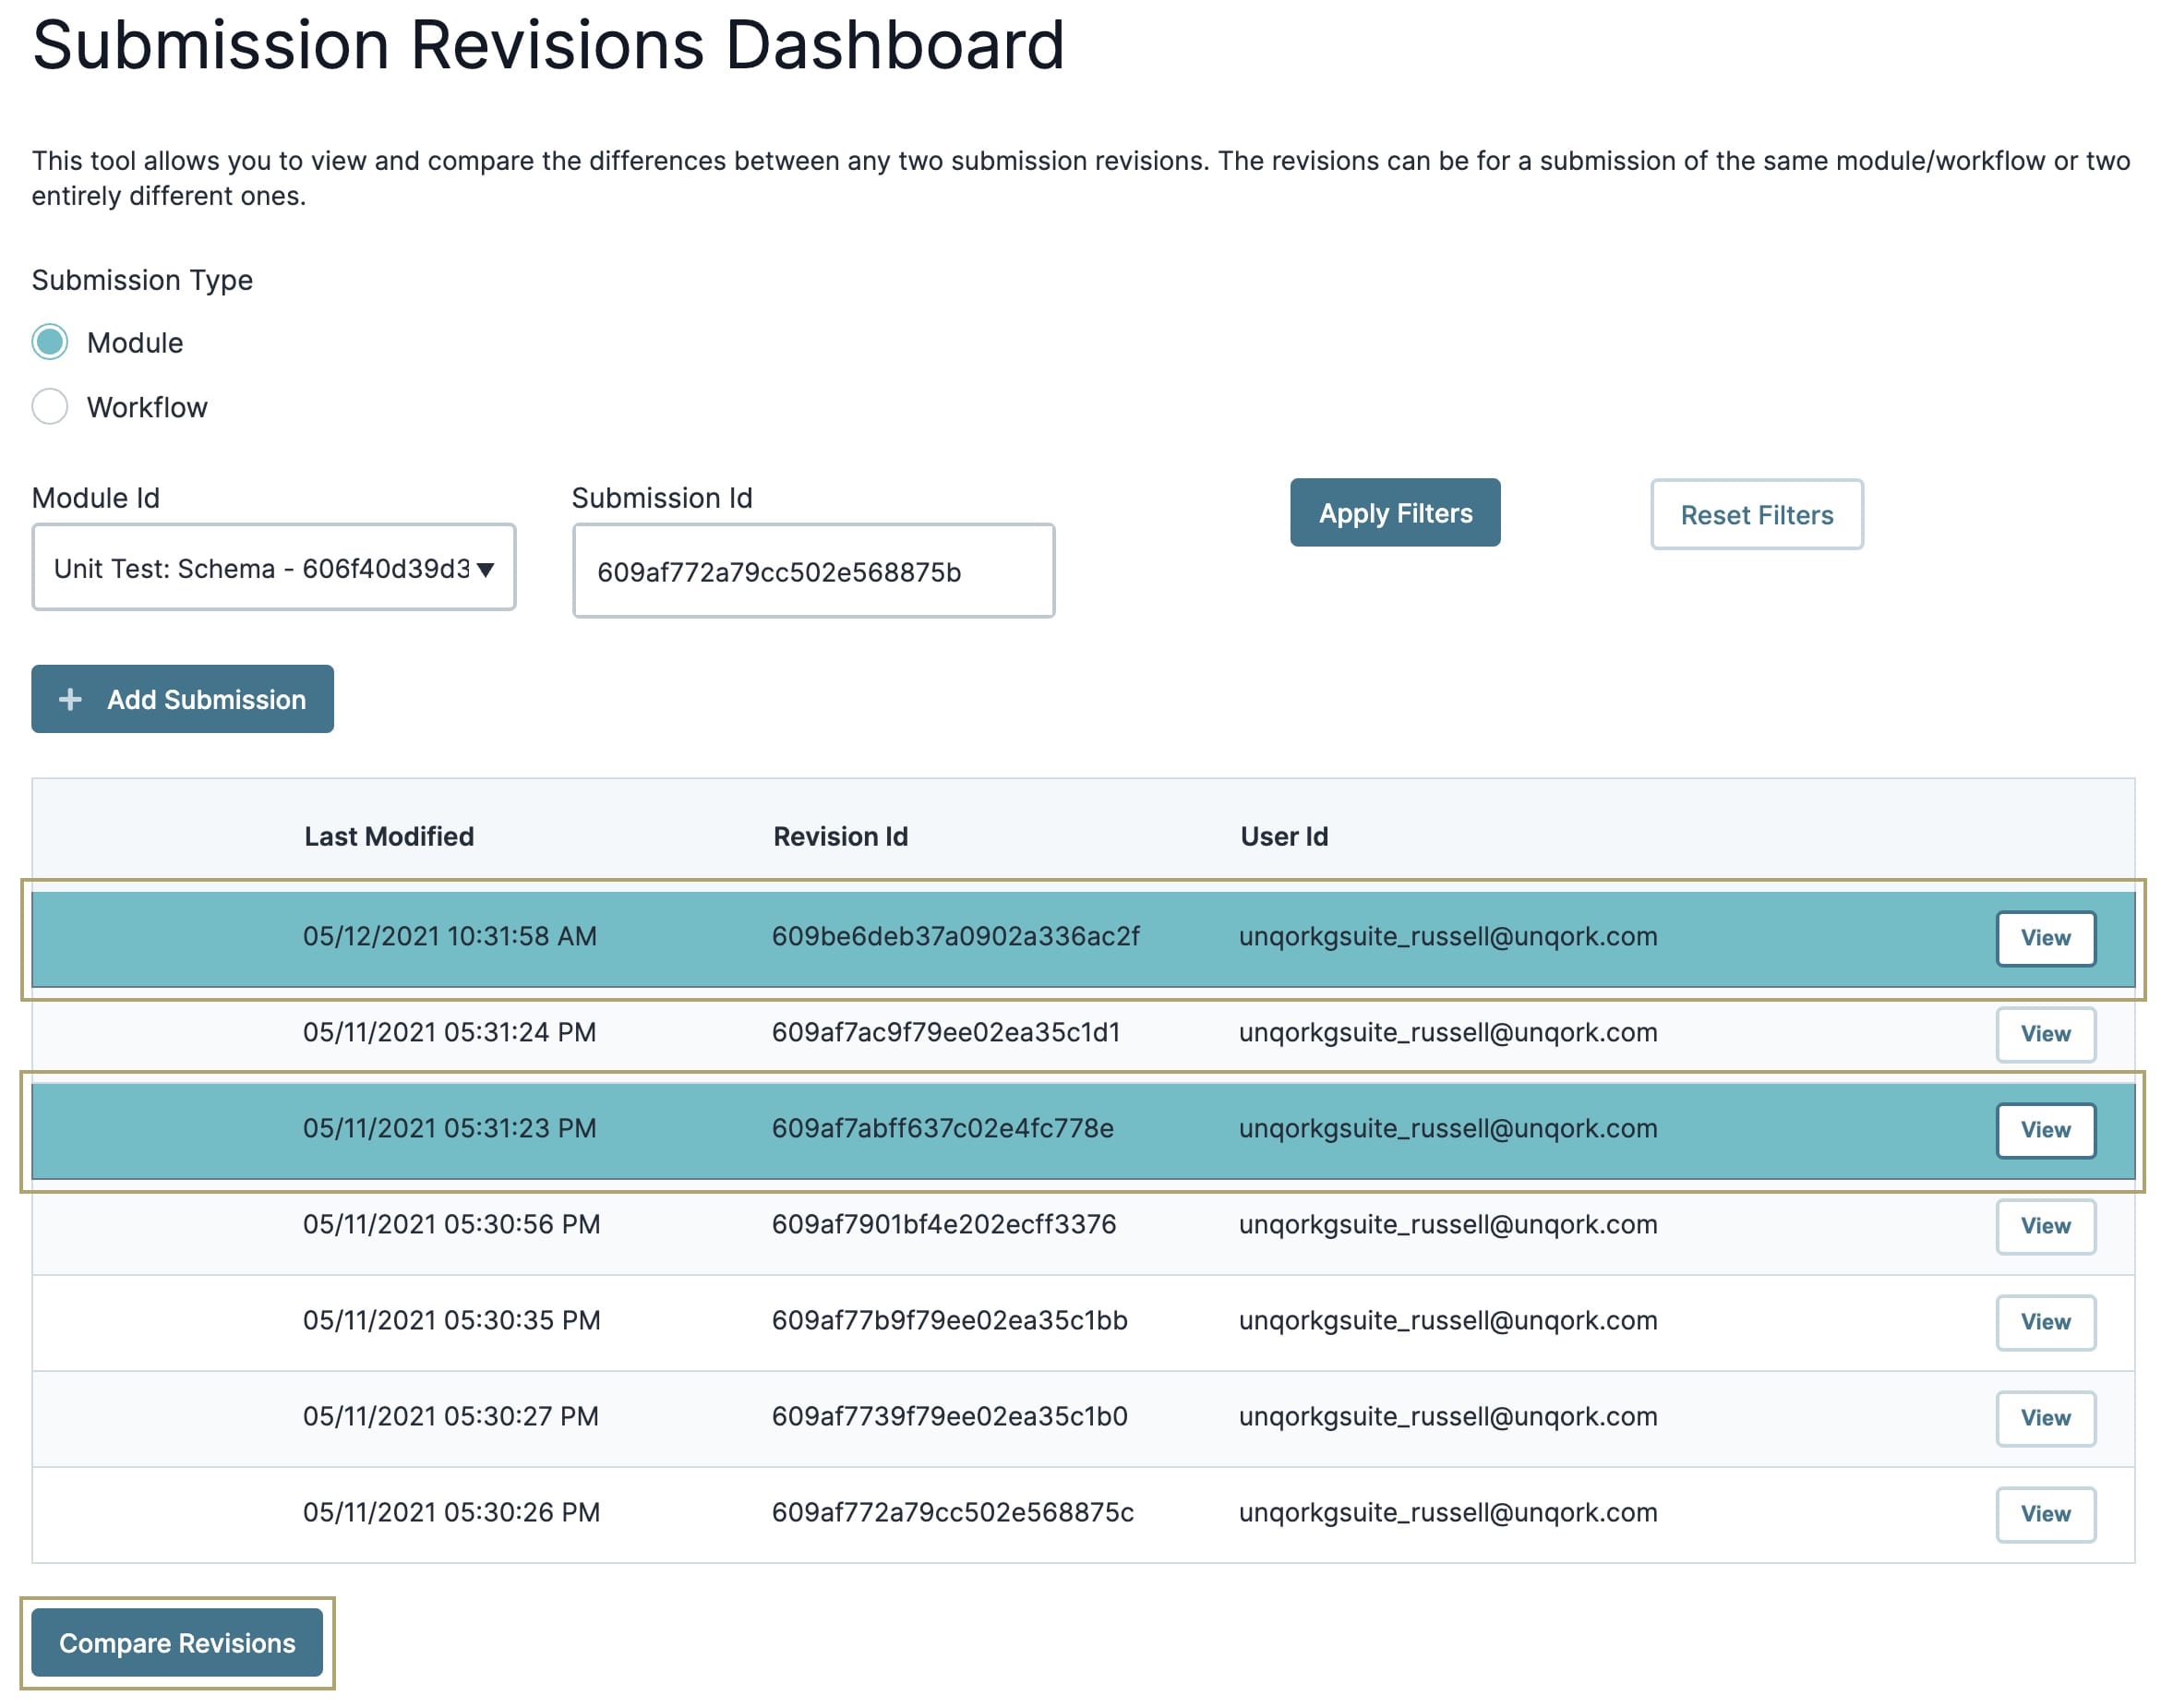
Comparing Submission Revisions
You can compare any two submission revisions. These revisions could be different ones for the same submission ID, or two revisions from different submission IDs. For this example, let's select two revisions to compare from the same submission ID.
To compare submission revisions:
Select the first revision for comparison in the table. The cell highlights blue when selected.
Select the second revision for comparison in the table. The cell highlights blue when selected.
Click Compare Revisions.
Navigating the Submission Revisions Diff Dashboard
This tool lets you compare submission revisions. The dashboard displays this information in two columns. The Left Revision column displays your first submission revision selection. The Right Revision column shows your second selection. There are also links at the top of each column to view the submission revisions in your browser.
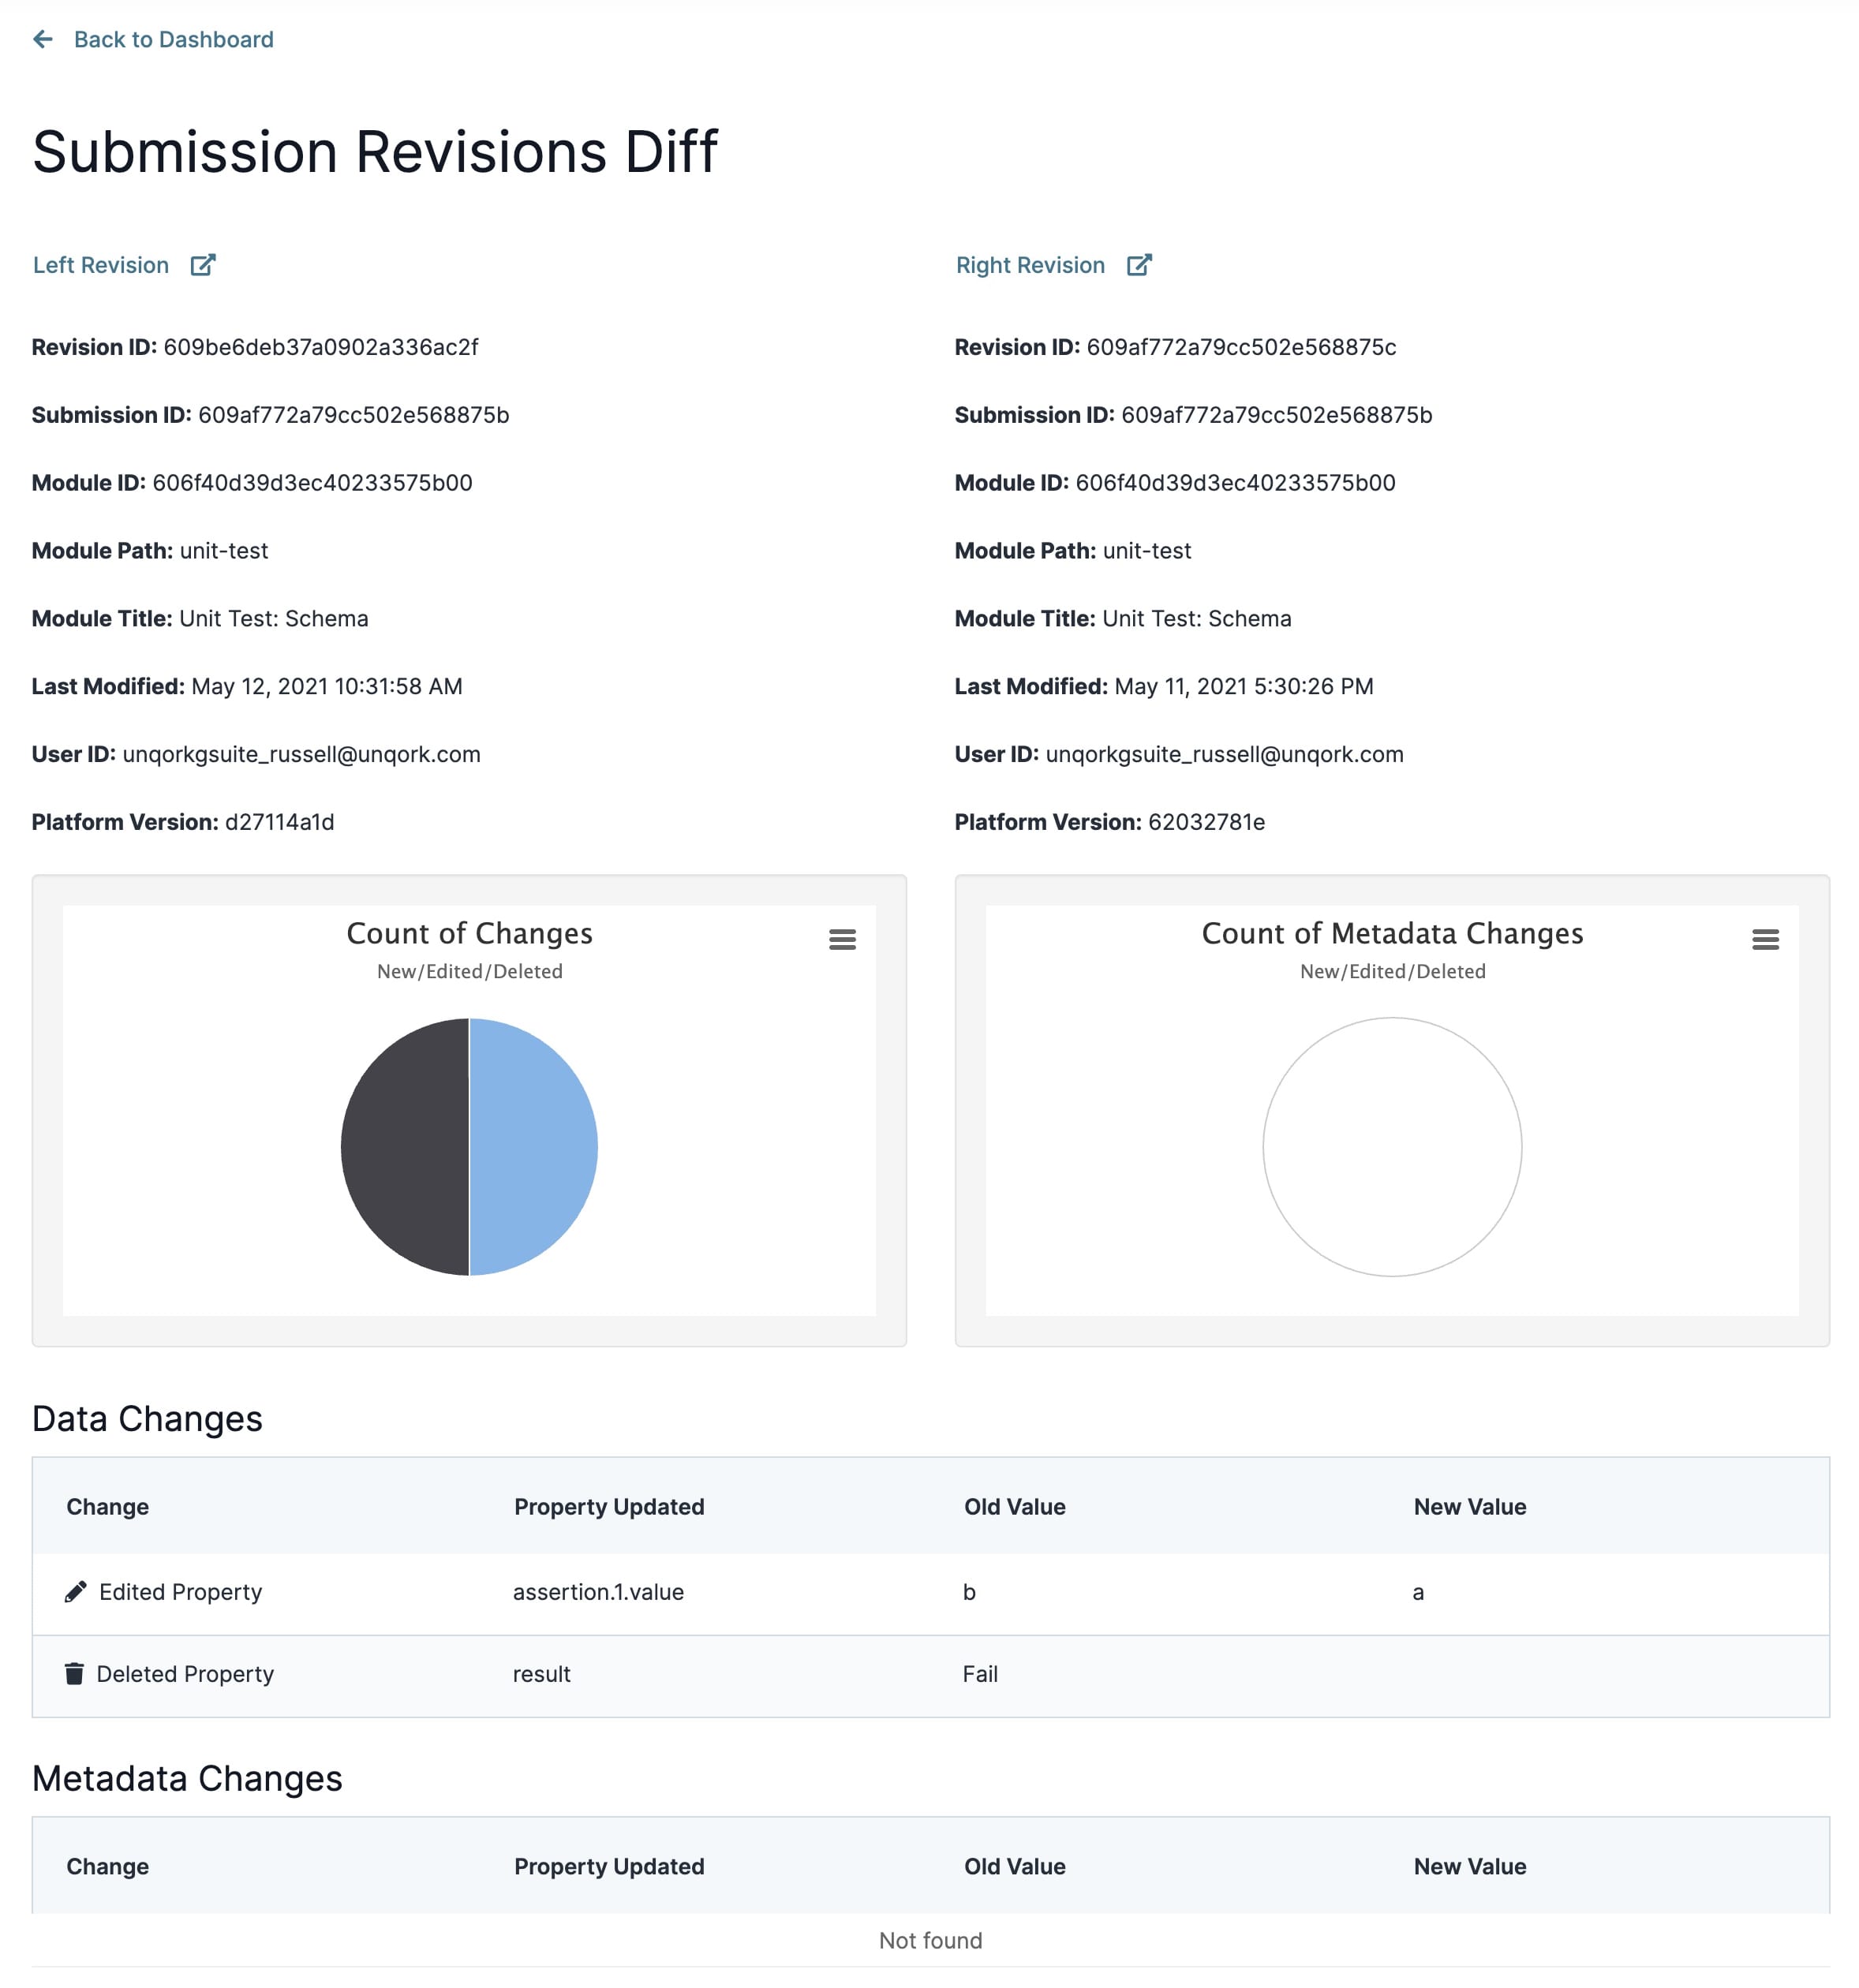
In each revision, you'll see the following:
Attribute | Description |
|---|---|
Revision ID | A unique identifier assigned to the revision. |
Submission ID | The submission identifier. |
Module ID | The unique module identifier. |
Module Path | The unique path of your module. |
Module Title | The name you choose for your module. |
Last Modified | The last date the module revision was edited. |
User ID | The identifier of the person who made the revision. |
Platform Version | The version of the Unqork platform at the time of the revision. |
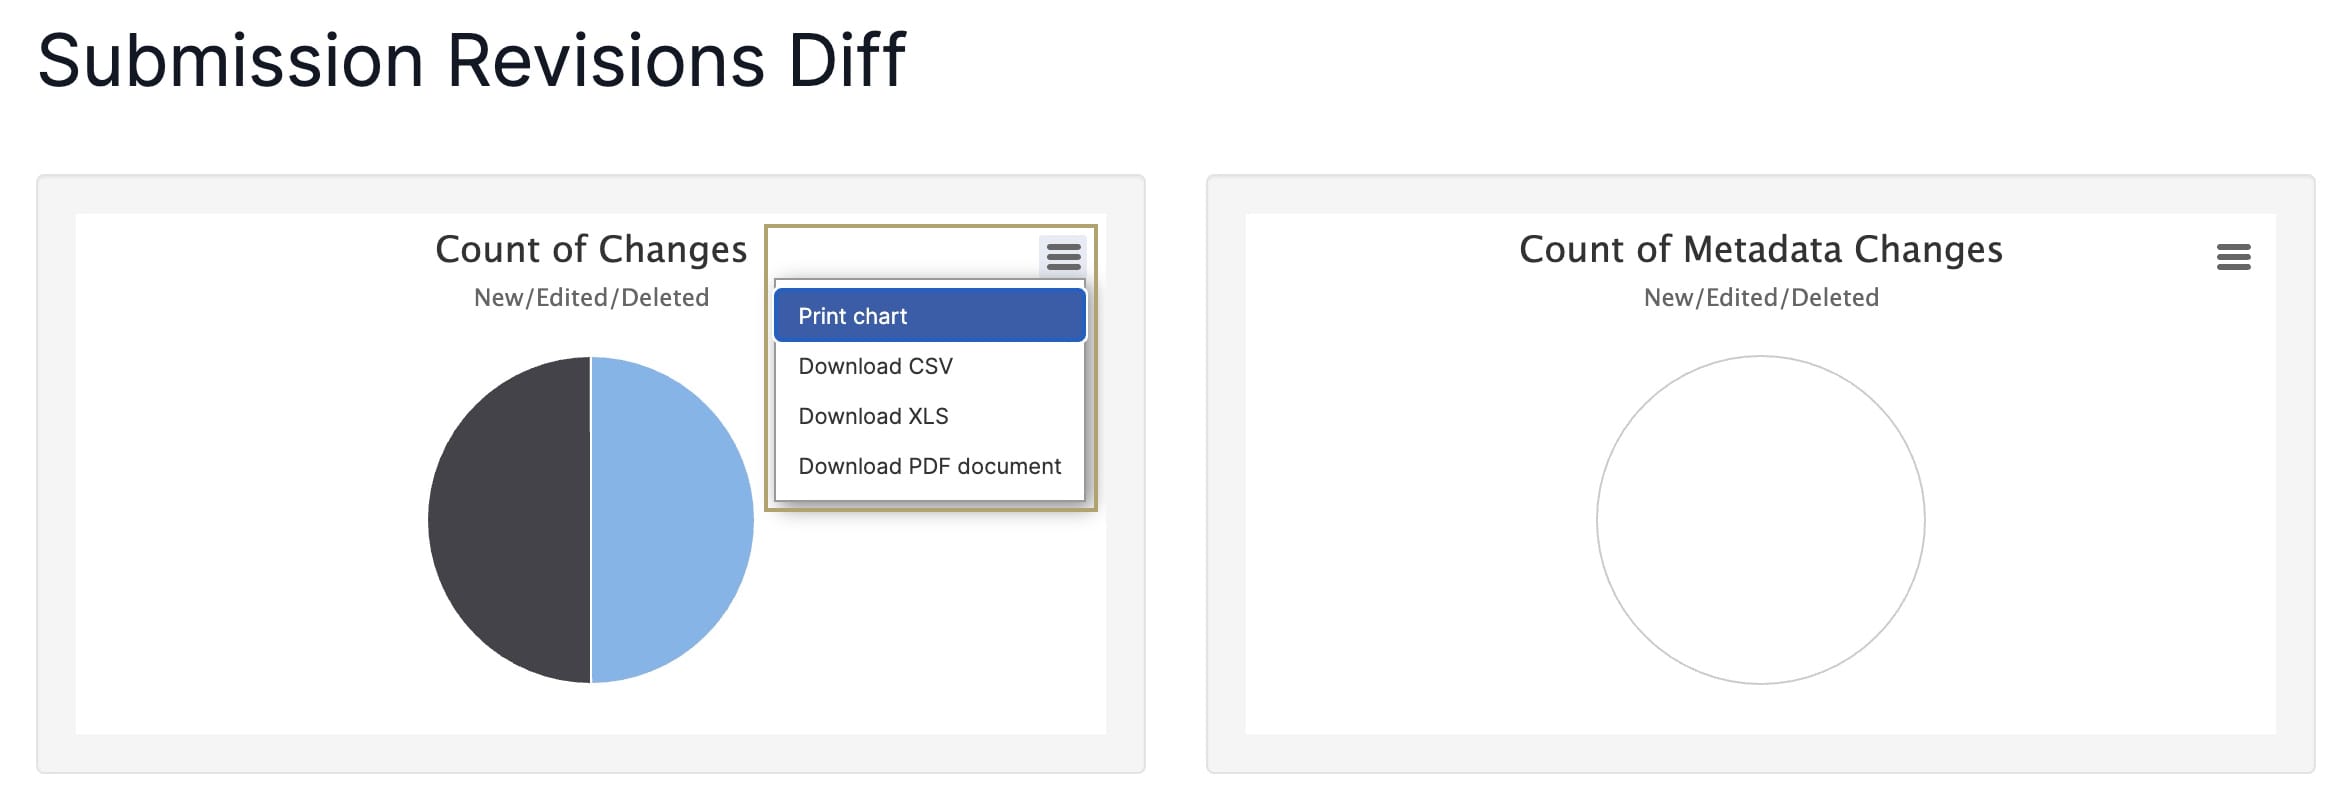
You'll also see two pie charts named Count of Changes and Count of Metadata Changes. The type of data updates is displayed in the first chart, and the type of metadata updates is displayed in the second one.
The types of updates are:
Attribute | Description |
|---|---|
New | New additions to submission data. These changes display in green. |
Edited | Edited submission data. These changes display in blue. |
Deleted | Deleted submission data. These changes display in black. |
There is also a Data Changes and Metadata Changes table that displays the specific updates made to the submissions.
Attribute | Description |
|---|---|
Change | The type of change made. Changes include New Component, Edited Property, or Deleted Component. |
Property Updated | The Property ID of the component whose submission was changed. |
Old Value | Shows the property's previous value. |
New Value | Shows the updated value. |
By default, these tables display ten entries. Use the pagination buttons below each table to navigate more entries.
Exporting and Sharing Your Data
The Submission Revisions Diff tool lets you export and share data from the pie charts.
Exporting and Sharing Chart Data
At the top right of each chart widget, click the ![]() (hamburger) button to view the following options:
(hamburger) button to view the following options:
Print chart
Download CSV
Download XLS
Download PDF document
Let's look at each of these in more detail.
Print Chart
The Print Chart option lets you print data from each chart.
To print a chart:
At the top right of each chart widget, click the
.jpg) (hamburger) button.
(hamburger) button.Select Print Chart.
At the print dialog, set your Destination:
Save as PDF.
A connected printer device.
Set the Layout as Portrait or Landscape.
Under More Settings, set the Scale as either Default or Custom. The Custom option lets you adjust the chart size to fit the full page.
Click Save/Print. The button updates based on the destination selected.
Download CSV
A CSV file is a plain-text file that contains a list of data.
To download your chart as a CSV file:
At the top right of each chart widget, click the
(hamburger) buttonSelect Download CSV.
Check your Downloads folder for the
.csvfile. Your file name is similar to that of the chart name. For example, the Count of Changes chart downloads ascount-of-changes.csv.
Download XLS
XLS is a file extension for use with Microsoft Excel.
To download your chart as an XLS file:
At the top right of each chart widget, click the
(hamburger) buttonSelect Download XLS.
Check your Downloads folder for the
.xlsfile. Your file name is similar to that of the chart name. For example, the Count of Changes chart downloads ascount-of-changes.xls.
Download PDF Document
Using the PDF format prevents modification of your chart file while still allowing sharing and printing.
To download your chart as a PDF file:
At the top right of each chart widget, click the
(hamburger) buttonSelect Download PDF Document.
Check your Downloads folder for the
.pdffile. Your file name is similar to that of the chart name. For example, the Count of Changes chart downloads ascount-of-changes.pdf.