On January 10, 2023, this tool is scheduled for sunsetting. Sunsetting means:
Removing access to the UDLC homepage on existing environments.
Module Settings set to NO ACCESS on existing environments.
No longer included in the provisioning of new environments.
Use the Transform Revisions Dashboard tool to view and manage transforms in Unqork. The tool also lets you test your transform and restore it to a previous version. You can test your transform with specific data or your transform's module submissions.
It's important to note that restoring a transform is environment-level specific. You'll have to restore revisions in each environment level manually.
What Is a Transform?
As you work in Unqork, you might need to convert data from one format or structure to another. Transforms can change one data type into another. On the surface, a transform is like a set of how-to instructions you give your modules to reformat your data. You'll create the transform to input or output data to or from your Unqork applications.
What type of data you're allowed to change depends on the direction of your transform. Input transforms always use JSON because that's the data type of Unqork. But Output transforms can be the following:
NJK (JSON)
XSL (XML)
NJK (PDF)
NJK (XML)
NJK (TXT)
Examples of when you might use a transform include:
Sending data to an external service that requires a format other than what's used in Unqork (JSON).
Accepting data from an external service that only provides data in a format other than JSON.
Sending data between Unqork modules using different Property IDs for the same data.
For more information about transforms, search for Transforms article.
Filtering a Transform
The Transform Revisions Dashboard tool consists of two dashboards:
Transform Revisions Dashboard: The tool's main dashboard for selecting a module and its transforms.
Transforms Dashboard: This dashboard displays all transforms in your current environment.
Each dashboard has features to help you locate a transform in your current environment. Let's explore these dashboards and their filter options.
Filtering a Transform Using the Transform Revisions Dashboard
The tool's main dashboard includes a couple of drop-down menus to help you locate your transform. When you use the Module ID drop-down, you'll see all the modules in your current environment. But not all modules use a transform. If you select a module that does not use a transform, an error message displays. The best way to use this drop-down is when you know the module name or module ID beforehand.
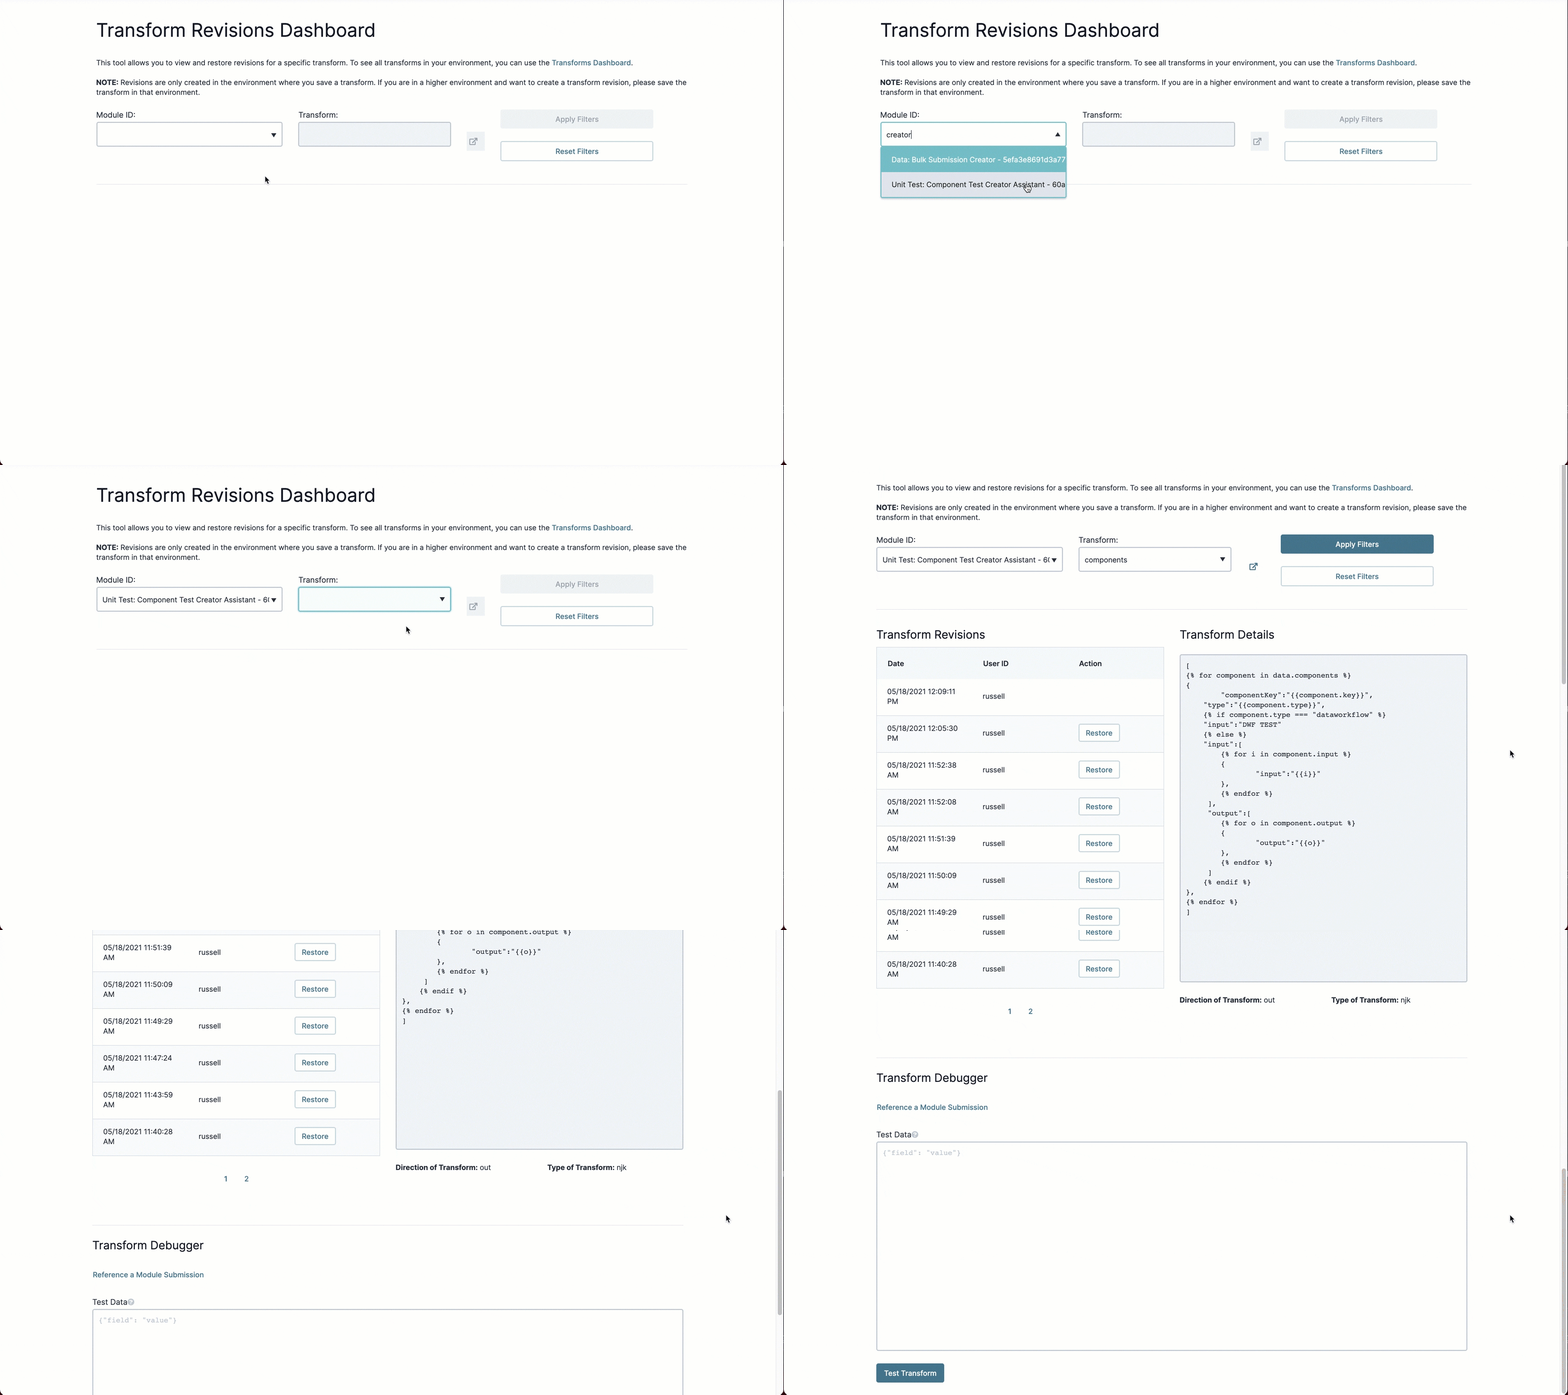
To find a transform using the Transform Revisions Dashboard:
From the Module ID drop-down, select a module.
From the Transform drop-down, select a transform.
If you're unsure you have the correct transform, click the link to the right of the Transform drop-down. This link opens your module to view the transform's information.
Click Apply Filters. Or click Reset Filters to begin a new query.
Filtering a Transform Using the Transforms Dashboard
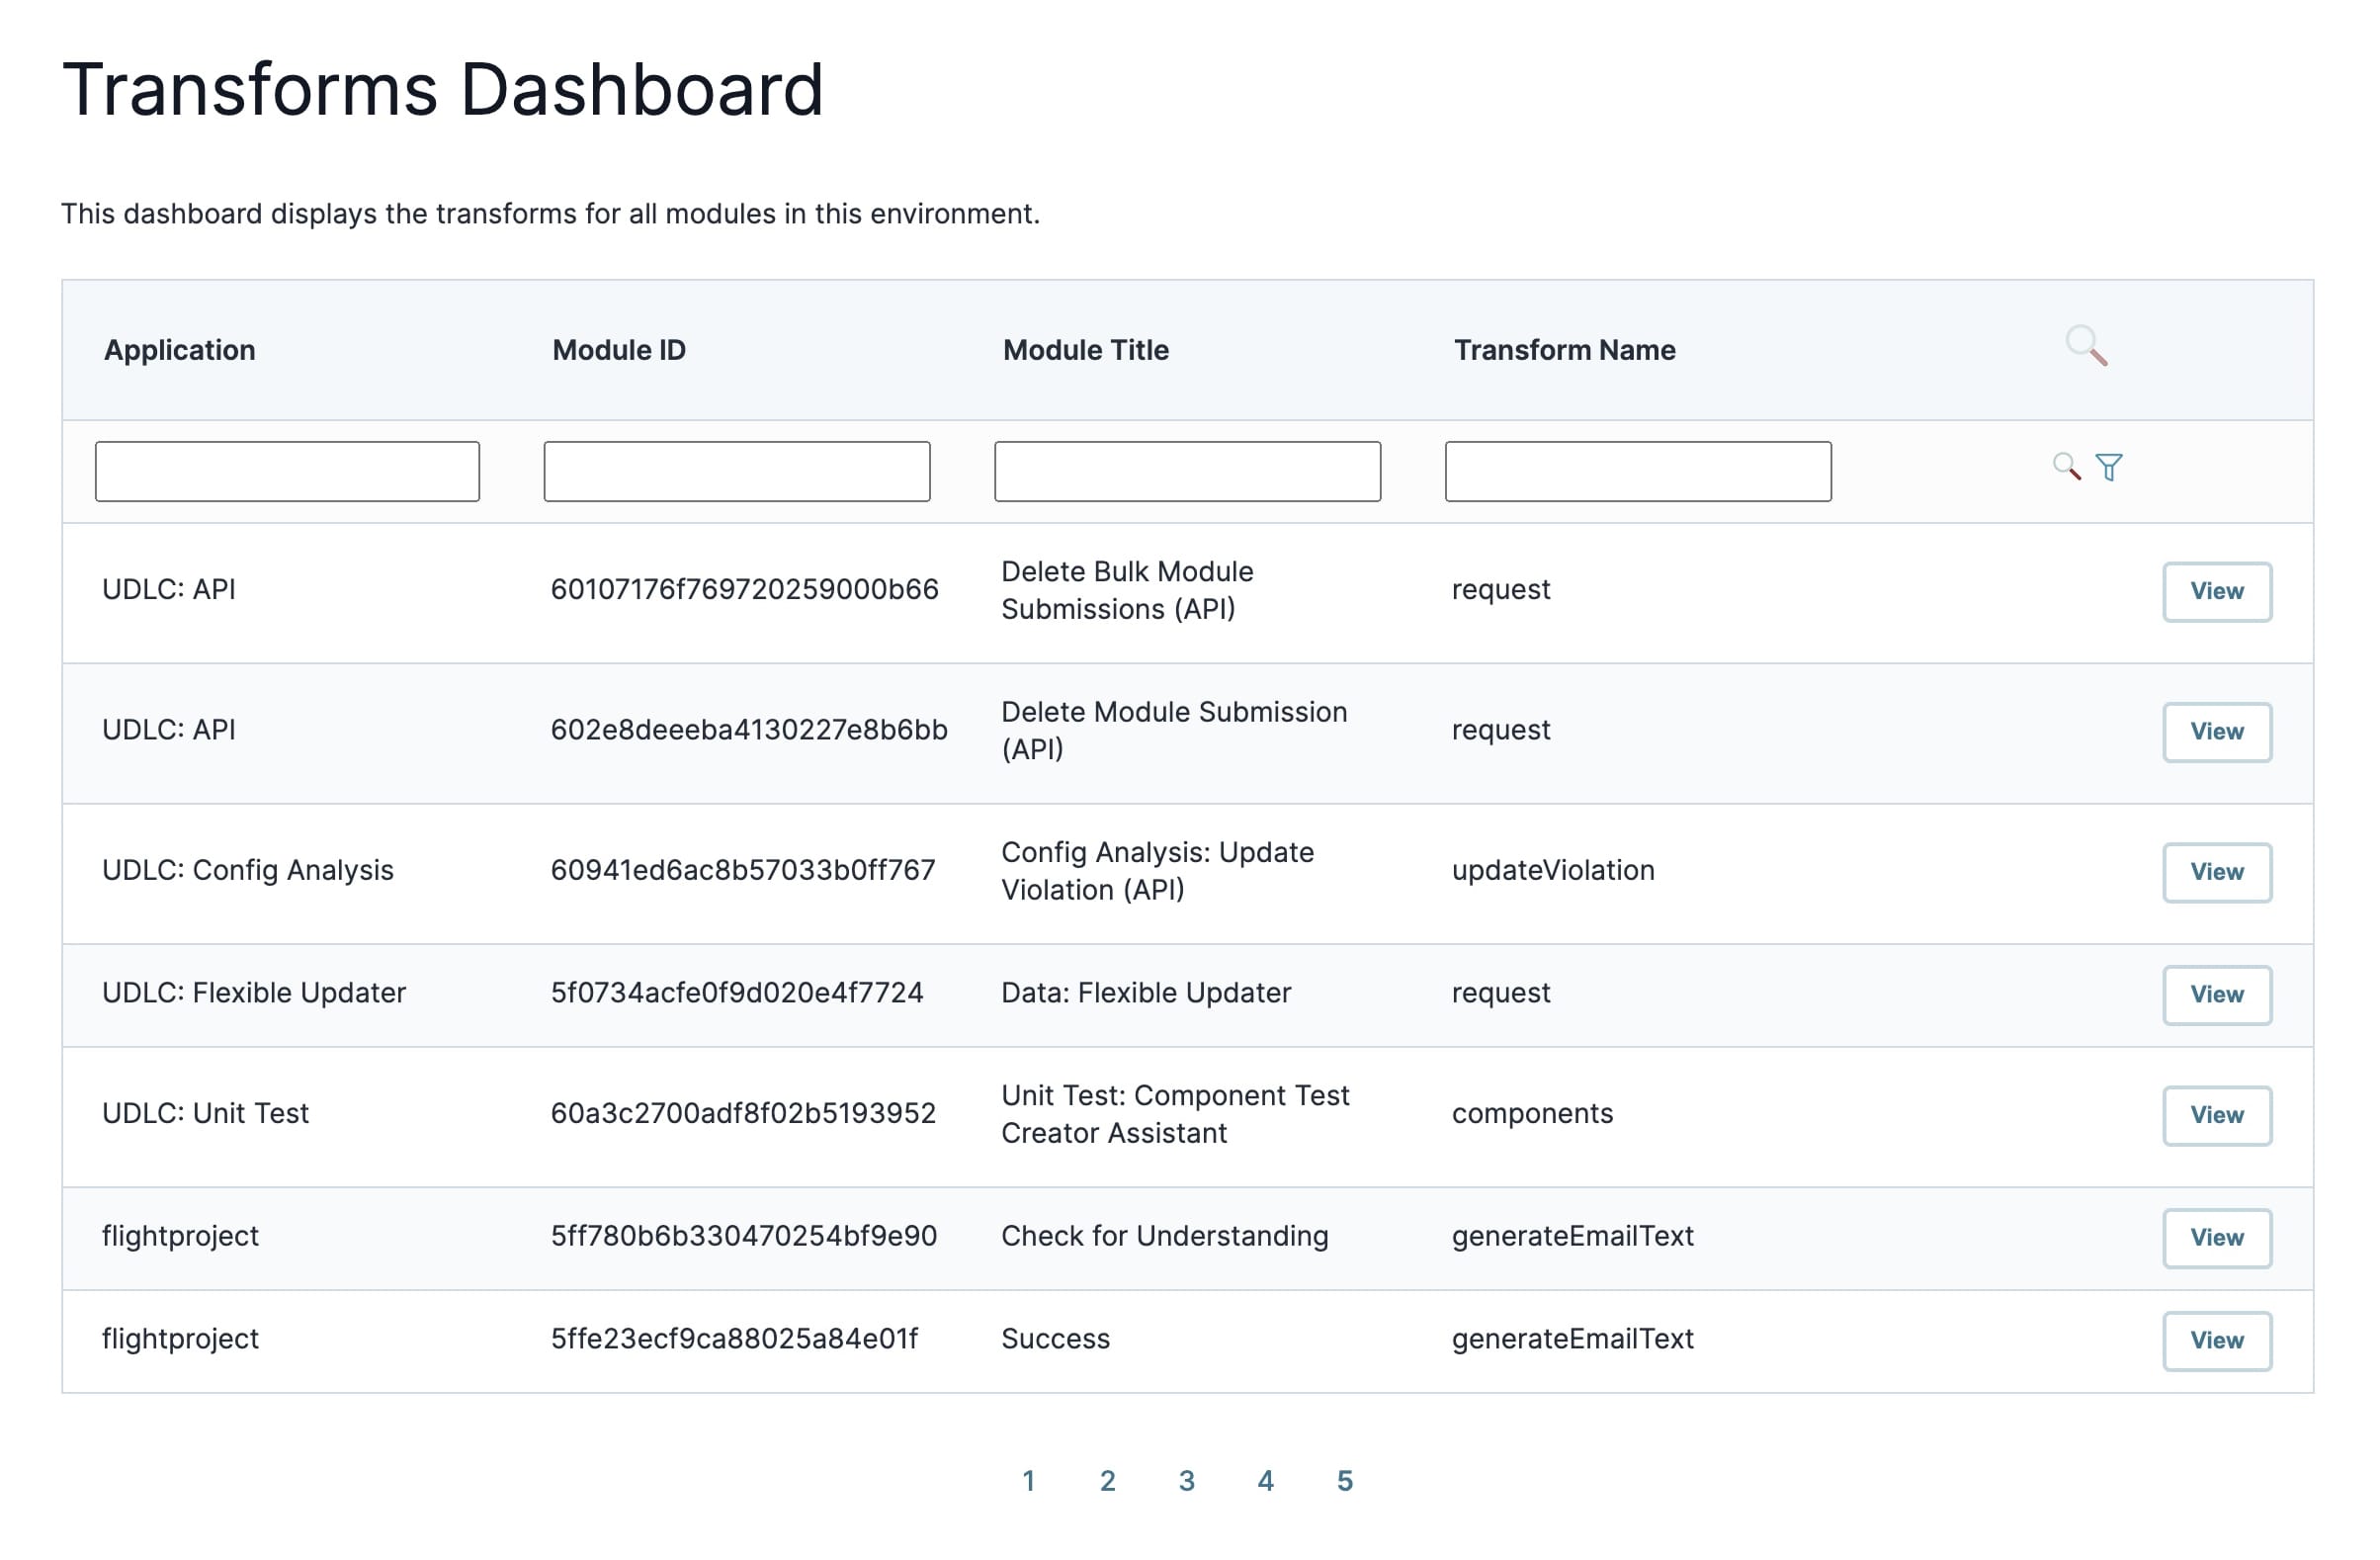
The Transforms Dashboard populates with only environment modules that use transforms. By default, the dashboard's table generates 10 entries. Use the pagination buttons at the bottom of the table to view more.
Or, you can use the dashboard's filters to find your module. As you enter text into the fields, the results display automatically. To clear all fields, click the funnel icon to the right. Let's take a closer look at these filters:
Filter | Description |
|---|---|
Application | This is the name of the application where your transform's module lives. |
Module ID | The module ID of your transform's module. |
Module Title | The module name of your transform's module. |
Transform Name | This is the name of your transform. |
To locate transforms using the Transforms Dashboard:
At the top right of the Transform Revisions Dashboard, click the Transforms Dashboard link.
Using the dashboard's filters, locate a module.
To the right of that module, click View.
After you've located your module, you can view its basic information.
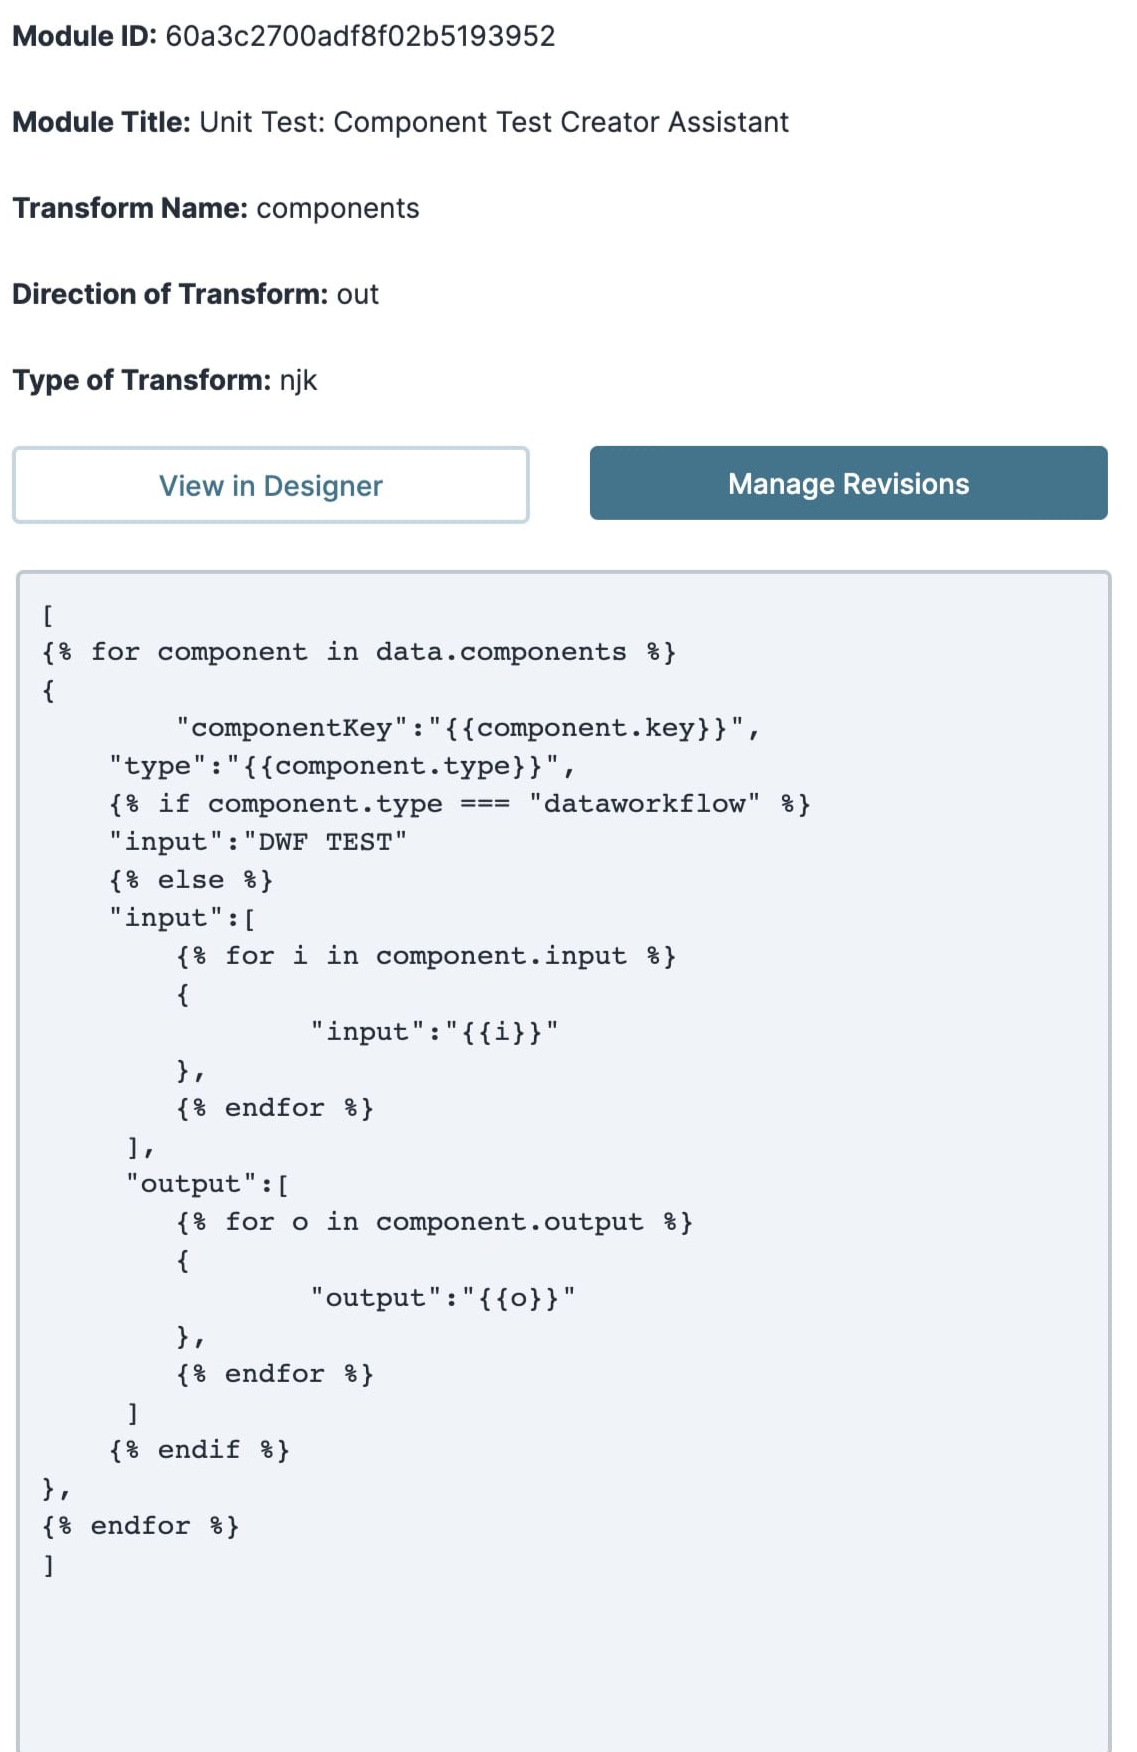
A pop-up modal displays with the following information:
Attribute | Description |
|---|---|
Module ID | The unique identifier of the module using the transform. |
Module Title | The name of the module using the transform. |
Transform Name | The name of the transform. |
Direction of Transform | The direction of the transform. Options are in and out. |
Type of Transform | The transform type. For example, njk or xsl. |
View in Designer | Click this button to open the module in the Module Builder. |
Manage Revisions | Click this button to return to the Transform Revisions Dashboard. |
Viewing Transform Revision Information
Once you've located your transform, you can view its revisions, restore it to a previous revision, or test it.
To view your transform revision information:
Locate your transform's module.
To the right of the Transform Name, click View. A modal displays.
Click Manage Revisions.
Three new sections display on the Transform Revisions Dashboard. These sections include:
Transform Revisions
Transform Details
Transform Debugger
Let's look at each section in more detail in the tabs below:
Navigating the Transform Revisions Table
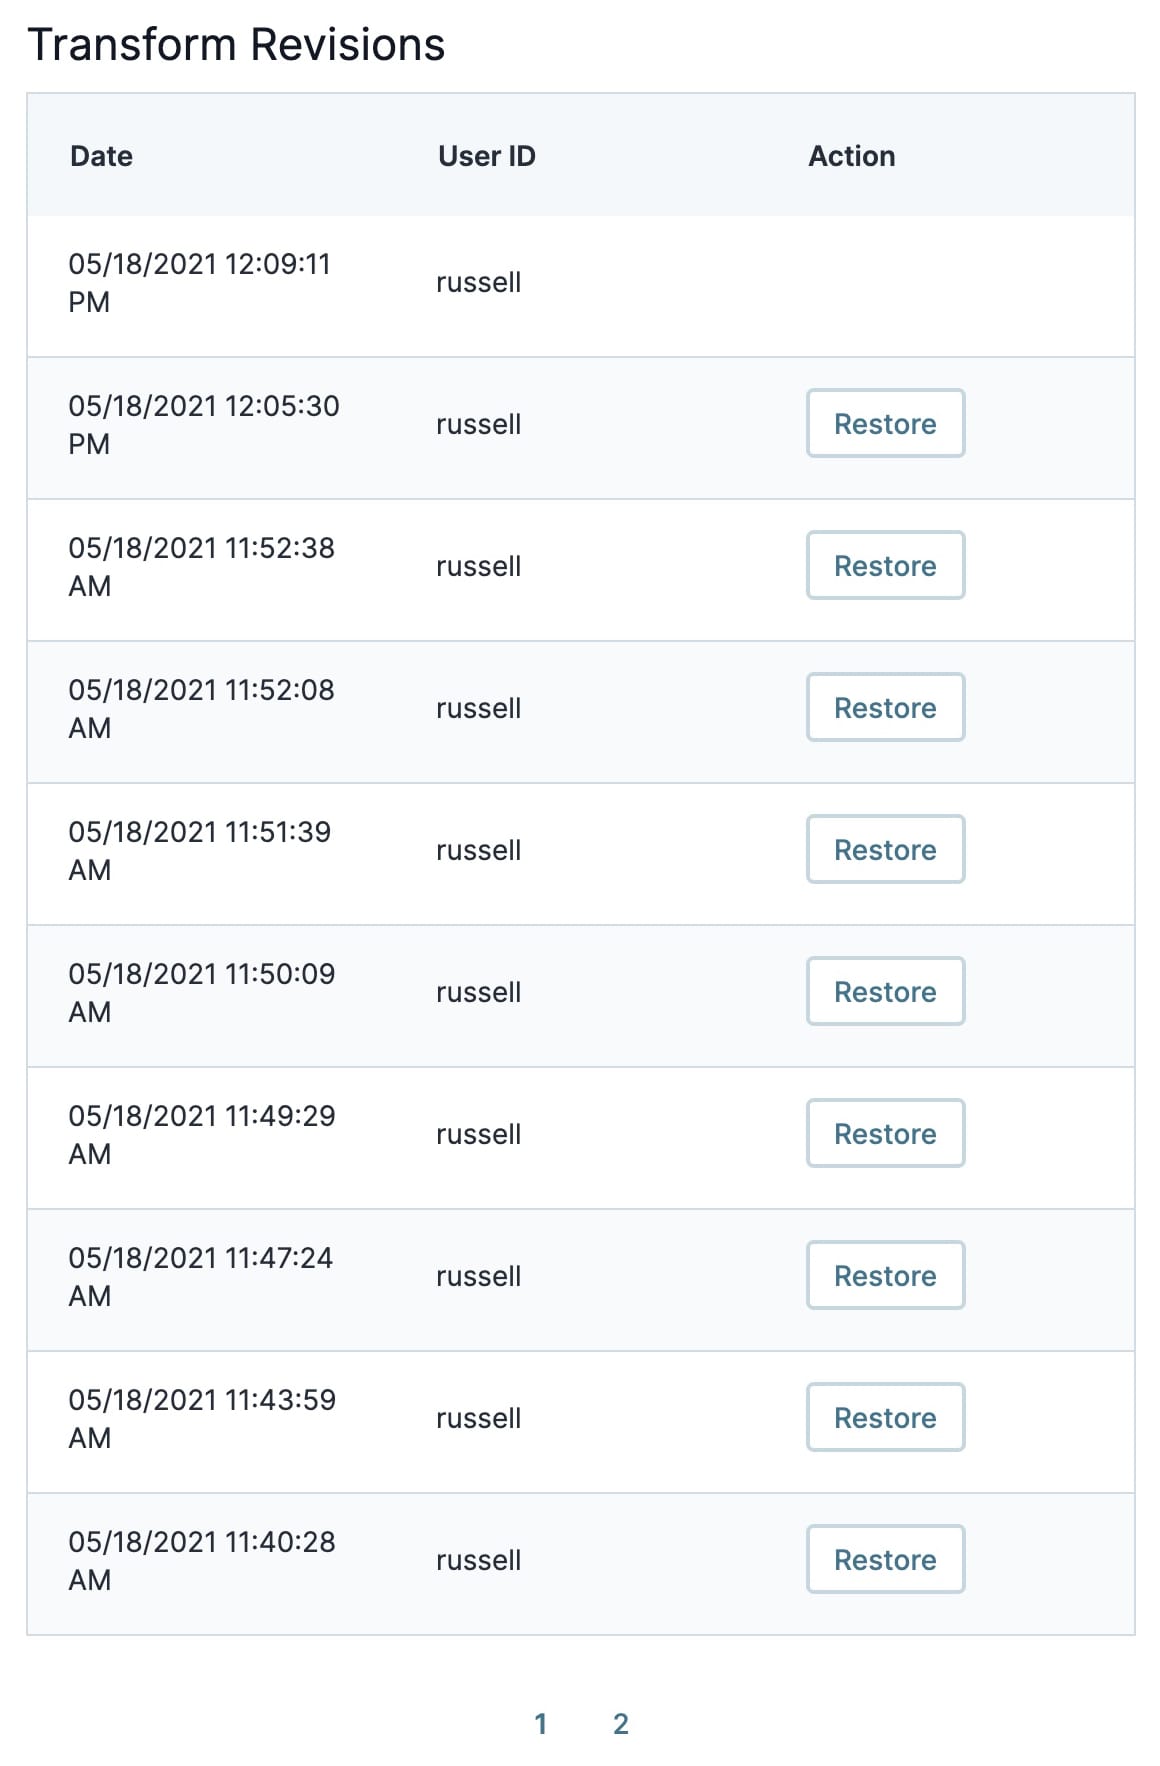
The Transform Revisions table displays all your transform's revisions. You can also use the table to restore your transform to a previous version. The table consists of the following attributes:
Attribute | Description |
|---|---|
Date | The date the revision was made. |
User ID | The identifier of the person who made the revision. |
Action | Nothing displays in this column for the most recent revision. But a Restore button displays for all previous revisions. Clicking the Restore button restores your transform to that version. |
By default, the table generates 10 entries. Use the pagination buttons at the bottom of the table to navigate to older entries.
Restoring a Transform Revision
The Transform Revisions table is also where you'll restore a transform to a previous version. Remember that this action only affects a transform in your current environment level. To restore the transform in another level, open the tool in that environment and make the same change.
It's important to note that you cannot review a revision before restoring it. So, ensure you've selected the correct one before moving on. Also, ensure you want to restore a revision because this action is permanent.
To restore a transform to a previous revision:
Locate the revision you want and click Restore.
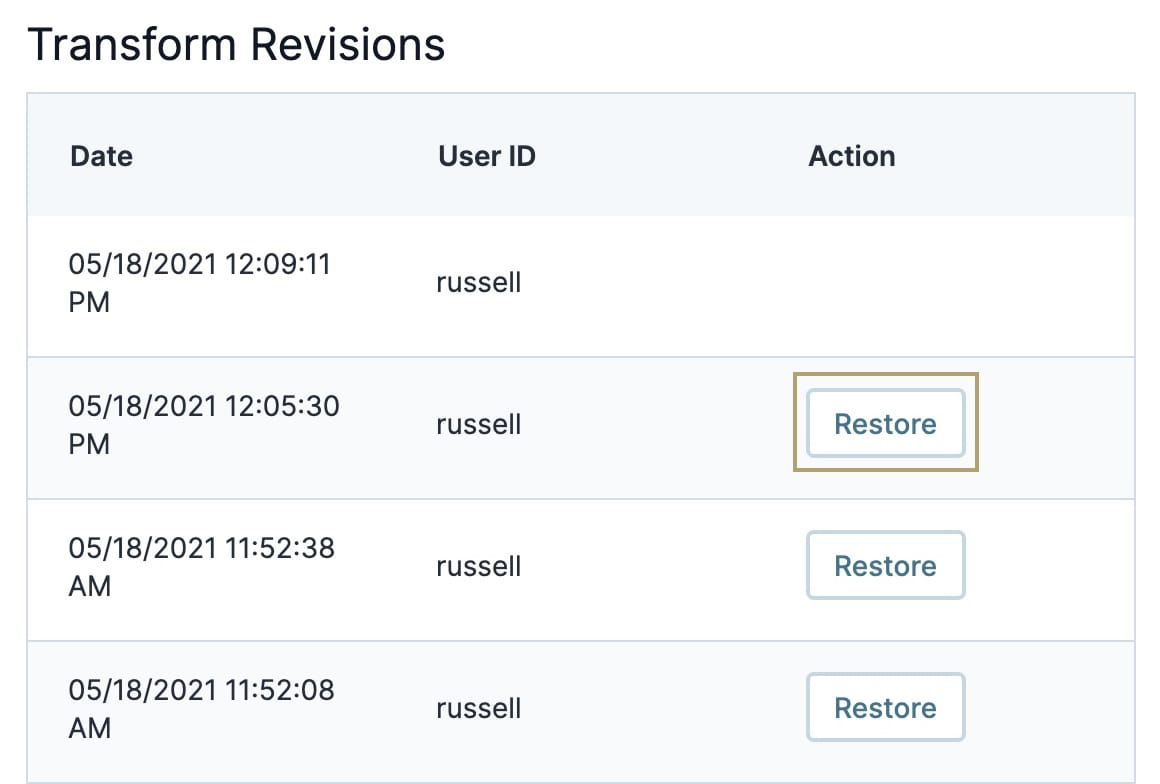
In the pop-up modal, click Restore. Or click Cancel if you do not want to make this change.
Remember, restoring a revision is permanent.
Viewing Your Transform's Details
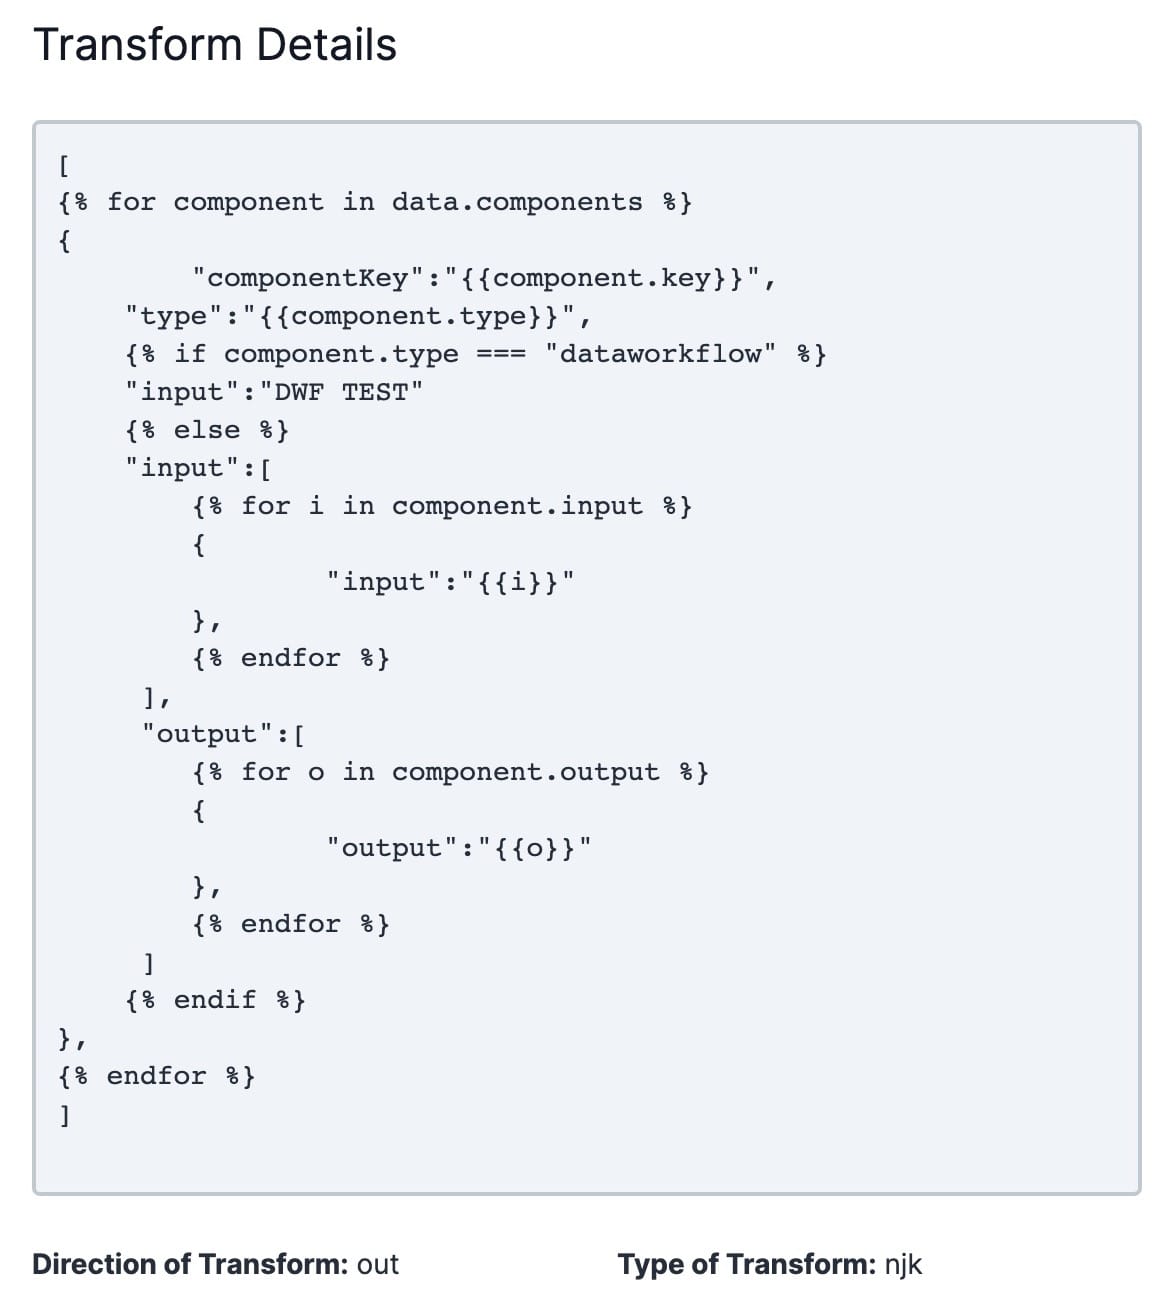
This section of the dashboard provides basic information about your selected transform. It includes the following attributes:
Attribute | Description |
|---|---|
Transform Window | This window displays the transform specifics. |
Direction of Transform | The direction your transform operates. The two supported options are In or Out. |
Type of Transform | The type of transform depends on its direction. If the direction is In, then the only transform type that appears is NJK (JSON). If the direction is Out, you'll see one of the following types:
|
The following image is an example of what you might see:
Using the Transform Debugger
This section of the dashboard lets you test your transform. There are a couple of ways to test your transforms:
Testing with specific test data.
Referencing and testing with a specific module submission.
Testing Your Transform Using Specific Data
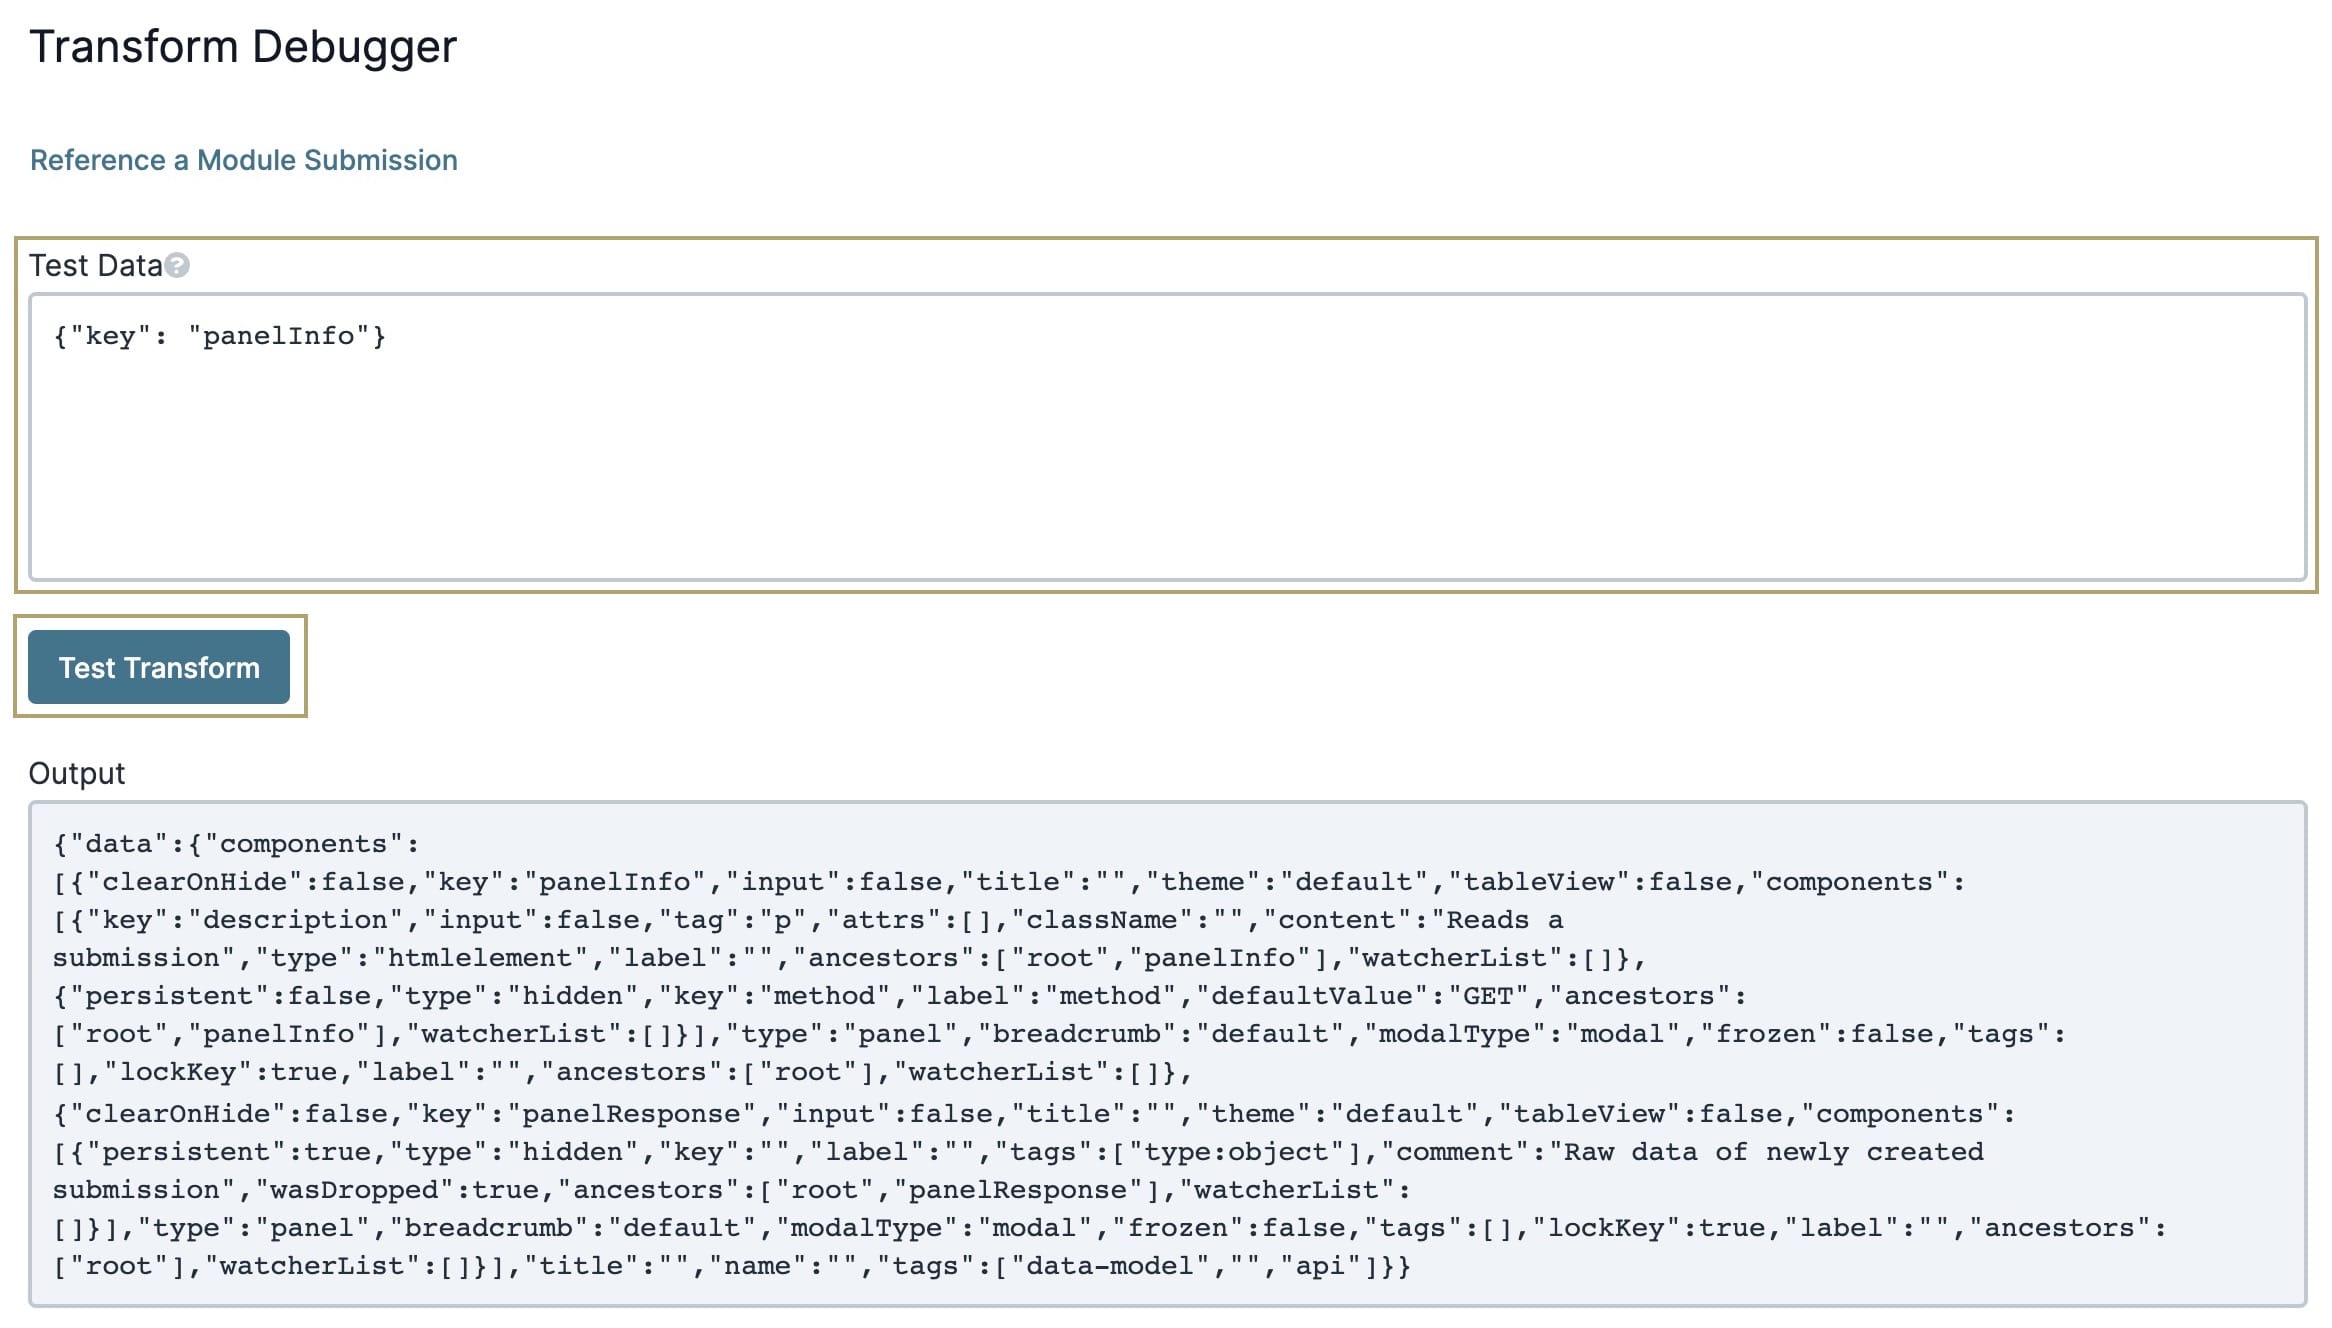
To test your transform with specific data, you’ll enter that data in the Test Data field. To test your transform, you'll enter your test data in the following format: {"field" : "value"}. The transformed data will output into a new window to view.
To test your transform with test data:
In the Test Data field, enter your test data. For example,
{"key" : "panelInfo"}.Click Test Transform.
When you click the Test Transform button, a new Output window displays with the transformed information. The image below shows the Transform Debugger with the sample Test Data above populated.
 Testing Your Transform Using a Module Submission
Now, let's test your transform with a specific module submission. You can also perform this same test in the Module Transform settings of the Module Builder.
For this test, you must preview your transform module in Express View and trigger your module. You'll copy the submission ID from the URL to use in the test.
The submission ID is the middle of the three alphanumeric codes in the Express View URL. You can see a sample submission ID bolded in the following URL: https://trainingx.unqork.io/5e13aa4616d385021040e00/5e8769e9c74b570d5e9d88bb/5e12aa4616d38502104.
To test your transform with a specific module submission:
Click the Reference a Module Submission link.
In the Module ID field, enter your transform module's ID.
In the Submission ID field, enter a submission ID.
Click Test Transform.
When you click the Test Transform button, a new Output window displays with the transformed information. The image below shows the Transform Debugger with the module ID and submission ID.