Formula Operator
Overview

The Formula operator calculates data values using an expression. Let's say you're calculating the cost of an insurance plan over time and you know the value for one month. To find the value for a year, you use a Formula operator to multiply your original value by 12. Another common use for this operator is to calculate percentages.
You have two options when creating a formula:
-
Creating a static formula using the Formula's Info window.
-
Creating a formula with dynamic values using the operator's argument port.
You’ll find the Formula operator under the Table group to the left of the Data Workflow canvas.
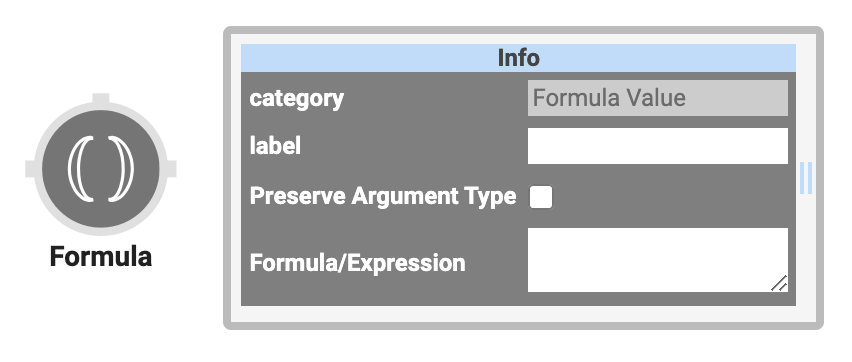
About the Info Window
And here's a breakdown of each setting in the Formula operator's Info window:
|
Setting |
Description |
|---|---|
|
Category |
Grayed out and non-adjustable setting indicating the operation type. |
|
Label
|
The name applied to the operator. This label displays within the workflow. Labels should be user-friendly and well associated with the role of the operator. |
|
Preserve Argument Type |
When selected, this setting ensures the argument data type is respected when the operator executes. |
|
Formula/Expression |
The formula or expression you want to apply to your data. For example, use A to represent your original data. Your original data is anything you bring in through the operator's input port. Let's say you want to multiply your data by 12. You'll enter =A*12 in this field. If you want to use an argument instead of a set value in your formula, use _arg. The above formula as an argument is the following: =A*arg. In this example, _arg takes the place of 12. Whatever value is set in the argument port goes in its place. |
Adding a Formula Operator
This example calculates the total insurance cost based on the number of months of coverage that is stored in the Dropdown component. Your end-user End-users, also known as Express Users, are the individuals accessing an application through Express View. In most cases, end-users are the customers using the product. has the choice of how long they need coverage. From there, a Data Workflow uses a Formula operator to calculate the cost of coverage.
Configure the Text Field Components
Begin by configuring two Text Field components that store the monthly cost of insurance and the total cost based on how many months of coverage the end-user End-users, also known as Express Users, are the individuals accessing an application through Express View. In most cases, end-users are the customers using the product. decides on. As the values are always monetary, you'll set a dollar sign as the prefix. The end-users End-users, also known as Express Users, are the individuals accessing an application through Express View. In most cases, end-users are the customers using the product. do not need to enter values in these Text Field components, so disable user input for both of them.
| 1. | Drag and drop two Text Field components onto your canvas. |
|
|
Property ID |
Label Text |
|---|---|---|
|
1 |
monthlyCost |
Monthly Cost |
|
2 |
totalCost |
Total Cost |
| 3. | In the Prefix field, enter $. |
| 4. | From the Input Behavior drop-down, select Disable User Input. |
| 5. | Save Component each component as you add it. |
Configure the Initializer Component
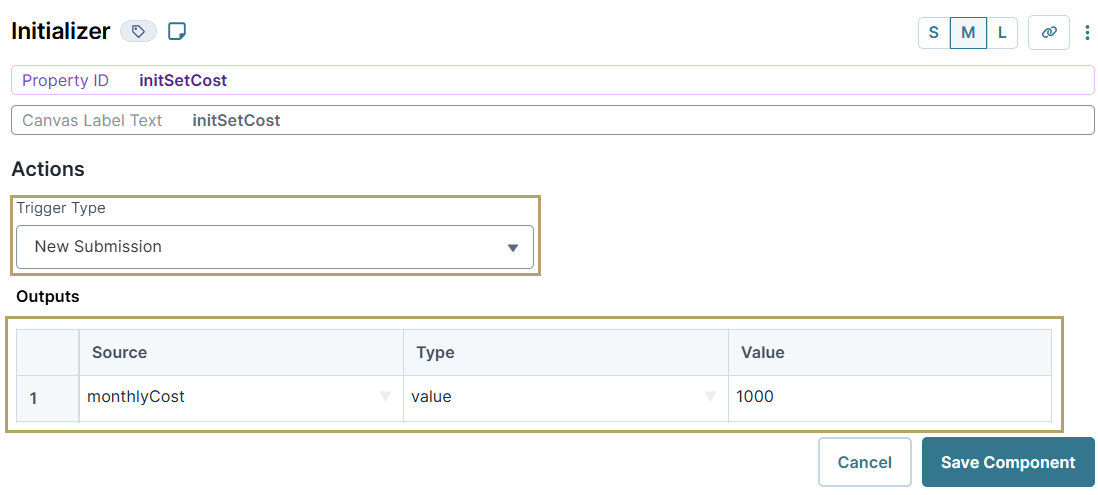
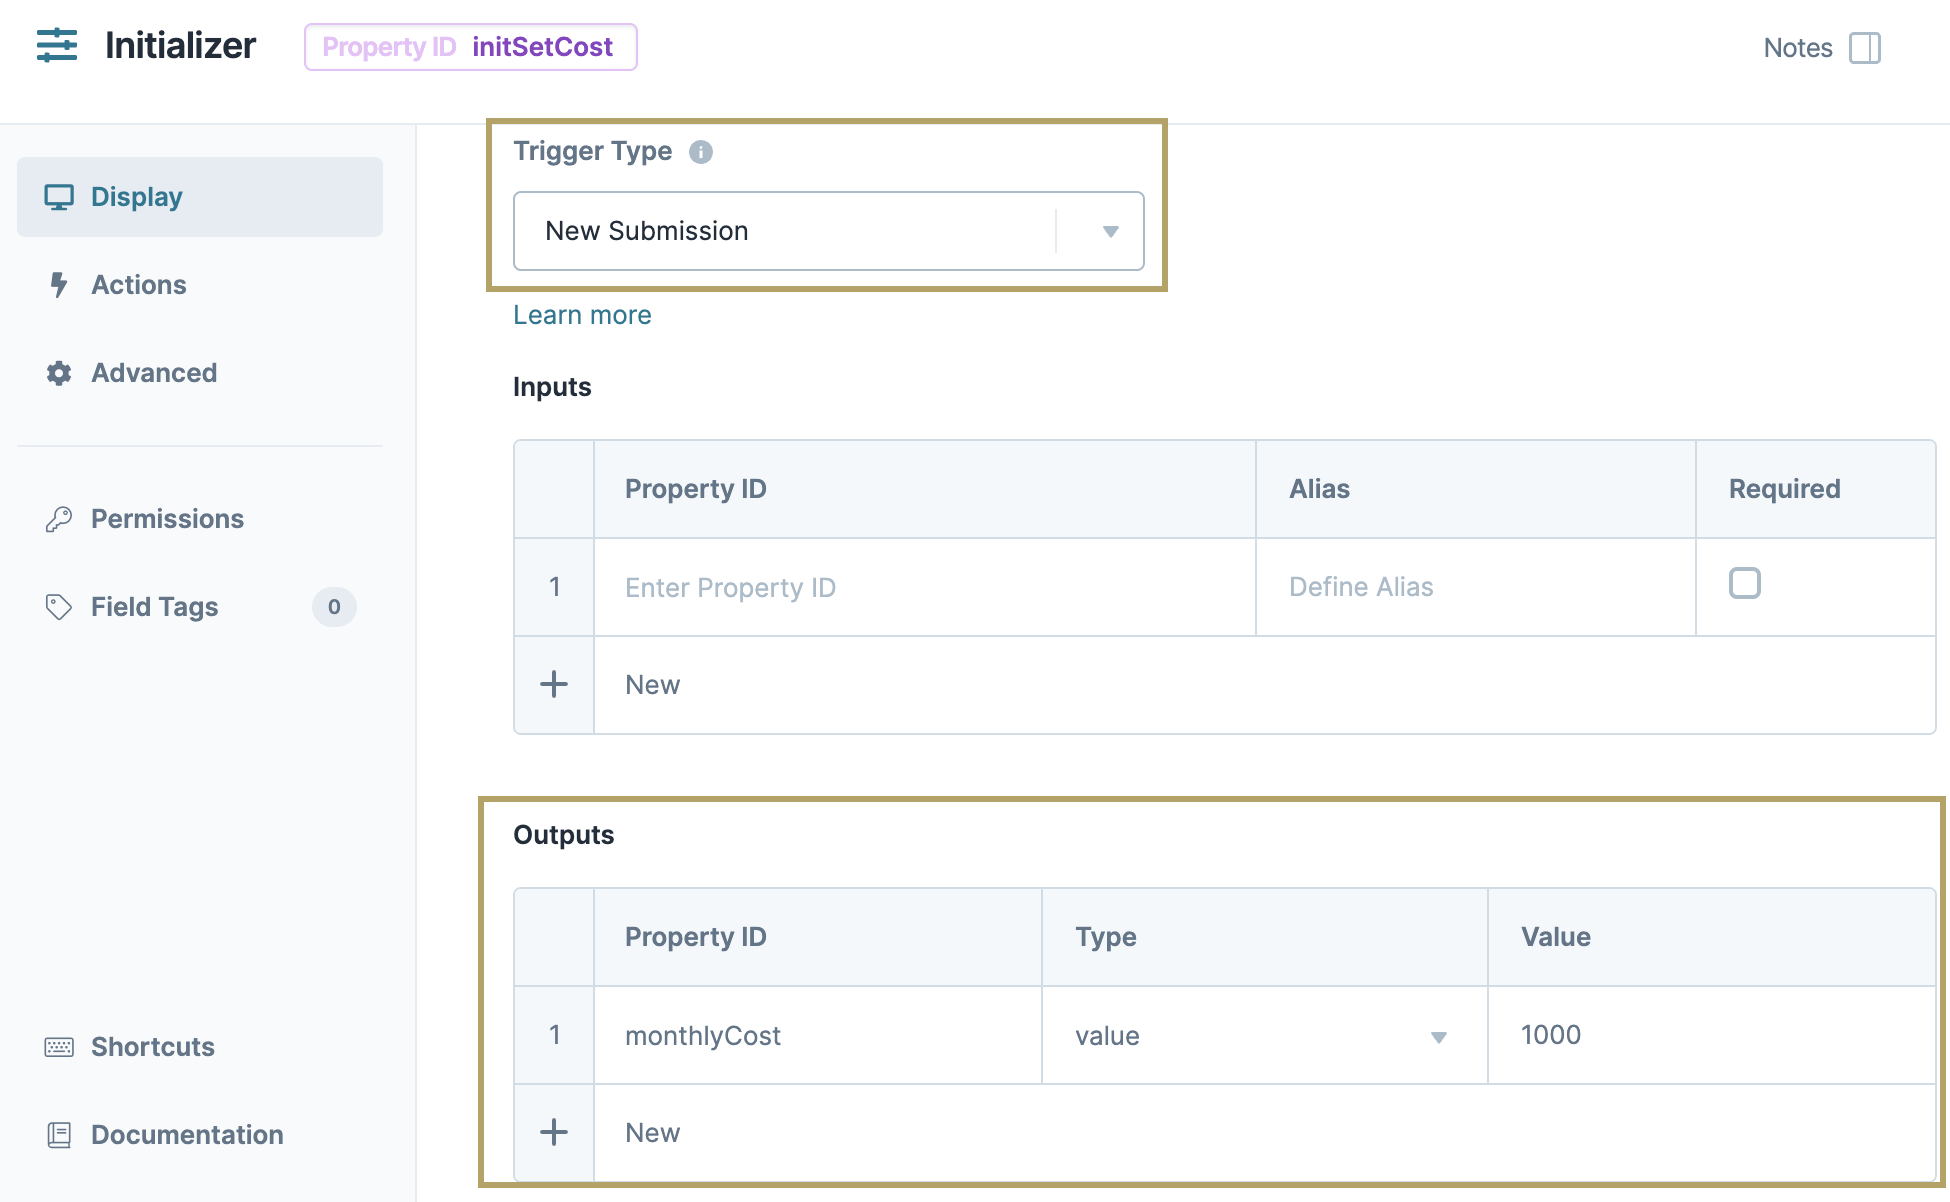
Next, add an Initializer component so that every time an end-user End-users, also known as Express Users, are the individuals accessing an application through Express View. In most cases, end-users are the customers using the product. opens a new submission, the component places a value of 1000 in the first Text Field component. Doing so lets the Initializer component manage the monthly cost. If you want to set a new monthly cost, you can update the value in the Initializer component.
| 1. | Drag and drop an Initializer component onto your canvas, placing it above your monthlyCost Text Field component. |
| 3. | From the Trigger Type drop-down, select New Submission. |
| 4. | In the Outputs table Enter outputs components and actions you want the component to perform., enter the following: |
|
|
Property ID |
Type |
Value |
|---|---|---|---|
|
1 |
monthlyCost |
value |
1000 |
| 5. | Click Save Component. |
Configure the Dropdown Component
Next, add a Dropdown component that lets your end-user End-users, also known as Express Users, are the individuals accessing an application through Express View. In most cases, end-users are the customers using the product. select how many months they want coverage. This component serves as the argument for your Formula operator.
| 1. | Drag and drop a |
| 2. | In the Property ID A Property ID is the unique field ID used by Unqork to track and link components in your module. field, enter coverageLength. |
| 3. | In the Label Text Label Text conveys what the input component is and what information it displays. Enter the purpose of the corresponding component or field. field, enter How many months of coverage do you need?. |
| 4. | Set the Label and Value as follows: |
|
|
Label |
Value |
|---|---|---|
|
1 |
6 |
6 |
|
2 |
12 |
12 |
|
3 |
18 |
18 |
|
4 |
24 |
24 |
| 5. | Click Save Component. |
Configure the Data Workflow Component
Lastly, add a Data Workflow component that brings in the monthly cost and the end-user's selection from the Dropdown component. Then, a configure a Formula operator to calculate the total cost. The final value will output to your Text Field component.
| 1. | Drag and drop a Data Workflow component onto your canvas, placing it below your other components. |
| 3. | Set |
Configure the First Input Operator
The first Input operator retrieves data from the monthlyCost Text Field component.
| 1. | Drag and drop an Input operator onto your Data Workflow canvas. |
| 2. | Configure the operator's Info window as follows: |
| Info | |
|---|---|
|
Category |
Input |
|
Component |
monthlyCost |
|
Required |
Yes |
|
Source |
Default |
Configure the Second Input Operator
The second Input operator retrieves your end-user's Includes the Short Answer component, Long Answer component, Select Boxes, Radio component, Dropdown, Number component and Single Checkbox. requested coverage length.
| 1. | Drag and drop a second Input operator onto your Data Workflow canvas. |
| 2. | Configure the operator's Info window as follows: |
| Info | |
|---|---|
|
Category |
Input |
|
Component |
coverageLength |
|
Required |
Yes |
|
Source |
Default |
Configure the Formula Operator
The Formula operator multiples the monthly cost (A) by your end-user End-users, also known as Express Users, are the individuals accessing an application through Express View. In most cases, end-users are the customers using the product.'s coverage length, which serves as the formula's argument (_arg).
| 1. | Drag and drop a Formula operator onto your Data Workflow canvas. |
| 2. | Configure the operator's Info window as follows: |
| Info | |
|---|---|
|
Category |
Formula Value |
|
Label |
Total Cost |
|
Preserve Argument Type |
Unchecked (no) |
|
Formula/Expression |
=A*_arg |
| 3. | Connect the output port (right) of the monthlyCost Input operator to the input port (left) of the Total Cost Formula operator. |
| 4. | Connect the output port (right) of the coverageLength Input operator to the argument port (top) of the Total Cost Formula operator. |
Configure the Output Operator
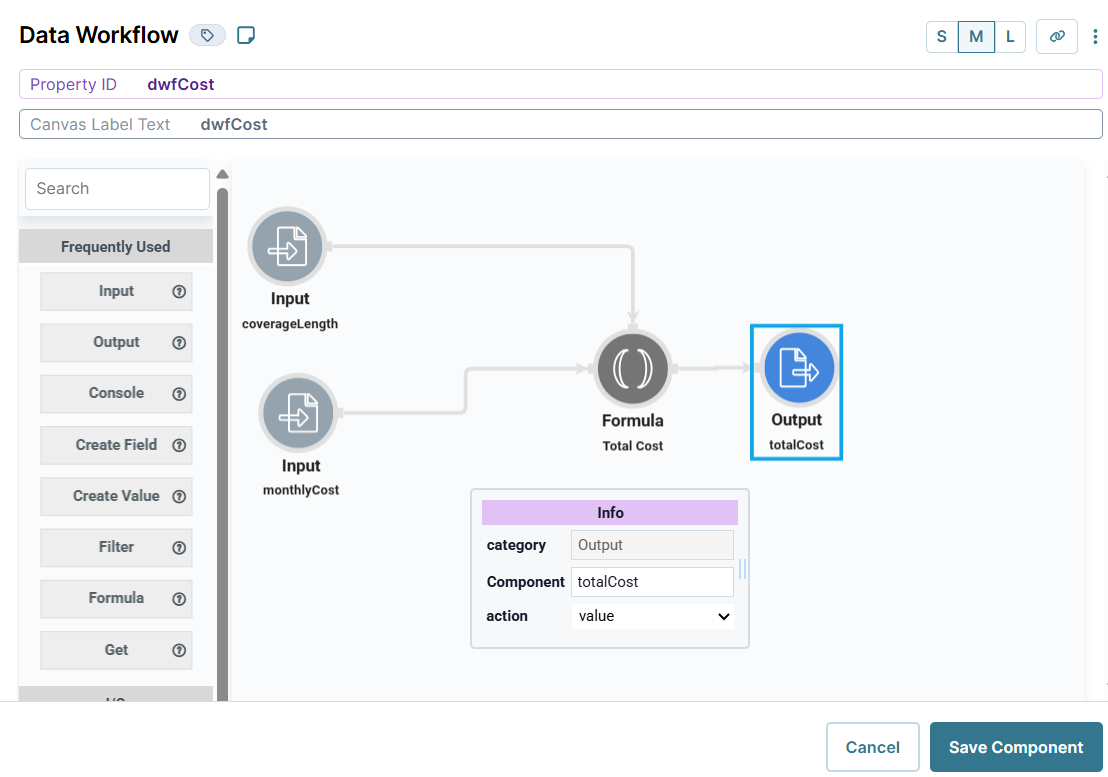
The Output operator sends the final cost to the totalCost Text Field component.
| 1. | Drag and drop an Output operator onto your Data Workflow canvas. |
| 2. | Configure the operator's Info window as follows: |
| Info | |
|---|---|
|
Category |
Output |
|
Component |
totalCost |
|
Action |
value |
| 3. | Connect the output port (right) of the Total Cost Formula operator to the input port (left) of the totalCost Output operator. |
| 4. | Click Save Component. |
| 5. | Save your module. |
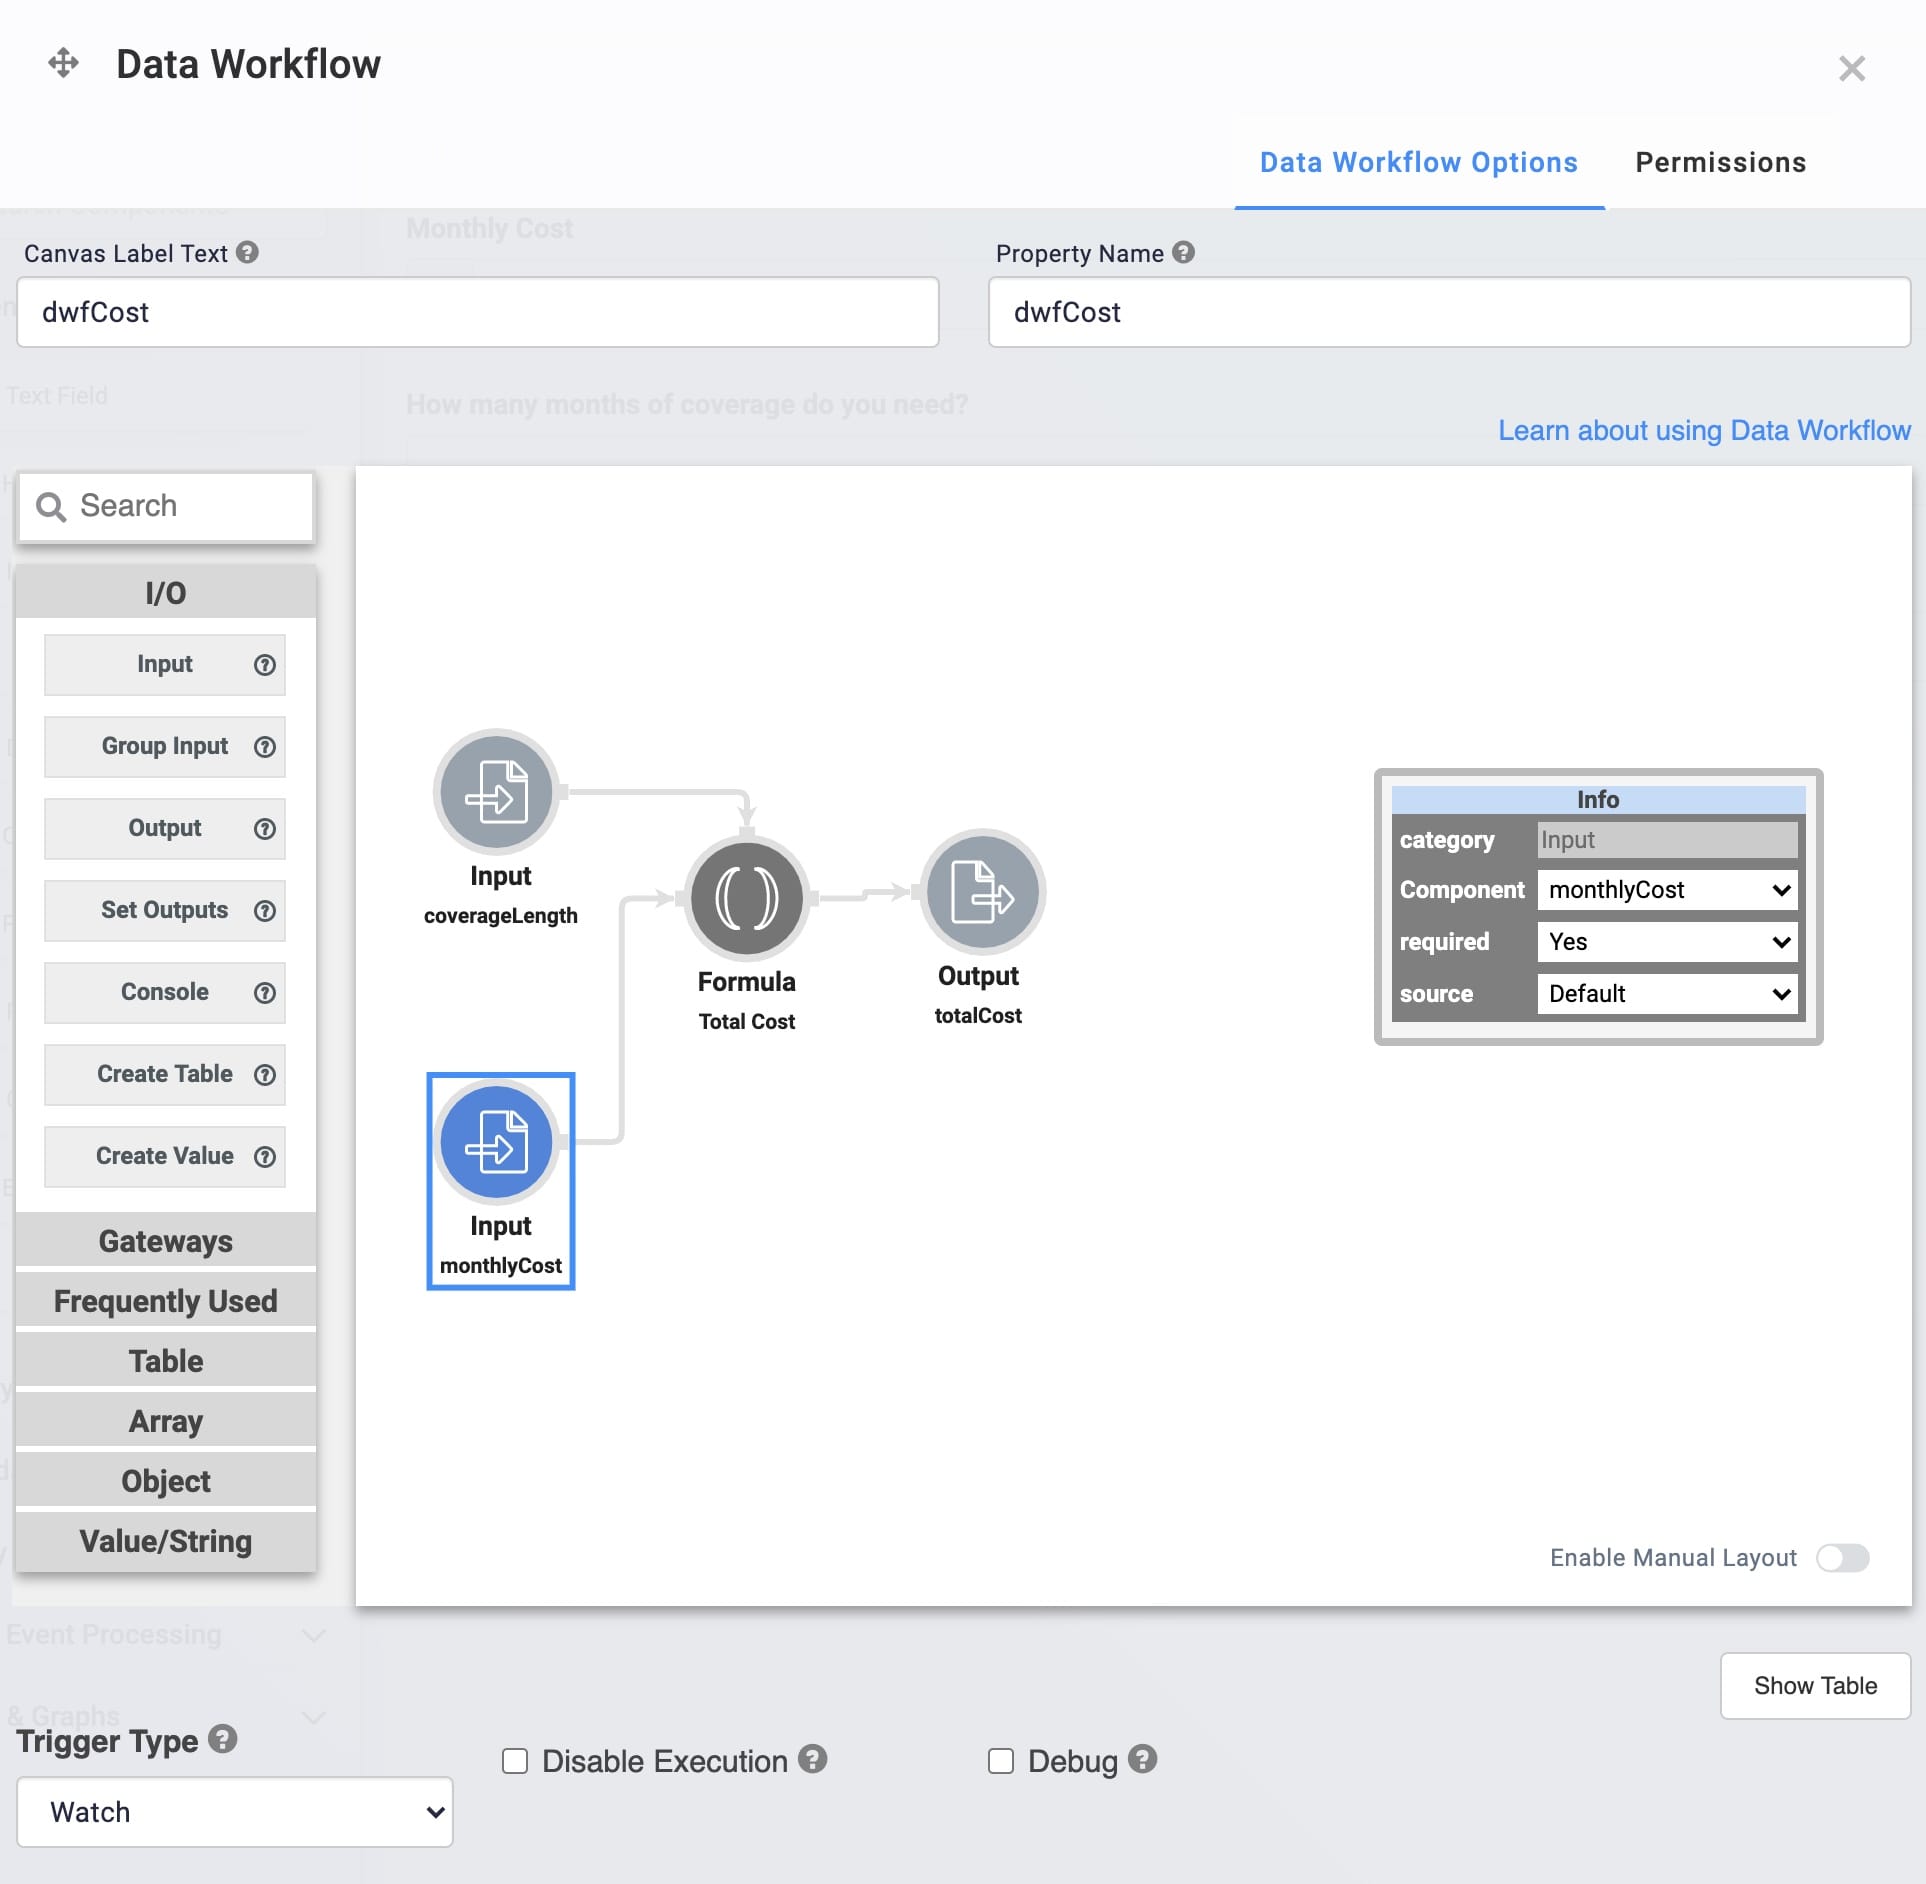
Here's how the completed Data Workflow looks:
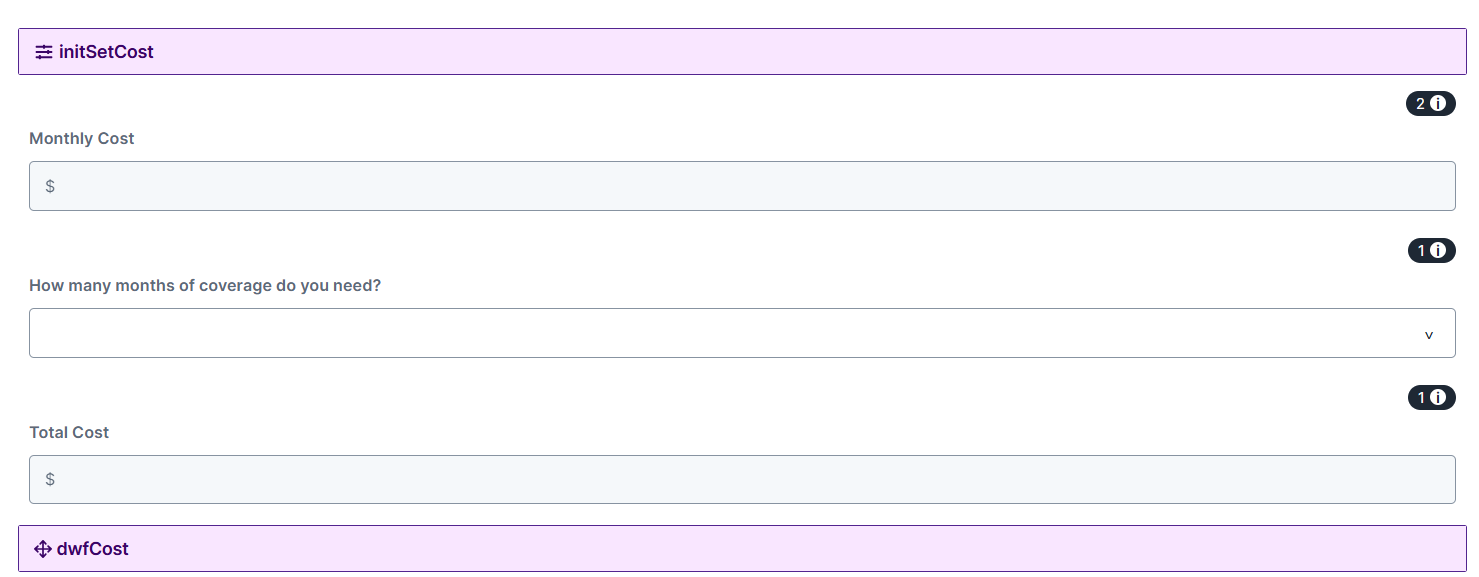
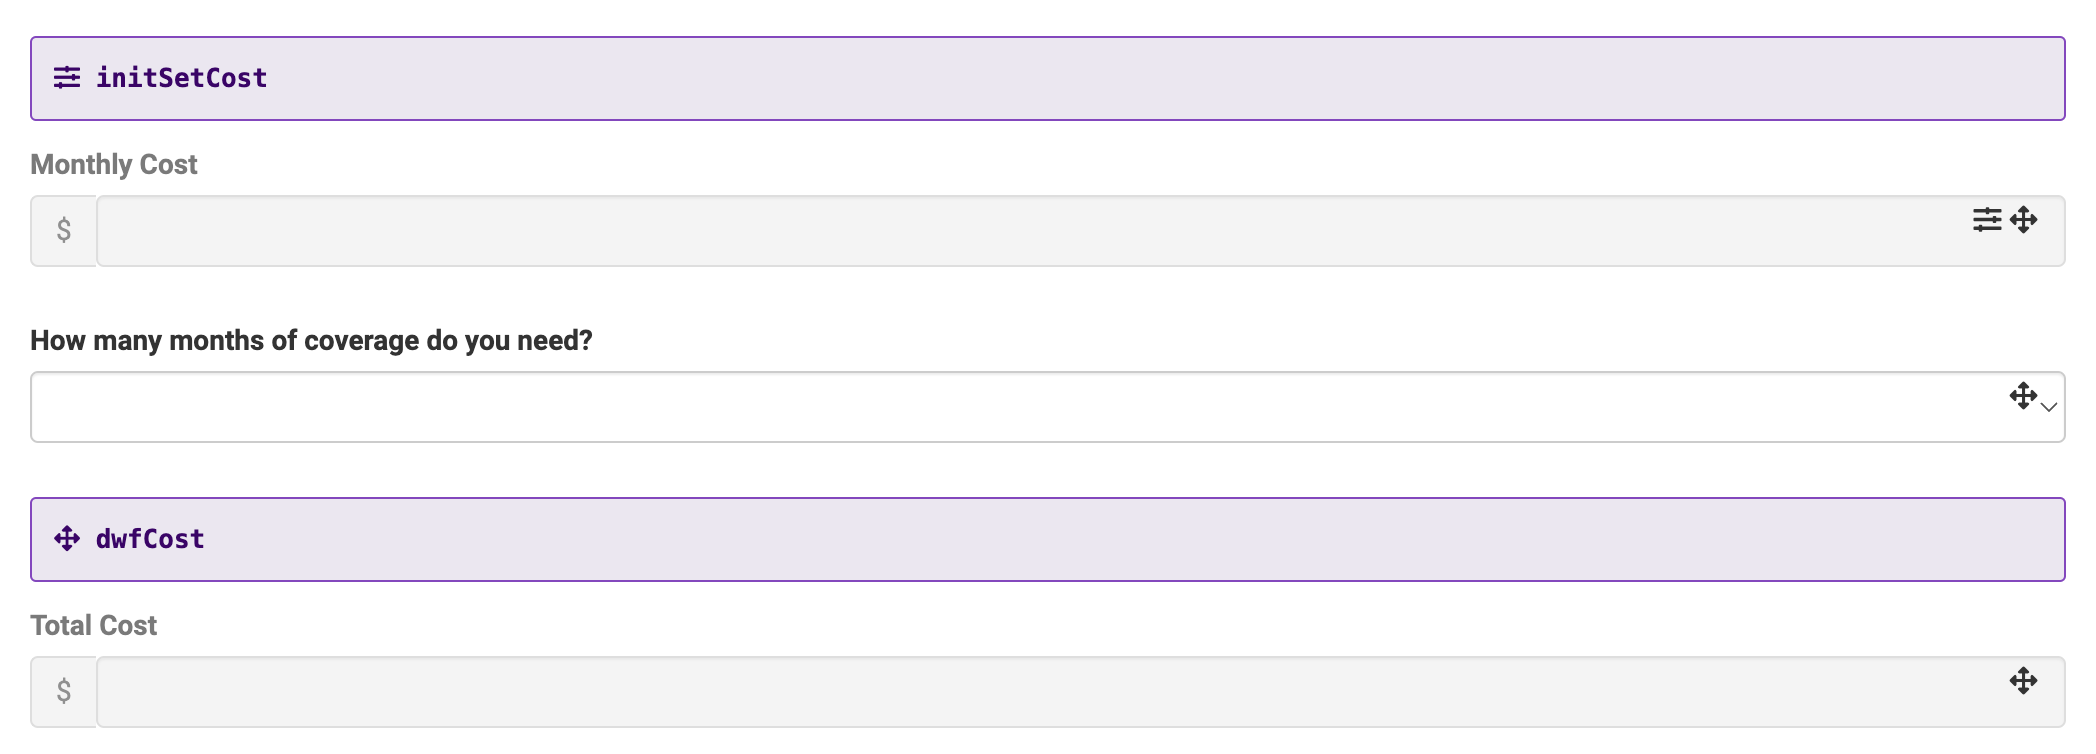
Here's how the completed example looks in the Module Builder:
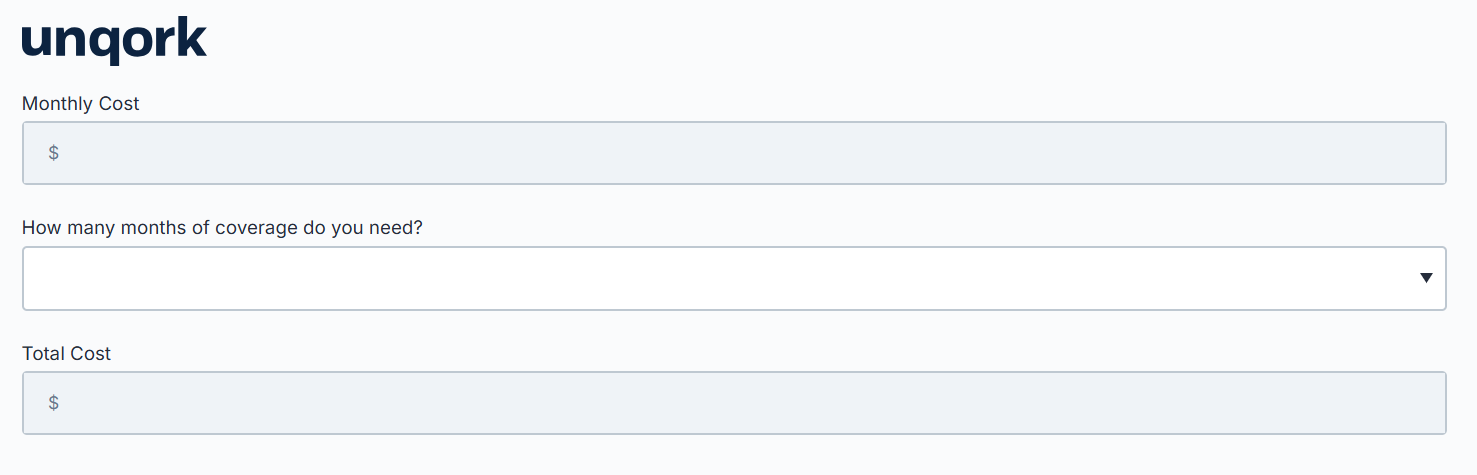
Preview your module in Express View Express View is how your end-user views your application. Express View also lets you preview your applications to test your configuration and view the styling. This is also the view your end-users will see when interacting with your application. After configuring a module, click Preview in the Module Builder to interact with the module in Express View. and make a selection from the drop-down menu. You'll see the calculated total cost in the Total Cost field. When you make a new selection, the total cost updates.
Overview
The Formula operator calculates data values using an expression. Let's say you're calculating the cost of an insurance plan over time and you know the value for one month. To find the value for a year, you use a Formula operator to multiply your original value by 12. Another common use for this operator is to calculate percentages.
You have two options when creating a formula:
-
Creating a static formula using the Formula's Info window.
-
Creating a formula with dynamic values using the operator's argument port.
You’ll find the Formula operator under the Table group to the left of the Data Workflow canvas.
About the Info Window
And here's a breakdown of each setting in the Formula operator's Info window:
|
Setting |
Description |
|---|---|
|
Category |
Grayed out and non-adjustable setting indicating the operation type. |
|
Label
|
The name applied to the operator. This label displays within the workflow. Labels should be user-friendly and well associated with the role of the operator. |
|
Preserve Argument Type |
When selected, this setting ensures the argument data type is respected when the operator executes. |
|
Formula/Expression |
The formula or expression you want to apply to your data. For example, use A to represent your original data. Your original data is anything you bring in through the operator's input port. Let's say you want to multiply your data by 12. You'll enter =A*12 in this field. If you want to use an argument instead of a set value in your formula, use _arg. The above formula as an argument is the following: =A*arg. In this example, _arg takes the place of 12. Whatever value is set in the argument port goes in its place. |
Adding and Configuring a Formula Operator
This example calculates the total insurance cost based on the number of months of coverage that is stored in the Dropdown component. Your end-user End-users, also known as Express Users, are the individuals accessing an application through Express View. In most cases, end-users are the customers using the product. has the choice of how long they need coverage. From there, a Data Workflow uses a Formula operator to calculate the cost of coverage.
Configure the Text Field Components
Begin by configuring two Text Field components that store the monthly cost of insurance and the total cost based on how many months of coverage the end-user End-users, also known as Express Users, are the individuals accessing an application through Express View. In most cases, end-users are the customers using the product. decides on. As the values are always monetary, you'll set a dollar sign as the prefix. The end-users End-users, also known as Express Users, are the individuals accessing an application through Express View. In most cases, end-users are the customers using the product. do not need to enter values in these Text Field components, so disable user input for both of them.
| 1. | Drag and drop two Text Field components onto your canvas. |
|
Property ID |
Label Text |
|---|---|
|
monthlyCost |
Monthly Cost |
|
totalCost |
Total Cost |
| 3. | In the Prefix field, enter $. |
| 4. | Set the Disable User Input toggle to (ON). |
| 5. | Save & Close each component as you add it. |
Configure the Initializer Component
Next, add an Initializer component so that every time an end-user End-users, also known as Express Users, are the individuals accessing an application through Express View. In most cases, end-users are the customers using the product. opens a new submission, the component places a value of 1000 in the first Text Field component. Doing so lets the Initializer component manage the monthly cost. If you want to set a new monthly cost, you can update the value in the Initializer component.
| 1. | Drag and drop an Initializer component onto your canvas, placing it above your monthlyCost Text Field components. |
| 3. | From the Trigger Type drop-down, select New Submission. |
| 4. | In the Outputs Enter outputs components and actions you want the component to perform. table, enter the following: |
|
Property ID |
Type |
Value | |
|---|---|---|---|
|
1 |
monthlyCost |
value |
1000 |
| 5. | Click Save & Close. |
Configure the Dropdown Component
Next, add a Dropdown component that lets your end-user End-users, also known as Express Users, are the individuals accessing an application through Express View. In most cases, end-users are the customers using the product. select how many months they want coverage. This component serves as the argument for your Formula operator.
| 1. | Drag and drop a |
| 2. | In the Property ID A Property ID is the unique field ID used by Unqork to track and link components in your module. field, enter coverageLength. |
| 3. | In the Label Text Label Text conveys what the input component is and what information it displays. Enter the purpose of the corresponding component or field. field, enter How many months of coverage do you need?. |
| 4. | Set the Option Label and Option Value as follows: |
| Option Label |
Option Value |
|---|---|
|
6 |
6 |
|
12 |
12 |
|
18 |
18 |
|
24 |
24 |
| 5. | Click Save & Close. |
Configure the Data Workflow Component
Lastly, add a Data Workflow component that brings in the monthly cost and the end-user's selection from the Dropdown component. Then, a configure a Formula operator to calculate the total cost. The final value will output to your Text Field component.
| 1. | Drag and drop a Data Workflow component onto your canvas, placing it below your other components. |
| 2. | In the Canvas Label Text and Property Name fields, enter dwfCost. |
| 3. | From the Trigger Type drop-down, select Watch. |
Configure the First Input Operator
The first Input operator retrieves data from the monthlyCost Text Field component.
| 1. | Drag and drop an Input operator onto your Data Workflow canvas. |
| 2. | Configure the operator's Info window as follows: |
|
Setting |
Value |
|---|---|
|
Category |
Input |
|
Component |
monthlyCost |
|
Required |
Yes |
|
Source |
Default |
Configure the Second Input Operator
The second Input operator retrieves your end-user's Includes the Short Answer component, Long Answer component, Select Boxes, Radio component, Dropdown, Number component and Single Checkbox. requested coverage length.
| 1. | Drag and drop a second Input operator onto your Data Workflow canvas. |
| 2. | Configure the operator's Info window as follows: |
|
Setting |
Value |
|---|---|
|
Category |
Input |
|
Component |
coverageLength |
|
Required |
Yes |
|
Source |
Default |
Configure the Formula Operator
The Formula operator multiples the monthly cost (A) by your end-user End-users, also known as Express Users, are the individuals accessing an application through Express View. In most cases, end-users are the customers using the product.'s coverage length, which serves as the formula's argument (_arg).
| 1. | Drag and drop a Formula operator onto your Data Workflow canvas. |
| 2. | Configure the operator's Info window as follows: |
|
Setting |
Value |
|---|---|
|
Category |
Formula Value |
|
Label |
Total Cost |
|
Preserve Argument Type |
Unchecked (no) |
|
Formula/Expression |
=A*_arg |
| 3. | Connect the output port (right) of the monthlyCost Input operator to the input port (left) of the Total Cost Formula operator. |
| 4. | Connect the output port (right) of the coverageLength Input operator to the argument port (top) of the Total Cost Formula operator. |
Configure the Output Operator
The Output operator sends the final cost to the totalCost Text Field component.
| 1. | Drag and drop an Output operator onto your Data Workflow canvas. |
| 2. | Configure the Output operator's Info window as follows: |
|
Setting |
Value |
|---|---|
|
Category |
Output |
|
Component |
totalCost |
|
Action |
value |
| 3. | Connect the output port (right) of the Total CostFormula operator to the input port (left) of the totalCostOutput operator. |
| 4. | Click Save. |
| 5. | Save your module. |
Here's how the completed Data Workflow looks:
Here's how the completed example looks in the Module Builder:
Preview your module in Express View Express View is how your end-user views your application. Express View also lets you preview your applications to test your configuration and view the styling. This is also the view your end-users will see when interacting with your application. After configuring a module, click Preview in the Module Builder to interact with the module in Express View. and make a selection from the drop-down menu. You'll see the calculated total cost in the Total Cost field. When you make a new selection, the total cost updates.
Resources
-
Text Field components
-
Initializer component
-
Dropdown component
