To learn more about specific Data Workflow use cases, see the How-to Guides: Operator Library section of our How-to Guides.
Your Unqork applications rely on data to function. The Data Workflow component lets you process and manipulate data as you wish. Most components process data in specific ways. For example, the Calculator component makes calculations, while input components store strings and numbers. The Data Workflow component, on the other hand, has broader functionality. It's an Extract, Transform, Load (ETL) tool that lets you transform, manipulate, and move data, as well as perform SQL-like functions on it. Use this component to manipulate data from one or more inputs and map the data to an output.
Data Workflow Canvas
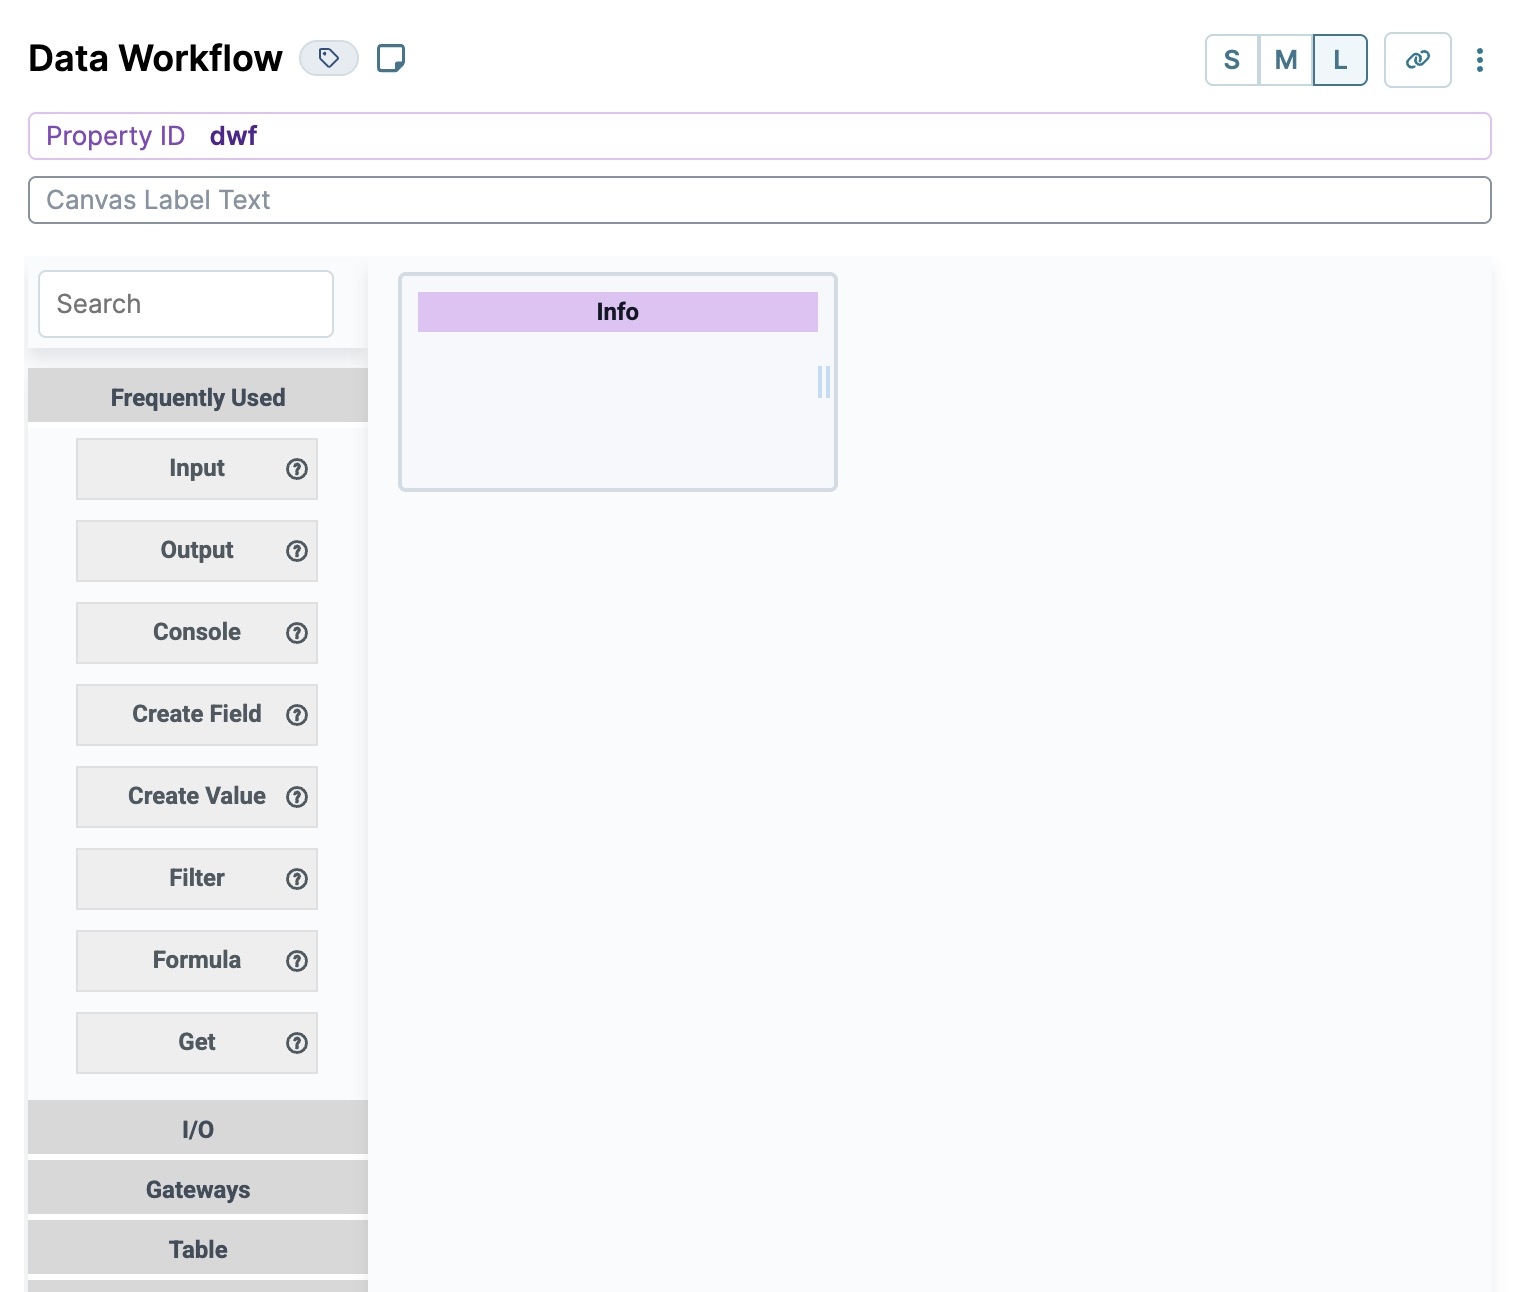
The first thing you notice about the Data Workflow component is that it has its own canvas. This is separate from the Module Builder canvas. Use this canvas to add, connect, and group Data Workflow operators.
To begin, drag and drop the Data Workflow component onto your Module Builder canvas. After adding the Data Workflow, you can see the Data Workflow canvas and the Data Workflow operators to the left of it.
Connecting Data Workflow Operators
Operators are the individual elements of your Data Workflow component. They let you manipulate large and complex data structures from multiple sources by connecting them to create processes.
Common ways to use operators include:
Inputting data.
Unwinding complex data structures.
Filtering data to obtain specific items.
Viewing data at different points in the Data Workflow.
Appending data items to create new structures.
Outputting data.
Here's an extract of a Data Workflow canvas showing an orchestration of operators that parses address data.
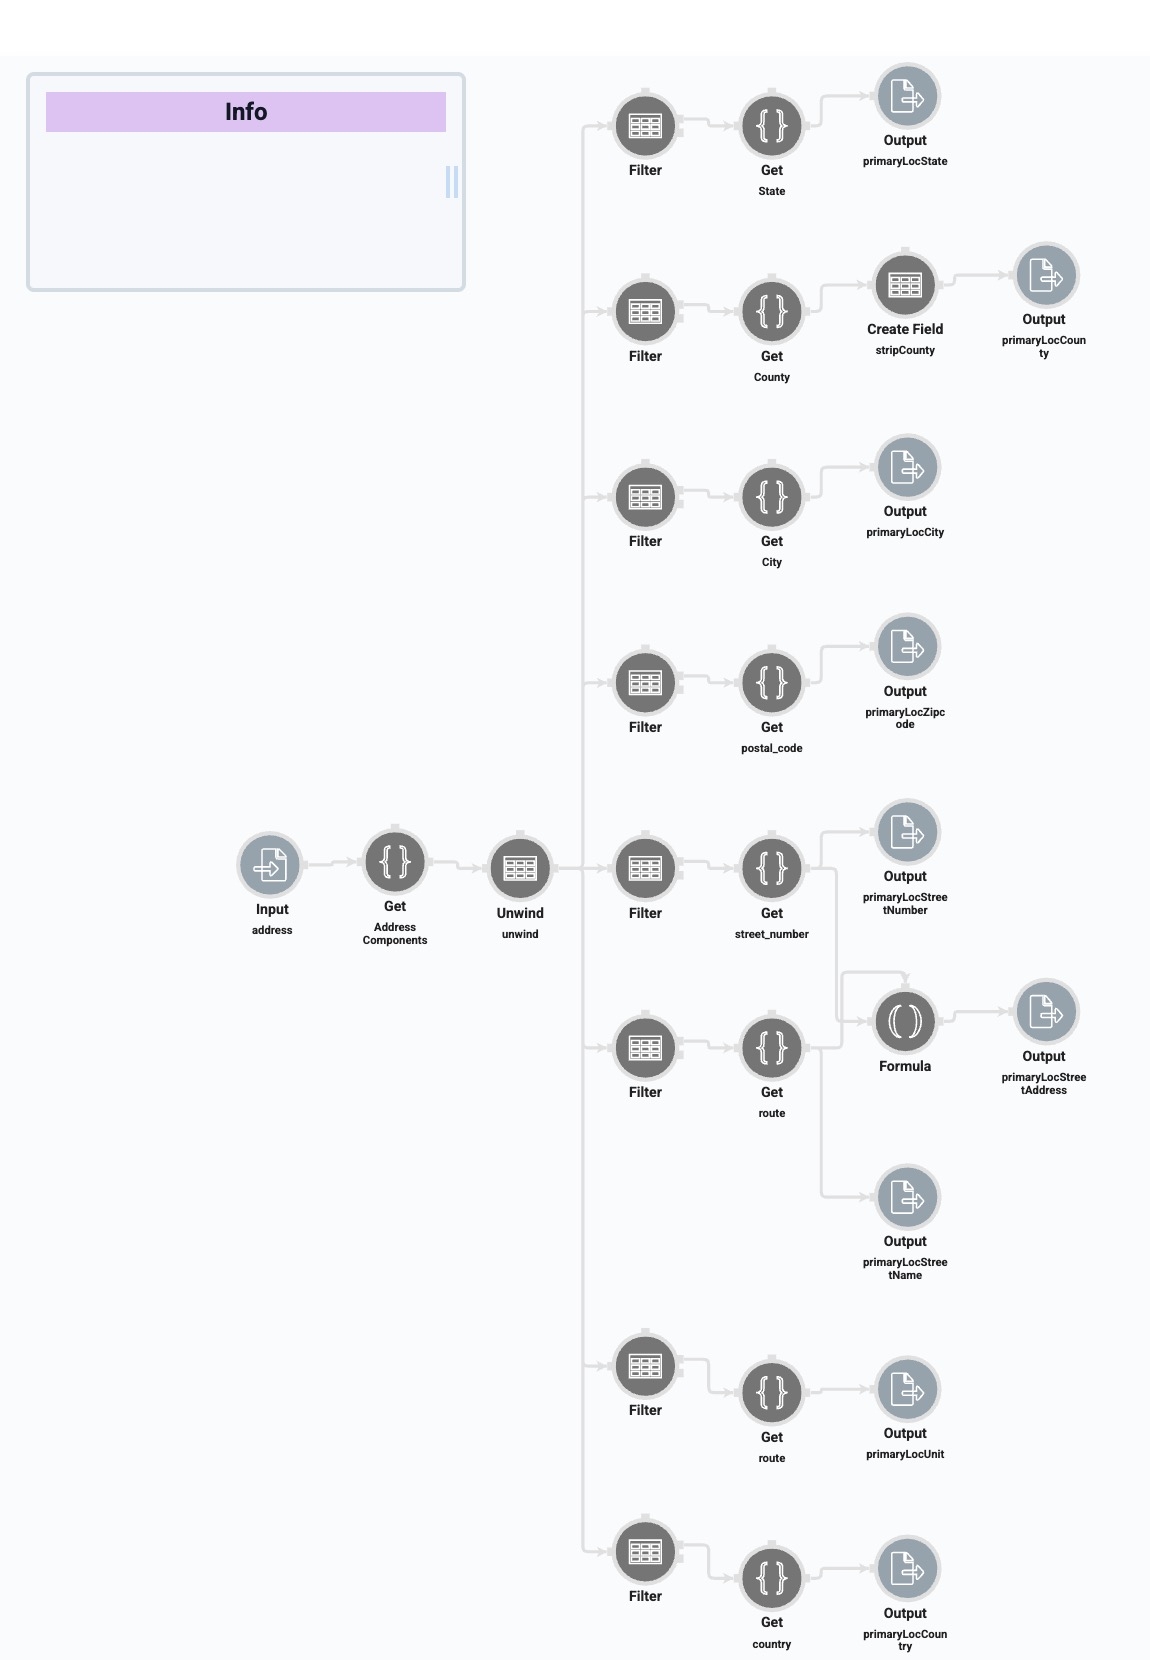
As you can see, the Input operator brings in the data from an Address Search component. The Unwind operator separates the individual data points, and the other operators take each data point and output it to different fields.
Operator Ports
When you look closer at Data Workflow operators, you see ports on the left, right, and sometimes the top of the operators. Use these ports to connect operators to create your process.
The three types of ports are:
Input (left port)
Argument (top port)
Output (right port)
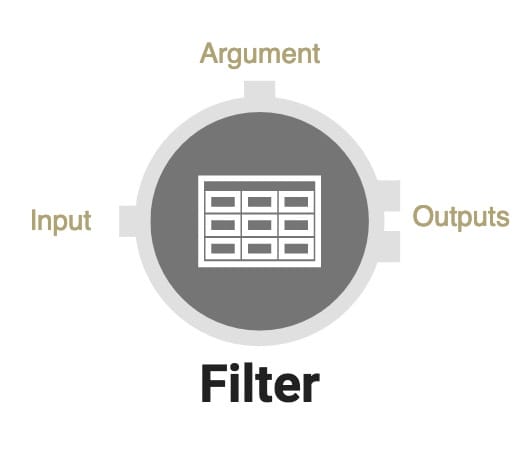
An operator can have more than one Input or Output port, and some have Argument ports. For example, to the right is the Filter operator and its associated ports. Not that this operator has top and bottom Output ports.
Input Port
The Input port (left) is the entry point into your operator. The Output port (right) of a previous operator in your Data Workflow connects to the next operator's Input port.
Some data operations have two inputs. For example, the Merge operator lets you input two data sets to combine them in a SQL-like JOIN fashion. One data set connects to the upper-left Input port, and another data set connects to the lower-left Input port. Then, the Merge operator outputs the combined results.
Argument Port
Arguments add a dynamic aspect to data processing. They can create conditions, rules, and more functionality for an operator. When you connect an operator to another operator's top port, you bring it in as an argument.
It's important to make a distinction between an argument and an expression. Most operators have an Expression, or Key, field that controls what the operator does.
Expression
Let's say you have a data set of savings accounts, and another populated with checking accounts. Now, you want to filter the two account types into separate outputs using a Filter operator. Without an argument, your expression might be account="savings". From there, the savings accounts filter out from a single output port. Anything that isn't a savings account is filtered out. If you want an operator to always have the same function, there's no need for an argument.
Argument
Use an argument when you want different functions based on dynamic data. Let's use the example above, using the same savings and checking account data sets. With an argument, you can make the filter more complex. You can add more filtering options and sort accounts by size. You can also add logic to your filter, calculating multiple account sizes. Or, you can set up decisions based on the accounts your end-user selects.
Unqork references an argument as _arg in an expression.
Output Port
Output ports (right) are where you send the final result of the data operation. Some data operations have two outputs, like the Filter operator. That way, you can separate data and outputs to multiple destinations. For example, the upper-right output might be the results that give a Boolean value of true. And the lower-right output might be the results that give a Boolean value of false.
Connecting Operators
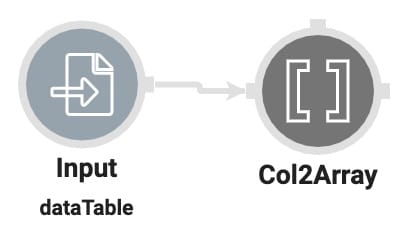
You connect operators with lines drawn from an Output (right) port to an Input (left) or Argument (top) port.
In the following example, an Input operator's Output (right) port connects to a Col2Array operator's Input (left) port:
Arranging and Grouping Operators
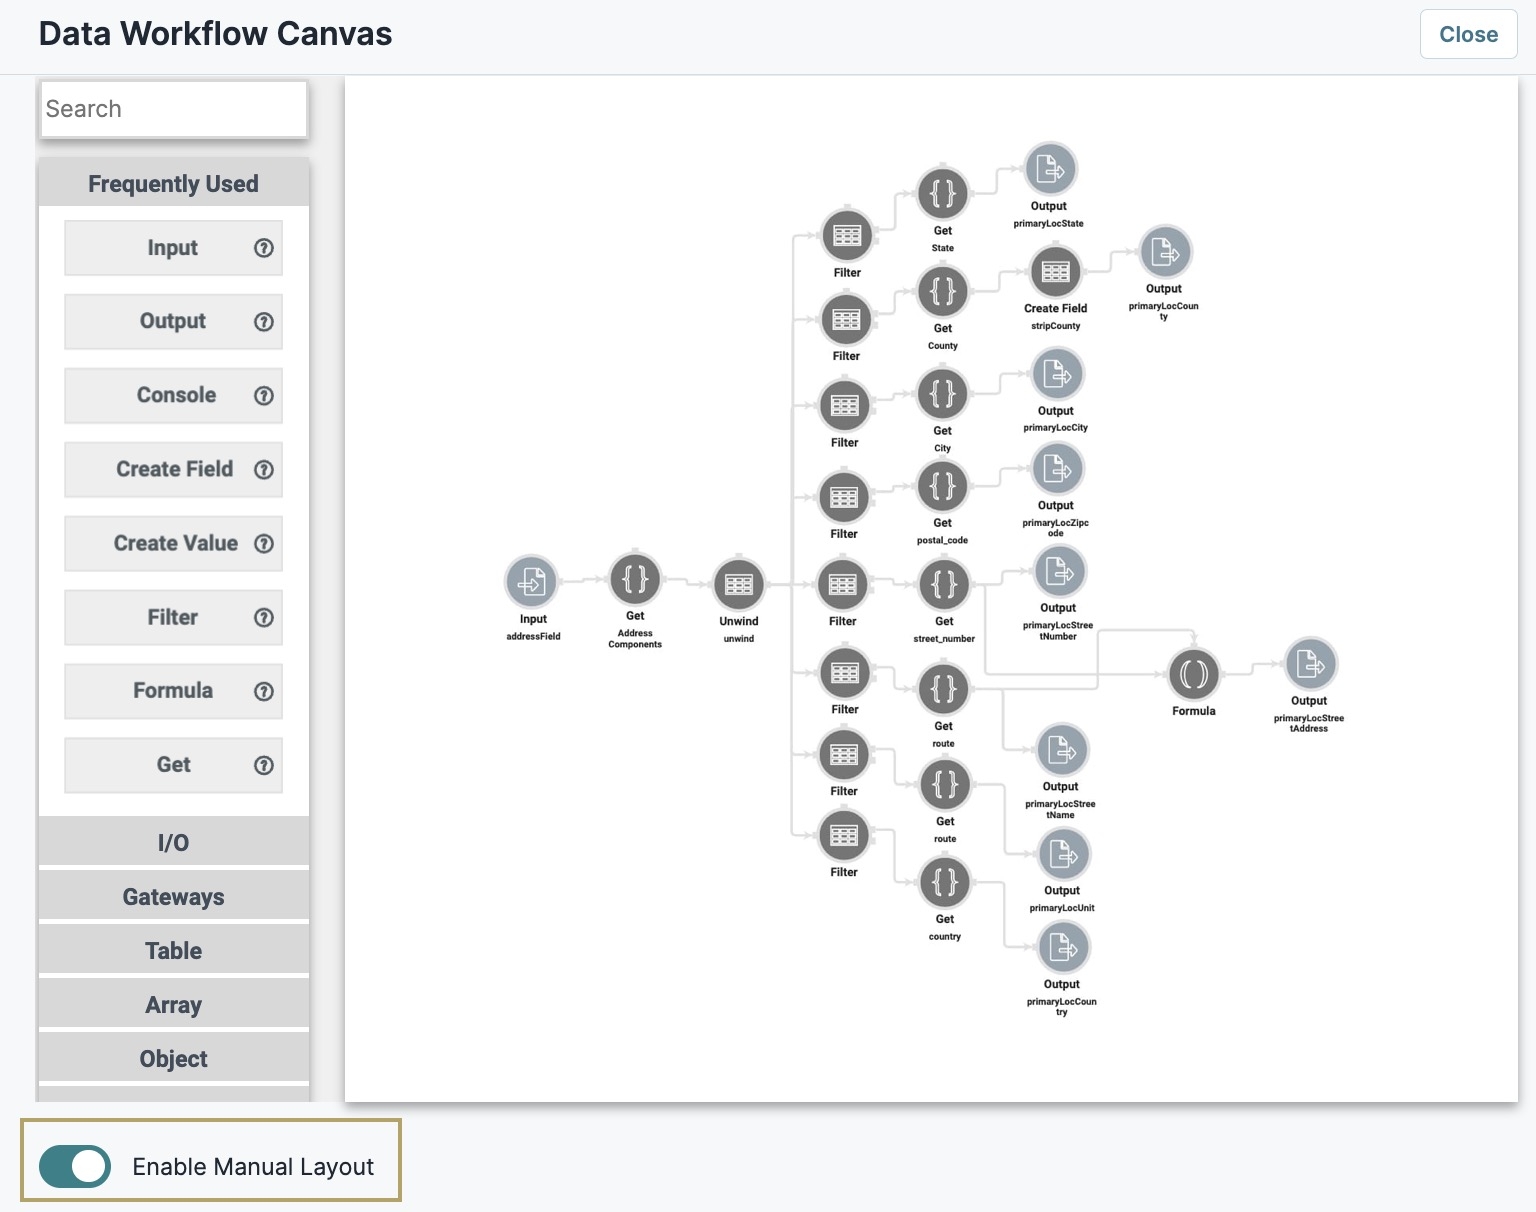
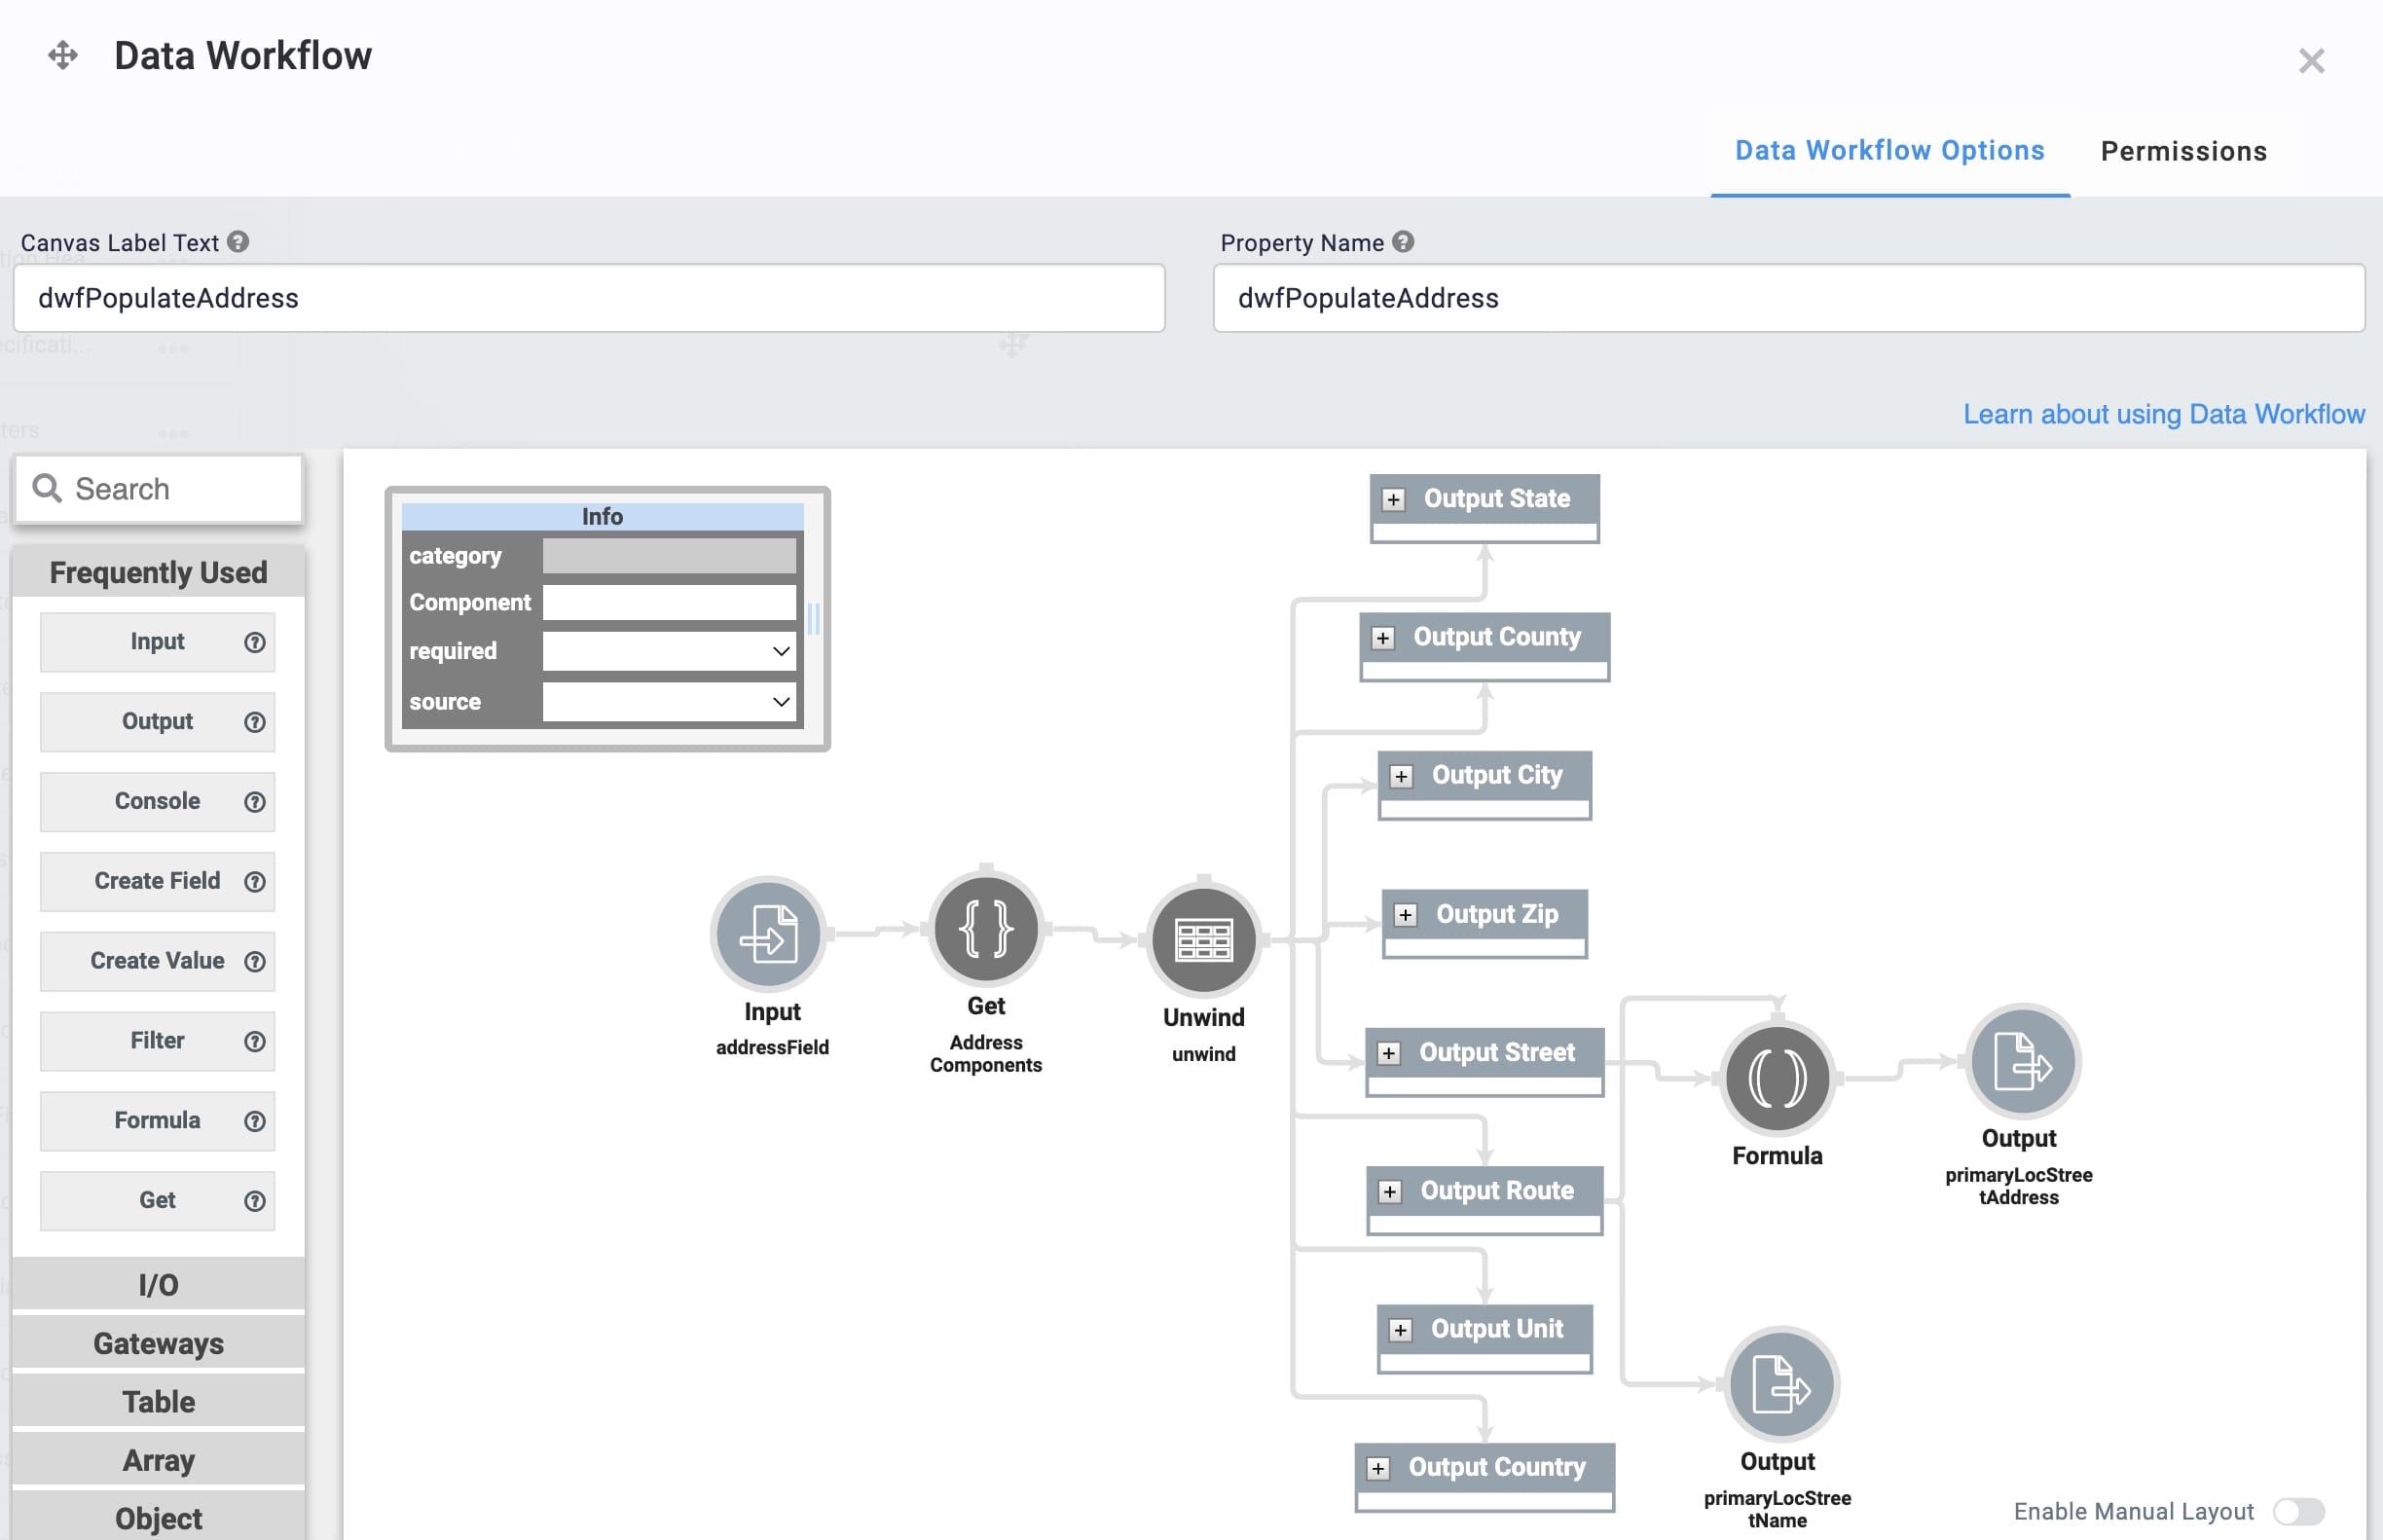
As you dive into more complex uses of the Data Workflow component, you may find yourself with a Data Workflow canvas crowded with operators and connecting lines. Grouping operators can help you organize your Data Workflow and provide a clearer process flow. You can also use the canvas' Enable Manual Layout toggle to arrange operators how you want. Labeling your grouped operators can also help you keep track of what functions your operators perform.
Arranging Operators
To arrange Data Workflow operators:
On the Data Workflow canvas, set Enable Manual Layout to
 (ON).
(ON).In the pop-up modal, click OK.
Grab the operators individually and rearrange them on the canvas. Or, hold down the Shift key when clicking the operators to select multiple operators to rearrange.
Click Save.
Below are examples of Data Workflow canvas layouts when Enable Manual Layout is enabled and disabled (notice how much tighter the organization is after manually arranging the operators):
Enable Manual Layout Set to ![]() (ON):
(ON):
Enable Manual Layout Set to ![]() (OFF):
(OFF):
.jpg)
Grouping Operators
To group Data Workflow operators together:
Hold down the Shift key when clicking the operators you want to group.
Press the Control + G keys (PC) or Command + G keys (Mac). The selected operators group together, then collapse into an expandable frame.
You can expand or collapse the frame by clicking the plus (+) or minus (-) sign in the frame's top bar.
In the Info window, enter a Label for your group of operations.
Click Save.
Below are examples of Data Workflow canvas layouts when grouped and not grouped:
Grouped:
Not Grouped:
.jpg)
Best Practices
For operators that require fields, like the Formula operator, it is best practice to avoid using symbols and numerical values in the fields. For example, instead of using
Test1Key="value", useTestOneKey="value".Data Workflows timeout after five minutes in all environments. Build Data Workflows to complete operations in five minutes to prevent timeouts.
If you don't plan to use disabled components in your application, remove them to ensure optimal performance. Remember to check all active components that connect to disabled components. Ensure active components still function properly after you remove the disabled ones.
Add labels to all Data Workflow operators to describe their function. These labels make it easier to know the purpose of an operator without having to open the Info window.
Select the Do Not Sanitize setting in all your operators to improve application performance.
Organize Data Workflow components based on their function in your application.
Use the component's Notes tab to comment on complex data processes. Add notes to explain what components are being triggered, trigger types, and the importance of each component.