About this Configuration Guide
Using this guide, you'll explore how the Codat Profit Loss (P&L) and Balance Sheet integration template works. You'll learn how to install the template to your environment and how to use it in your applications.
First, you'll set up your Codat account directly through Codat. Then, you can add your Codat authentication information to your environment.
All images used in this guide are for illustrative purposes only. Images are subject to change without notice. All images are correct at the time of publication.
Overview
The P&L Balance Sheet template exists primarily to show you how to make use of your Codat service. The accounting data this template retrieves is one of many different data points you can call using Codat. If you don't need P&L or Balance Sheet data, use this template as an accelerator to build any type of Codat integration use case.
To work correctly, this template requires a company ID input from Codat. You can either configure that integration yourself, or install our Codat Connect integration template to your environment.
Here's a high-level overview of the modules in this template:
Module | Description |
|---|---|
Codat: Profit & Loss and Balance Sheet | This is the front-end module for the end-user. Here the end-user enters a Company ID. After they get the company, they select which time periods to view the accounting data from. When they submit their query, they get the company's profit and loss statements plus their balance sheet. |
Codat: Get Company (API) | This API module uses the Company ID to retrieve company-specific data. |
Codat: Get Company Balance Sheet (API) | This API module calls a Codat endpoint that gets the company's balance sheet data. |
Codat: Get Company Profit and Loss (API) | This API module calls a Codat endpoint that gets the company's profit and loss data. |
Features
With this template, you can:
Retrieve a company's profit and loss data.
Retrieve a company's balance sheet data.
Select which time period to retrieve the data from.
Requirements
To use this template, you must have:
Administrator-level access to an Unqork environment.
Adding the Template
Before you can build an application from this template, you must install the template to your environment. Then, you can visit your Library and build an application from your new template.
Adding the Template to Your Environment
To add the template to your environment:
At the top right of the Unqork Designer Platform, click Library.
Click Templates.
Click the Marketplace button.
You can also access the Marketplace at any time by visiting https://marketplace.unqork.io.
In the Search the Marketplace field, enter Profit Loss and Balance Sheet.
Click the Profit Loss and Balance Sheet tile.
Click Install to Environment.
Click Install Template.
If you aren't logged in, you'll see a field for Environment URL and a Login button. Enter your environment's URL where you want to install the template. For example: [environmentname.unqork.io]. Click the Login button. Then, return to step 4 and click Install to Environment again. Follow the remaining steps as listed.
Now, you can now use your newly installed template to create an application.
Creating an Application from the Template
After you add the template to your environment from Marketplace, you can use it to create an application. This template creates a module-type application.
At the top right of the Unqork Designer Platform, click Library.
Click Templates.
Find the Profit Loss and Balance Sheet template tile.
Click Create App from Template.
From the Workspace drop-down, select the destination workspace. This is where your application lives once created.
Enter your unique App Name. The App Path autofills as you type your App Name.
If you want a different App Path, enter it in the App Path field.
From the Style drop-down, select a preview style. A style specifies your application’s appearance in Express View. If left blank, your application uses your environment's default style.
The App Type and App Entrypoint are grayed out. The template automatically takes care of these for you.
Click Create App.
The application opens in the workspace you specified. You land on the Modules tab of your application, which lists all modules of this template.
Your new application looks something like this:
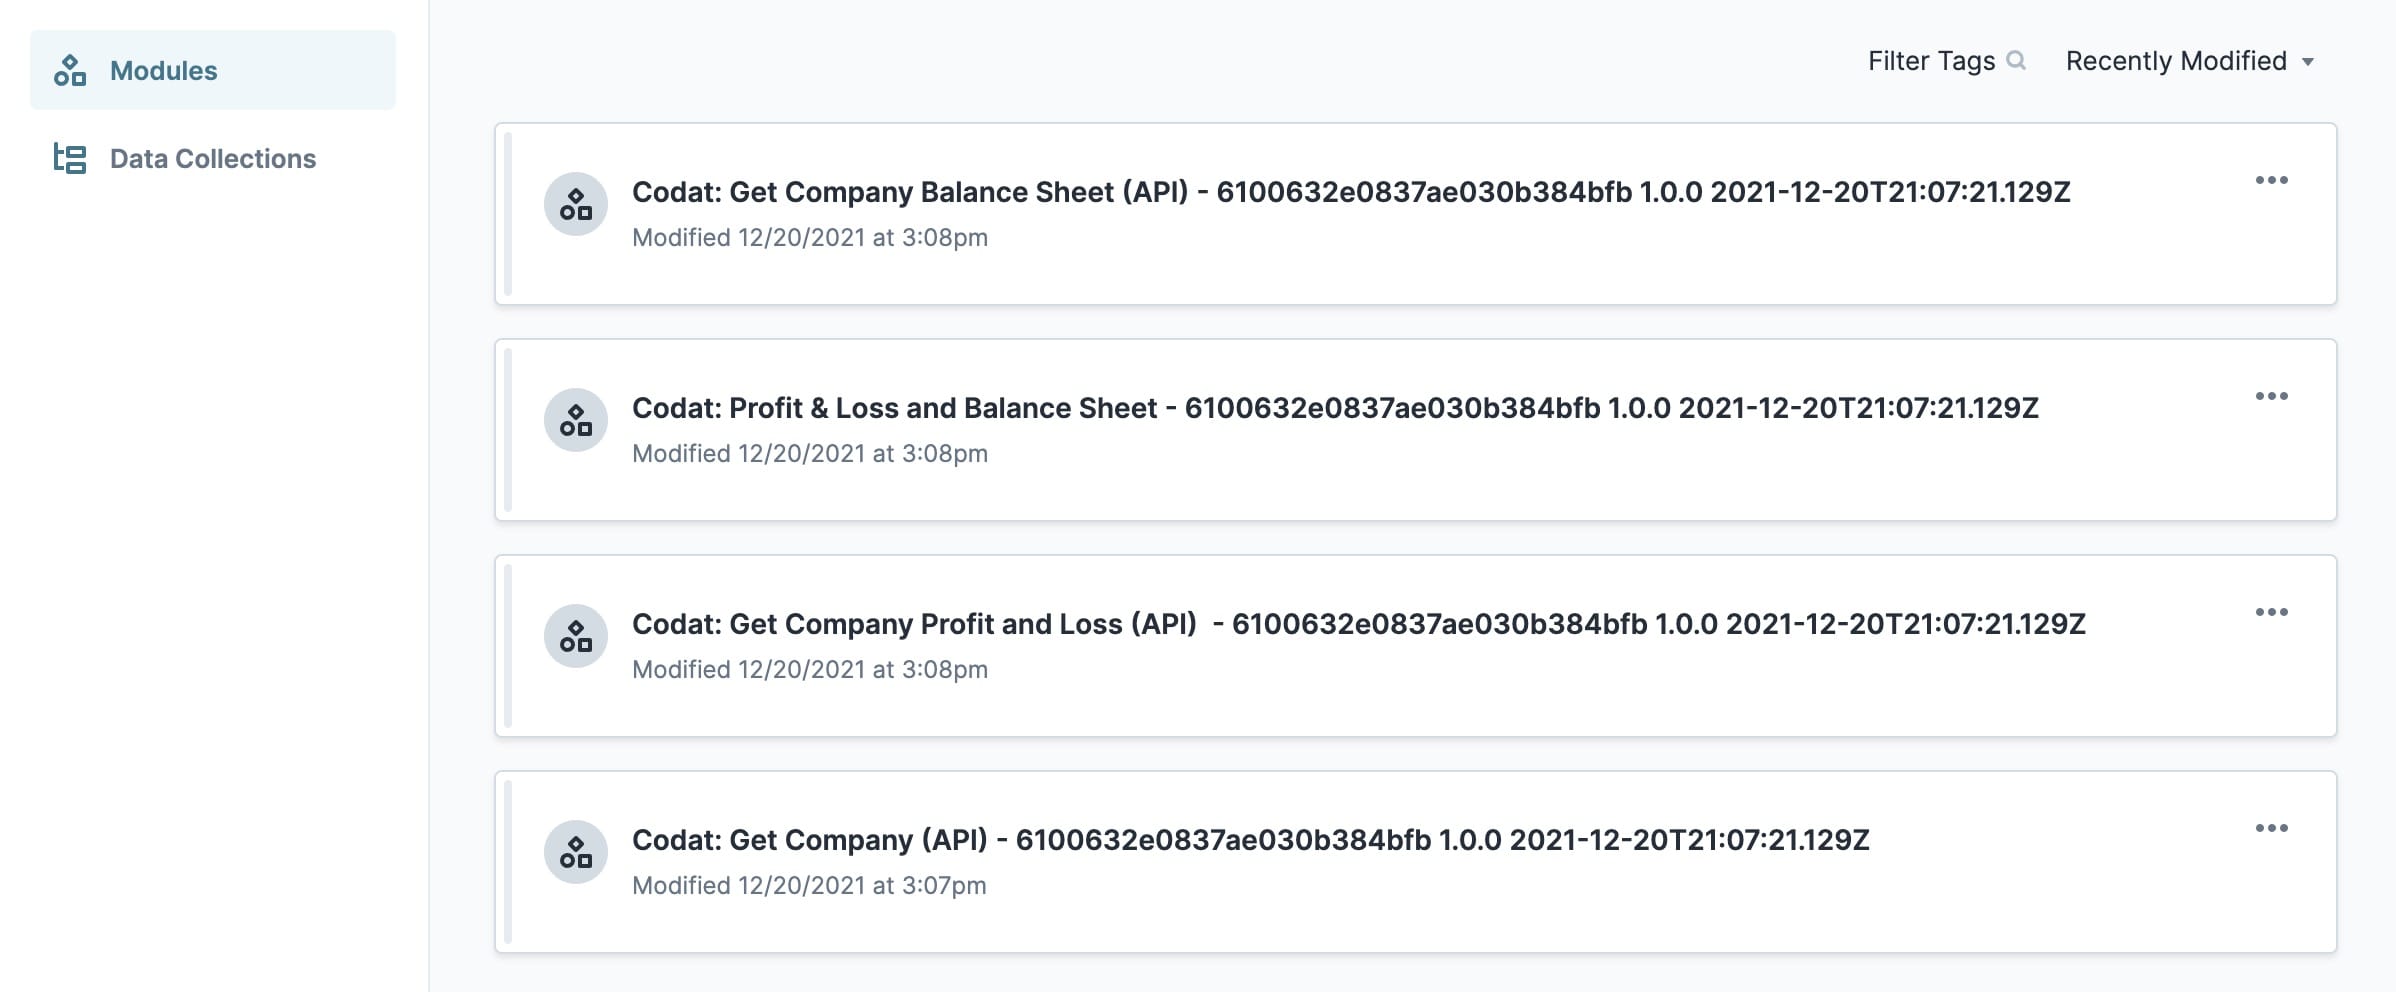
The template is a front-end module and 3 API modules. Each API module calls a different Codat API endpoint.
When you create an application from the template, your module names automatically include the template ID and a time stamp. This is to prevent any duplicate module paths. You can change module names and module paths at any time. Any service or workflow you create with your template also has a template ID and time stamp.
Adding the Codat Service
If you set up the Codat Connect template, your Codat service is configured already. If you haven't set up your Codat service, you must get your Codat credentials directly from Codat.
How the Template Works
The front-end of the Profit Loss and Balance Sheet template gives end-users a blank field where they can enter a Company ID.
Company IDs are created when an end-user sets up their account using Codat's companies endpoint. You can review Codat's documentation for more information. Additionally, the Codat Connect template provides you with the configuration to create Company IDs.
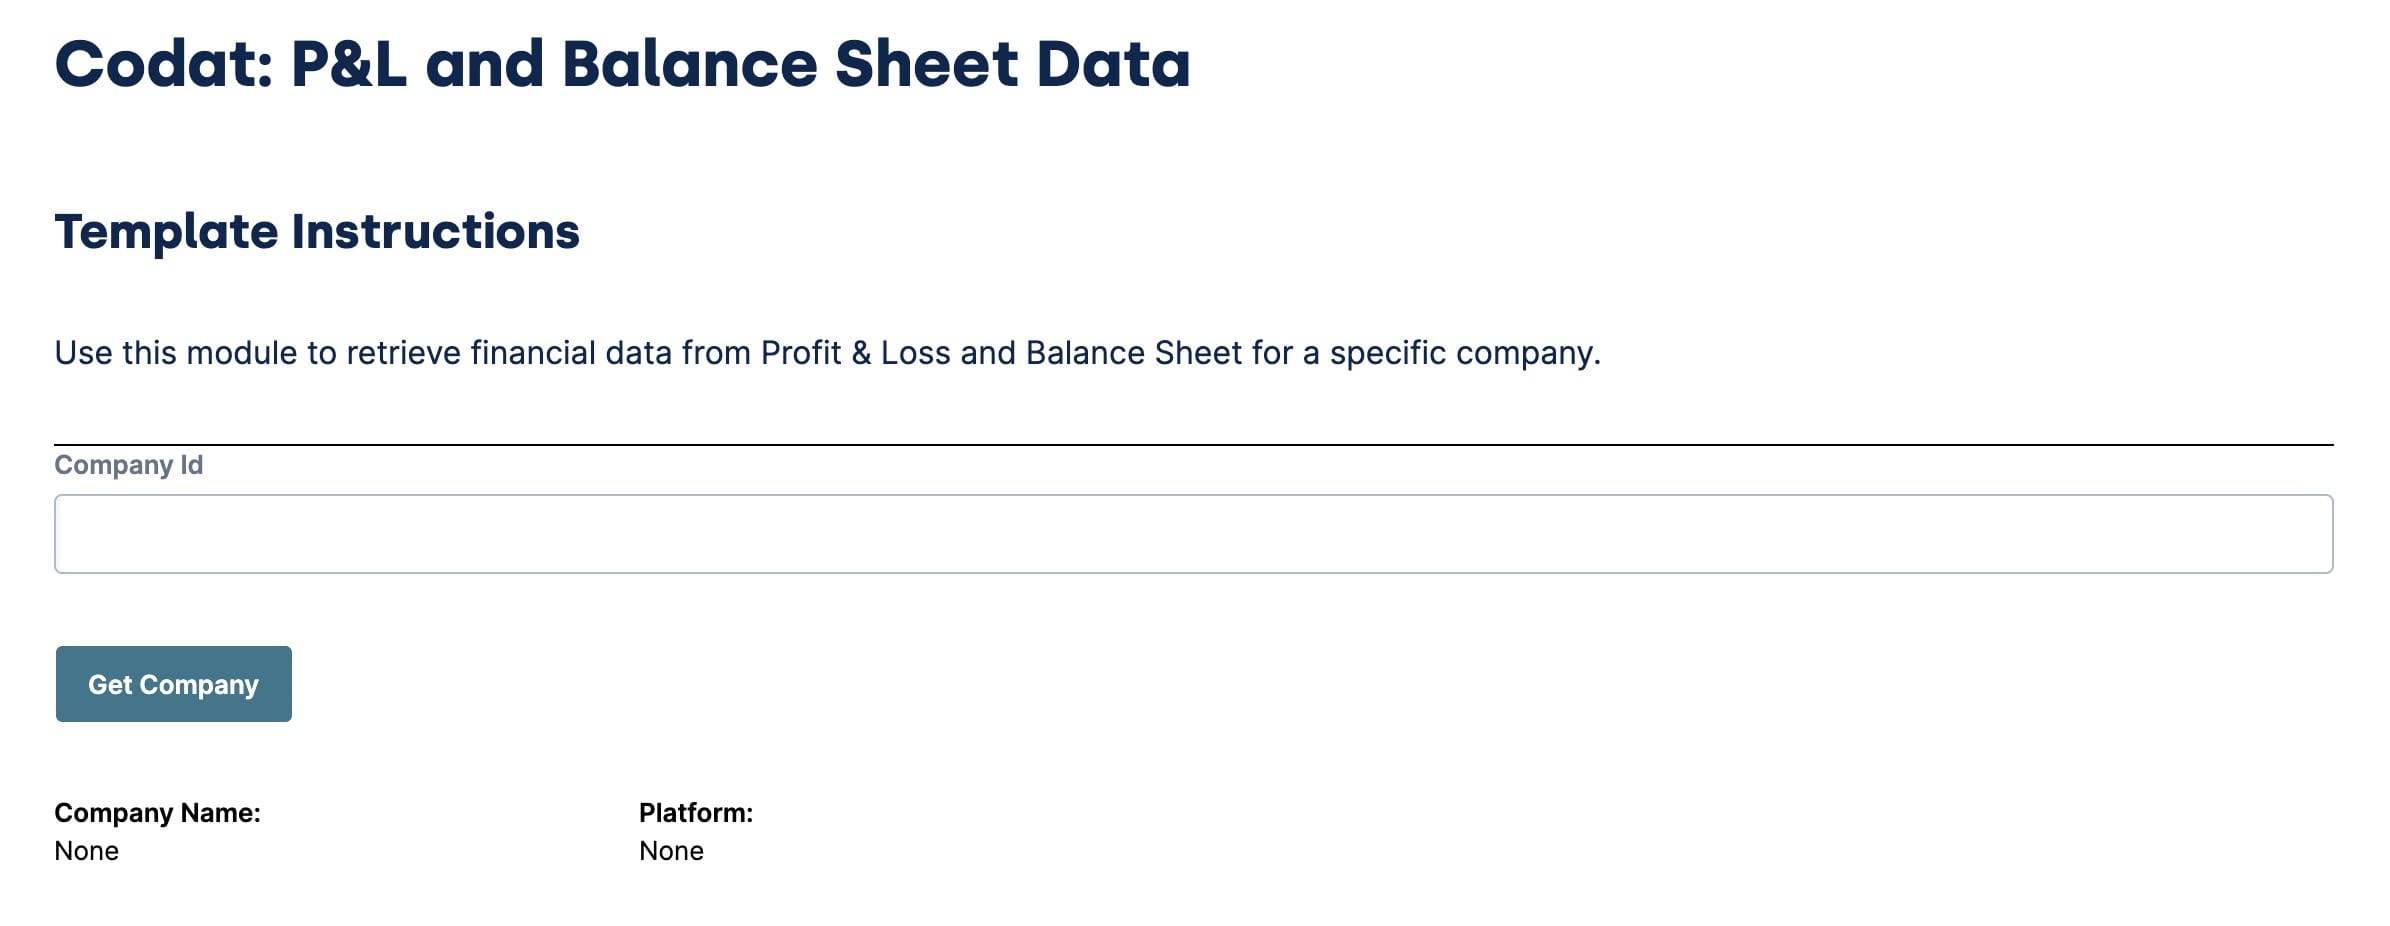
After end-users enter a valid Company ID, they click the Get Company button which triggers the Get Company API module.
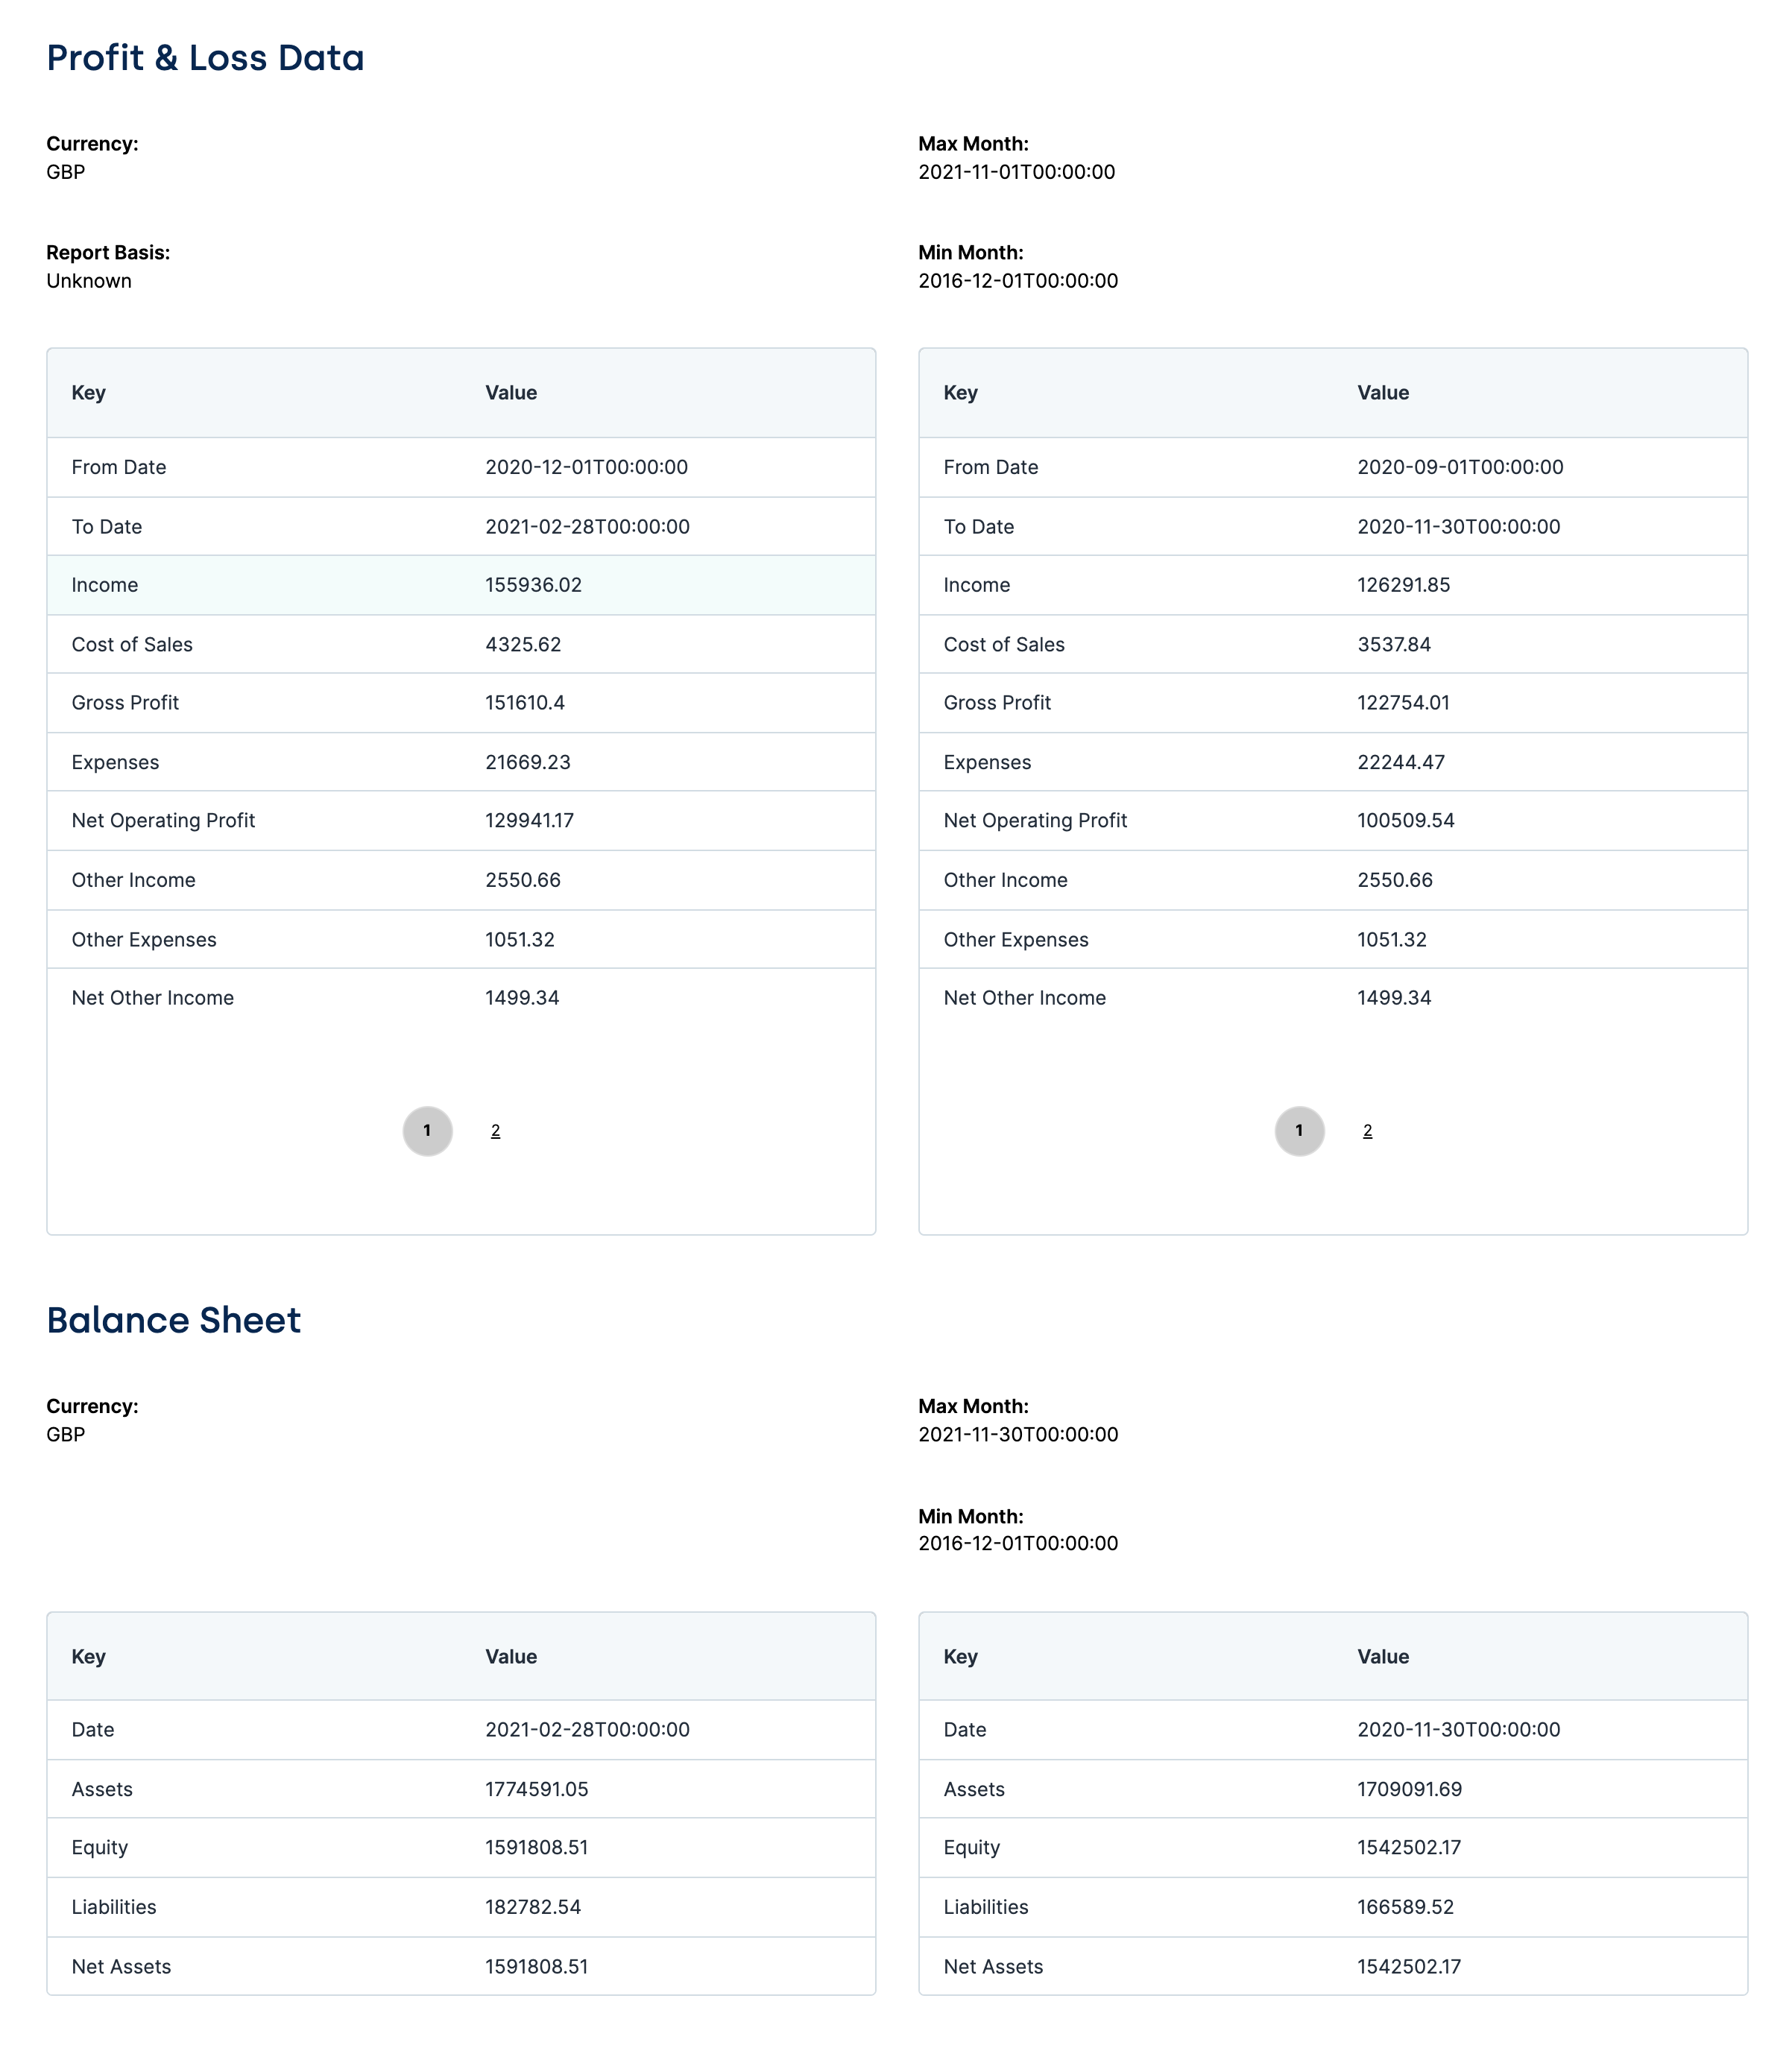
The button also displays some parameters the end-user can use when requesting data. They can select the Period Length and Date of the data. Periods to Compare is set to 2 by default. If the end-user enters a date outside of the data set, they see an error message and a prompt to enter a different date.

Once they select the parameters, the end-user clicks Submit. That triggers the other 2 API modules. The data is processed and mapped using Data Workflows (dwfBalanceSheet and dwfProfitLoss). It then gets outputted into tables.
Customizing the Template
This template is meant to customize for your specific use case. The data that displays by default is only a fraction of what you can pull with Codat.
In the Companies section of your Codat Portal you can find all the available data for a company. The Codat screenshot below shows some of the additional data you can use.
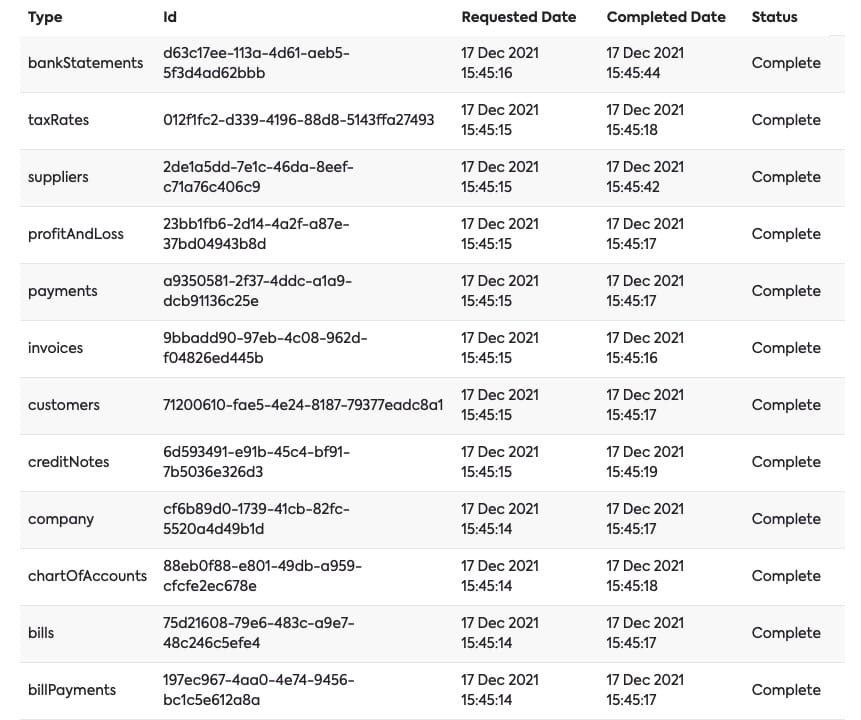
If you want to use Codat for something other than retrieving balance sheets, use this template as an accelerator. You can easily update the API smodule to call for different data. Then use Data Workflows to refine the way the data displays.
Using the Codat Connect template, you can customize it so companyId automatically passes to this template. That way, the end-user redirects to the P&L and Balance Sheet module after successfully connecting to their accounting software.
Removing the Template
What if you no longer need this template or the application you built from it?
Removing the Template from Your Environment
You might need to clean your environment and remove unused templates. The Unqork Library makes this easy. To uninstall a template from your environment:
At the top right of the Unqork Designer Platform, click Library.
Click Templates.
Find the template to uninstall.
In the template tile header, click the ellipsis (...).
Click Uninstall Template.
Click Yes, Uninstall in the confirmation modal.
You can visit the Marketplace and reinstall the template at any time.
Deleting the Profit Loss and Balance Sheet Application
If you no longer need the application you created from your template, you can delete it. To delete your application:
Navigate to the Apps tab from an open workspace.
Find the application to delete.
Click the ellipsis (...) in the app tile header.
Click Delete.
Retype the provided text.
Click Yes, Delete.
Removing the Codat Service from Your Environment
To remove your service from your environment:
At the top right of the Unqork Designer Platform, click the Settings drop-down.
Click Administration.
Under Integration, select Services Administration.
Scroll down and select the Codat service you want to delete from the Active Services list.
Click the Delete link. You’ll find this above the Active Services list.
At the Delete message, click OK.
At the Success message, click OK.
What if you have an existing application built from this template and then uninstall the template from your environment? Your existing application remains unaffected. Also, it no longer has any ties to the template. So, let's say you reinstall a newer version of the template in the future. You can rest assured that the installation doesn't impact your existing application