Codat Connect Integration Template
About this Configuration Guide
Using this guide, you'll explore how the Codat Connect integration template works. You'll learn how to install the template to your environment and how to use it in your applications.
You'll first need to set up your Codat account directly through Codat. Then you can add your Codat authentication information to your environment.
All images used in this guide are for illustrative purposes only. Images are subject to change without notice. All images are correct at the time of publication.
Overview
Codat is an API that allows financial institutions to build integrated products for their small business customers. In Unqork, you can add a Codat integration to your application. This allows small business customers to easily connect their accounting and banking software to your application.
This Codat Connect template is the first step in adding Codat to your application. With it, customers select which financial software they want to connect with. They log in. Then Codat creates a new company ID that is referenced whenever you want to pull data.
The other Codat templates can help you add specific data pulls to your applications.
Here's a high-level overview of the modules in this template:
| Module | Description |
|---|---|
|
Codat: Connect a Source |
This is the front-end module for the end-user. Here the end-user selects which source they want to connect to. When they select the source, they are redirected to the Codat flow. After the Codat flow, they are redirected back to this module. |
|
Codat: Get Company (API) |
This API module uses the Company ID to retrieve company-specific data. |
|
Codat: Create Company (API) |
This API module calls a Codat endpoint that creates a new company in your Codat portal. The new company is assigned an ID that Unqork references to pull financial data. |
|
Codat: Get Integrations (API) |
This API module pulls in all the integrations set to ON in your Codat portal. The integrations this API call receives are the ones that the end-user is able to choose from when connecting their account. |
Features
With this template, you can:
-
Add an initial Codat integration to your application.
-
Allow small-businesses to link their financial service accounts to your application.
-
Generate a unique Company ID for new small-business accounts.
Requirements
To use this template, you must have:
-
Administrator-level access to an Unqork environment.
What You'll Learn
In this article, you'll learn:
Adding the Template
Before you can build an application from this template, you must install the template to your environment. Then, you can visit your Library and build an application from your new template.
Adding the Template to Your Environment
To add the template to your environment:
| 1. | At the top right of the Unqork Designer Platform, Click Library. |
| 2. | Click Templates. |
| 3. | Click the Marketplace button. |
You can also access the Marketplace at any time by visiting https://marketplace.unqork.io.
| 4. | In the Search the Marketplace field, enter Codat Connect |
| 5. | Click the Codat Connect tile. |
| 6. | Click Install to Environment. |
| 7. | Click Install Template. |
If you aren't logged in, you'll see a field for Environment URL and a Login button. Enter your environment's URL where you want to install the template. For example: [environmentname.unqork.io]. Click the Login button. Then, return to step 4 and click Install to Environment again. Follow the remaining steps as listed.
Now, you can use your newly installed template to create an application.
Creating an Application from the Template
After you add the template to your environment from Marketplace, you can use it to create an application. This template creates a module-type application.
| 1. | At the top right of the Unqork Designer Platform, click Library. |
| 2. | Click Templates. |
| 3. | Find the Codat Connect template tile. |
| 4. | Click Create App from Template. |
| 5. | From the Workspace drop-down, choose the destination workspace. This is where your application lives once created. |
| 6. | Enter your unique App Name. The App Path autofills as you type your App Name. |
| 7. | If you want a different App Path, enter it in the App Path field. |
| 8. | From the Style drop-down, select a preview style. A style specifies your application’s appearance in Express View. If left blank, your application uses your environment's default style. |
The App Type and App Entrypoint are grayed out. The template automatically takes care of these for you.
| 9. | Click Create App. |
The application opens in the workspace you specified. You land on the Modules tab of your application, which lists all modules of this template.
Your new application looks something like this:
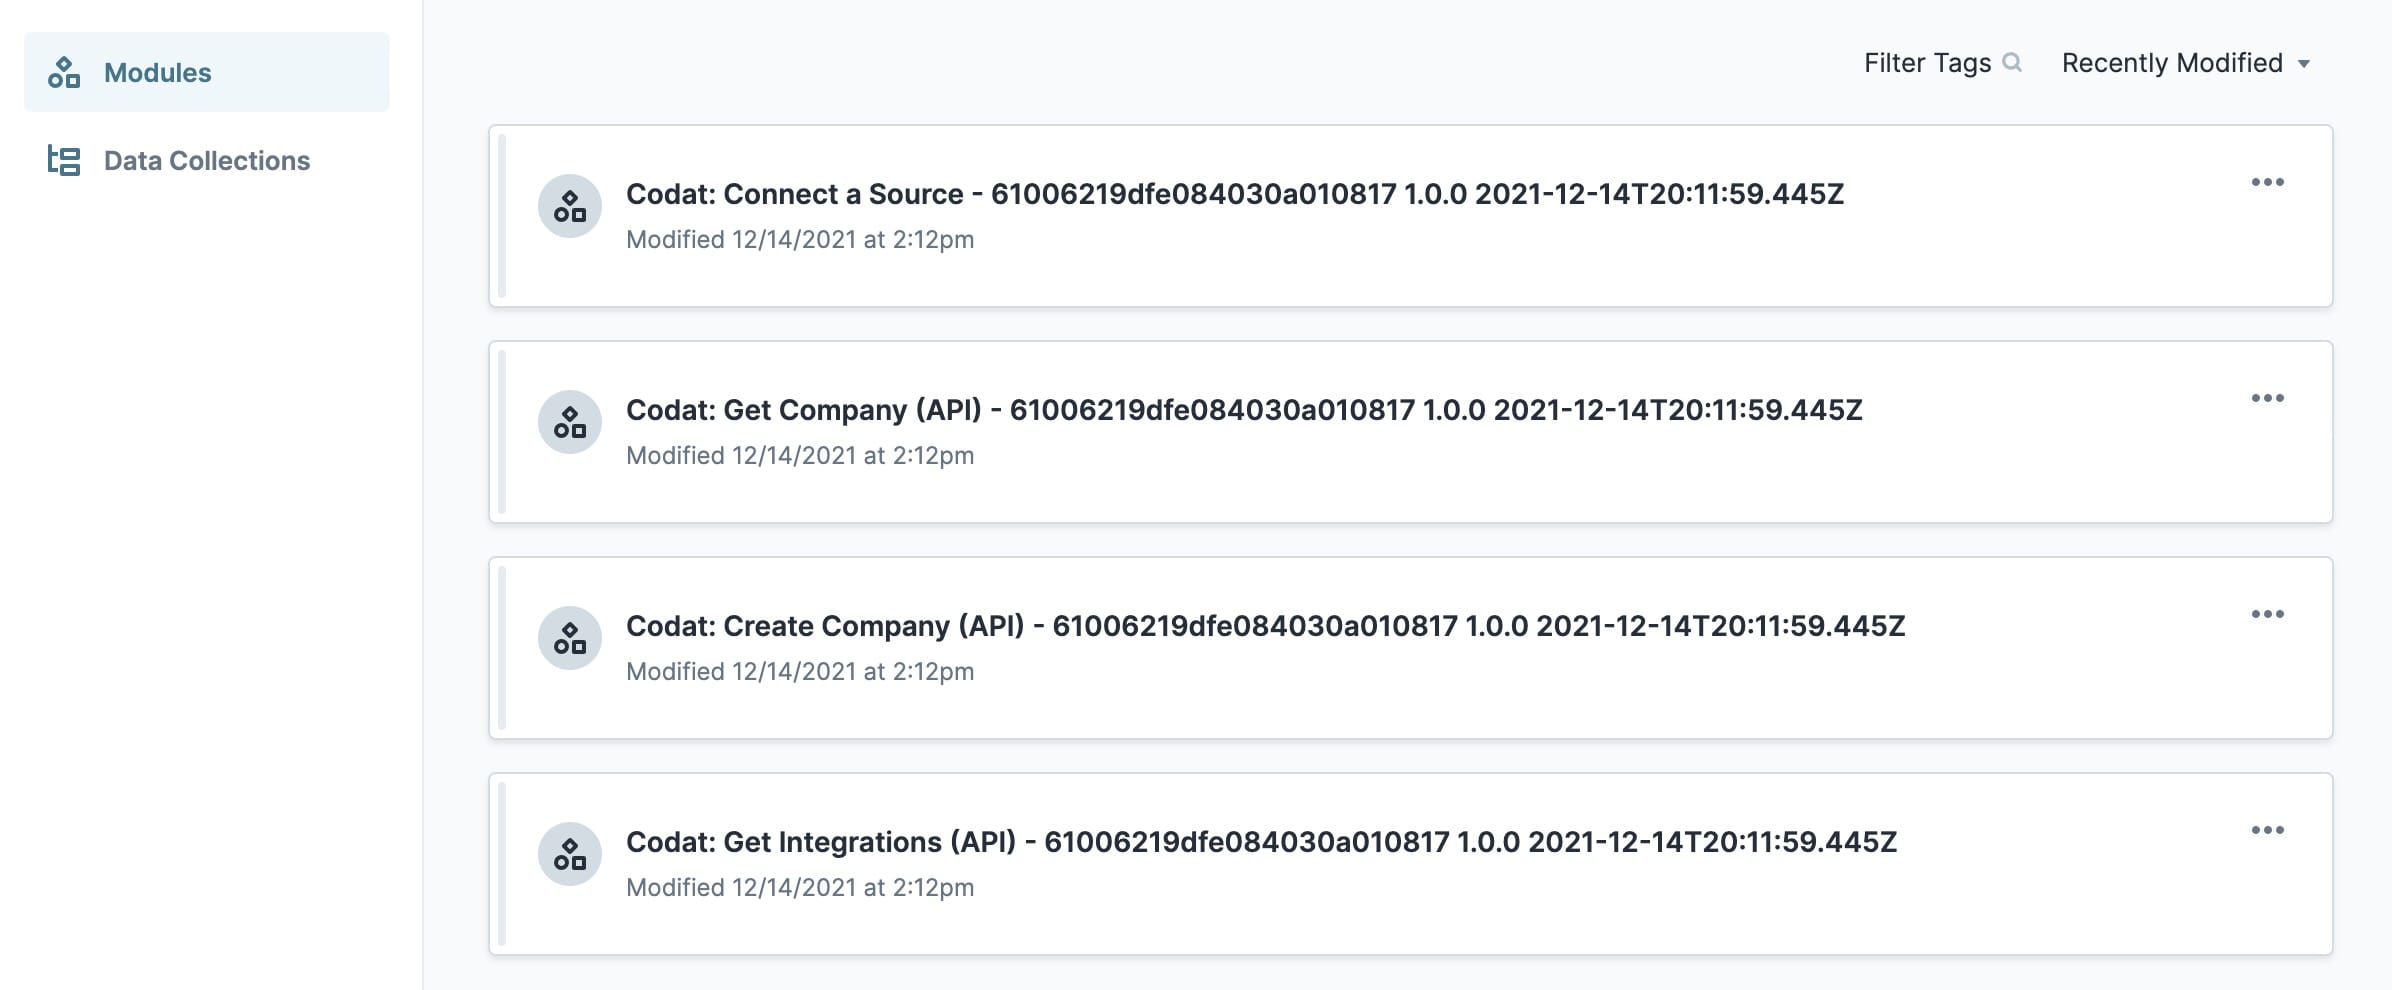
There is one front-end module and 3 API modules. Each API module calls a different Codat API endpoint.
When you create an application from the template, your module names automatically include the template ID and a time stamp. This is to prevent any duplicate module paths. You can change module names and module paths at any time. Any service or workflow you create with your template also has a template ID and time stamp.
Adding the Codat Service
When you create an application from this template, you'll see a new service added to your Services Administration. This service has the correct setup for Codat. You'll update it with your company's Codat account credentials. (You'll get those credentials when you set up your account directly through Codat.)
How the Template Works
The Codat Connect template provides end-users with a list of accounting software they can connect to. The end-user selects which software to log in to, enters their company name, then clicks Create Company. This gives them a Company ID, which is how the end-user is referenced in Codat.
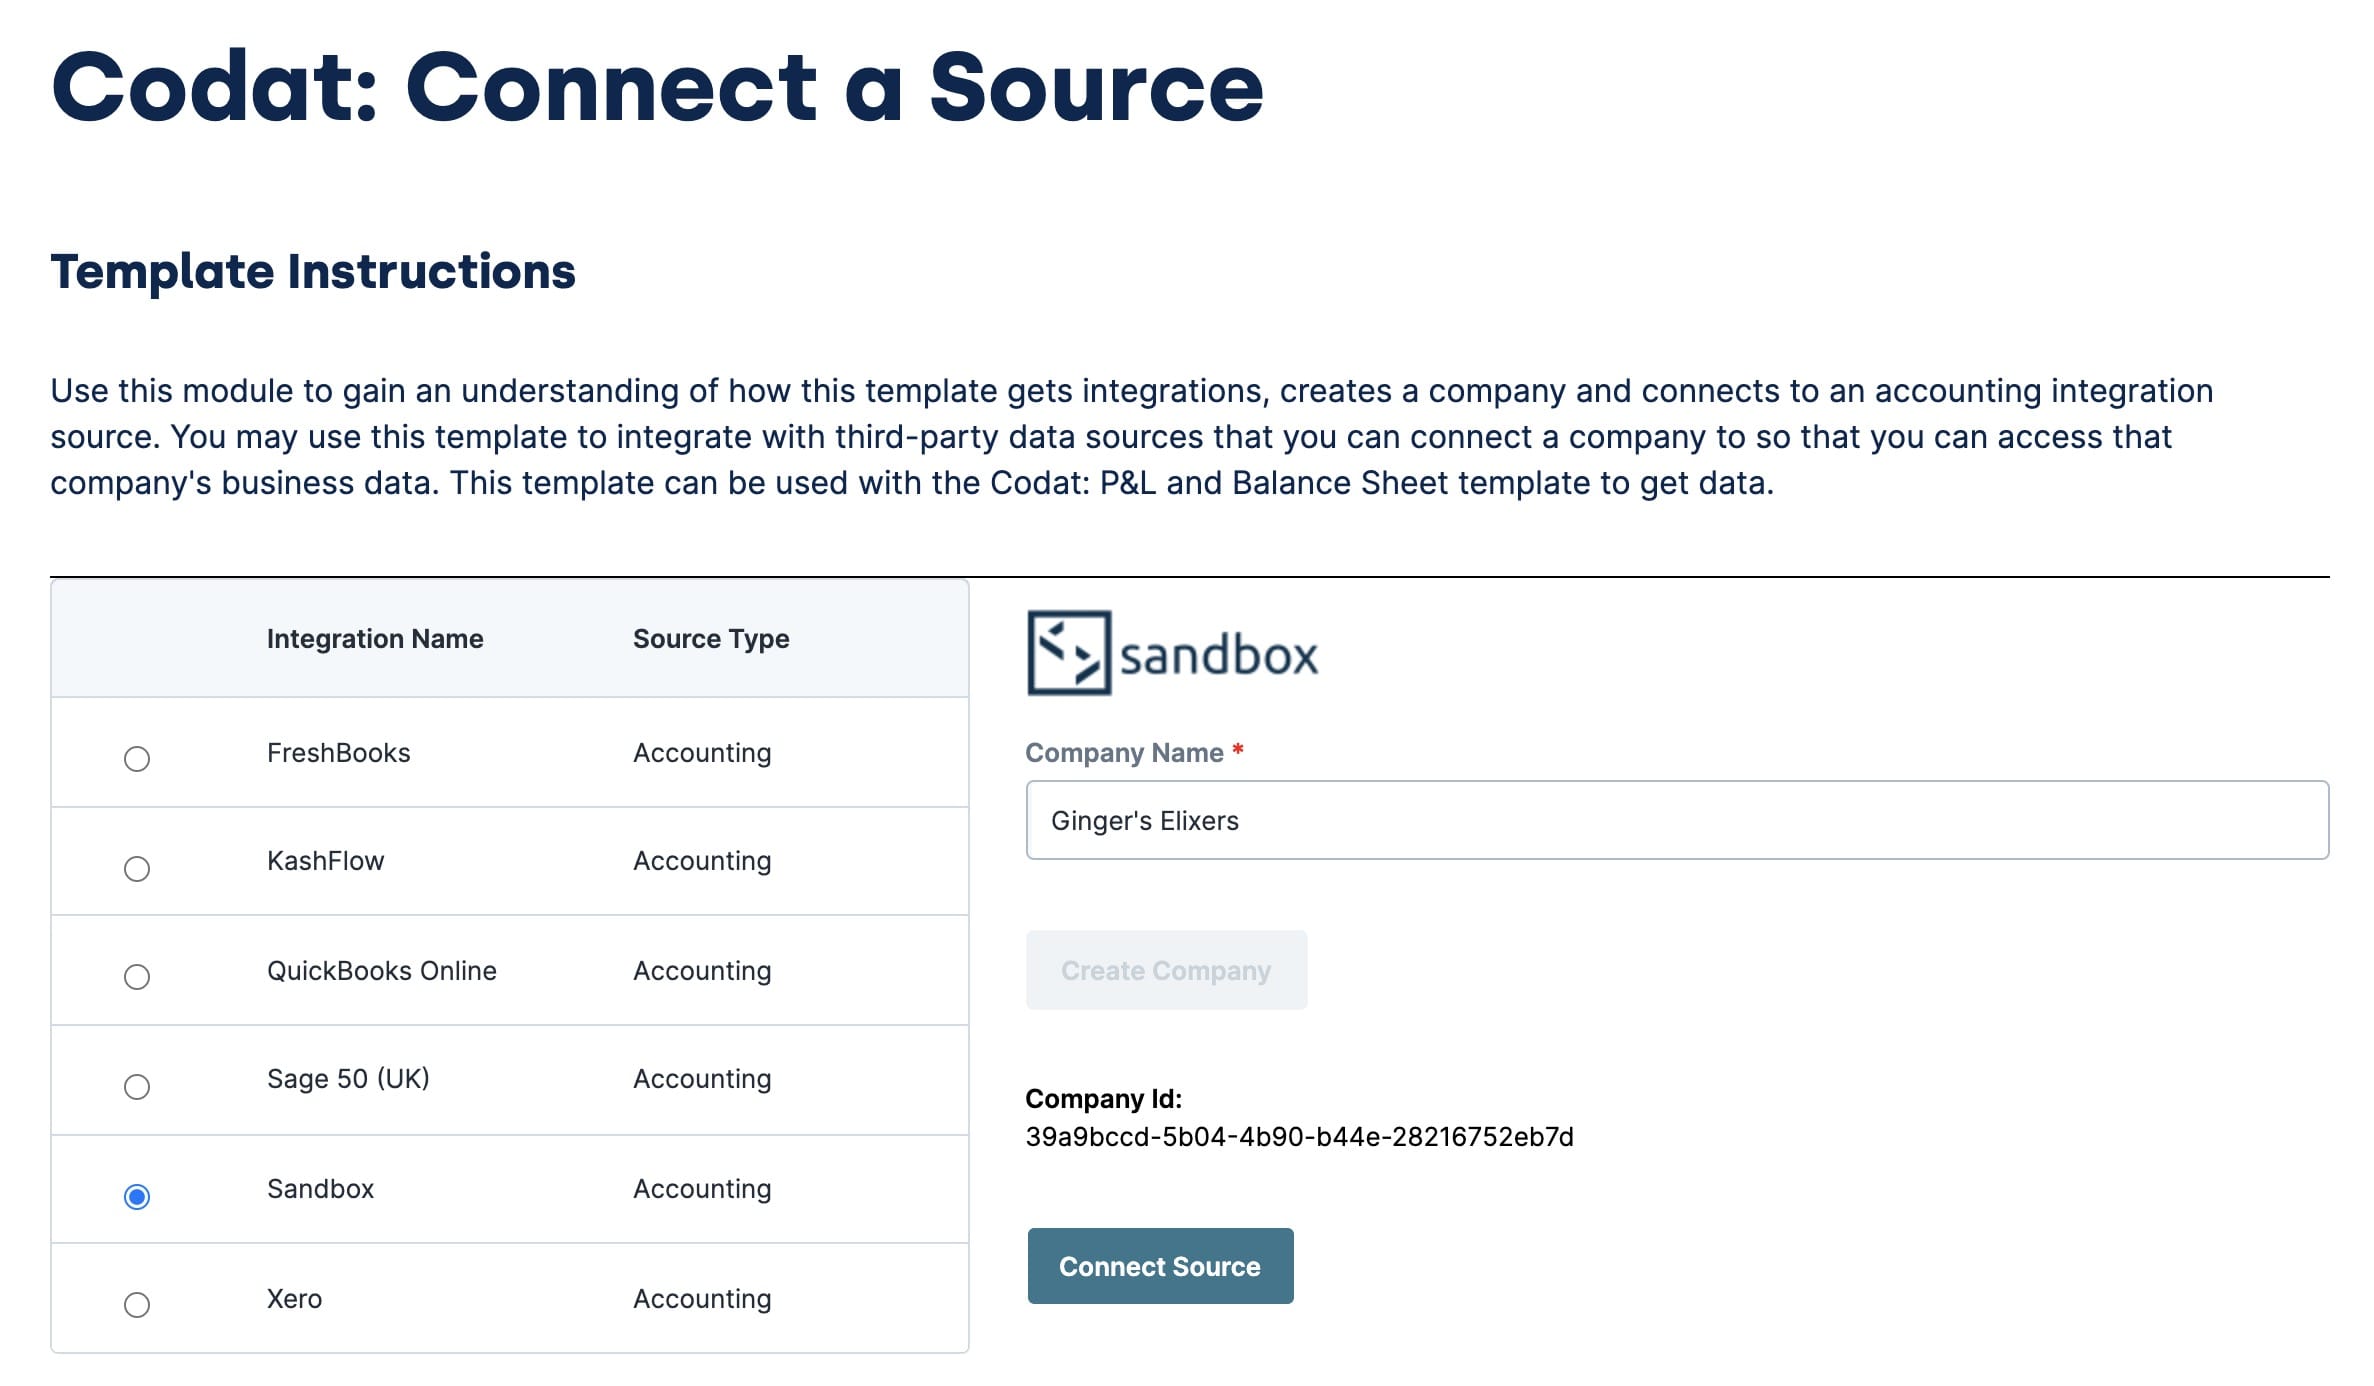
After they create their company, the end-user clicks Connect Source. This takes them to the Codat flow where they can log in to their accounting software account.
Once the end-user connects their account with Codat, they are taken back to the Unqork application where they see a review screen.
This template is unique in that it redirects the end-user away from your Unqork application and to the Codat flow. Once the end-user connects their accounting software to Codat, the Codat flow redirects them back to your Unqork application. There they'll see a review of their account connection.
Configuring the Template
There are a few things you must do to get this template working in your application. First is setting up your Codat account, if you haven't already.
Once you have your Codat account set up and you added your credentials in the Services Administration page, it's time to configure your application.
Enable Integrations in Your Codat Portal
When you look at your Codat portal, there is a section called Integrations. Here you'll enable any integrations you want your application to support. If you don't enable any of these integrations, your end-user can't connect their accounts to your application.
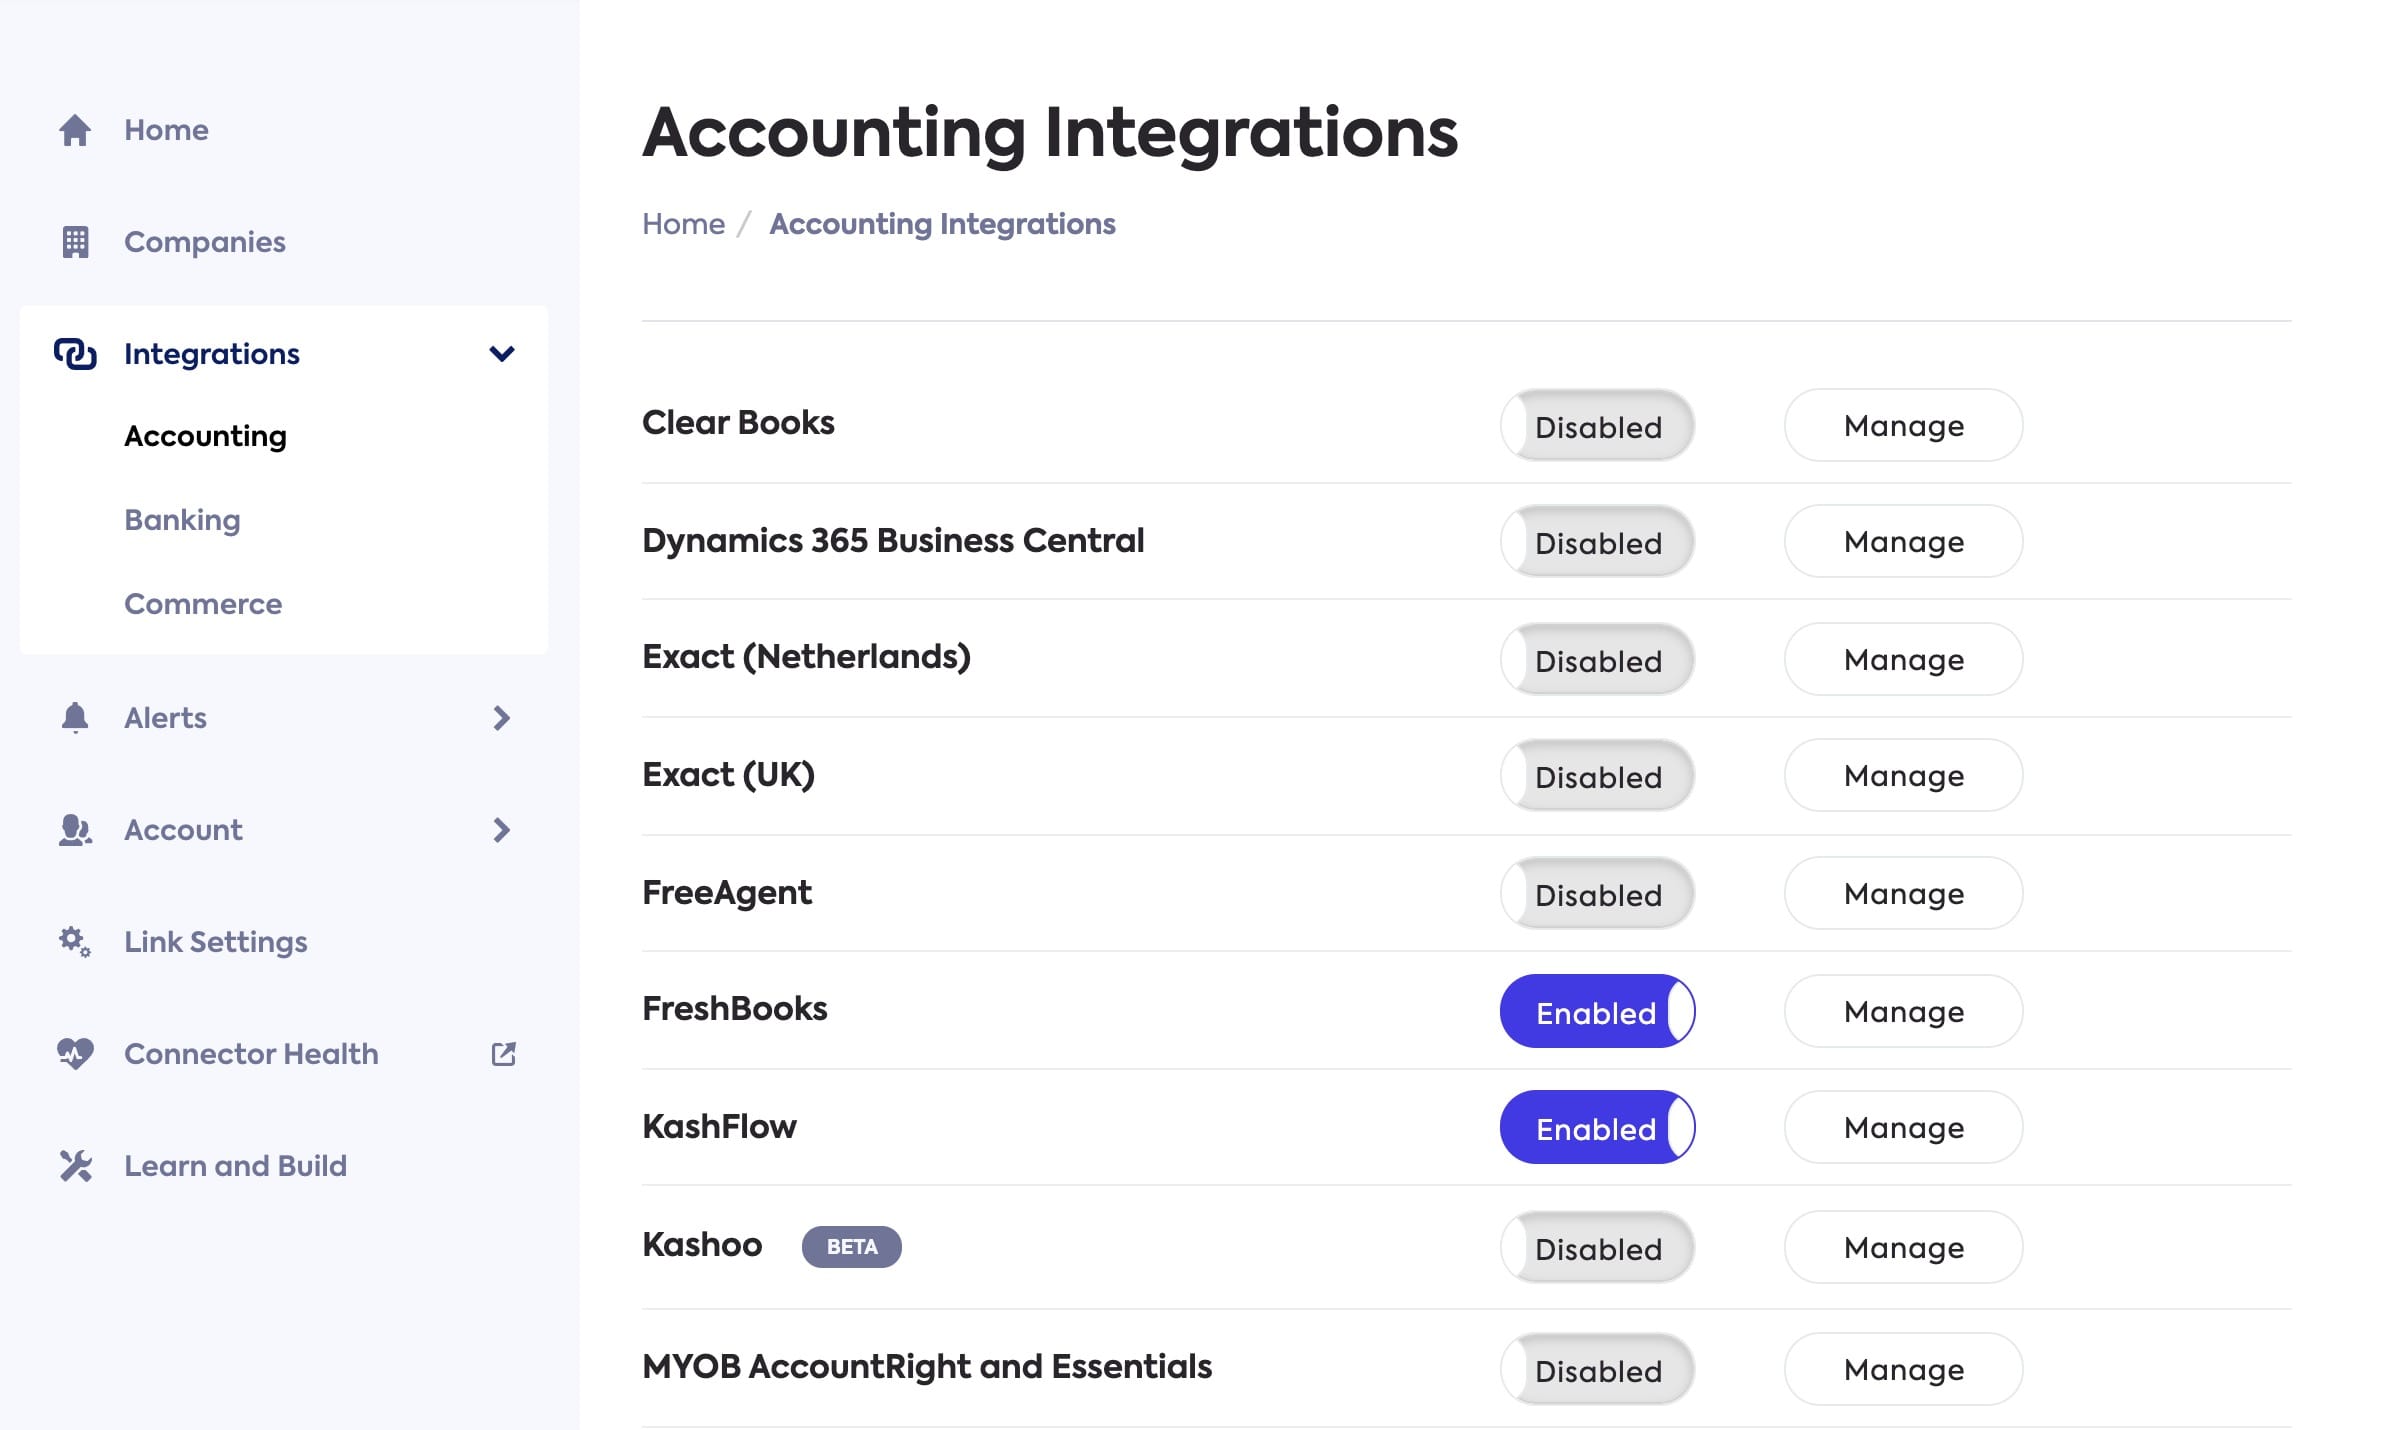
To enable an integration, select the type of integration (this template uses accounting by default) then set any desired toggles to Enabled. You can also click the Manage button to set up Client ID information.
Set up the Authorization Flow in Your Codat Portal
Part of this template redirects from your application to Codat back to Unqork. You'll set up this flow through your Codat portal. You can find this in the Link Settings section of your Codat portal. Here you can customize the flow. This includes adding your brand colors, customizing the text, and turning on a Sandbox integration so you can test your template.
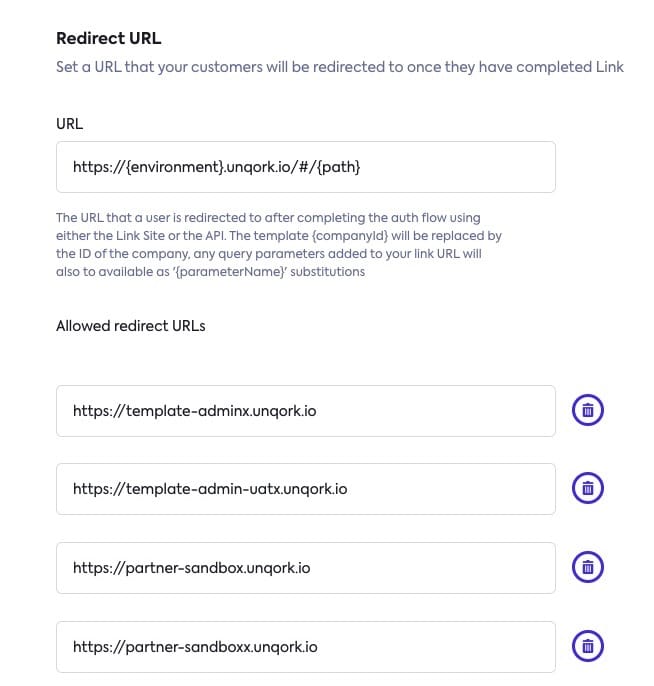
Add Redirect Links
Most importantly, you'll tell Codat where to redirect the end-user to once they complete their connection. You can do this under the Redirect URL header of the Link Settings section.
There is also a section where you enter which redirect URLs you want to allow. These URLs most likely include all your Unqork environments.
Review the Codat documentation to learn more about redirects: docs.codat.io/docs/authentication-redirect.
Update Module IDs in the Front-End Module
Lastly, to get your template running, add the module ID to the Hidden component in the front-end module. This completes the configuration so Codat can redirect the end-user back to your Unqork application.
To set this up:
| 1. | Open up Module Builder for the module Codat: Connect a Source. |
| 2. | Hover over the moduleID Hidden component. |
A 5-button toolbar displays above the component on hover-over.
| 3. | Using the toolbar, click the  (Settings) button. (Settings) button. |
| 4. | In the Default Value field, enter the module ID for your Codat: Connect a Source module. You can easily grab this ID by looking at your current URL as seen in the image below. |

| 5. | Click Save. |
| 6. | Save your module. |
By default this template redirects end-users back to the original module. But, you can configure the template to redirect to any module in your application.
Removing the Template
What if you no longer need this template or the application you built from it?
Removing the Template from Your Environment
You might need to clean your environment and remove unused templates. The Unqork Library makes this easy. To uninstall a template from your environment:
| 1. | At the top right of the Unqork Designer Platform, Click Library. |
| 2. | Click Templates. |
| 3. | Find the template to uninstall. |
| 4. | Click the ellipsis (...) in the template tile header. |
| 5. | Click Uninstall Template. |
| 6. | Click Yes, Uninstall in the confirmation modal. |
You can visit the Marketplace and reinstall the template at any time.
Deleting the Codat Connect Application
If you no longer need the application you created from your template, you can delete it. To delete your application:
| 1. | Navigate to the Apps tab from an open workspace. |
| 2. | Find the application to delete. |
| 3. | Click the ellipsis (...) in the app tile header. |
| 4. | Click Delete. |
| 5. | Retype the provided text. |
| 6. | Click Yes, Delete. |
Removing the Codat Service from Your Environment
To remove your service from your environment:
| 1. | At the top right of the Unqork Designer Platform, click the Settings drop-down. |
| 2. | Click Administration. |
| 3. | Under Integration, select Services Administration. |
| 4. | Scroll down and select the Codat service you want to delete from the Active Services list. |
| 5. | Click the Delete link. You’ll find this above the Active Services list. |
| 6. | At the Delete message, click OK. |
| 7. | At the Success message, click OK. |
What if you have an existing application built from this template and then uninstall the template from your environment? Your existing application remains unaffected. Also, it no longer has any ties to the template. So, let's say you reinstall a newer version of the template in the future. You can rest assured that the installation doesn't impact your existing application
