Lob Address Verification Integration Template
About this Configuration Guide
Using this guide, you'll explore how the Lob Address Verification template works. You'll learn how to install the template to your environment and how to build an application from it.
This template consists of a module and an API (application programming interface) integration. So, you'll also learn how the Lob external service works to validate addresses.
You'll need to set up your Lob account first. You'll do this directly through Lob. When configuring your template, you'll need Lob credentials to link your application with Lob. This grants your environment permission to use the Lob service.
And here's a high-level overview of the modules:
| # | Module | Description |
|---|---|---|
| 1 |
Lob Address Validation (API) |
This API module uses Lob integration to dynamically validate an address in the United States. |
| 2 |
Lob Address Validation |
This module lets you dynamically add an address to validate. It triggers the API module and displays the response. |
All images used in this guide are for illustrative purposes only. Images are subject to change without notice. All images were correct at the time of publication.
Overview
Nothing is more frustrating than when address information is incomplete or incorrect. Incorrect addresses mean you lose money and time when deliveries are unsuccessful. This template helps ensure this never happens to your business. The Lob Address Verification template integrates with Lob to verify an end-user's physical address. It even makes corrections if an address is incomplete or incorrect. The Lob service ensures deliverable addresses and standardizes them based on USPS's Coding Accuracy Support System (CASS).
To learn more about Lob, you can view their documentation here: https://docs.lob.com/#intro.
This is a module integration template. You'll see a service (integration) added to your environment if you build an application from this template. You'll see this in your environment's Services Administration. The service has a layout prepped for your Lob credentials. This also means you can use Lob Address Verification with any application in your environment.
Features
With this template, you can verify deliverable addresses in the United States.
Requirements
To use this template, you must have a Lob account with Address Verification credentials.
What You'll Learn
In this article, you'll learn:
Adding the Template
Before you build an application from this template, you must install the template in your environment. Then, you can visit your Library to build an application from your new template.
Adding the Template to Your Environment
To add the template to your environment:
| 1. | Click the Library drop-down in the top-right corner of the Unqork Designer Platform. |
| 2. | Select Templates. |
| 3. | Click the Marketplace tile. |
You can also access the Marketplace at any time by visiting https://marketplace.unqork.io.
| 4. | Enter Lob Address Verification template in the Search the Listings Directory field. |
| 5. | Click the Lob Address Verification Template tile. |
| 6. | Click Install to Environment. |
| 7. | Click Install Template. |
If you aren't logged in, you'll see a field for Environment URL and a Login button. Enter your environment's URL where you want to install the template. For example: [environmentname.unqork.io]. Click the Login button. Then, return to step 6 and click Install to Environment again. Follow the remaining steps as listed.
Now, you can now use your newly installed template to create an application!
Creating an Application from the Template
After you add the template to your environment, you can use it to create an application. This template creates a module-type application.
| 1. | Click Library in the top-right corner of the Unqork Designer Platform. |
| 2. | Find the Lob Address Verification Template tile. |
| 3. | Click Create App from Template. |
| 4. | Select the destination workspace from the Workspace drop-down. This is where your application will live once created. |
| 5. | Enter your unique App Name. The App Path auto-fills as you type your App Name. |
| 6. | If you want a different App Path, enter it in the App Path field. |
| 7. | Select a preview style from the Style drop-down. A style specifies your application’s appearance in Express View. If left blank, your application uses your environment's default style. |
You'll notice the App Type and App Entrypoint are grayed out. The template automatically takes care of these for you!
| 8. | Click Create App. |
The application opens in the workspace you specified. You'll land on the Modules tab of your application, which lists all modules of this template.
Your new application looks something like this:
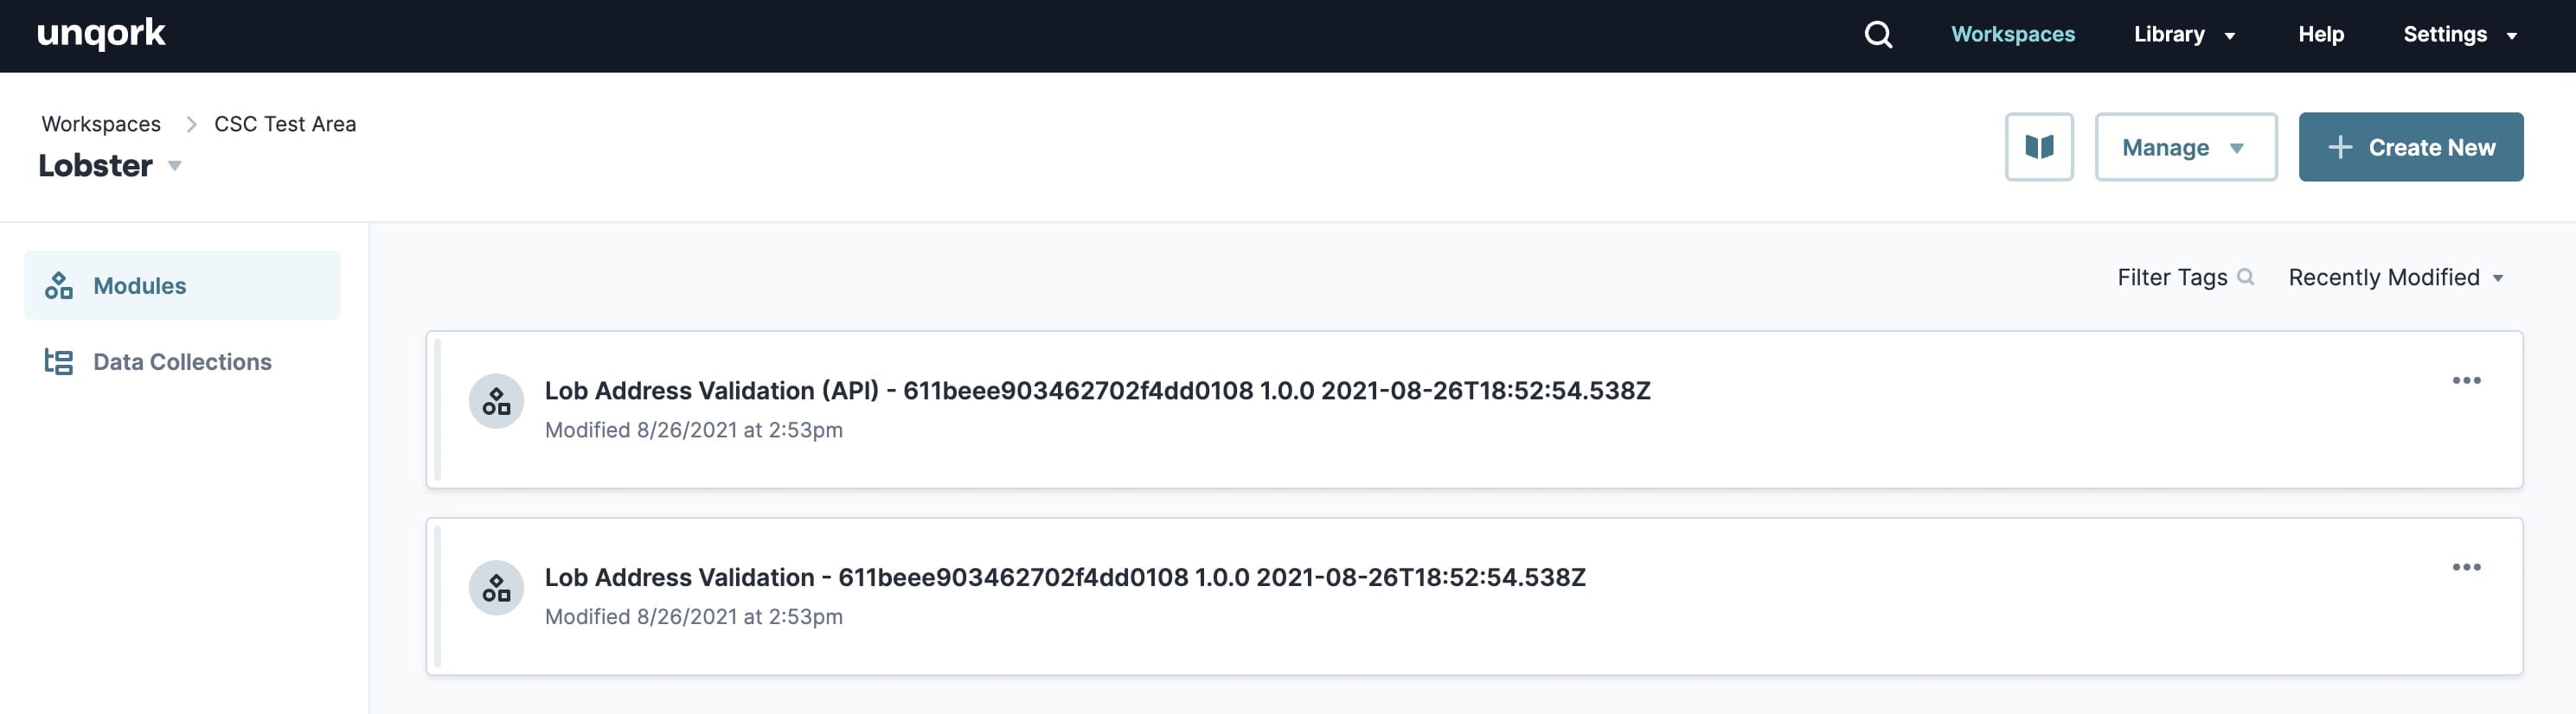
When you create an application from the template, your module names automatically include the template ID and a time stamp. This prevents any duplicate module paths. You can change module names and module paths at any time. Any service or workflow created with your template also has a template ID and time stamp.
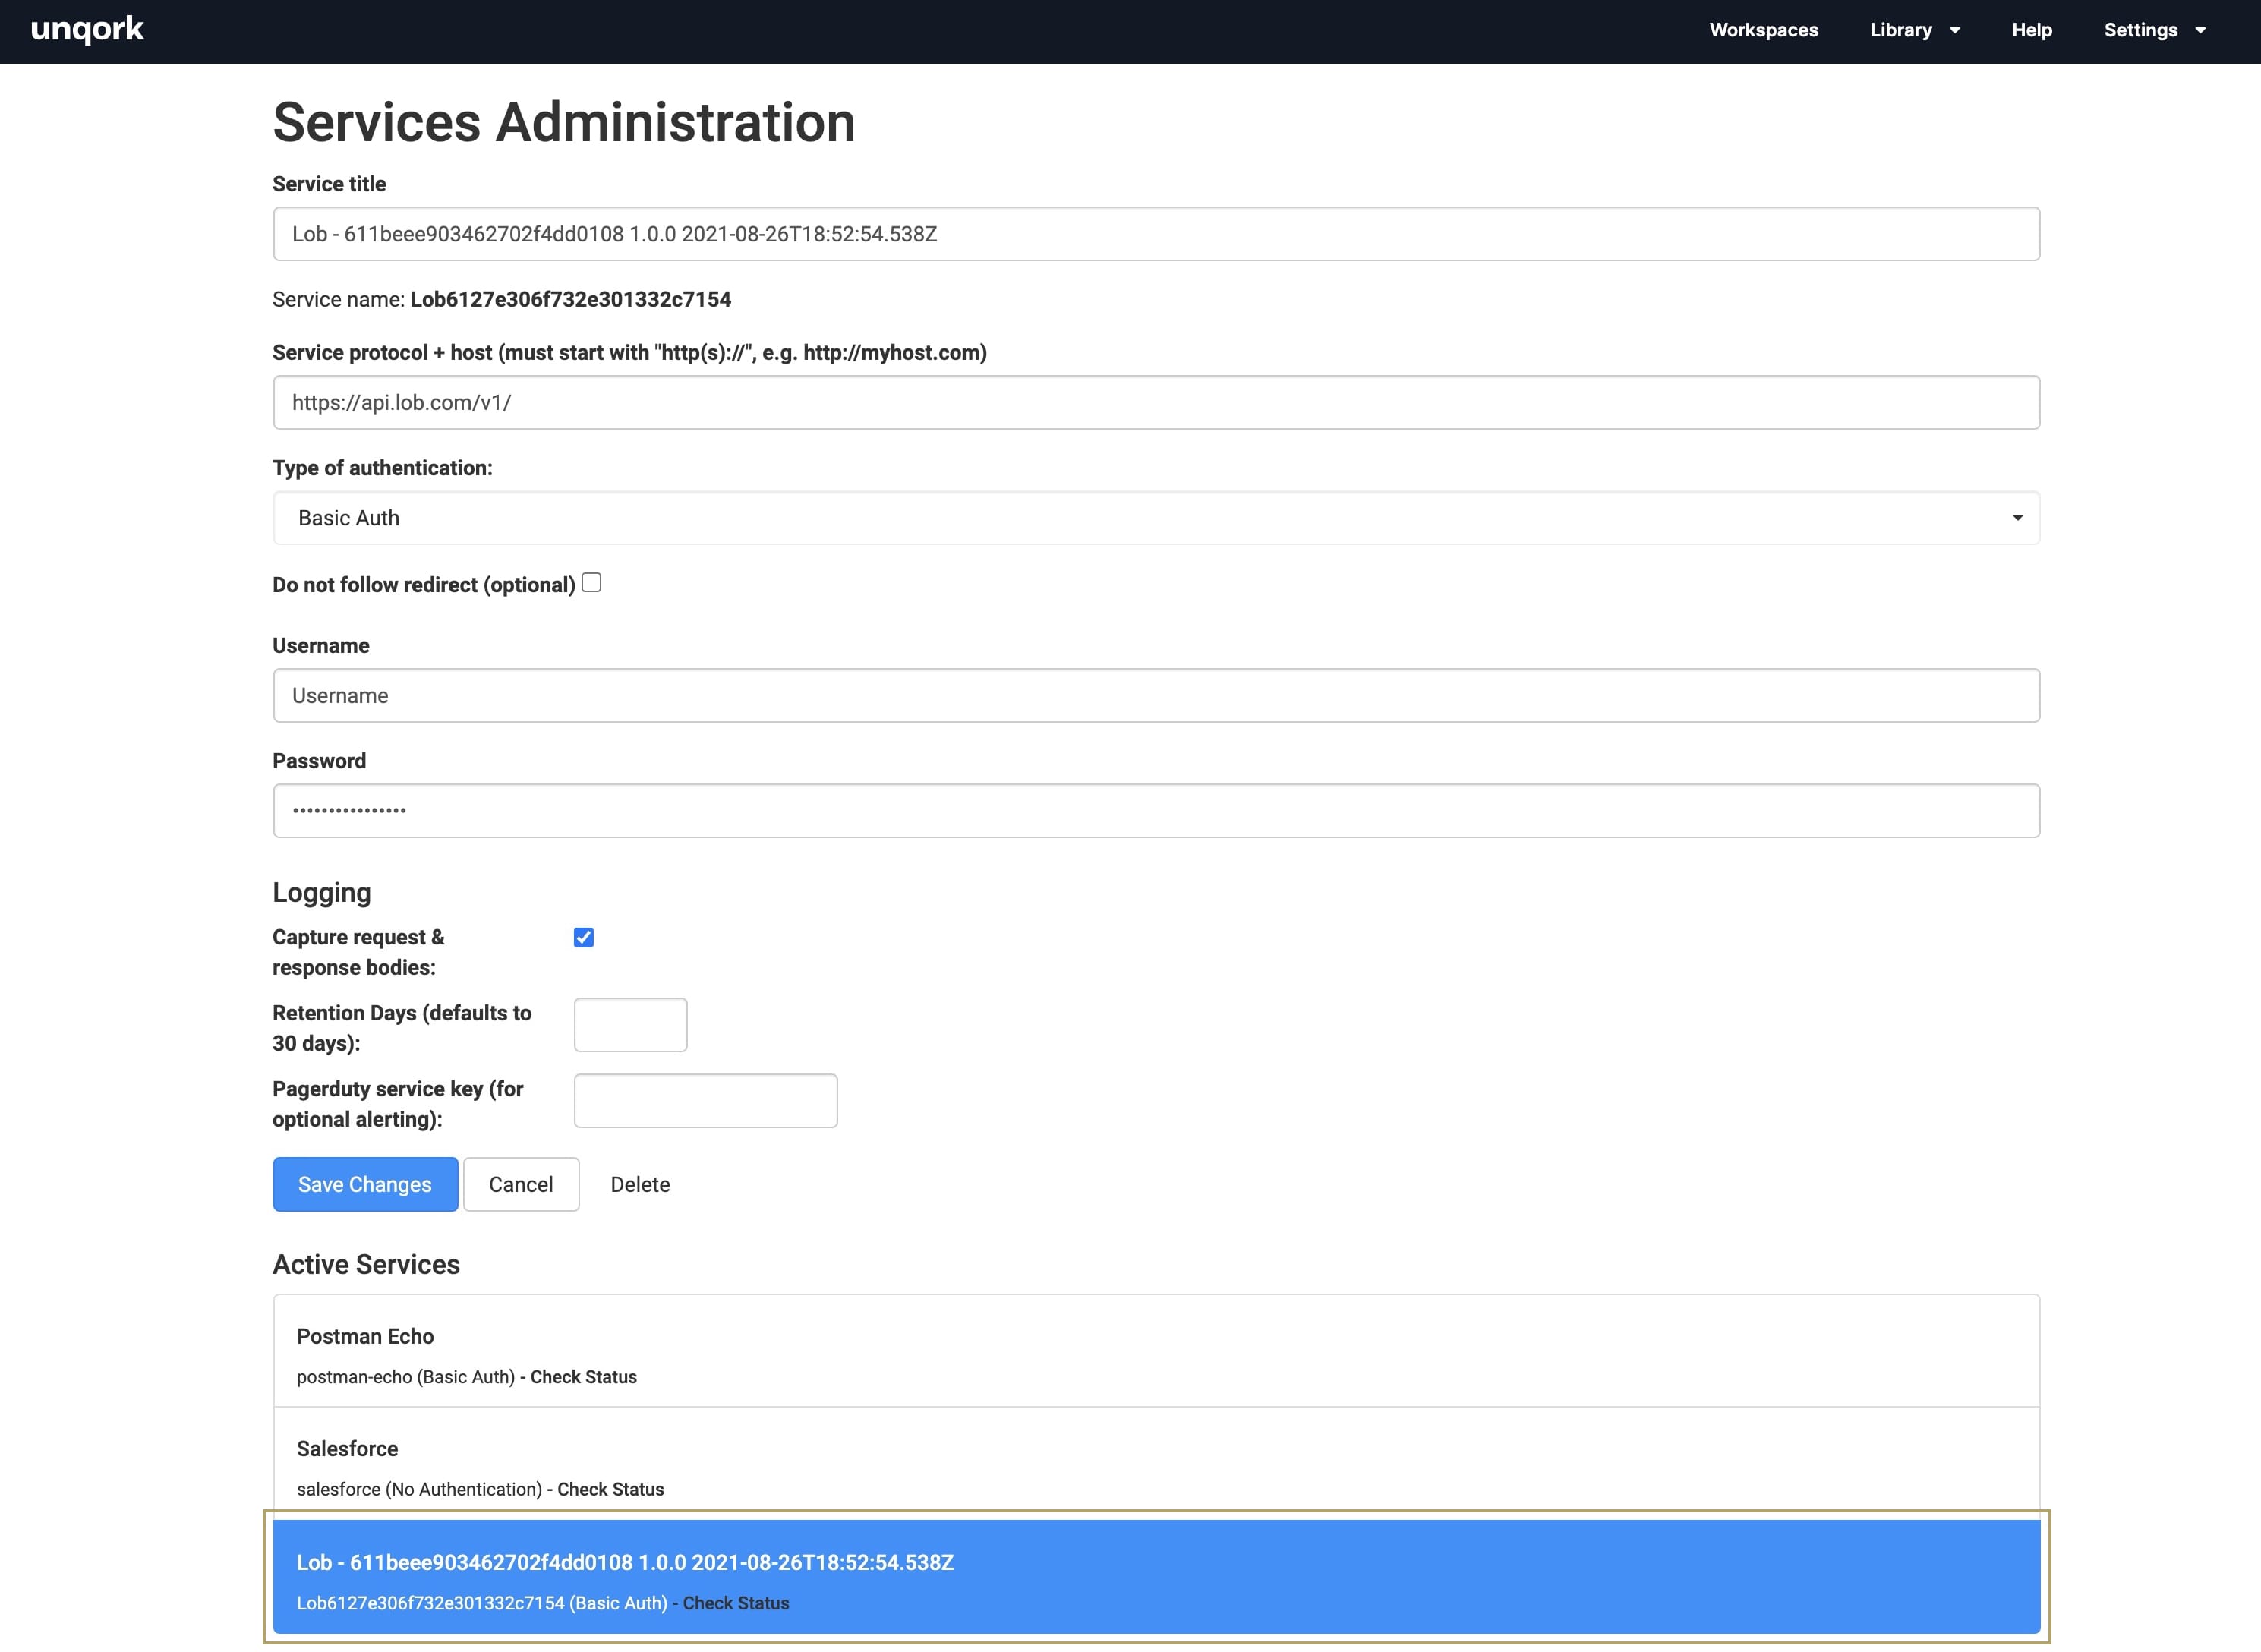
When you create an application from this template, you'll see a new service added to your Services Administration. This service has the correct service protocol and host for Lob. You'll need to update it with your company's Lob account credentials. (You'll get those credentials when you set up your account directly through Lob.) You'll learn how to link your environment to Lob in the Configuring the Template section.
Here's an example of a Lob service in Services Administration:
How the Template Works
As the name suggests, a module integration template has modules and an integration. An integration is a service external to Unqork. Here, the service is a Lob API that verifies an address entered by an end-user. You'll set up your Lob account directly through Lob. Your API keys generate automatically after creating your Lob account.
When you create an application from this template, you’ll get:
-
A new service in Services Administration with the correct service protocol and host for Lob.
-
A module-type app with 2 modules.
Let's take a look at how the Lob service and modules work.
How the Lob Service Works
Lob is a service that uses an API call to verify addresses entered by end-users. You'll use this service to confirm an entered address is to a deliverable location.
You'll set up your Lob account directly through Lob. Then, you'll create an application from the Lob Address Verification template. The template adds a service to your environment that has the correct setup for Lob. After some basic service configuration, your application is ready to go.
How the Lob Address Verification Module Works
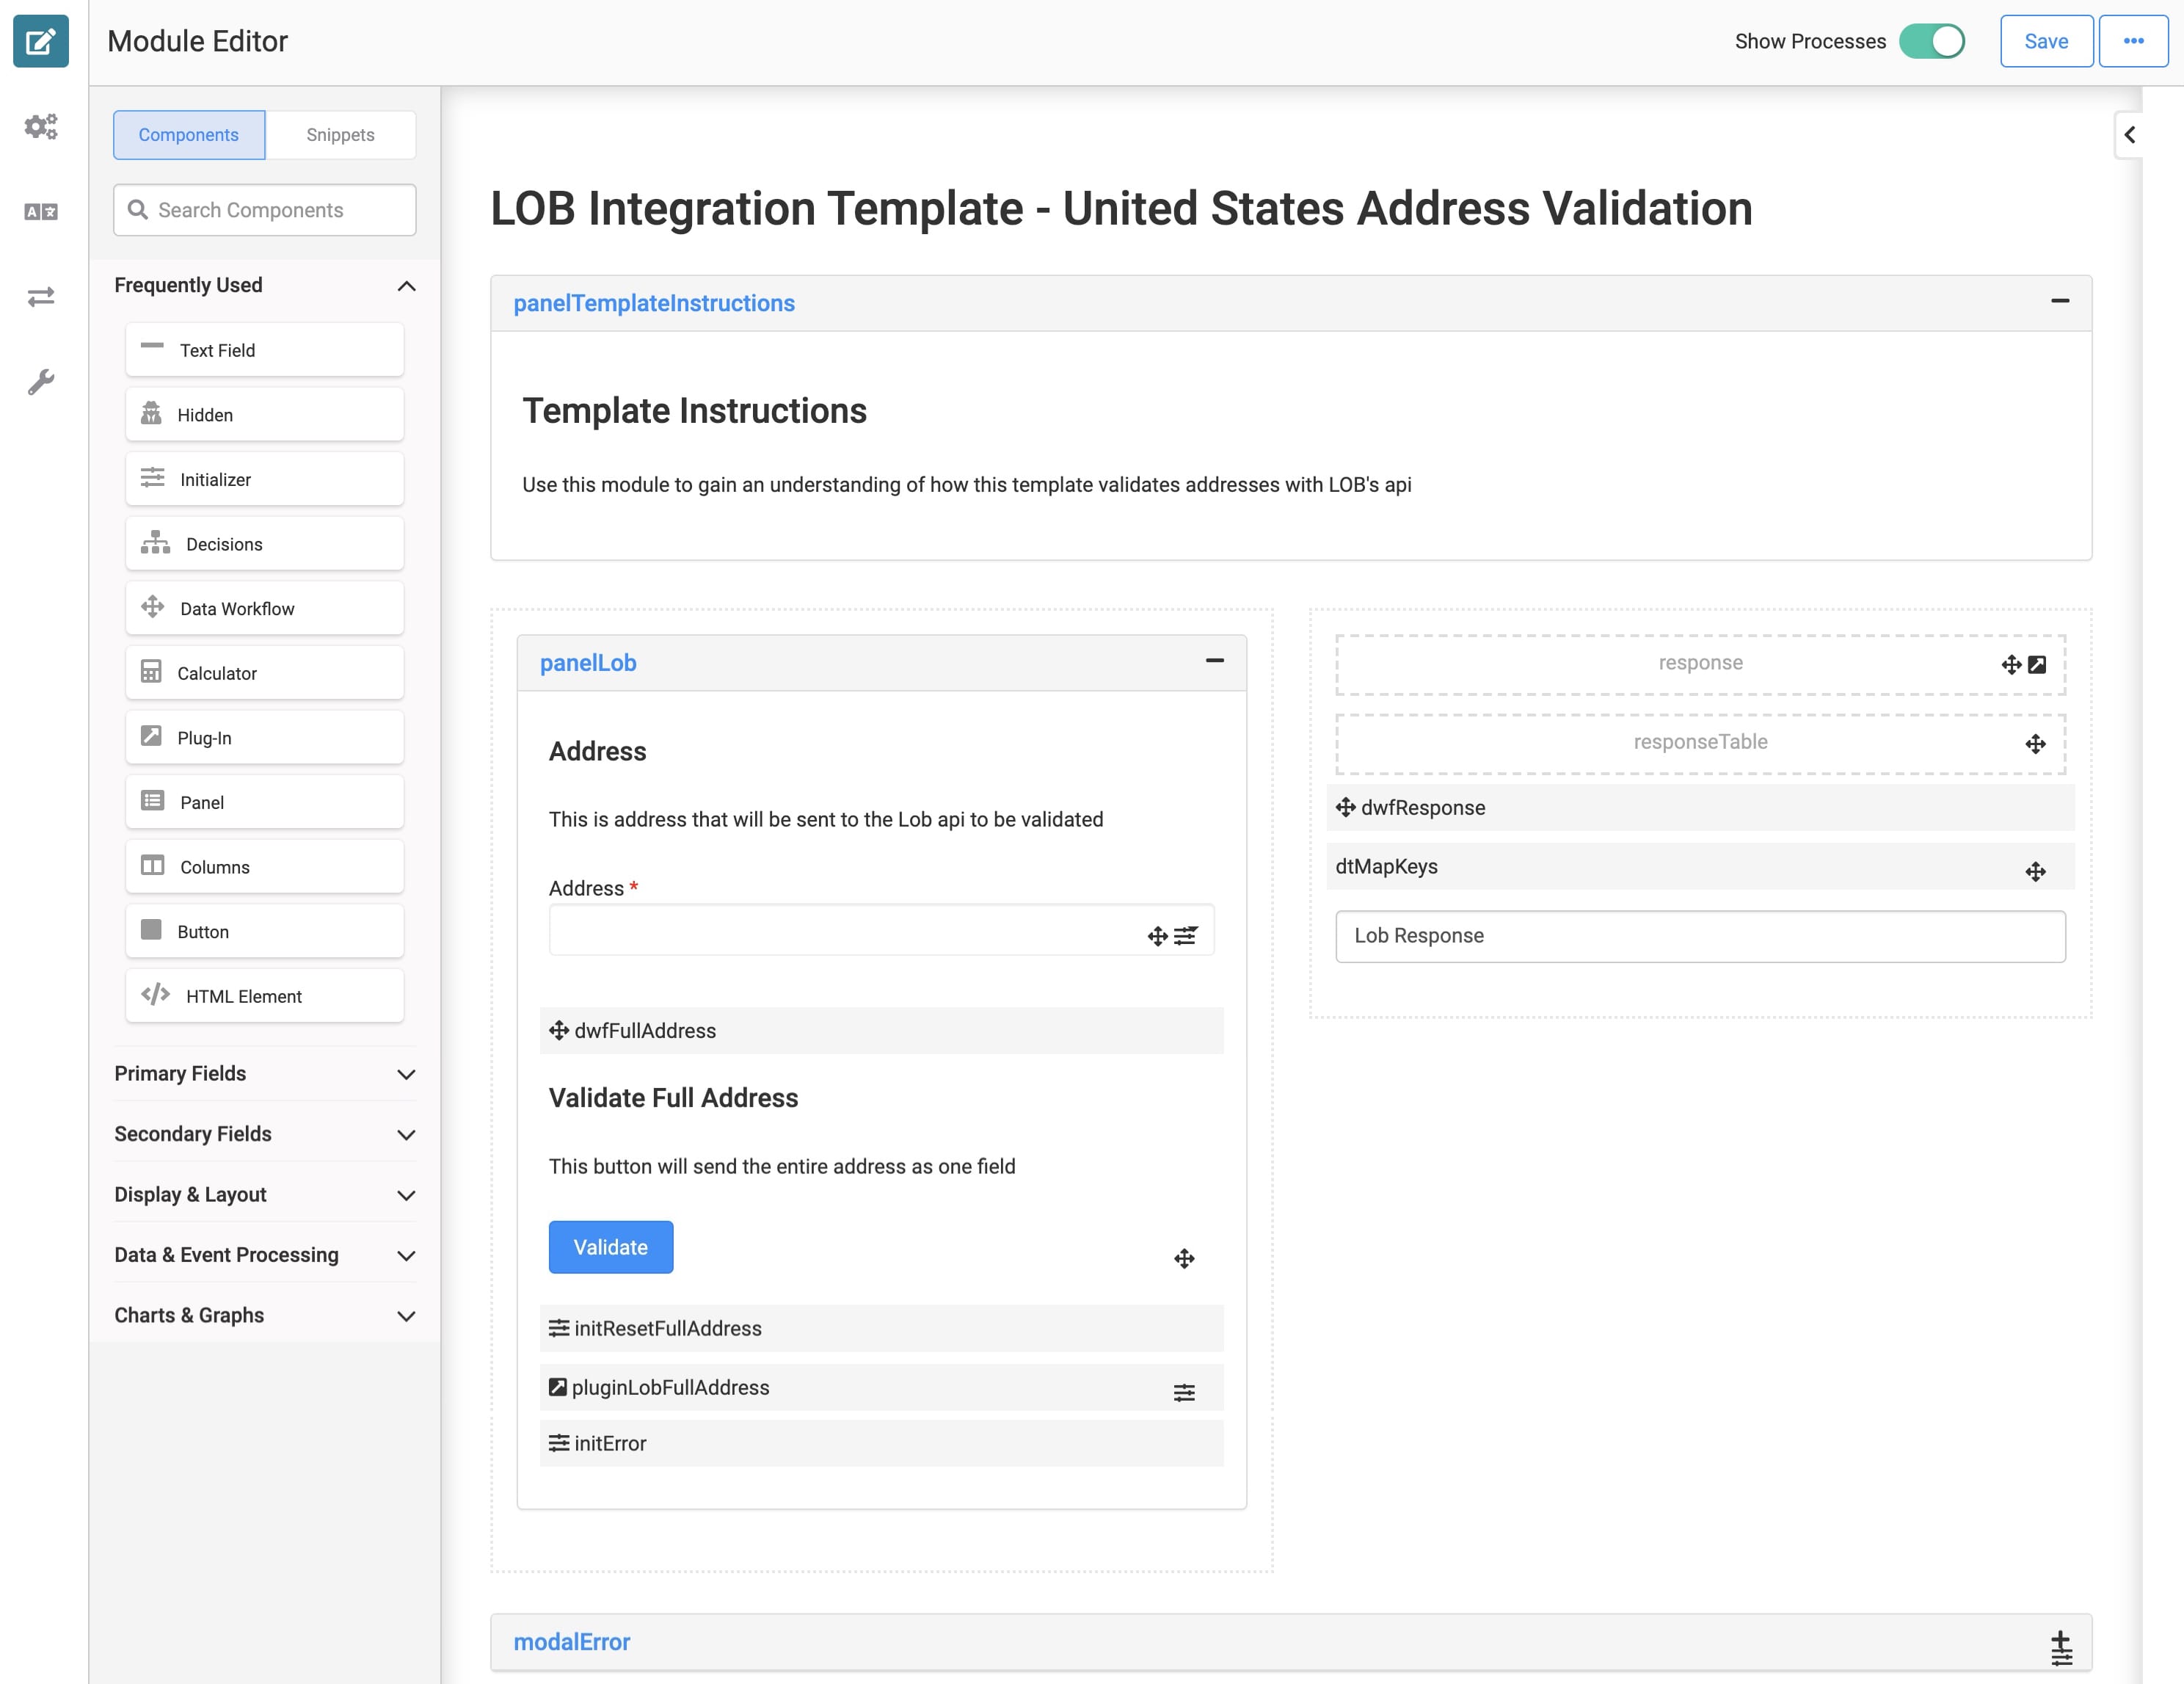
This simple Express View module lets an end-user enter a full address in the Address field. To make the process even easier, an Address component provides options as the end-user enters the address. After entering the full address, the end-user clicks Validate. This triggers an API module to send the address to Lob for verification. The response displays in a table. In this table, you can view the correct and/or corrected address.
Here's how the module looks in the Module Builder:
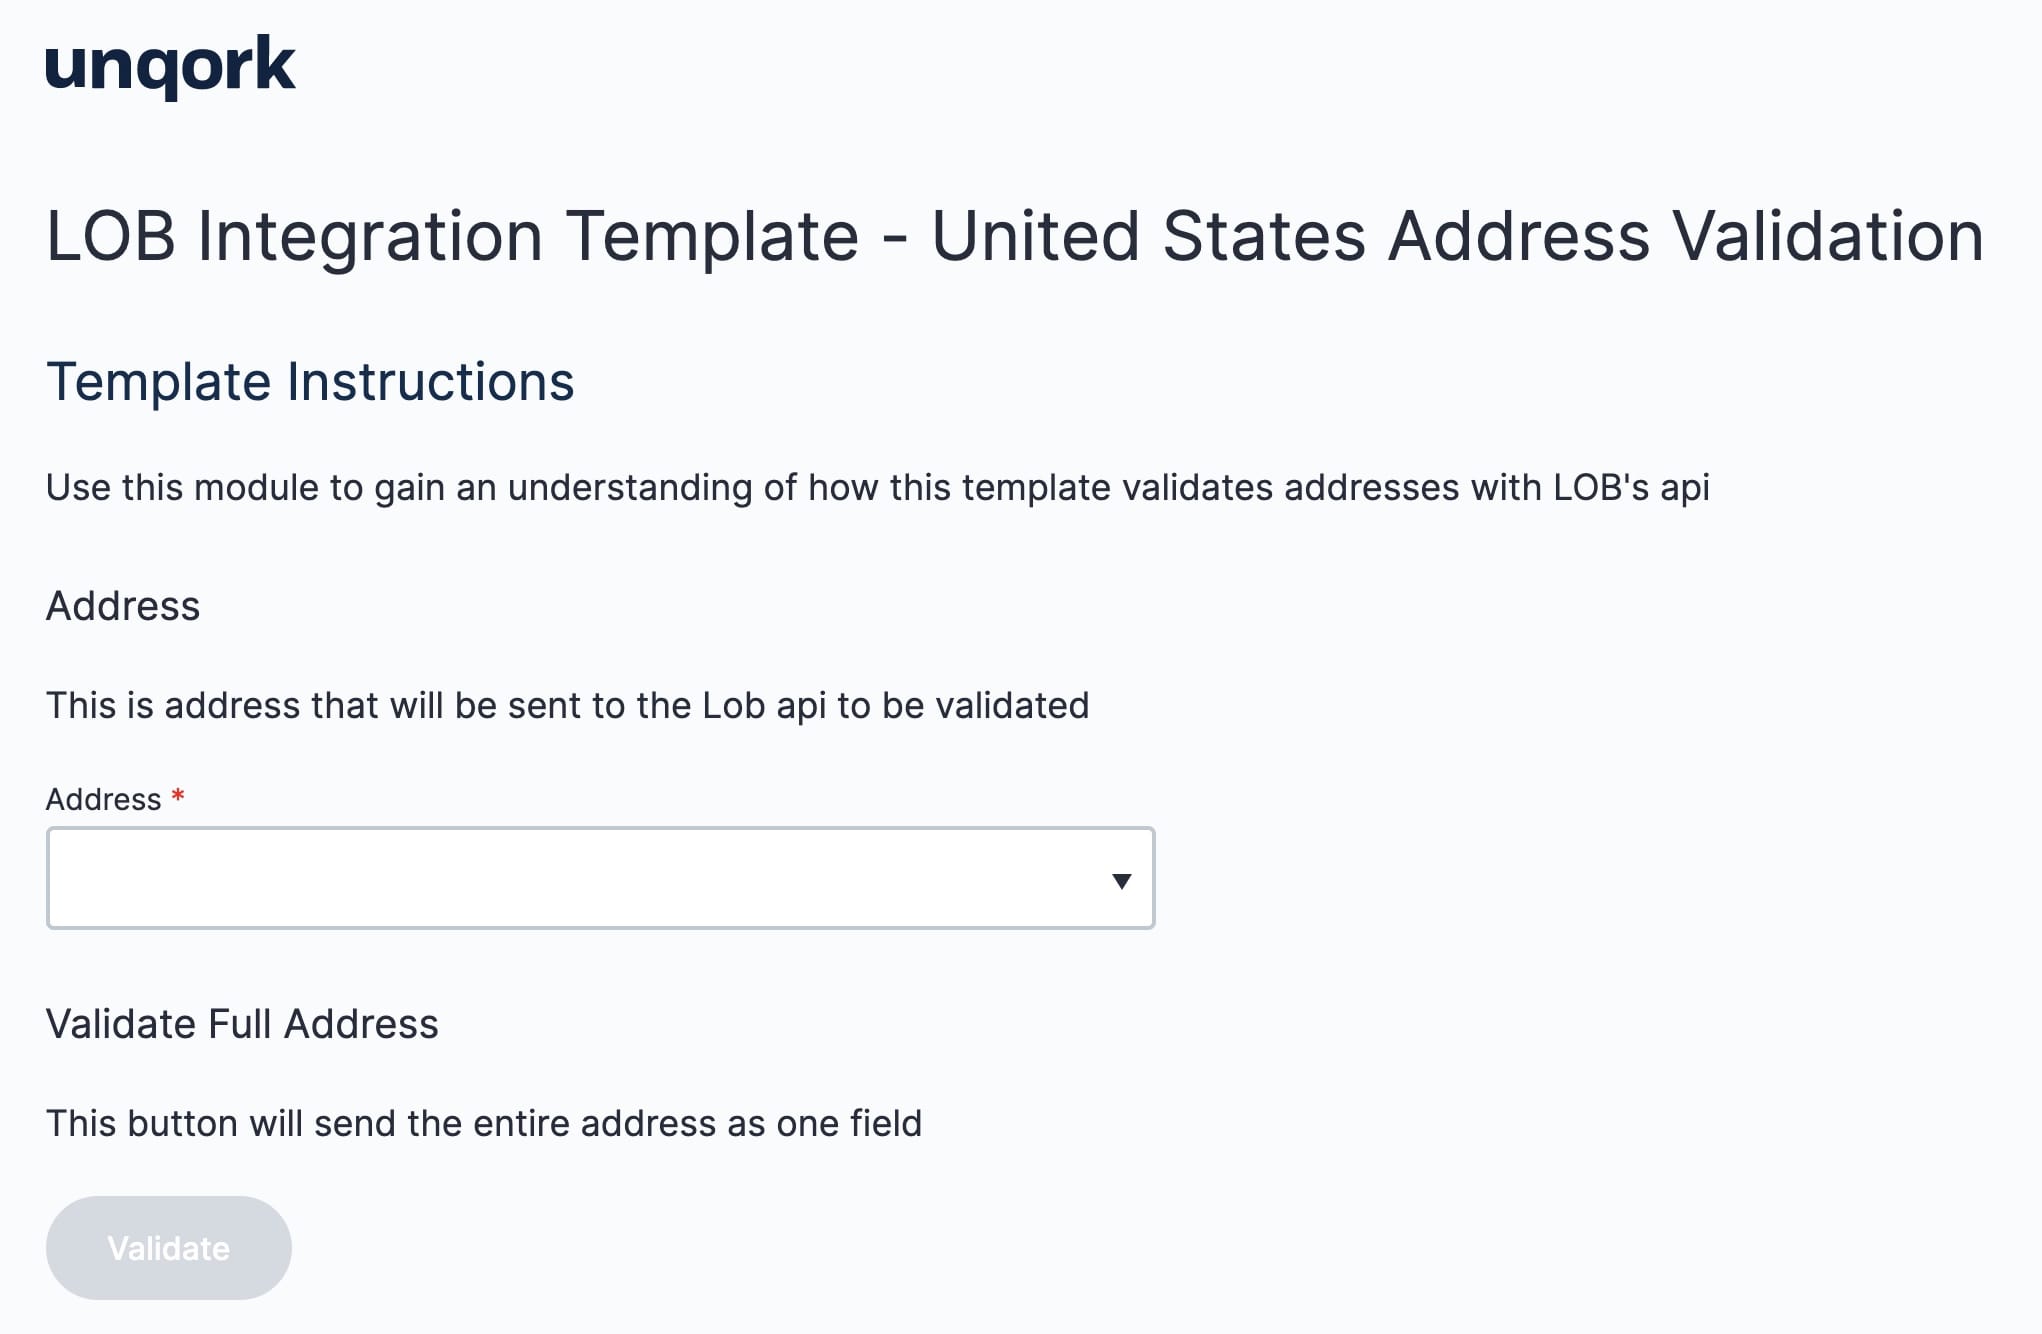
Here's how the module looks in Express View:
How the Lob Address Verification (API) Module Works
The Lob Address Verification (API) module does all the hard work for the template. After the end-user clicks Validate in the previous module, the API module fires. It sends the full address to Lob for verification. Lob sends a response back to the Lob Address Verification module. Then, the address information displays on the Express View dashboard.
Here's how the module looks in the Module Builder:
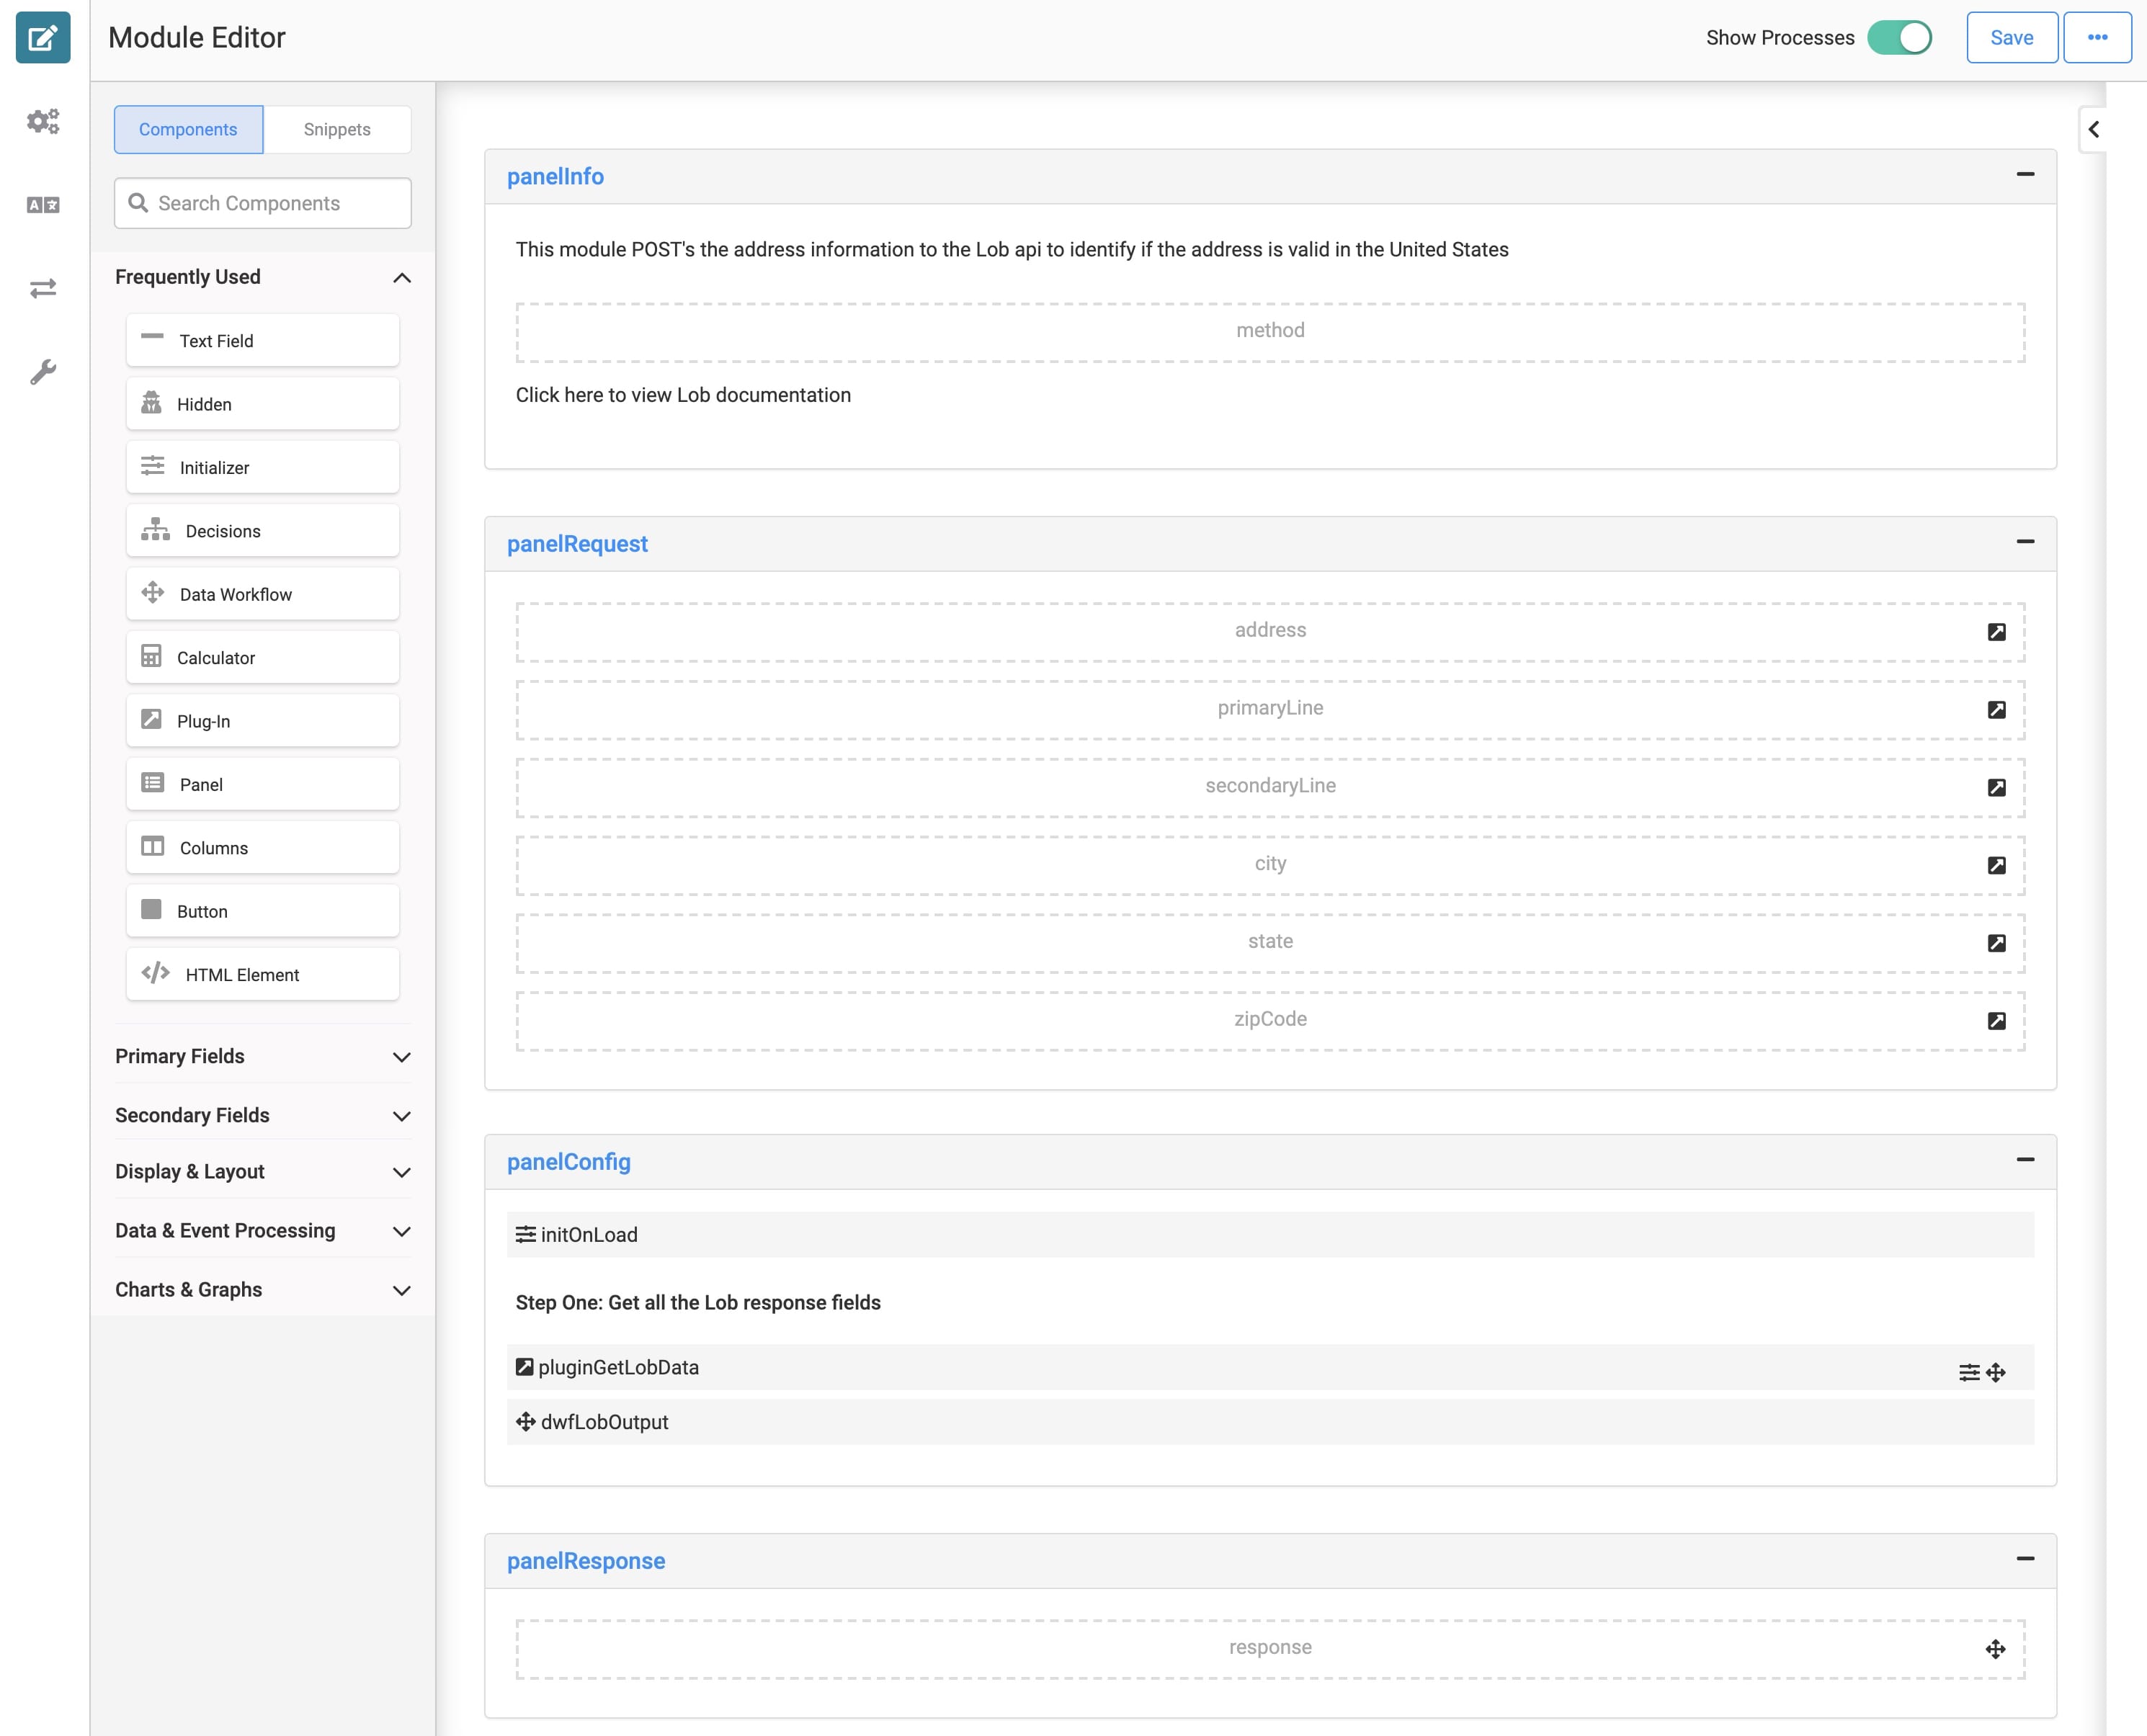
You'll see various Hidden components in the panelRequest Panel. These Hidden components store the different address fields. The address fields include primary and secondary address lines, city, state, and zip code. The Lob Address Verification module's Plug-In maps to these Hidden components. From there, this API module communicates with Lob to verify the accuracy of the address.
Configuring the Template
Once you create an application from this template, you'll need to update some configurations. To use the template, you'll update your Lob service in Services Administration. You'll need 2 API keys from Lob to make the service work. You'll need the Publishable (username) key and the Secret (password) key. Let's look at the configuration in more detail.
Configuring the Lob Service in Services Administration
First, log in to your Lob account to retrieve your keys:
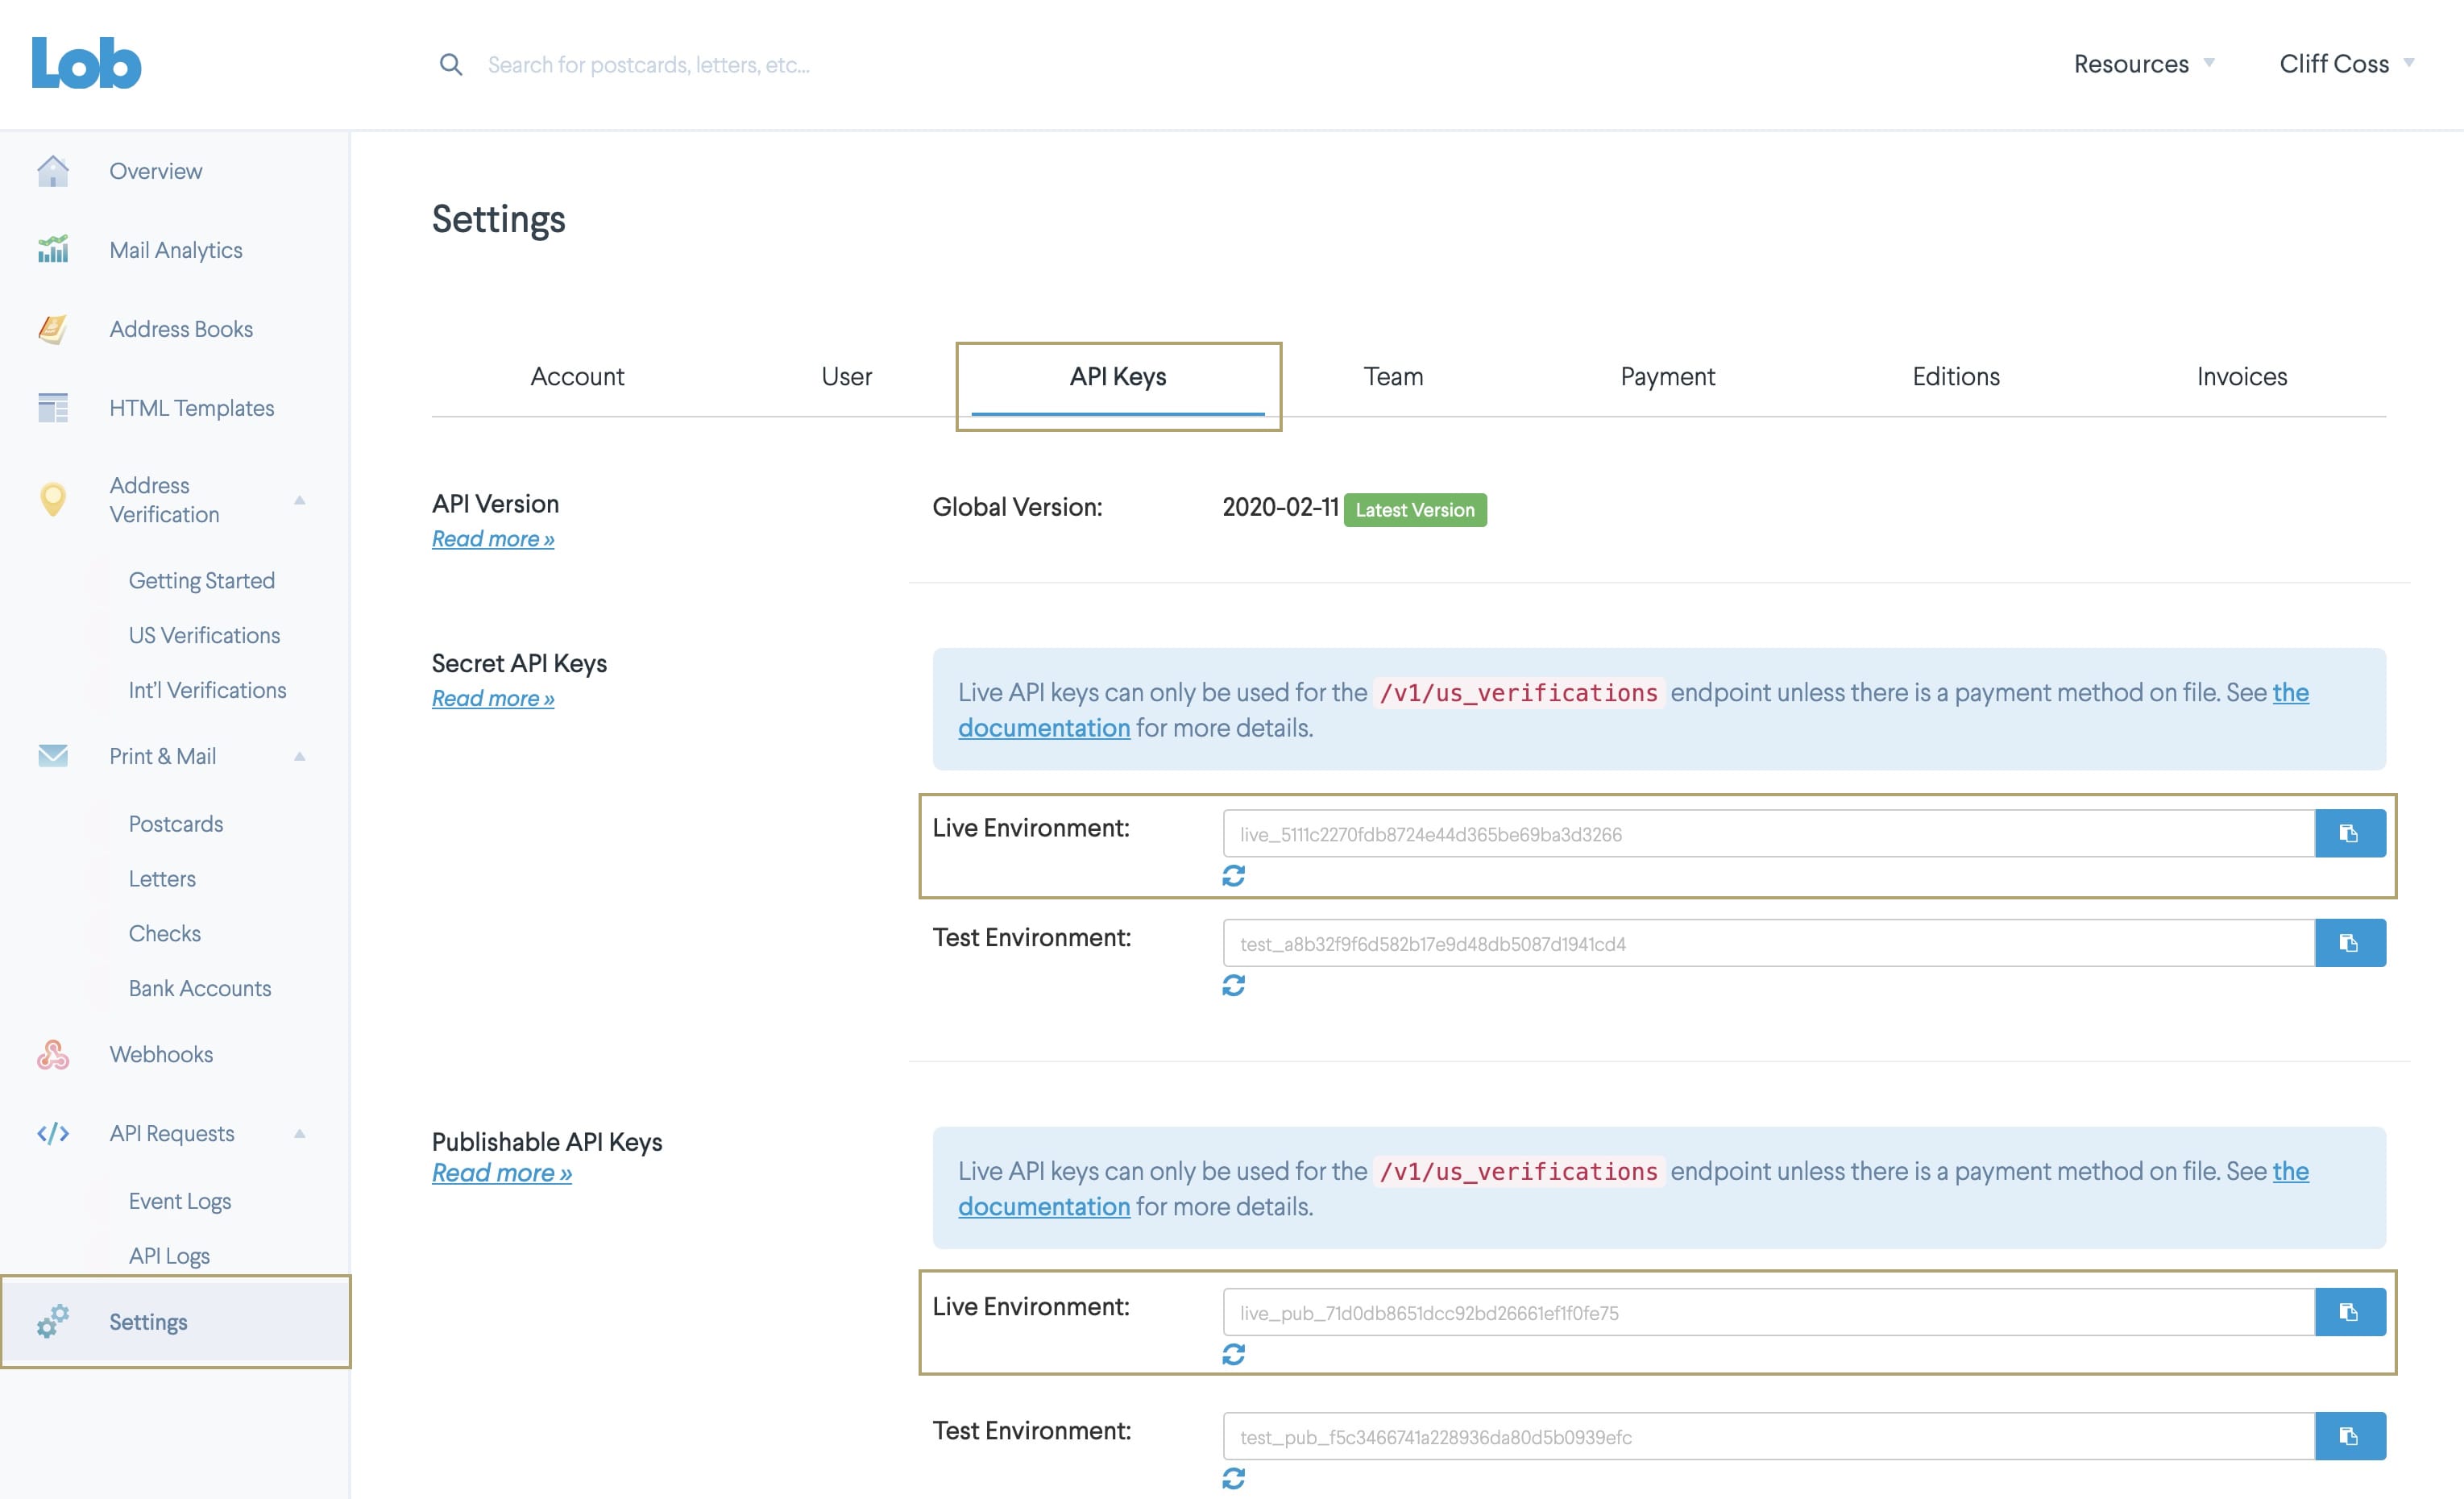
| 1. | Click Settings in the bottom-left corner of your Lob Dashboard. |
| 2. | Click API Keys. |
| 3. | In the Secret API Keys section, copy the Live Environment key. The key looks like this: live_{{unique secret API key}}. This is your password. |
| 4. | In the Publishable API Keys section, copy the Live Environment key. The key looks like this: live_pub_{{unique publishable API key}}. This is your username. |
Now that you've located your keys, add them to your Lob service in Services Administration.
To access Services Administration:
| 1. | Click the Settings drop-down in the top-right corner of the Unqork Designer Platform. |
| 2. | Click Administration. |
| 3. | Under Integration, select Services Administration. |
Next, you'll need to find and update the Lob service:
| 1. | Scroll to the bottom of your Active Services list. |
| 2. | Click your Lob service. |
The title is something like this: Lob - 611beee903462702f4dd0108 1.0.0 2021-08-26T14:37:26.852Z. What if your environment has more than one Lob service? Here's a trick. Look for the service with the same template ID and time stamp as your template's modules.
| 3. | Scroll to the top of the page. |
| 4. | In the Username field, paste Lob's Publishable API Key. |
| 5. | In the Password field, paste Lob's Secret API Key. |
| 6. | Select the Capture request & response bodies checkbox if you want to capture this information. |
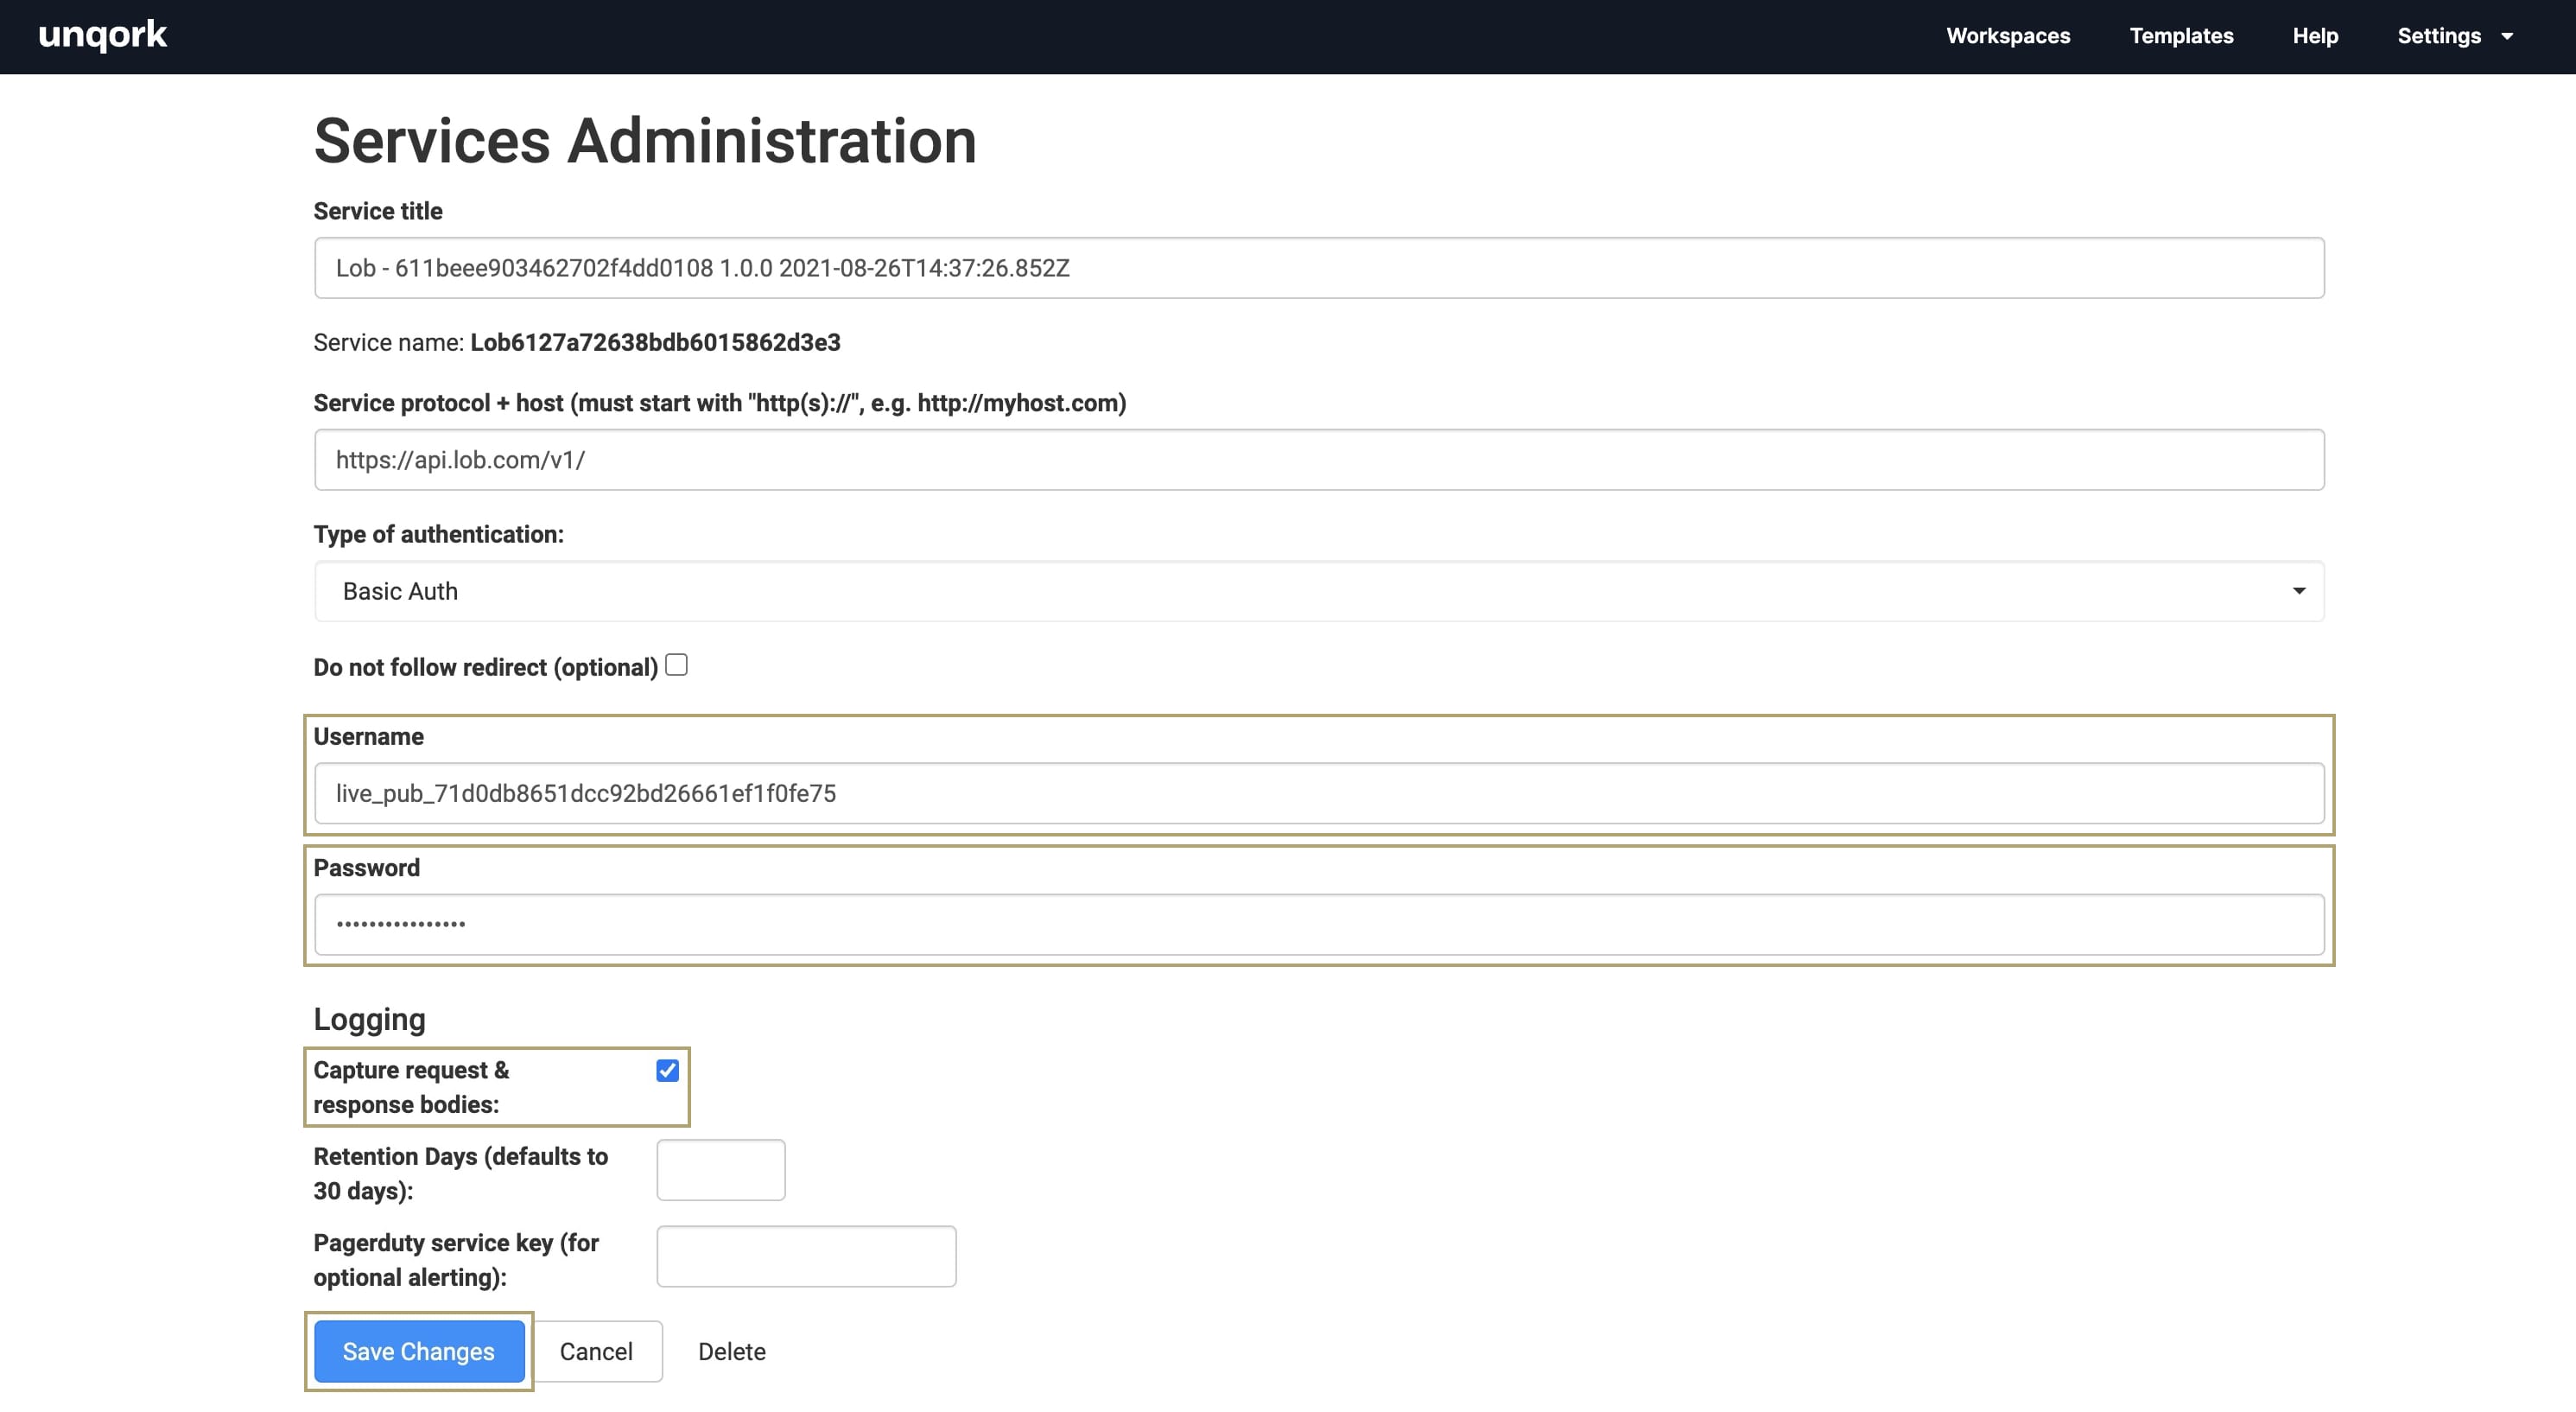
| 7. | Click Save Changes. |
Testing the Template
Now, let's test your template. Open the Lob Address Verification module in Express View. Enter an address in the Address field. Click Validate. The API response object displays on the dashboard. Right away, you can confirm if the address is valid and a deliverable location. Use the pagination at the bottom of the table to see all information about this address.

Removing the Template
What if you no longer need this template or the application you built from it? There are 2 parts to removing this template. First, you'll uninstall it from your environment. Then you'll delete the application you created from the template. These steps are easy, and you can do them in any order.
Removing the Template from Your Environment
You might need to clean your environment and remove unused templates. The Unqork Library makes this easy. To uninstall a template from your environment:
| 1. | At the top right of the Unqork Designer Platform, click Library. |
| 2. | Find the template to uninstall. |
| 3. | Click the ellipsis (...) in the template tile header. |
| 4. | Click Uninstall Template. |
| 5. | Click Yes, Uninstall in the confirmation modal. |
You can visit the Marketplace and reinstall the template at any time.
What if you have an existing application built from this template and then uninstall the template from your environment? Your existing application remains unaffected. Also, it no longer has any ties to the template. So, let's say you reinstall a newer version of the template in the future. You can rest assured that the installation doesn't impact your existing application.
Deleting Your Application
If you no longer need the application you created from your template, you can delete it. To delete your application:
| 1. | Navigate to the Apps tab from an open workspace. |
| 2. | Find the application to delete. |
| 3. | Click the ellipsis (...) in the app tile header. |
| 4. | Click Delete. |
| 5. | Retype the provided text. |
| 6. | Click Yes, Delete. |
