About this Configuration Guide
This guide covers setting up the Carpe Data Minerva module integration template. Using this guide, you'll explore how the Carpe Data Minerva template works. You'll learn how to install the template to your environment and how to build an application from it. Plus, you'll see how to customize your application to fit your needs.
You must set up your Carpe Data account directly through Carpe Data. When configuring your template, enter your Carpe Data credentials to grant your environment permission to use Carpe Data.
Here's a high-level overview of the modules:
Title | Element Type | Description |
|---|---|---|
Carpe Data Integration | Module | This module does two things. First, it lets the end-user add an address. After validating it, this module triggers the API module and displays a company's risk factors, indexes, and scores. |
Carpe Data Integration (API) | Module | This API module uses the Carpe Data integration to dynamically populate a business's insurance risk factors. |
Carpe Data Minerva | Service | The Minerva service helps better classify & evaluate commercial risk. Carpe Data supplies insurers with emerging and alternative data spanning social media, online content, and everything in between. They provide modern insights into underwriting and claims management. |
All images used in this guide are for illustrative purposes only. Images are subject to change without notice. All images are correct at the time of publication.
Overview
This template uses Carpe Data Minerva so you can learn risk information about a company you want to insure. For example, let's say a restaurant applies for employee compensation. Using this template, all you have to do is enter the restaurant's business address. From there, you can see information that helps you decide whether to insure the restaurant — their latest health and sanitation score, building accessibility, types of employees, and more.
This is a module integration template. So, when you build an application from this template, it also adds a service (integration) to your environment in Services Administration. The service has a layout prepped for your Carpe Data Minerva credentials. You'll learn more about this later in the article.
Features
With this template, you can:
Look up and validate a company's address.
Populate factors and indexes from Carpe Data Minerva to help determine a company's risk level.
Requirements
To use this template, you must have:
Administrator-level access to an Unqork environment.
An active Carpe Data account.
Adding the Template
Before you can build an application from this template, you must install the template to your environment. Then, you can visit your Library and build an application from your new template.
Adding the Template to Your Environment
To add the template to your environment:
Click Marketplace at the top right of the Unqork Designer Platform.
You can also access the Marketplace at any time by visiting https://marketplace.unqork.io.
Enter Carpe Data in the Search the Marketplace field.
Click the Carpe Data Minerva Integration tile.
Click Install to Environment.
Click Install Template.
If you aren't logged in, a field for Environment URL and a Login button displays. Enter your environment's URL where you want to install the template. For example: [environmentname.unqork.io]. Click the Login button. Then, return to step 4 and click Install to Environment again. Follow the remaining steps as listed.
Now, you can now use your newly-installed template to create an application.
Creating an Application from the Template
After you add the template to your environment from Marketplace, you can use it to create an application. This template creates a module-type application.
Click Library at the top right of the Unqork Designer Platform.
Click Templates.
Find the Carpe Data template tile.
Click Create App from Template.
Choose the destination workspace from the Workspace drop-down. This is where your application lives once created.
Enter your unique App Name. The App Path auto-fills as you type your App Name.
If you want a different App Path, enter it in the App Path field.
Select a preview style from the Style drop-down. A style specifies your application’s appearance in Express View. If left blank, your application uses your environment's default style.
The App Type and App Entrypoint are grayed out. The template automatically takes care of these for you.
Click Create App.
The application opens in the workspace you specified. You land on the Modules tab of your application, which lists all modules of this template.
Your new application looks like this:
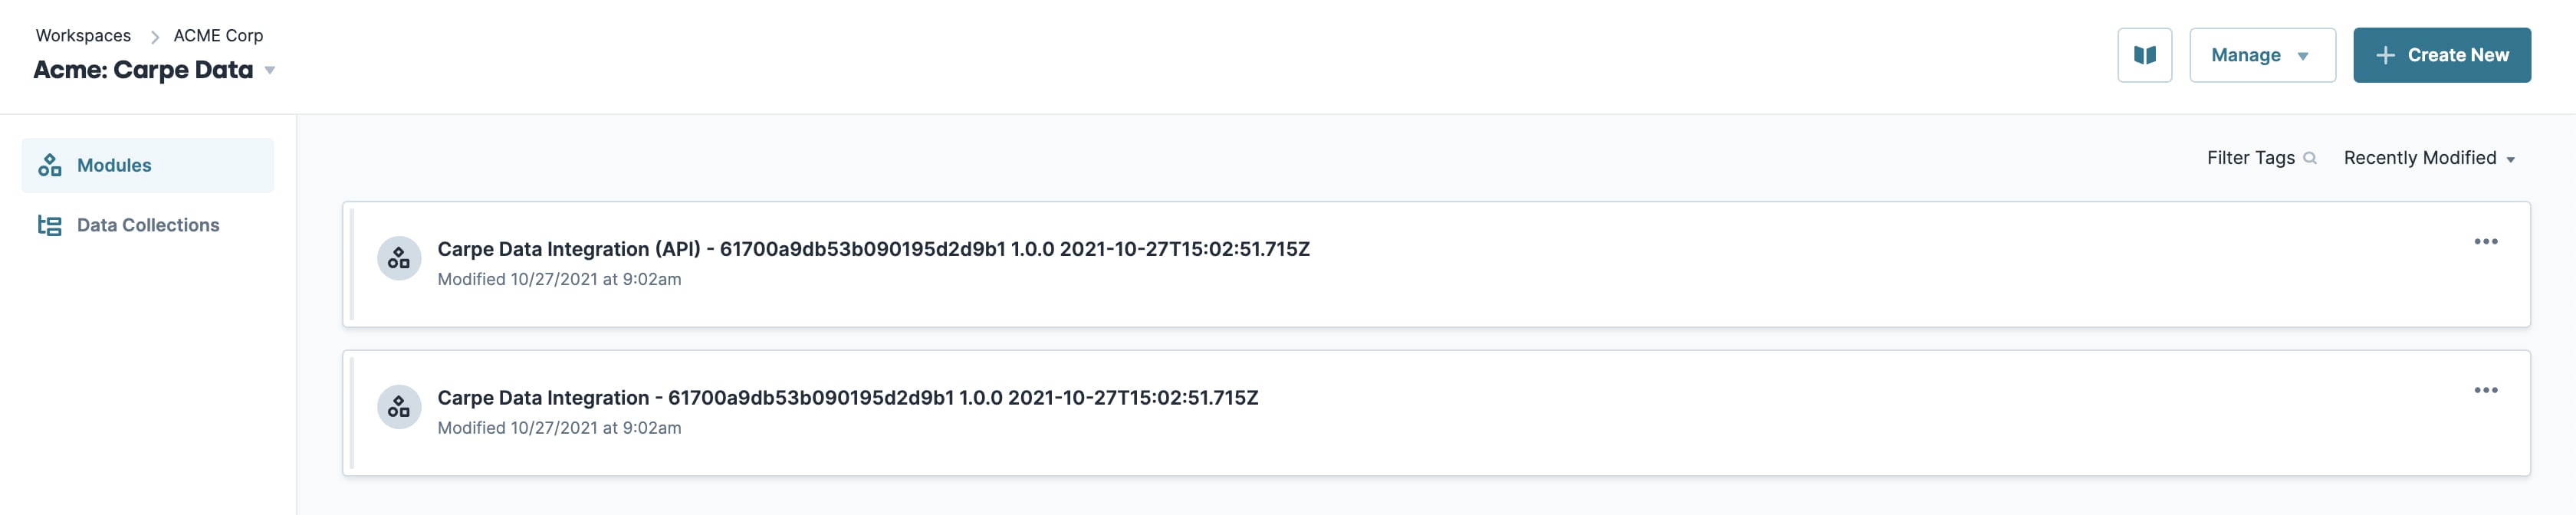
When you create an application from the template, your module names automatically include the template ID and a time stamp. This is to prevent any duplicate module paths. You can change module names and module paths at any time. Any service or workflow you create with your template also has a template ID and time stamp.
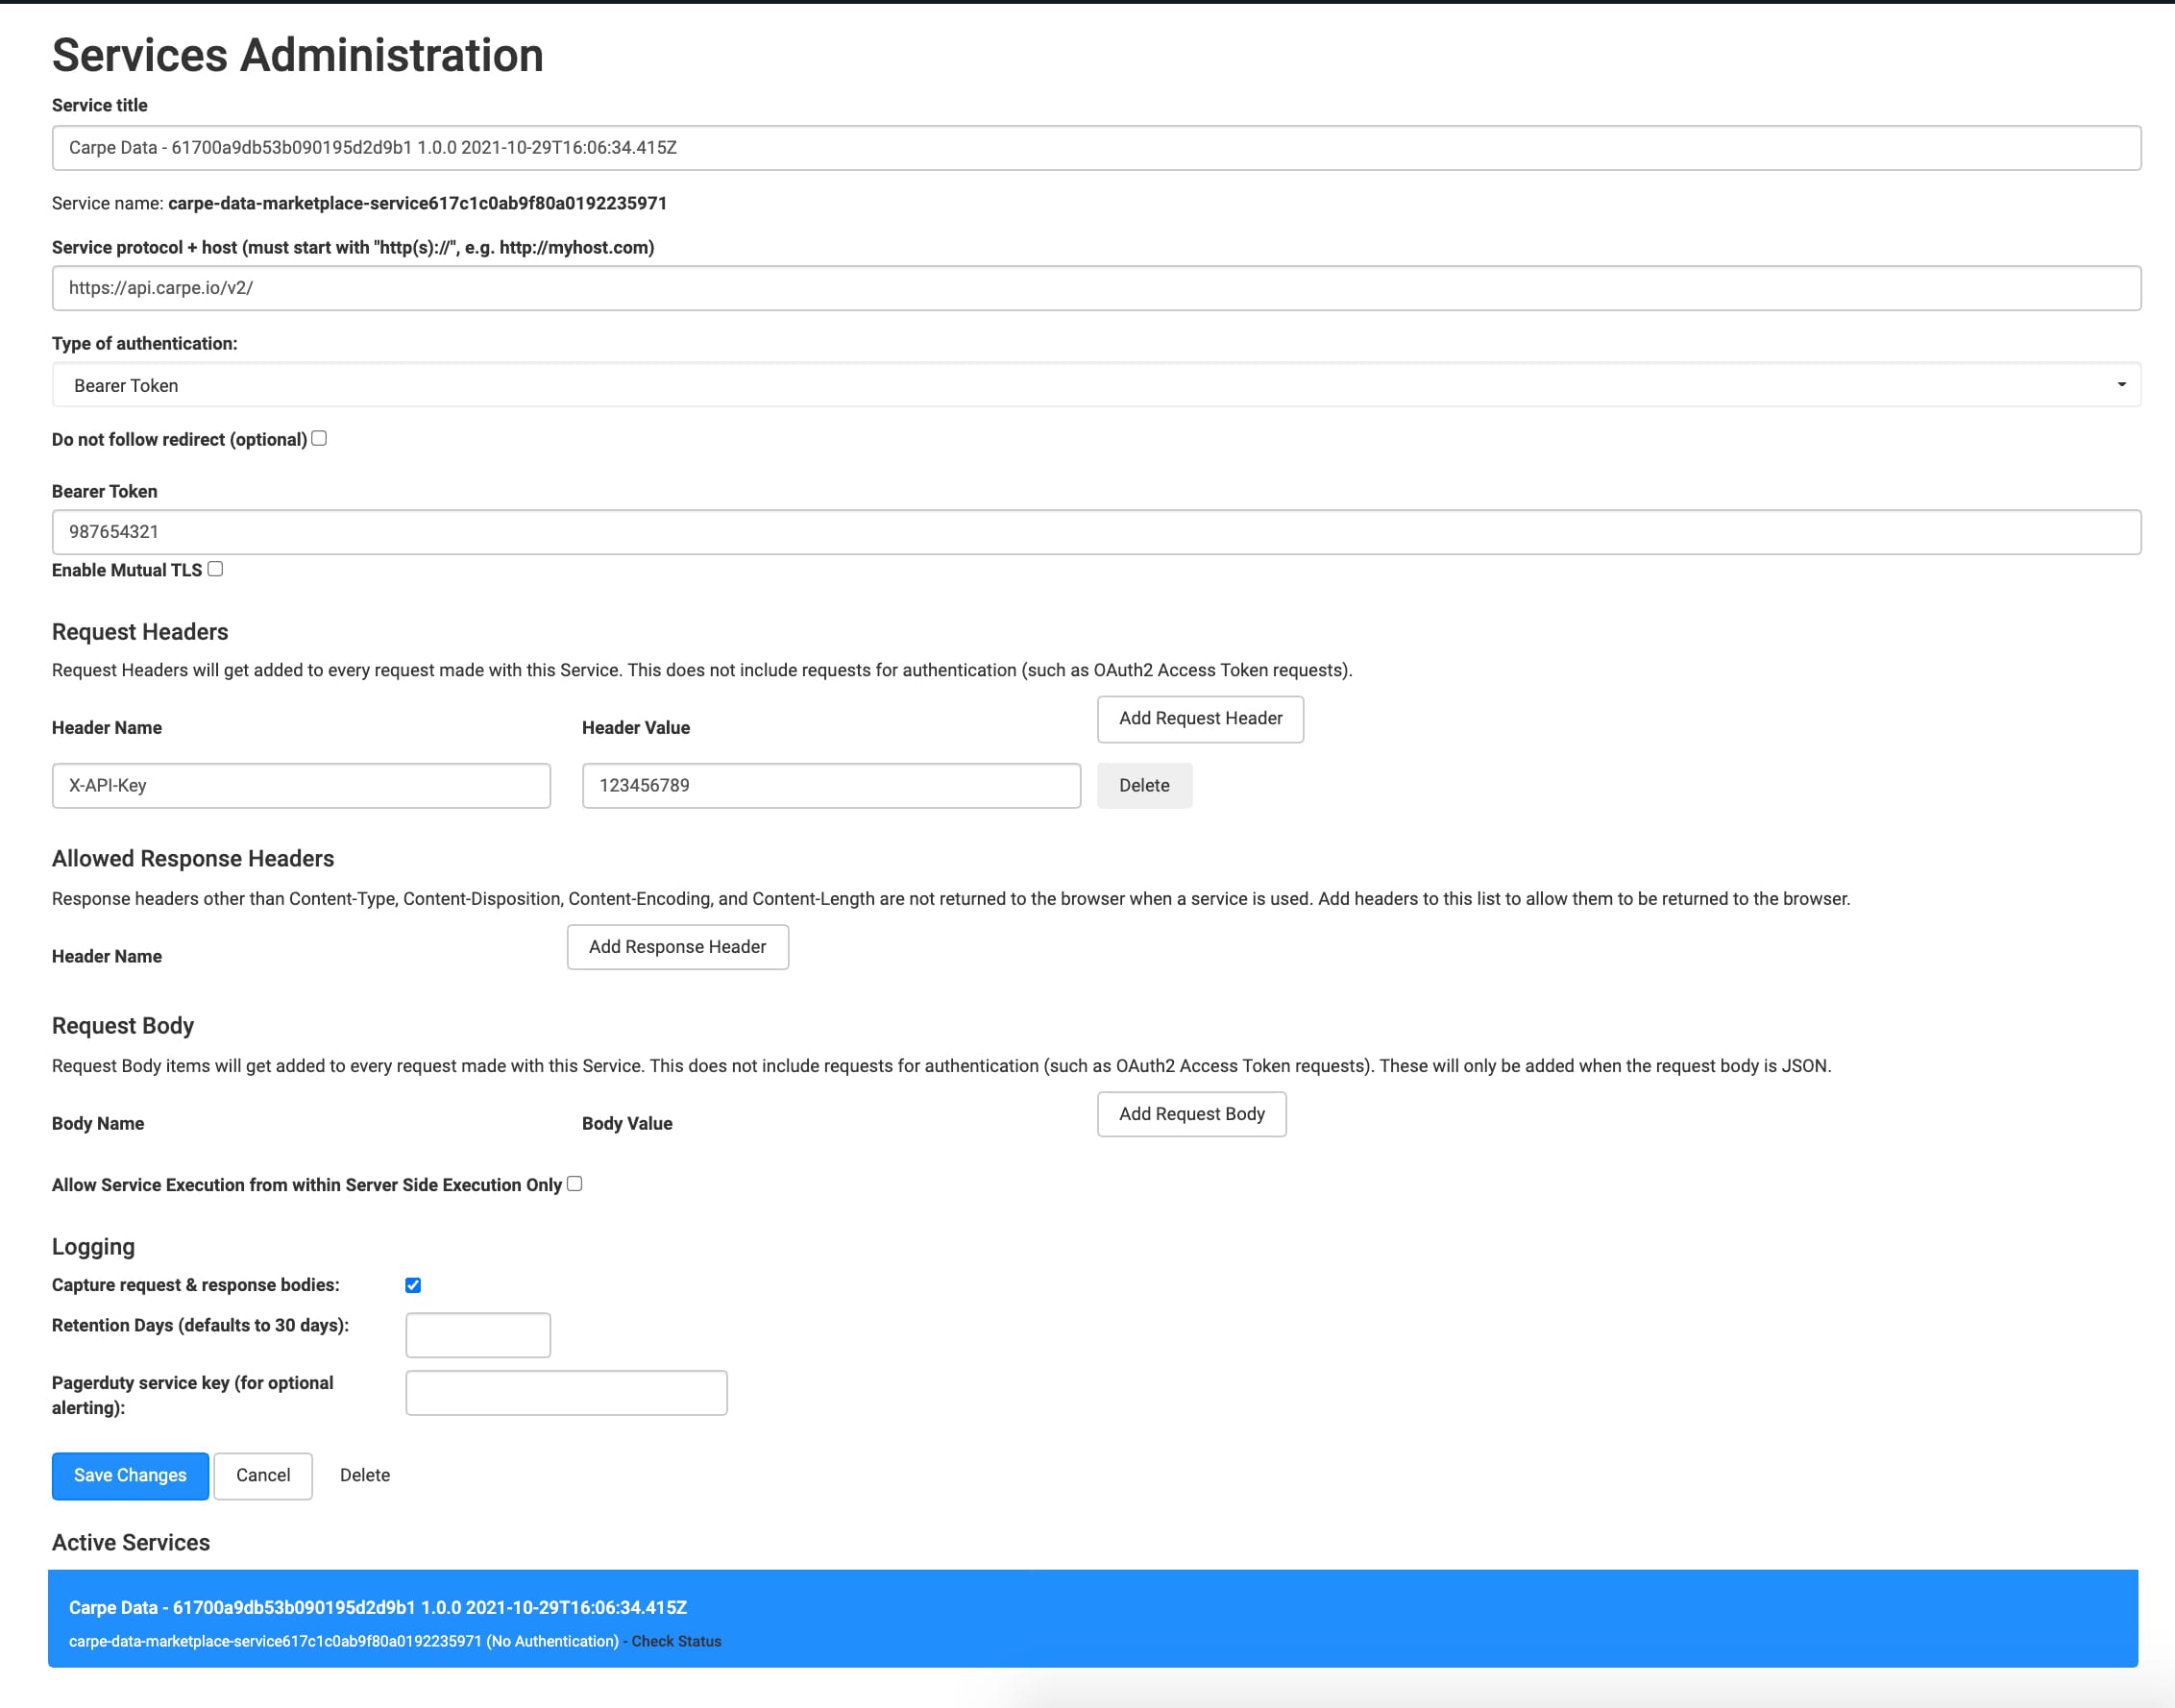
Here's an example of a Carpe Data service in Services Administration:
How the Template Works
As the name suggests, a module integration template has modules and an integration. An integration is a service external to Unqork. Here, the service is a Carpe Data API that uses Carpe Data's Minerva database to pull risk information about a business. You'll set up your Carpe Data account directly through Carpe Data. Your API keys generate automatically after creating your Carpe Data account.
How the Carpe Data Minerva Service Works
Carpe Data Minerva is a service that uses an API call to pull business information from its database. You can use the populated information to help determine how insurable a company is.
In Express View, this data is presented in two tables: Risk Factors and Indexes and Scores.
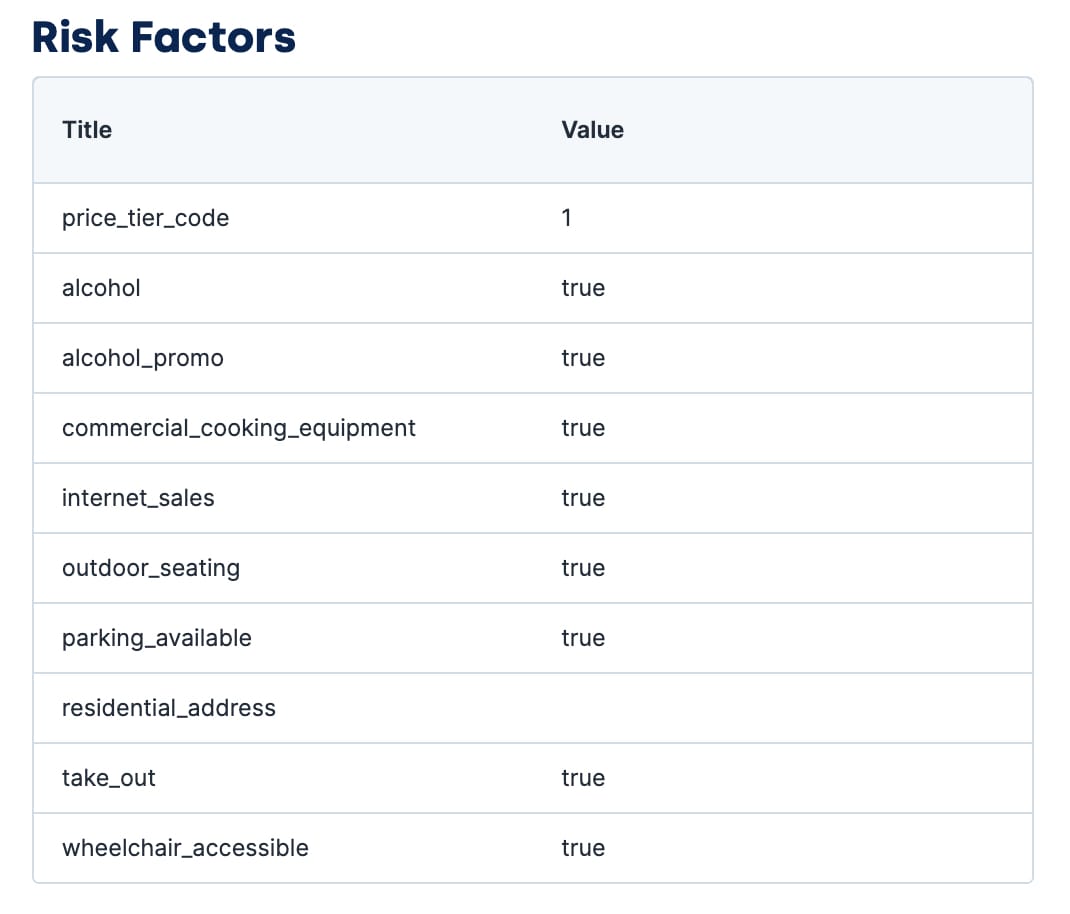
Risk Factors
This table shows various data points about a business that could impact its insurability. You see different information about a business depending on its industry. For example, the working_at_heights factor doesn't show if you look up a veterinary clinic.
Here's what the table displays:
Heading | Description |
|---|---|
Title | The name of the risk factor. |
Value | The factor's status, depending on the data type. This can be an array, boolean, string, and more. |
And here's an example of what you might see if you enter a restaurant's address:
To see a full list of Carpe Data's risk factors, contact Carpe Data directly at carpe.io/contact-us
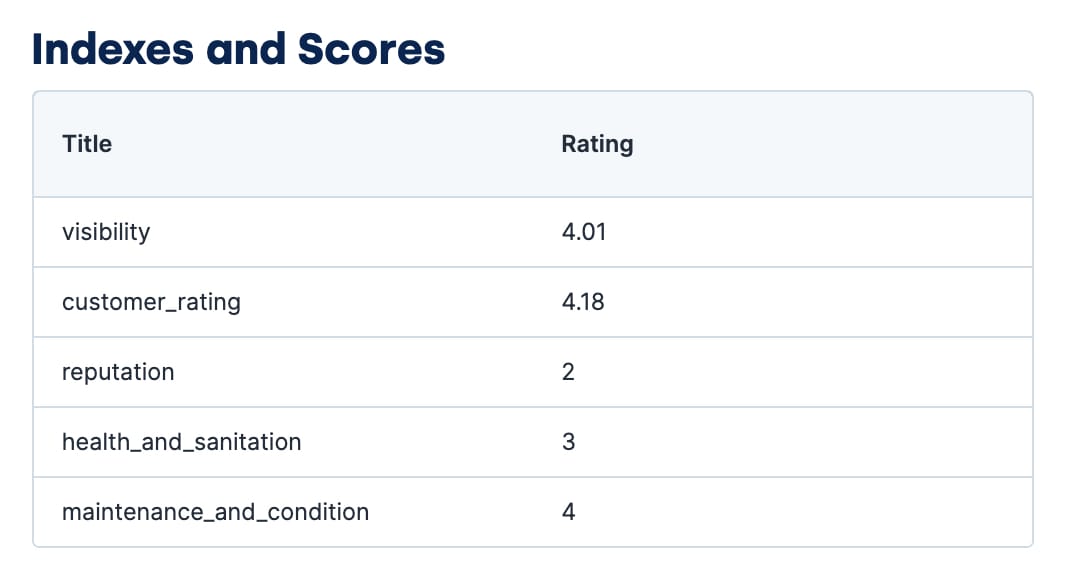
Indexes and Scores
Risk factors are present or not present (for example, a building either has wheelchair access or it doesn't). Alternately, indexes and scores use a numeric range to show how well a company is performing in different categories. Again, these data points paint a picture of a business's insurability. Like the Risk Factors table, you see different information about a business depending on its industry.
Here's what the table displays:
Heading | Description |
|---|---|
Title | The name of the factor. |
Value | The factor's score.
|
And here's an example of what you might see if you enter a restaurant's address:
How the Carpe Data Integration Module Works
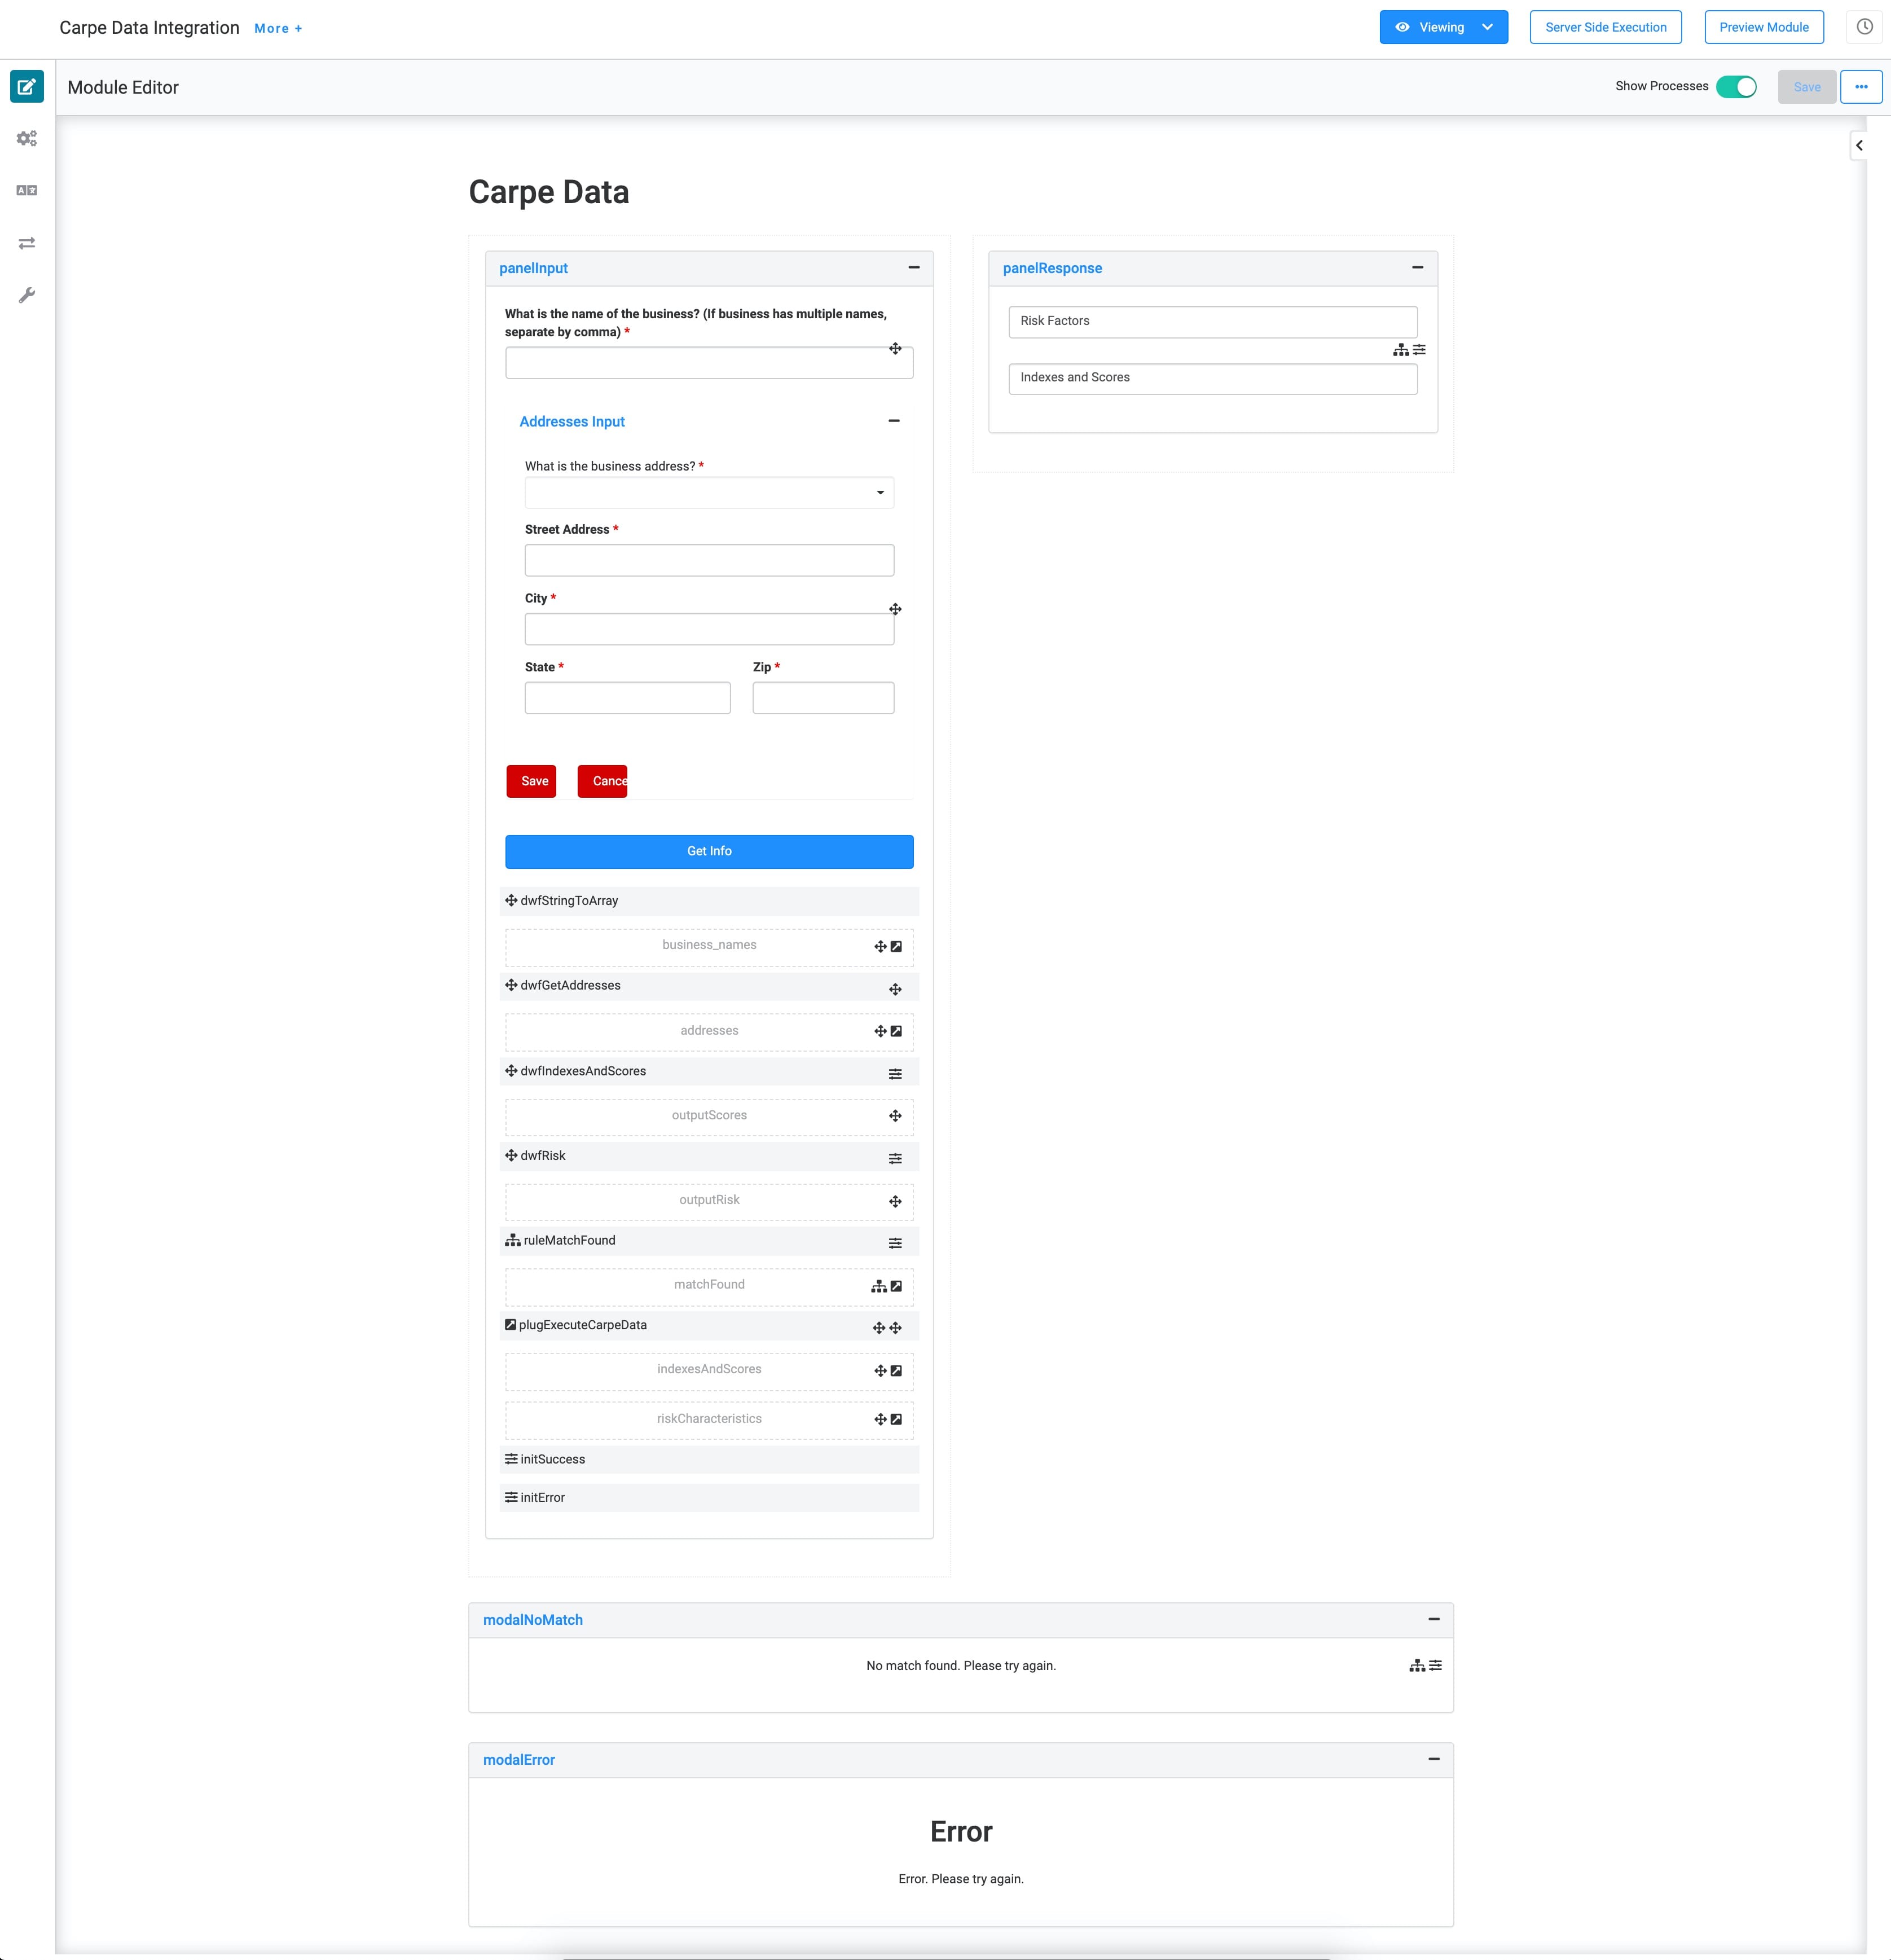
The Carpe Data Integration module is the only user-facing module in this template. So, it's the only one you or your end-user interacts with in Express View.
This module is where you or your end-user fills out the name of the business. In the next section, you fill out the address field manually or by using the Address Search component to look it up automatically. Finally, click Get Info to initiate the Carpe Data API call and populate a business's information.
Here's how the module looks in the Module Builder:
And here's how it works in Express View:
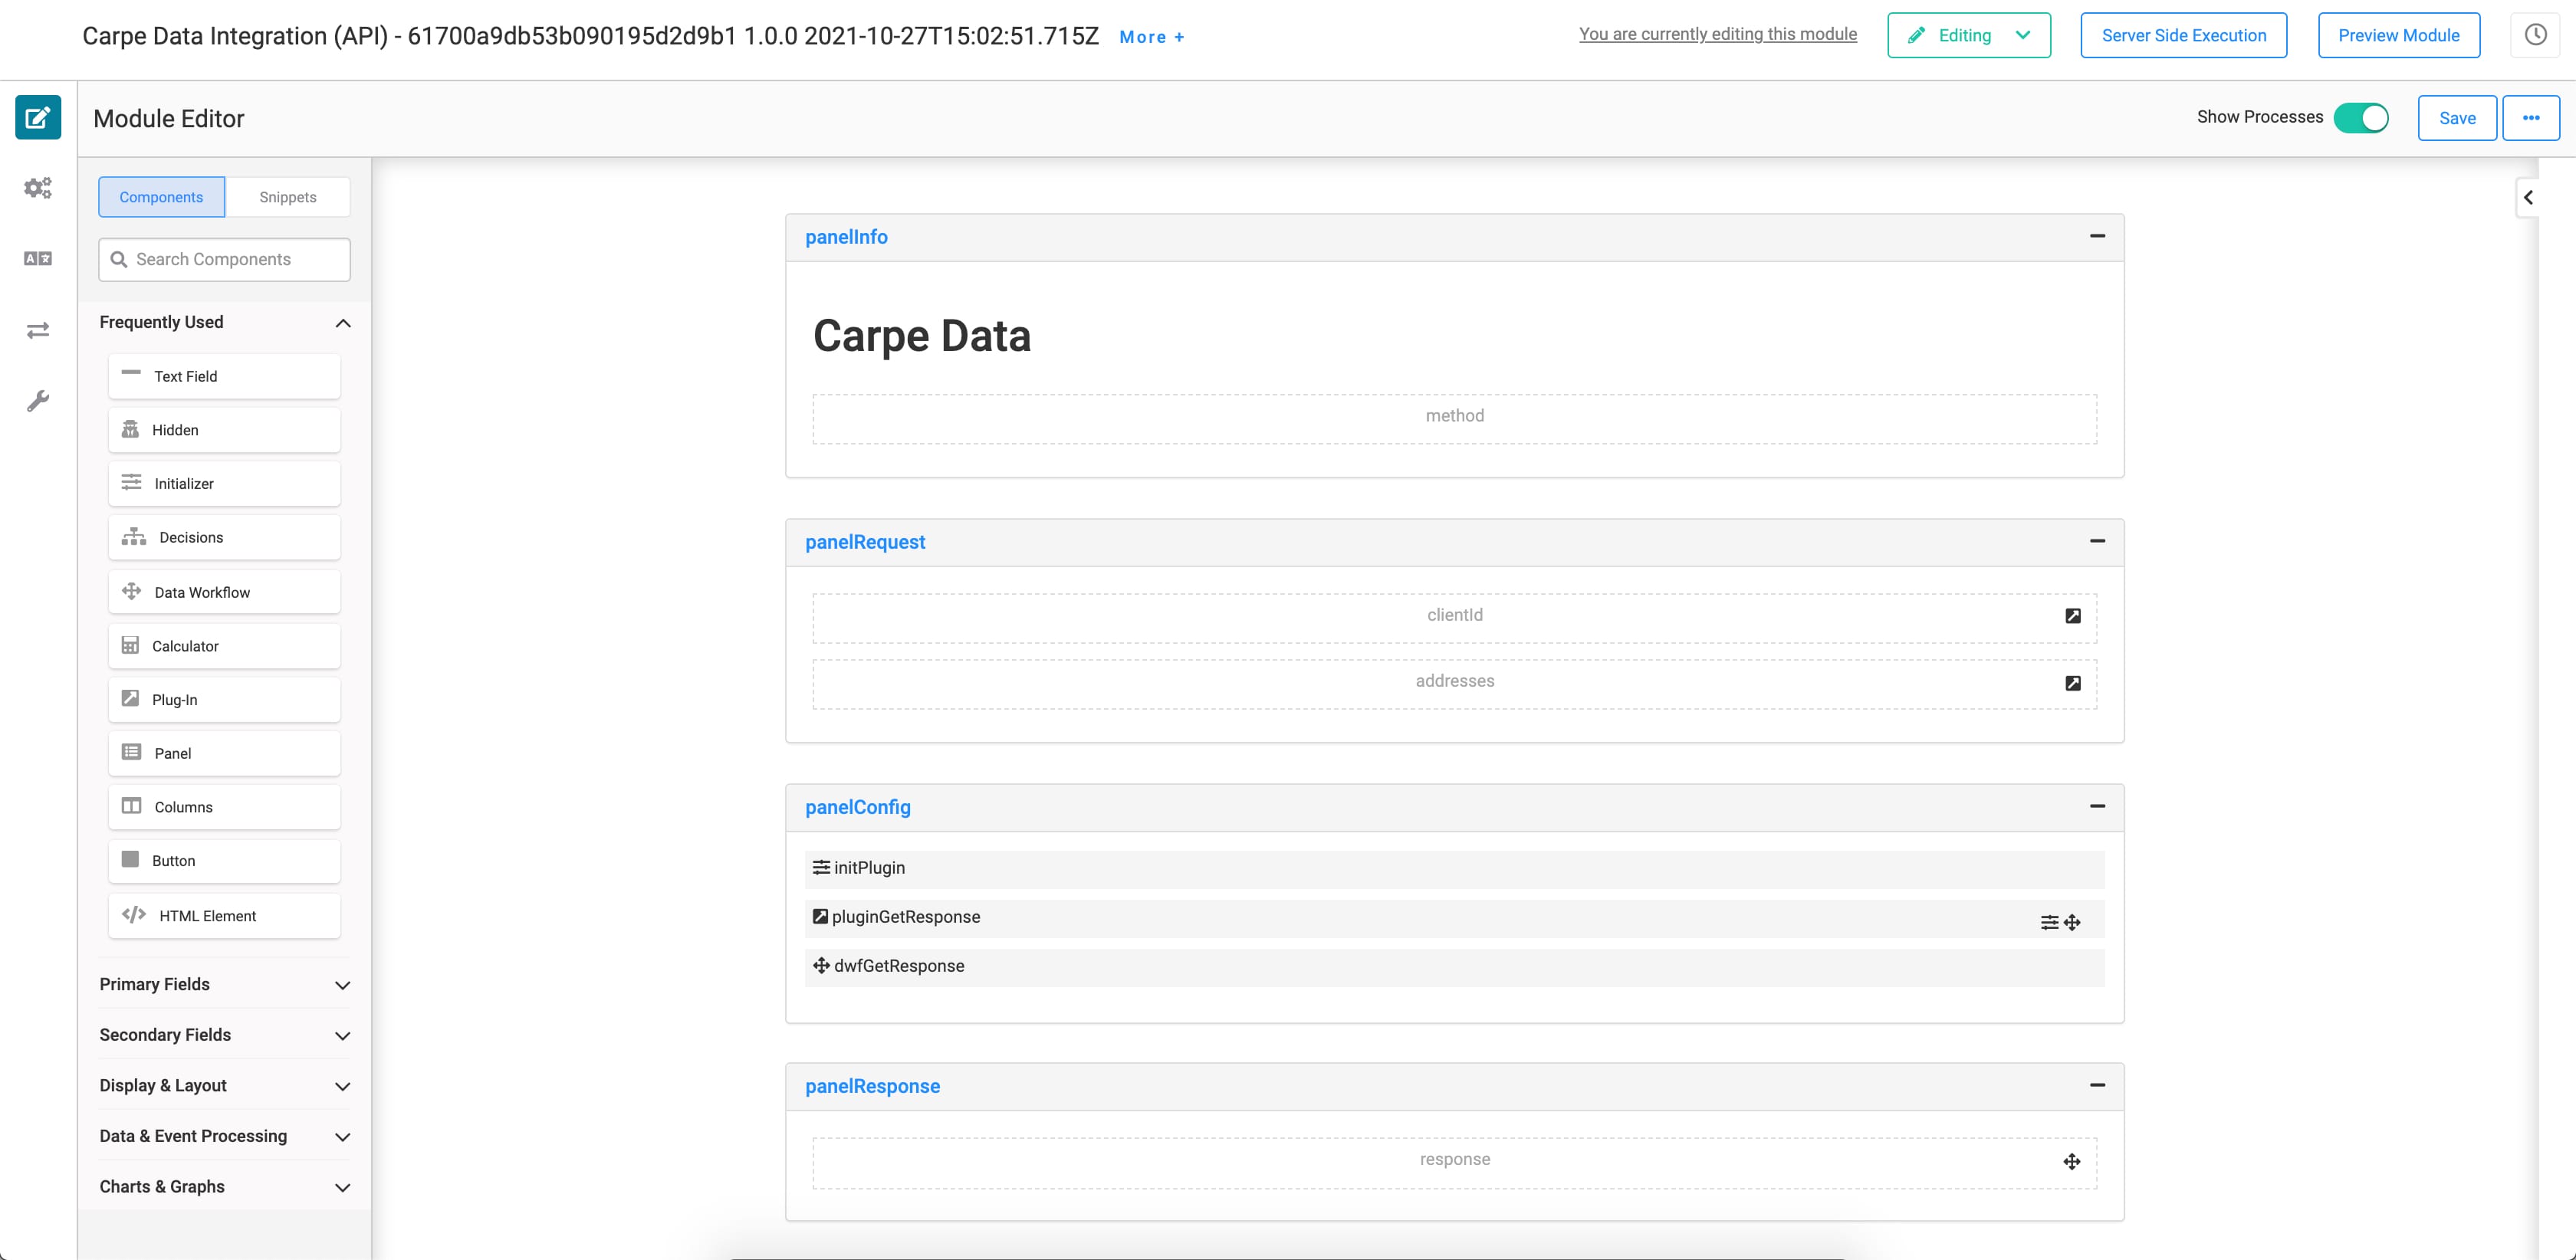
How the Carpe Data Integration (API) Module Works
The Carpe Data Integration (API) module does all the hard work for the template. After the end-user clicks Get Info in the previous module, the API module fires. It sends the full address to Carpe Data Minerva so it can pull risks and indexes. Carpe Data sends a response back to the Carpe Data Integration module. Then, the risks and indexes populate in their corresponding tables.
Here's how the module looks in the Module Builder:
Configuring the Template
Once you create an application from this template, you need to update some configurations. To use the template, update your Carpe Data service in Services Administration. You need a Bearer Token from Carpe Data to make the service work. Let's look at the configuration in more detail.
Configuring the Carpe Data Minerva Service in Services Administration
To access Services Administration:
Click the Settings drop-down at the top right of the Unqork Designer Platform.
Click Administration.
Under Integration, select Services Administration.
Next, you need to find and update the Carpe Data service with your Carpe Data Bearer Token:
Scroll to the bottom of your Active Services list.
Click your Carpe Data service.
What if your environment has more than one Carpe Data service? Here's a tip. Look for the service with the same template ID and time stamp as the template's modules.
Scroll to the top of the page.
Click the Type of authentication drop-down and select Bearer Token.
Enter your Bearer Token in the Bearer Token field.
When you open your Carpe Data service for the first time, there's already an obfuscated Bearer Token entry. This is a dummy entry, meaning it doesn't map anywhere. Make sure to enter your Bearer Token for this service to work. Note that once you save your Bearer Token to this Carpe Data service, it also becomes obfuscated.
.jpg)
Click Save Changes.
Testing the Template
Now, it's time to test your template.
Open the Carpe Data Integration module in Express View.
Enter a business name in the text field.
Click Add. The Address Input pop-up modal displays.
Enter the business's address. You can either use the What is this business address? field to look up the business, or manually fill out their address using the address fields at the bottom.
Click Save.
Click Get Info.
The API response object displays on the two tables on the right side of the page.
Removing the Template
What if you no longer need this template or the application you built from it? There are multiple parts to removing this template.
Removing the Template from Your Environment
You might need to clean your environment and remove unused templates. The Unqork Library makes this easy. To uninstall a template from your environment:
At the top right of the Unqork Designer Platform, click Library.
Find the template to uninstall.
Click the ellipsis (...) in the template tile header.
Click Uninstall Template.
Click Yes, Uninstall in the confirmation modal.
You can visit the Marketplace and reinstall the template at any time.
What if you have an existing application built from this template and then uninstall the template from your environment? Your existing application remains unaffected. Also, it no longer has any ties to the template. So, let's say you reinstall a newer version of the template in the future. You can rest assured that the installation doesn't impact your existing application.
Deleting Your Carpe Data Minerva Application
If you no longer need the application you created from your template, you can delete it. To delete your application:
Navigate to the Apps tab from an open workspace.
Find the application to delete.
Click the ellipsis (...) in the app tile header.
Click Delete.
Retype the provided text.
Click Yes, Delete.
Removing the Carpe Data Minerva Service from Your Environment
To remove your service from your environment:
Click the Settings drop-down at the top right of the Unqork Designer Platform.
Click Administration.
Under Integration, select Services Administration.
Scroll down and select the Carpe Data service you want to delete from the Active Services list.
Click the Delete link. You’ll find this above the Active Services list.
At the Delete message, click OK.
At the Success message, click OK.