VCS: Create a Branch
Early Access VCS Articles
|
Pardon our dust! The VCS: Create a Branch article's layout, design, and language is currently undergoing changes. Use caution when referring to steps and processes contained in this page.
Overview
The Version Control System (VCS Unqork Version Control, also known as source control, is a system used to track and manage changes to modules and applications.) Create Branch page contains all the details for creating a new branch from the main branch The Main Branch (or Main Modules) consists of a core set of modules for an application. The Main Branch's modules can only be modified by creating a seperate branch. of an application. Any modifications to the main branch are made by creating a new branch using the Create Branch page. The Create Branch page details include a name and description of the new branch A branch is a copy of modules in an Unqork application that helps Creators work in parallel. Branching an application can seperate in-progress changes from release-ready modules., which modules are to be modified or created, and which Creators Also known as Unqork Users, or Designer Users; is anyone who is inside the Unqork platform. have permission to edit, view, or review module changes in the branch.
VCS Branching includes these benefits:
-
Allows large teams to work on the same module in an application, at the same time.
-
Review and approval process for changes made to branched modules.
-
A main branch of core modules that can only be edited by creating branches.
-
A rich comment system that allows Creators to leave messages at the Component, Module, and Branch levels.
What You'll Learn
After completing this article, you'll understand the Create a New Branch page settings and how to create a new branch using the VCS tool.
Access the Create Branch Page
To access the Create Branch page from Workspaces:
| 1. | Select a workspace with a VCS-enabled application. |
To learn how to enable VCS, view our How to: Enable VCS article.
| 2. | Click the application's View App in VCS button. |
| 3. | Log into the UDLC tool using your credentials. The View App Details' Branches page displays. |
| 4. | Click + Create Branch. The Create Branch page displays. |
About the Create Branch Page
The Create Branch page is divided into three sections: General, Modules, and Participants.
General
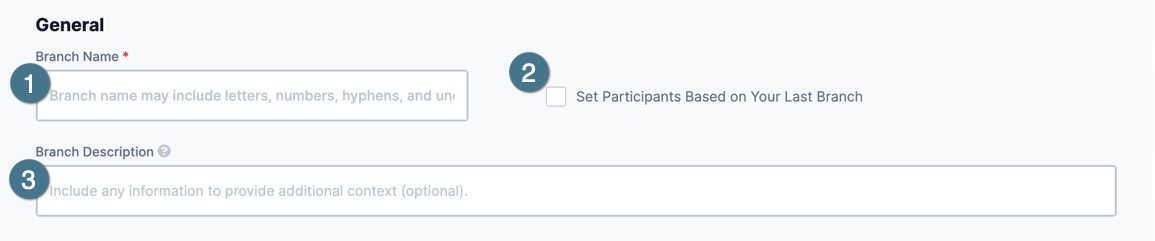
The General section contains the descriptive details of the branch, and the option to include participants from the Owner's previous branches.
The General section includes:
| Setting | Description | |
|---|---|---|
|
1 |
Branch Name* |
Enter a name for the branch. Branch names cannot include special characters. Entering spaces into a branch converts them to a - (hyphen). *This field is required. |
|
2 |
Set Participants Based on Your Last Branch |
When set to |
|
3 |
Branch Description |
Enter an optional description of the branch. |
 (Checked), it adds participants from the Owner's last branch to this branch's
 Modules
The Modules section includes a list of Main Modules and a search bar. When actions are applied to main modules, new category lists display. Actions include branching, restoring, deleting, and creating modules.
Main Modules
Main Modules are Main Branch The Main Branch (or Main Modules) consists of a core set of modules for an application. The Main Branch's modules can only be modified by creating a seperate branch. modules eligible for branching.
Modules with WSRBAC Shared Elements enabled are not available in VCS.
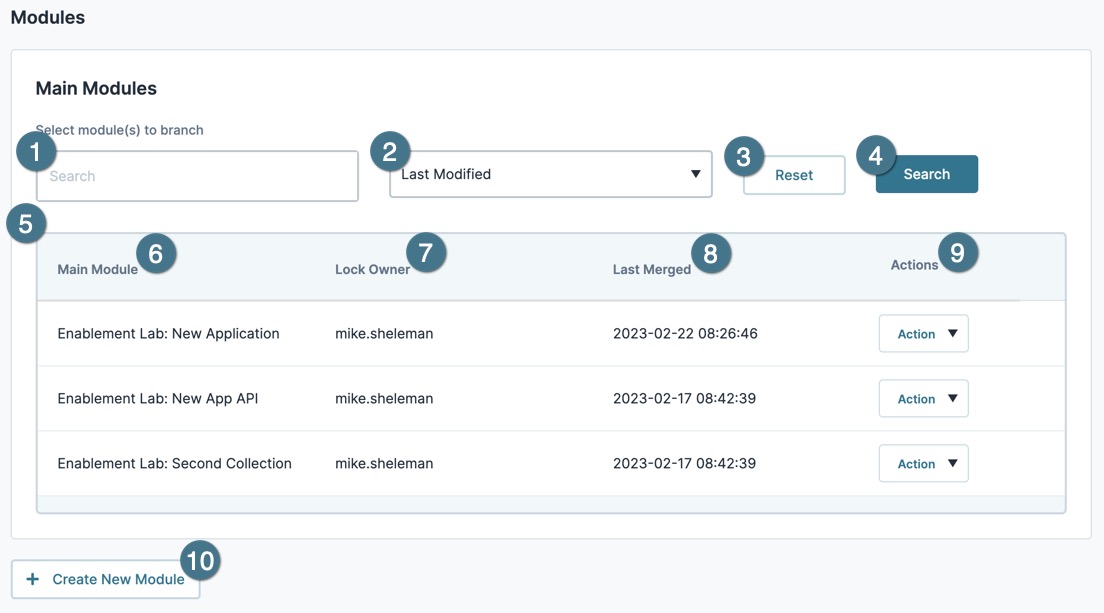
The Main Modules list includes:
| Setting | Description | |
|---|---|---|
|
1 |
Search |
Enter part or all of a module name to search for that module. |
|
2 |
Last Modified ▾ |
Choose an option from the drop-down to sort the Main Module list. |
|
3 |
Reset |
Resets the Search and Last Modified fields to their defaults. |
|
4 |
Search |
Click to search for modules based on the values in the Search and Last Modified fields. |
|
5 |
Main Module List |
The Main Module list displays all modules that are available to be branched. |
|
6 |
Main Module |
The name of the main branch module. |
|
7 |
Lock Owner |
The user that last modified the module. |
|
8 |
Last Merged |
The last time a branch module was merged into the main module. |
|
9 |
Actions |
Depending on the action, the main module moves into a new list below the Main Module list. Once the branch is created, the action executes and adds, deletes, or removes the module from the new branch. Click the Action ▾ button to display the following settings:
|
|
10 |
+ Create New Module |
Opens the Create New Module modal A modal is a window that appears on top of the content you are currently viewing.. |
Modules to Branch Dashboard
This list displays when a main module is added to the new branch. When the new branch is created, the module becomes available for editing by the Owner and Contributors. By default, this list is hidden until a main module is added to the new branch.
To learn how to add modules to a branch, view our VCS How To: Add a Module to a New Branch article.
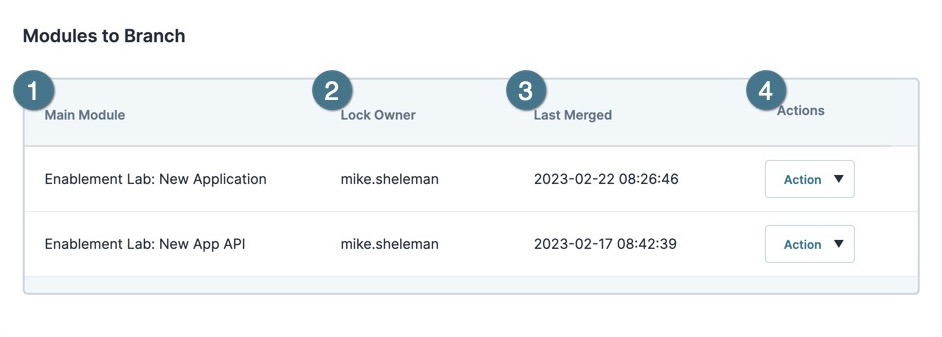
The Module to Branch list includes:
| Setting | Description | |
|---|---|---|
|
1 |
Main Module |
The name of the main branch module. |
|
2 |
Lock Owner |
Displays the last user to modify the branch. |
|
3 |
Last Merged |
The unique ID of the current and previous branches. |
|
4 |
Actions |
Click the Action ▾ button to display the following settings:
|
Modules to Restore in Branch Dashboard
This list displays when a previous version of a main module branch is added to the new branch. When the new branch is created, the previous version of the module becomes editable. By default, this list is hidden until a main module is added to the new branch.
To learn how to restore previous versions of modules to a branch, view our VCS How To: Restore a Previous Version of a Module to a New Branch article.
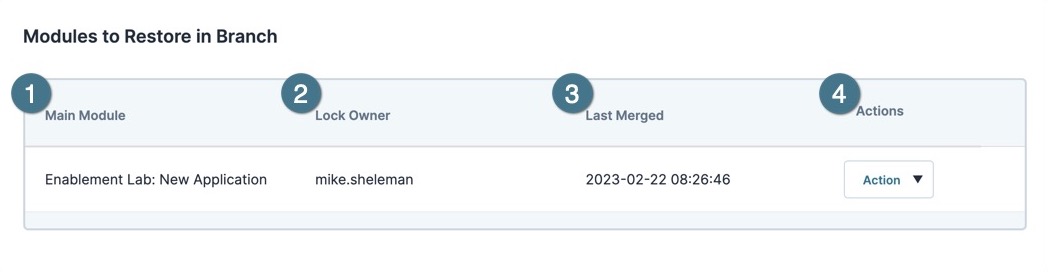
The Module to Restore in Branch list includes:
| Setting | Description | |
|---|---|---|
|
1 |
Main Module |
The name of the main branch module. |
|
2 |
Lock Owner |
Displays the last user to modify the branch and the date/time of the modification. |
|
3 |
Last Merged |
The unique ID of the current and previous branches. |
|
4 |
Actions |
Click the Action ▾ button to display the following settings:
|
Modules to Create in Branch Dashboard
This list displays when a new module is created using the + Create New Module button. When the new branch is created, the new module becomes available for editing by the Owner and Contributors. The new module does not display in the Main Branch until the branch merge is complete.
To learn how to create new modules in a branch, view our VCS How To: Create a Module in a New Branch article.
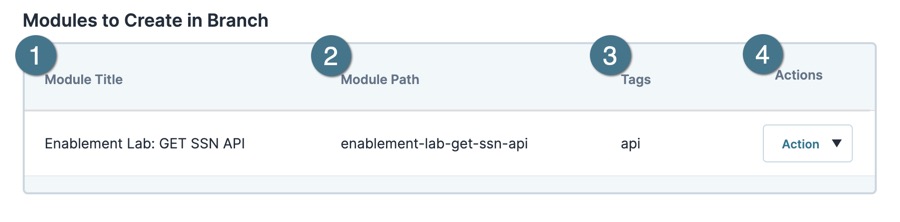
The Modules to Create in Branch list includes:
| Setting | Description | |
|---|---|---|
|
1 |
Module Title |
The name of the new module. |
|
2 |
Module Path |
The path value determined in the Create New Module modal. |
|
3 |
Tags |
Displays all tags added in the Create New Module modal. |
|
4 |
Actions |
Click the Action ▾ button to display the following settings:
|
Modules to Delete From App Dashboard
This list displays when a main module branch is scheduled to be deleted from the new branch. When the new branch is created, the module is removed. However, the main branch module is not deleted until the branch merge is complete.
To learn how to mark a module for deletion in a branch, view our VCS How To: Restore a Previous Version of a Module to a New Branch article.
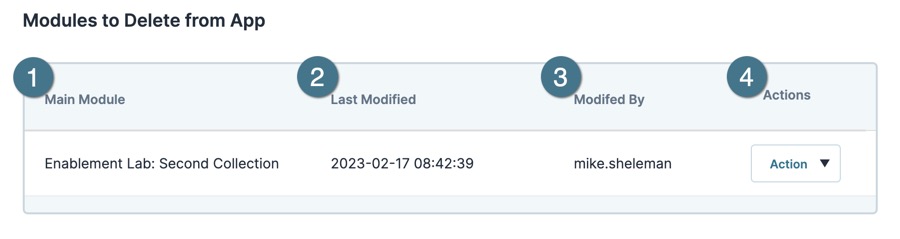
The Module to Delete From App list includes:
| Setting | Description | |
|---|---|---|
|
1 |
Main Module |
The name of the main branch module. |
|
2 |
Last Modified |
The date/time the module was last modified. |
|
3 |
Modified By |
The last user to modify the module. |
|
4 |
Actions |
Click the Action ▾ button to display the following settings:
|
Participants
The Participants section includes the Participants list and Add Participant bar. The branch owner can select designer users from the environment and give them permission to contribute, review, or approve branch changes. By default, the Participants list includes the owner. Owners can edit branch permissions and details until a Pull Request begins. They can also comment, view, and modify modules in the branch, and submit Pull Requests.
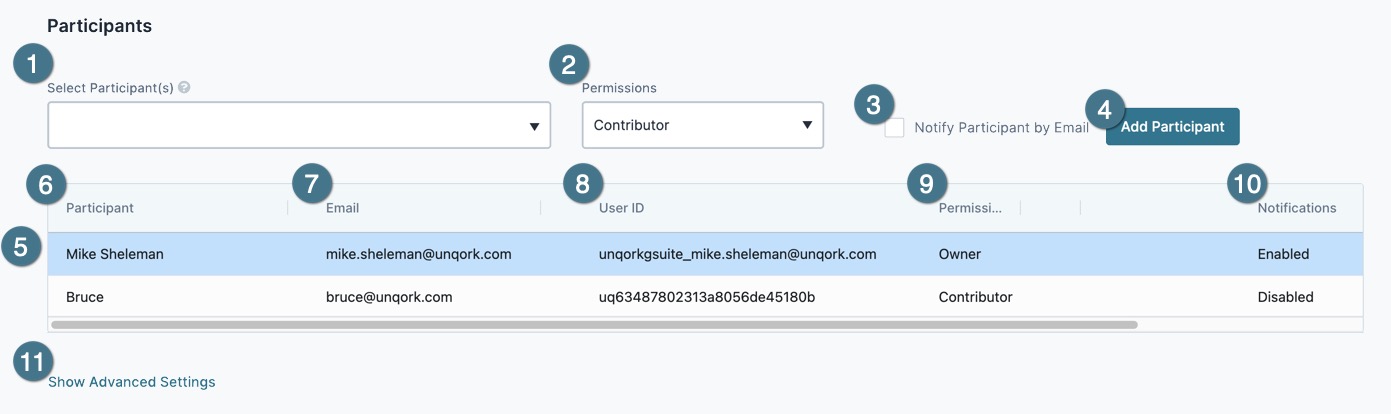
The Participants list includes:
| Setting | Description | |
|---|---|---|
|
1 |
Select Participant(s) |
Search for a user in the environment by entering all or part of their name. |
|
2 |
Permissions |
Select permissions to assign to the user of the new branch. By default, all permissions can see the branch details pages. Permissions include:
|
|
3 |
Notify Participant by Email |
Check the box to email the participant, notifying them of their role when the new branch is created. |
|
4 |
Add Participant |
Adds the participant to the Participants list with the specified permission type. |
|
5 |
Participants List |
Contains designer users who are contributing, reviewing, or approving the new branch. Participants can only have one permission assigned to them in a branch. To learn more about creating and managing designer users, view our Creator (User) Administration article. |
|
6 |
Participant |
The name of the user, as specified in Creator (User) Administration. |
|
7 |
|
The user's email address. |
|
8 |
User ID |
The user's unique UserId. |
|
9 |
Permissions |
The permission assigned to the user using the Permissions drop-down. |
|
10 |
Notifications |
Enables notifications for the participant. |
|
11 |
Show Advanced Settings |
Click to display Advanced Settings. Advanced Settings include:
Outside of testing, the use of this setting should be determined by your organization. |
Best Practices
-
To maximize the power of Unqork's VCS, branch and merge frequently. Branching and merging frequently allows multiple Creators to efficiently build, test, review, and merge at the same time.
-
Include project tracking (JIRA, Asana, Smartsheet, and so on) ticket URLs in the branch description field. This helps Creators track projects between Unqork and their project management platforms.
-
Creating a branch for each project ticket optimizes the workflow for Creators, making it easier to track changes that need to be made. A branch per ticket also helps reviewers identify the project parameters and goals.
-
Test new branches often. Unqork's VCS provides the ability to test an entire application in a branch. This features helps Creators understand their changes against the current state of the Main Branch.
