How to: Enable VCS (Version Control System)
Early Access VCS Articles
|
Pardon our dust! The How To: Enable VCS article's layout, design, and language is currently undergoing changes. Use caution when referring to steps and processes contained in this page.
Overview
The UDLC VCS (Version Control System) is an optional tool designed for Creators Also known as Unqork Users, or Designer Users; is anyone who is inside the Unqork platform. to simultaneously work on the same module(s) in an application at the same time. In the Unqork Designer Platform, turning on VCS for an application is a simple process. You can enable VCS when creating new applications, or turn it on for existing applications.
What You'll Learn
In this article, you'll learn how to turn on VCS for new or existing applications in your workspace. You'll also learn how to reconcile shared modules for VCS compatibility.
Turn on Version Control (VCS) for a New Application
You can enable VCS during the application creation process. After enabling VCS, you must access the UDLC Toolkit to use it.
What You Need
To create a new application with VCS enabled, you need:
- 1 Workspace
Create a New Application with VCS
From the Workspace view:
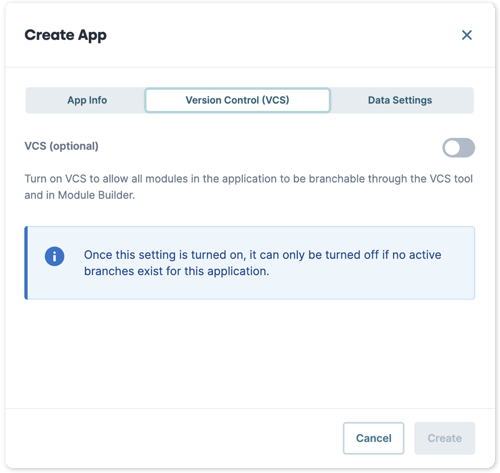
| 1. | Click +Create App |
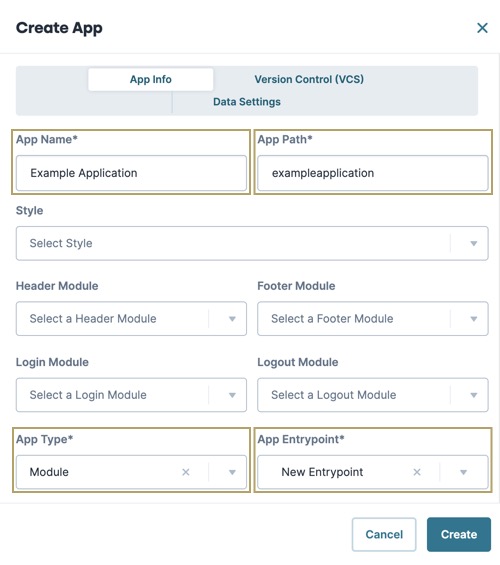
| 2. | In the App Info tab, enter the required application information, including App Name, App Path, App Type, and App Entry Point. |
| 3. | Click Version Control (VCS). |
| 4. | Set VCS (optional) to (ON). |

| 5. | Click Create. |
Once the application is created, the page redirects to the UDLC Toolkit login screen. After logging in, the application's VCS App Details page displays.
Turn on Version Control (VCS) for an Existing Application
You can enable VCS for an existing application in the application tile's settings menu. After enabling VCS, access to the UDLC Toolkit is required to use it.
VCS does not support WSRBAC Shared Elements. You can enable VCS for applications with shared elements, but you must reconcile shared modules before using VCS. See the Managing Shared Elements in a VCS Application section for more information.
From the Workspace view:
| 1. | Navigate to the application tile and click the ··· (ellipsis) button. |
| 2. | Click  Settings. The App Settings modal A modal is a window that appears on top of the content you are currently viewing. displays. Settings. The App Settings modal A modal is a window that appears on top of the content you are currently viewing. displays. |
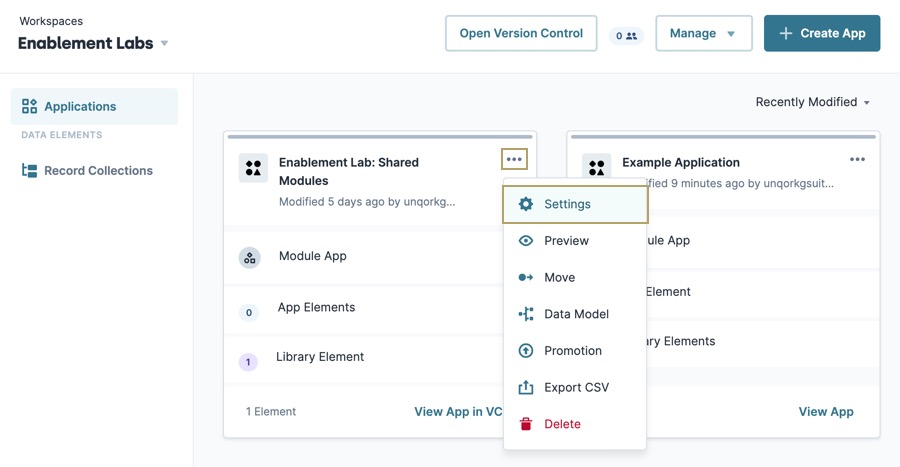
| 3. | Click Version Control (VCS). |
| 4. | Set VCS (optional) to (ON). |
| 5. | Click Save. The Workspace refreshes and the the VCS icon and the View App in VCS selection displays on the application tile. |
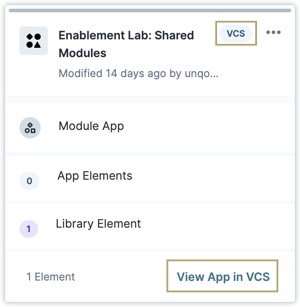
Click on the application tile or View App in VCS to redirect to the UDLC Toolkit login screen. After logging in, the application's VCS App Details page displays.
Managing Shared Elements in a VCS Application
Modules with shared elements must be converted to a main modules to be compatible with VCS. After enabling VCS for an application with shared elements, the App Details page displays the Library Modules tab under Not VCS Enabled. All other App Details tabs are disabled until modules with shared elements are reconciled.
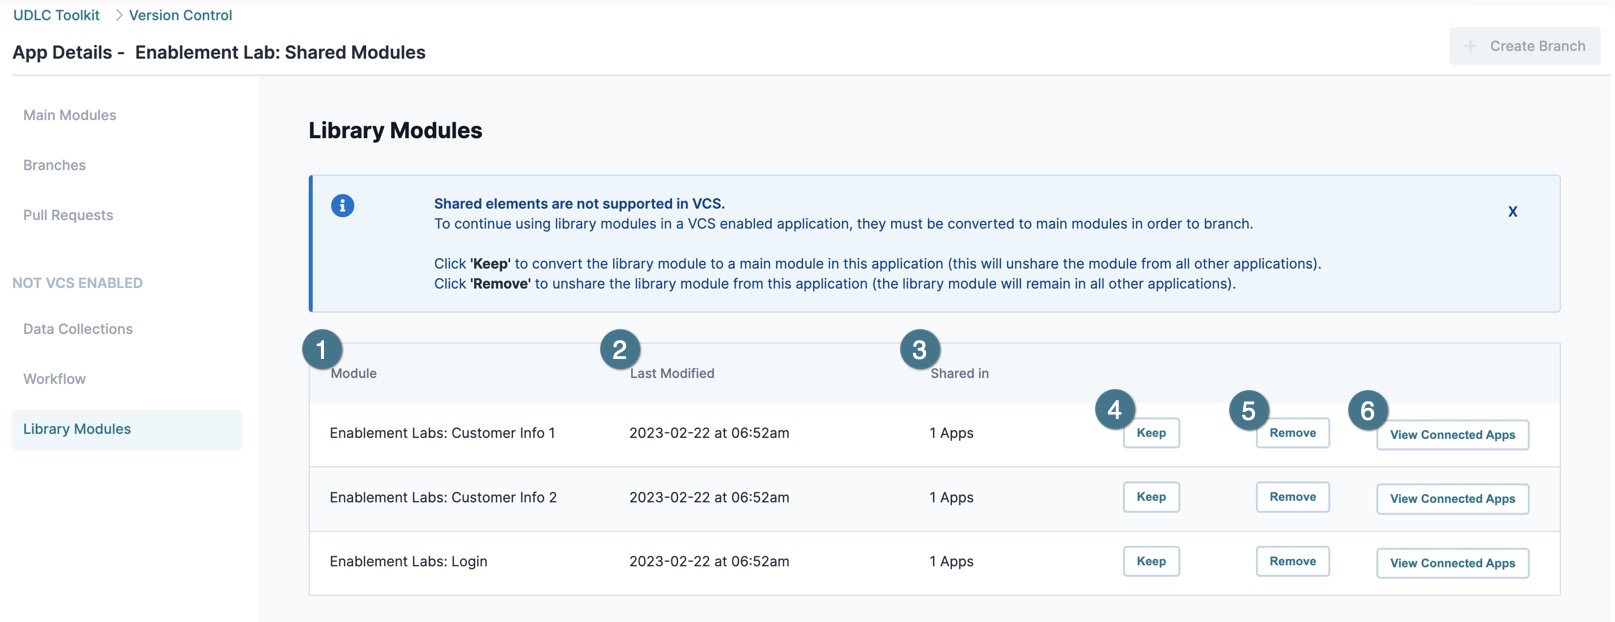
VCS Library Modules List
The VCS Library Module Modules List displays when turning on VCS for applications that contain modules with shared elements. After resolving all shared elements, the App Details tool becomes available and the Library Modules page becomes unavailable.
| Setting | Description | |
|---|---|---|
|
1 |
Module |
The name of the module. |
|
2 |
Last Modified |
The last time the module was modified by a user. |
|
3 |
Shared In |
This value represents the total number of applications where this module is shared. |
|
4 |
Keep |
Click to convert the shared module to a main module. Converted modules are unshared from all environments. If VCS is disabled later, converted modules can be re-shared with other applications. |
|
5 |
Remove |
Removes the module from the list and application. The module remains available to applications where it has been shared. |
|
6 |
View Connected Apps |
Click to display the module's Shared Workspace and Application List. |
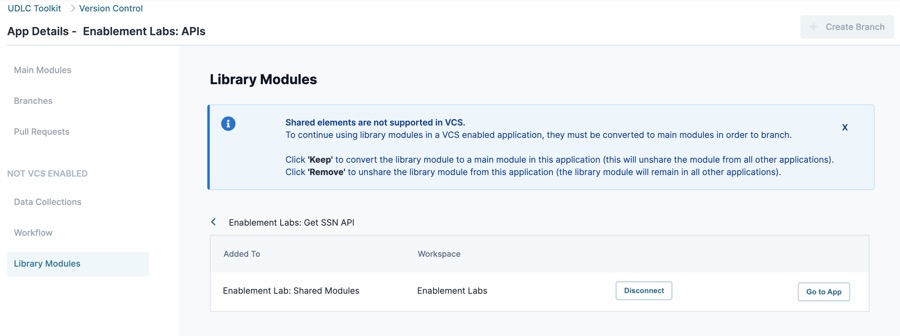
Shared Workspace and Application List
The Workspace and Application List displays shared modules connected to Applications and Workspaces. From this list, you can disconnect individual applications or view the application's workspace.
| Setting | Description |
|---|---|
|
Added To |
The application name where the module has been shared. |
|
Workspace |
The workspace name that contains the application where the module has been shared. |
|
Disconnect |
Removes the shared module from the application. To disconnect the shared module from all other applications and workspaces simultaneously, use the Remove button on the Library Modules page. |
|
Go to App |
Opens the application workspace in a new tab. |
Reconciling Shared Modules
Reconciling shared modules is required to begin using VCS. Careful consideration should be taken when determining the scope of applications affected by converting a shared module to a main module.
These instructions assume you have enabled VCS on an application containing shared modules.
To reconcile shared modules in a VCS application from the workspace page:
| 1. | Click the application's View App in VCS button. The View App Details Library Module page displays. |
| 2. | From the Library Modules List, click Keep to unshare the module from all applications and workspaces. |
| 3. | (Optional) Click Remove to remove the module from the VCS application. The module remains accessible in all other applications where it is shared. |
| 4. | Repeat this process until all shared modules are reconciled by converting them to main modules, or removing them from the app. |
Once all shared modules are reconciled, the App Details page becomes available, and new branches can be created.
