VCS How To: Restore a Previous Module Version in a New Branch
Early Access VCS Articles
|
Overview
To restore the previous version of a main module in a VCS-controlled Unqork Version Control, also known as source control, is a system used to track and manage changes to modules and applications. application, use the Restore To Previous Version action during the Create Branch process. Restoring a module in a branch makes it available for editing by Owners The VCS (version control system) Owner role is the user who creates a new branch. The VCS owner decides what parts of an application are to be modified in a branch, and assigns roles to users for the branch. and Contributors The VCS (version control system) Contributor role has permissions to edit modules in a branch. Set contributors during the VCS Create a Branch process..
What You'll Learn
After completing this article, you'll understand the Restore Previous Version History Panel. You'll also know how to restore a main module in a VCS branch.
About the Restore Previous Version History Panel
On the Create Branch page, the Version History panel displays when restoring previous versions of a main module. This panel contains a list of previous versions that can be viewed or selected for restoration.
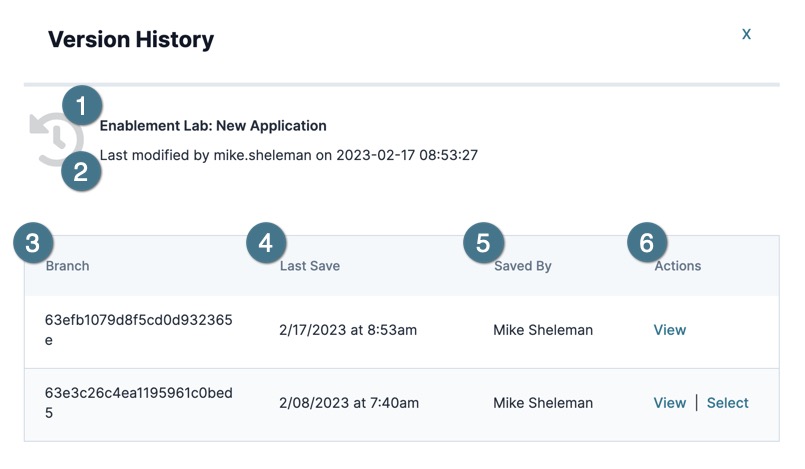
The Version History panel contains the following fields:
| Setting | Description |
|---|---|
|
Application Name |
The name of the application containing the branch history. |
|
Last Modified |
Displays the last user to modify the branch and the date/time of the modification. |
|
Branch |
The unique ID of the current and previous branches. |
|
Last Save |
Displays the current and previous branch's date and time it was last saved. |
|
Last Saved By |
The last user to modify the current or previous branch. |
|
Actions |
Displays a list of options for current or previous branches:
|
Restoring a Previous Version of a Module in a New Branch
In a VCS-controlled application, use the Create Branch page to restore previous versions of a mainmodule. After creating a branch, restored modules become available for editing by the Owner The VCS (version control system) Owner role is the user who creates a new branch. The VCS owner decides what parts of an application are to be modified in a branch, and assigns roles to users for the branch. and Contributors The VCS (version control system) Contributor role has permissions to edit modules in a branch. Set contributors during the VCS Create a Branch process.. After completing the edits, it is ready to be submitted to the Main Branch using a Pull Request A Pull Request, also known as a Merge Request, is a VCS event that indicates the contributor is ready for their branch changes to be reviewed by an Approver, then merged into the main branch.. After review, approval, and merge, the new module becomes a main module.
Module modifications made in a branch cannot be restored using the Create Branch Version History panel.
This example assumes you have access to a VCS-controlled application.
To learn how to enable VCS, view our How to: Enable VCS (Version Control System) article.
From the Workspaces page:
| 1. | Find and open a workspace that contains a VCS-enabled application. |
| 2. | Click the application's View App in VCS button. The UDLC Login page displays. |
| 3. | Enter your credentials and click Login. The View App Details' Branches page displays. |
| 4. | Click + Create Branch. The Create Branch page displays. |
| 5. | In the Branch Name* field, enter a name for the branch. |
| 6. | From the Main Modules grid, find the module you want to branch and click Action ▾. |
| 7. | Select Restore to Previous Version. The Version History panel displays. |
| 8. | Find a previous module version you want to restore and click Select. The Version History panel closes, and the module moves from the Main Modules list to the Modules to Restore in Branch list. |
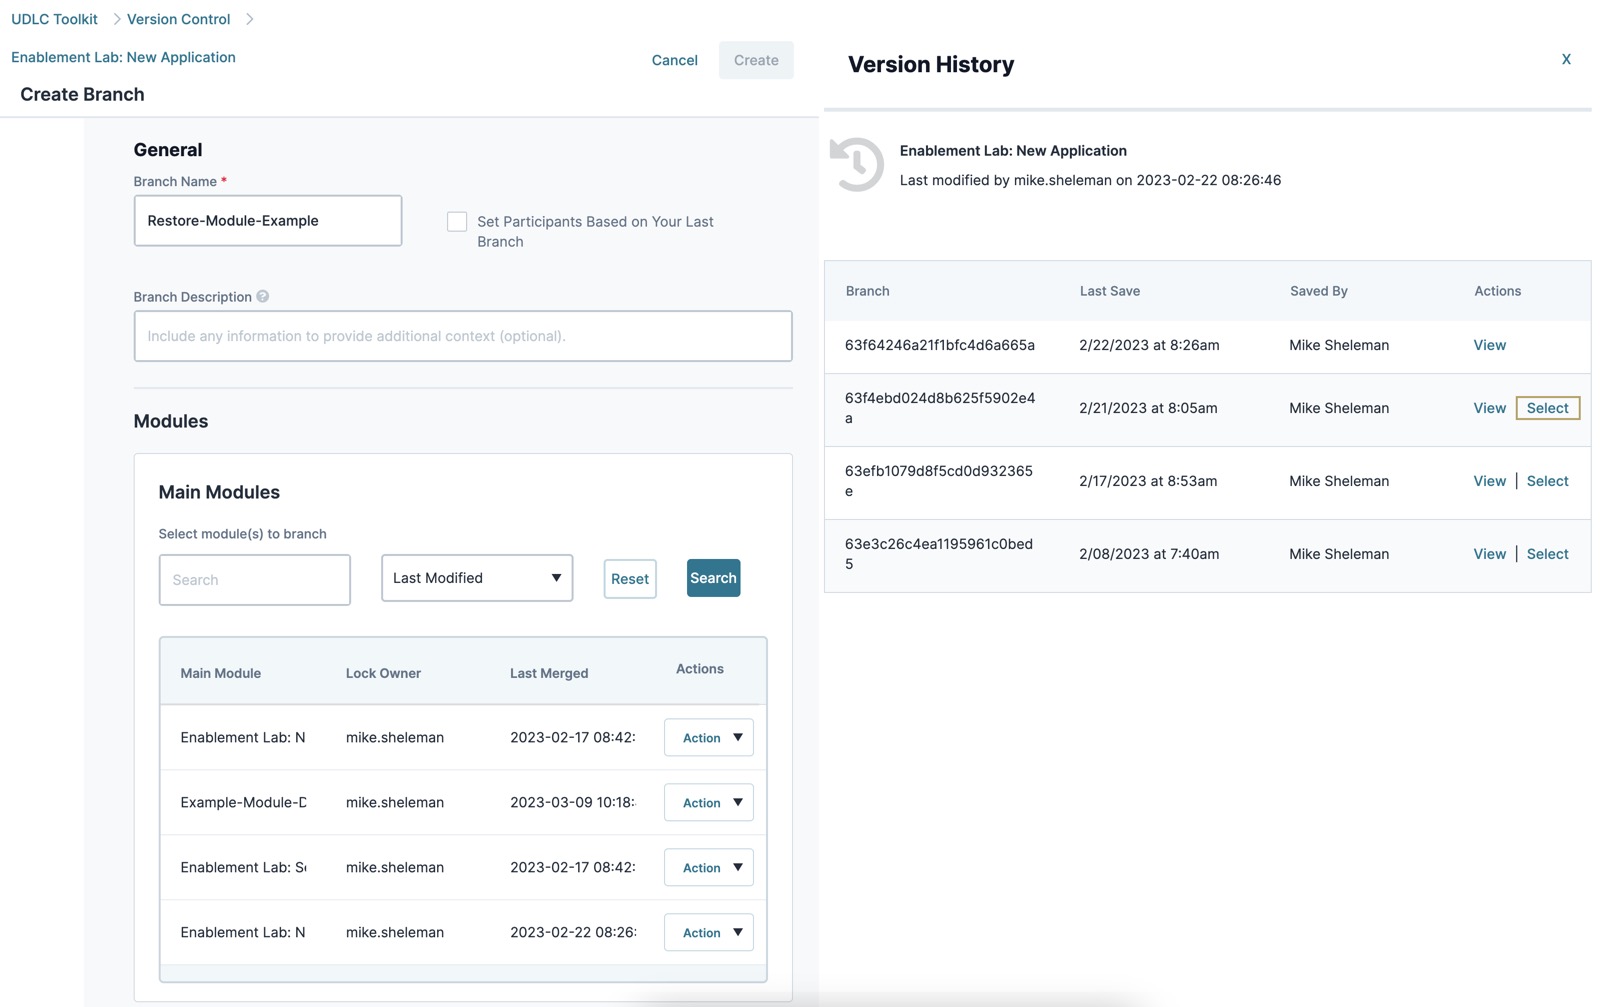
(click image to enlarge)
| 9. | Under Participants, click Show Advanced Settings. |
| 10. | Set Owner Can Approve Pull Requests to  (Checked). (Checked). |
This setting allows the Owner The VCS (version control system) Owner role is the user who creates a new branch. The VCS owner decides what parts of an application are to be modified in a branch, and assigns roles to users for the branch. to review and approve the branch's Pull Request. Outside of testing, the use of this setting should be determined by your organization.
| 11. | In the Please Document Reason field, enter |
| 12. | Click Create. A modal A modal is a window that appears on top of the content you are currently viewing. displays informing you the branch has been successfully created. |
| 13. | Click OK. The Branch Details page displays. |
