Estimated Reading Time: 6 minutes
Overview
A JSON Schema defines the requirements for storing and validating data in an application. The Schemas Viewer displays the JSON schemas that have been added to a workspace, letting you upload, manage, and publish them. When published, you can use schemas to create Unqork Data Models you can apply to Unqork modules in the same workspace.
Only Creators with an Administrator role can access the Schemas Viewer.
JSON Schemas provide the following benefits:
They promote a data-first development approach.
In advance of building your application, they specify the structure for your data.
They force consistent data validation from a central location.
What You'll Learn
In this article, you'll learn about the Schemas Viewer and how to import, edit, download, and publish JSON Schema files. You'll also explore ways to create validation in your schema files.
Accessing the Schemas Viewer
The Schemas Viewer is located under Data Elements to the left of your Workspaces page.
To access the Schemas Viewer:
In Workspaces view, navigate to and select your Workspace.
To the left of the page, select
(1).png) Schemas.
Schemas.
About the Schemas Viewer
Once you've accessed the Schemas Viewer, you'll see a list of schemas available in the workspace. Use this page to import, view, publish, and archive JSON Schemas.
 Below are the available attributes and actions you can take in the Schemas Viewer:
Attribute | Description | |
|---|---|---|
1 | + Import Schema | Used to upload a JSON Schema into your workspace and name it.
|
2 | Schemas | Displays a list of JSON Schemas imported in your workspace. Each schema tile includes a title, a timestamp when it was last modified, and a status of You can also click a schema tile to view its details in a side panel.
|
3 | Active Schemas / Archived Schemas | Let's you filter by all active or archived schemas and display them in the Schemas Viewer. |
4 |
| Click this button on a specific schema tile to perform the following actions:
|
5 | Associated Data Models | Each tile displays the Data Model(s) associated with it. Click |
Importing JSON Schemas
Not all JSON Schemas are supported in Unqork. For example, you cannot upload schemas with specific keywords. If your schema is not valid, edit it and remove these keywords. Additionally, Unqork schemas require that all arrays specify the items property.
Unsupported keywords include:
$refs | $anchor | dependencies | allOf | if | not | contentSchema | minContains | patternProperties |
$ref | definitions1 | dependentSchemas | anyOf | then | examples | contentMediaType | prefixItems | unevaluatedItems |
$dynamicRef | defs | dependentRequired | oneOf | else | contentEncoding | maxContains | propertyNames | unevaluatedProperties |
Property keys cannot use the ( . ) period character. Periods in a property key affect dot notation functionality.
To learn more about creating valid JSON Schemas, visit: https://json-schema.org/.
To import a JSON Schema:
At the top right of Schemas Viewer, click + Import Schema.
In the Schema Name* field, enter a unique name for your schema.
In the Upload Schema* field, browse or drag and drop your schema file.
You must upload a valid .json file.
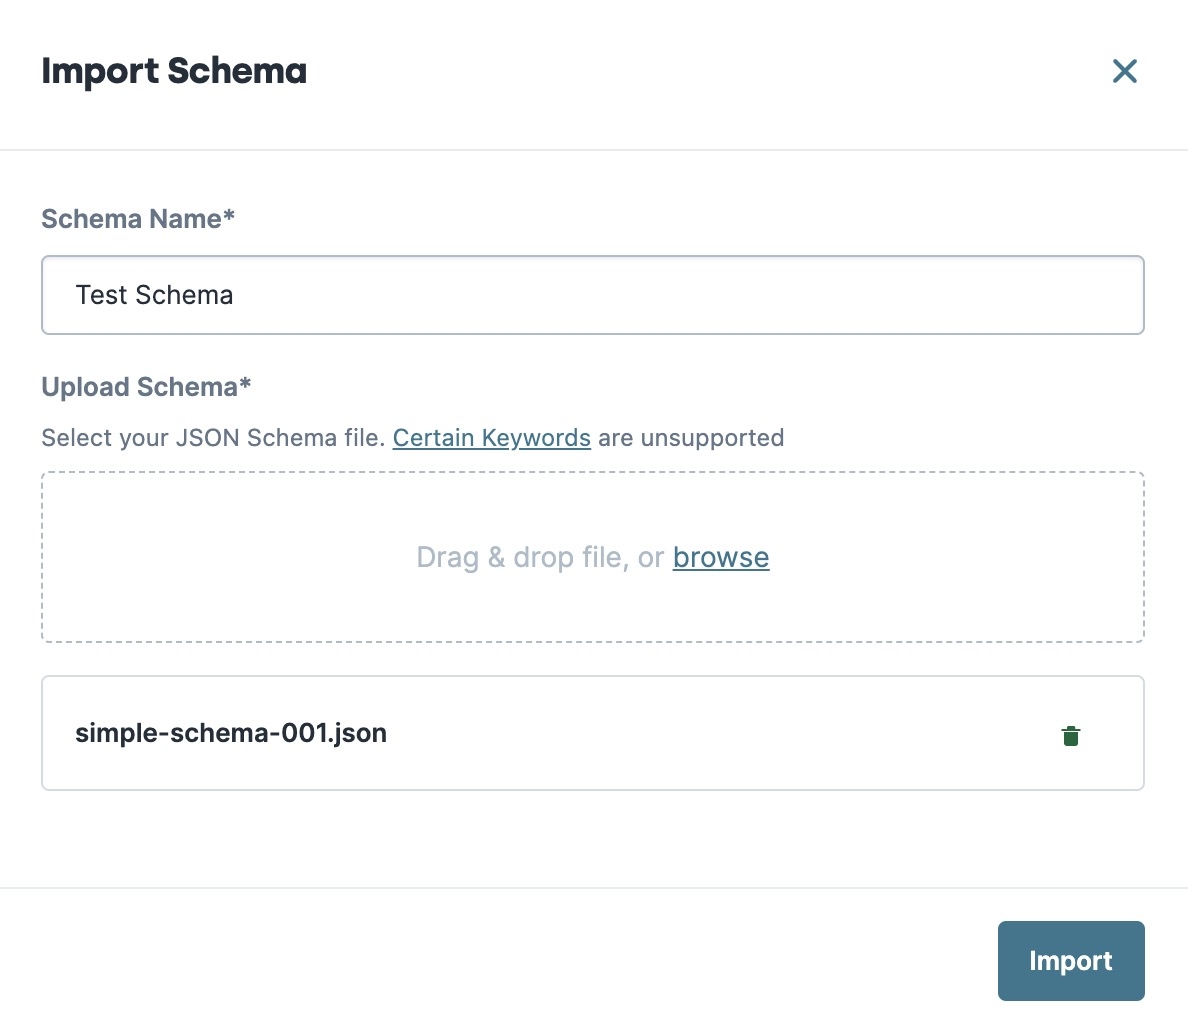
Click Import.
Viewing JSON Schema Details
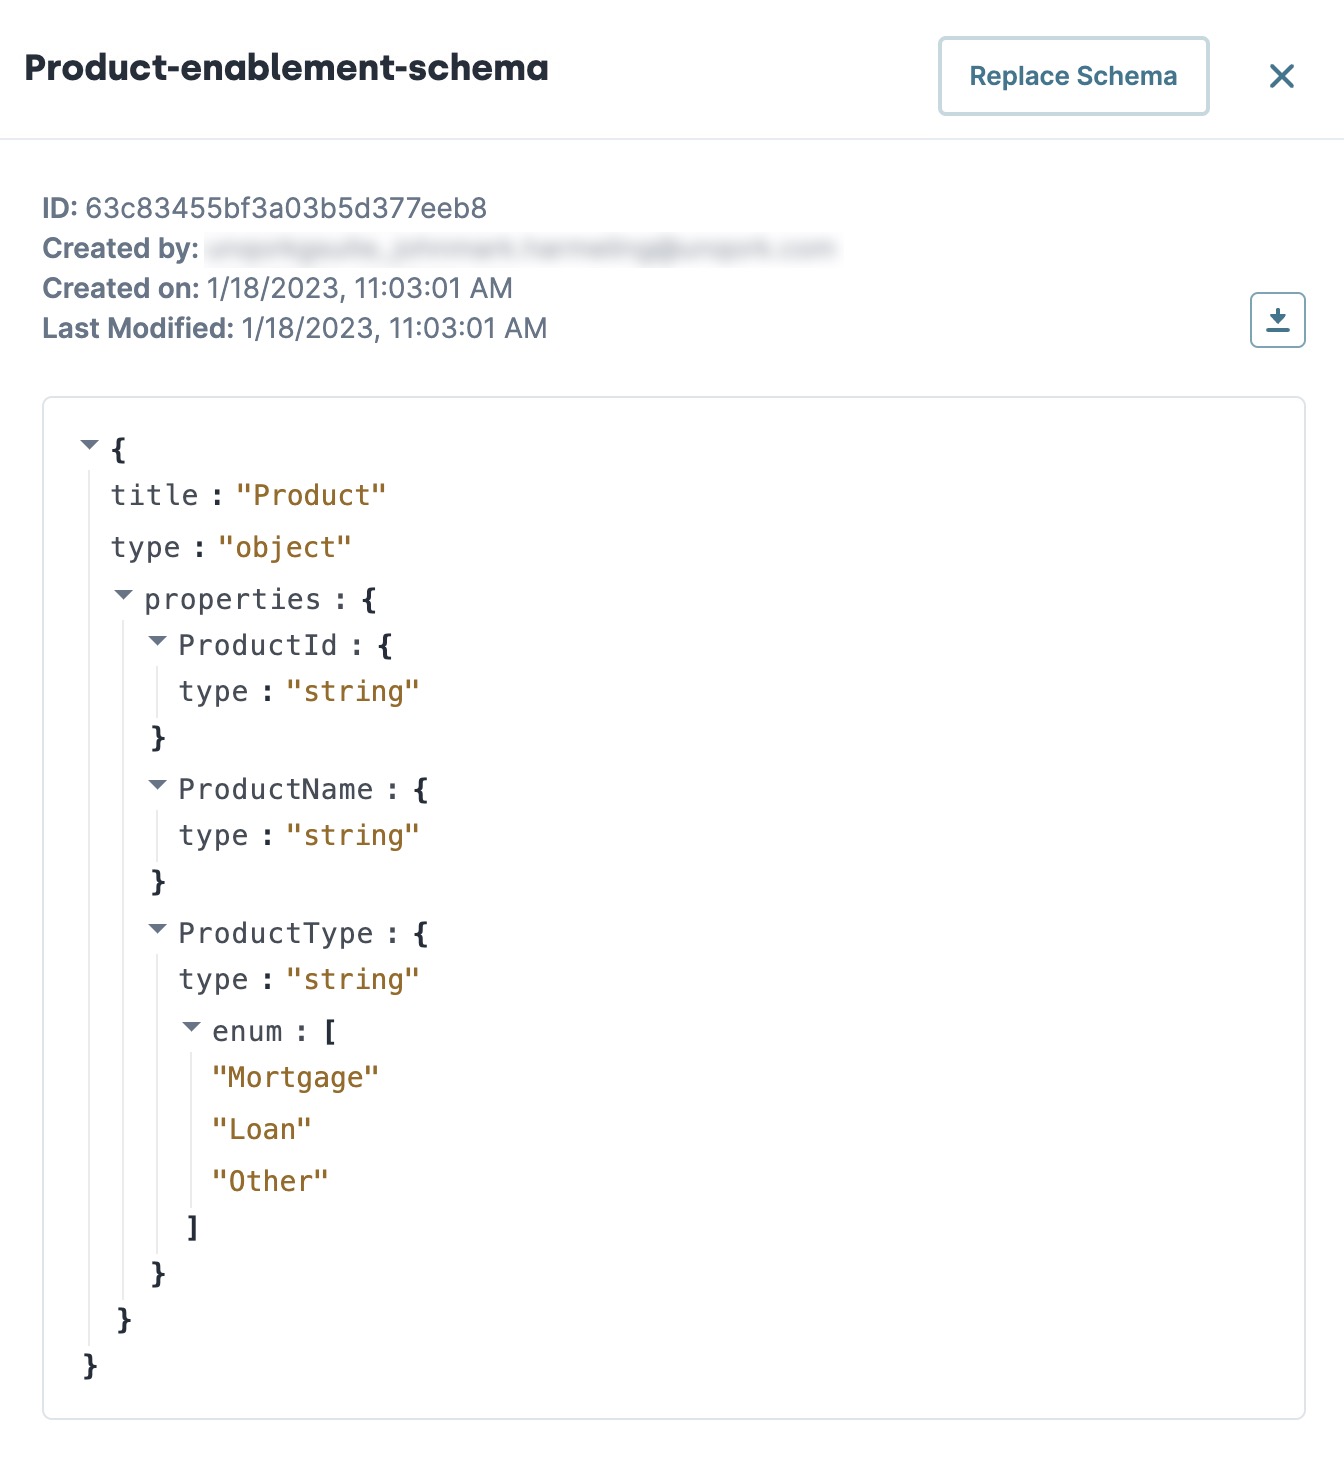
Clicking on a schema tile displays that schema's details in a side panel. Below are the various details and actions available in a schema's details panel:
Attribute | Description |
|---|---|
Schema Name | The name of the selected schema. |
Replace Schema | Lets you upload and replace the current schema with another JSON Schema. This button only displays when a schema is in a
|
ID | The unique identifier of schema. You can reference the schema ID in API calls. |
Created By | The email address of the Creator who created the JSON schema. |
Created On | The date and time the schema was created. |
Last Modified | The date and time the schema was last updated. |
| Lets you download this JSON Schema to your computer as a .json file. |
JSON Field | A field that displays the JSON. Hover over a JSON value in your schema to display
|
Publish | Publishes your schema and changes the state from
|
Save | Saves any changes made to your schema. |
Editing JSON Schema Values
After you import your schema in your workspace, it's in a ![]() Draft state. That way, you can edit or replace your schema file in the Schemas Viewer. It's important to note that you can only edit the values of existing fields in your uploaded JSON Schema. To add or delete fields, or rename an attribute, edit your schema outside Unqork and upload the file again.
Draft state. That way, you can edit or replace your schema file in the Schemas Viewer. It's important to note that you can only edit the values of existing fields in your uploaded JSON Schema. To add or delete fields, or rename an attribute, edit your schema outside Unqork and upload the file again.
Editing schema types changes the component it can be mapped to. Confirm your field type matches its data values before saving.
To edit your JSON Schema's values:
From the Schemas Viewer, click the schema tile you want to edit.
Hover over the JSON value you want to edit and select
.png) .
.After making your changes, click
.png) to save them. Or, click
to save them. Or, click .png) to undo them.
to undo them.Click Save.
To replace your JSON Schema file with another file:
In the Schemas Viewer, select the draft schema you want to replace.
At the top of the panel, click Replace Schema.
Browse or drag and drop your replacement file in the Replace Schema modal.
Click Replace.
Schema Validations
Enforcing validation with Data Models begins with your JSON Schemas. You can include validation for fields or by marking a key as required. Because schema fields map to components, field validations are applied to the mapped component.
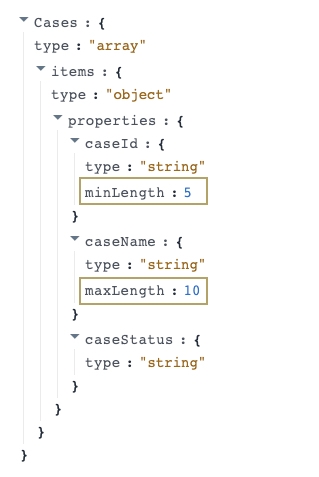
Let's look at an example of validating a JSON Schema's individual fields and how that applies to your module. In this use case, the Solutions Architect wants to structure case data in an insurance application. They upload a JSON Schema with an array of objects named Cases. Each object includes a validation for the minimum or maximum length of each entry. They bind their JSON Schema with a Data Model and then apply it to an application module. Because it is an array of objects, it maps to a Uniform Grid component they can add in the Module Builder. This component field includes the validation for each array object. When end-users create a new case, the application validates the minimum and maximum length before saving the data. |
|
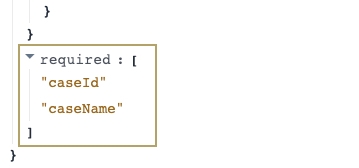
The Solutions Architect can also make Cases entries required for all end-users. They can upload a new schema with the required text in their JSON Schema, bind it to a Data Model, and apply the schema to a chosen module. |
|
.png) View
View  (edit). Click it to change the value. Click
 .png) to save your changes or
to save your changes or .png) to undo them.
to undo them.