Workflow Transforms
Overview
Working in Unqork, you may need to convert data from one format to another. To do that, you'll use a transform. Workflow transforms help you convert data when creating or retrieving a workflow submission. Examples of when you might use a transform include:
-
Sending data to an external service that requires a format other than what's used in Unqork (JSON).
-
Retrieving data from an external service that only provides data in a format other than JSON.
-
Sending submissions between Unqork workflows using different Property IDs for the same data.
What You'll Learn
In this article, you'll learn about workflow transforms, and how to create, edit, test, and download them.
What Is a Transform?
A transform is like a set of instructions you give Unqork to reformat your data. First, specify whether the data is coming in or going out of Unqork. Doing so determines the direction of the transform. Then, select the type of transform you want to perform, and choose a programming language compatible with your data's destination. For Input transforms, you can only use JSON because that is what Unqork uses. For Output transforms, you can use (where the type of language is first and the output is in parentheses):
-
XSL XSL (eXtensible Stylesheet Language) is a styling language used to transform and render XML. (XML)
-
NJK (PDF)
-
NJK (XML)
-
NJK (TXT)
For Output transforms, confirm the format needed based on your destination.
Once a transform type is selected, you can write your transform and input any structural changes. For example, you might change Label Text or Property IDs when submitting between workflows.
Accessing Workflow Transforms
To access transforms:
| 1. | Open your workflow in the Workflow Builder. |
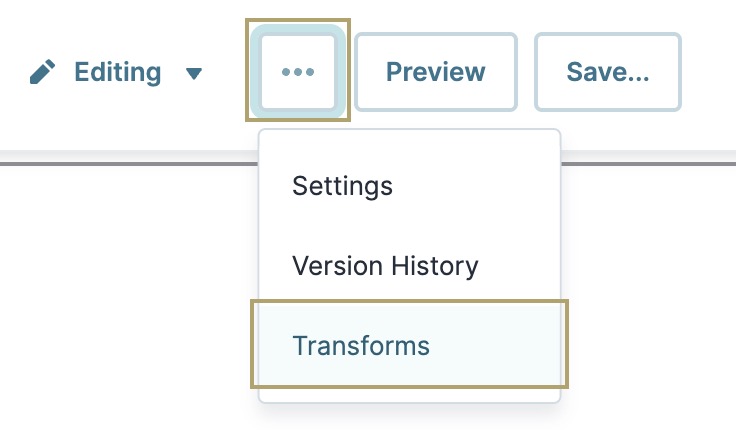
| 2. | Click the ··· (ellipsis) button. |
| 3. | Select Transforms. |
Creating a Transform
The first step of working with transforms in Unqork is to create on.
To create a transform:
| 1. | Click + New Transform. |
| 2. | In the Enter Transform Name field, enter a name for your transform. Use this name to reference your transform in your module. |
Once created, you can't change this name.
| 3. | Under Direction of Transform select Input or Output depending on the direction of your transform. |
| 4. | For an Output type, click the Output tab and select the Type of Transform you want to use. |
By default, the only available Input type is NJK (JSON).
| 5. | In the Transform field, enter your transform. |
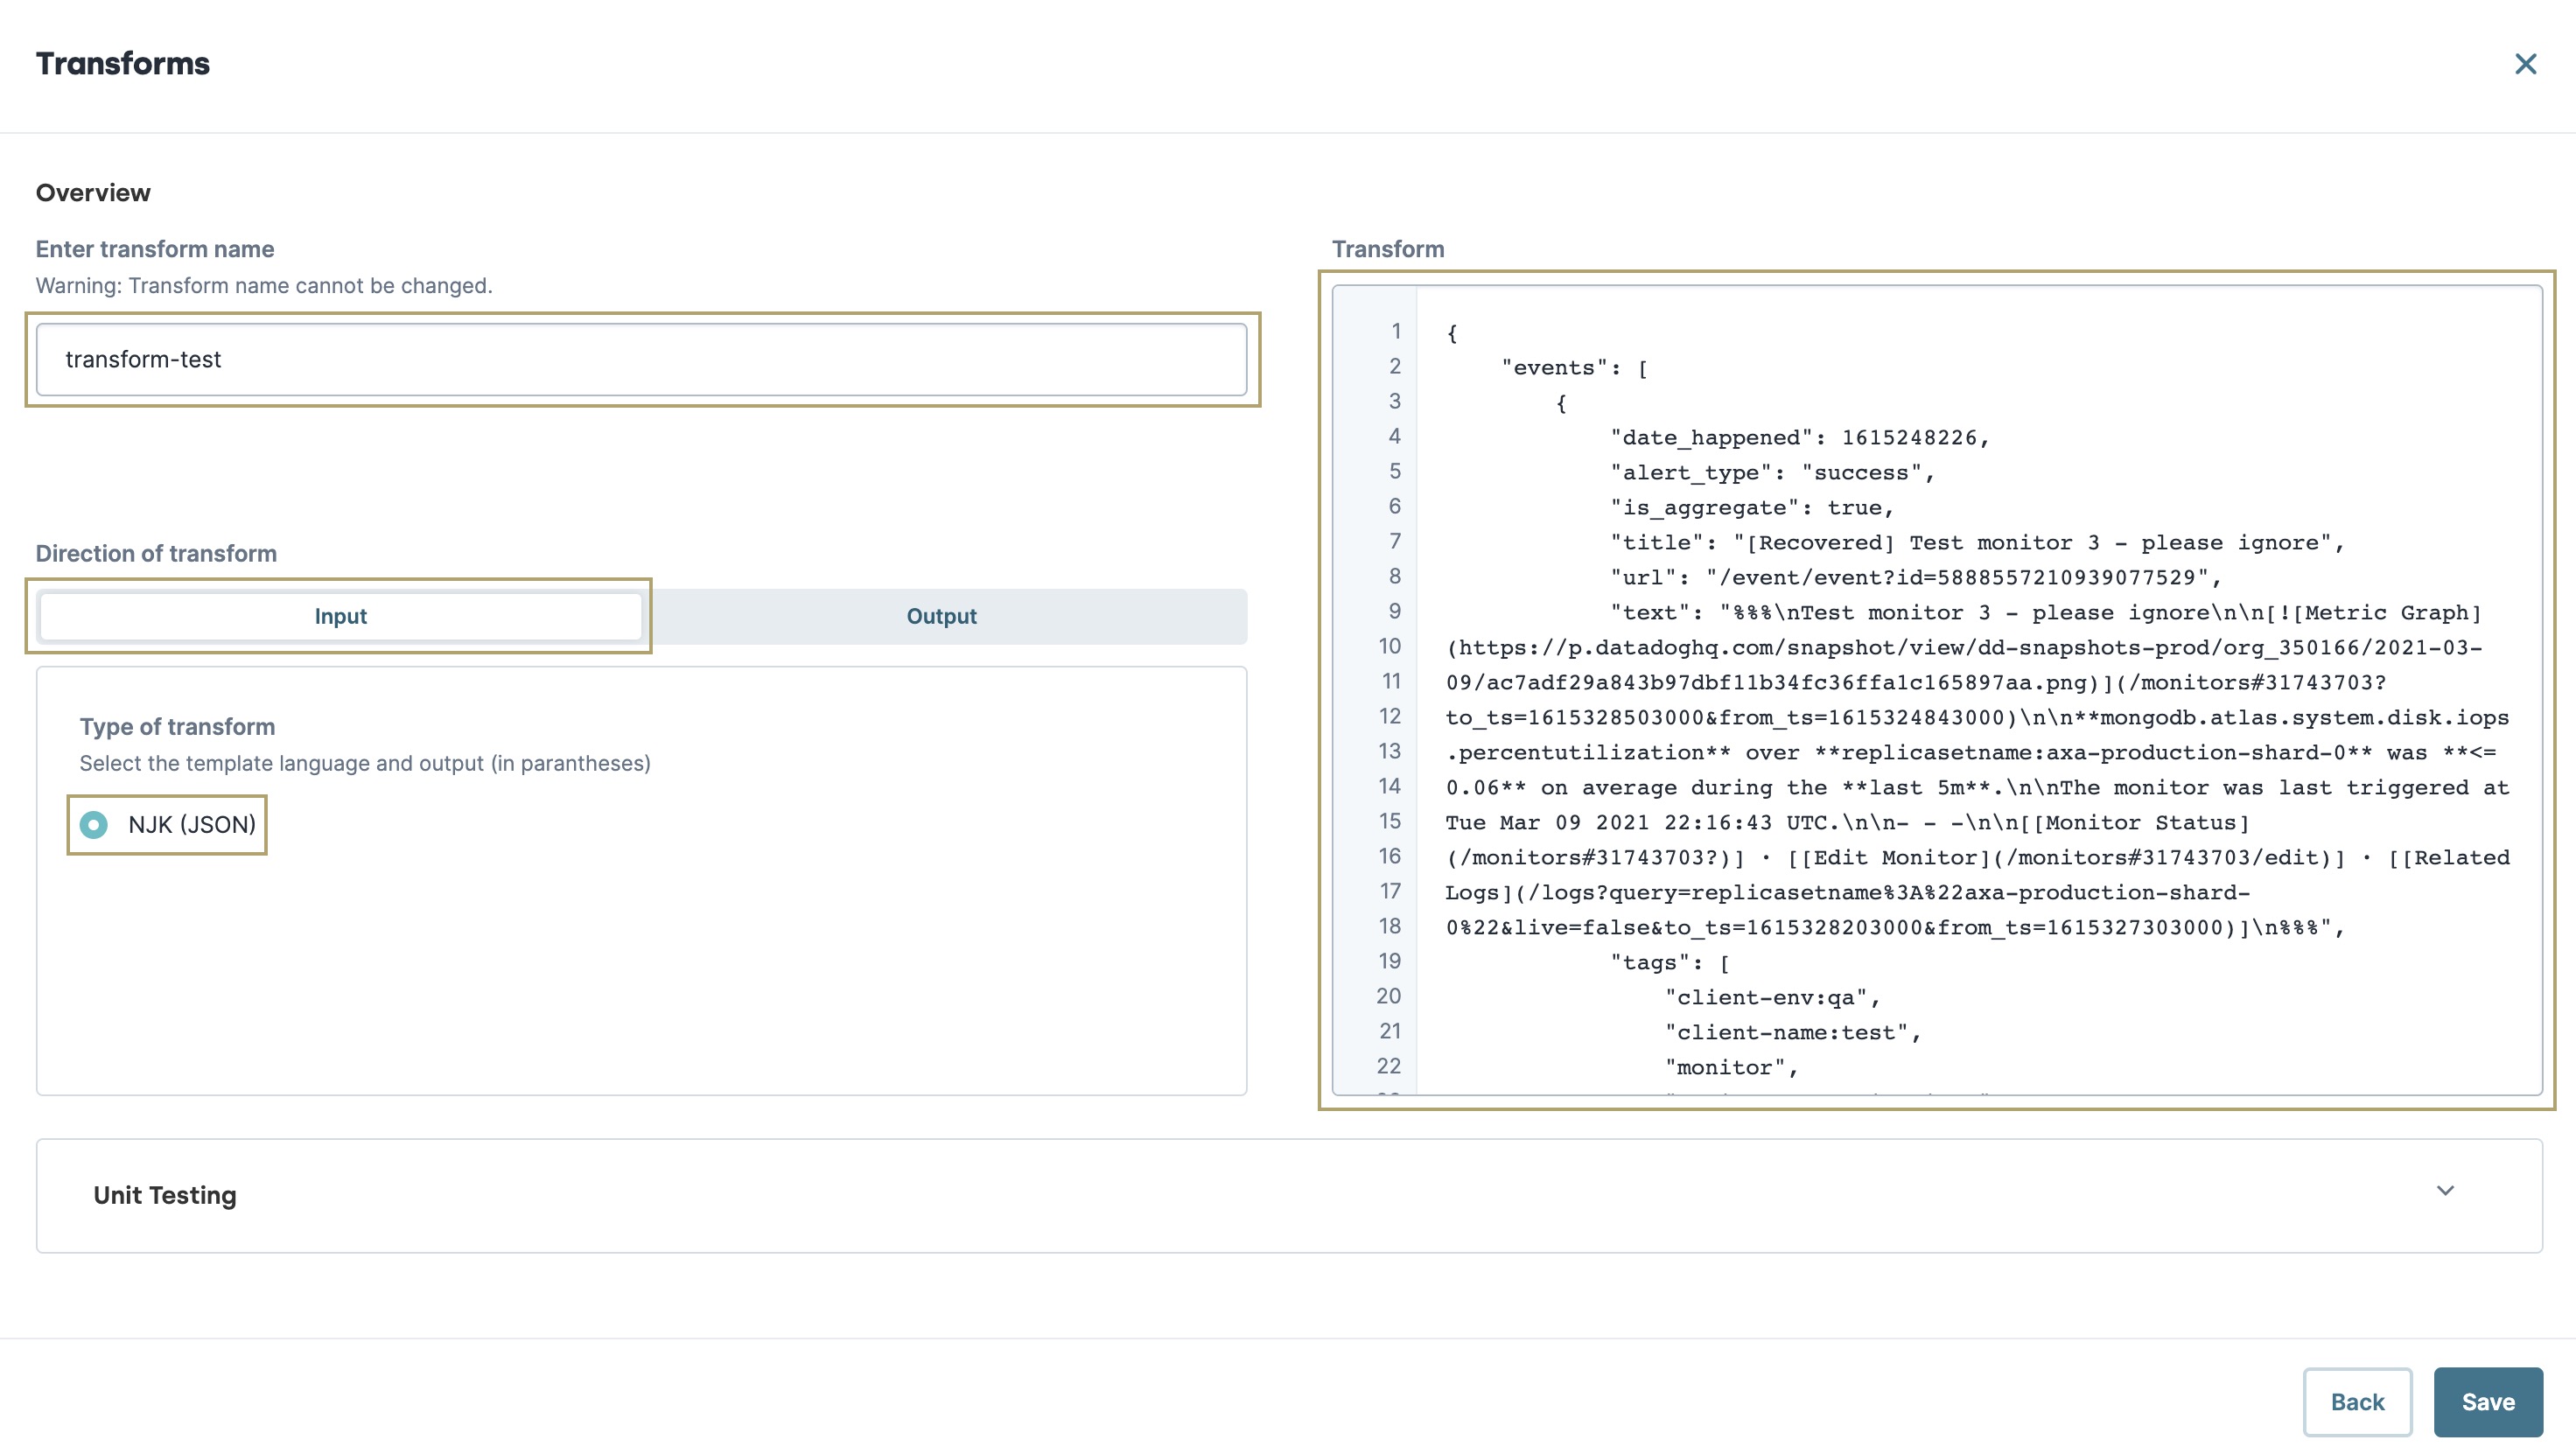
| 6. | Click Save. |
| 7. | Click Back to return to the Transforms modal A modal is a window that appears on top of the content you are currently viewing.. Or, click X to return to the Module Builder. |
Referencing a Workflow Transform
Transforms created in the Workflow Builder work the same way as transforms created in the Module Builder. The main difference is how you trigger a Workflow Builder transform. Like triggering transforms created in the Module Builder, you'll use a Plug-In component. But, instead of calling the Execute Transform with an Input Data endpoint, you'll call the Get Workflow Submission endpoint. The point in your workflow at which you'll add the Plug-In depends on your use case. Then, configure a Button component to trigger the Plug-In component.
Adding a Plug-In Component
You'll use this Plug-In to make an API (application programming interface) call to the Get Workflow Submission endpoint. By referencing the name of your transform in the call, you can trigger the transform.
The module where you configure the Plug-In component must exist in the Workflow-type app where you created your transform.
| 1. | Open the module where you created the transform. |
| 2. | In the Module Builder, drag and drop a Plug-In component onto your canvas. |
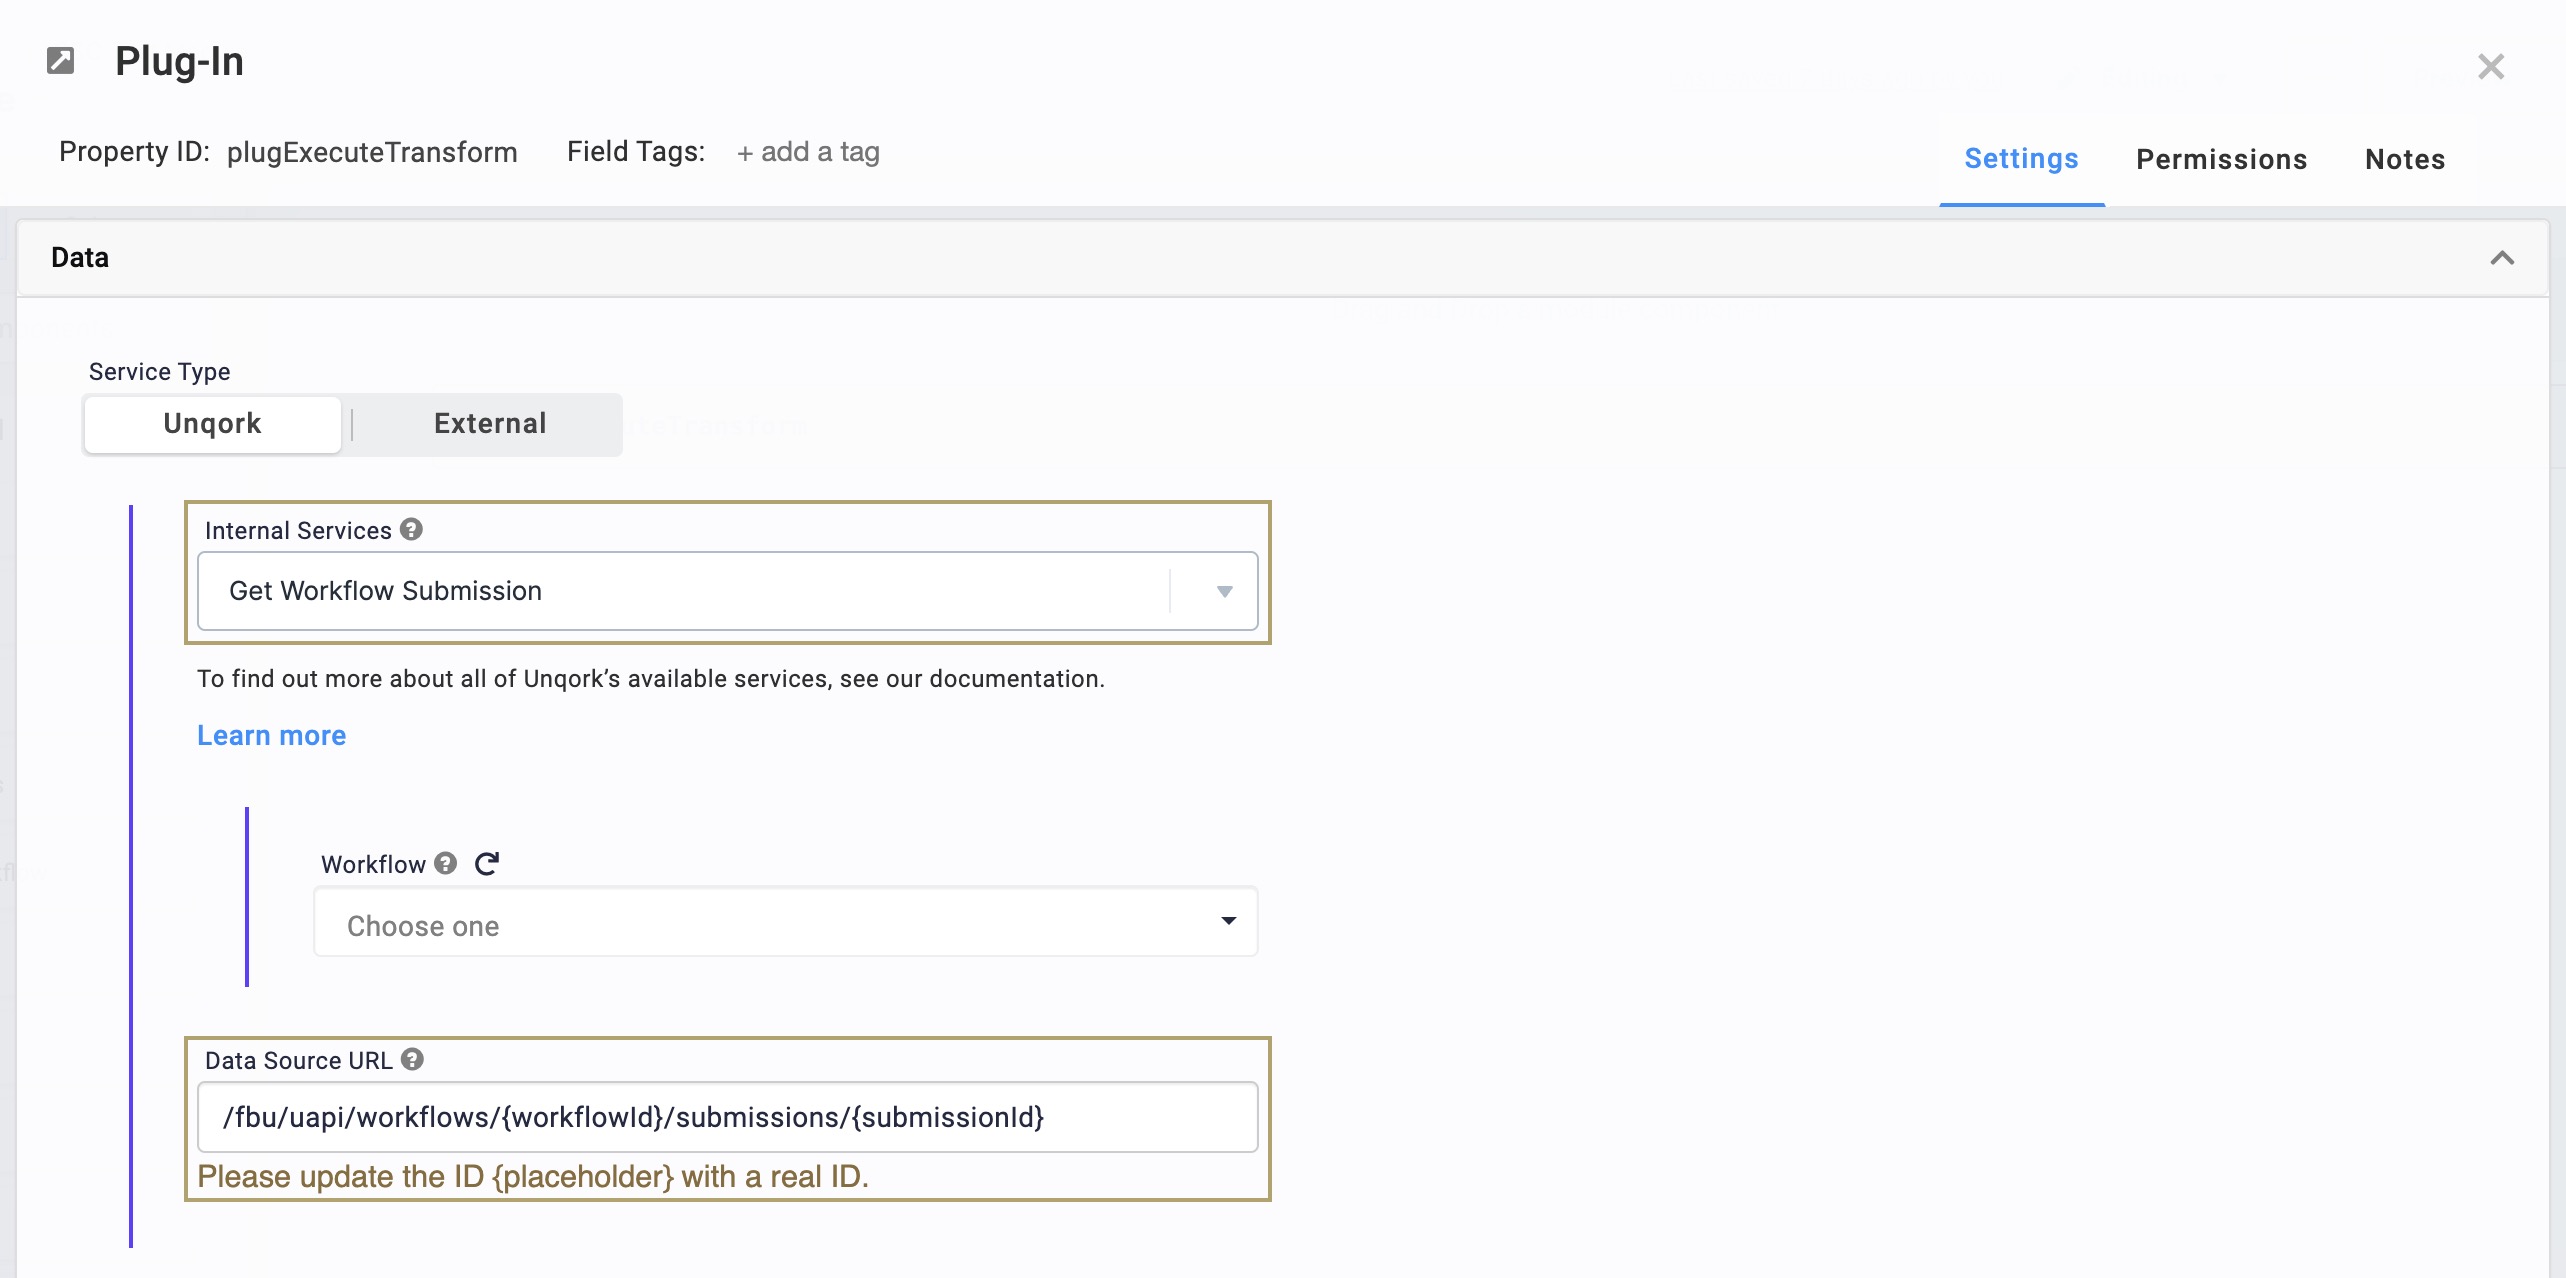
| 3. | In the Property ID and Canvas Label Text fields, enter pluginExecuteTransform. |
| 4. | From the Internal Services drop-down, select Get Workflow Submission. The Data Source URL and Request Type prepopulate. |
| 5. | Replace the {workflowId} and {submissionId} placeholder values in the Data Source URL with your workflow ID and workflow submission ID. |
You have two options for replacing the placeholder values. You can hard-code the workflow ID and submission ID values. Or, you can reference components in your module that are storing those values. If referencing a component in your module, apply curly braces to the component's Property ID. If hard-coding the values, replace the {workflowId} and {submissionId} placeholders.
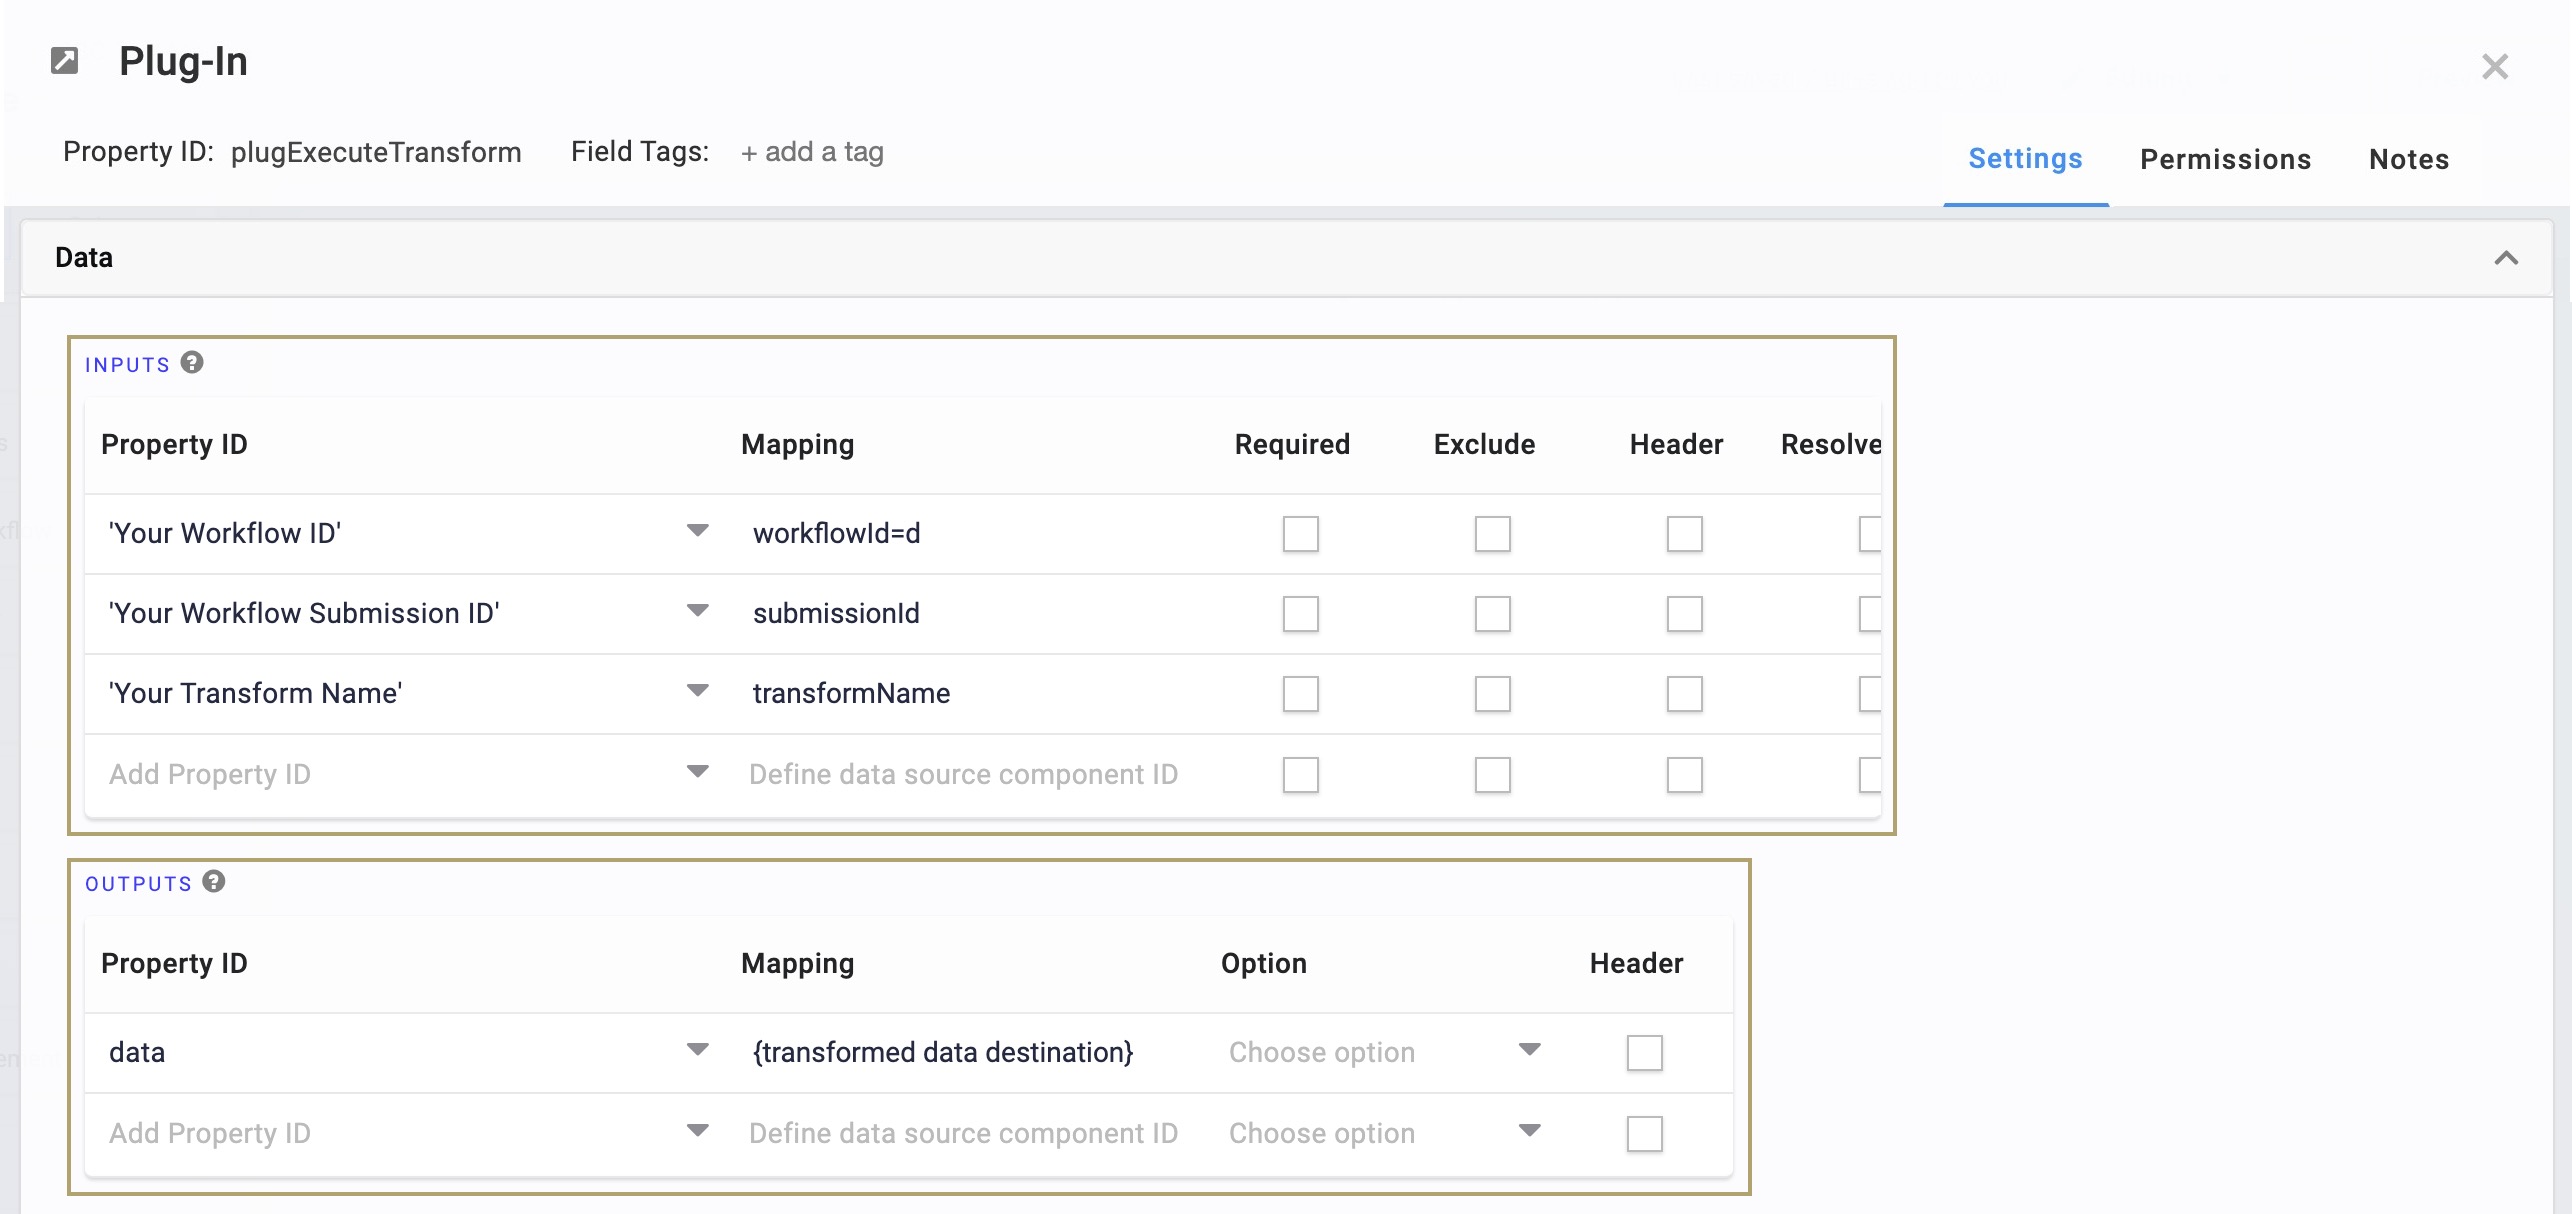
| 6. | In the Inputs table, enter the following: |
|
Property ID |
Mapping |
|---|---|
|
'Your Workflow ID' |
workflowId |
|
'Your Workflow Submission ID' |
submissionId |
|
'Your Transform Name' |
transformName |
This example assumes you hard-coded each value, so there are single quotes applied. Doing so lets the Plug-In know not to look for matching Property IDs in the module. If your Property ID column references fields in the module, you don't need single quotes.
| 7. | In the Outputs table, enter data in the Property ID column. |
Entering data references the entire object returned by the API call. Your transformed data returns as an object stored under the data key. You can also use dot notation to reference the fields stored inside the data object. To learn more about other parameters, view the Get Workflow Submission endpoint here: https://developers.unqork.io/#tag/Submissions%2Fpaths%2F~1workflows~1%7BworkflowId%7D~1submissions~1%7BsubmissionId%7D%2Fget.
| 8. | In the Outputs table, consider the following: |
| Transform Type | Mapping |
|---|---|
|
Input |
Map the information coming out of the transform to the applicable field(s) in your module. This overrides the original information. |
|
Output |
Map the information coming from the transform to where you want it to go. |
| 9. | Click Save. |
Adding a Button Component
Next, add a Button component to trigger the Plug-In component.
| 1. | Drag and drop a  Button component onto your canvas, placing it below the pluginExecuteTransform Plug-In component. Button component onto your canvas, placing it below the pluginExecuteTransform Plug-In component. |
| 2. | In the Property ID field, enter btnExecuteTransform. |
| 3. | In the Label Text field, enter Execute Transform. |
| 4. | Set the Action Type The action performed by the button when selected. to Event. |
| 5. | In the Click Event field, enter the Plug-In component's Property ID. |
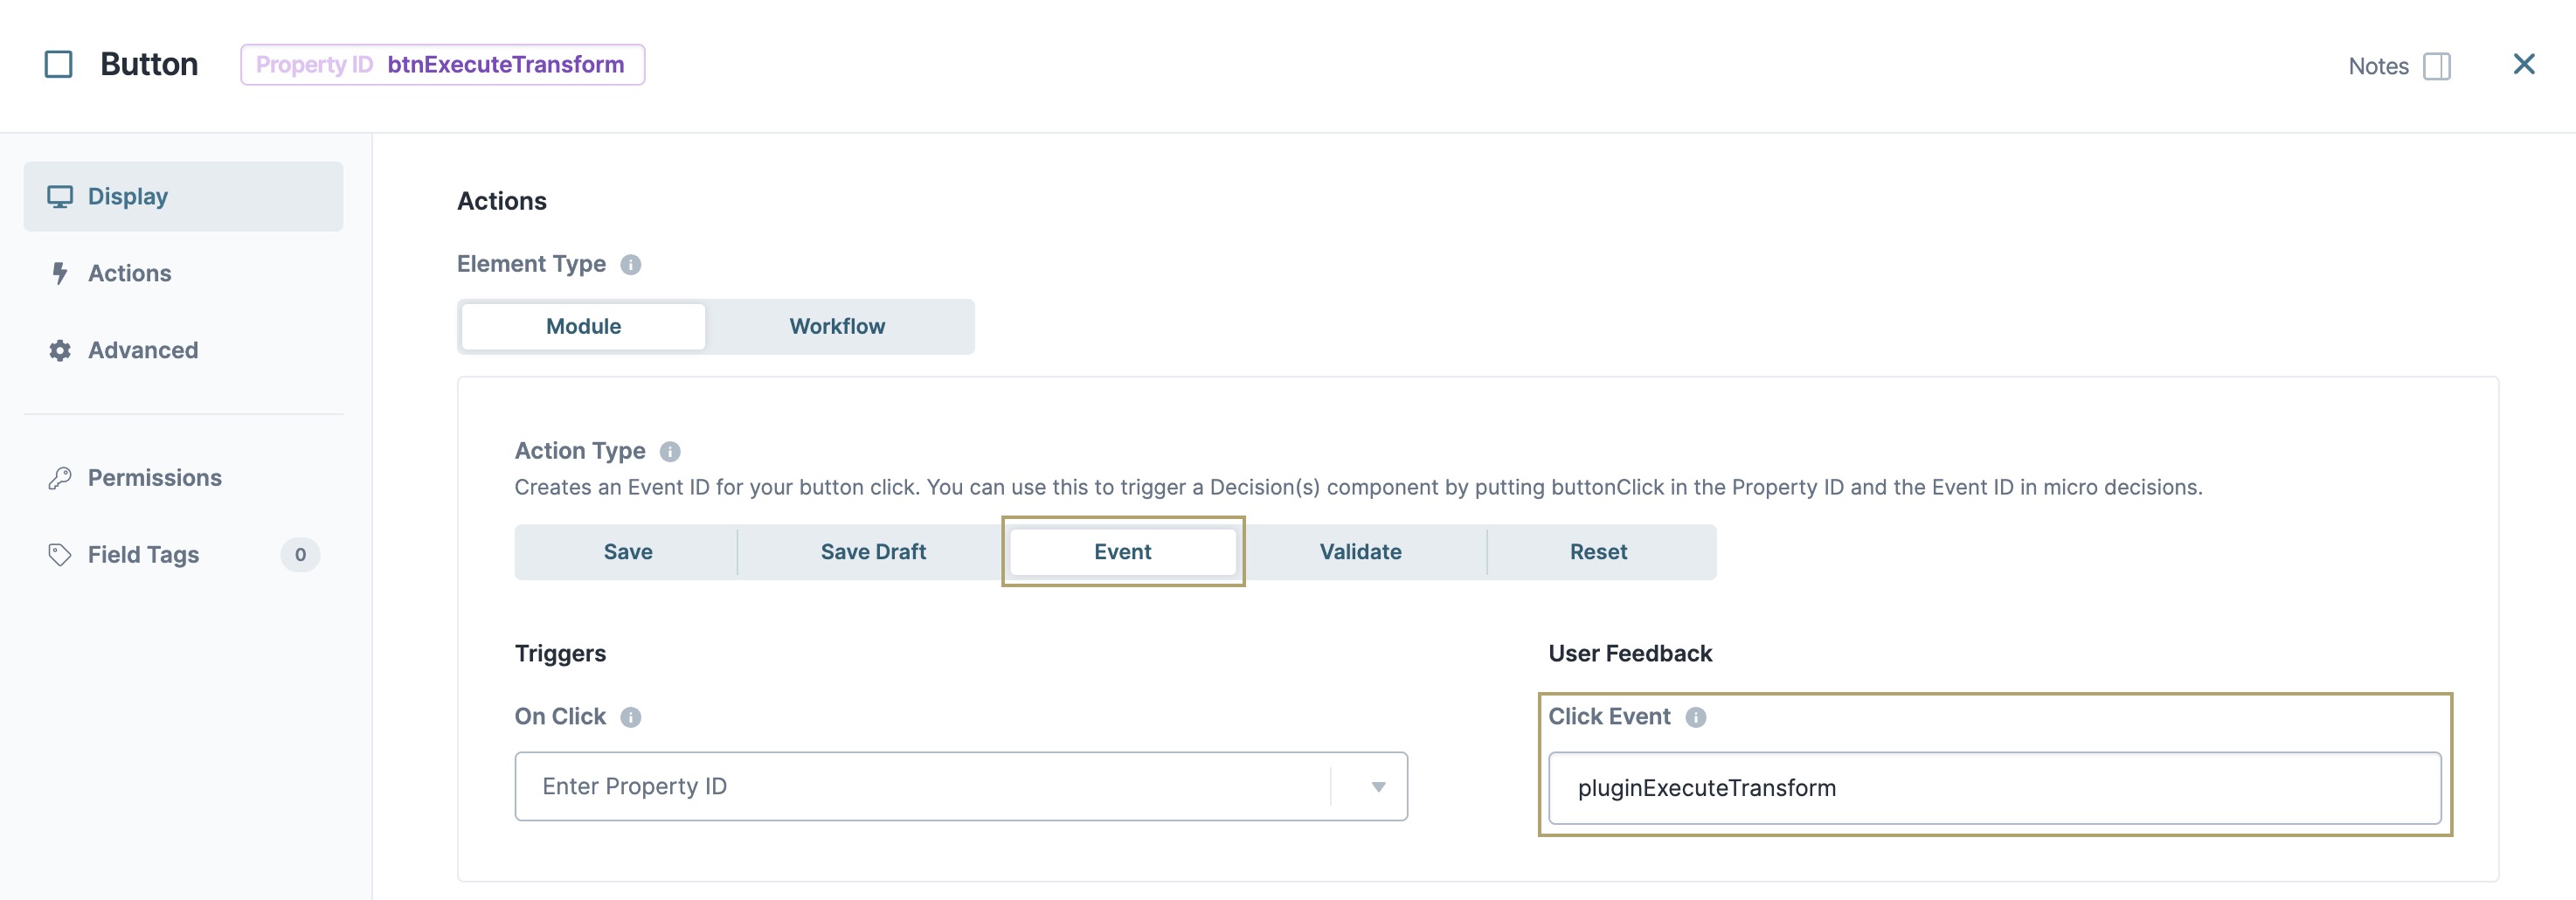
| 6. | Click Save & Close. |
| 7. | Save your module. |
Testing a Transform
Before using a transform, you should test it. To test the transform, open your workflow in Express View and create a submission. Next, use the submission ID in the Transforms modal.
After creating a submission, you can find the workflow submission ID at the end of the Express View URL. You can get a submission's ID from the Express View URL. For example, the workflow submission ID is bolded in this sample URL: https://trainingx.unqork.io/#/workflow/enablementlabGatewayusecase/customerinformation/submission/6089f30acbd55b0211997e9f
To test your transform:
| 1. | Open your workflow in the Workflow Builder. |
| 2. | Click the ··· (ellipsis) button. |
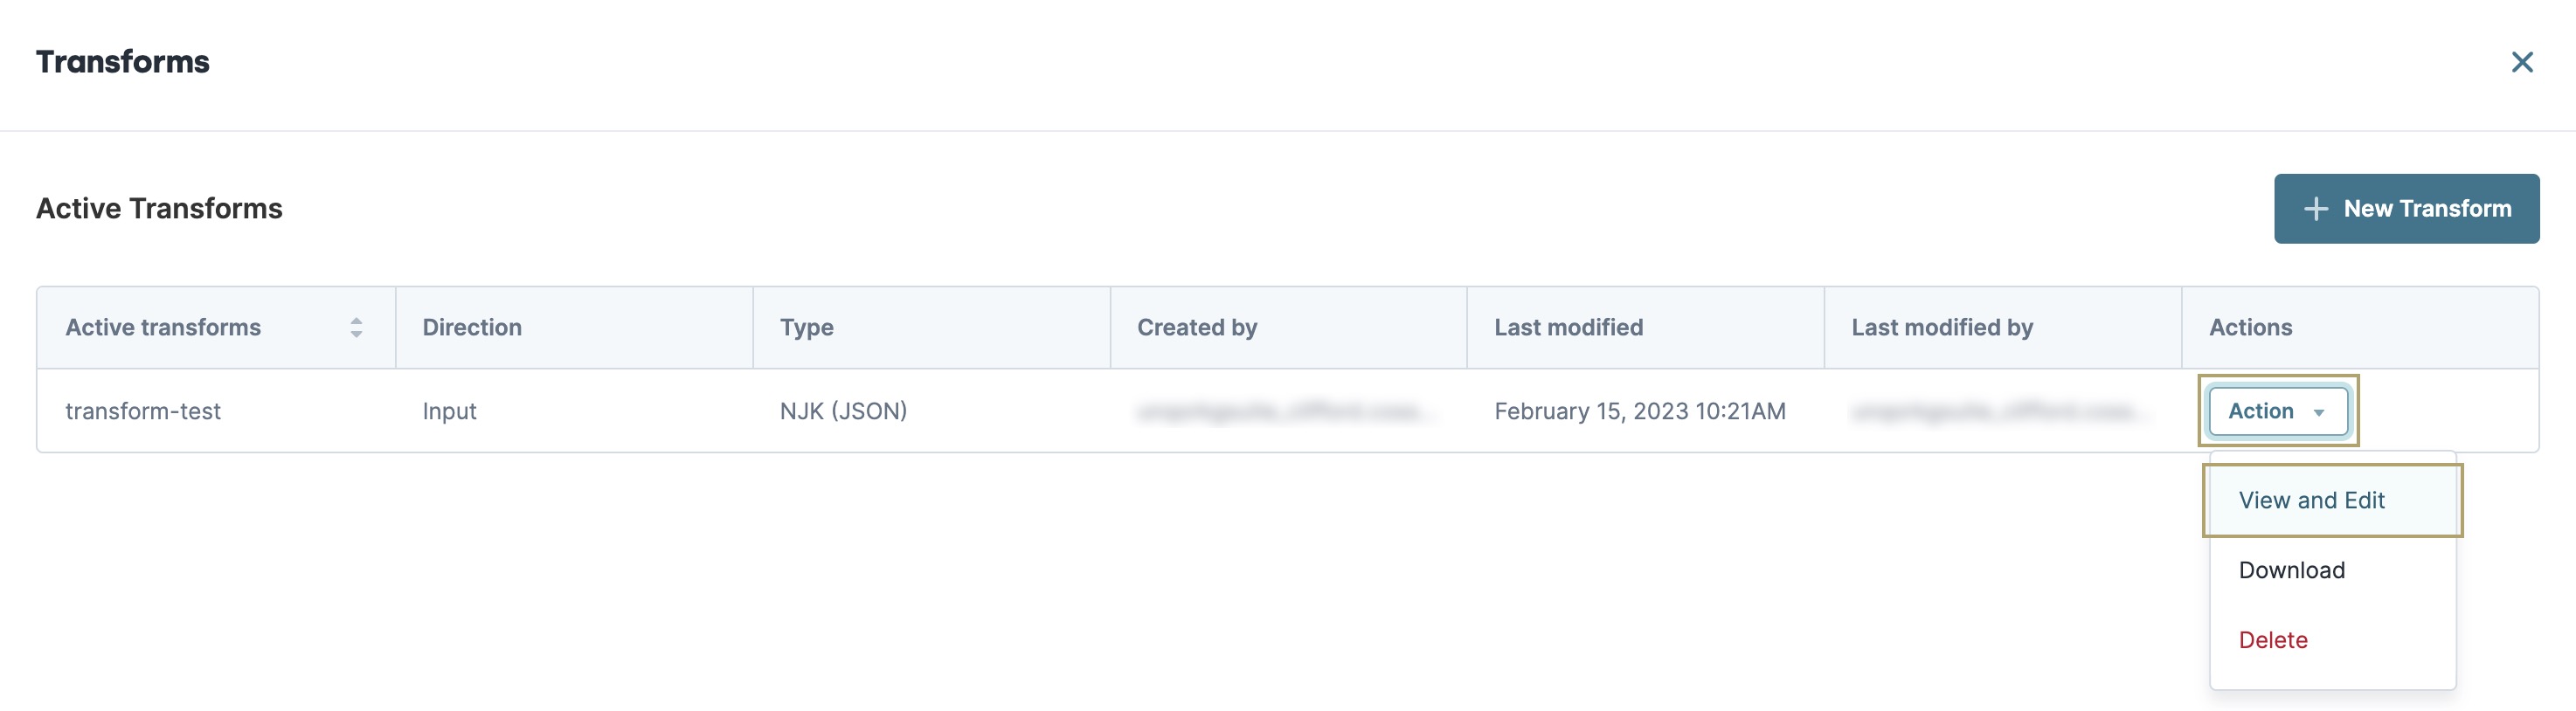
| 3. | Select Transforms. Your transforms display in the Active Transforms table. |
| 4. | From the Actions ▾ drop-down, click View and Edit for the transform you want to test. |
| 5. | Expand the Unit Testing |
| 6. | In the Submission ID field, enter your submission ID. Submission data from the module populates in the Input field. |
| 7. | Click Run Test. The transformed data displays in the Output field. |

Using the Active Transforms Table
If you click Back after creating transforms, all your transforms display in the Active Transforms table. This table displays the following information about your transforms:
| Attribute | Description |
|---|---|
|
Active Transforms |
The name of the transform. |
|
Direction |
The direction of the transform. Options include Input or Output. |
|
Type |
The type of transform, including the template language and the output format in parentheses:
|
|
Created By |
The user that created the transform. |
|
Last Modified |
The date and time the transform was created. |
|
Last Modified By |
The user that last modified the transform. |
|
Actions |
The available actions you can you can take on the transform. Actions include:
|
Editing a Transform
After creating and testing your transform, you can make changes to it. Once you've created a transform you can only change the Transform block, or what your transform actually does.
To edit a transform:
| 1. | Open your module in the Module Builder. |
| 2. | Click the ··· (ellipsis) button. |
| 3. | Select Transforms. Your transforms display in the Active Transforms table. |
| 4. | From the Actions ▾ drop-down, click View and Edit for the transform you want to edit. |
| 5. | Edit your transform as necessary. |
You cannot edit the transform name after creation.
| 6. | Click Save. |
| 7. | Click Back to return to the Transforms modal. Or, click X to return to the Module Builder. |
Downloading a Transform
If you restore a previously deleted module, the transforms don’t restore with it. To avoid having to recreate the transform, you can download it as a backup. Then, you can copy and paste it to a new transform.
It's important to note that your downloaded transform includes the transform body only. The file doesn’t include the Unqork settings that go with it. To restore your Unqork settings, set them up as you would a new transform.
To download a transform:
| 1. | Open your module in the Module Builder. |
| 2. | Click the ··· (ellipsis) button. |
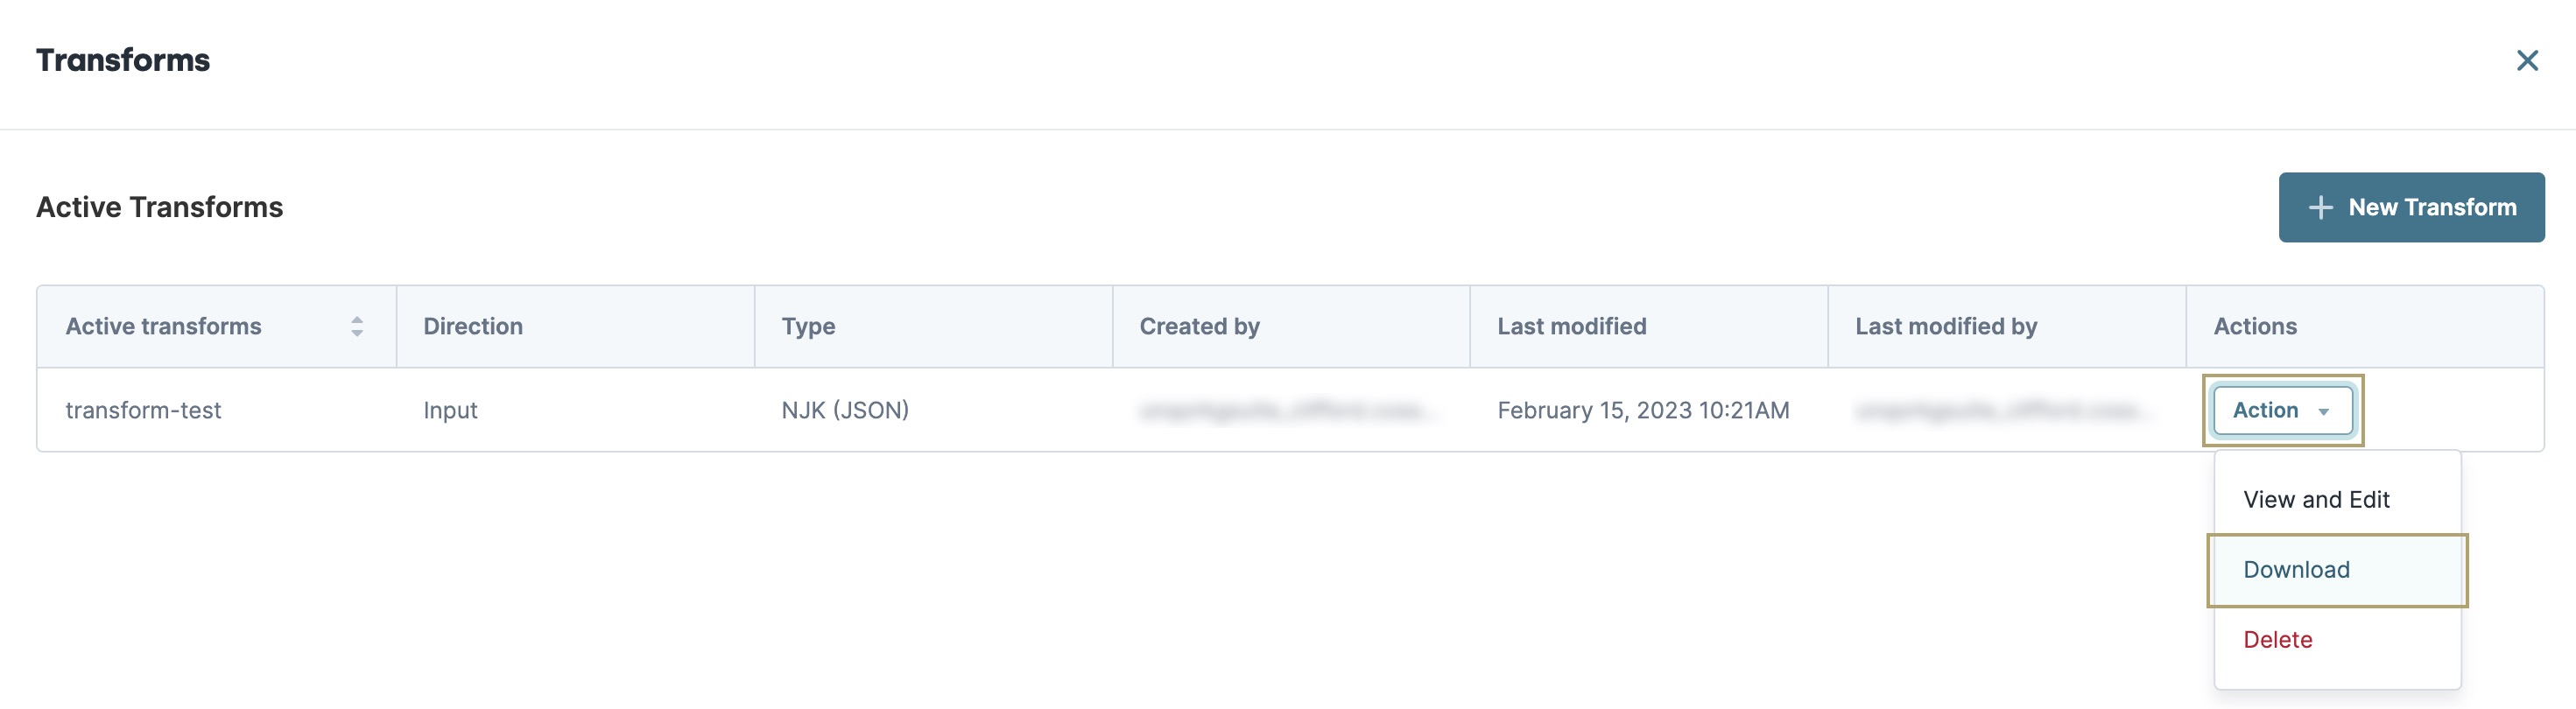
| 3. | Select Transforms. Your transforms display in the Active Transforms table. |
| 4. | From the Actions ▾ drop-down, click Download for the transform you want to download. |
| 5. | Locate the file in the downloads folder of your computer. |
Deleting a Transform
If you no longer need a transform, you can delete it. Keep in mind that deleting a transform doesn't delete the components that reference it. You still need to delete any references to the transform from your module.
To delete a transform:
| 1. | Open your module in the Module Builder. |
| 2. | Click the ··· (ellipsis) button. |
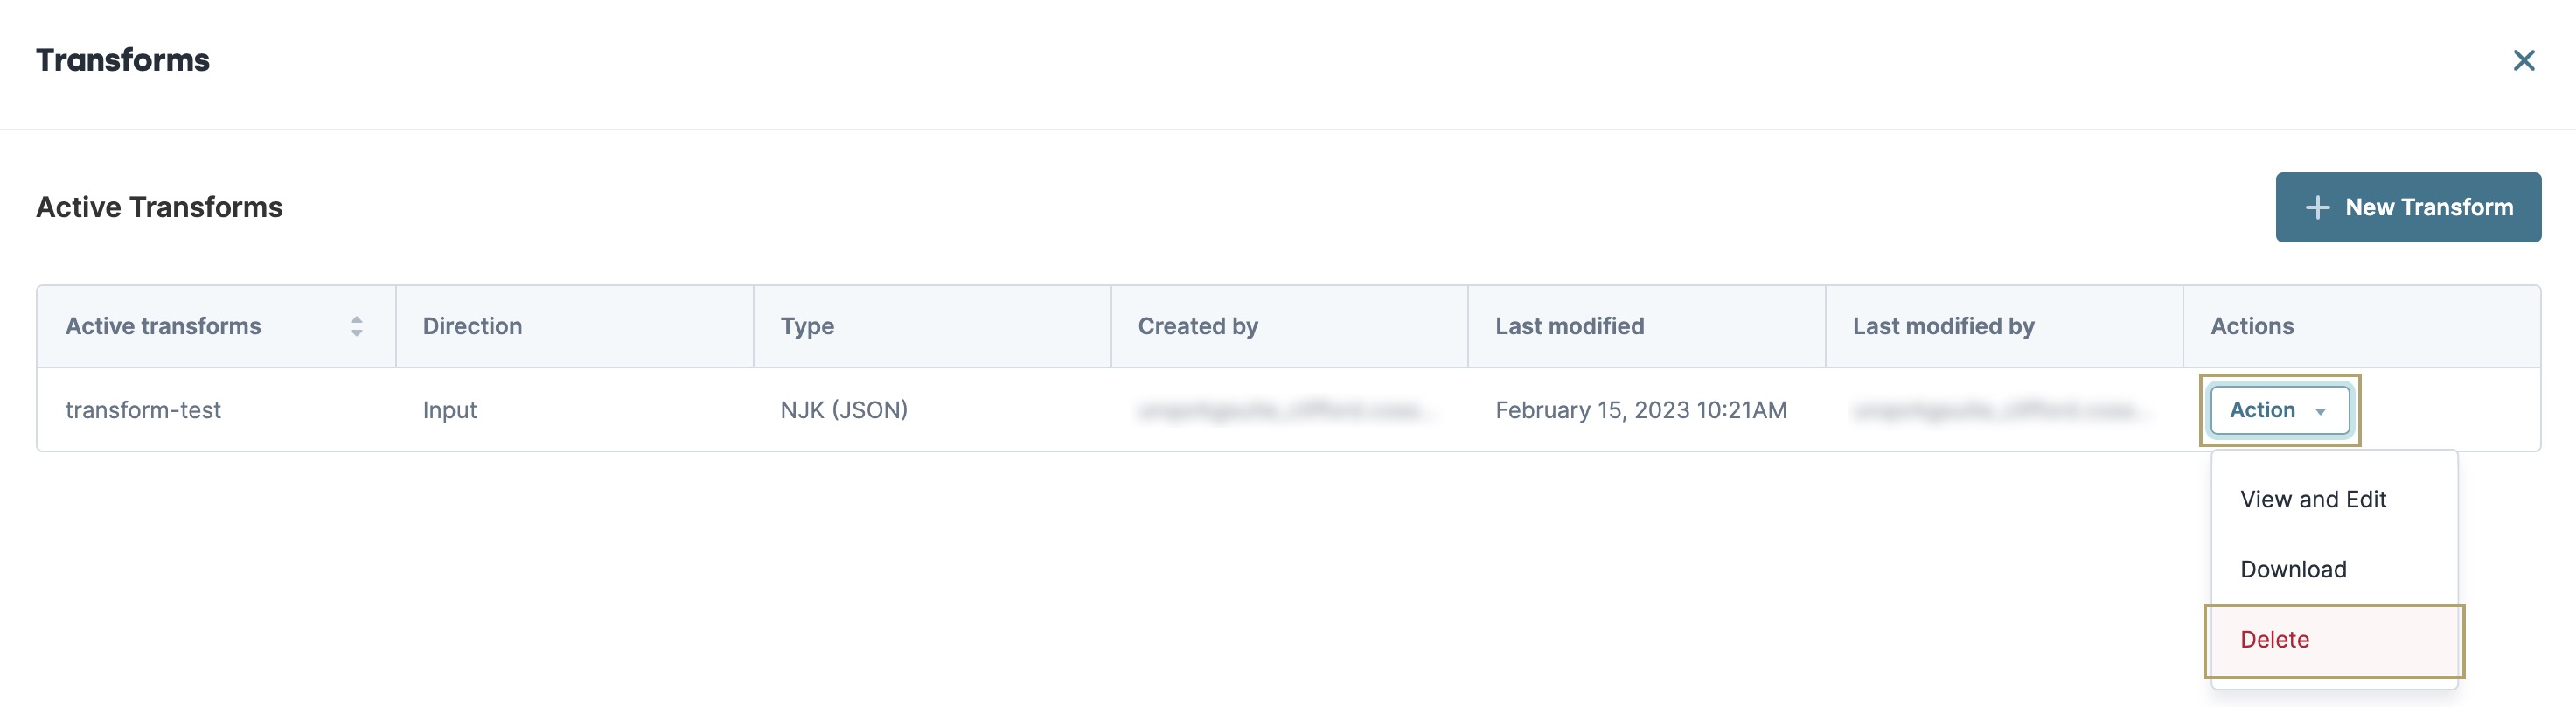
| 3. | Select Transforms. Your transforms display in the Active Transforms table. |
| 4. | From the Actions ▾ drop-down, click Delete for the transform you want to remove. |
| 5. | At the Delete confirmation message, click OK. |
Best Practices
Build automated lane tasks to complete operations in five minutes to prevent timeouts. User input modules can complete operations as long as needed. The five-minute limitation does not apply to QA or Staging environments. However, workflows promoted to the Production environment are affected by the five-minute operation limit.
-
Create modules in the Automated Workflow lane with the following settings:
-
Enable Server-side Execution Only in module settings for external API service endpoints that are configured in server administration. SSE prevents external services from seeing sensitive information such as financial data or PII (Personal Identifiable Information).
-
Enable Customize RBAC for this Module in the module permissions.
-
