Overview
The Integration Gateway lets you integrate with over 700 systems across enterprise applications, databases, and legacy on-premise infrastructure—in the cloud or on-premise. To take advantage of these integrations, it requires creating connections and recipes, activating them, and using a Plug-In component to run them. This how-to guide teaches you how to create connections and recipes and run your integrations.
To learn how to access the Integration Gateway, view our Integration Administration article.
Creating an Integration Using Integration Gateway
A few steps are involved when creating connections and recipes and running them:
Create a connection: First, you must connect to your external service to make any API calls using Unqork. This process requires an account and authorization credentials for that service.
Create a recipe: Recipes are workflow-like steps that perform actions. Recipes have many advanced features that can handle all application integrations and workflow automation scenarios, including conditional triggers, actions, and so on.
Define an endpoint for a recipe: To make an API call to an external service in your Unqork applications, you must establish an endpoint. You'll use this endpoint to make the call in a Plug-In component.
Configure a Plug-In component: Set up a Plug-In component to call your recipe's endpoint and perform the recipe's actions.
Creating a Connection
You must have accounts to all your external systems to create connections. For example, if you connect to Salesforce, you're prompted to log into your Salesforce account to complete the connection. After confirming your credentials, you can use the connection in a recipe to set up the integration.
To create a connection:
Open your Integration Gateway project.
Click Create ▾.
Select
 Connection.
Search for or select the supported connection you want to use.
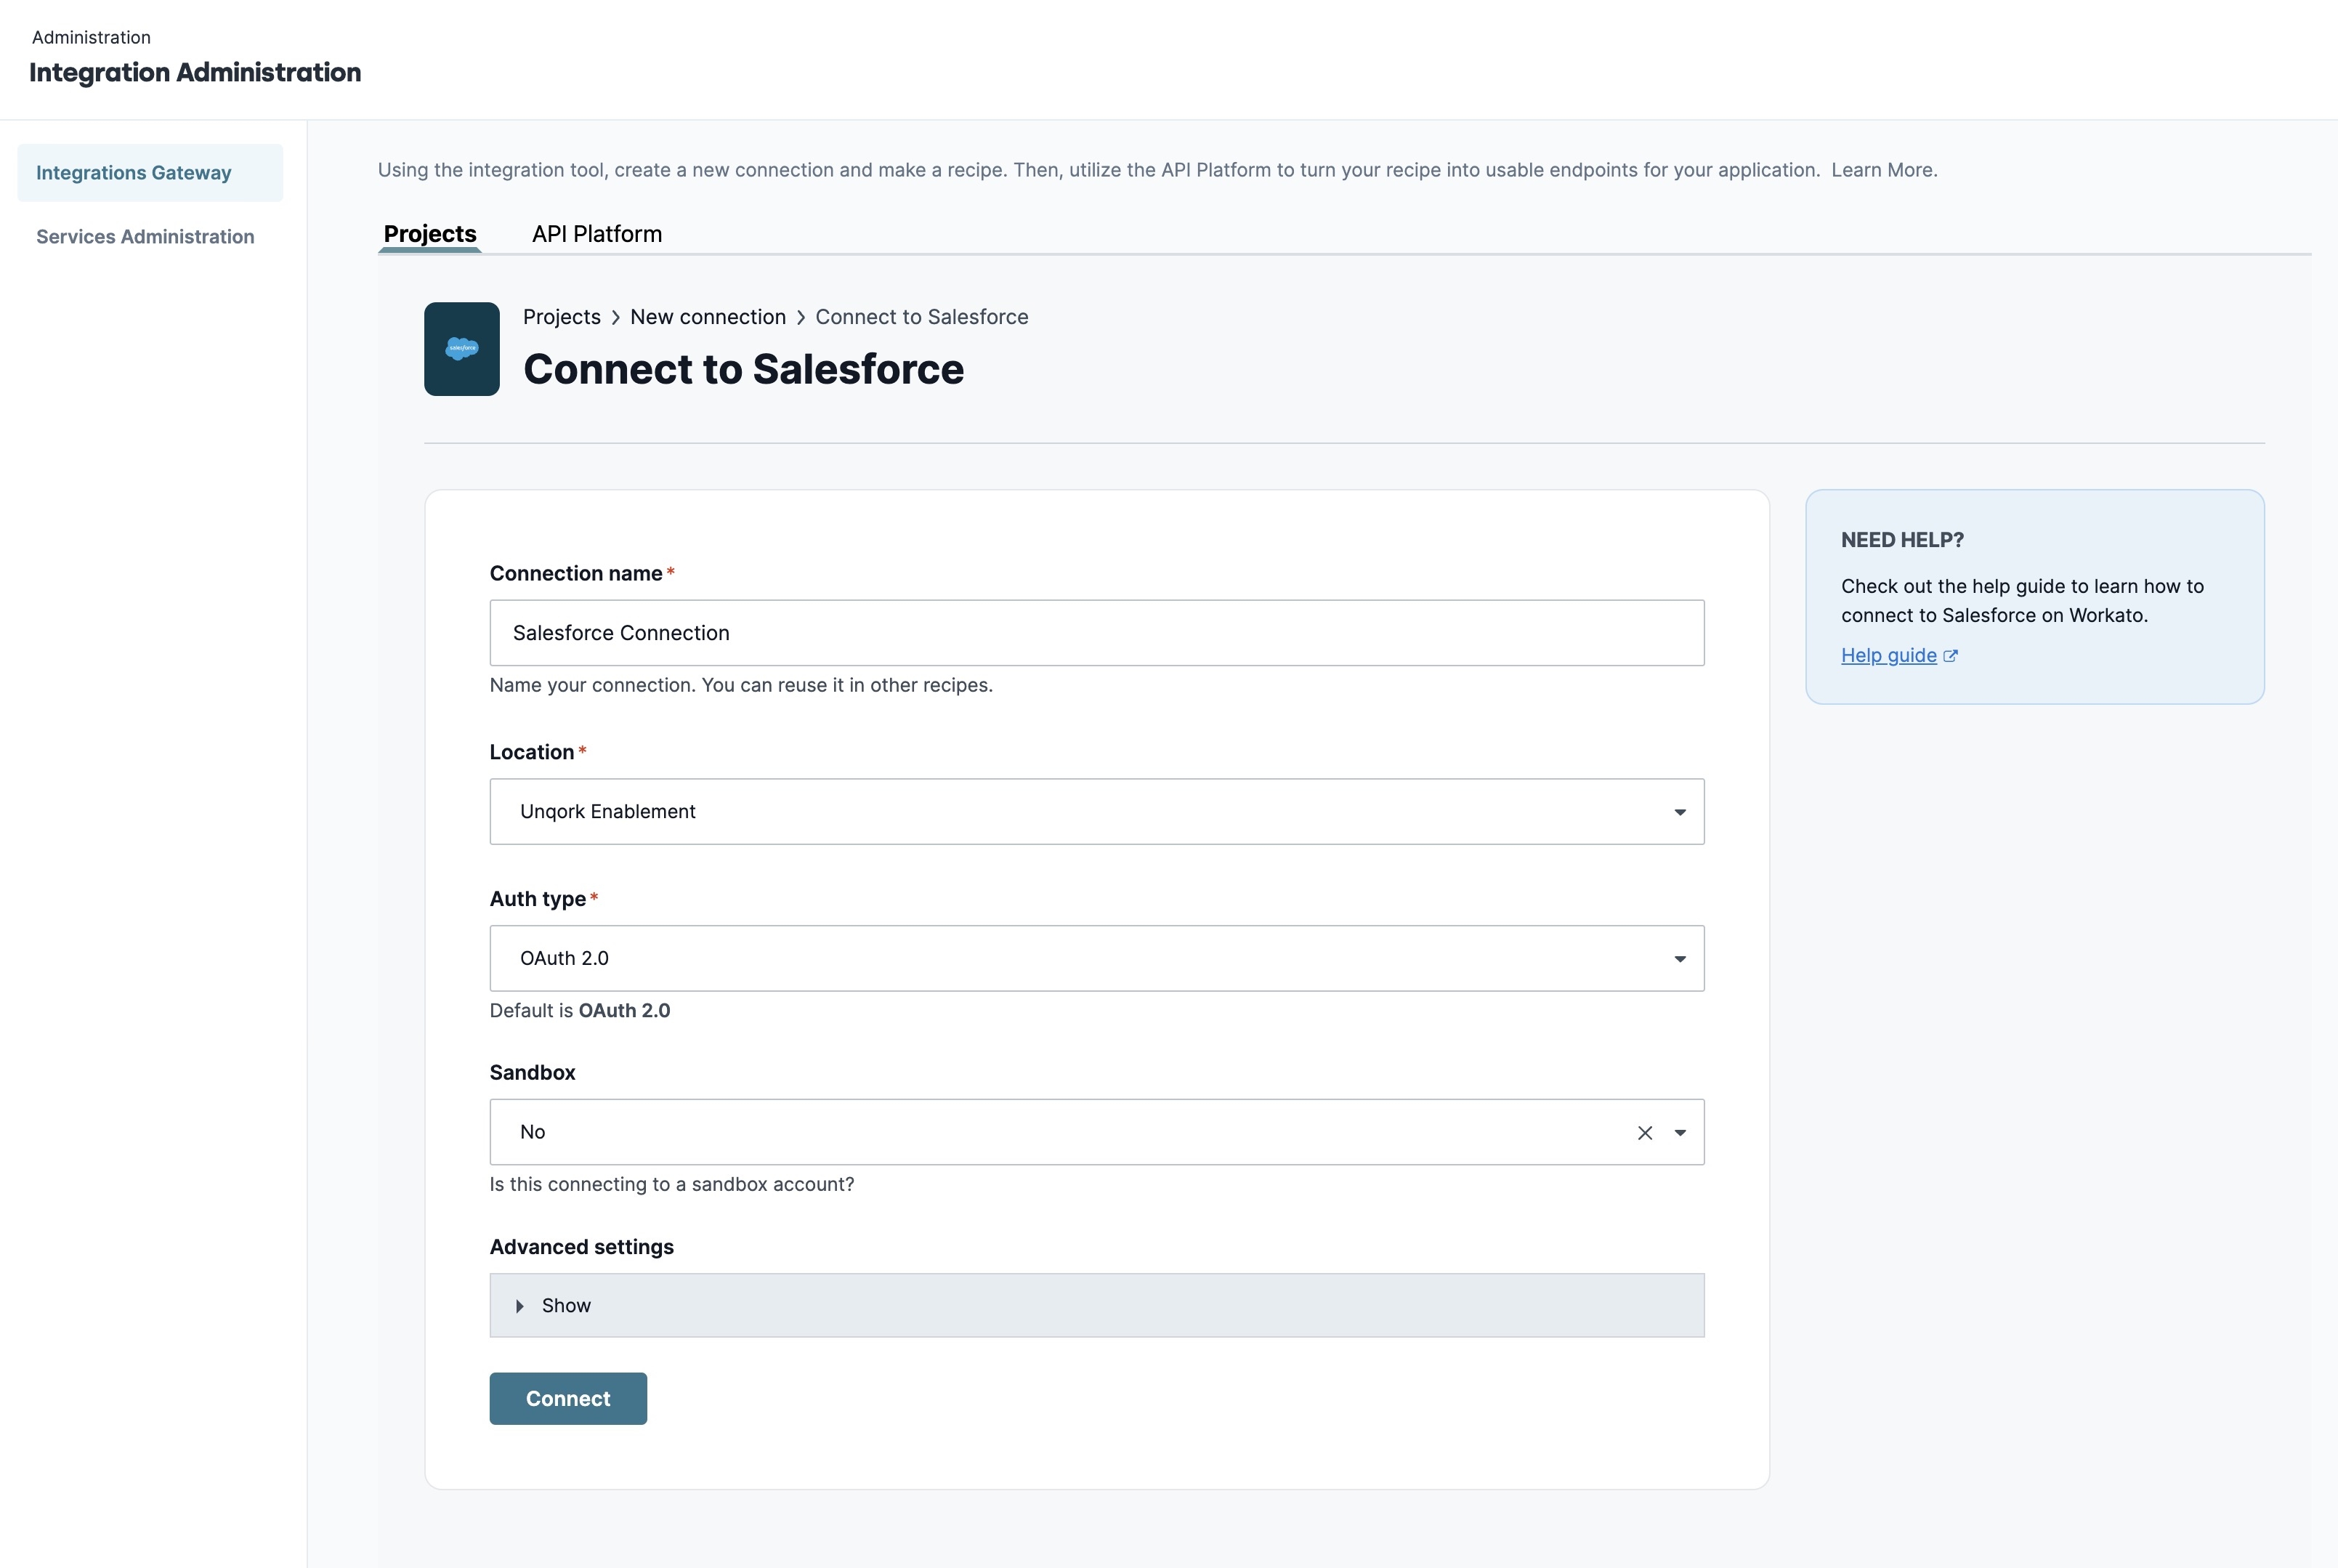
In the Connection Name* field, enter a name for your connection.
It's a best practice to create a name that clearly defines the connection's purpose.
From the Auth Type* drop-down, select an authentication type.
By default, OAuth 2.0 is selected.
From the Sandbox drop-down, determine if you want to set up this connection in a non-production sandbox.
Setting up a connection in a sandbox lets you test the connection without altering the live data.
Complete the remaining fields to authenticate the connection. These fields are specific to the external service.
If you are unsure how to configure the remaining fields, visit that external service's documentation.
Click Connect.
Below is an example of a configured connection:
Creating a Recipe
With your connection set up, you can now build a recipe. A recipe works like an Unqork Workflow. You'll create a starting and ending point with steps in between. Recipes let you integrate your connections, set up triggers, and determine the actions and events you want to trigger.
Setting a Starting Point
To create a recipe:
Open your Integration Gateway project.
Click Create ▾.
Select
 Recipe.
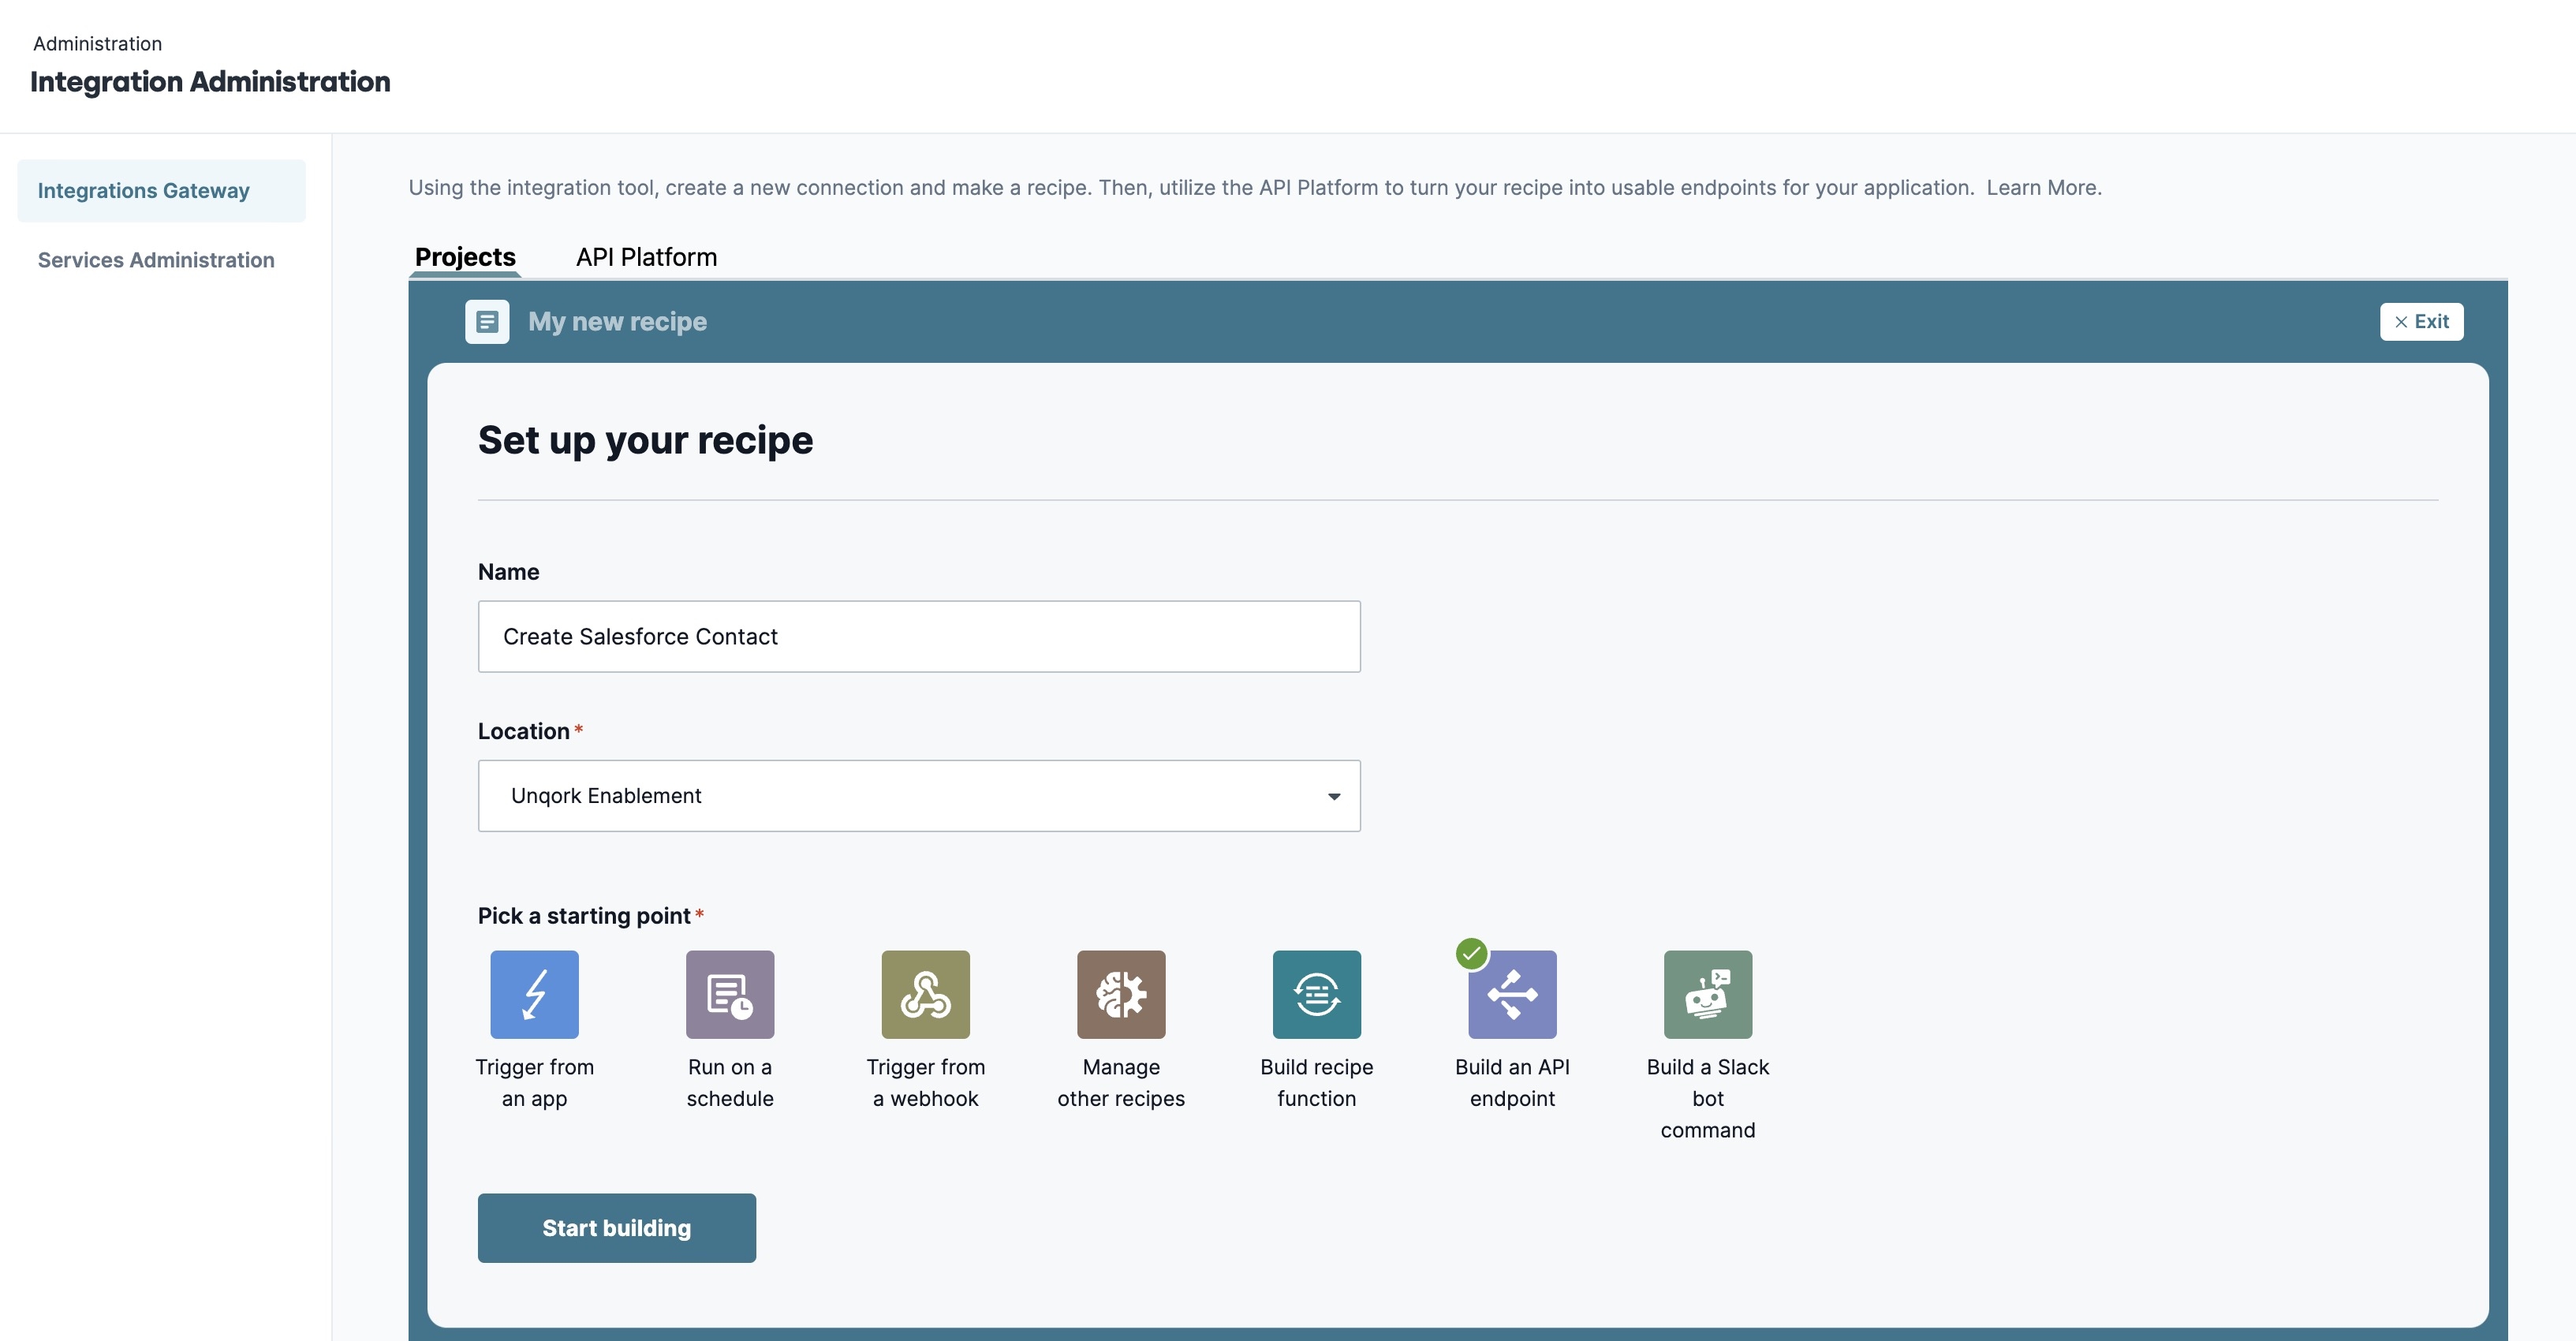
In the Name field, enter a name for your recipe.
From the Pick a Starting Point* section, select
 Build an API Endpoint.
You must create an API endpoint recipe or the integration will not be available in Unqork.
Click Start Building.
Below is an example of a configured starting point:
Configuring Actions
With the starting point set, you can create actions and link them to the connections. Actions are recipe steps that let you create, update, and search for data in a target application.
Using the ![]() button, you can add multiple actions, connecting them to your connection and Unqork. When your recipe is complete, click Save. Then, click Test Recipe to confirm it works correctly. Recipe actions include:
button, you can add multiple actions, connecting them to your connection and Unqork. When your recipe is complete, click Save. Then, click Test Recipe to confirm it works correctly. Recipe actions include:
Action in an App
Performs a specific action in an application.
Call Function
These actions are called recipe functions. They let you call another recipe so you can reuse recipe logic.
IF Condition
Performs an action when criteria are met and another action when not.
IF/ELSE Condition
Performs a different action if the specified criteria are not met.
Handle Errors
Lets you monitor for errors, make another job attempt, or notify a user.
Repeat Action
Performs the same action on each item of a list.
Stop Job
Stops a job from processing. You can use this action to define a failed or successful job and end it
Starting the Recipe
Before you leave your recipe, you must run it.
To start your recipe:
At the top of the Recipe Builder panel, click Save.
At the top right of the Recipe Builder panel, click x Exit.
Click Start Recipe.
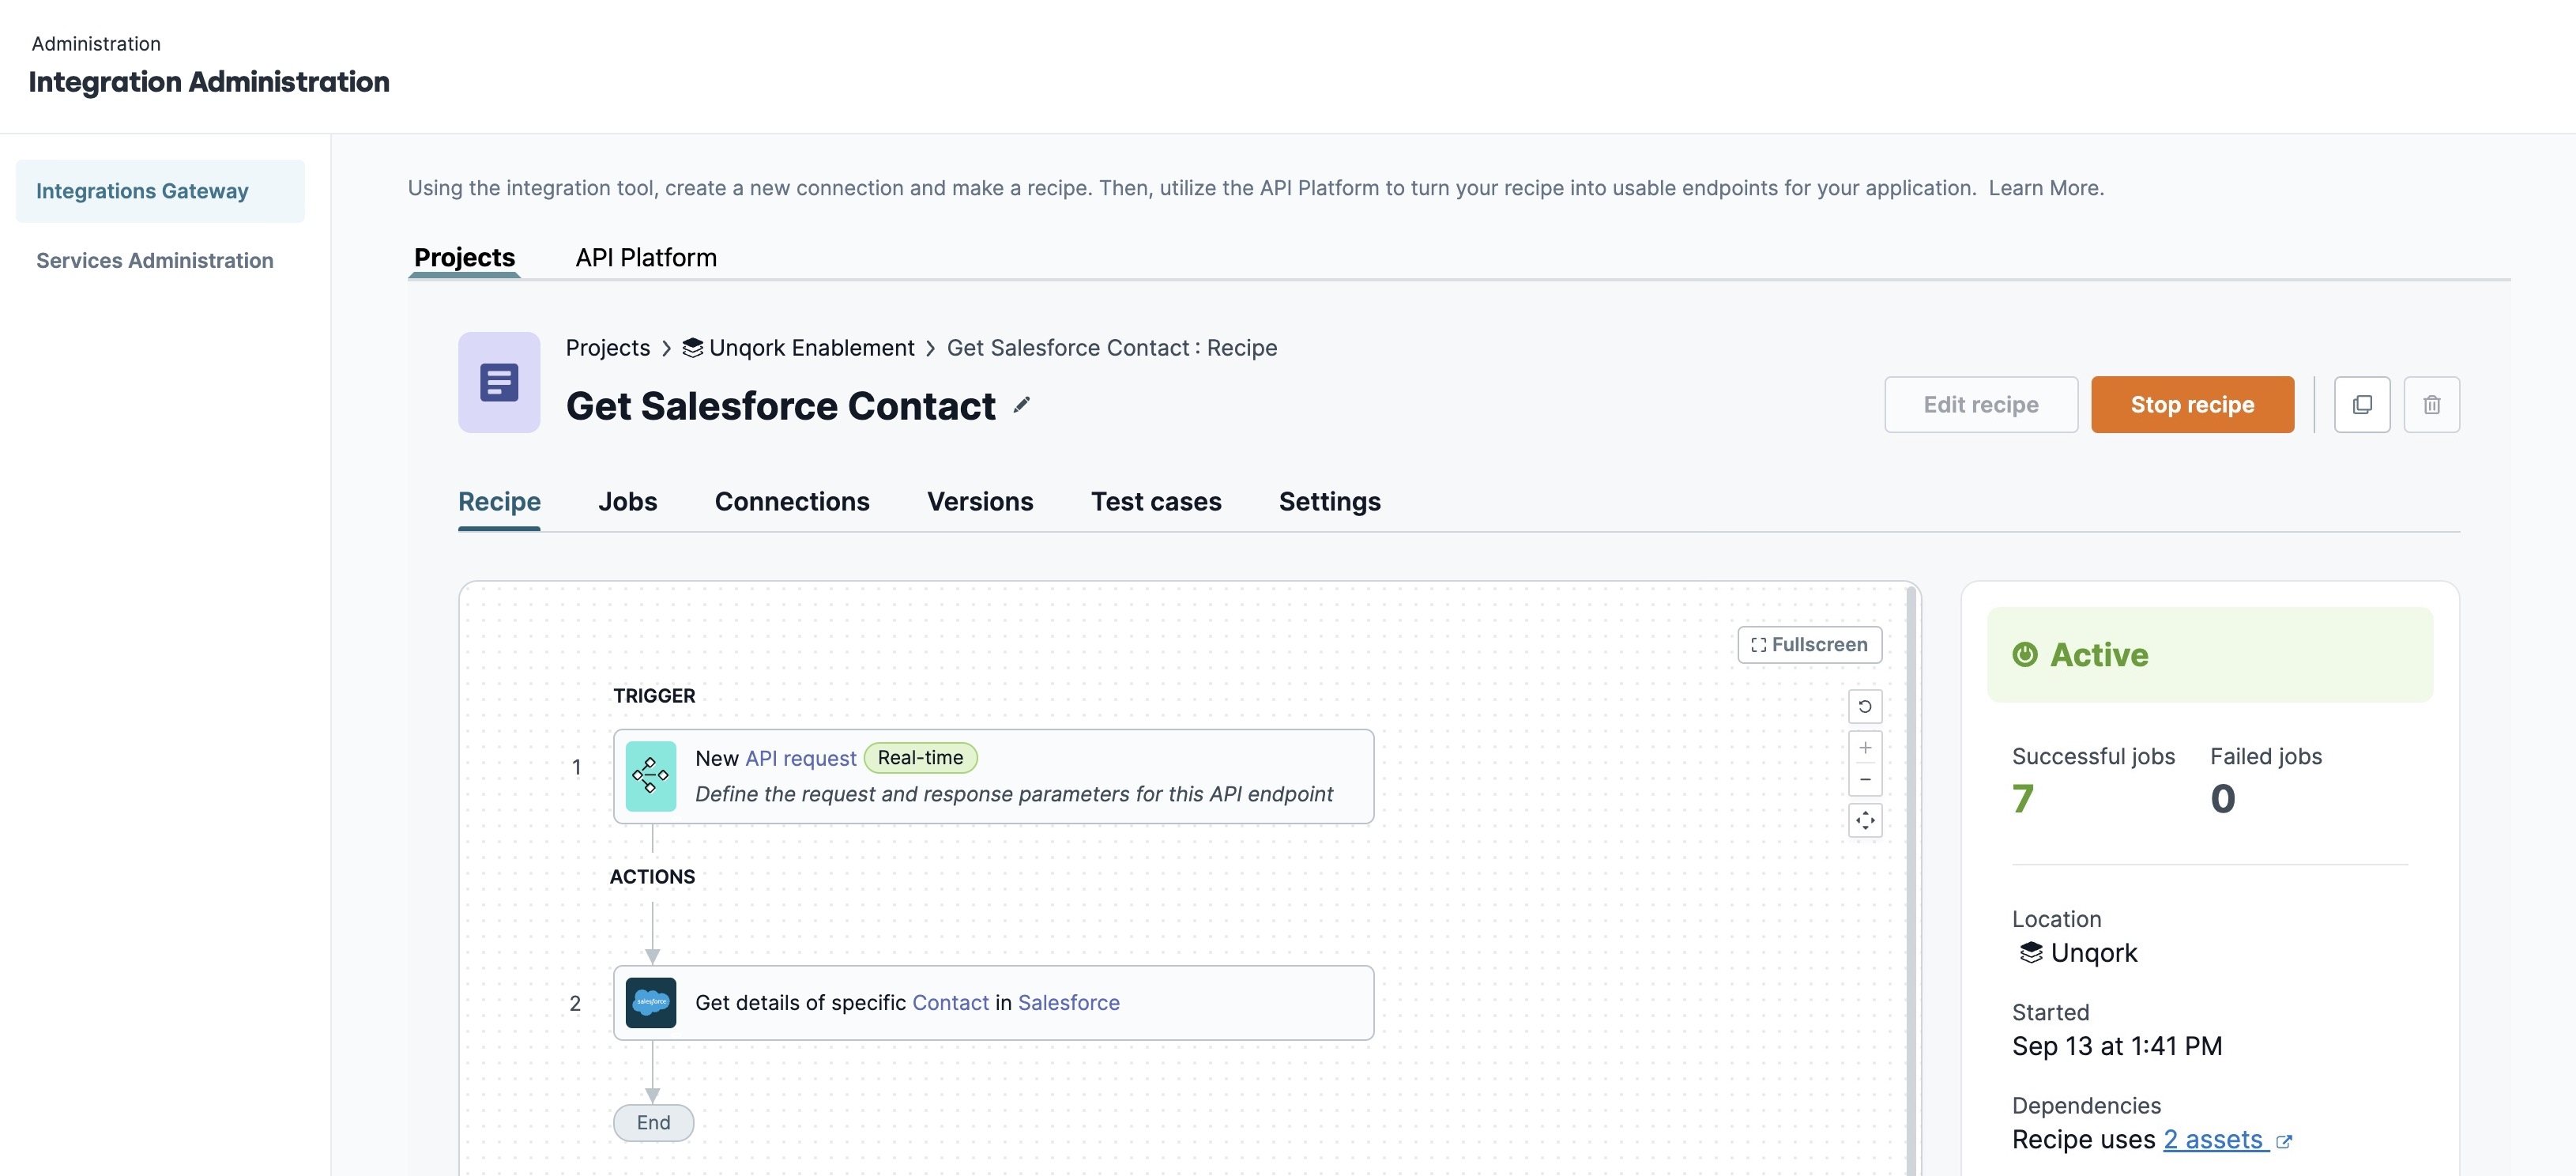
Below is an image of a configured and running recipe:
Your recipe is now running and ready for use in Unqork. The final step is to create an endpoint for your recipe.
Creating an Endpoint
Next, you must create a usable endpoint for your recipe. Doing so lets you use a Plug-In component to run the recipe. You'll define your endpoint's path and HTTP method, set up timeouts, and determine how long the response is stored in the cache. Use the API Platform tab in the Integration Gateway to set up your endpoint.
To configure your endpoint:
At the top of the Recipe Builder, click the API Platform tab.
From the API Collections panel, select the Unqork Gateway collection tile.
Click + New Endpoint. A modal displays to configure your new endpoint.
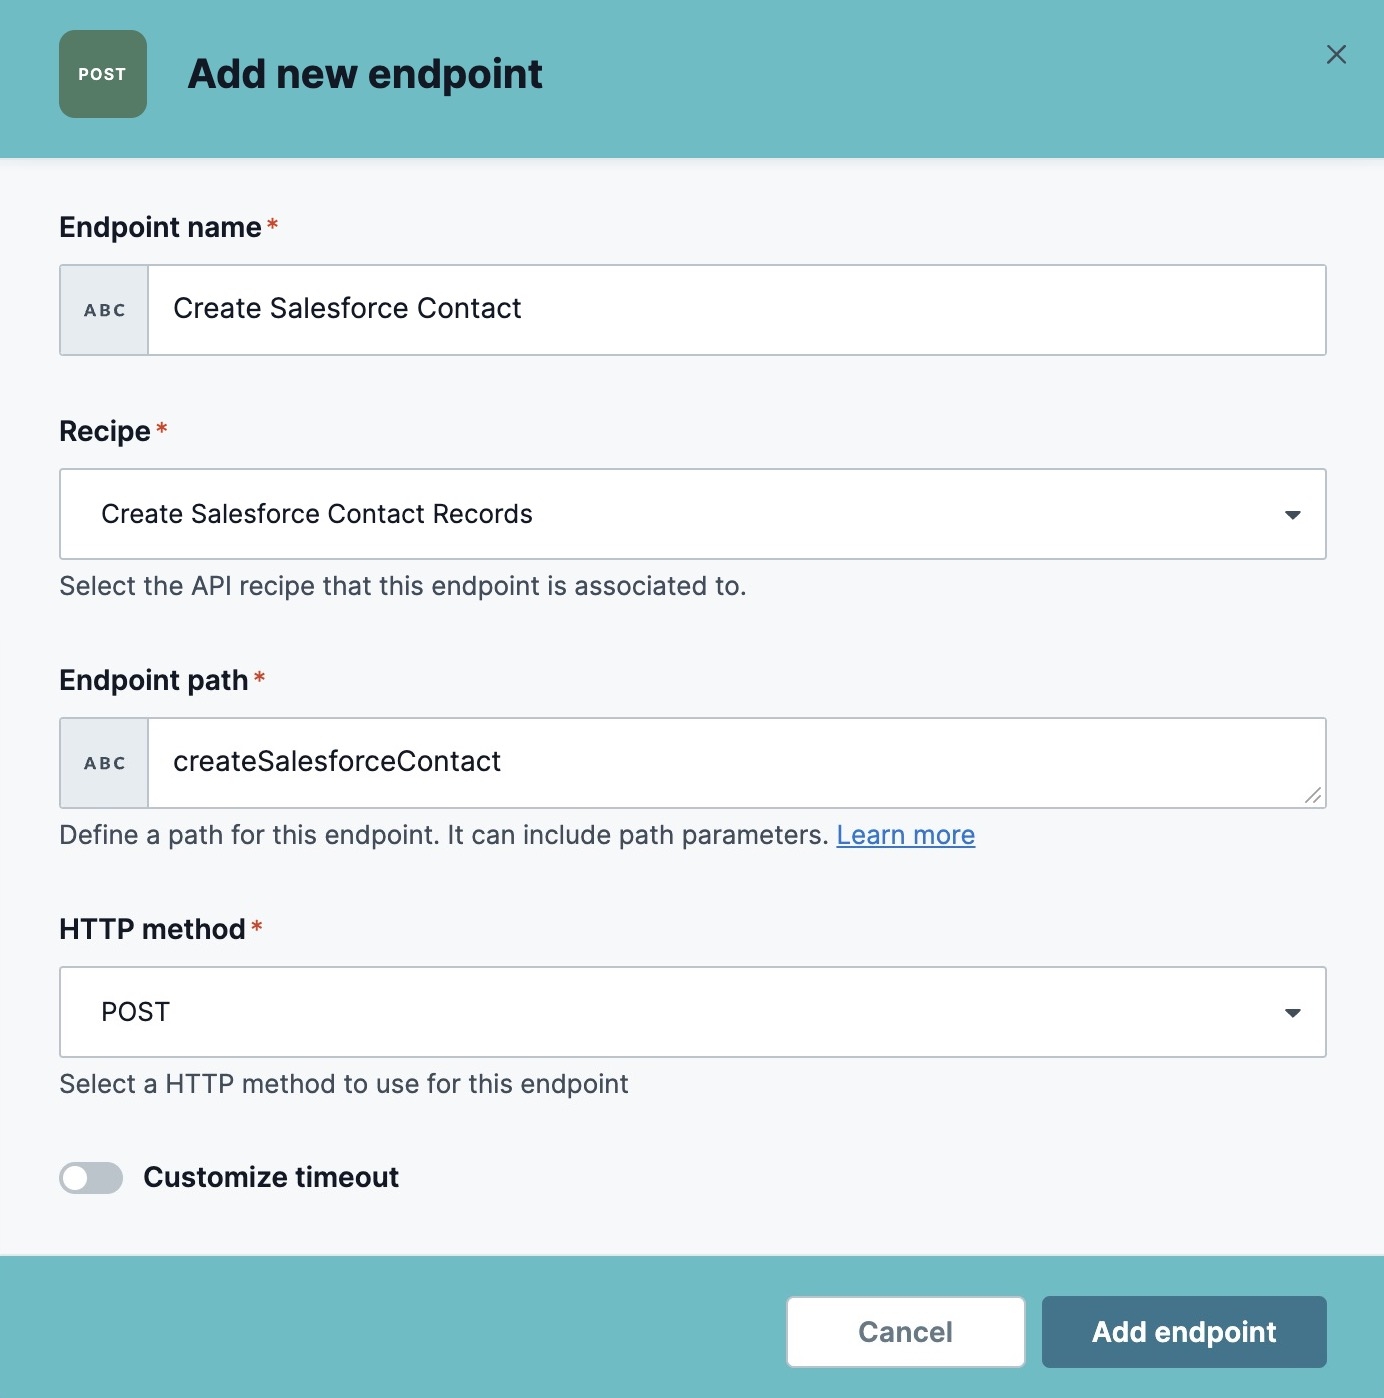
In the Endpoint Name* field, enter a name for this endpoint.
It's a best practice to create a name that defines your endpoint.
From the Recipe* drop-down, select your recipe.
In the Endpoint Path* field, enter a unique path for your endpoint. For example,
createSalesforceContact.From the HTTP Method* drop-down, select the method for this endpoint.
Click Add Endpoint. You return to the API Platform page.
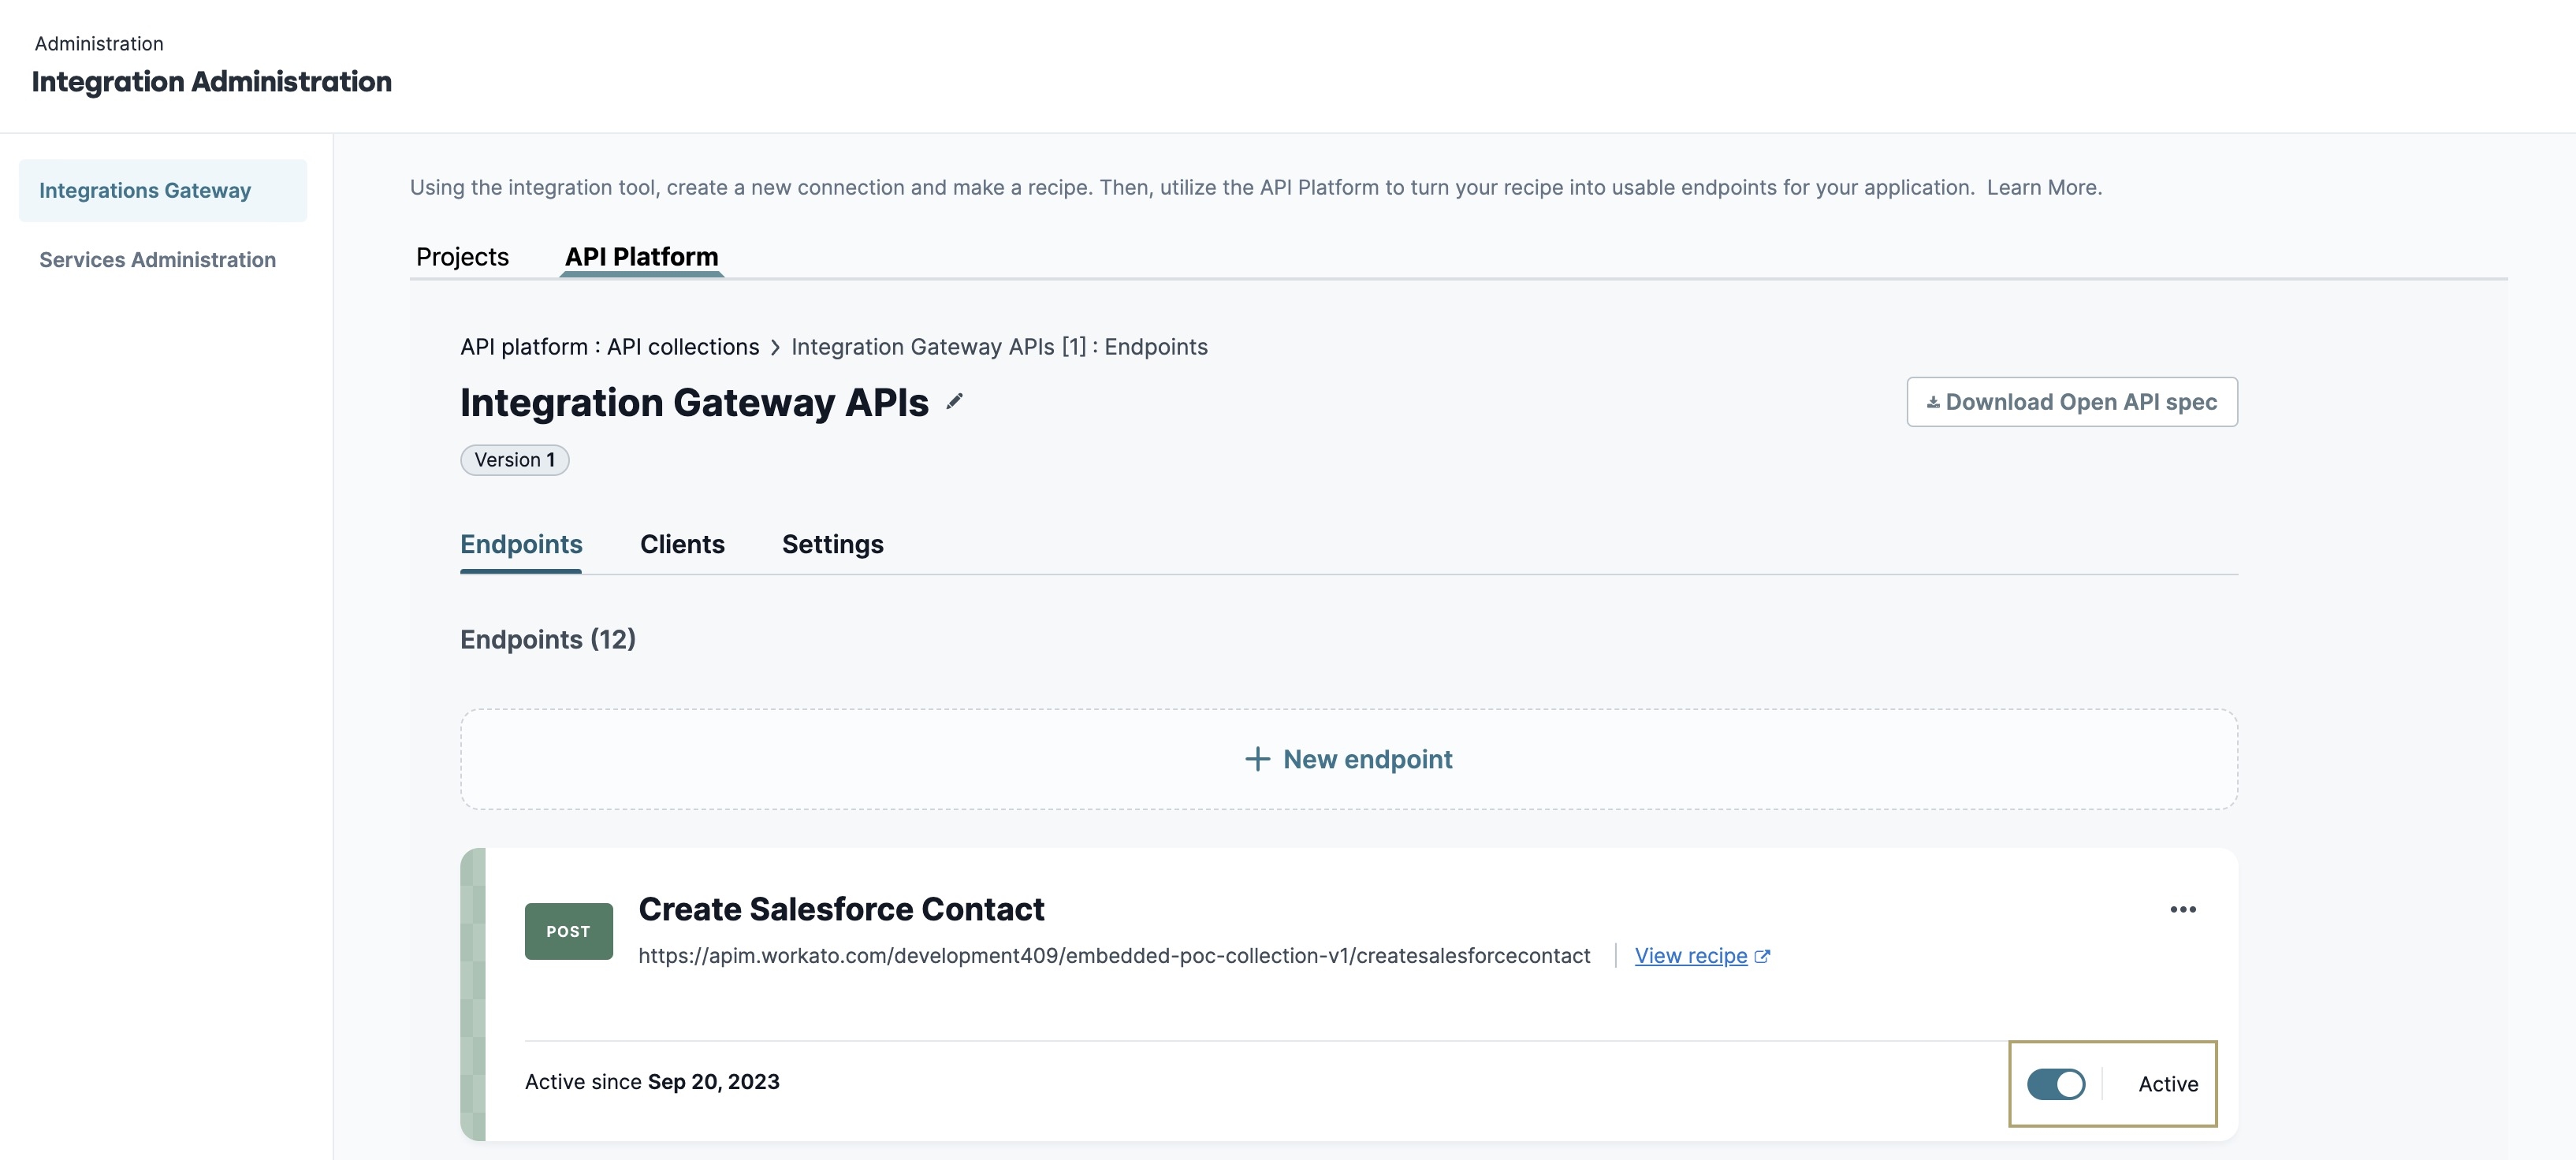
Below is an example of a configured endpoint:
Before you can configure your API call in a Plug-In component, you must activate your endpoint. On your endpoint tile, set the Active toggle to ![]() (ON). You can now select the endpoint in a Plug-In component.
(ON). You can now select the endpoint in a Plug-In component.
Configuring a Plug-In Component
The final step is to configure your endpoint in a Plug-In component. These instructions assume that you have an open module saved with a title.
In the Module Builder, drag and drop a Plug-In component onto your canvas.
In the Property ID and Canvas Label Text fields, enter values that describe your Plug-In component.
To the left of the component's configuration window, click Data.
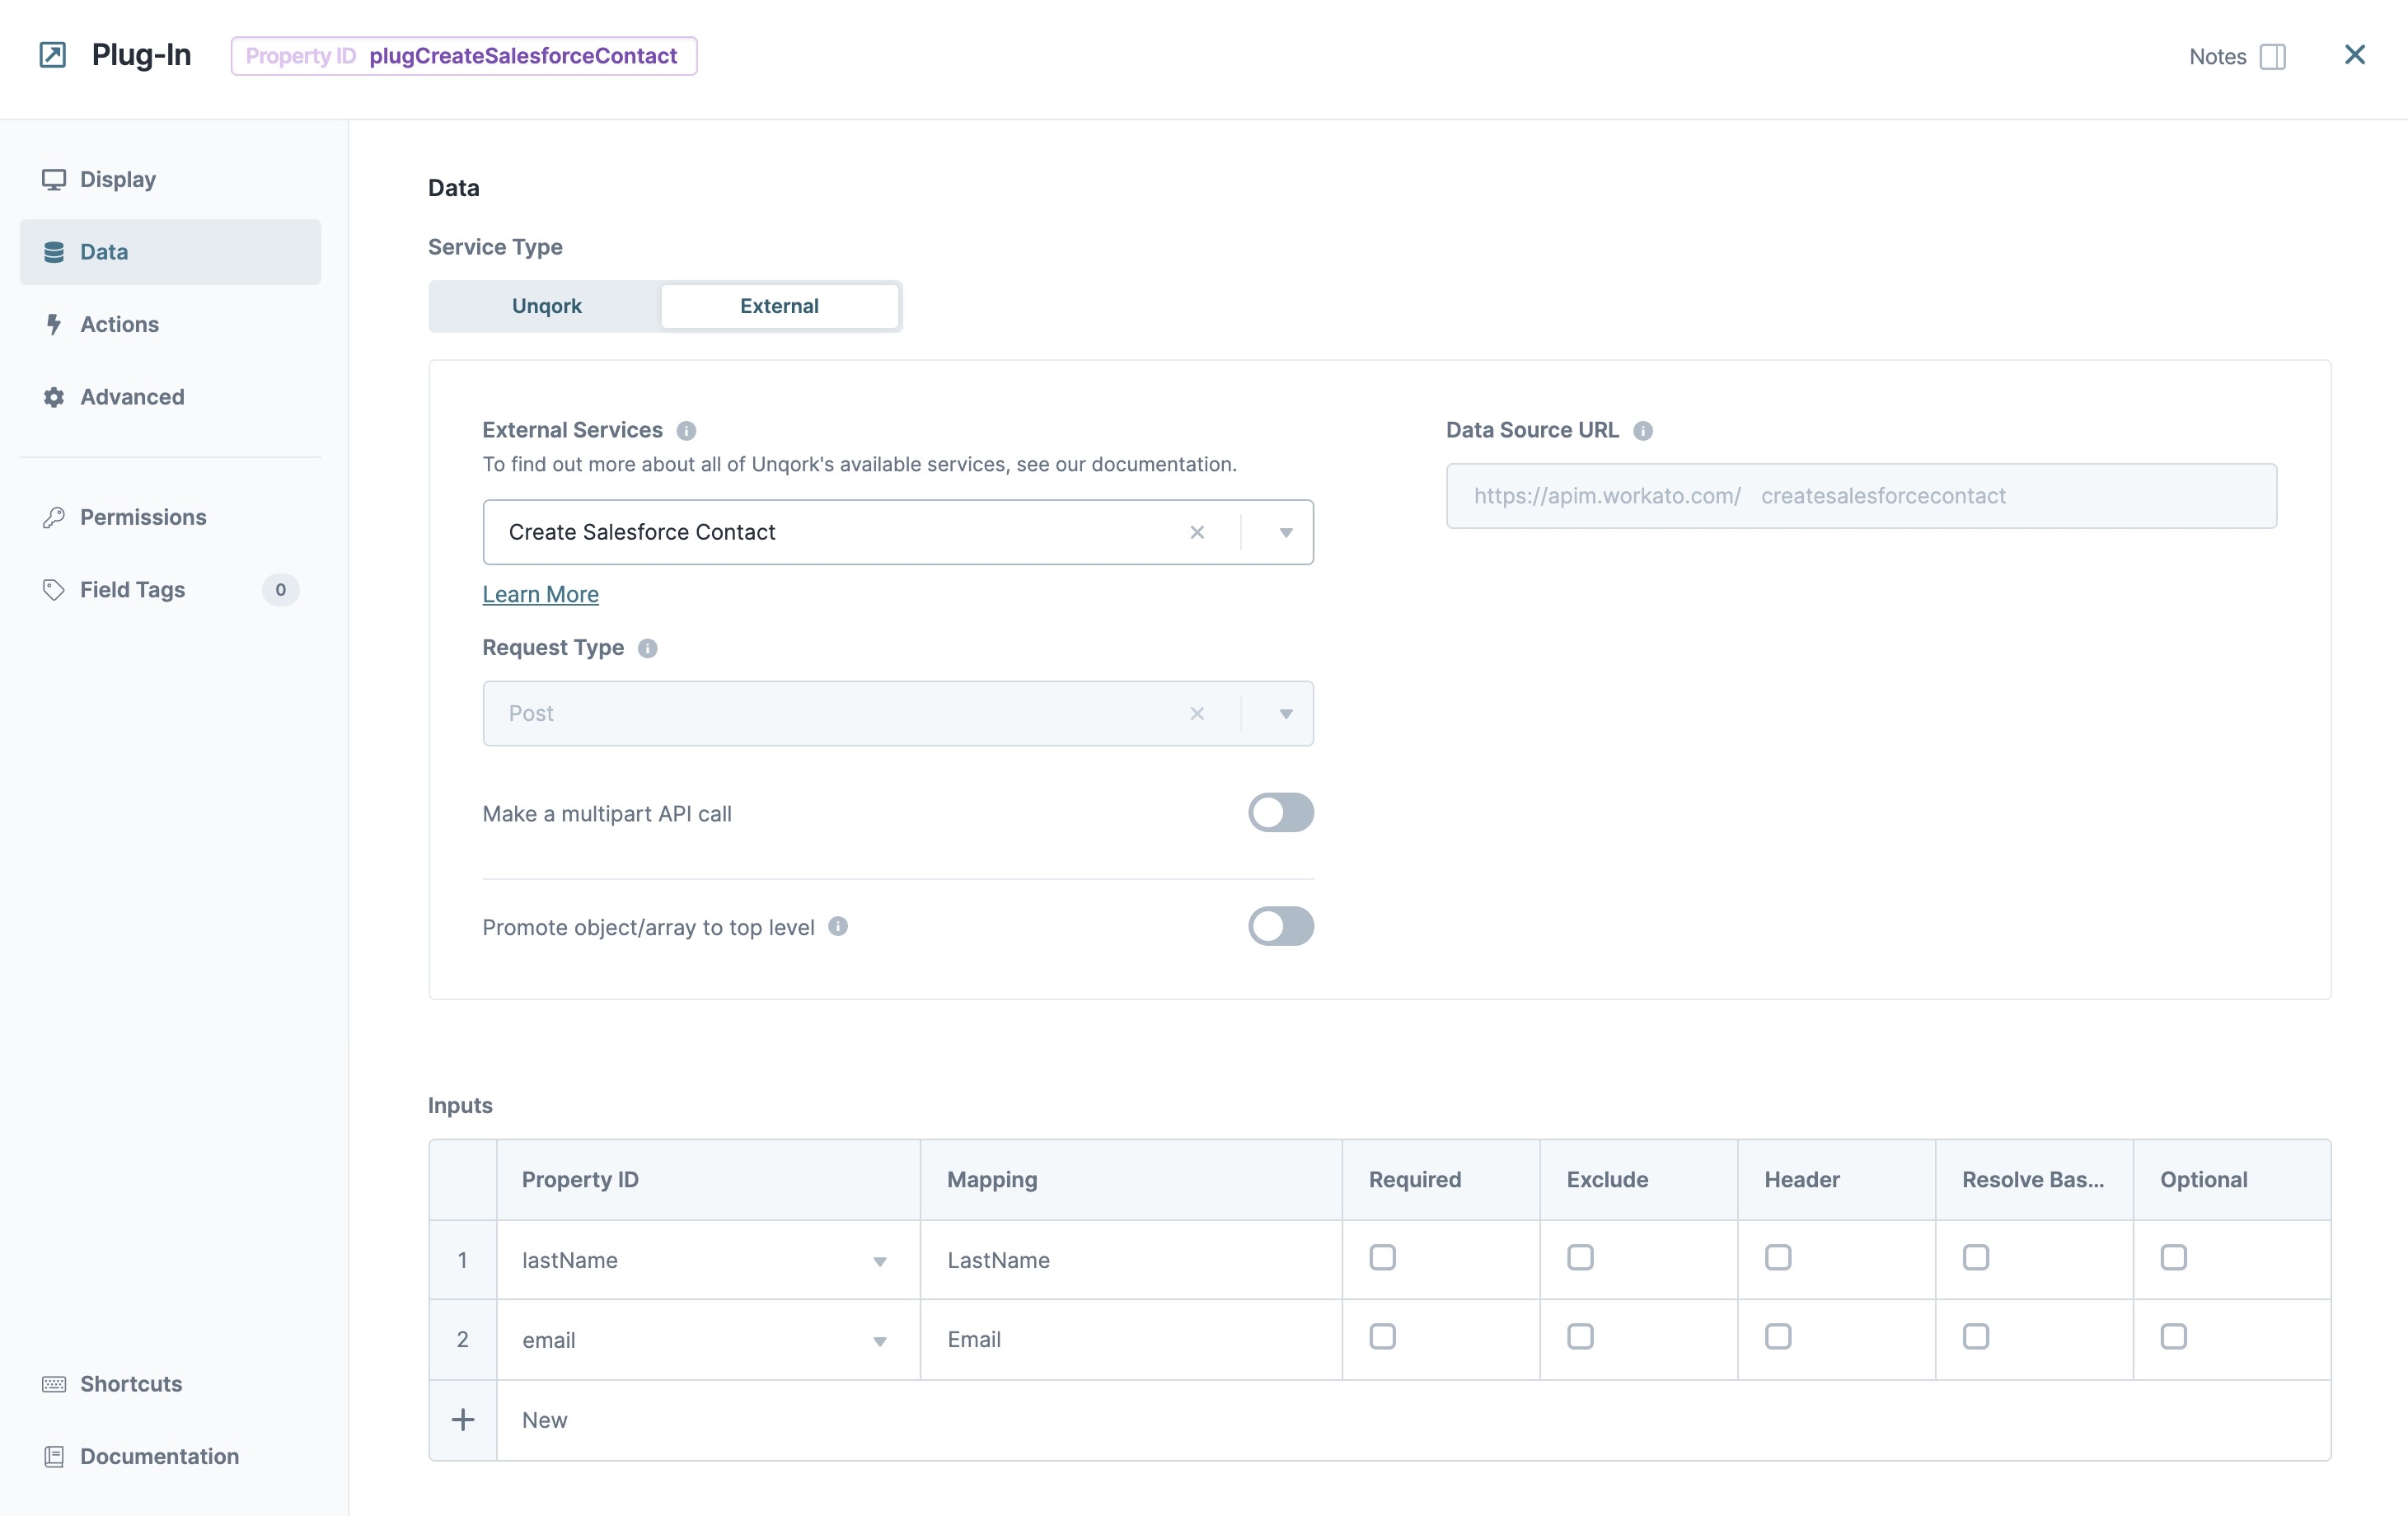
Set External as the Service Type.
From the External Services drop-down, select the endpoint you created.
On selection, the Data Source URL and Request Type automatically populate.
In the Inputs table, configure the specific fields you want.
Click Save & Close.
Save your module.
Below is an example of a configured Plug-In component:
