Overview
The Integration Gateway lets you integrate with over 700 systems across enterprise applications, databases, and legacy on-premise infrastructure—in the cloud or on-premise. To integrate with on-premise (or on-prem) systems, you must create an On-Prem Group in the Integration Gateway. From there, you can create an On-Prem Agent, download it locally, activate it, and test it.
To learn how to access the Integration Gateway, view our Integration Administration article.
What You'll Learn
In this article, you'll learn how to create an On-Prem Group, On-Prem Agent, and activate and test it.
Creating an On-Prem Group Using Integration Gateway
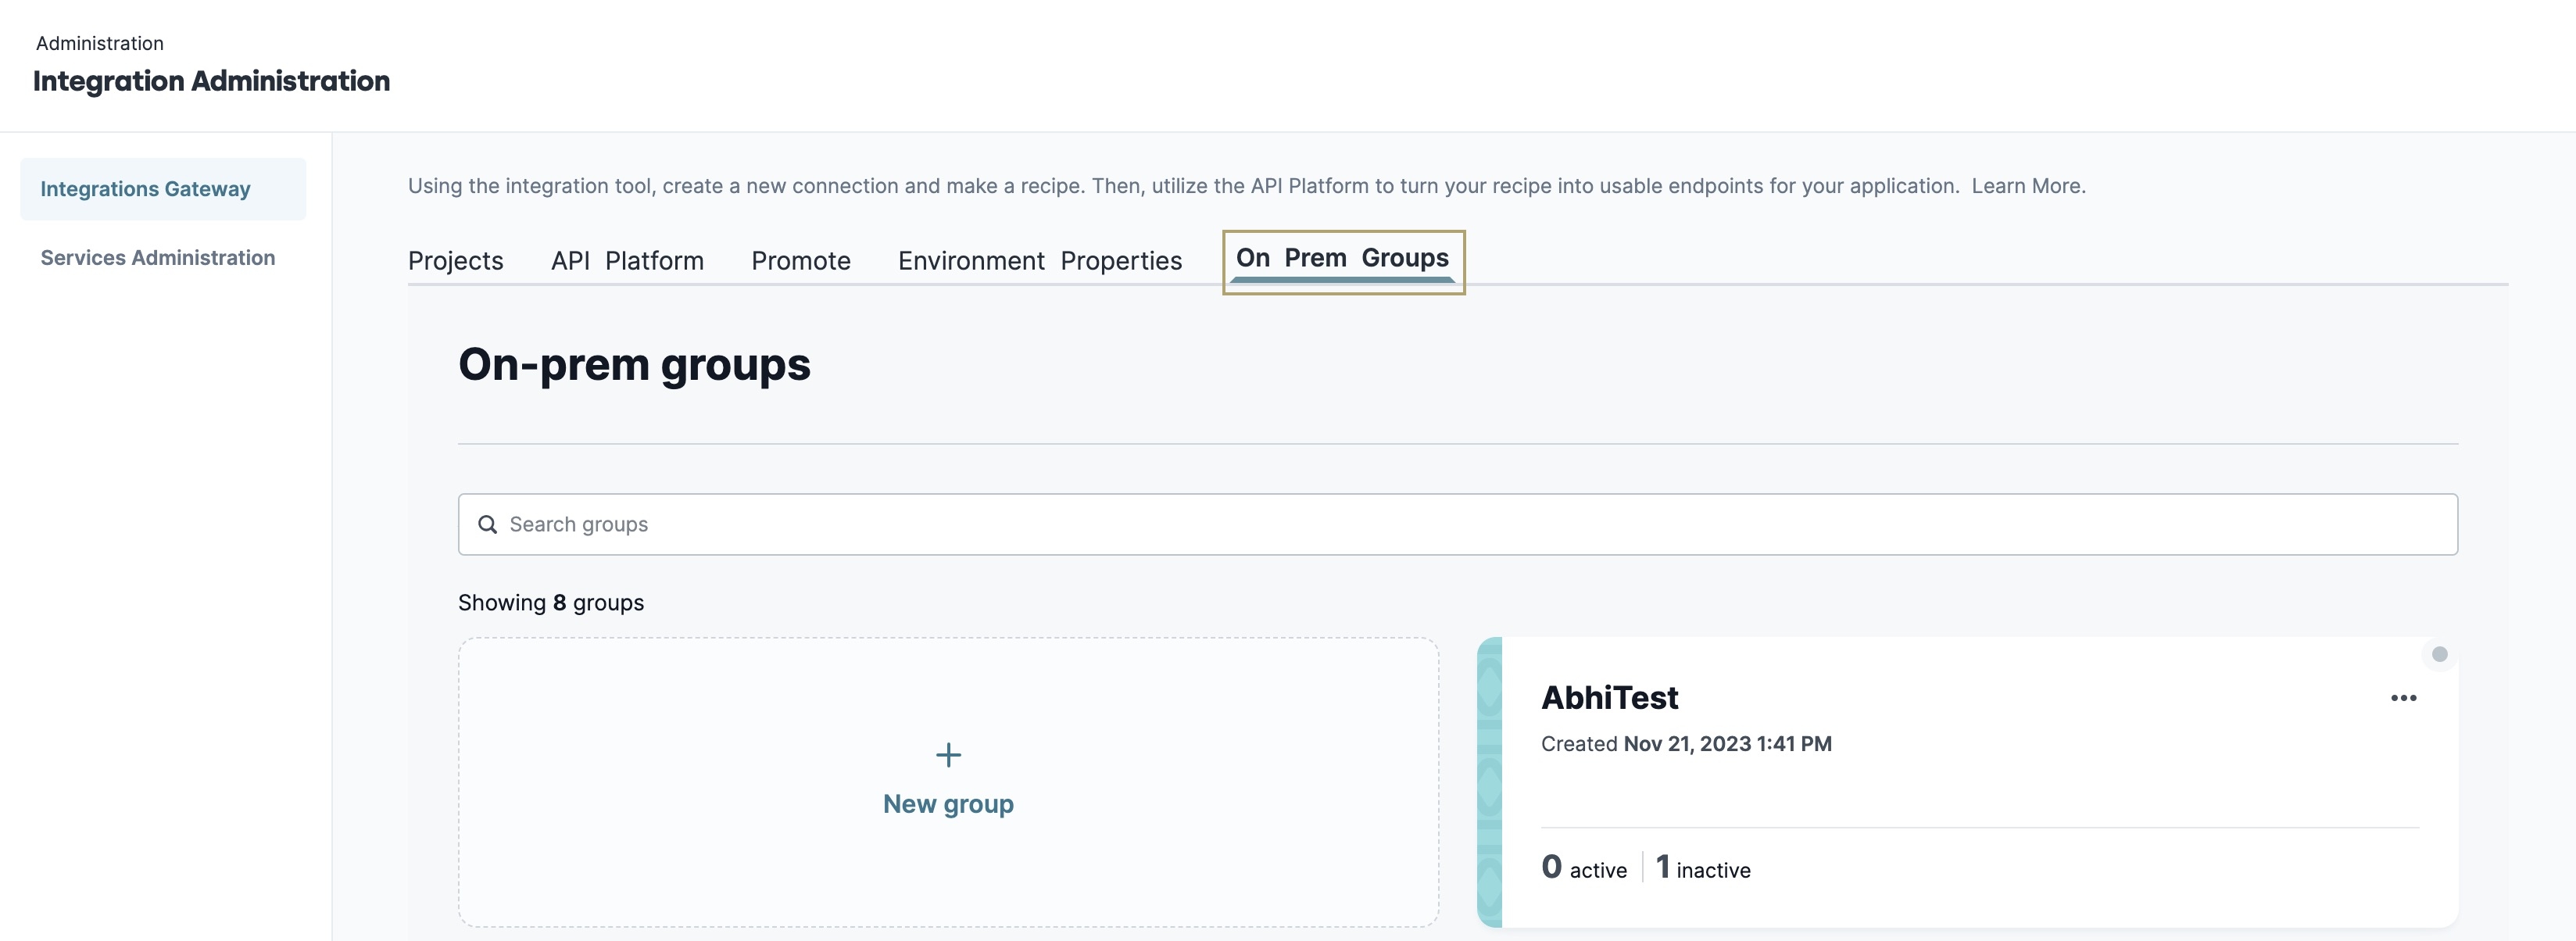
After accessing the Integration Gateway, you'll use the On-Prem Groups tab to create an On-Prem Group. After creating your group, you can set up, activate, test, and store as many agents as you want. From this tab, you can also view and select existing on-prem groups in your environment.
To create an On-Prem Group:
Navigate to the On-Prem Groups tab.
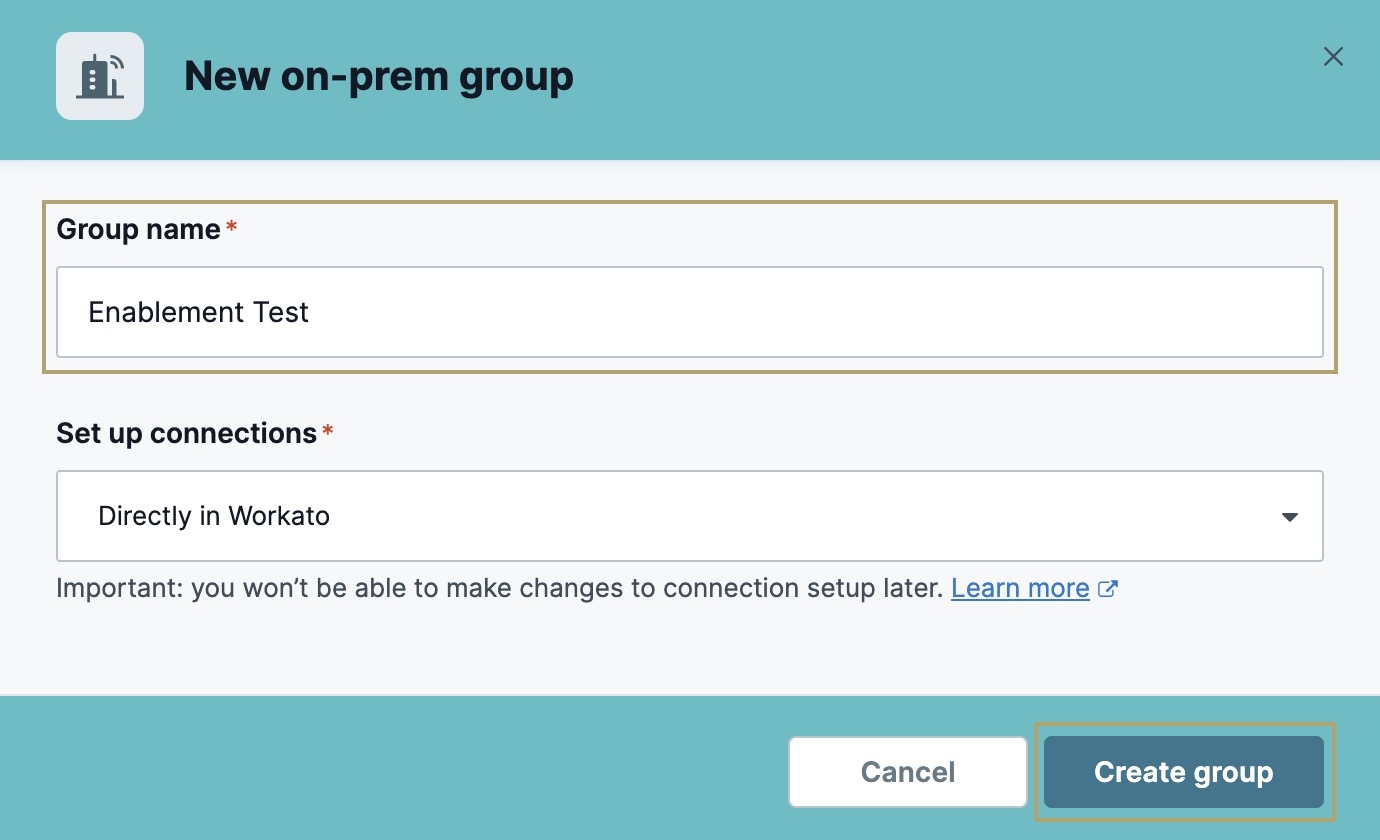
Click the + New Group tile. The New On-Prem Group modal displays.
In the Group Name* field, enter a name for your On-Prem Group.
Click Create Group.
Creating an On-Prem Agent Using Integration Gateway
After creating your On-Prem Group, you can begin setting up your On-Prem Agents. The process lets you select your operating system, download the agent installer, then activate and test the agent. The various steps involved depend on the operating system you choose. The steps required to create your On-Prem Agent are the following for each operating system:
Windows
Choose OS (Operating System)
Accept ToS (Terms of Service)
Install Agent (
.exefile format)Activate and Run Agent
Test Agent
Linux
Choose OS (Operating System)
Accept ToS (Terms of Service)
Install Agent
Activate Agent
Run Agent
Test Agent
Mac
Choose OS (Operating System)
Accept ToS (Terms of Service)
Download Agent (
.tar.gzfile format)Activate Agent
Run Agent
Test Agent
Docker
Choose OS (Operating System)
Accept ToS (Terms of Service)
Pull the Agent
Activate and Run Agent
Test Agent
Choose OS (Operating System)
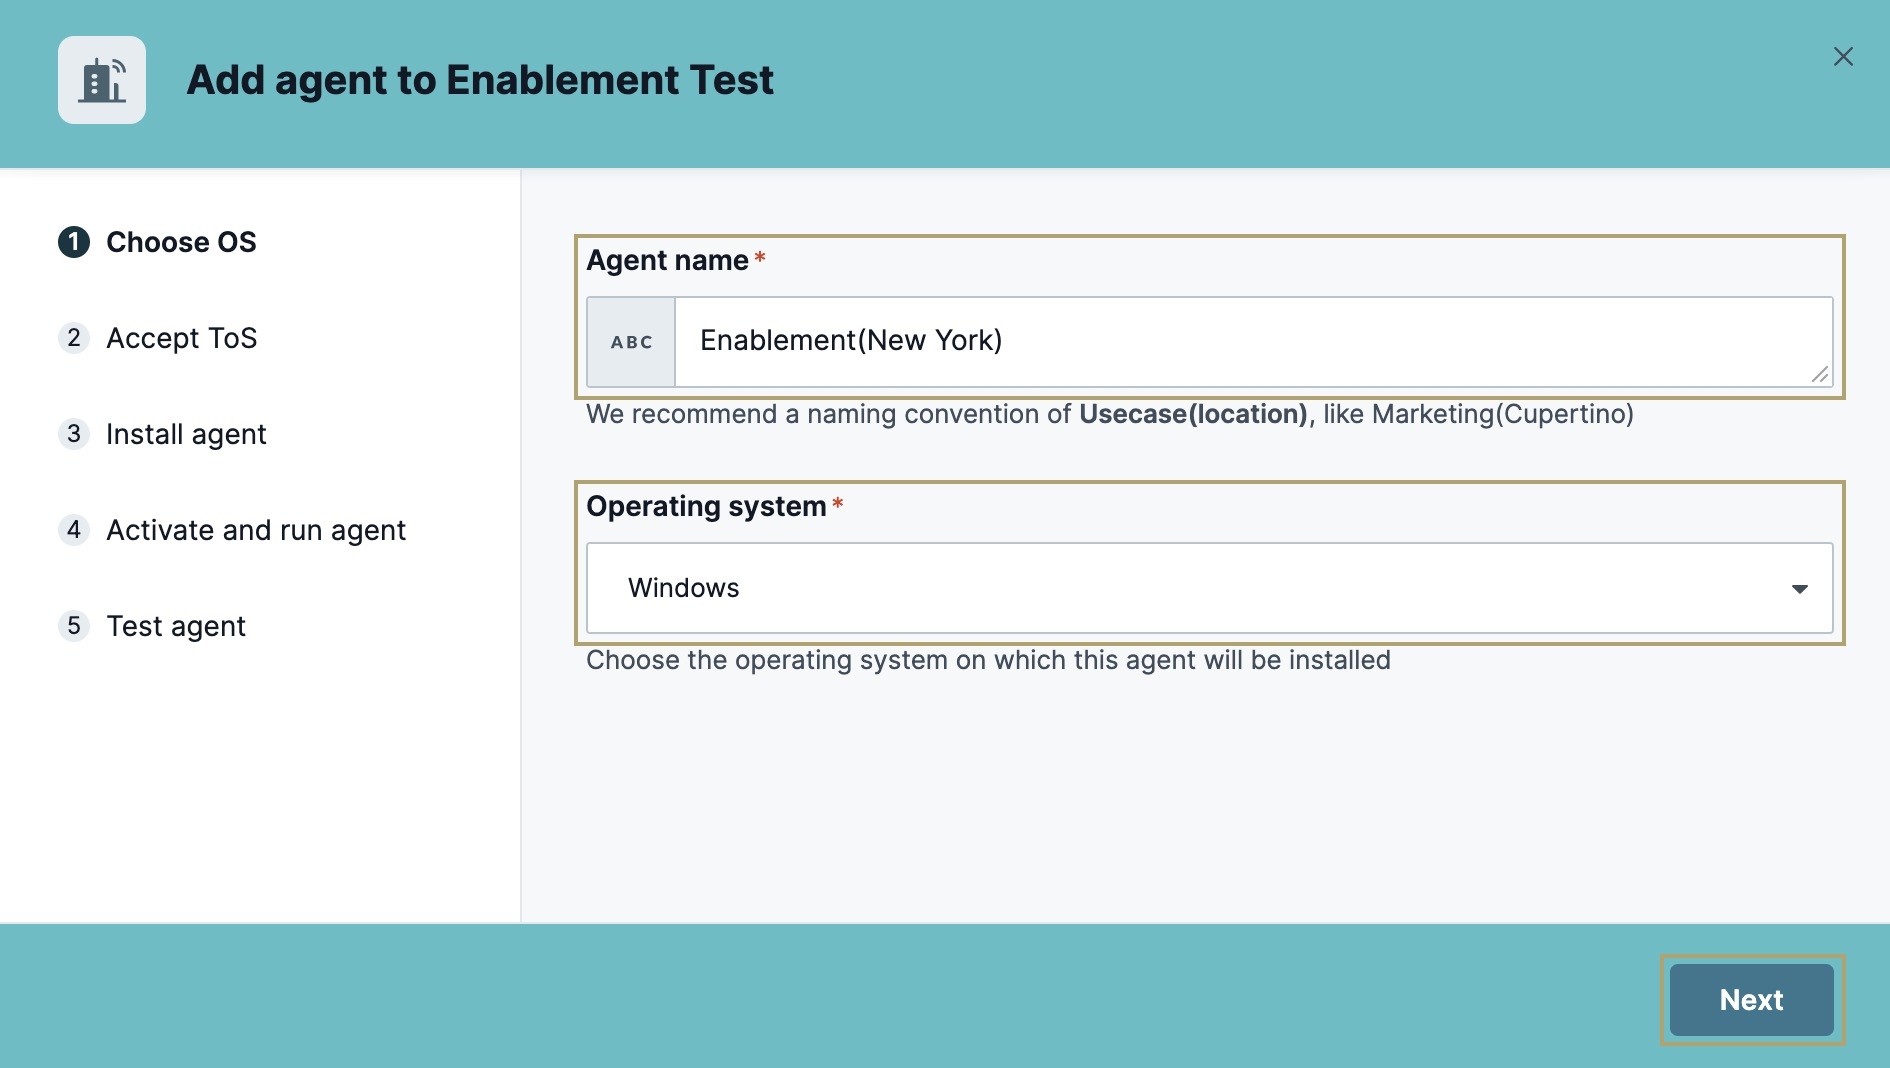
The first step is to name your On-Prem Agent and select an operating system. For this example, we'll follow the steps necessary to set up an On-Prem Agent using the Windows operating system.
To create, name, and select an operating system for your On-Prem Agent:
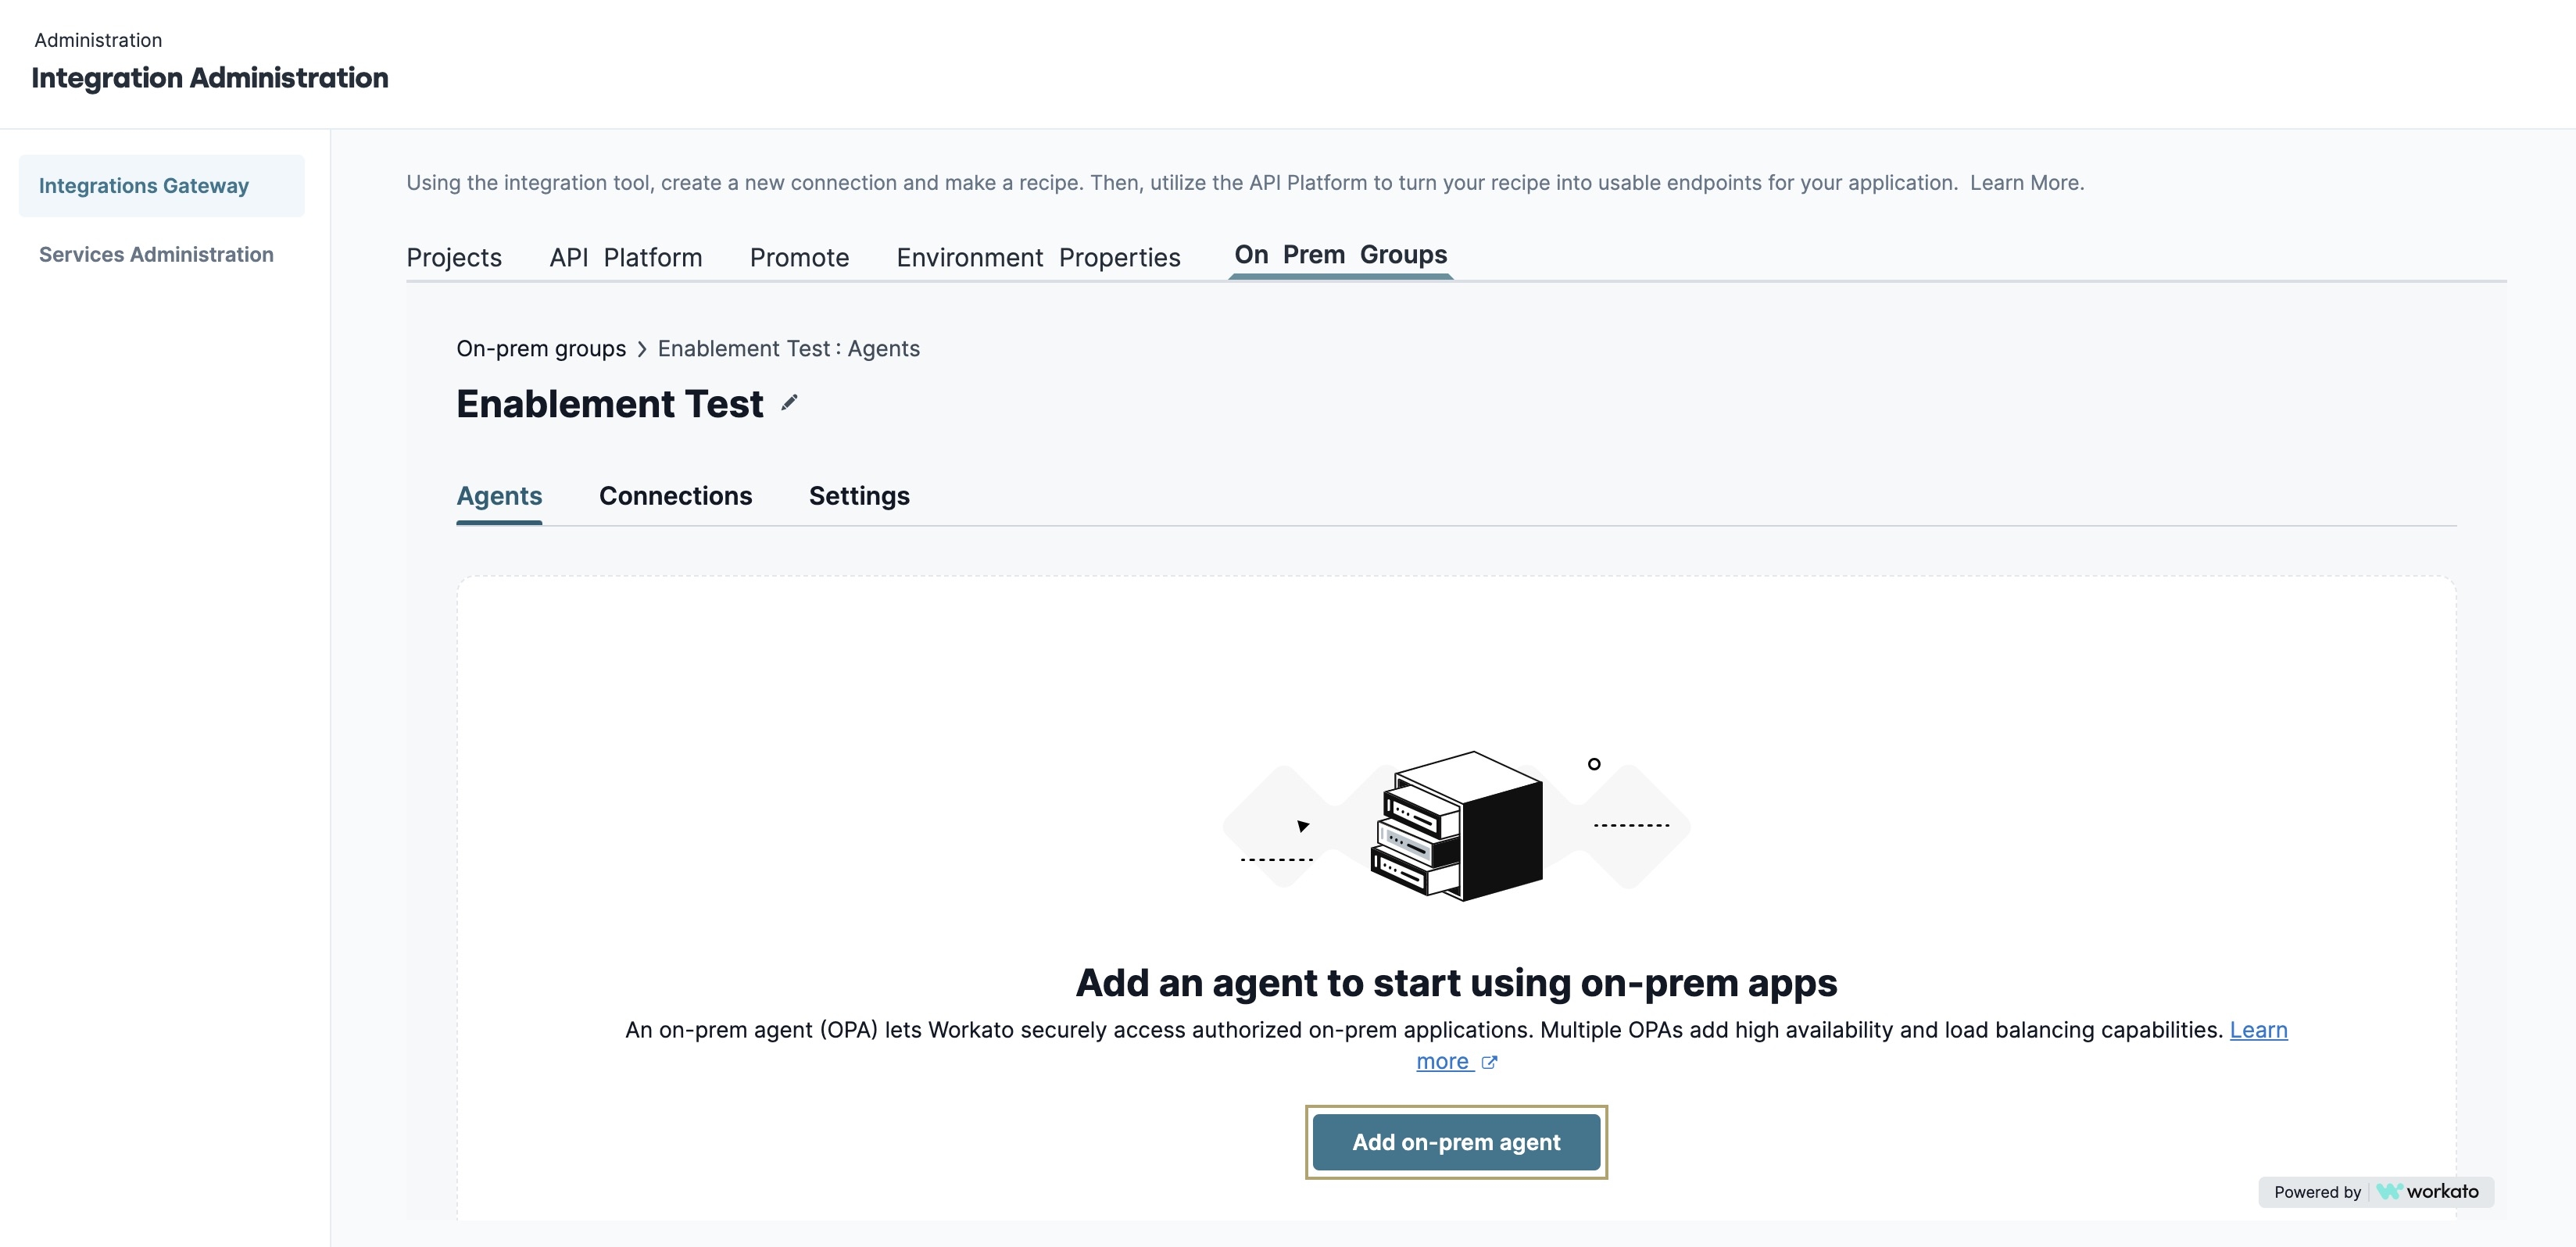
Click Add On-Prem Agent. The Add Agent modal displays..
If you already have an existing On-Prem Group, access it and click Add Agent at the top right of the page.
In the Agent Name* field, enter a name for your On-Prem Agent.
From the Operating System* drop-down, select your computer's operating system.
When selecting the Linux operating system, a new drop-down displays in the modal. Use this drop-down to select which agent package format you want to use for installation. The options include DEB package, RPM package, or TGZ archive.
Click Next.
Accept ToS (Terms of Service)
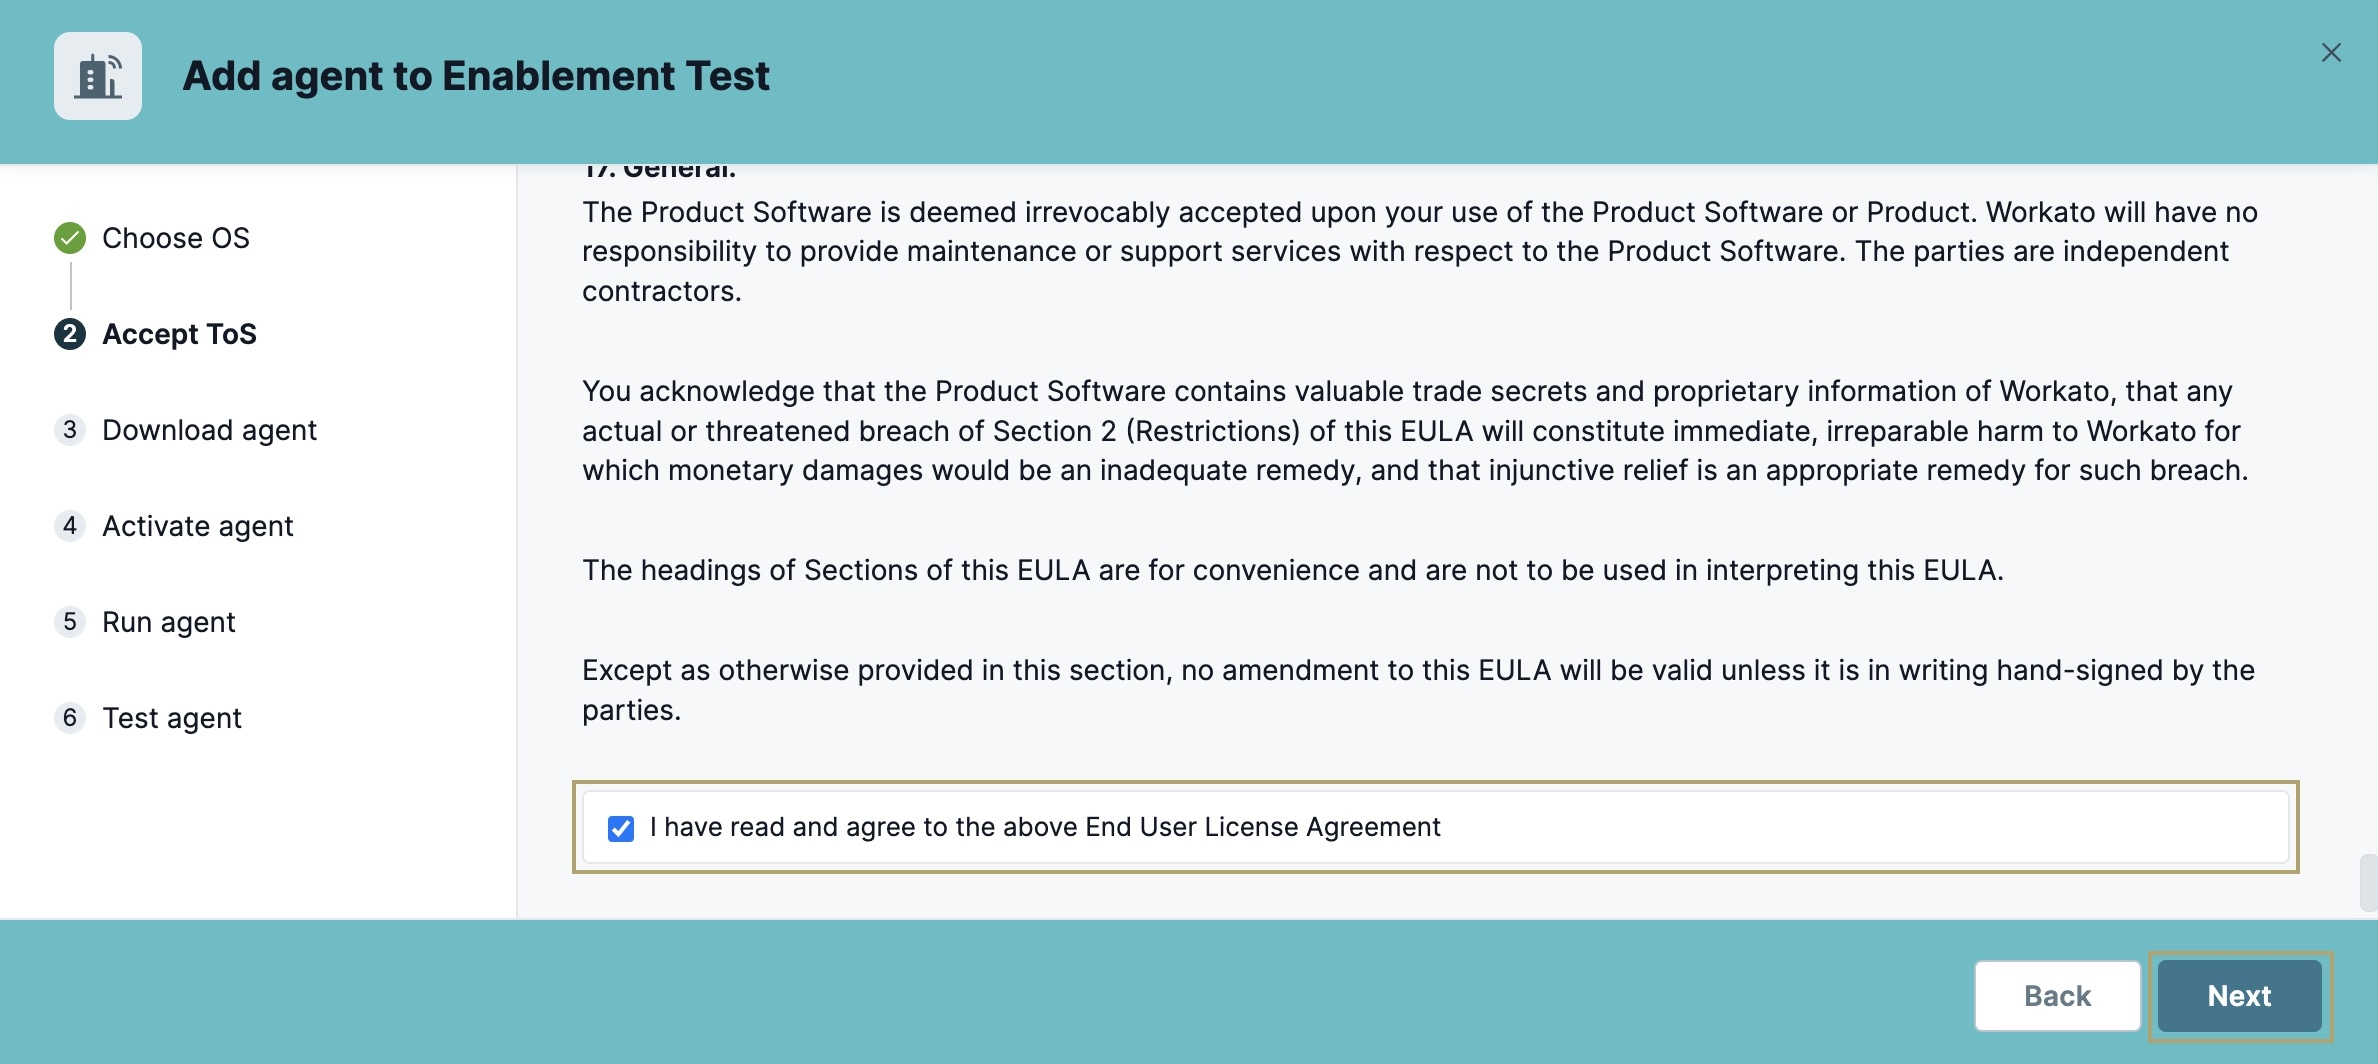
The next step is to accept the terms of service for your On-Prem Agent. If you accept the terms, select ![]() I have read and agree to the above End User License Agreement at the bottom of the modal. Then, click Next.
I have read and agree to the above End User License Agreement at the bottom of the modal. Then, click Next.
Install Agent
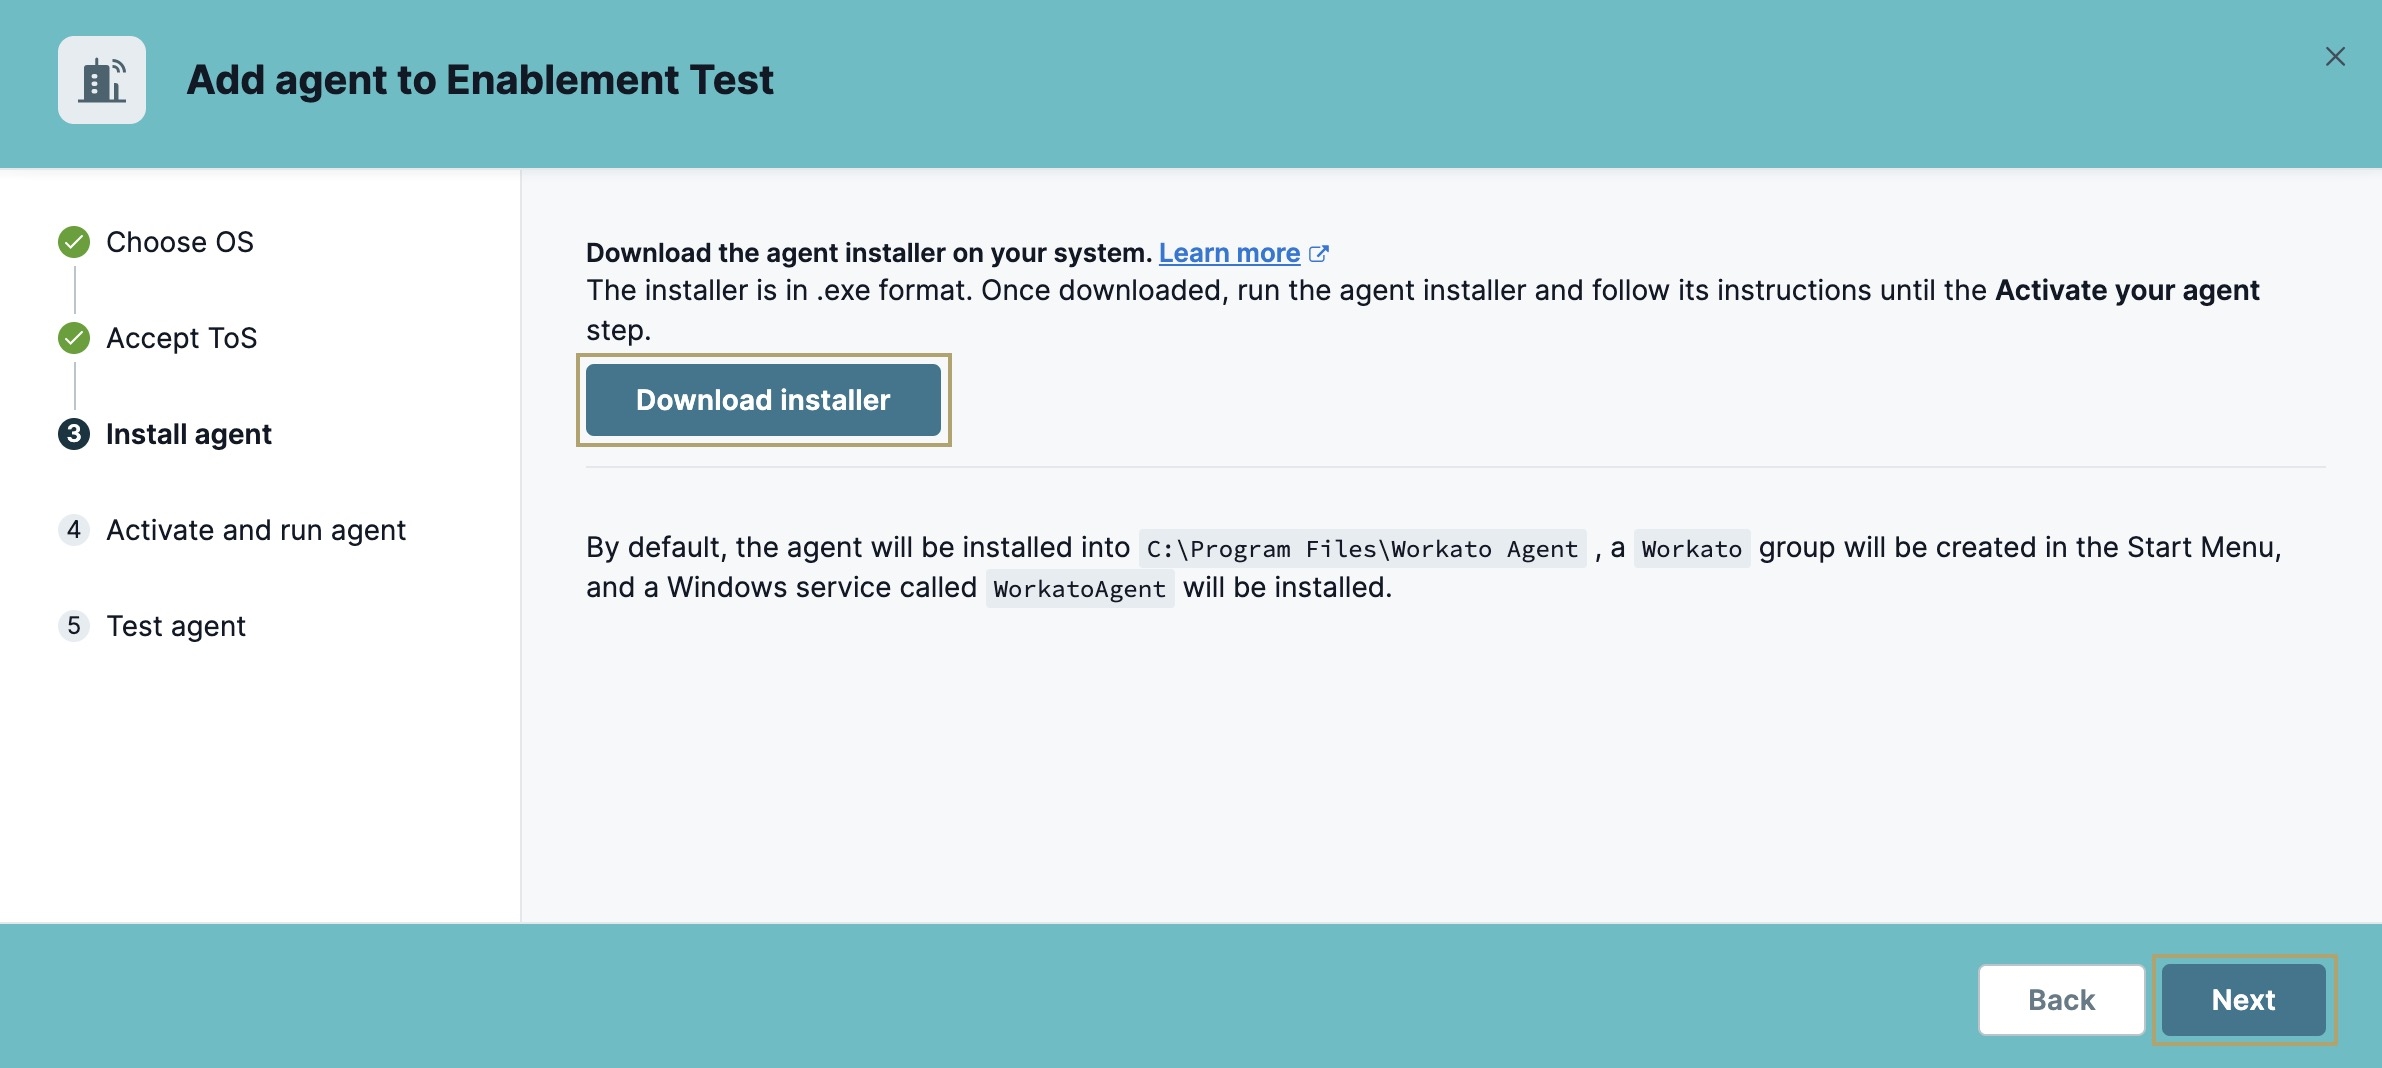
In the next step, click Download Installer to download the agent. After the download is complete, install it on your computer. You'll be prompted to complete the installation through an installation wizard. As you progress through the installation wizard, you will be asked to provide an activation code. Click Next in the Add Agent modal to display the code.
To activate and run the On-Prem Agent, your server must have permission to allow traffic between it and the Integration Gateway. To learn more, view the following documentation:
https://docs.workato.com/security/ip-allowlists.html#traffic-from-workato.
Activate and Run Agent
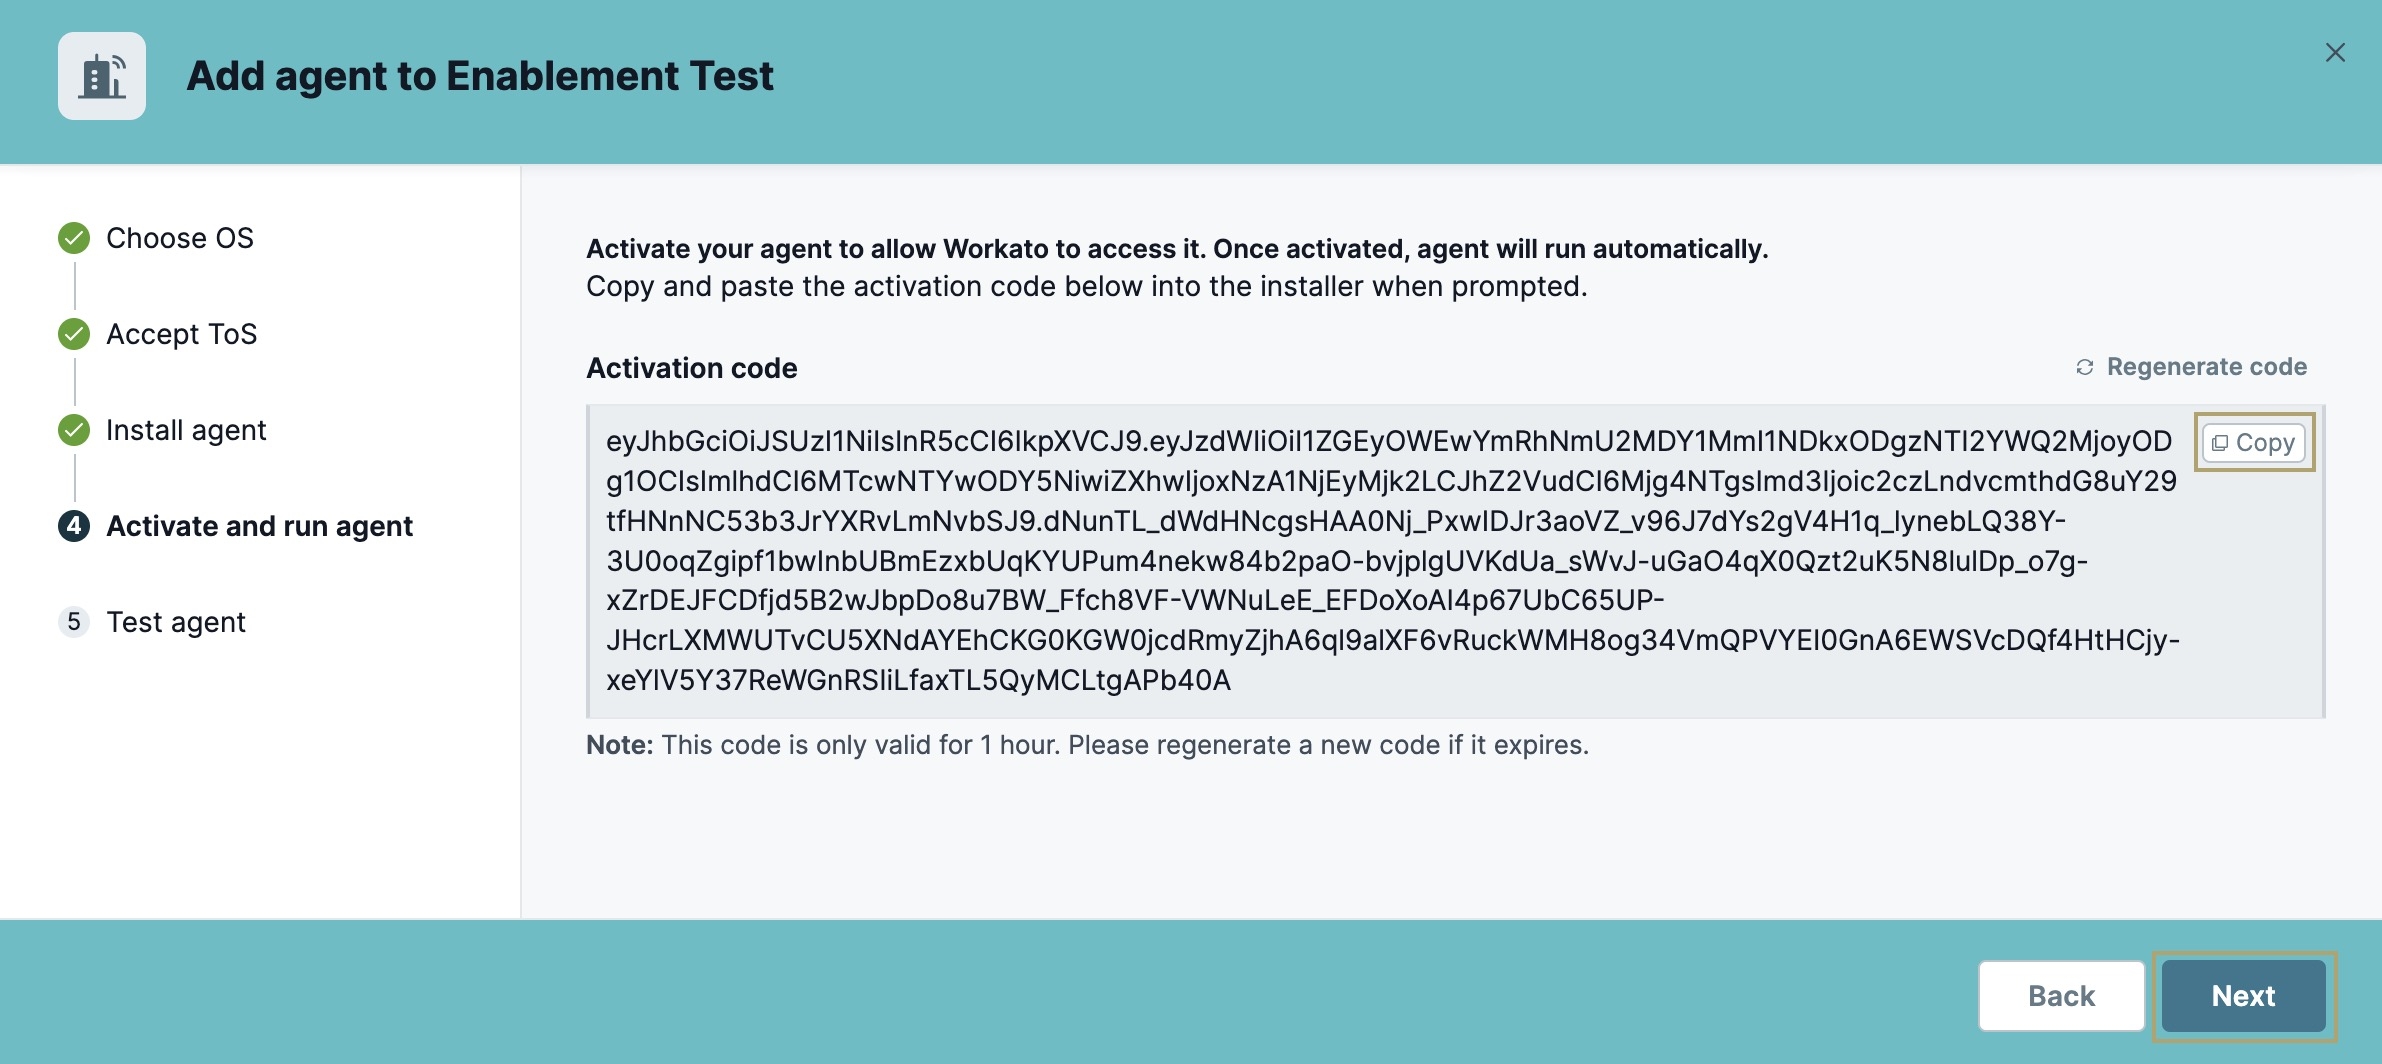
This step of the Add Agent modal displays the activation code you must enter into the installation wizard. Click ![]() Copy to copy the code to your clipboard. Then, paste it into the required field of the installation wizard.
Copy to copy the code to your clipboard. Then, paste it into the required field of the installation wizard.
Once the installation is complete, your On-Prem Agent is activated and runs automatically. Click Next in the Add Agent modal to proceed.
The activation code expires in one hour. If it expires, click
Regenerate Code to generate a new one.
Test Agent
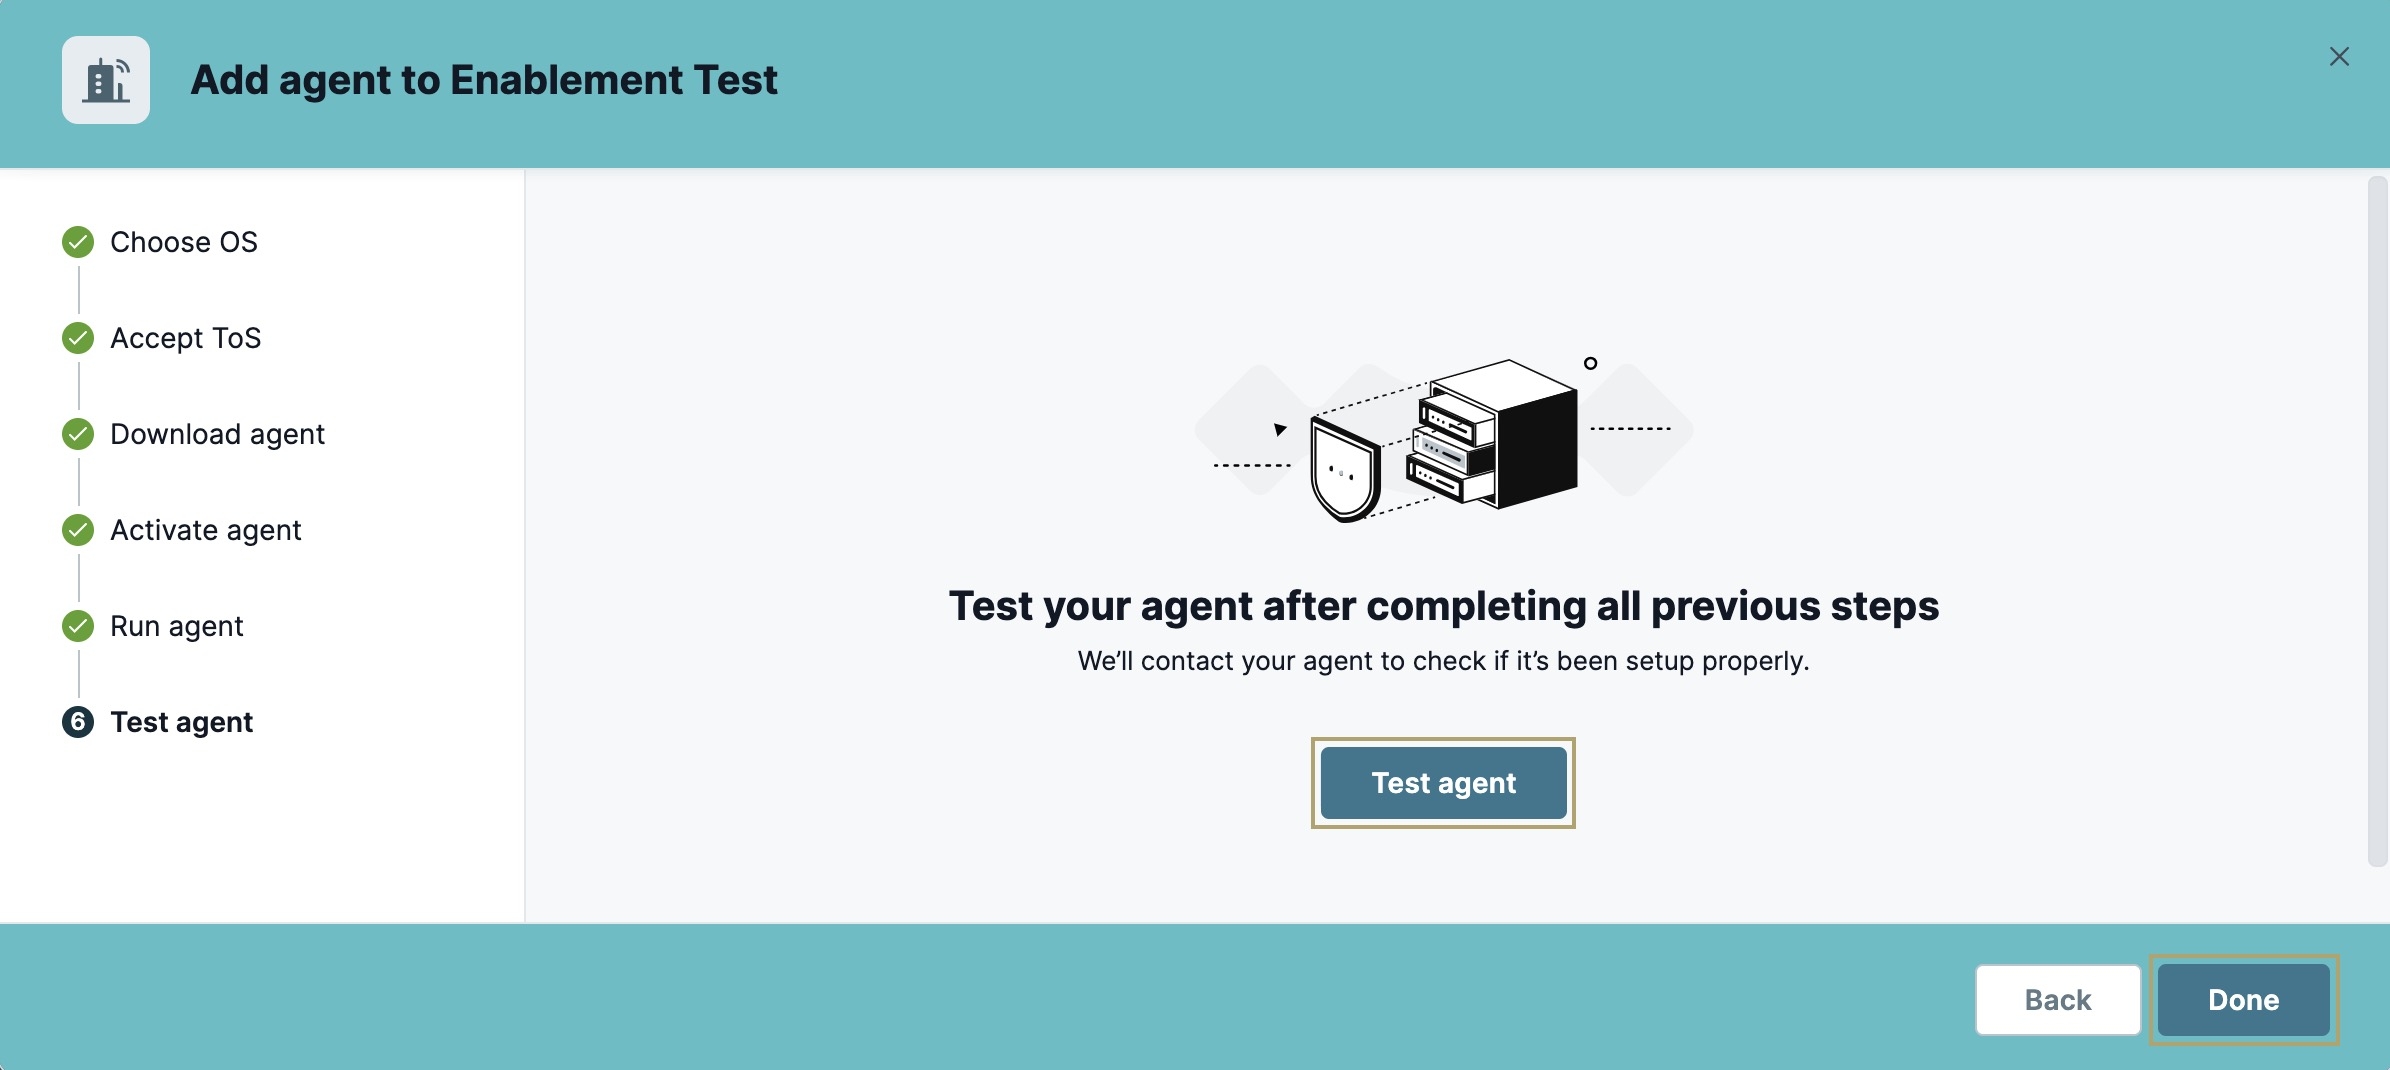
Now that your On-Prem Agent is activated and running, test it to ensure it works correctly. In this final step of the process, click Test Agent. After you receive confirmation it's working correctly, click Done. You'll return to your On-Prem Group where you can repeat the process to set up another On-Prem Agent.
