Overview
The Integration Gateway lets you integrate with over 700 systems across enterprise applications, databases, and legacy on-premise infrastructure—in the cloud or on-premise. After creating recipes in your non-production environment levels, you can promote them to Production. Following this promotion process lets you develop more efficiently and ensures your integrations work correctly in all your environment levels.
To learn more about Unqork environment levels and promotion stages, view our Unqork Promotions Order article.
This process involves setting up your recipe package, or manifest, in a non-production environment level and downloading it to your computer. Then, you'll access your Production environment level and upload it. It's important to note that you do not have to promote your recipes and connections at every Unqork environment level. If you create your manifest in any non-production environment (Staging, QA, or UAT), it's available in the other non-production environment levels. So, you only need to promote your manifest to your Production environment.
For Creators with a Pre-Production environment level, the Integration Gateway considers it to be a production environment level. If you promote your manifest to your Production environment level, it's also available in your Pre-Production environment level.
To learn how to access the Integration Gateway, view our Integration Administration article.
What You'll Learn
In this article, you'll learn how to export your existing recipes from one environment level and import them to another.
Exporting a Manifest
After accessing the Integration Gateway, you'll use the Promote tab to create a recipe package that you can export from your non-production environment levels. When you navigate to this section of the Integration Gateway, the default view is the Export tab. From this tab, you can create an export manifest or view and select an existing one.
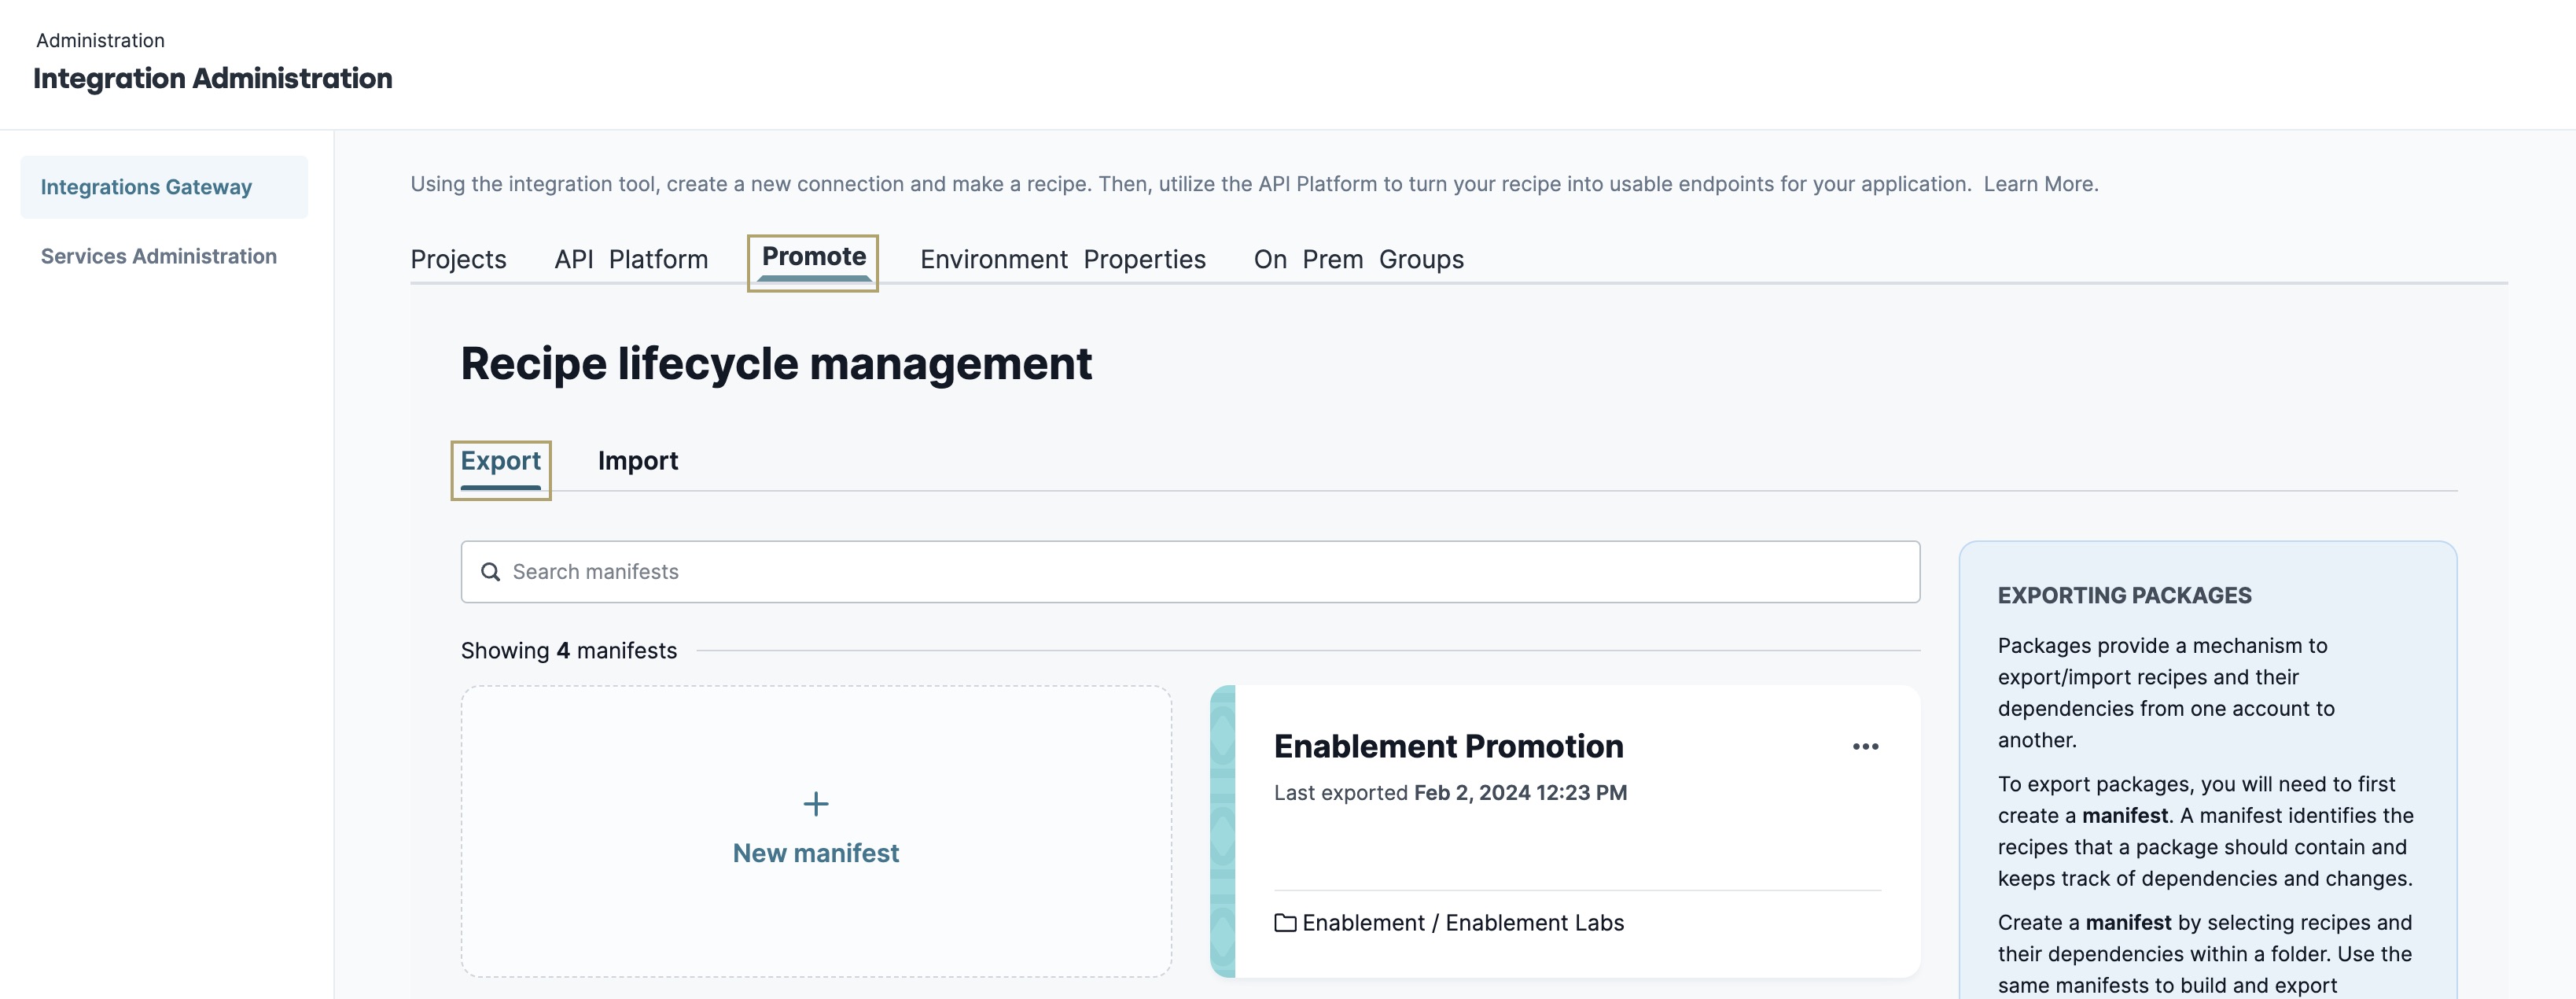
Creating an Export Manifest
The first step is to create an export manifest using the Export tab. You'll select the folder storing all your recipe and connection assets and include it in the manifest.
To create an export manifest:
Navigate to the Promote tab.
Click New Manifest.
In the Manifest Name* field, enter a name for your manifest.
From the Source Folder* menu, select the project folder whose assets you want to include.
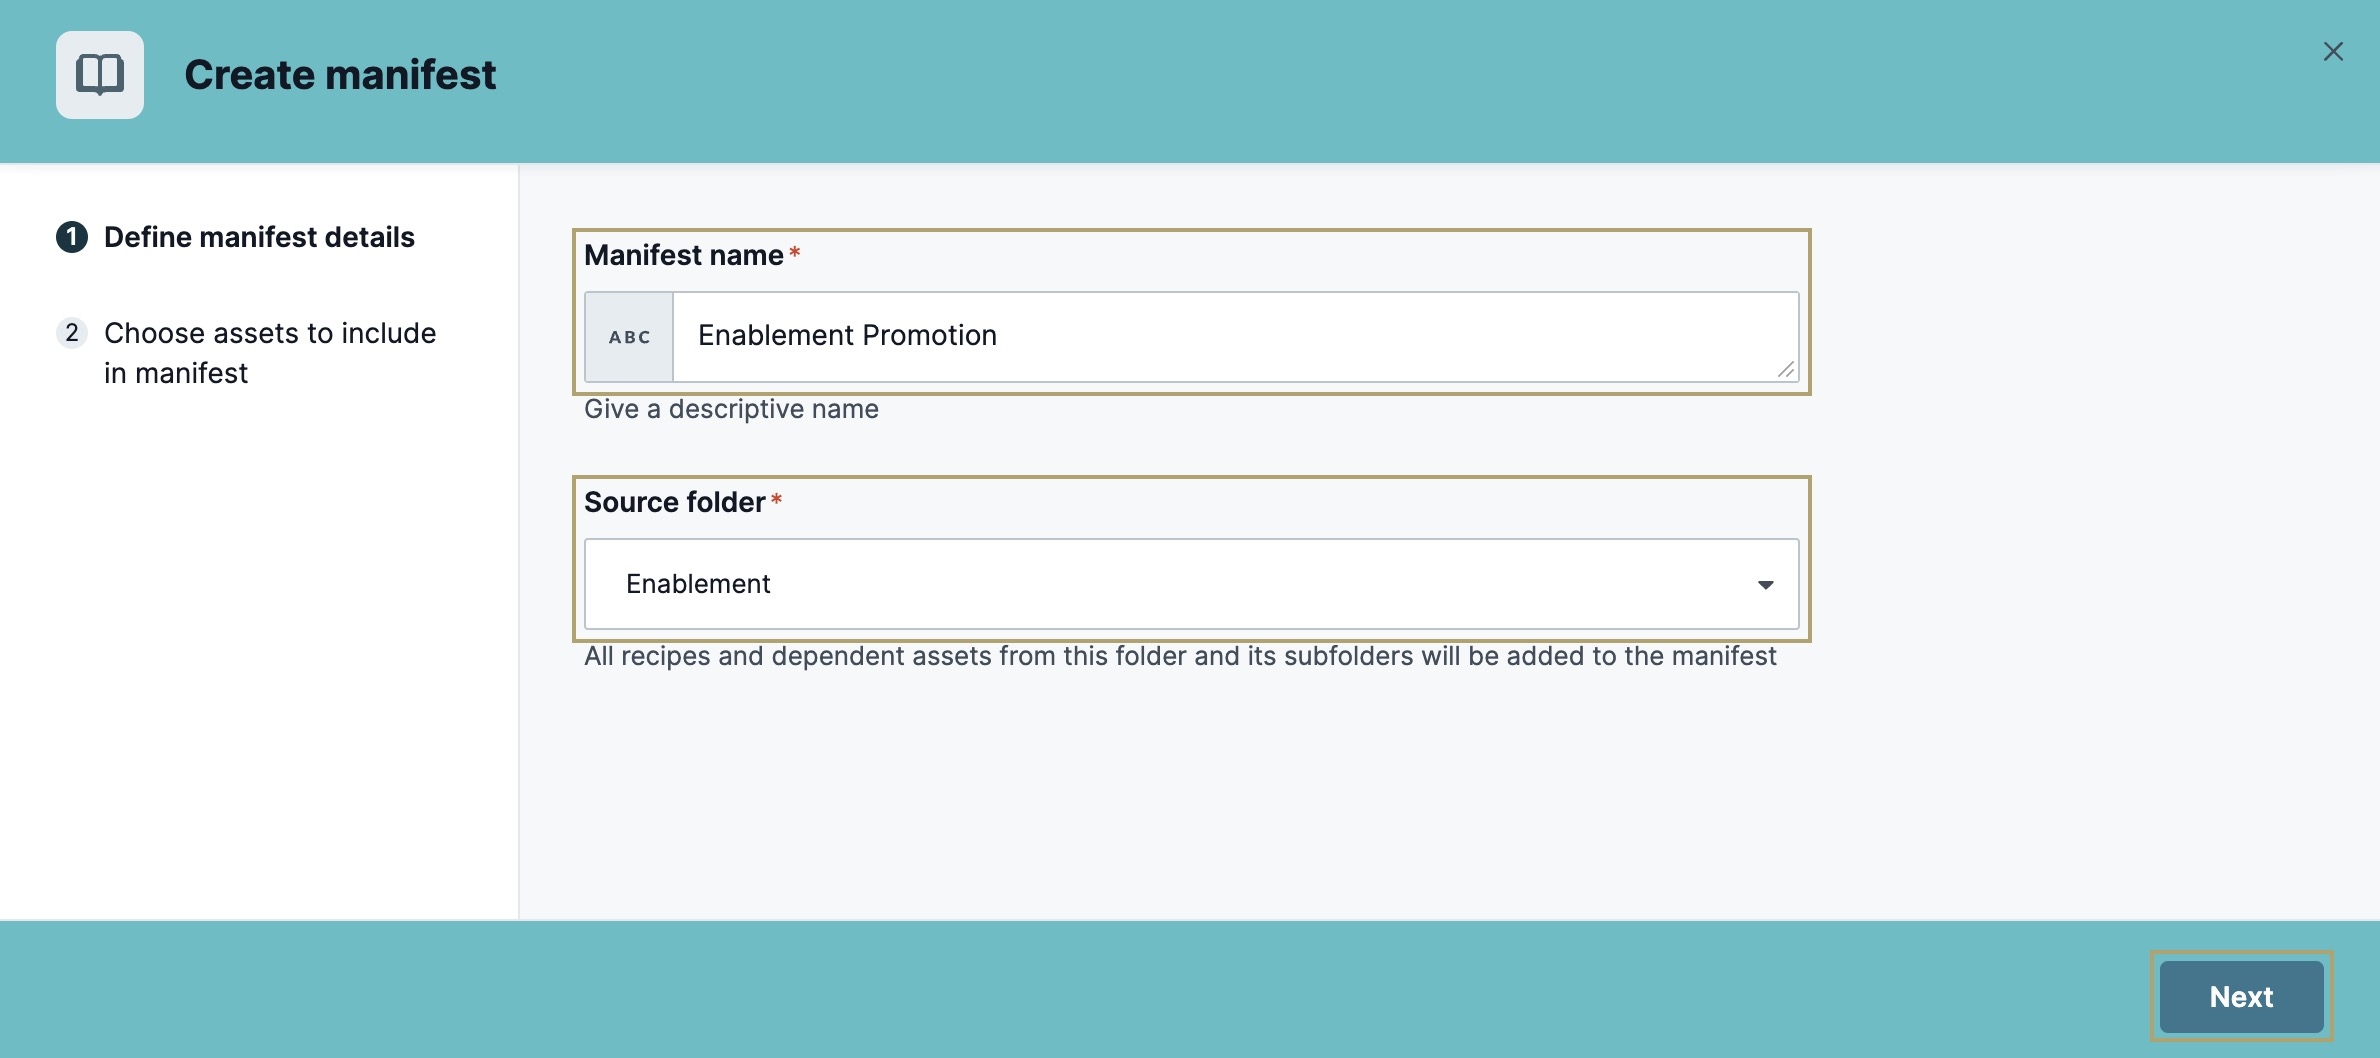
Click Next.
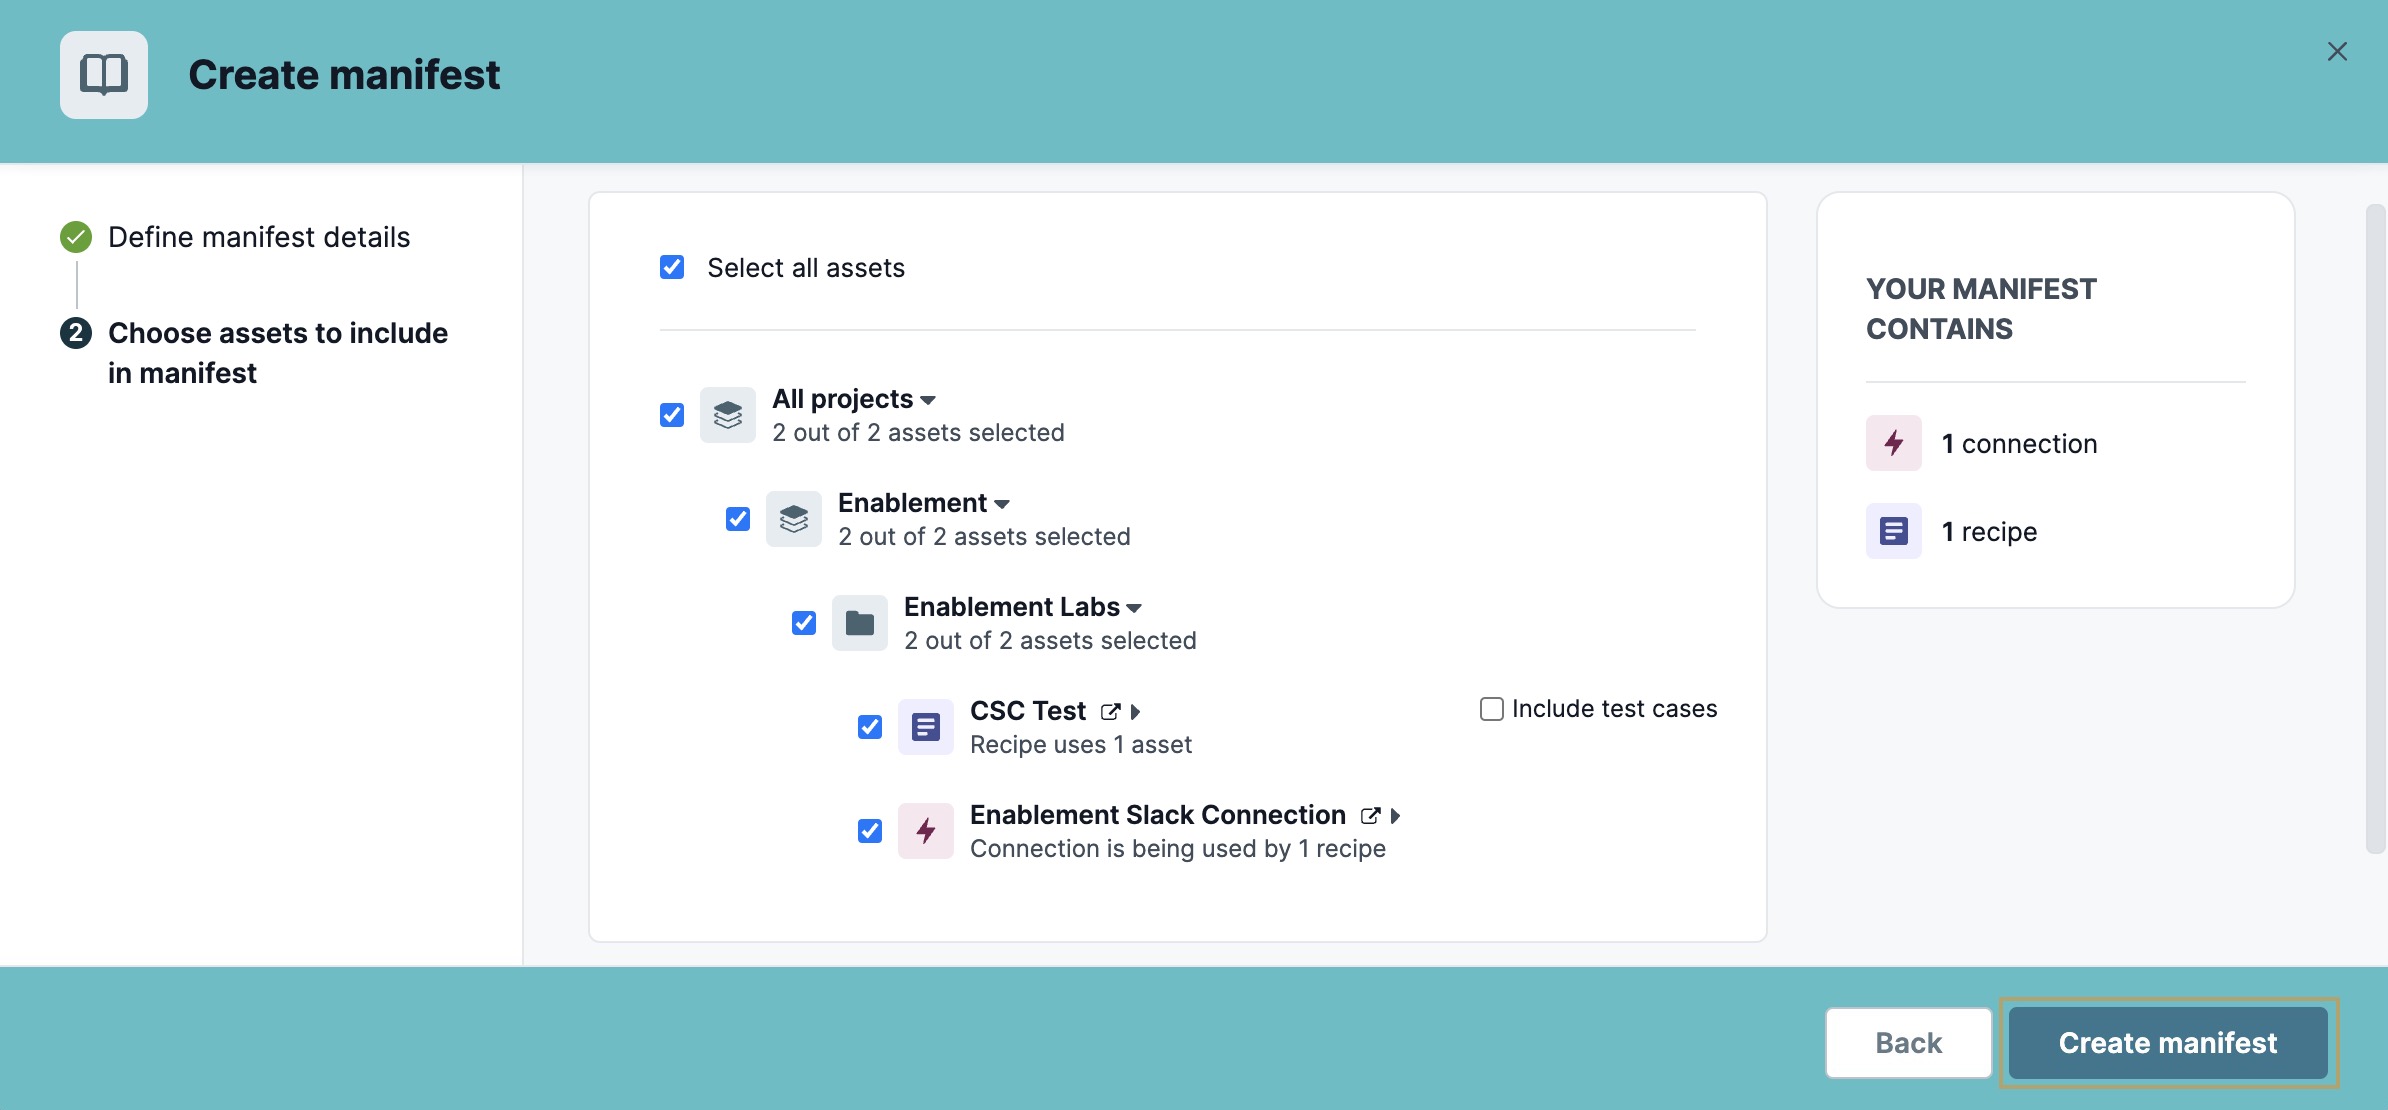
Select all assets you want to include in the manifest. You can also choose to select test cases created when testing your recipe.
By default, all assets are selected. Deselect those you want to exclude from the manifest.

Click Create Manifest. The details of your export manifest display.

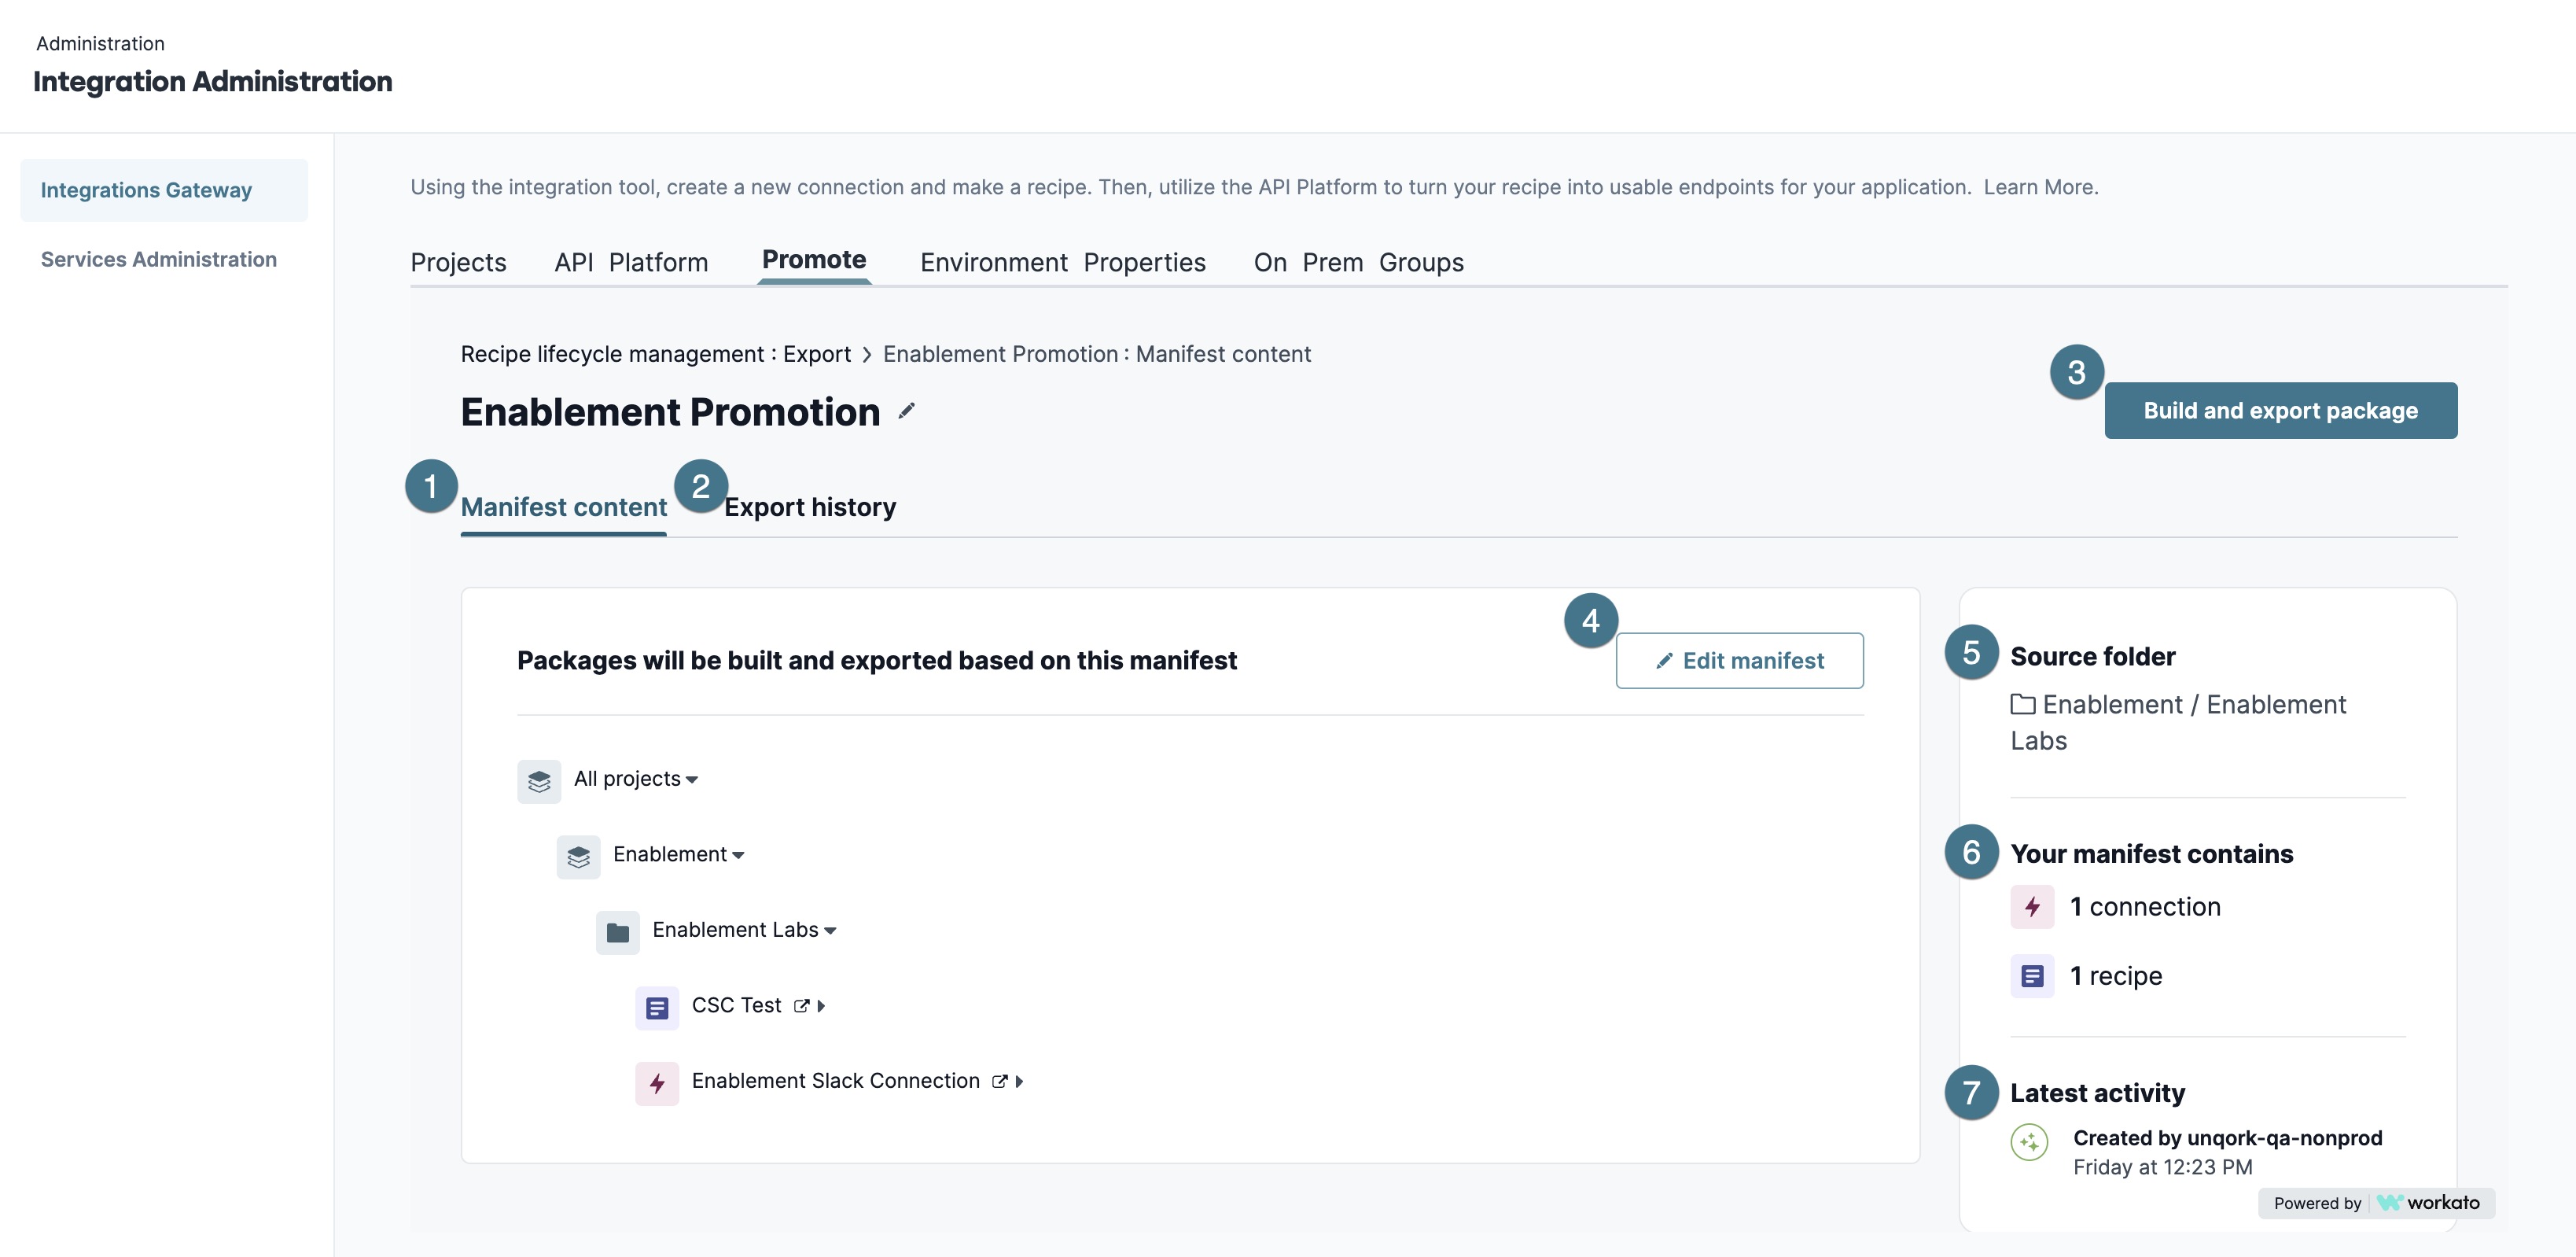
Viewing the Export Manifest Details
After creating or accessing an existing manifest, you can view its details and take various actions on the manifest.
| Attribute | Description |
|---|---|---|
1 | Manifest Content | This tab displays the assets contained in the manifest. |
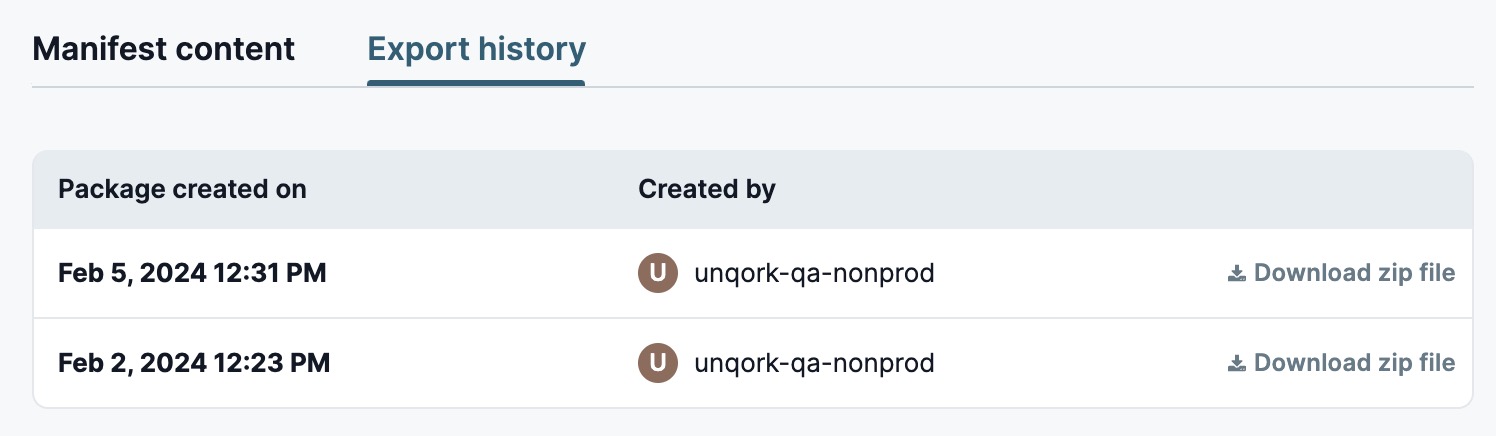
2 | Export History |
Every time you build a manifest package, it stores in Export History. Use this tab to view all the built packages and when they were built. You can also download the packages as a ZIP file onto your computer. |
3 | Build and Export Package | Lets you build a manifest package and download it as a ZIP file onto your computer. All builds display in the Export History tab. |
4 | | Lets you update the manifest's assets. After making your changes, click Update Manifest. |
5 | Source Folder | The folder and subfolders added to the manifest. |
6 | Your Manifest Contains | The recipes and connections included in the manifest. |
7 | Latest Activity | The date and time the manifest was created or modified. |
.png) Edit Manifest
Edit ManifestBuilding and Exporting a Manifest
The final step of the exporting process is to build and export your manifest. The Integration Gateway builds your manifest as a ZIP file so you can download it onto your computer. Then, you'll import that file for use in your Production environment level.
To build and export your manifest:
Access your export manifest from the Integration Gateway's Export tab.
At the top right, click Build and Export Package.
Click Download. Your file is now available in your computer's downloads folder with the file name of {manifest-name}-unqork-qa-nonprod.zip.
With your file downloaded, you're ready to use it in the import process to promote it to your Production environment level.
Importing Assets
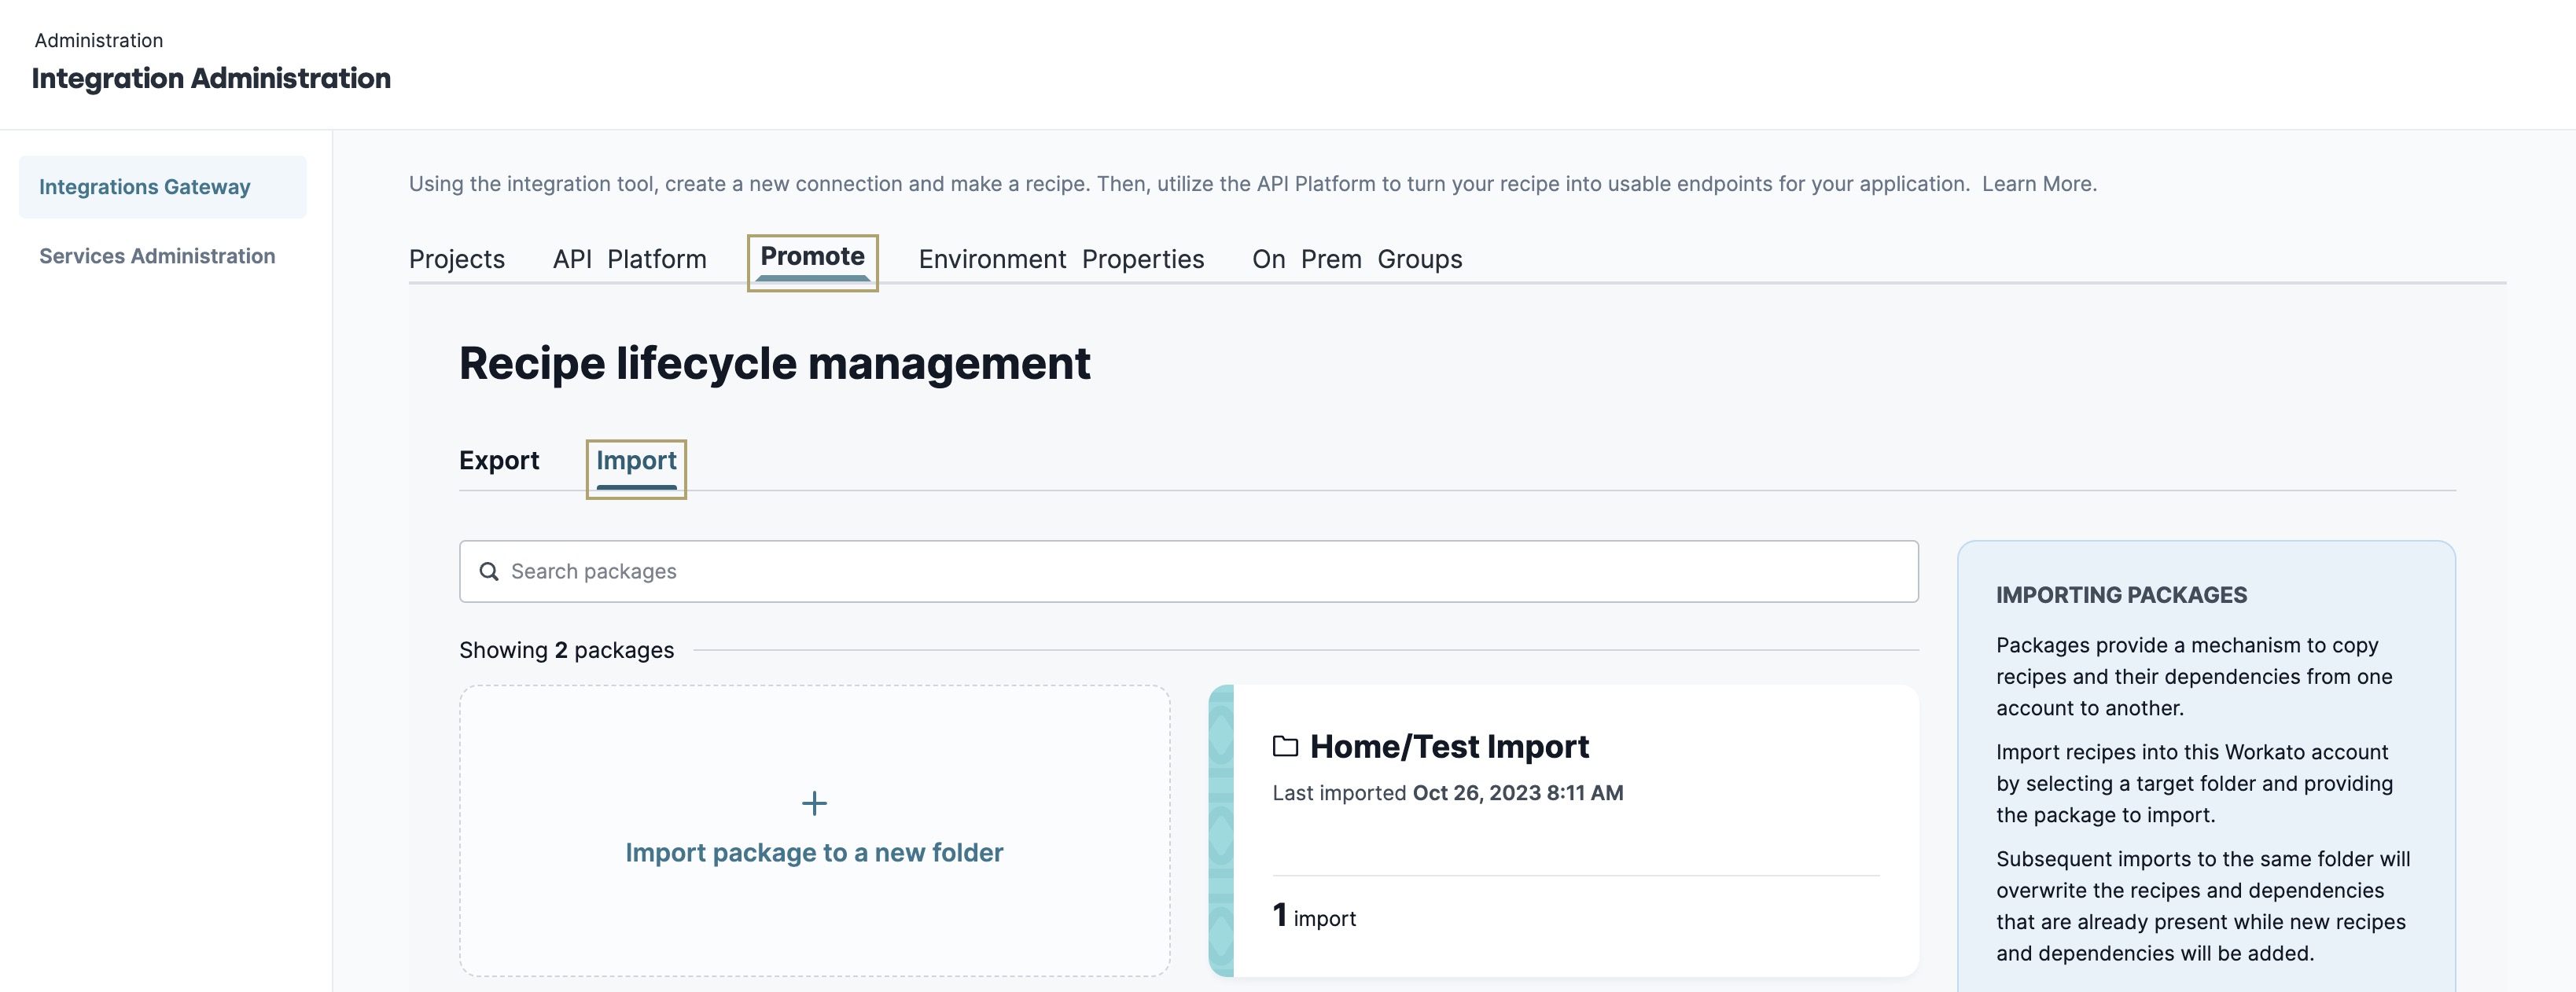
After accessing the Integration Gateway, you'll use the Promote tab to import a recipe package to a production environment level. After navigating to this section of the Integration Gateway, click the Import tab. From this tab, you can create an import manifest to store the assets you exported and downloaded from your non-production environment level.
Creating an Import Manifest
Before you import your non-production assets, you must create an import manifest to store them.
To create an import manifest:
Navigate to the Promote tab.
Click Import.
Click Import Package to a New Folder.
In the Select ZIP File* field, browse for or drag and drop your non-production asset file.
This field only supports ZIP files.
From the Target Folder* drop-down, select the project folder and subfolders where you want to store the manifest.

Click Next.
Review your assets to ensure you have the correct file.
Click Next. You assets import into the Integration Gateway.
After the import is complete, click Finish.

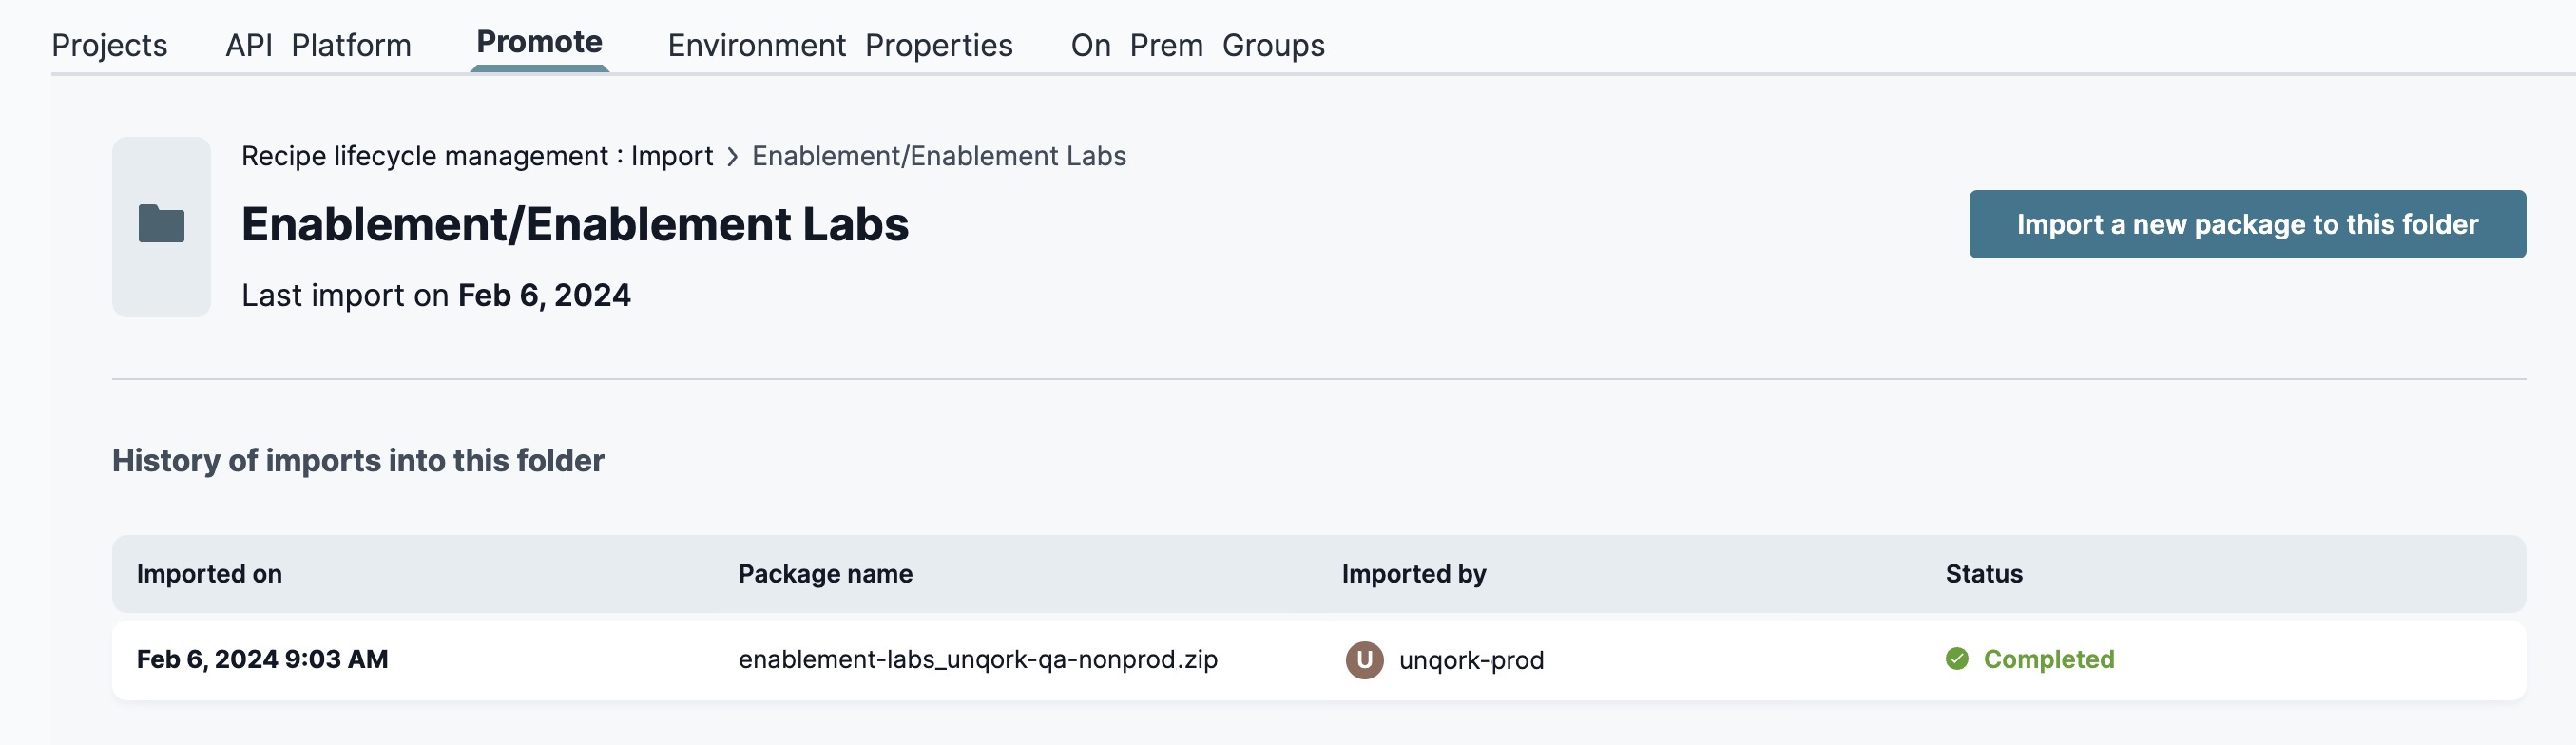
Your imported file now displays in the project folder of your production environment level and are ready for use. Inside your project folder, import other assets by clicking Import a New Package to This Folder.
Resources
How to: Create Connections and Recipes Using the Integration Gateway.
How to: Create On-Prem Agents Using the Integration Gateway.