SendGrid is a paid cloud-based SMTP (Simple Mail Transfer Protocol) provider with which you can integrate to send emails. SendGrid integration also means you don't need to maintain any email servers. Because of SendGrid's versatility, it's one of the most commonly used services in Unqork.
To integrate with SendGrid, set up an account directly through SendGrid. Then, you'll complete additional configurations to make it work. This article highlights the best practices to integrate SendGrid with your application.
What to Do Before Integrating with SendGrid
Before integrating with SendGrid, you must understand the email needs of your application. Here's a list of common questions to help get you started:
What kind of emails are you sending?
You can send either Transactional or Marketing/Bulk emails. Transactional emails are sent based on end-user interaction in the application. This type of email is like a personalized notification. Marketing/Bulk emails are sent to a list of contacts at one time. This type sends mass emails or newsletters. You can send one or both email types.
What domain are you sending from?
The types of emails you send impact the domains you use. The domain is the latter half of the email address. For example,
name@unqork.comhas the domainunqork.com. You might want a different subdomain depending on the function of the email. For instance, you can usemail.unqork.cominstead ofunqork.com. You also might use one subdomain for marketing emails and another for transactional emails. That way, if your end-user marks your marketing emails as spam, it doesn't affect your transactional emails. This concept is known as the subdomain reputation. Using separate subdomains helps uphold that reputation.What alias are you sending from?
The alias is the first half of the email address. For example,
info@unqork.comusesinfoas the alias. You can also use a person’s name.What name are your emails coming from?
The name is what shows in the
Fromline of your emails. Like the alias, this name can be something generic. For instance, the name can be the name of your company or a specific person.What is your preferred
reply-toemail address?Your automated emails might gather a response from the end-user. To work, you must provide an email address to collect responses. This is the
reply-toemail address. The same options apply here as for the alias, but the domain (or subdomain) remains the same.What content does your email include?
Content can include text and dynamic fields. This is crucial for building out your email templates.
What environments does your domain use to send emails to and from?
Most often, test emails use the domain
unqork.cominstead of your specific domain. This means that only Unqork UAT (user acceptance testing) and Production environments can use your specified domain.Can you update your domain’s DNS records?
The setup process for SendGrid requires adding DNS (Domain Name System) records to your DNS Zones. That way, SendGrid can send emails on behalf of your domain. Be sure to add these records so SendGrid integration works correctly.
What is your anticipated outgoing email volume?
SendGrid has different tiers when it comes to email volume. You must verify the number of emails you plan to send before you set up your SendGrid account.
Creating a SendGrid Subuser
Once you answer the above questions, you need to create 2 SendGrid subusers:
Quality Assurance (QA): Used in Unqork Staging, QA, and UAT environment levels.
Production (Prod): Used in Unqork Pre-Production and Production environment levels.
These 2 subusers let you test new configurations without impacting those already in use. Currently, to make these users in Unqork’s Master Account, you need to request help from the Solutions team to gain access.
These instructions assume you have already created a SendGrid account.
Configure the Subuser
To create a SendGrid subuser:
Navigate to the Create New Subuser page in SendGrid.
In the Username field, enter your username. This follows the format
<yourName>-qa or <yourName>-prod, depending on which account you’re creating.In the Email field, enter an email address. This is the email address for the account owner or the point of contact, if you're working with a client.
In the Password field, enter a password.
In the Confirm Password field, re-enter your password.
In the Address field, enter the required address information.
Click Create Subuser.
Repeat for each subuser.
Configure the API Keys
Next, retrieve the API (application programming interface) key for each subuser. This is how SendGrid authenticates each API call. You also need these API keys to set up the authentication on the Unqork side.
You must complete this process twice, once for your QA subuser and once for your Prod subuser.
Log in to your SendGrid subuser account.
In the Settings menu to the left, select API Keys.
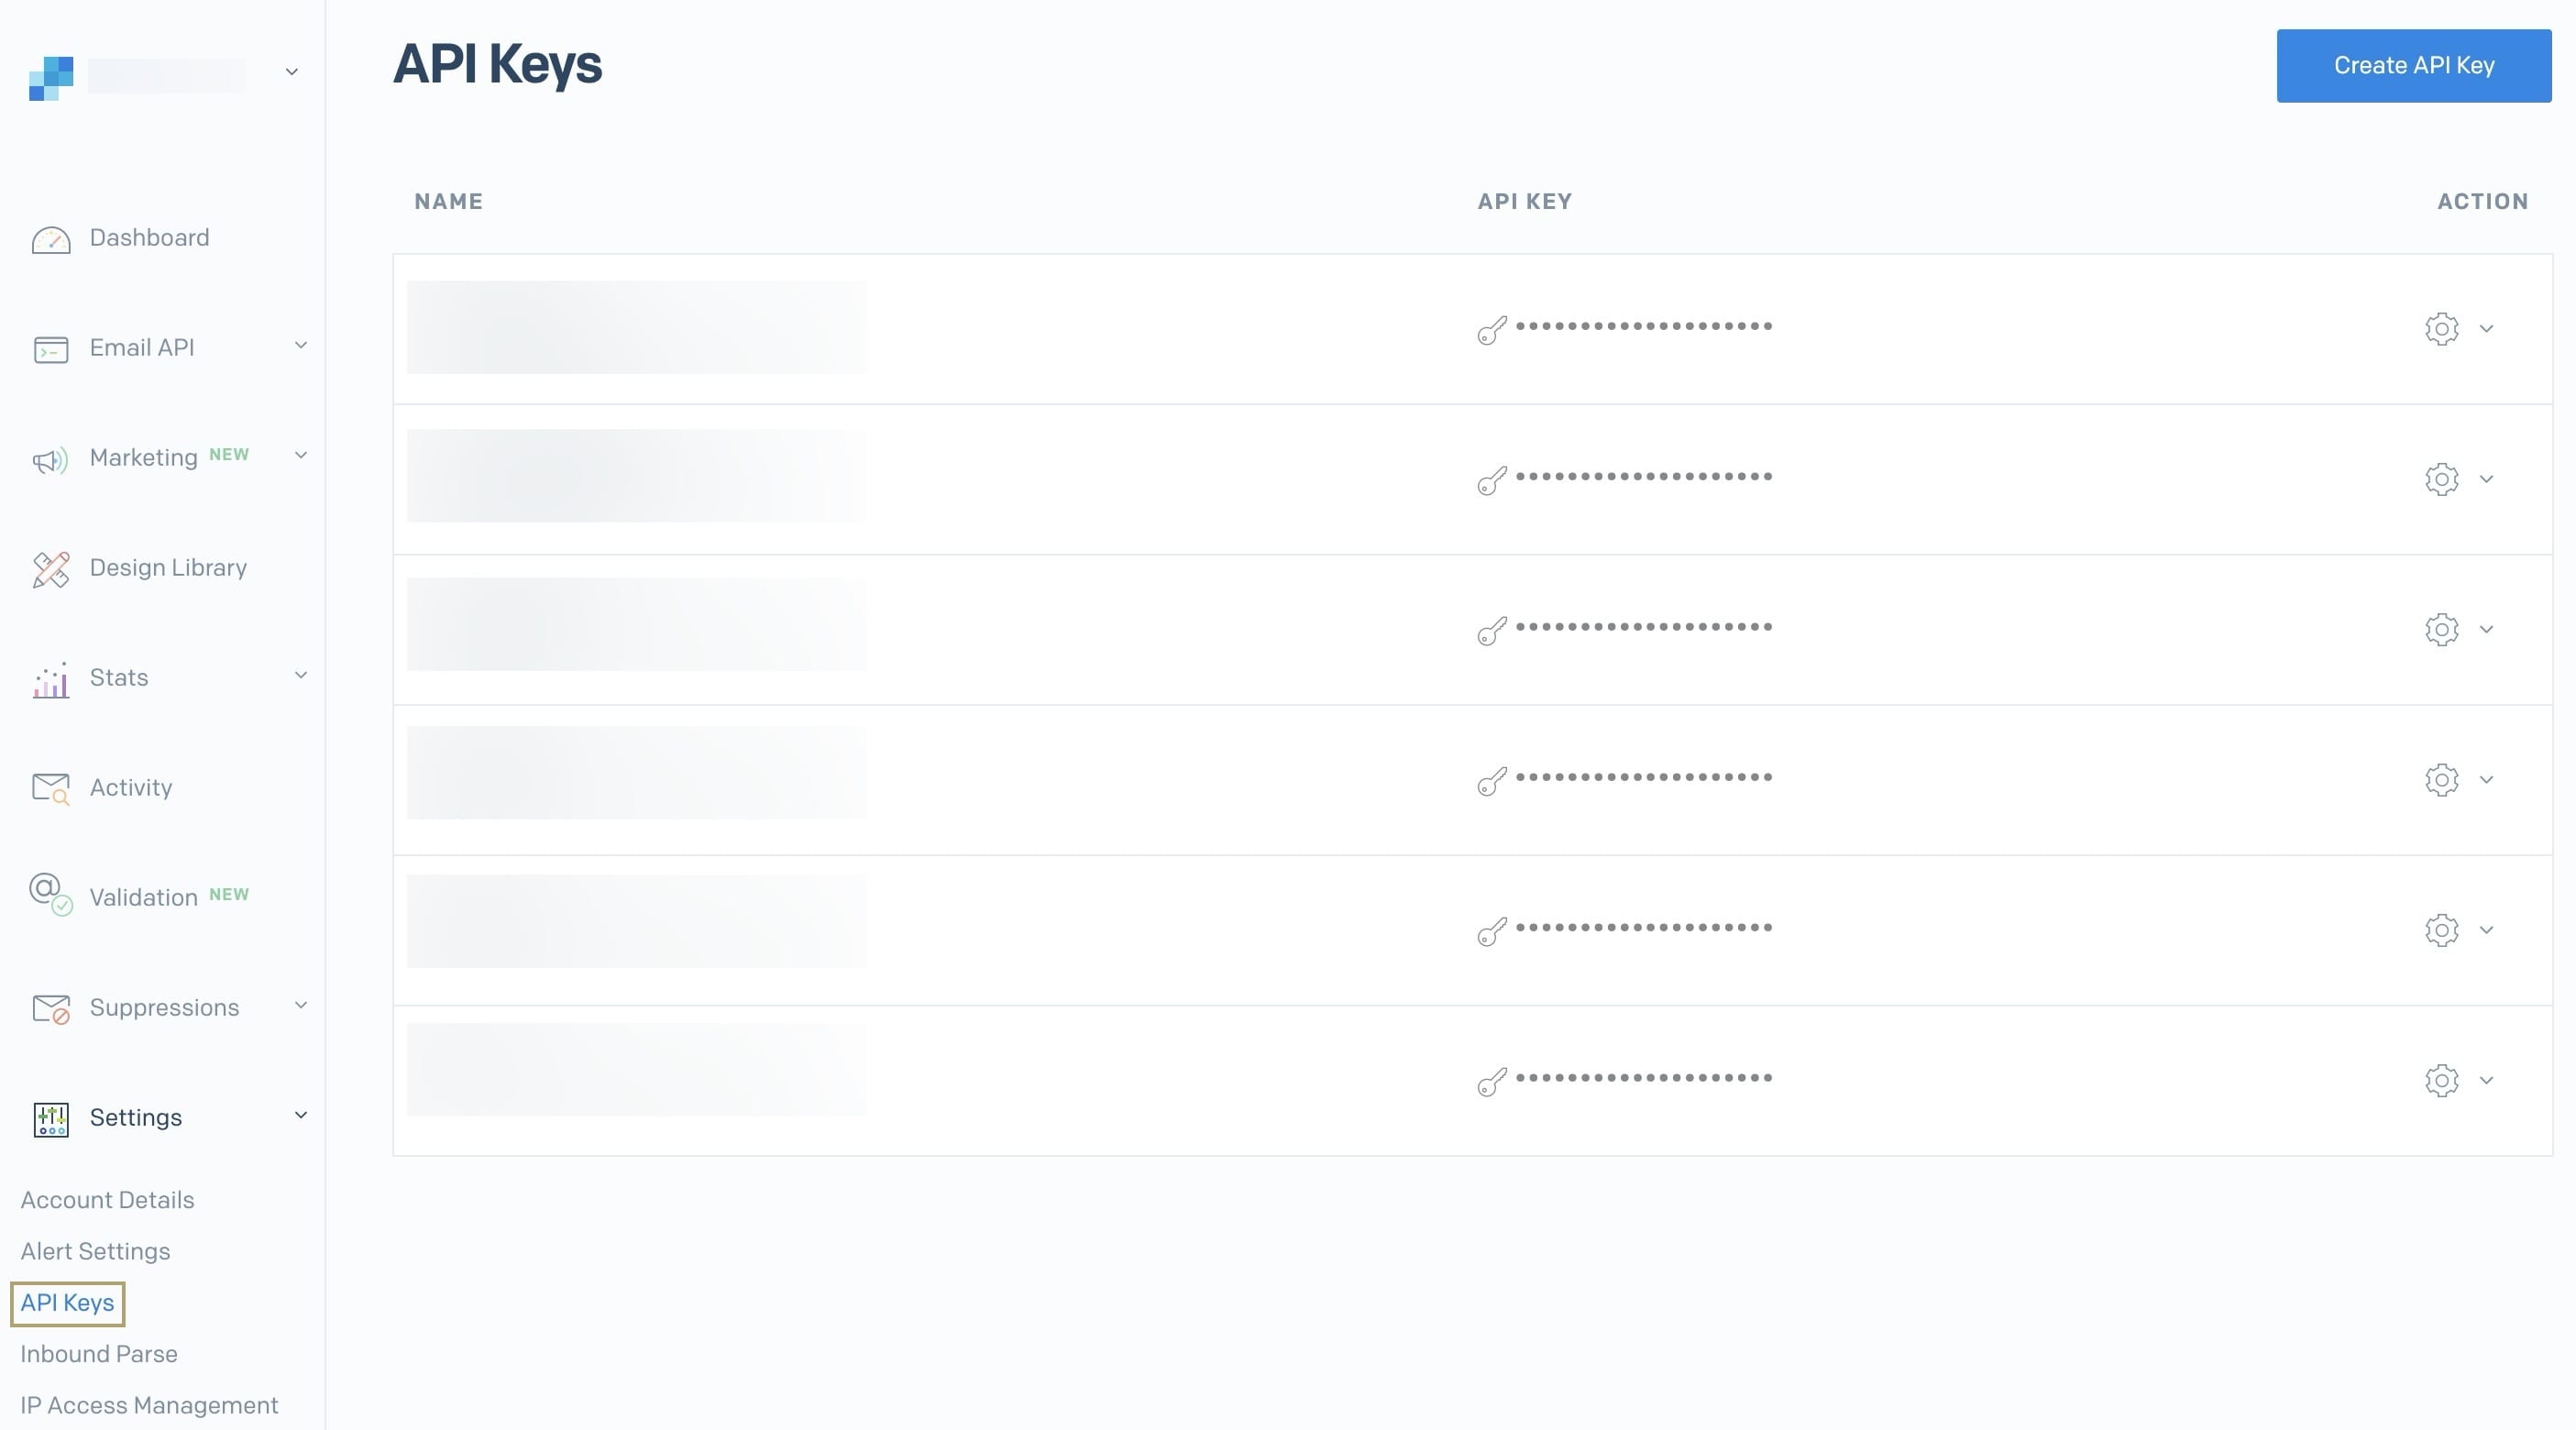
Click Create API Key.
In the API Key Name field, enter a name for your API key.
Select Full Access. This grants full access to all API calls using this key.
Click Create & View.
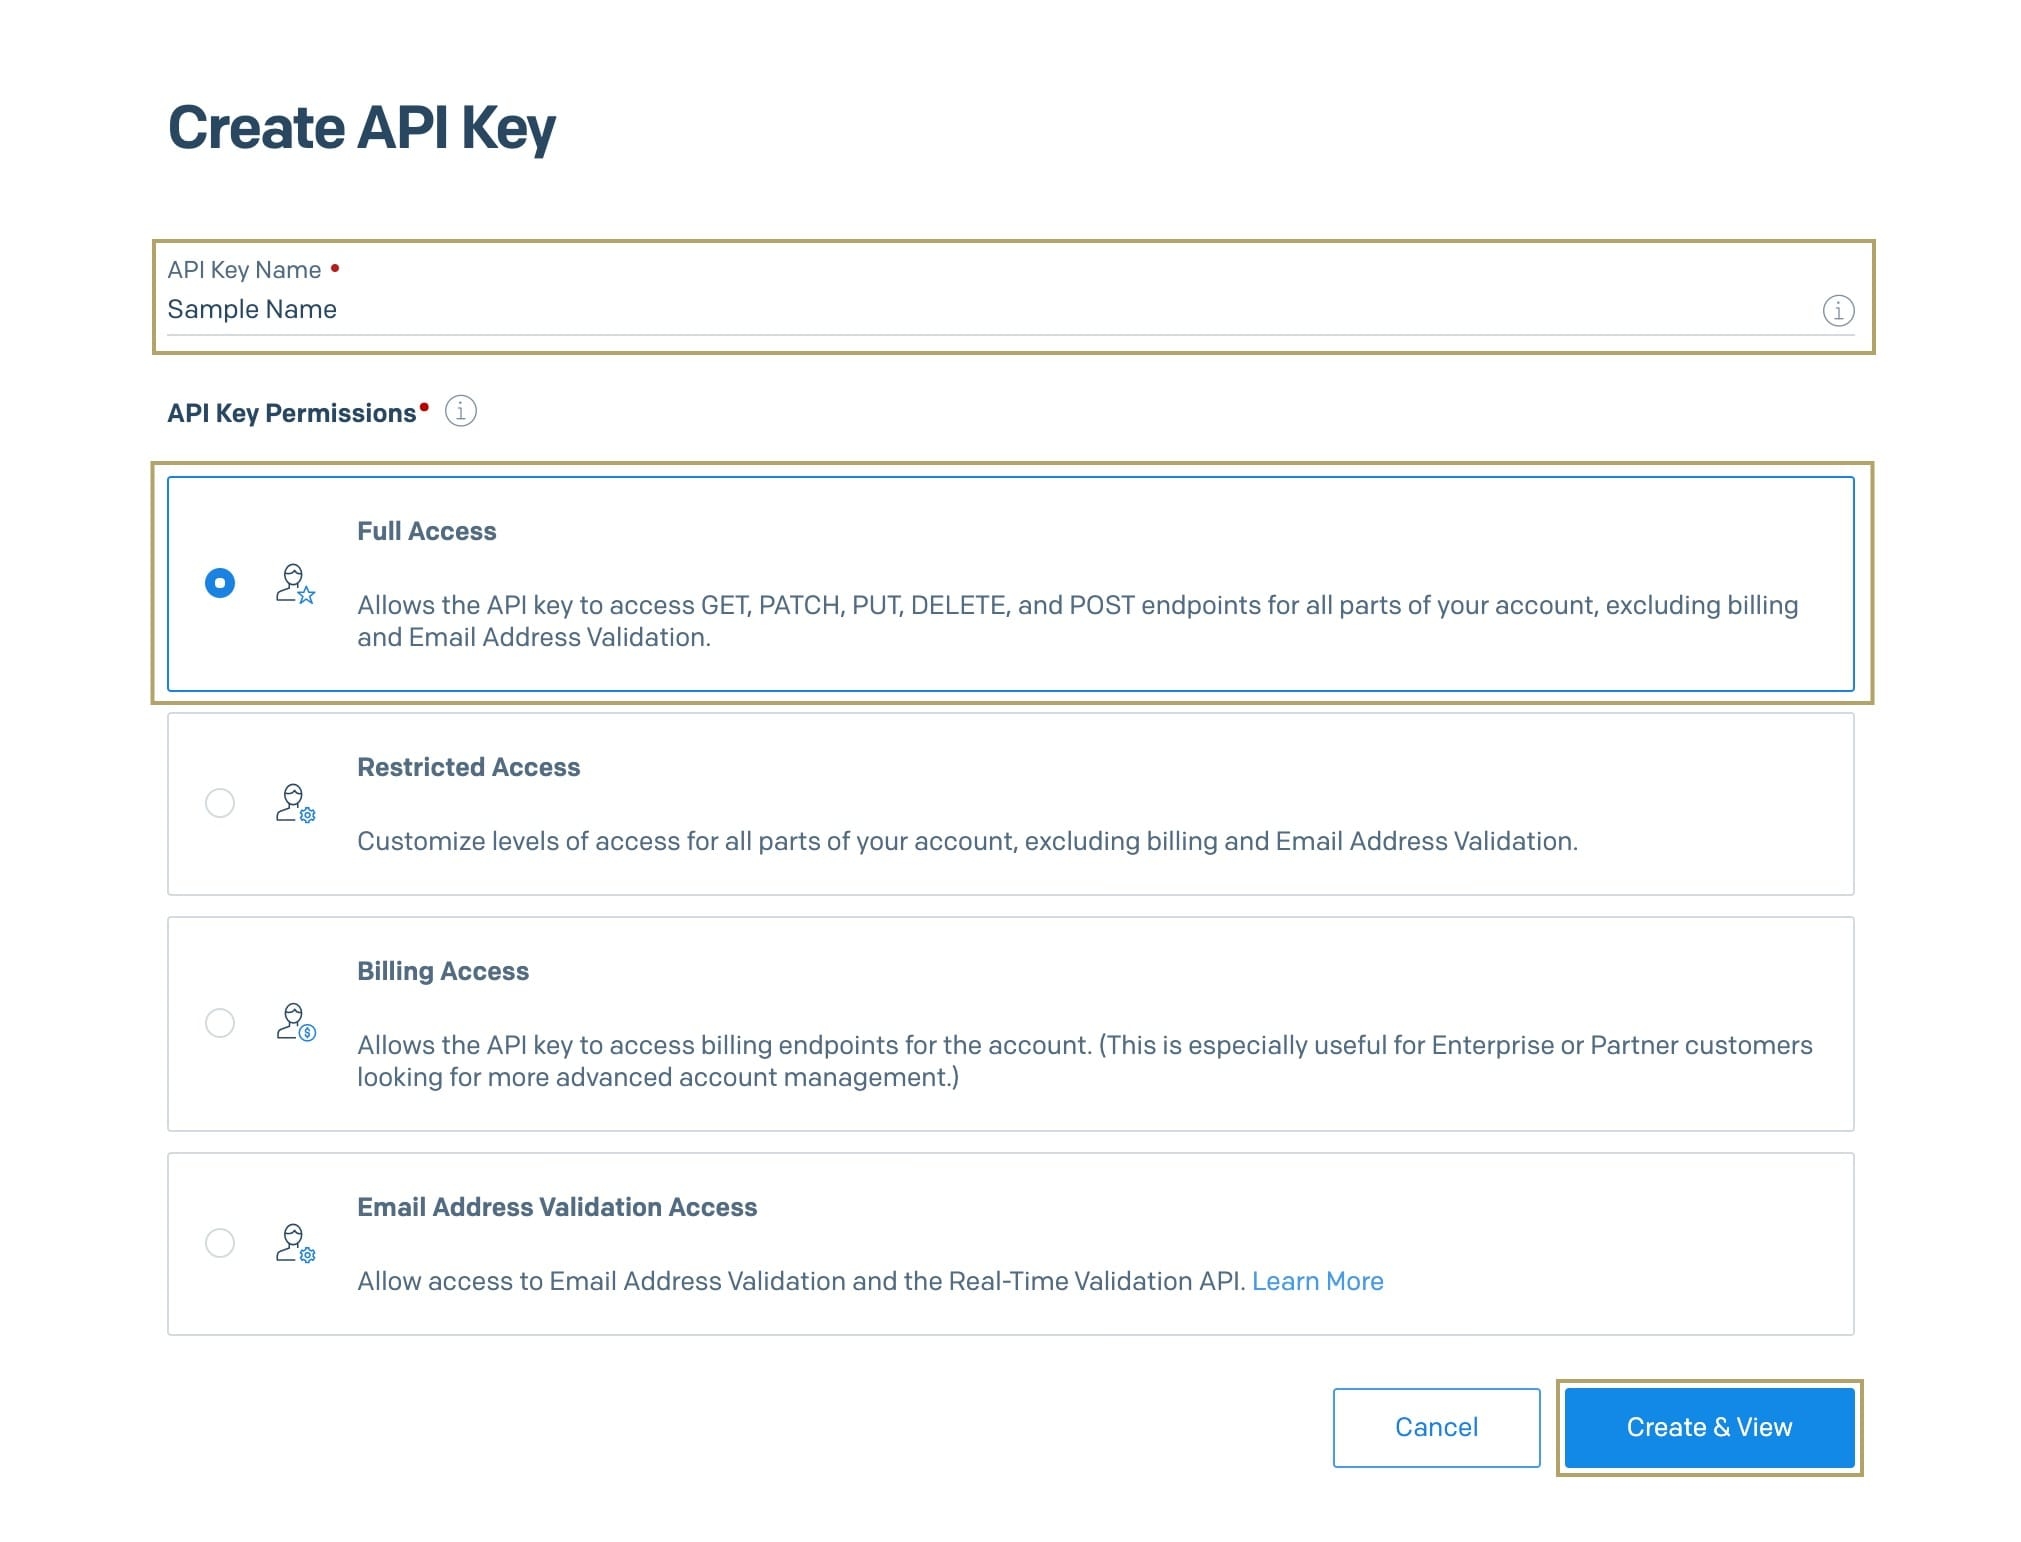
Copy the key that displays and store it in a secure location on your computer.
Set Up the Service in Unqork
Now, add your SendGrid API key to your Unqork environment. This API key lets SendGrid recognize the API calls coming from your application. You can set up your SendGrid service using Unqork's Services Administration.
You’ll complete these steps more than once. You need to add SendGrid to each Unqork environment you plan to send emails from. Be sure to use the correct SendGrid subuser for each.
It's best practice to use Unqork’s Global Variables feature. This feature is great for testing your application at different environment levels. Using global variables, you can test your application without sending emails to real end-users. To learn more about referencing a global variable in your configuration, search Referencing a Global Variable in our In-Product Help.
To add SendGrid to your Unqork environment:
At the top right of the Unqork Designer Platform, click the Settings ▾ drop-down.
Click Administration.
Under Integration, click Services Administration.
Click + Add a Service
In the Service Title and Service Name fields, enter
SendGrid.The Service Name is case-sensitive and can't be changed. Entering
sendGridmight result in errors.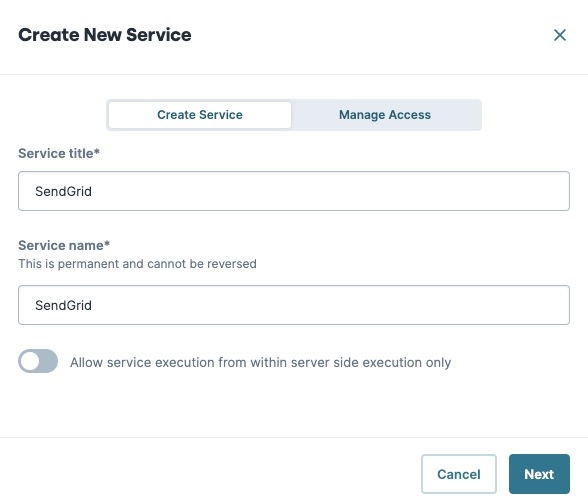
Click Next. The Manage Access tab displays.
Set Share to to Environment.
Click Create. The SendGrid services page displays.
Click Edit
From the navigation menu, select Service Type.
In the Service Protocol + Host field, enter
https://api.sendgrid.com/v3.Under Authentication Method* from the drop-down, select Bearer Token.
In the Bearer Token field, enter your API key.
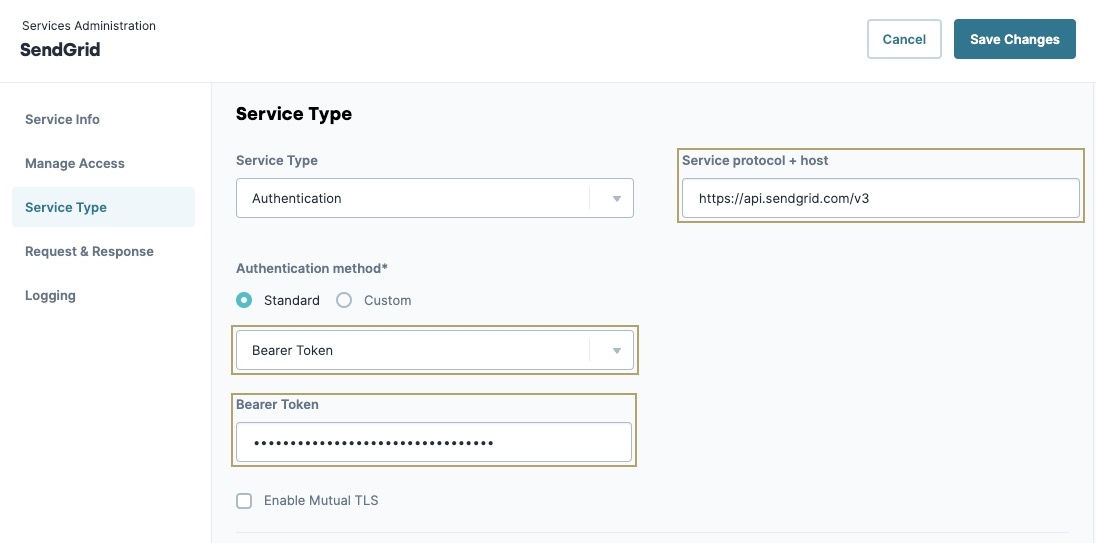
Click Save Changes.
Domain Authentication
Once you configure your account and service, you need to authenticate the domain you’re sending from. Depending on the number of emails you plan to send, you have 2 options for authenticating a domain:
Authentication for normal senders (<100,000 emails per day).
Authentication for bulk senders (100,000 emails or more per day).
Normal Sender Authentication
Normal senders are those sending fewer than 100,000 emails per day. You'll configure SendGrid domain settings to get DNS records. Then, you'll work with your Network Administrator to add them. You need to complete this process for both SendGrid subaccounts, QA and Prod.
To set up Normal Sender Authentication:
Log in to your SendGrid subuser account.
From the Settings menu to the left, select Sender Authentication.
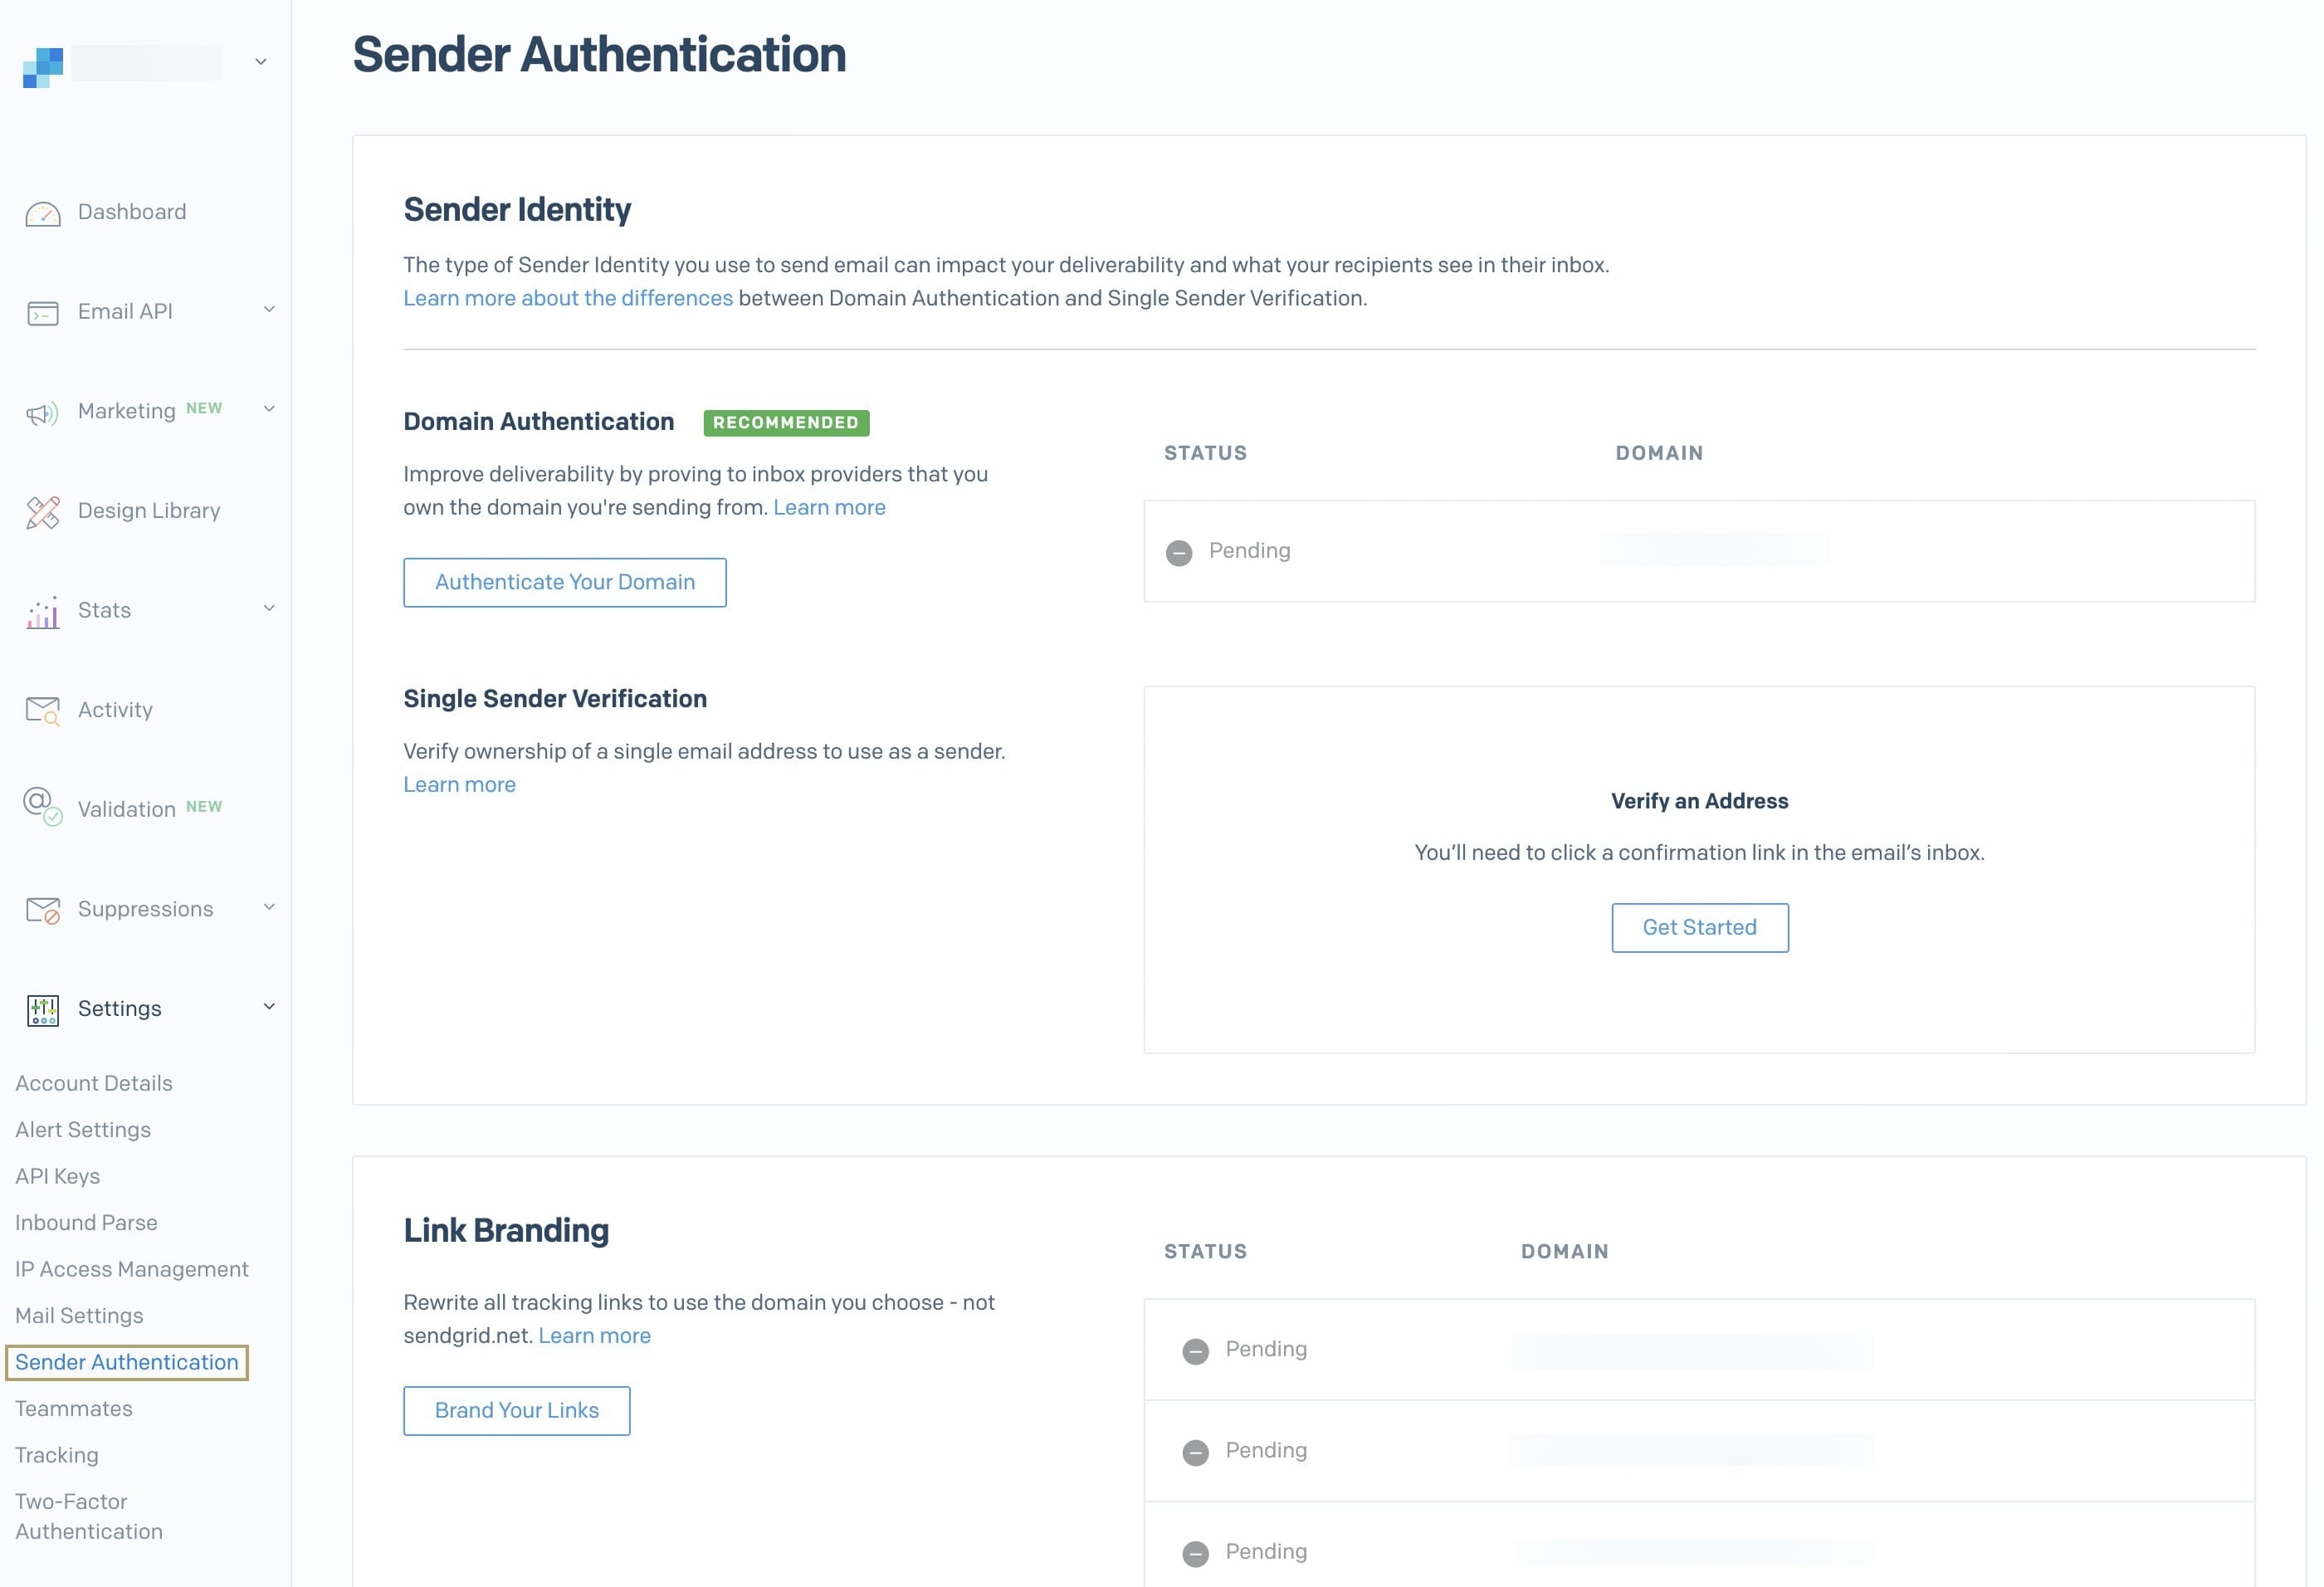
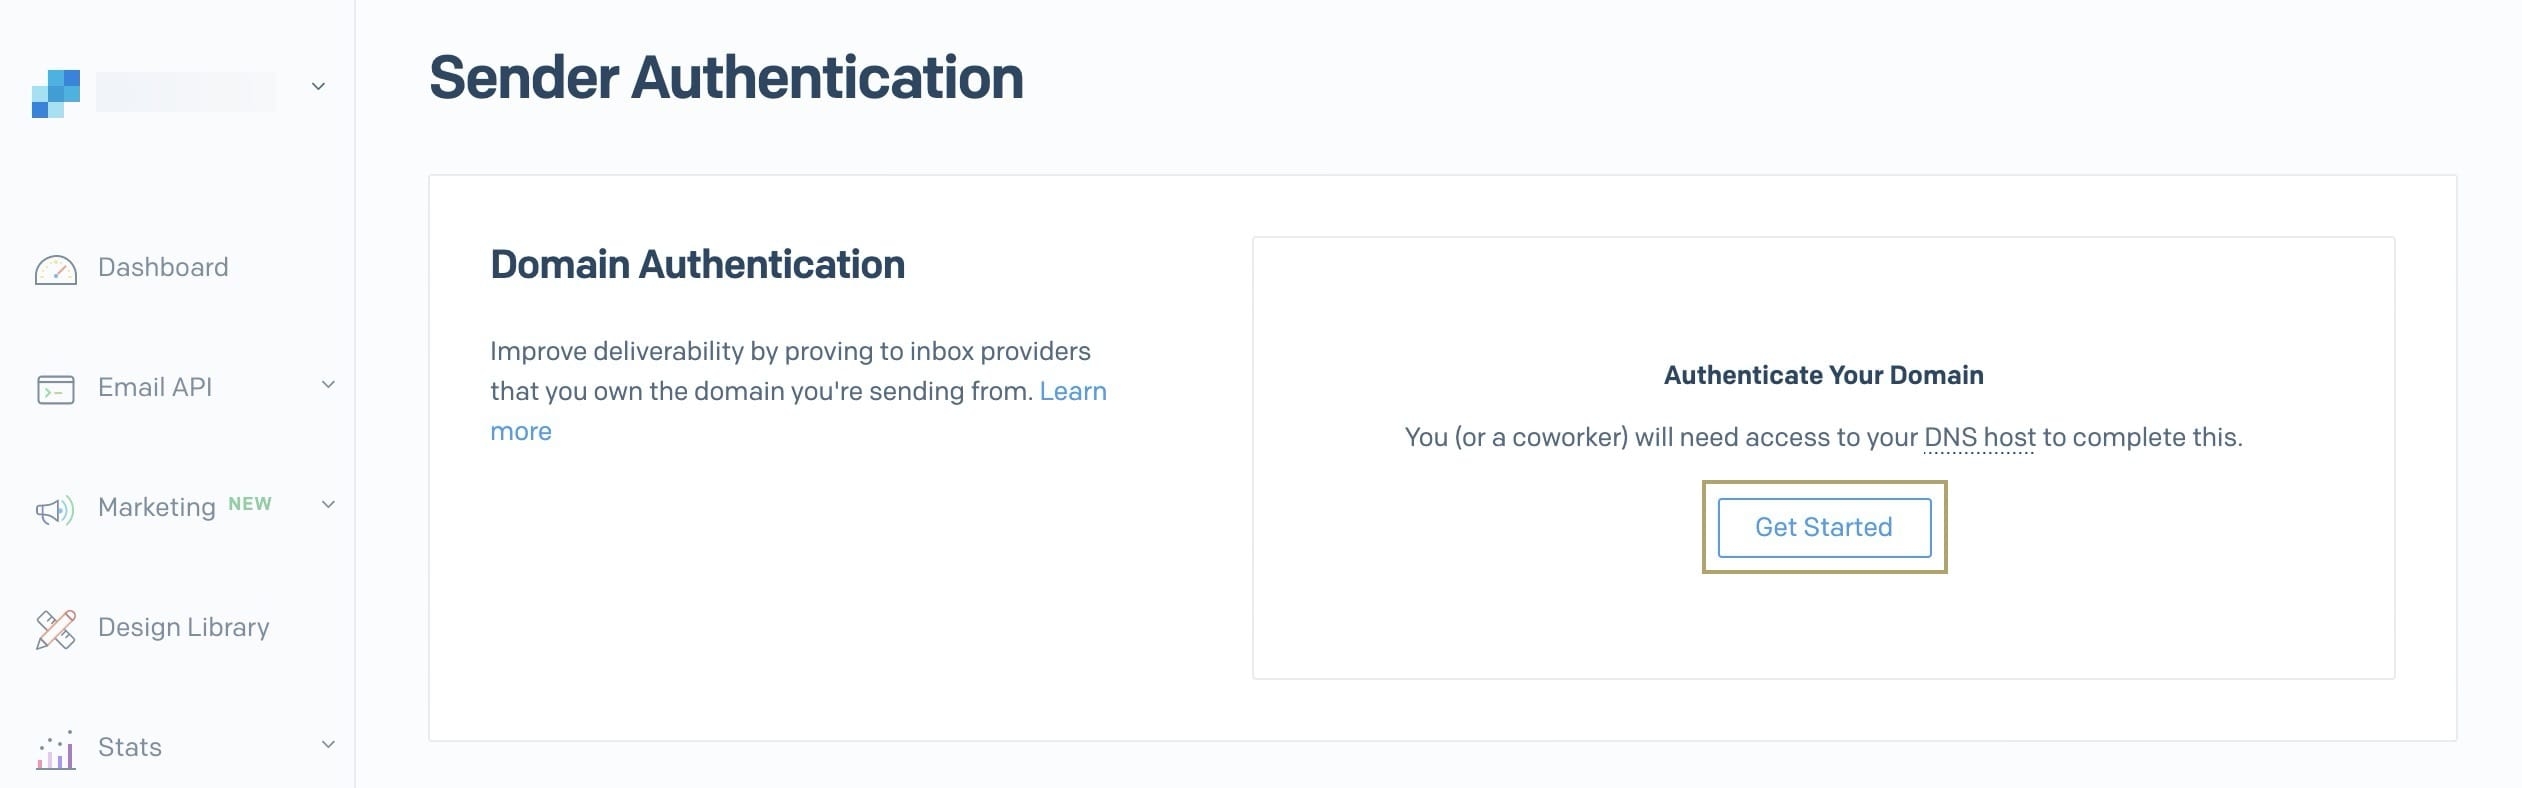
Under Authenticate Your Domain, click Get Started.
Under Would you also like to brand the links for this domain?, select Yes. This stops spam filters from flagging your emails.
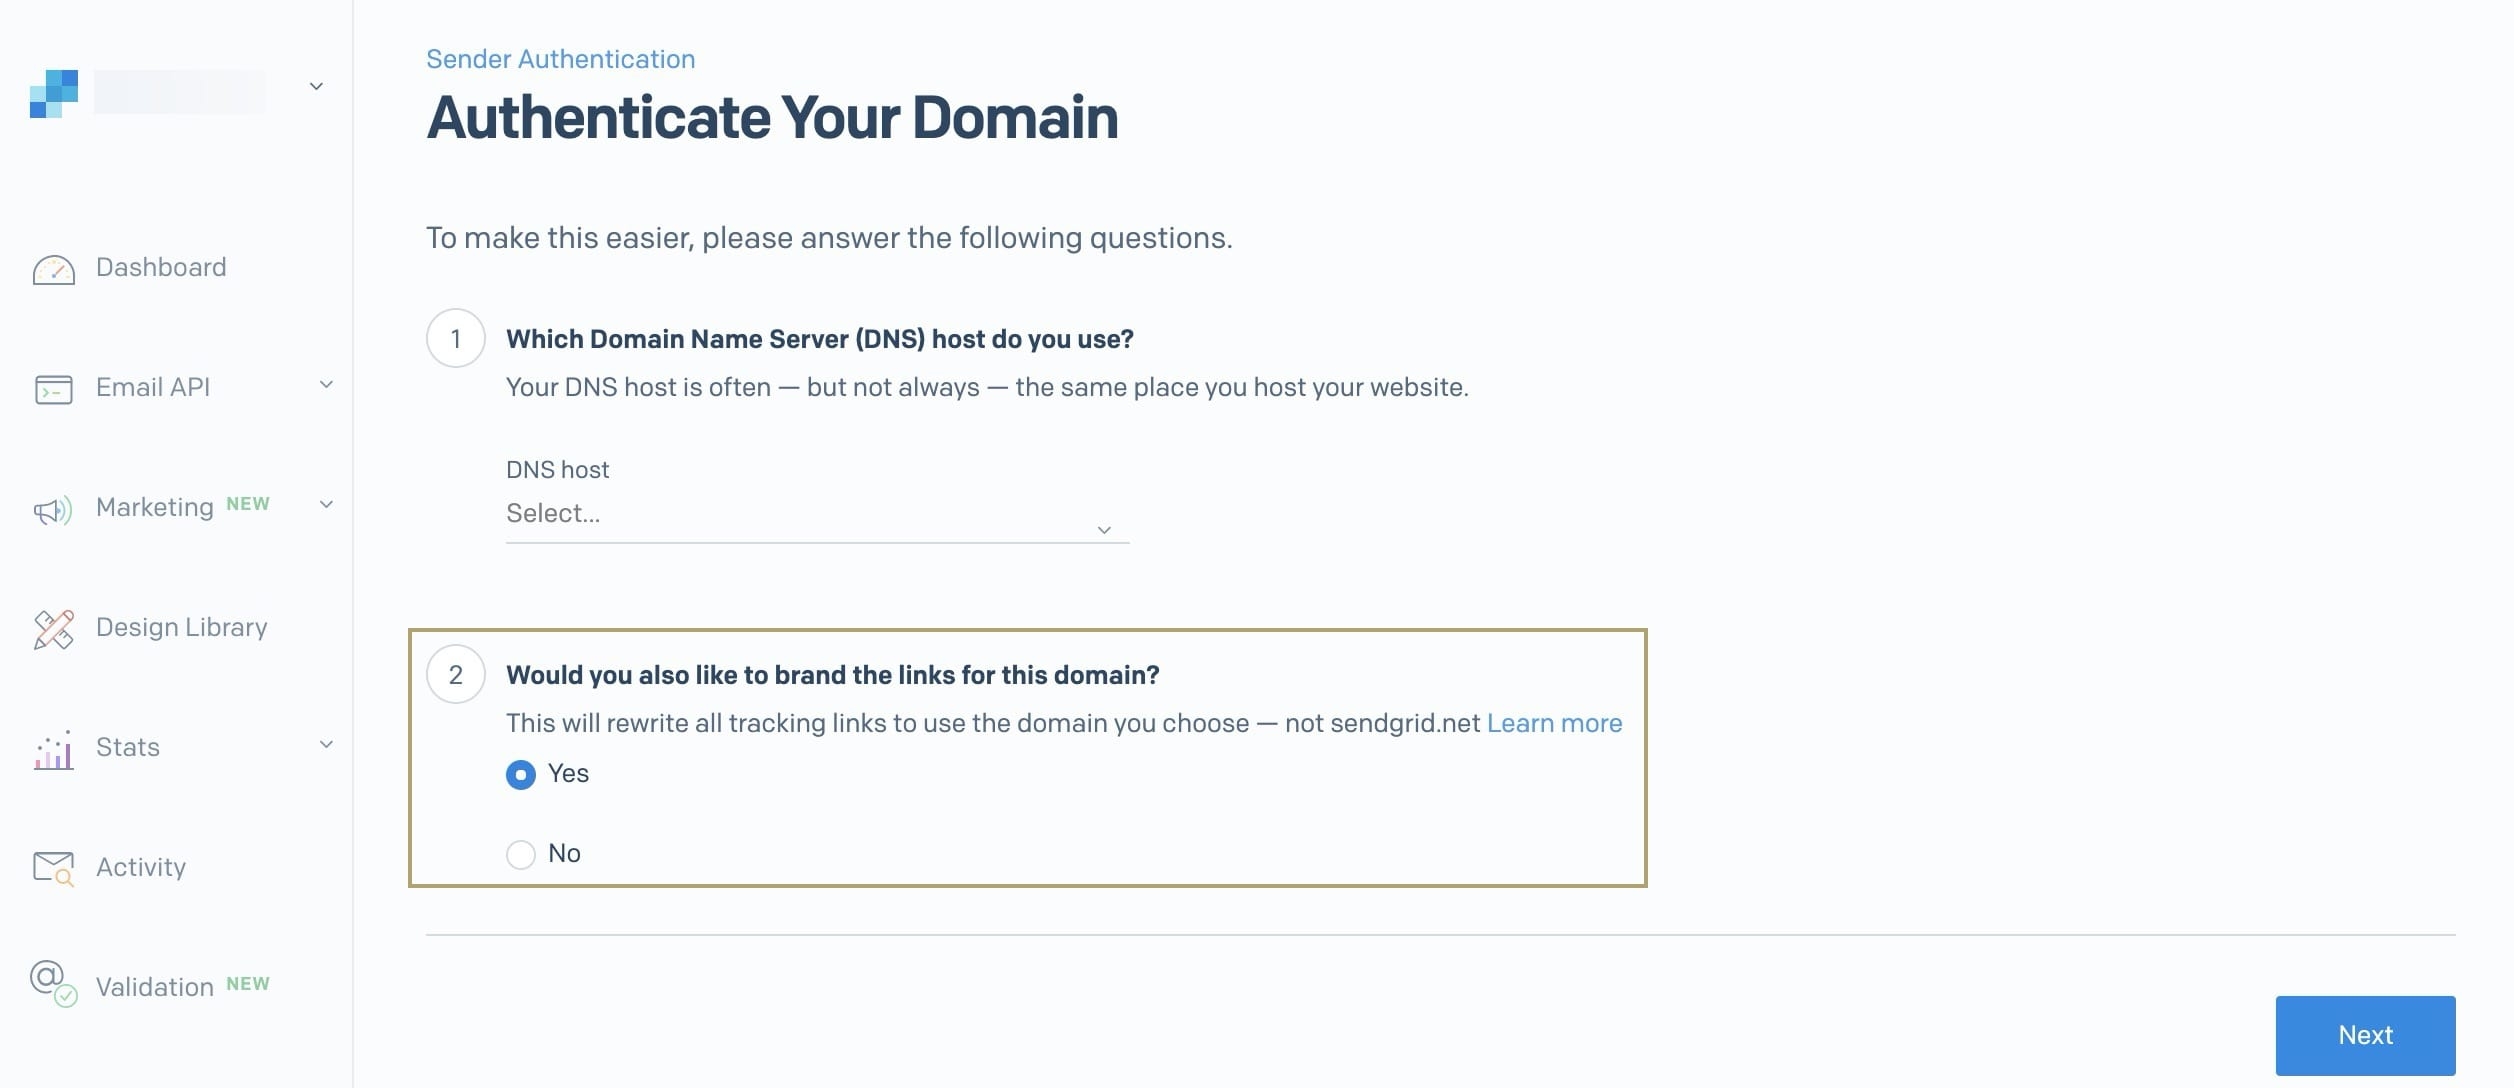
Leave the Which Domain Name Server (DNS) do you use? section empty.
Click Next.
Authenticate Your Domain
In the Domain You Send From field, enter your subdomain.
The domain must be an active domain to receive emails.
To view more security options, click Advanced Settings.
In the Advanced Settings, select the following:
Checked
Setting
Yes (selected)
Use Automated Security
No (clear)
Use Custom Return Path
No (clear)
Use a Custom Link Subdomain
Yes (selected)
Use a Custom DKIM Selector
In the DKIM Selector field, enter a unique DKIM (DomainKeys Identified Mail).
It's best practice to use a unique DKIM, so you can use more than one SendGrid configuration per domain. A unique DKIM helps you avoid any issues you might have setting up another account. You can keep it as simple as
unq.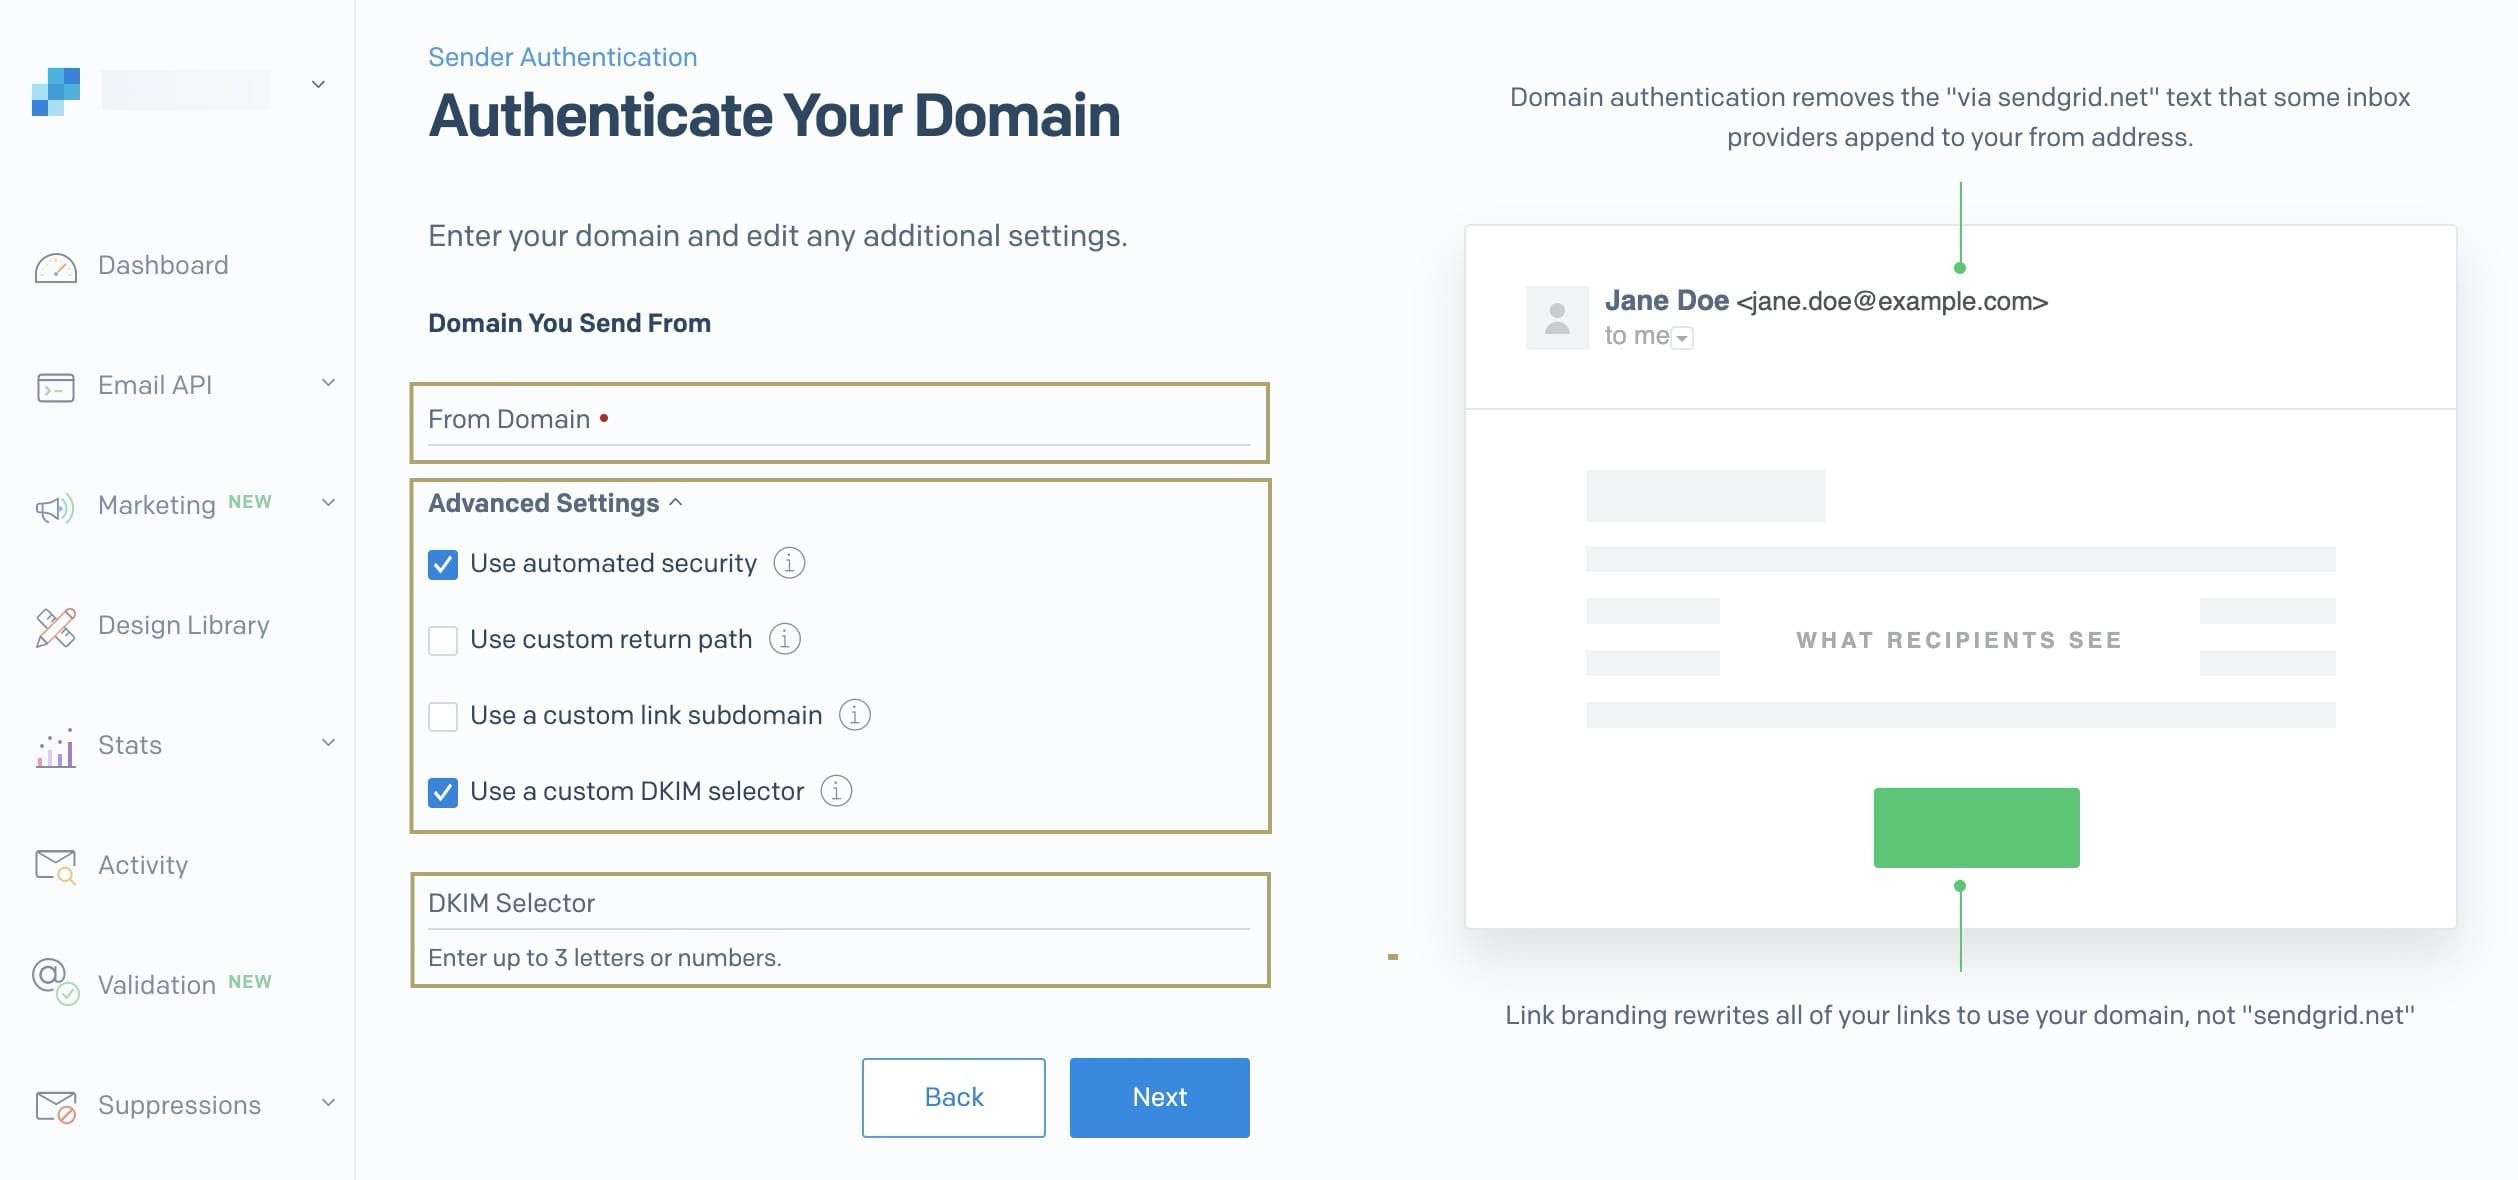
Click Next.
Add DNS Records
You must add CNAME (canonical name) records to the DNS section. You need to communicate these records to your Network Administrator. You can send your Network Administrator the records manually using the Install Myself tab. Or, you can send an automated email using the Send to a Coworker tab.
Add your DNS records to the table.
Select I’ve Added These Records.
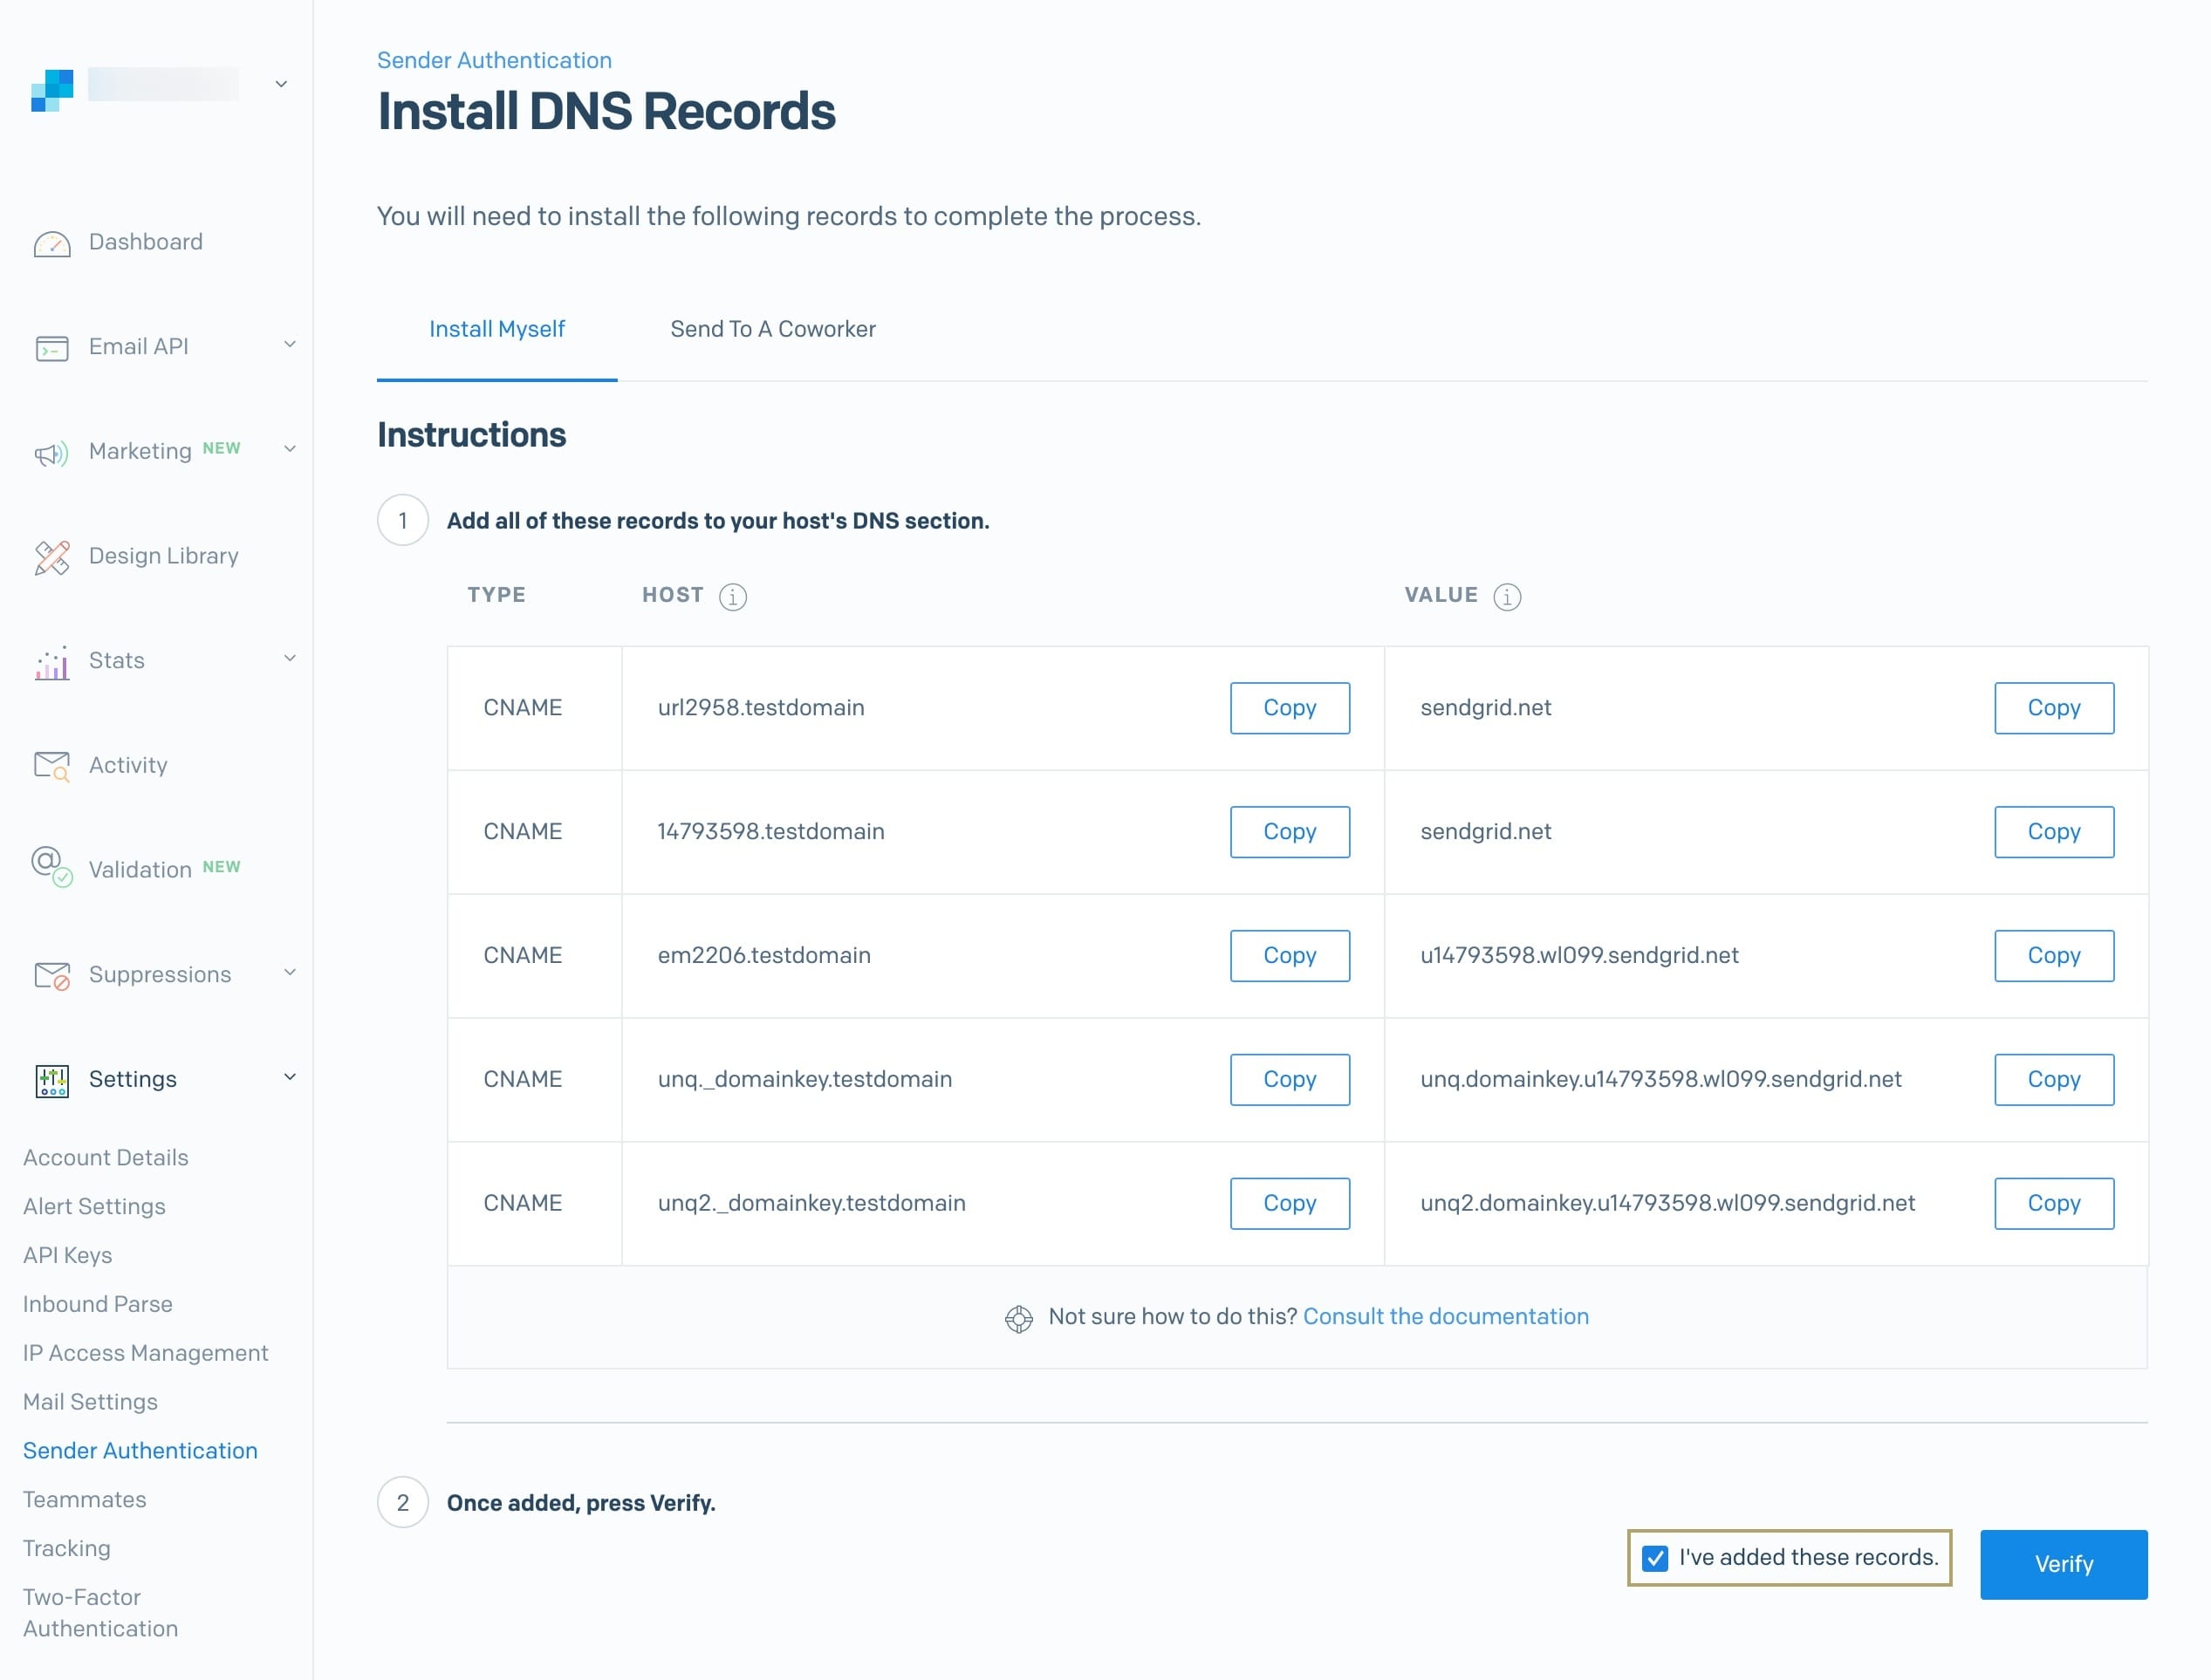
Click Verify.
SendGrid tests each record and shows the results. If any entries fail after 2–3 minutes, have your Network Administrator double-check their entries.
Bulk Sender Authentication
To set up Bulk Sender Authentication, work with an Unqork Customer Success or Solutions team member. You need to get a new IP address from Unqork’s master SendGrid account. Then, you can follow the same steps as above for Normal Sender Authentication.
Template Setup
If you send emails that share common features, it's best practice to create this content using a SendGrid template. That way, you don't need to recreate the entire email each time it's needed. SendGrid templates let you store email styling, images, and content for use. Each SendGrid template has a template ID, which you must include in your API call. This template ID informs SendGrid which template you are using.
To create a new template:
From the Email API drop-down to the left, select Dynamic Templates.
The Dynamic Templates page displays all your created templates. Selecting a template shows its template ID.
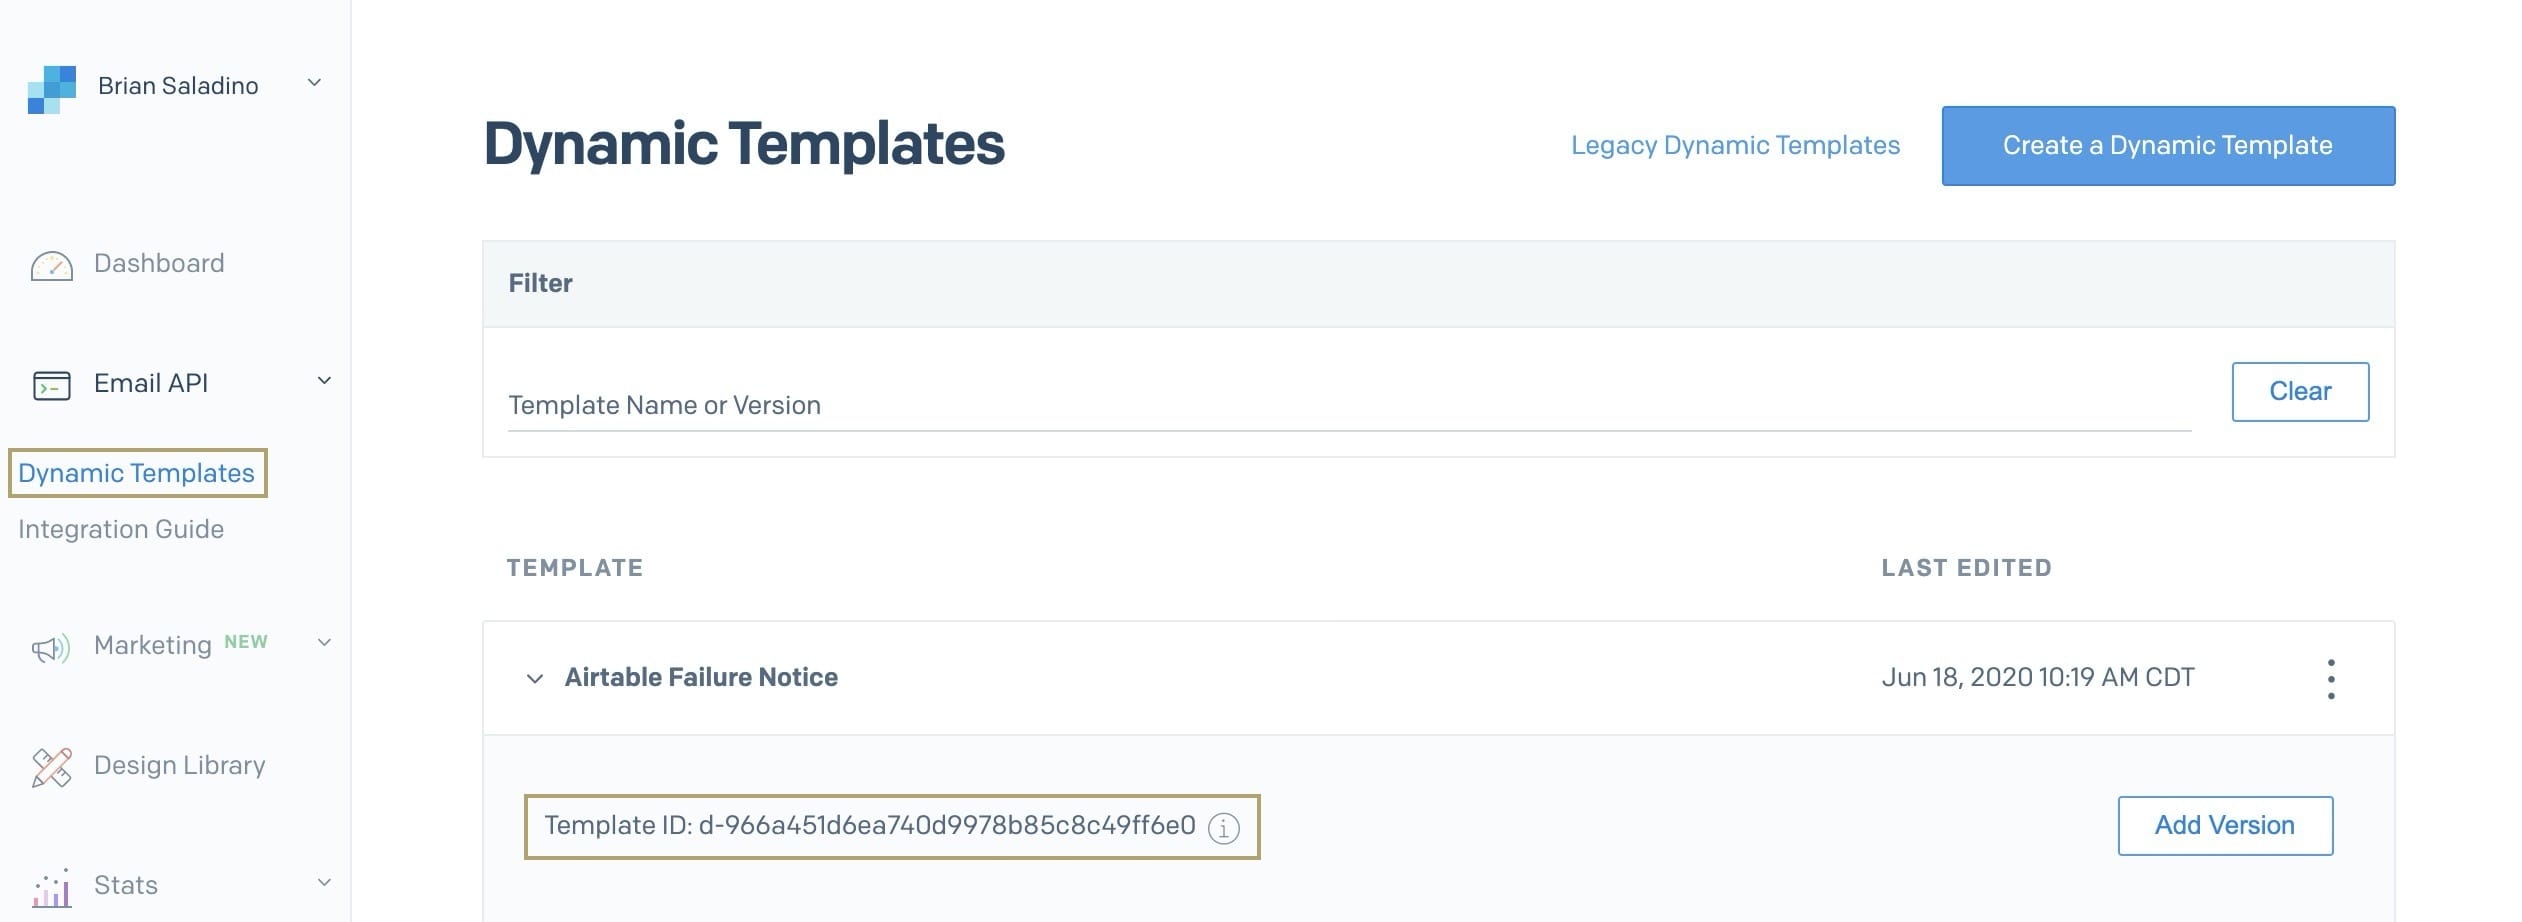
At the top right of the page, click Create a Dynamic Template.
In the Name field, enter a name for your new template.
Click Create.
Dynamic Variables
The template's content usually stays the same across all emails. But you might change some basic information in each email. For example, think of the recipient. It’s a best practice to address the recipient of an email by name. To include a unique detail, like the recipient’s name, use a dynamic variable.
Dynamic variables in SendGrid use Nunjucks to set them apart from the rest of the content of your email. Here’s an example:
Hi {{firstName}},
This is a completely personalized test email. Thank you and have a great day.
Sincerely,
The Unqork Team
In the above sample email, {{firstName}} is a dynamic variable that populates with a field of your choice. You can specify this variable when you make the API call from your Unqork application.