Overview
In this lesson, we'll explore how to use external tools to diagnose issues with API calls in Unqork. Helpful external tools for testing your API requests include Postman and Insomnia. Both tools work alike so, for this lesson, we are going to focus on Postman.
What Is Postman?
You can use Postman to test your Unqork API calls. It lets you make API requests and examine the responses without using a terminal or having to write code. When you submit an API request, the API response appears in the Postman user interface. That way, you can visualize, examine, and, if necessary, troubleshoot the call.
This can be helpful if you’re getting a failed response to an endpoint in the Unqork Designer Platform. Postman will help you discover if the issue is with the endpoint or with what you’re passing in. If the endpoint works when called from Postman, you likely have a configuration issue.
In this lesson, we’ll go over a few of the core features of Postman. This includes using creating Postman Collections and using Postman to make Unqork calls. For more details on Postman, we encourage you to visit the links included in this article.
Accessing Postman
To install the Postman desktop application, click this link: https://learning.postman.com/docs/getting-started/installation-and-updates/. You'll see there are options to install the app on a Mac and PC. After downloading the app, you'll create a Postman account. Once you're set-up, you'll find helpful tutorials and troubleshooting guides.
For details and explanations on how to navigate Postman, click this link: https://learning.postman.com/docs/getting-started/navigating-postman/. Here you'll find Postman's basic functions. Document topics include:
Creating workspaces
Accessing reports
Using the universal search tool
Viewing API request history
Accessing Postman Bootcamp
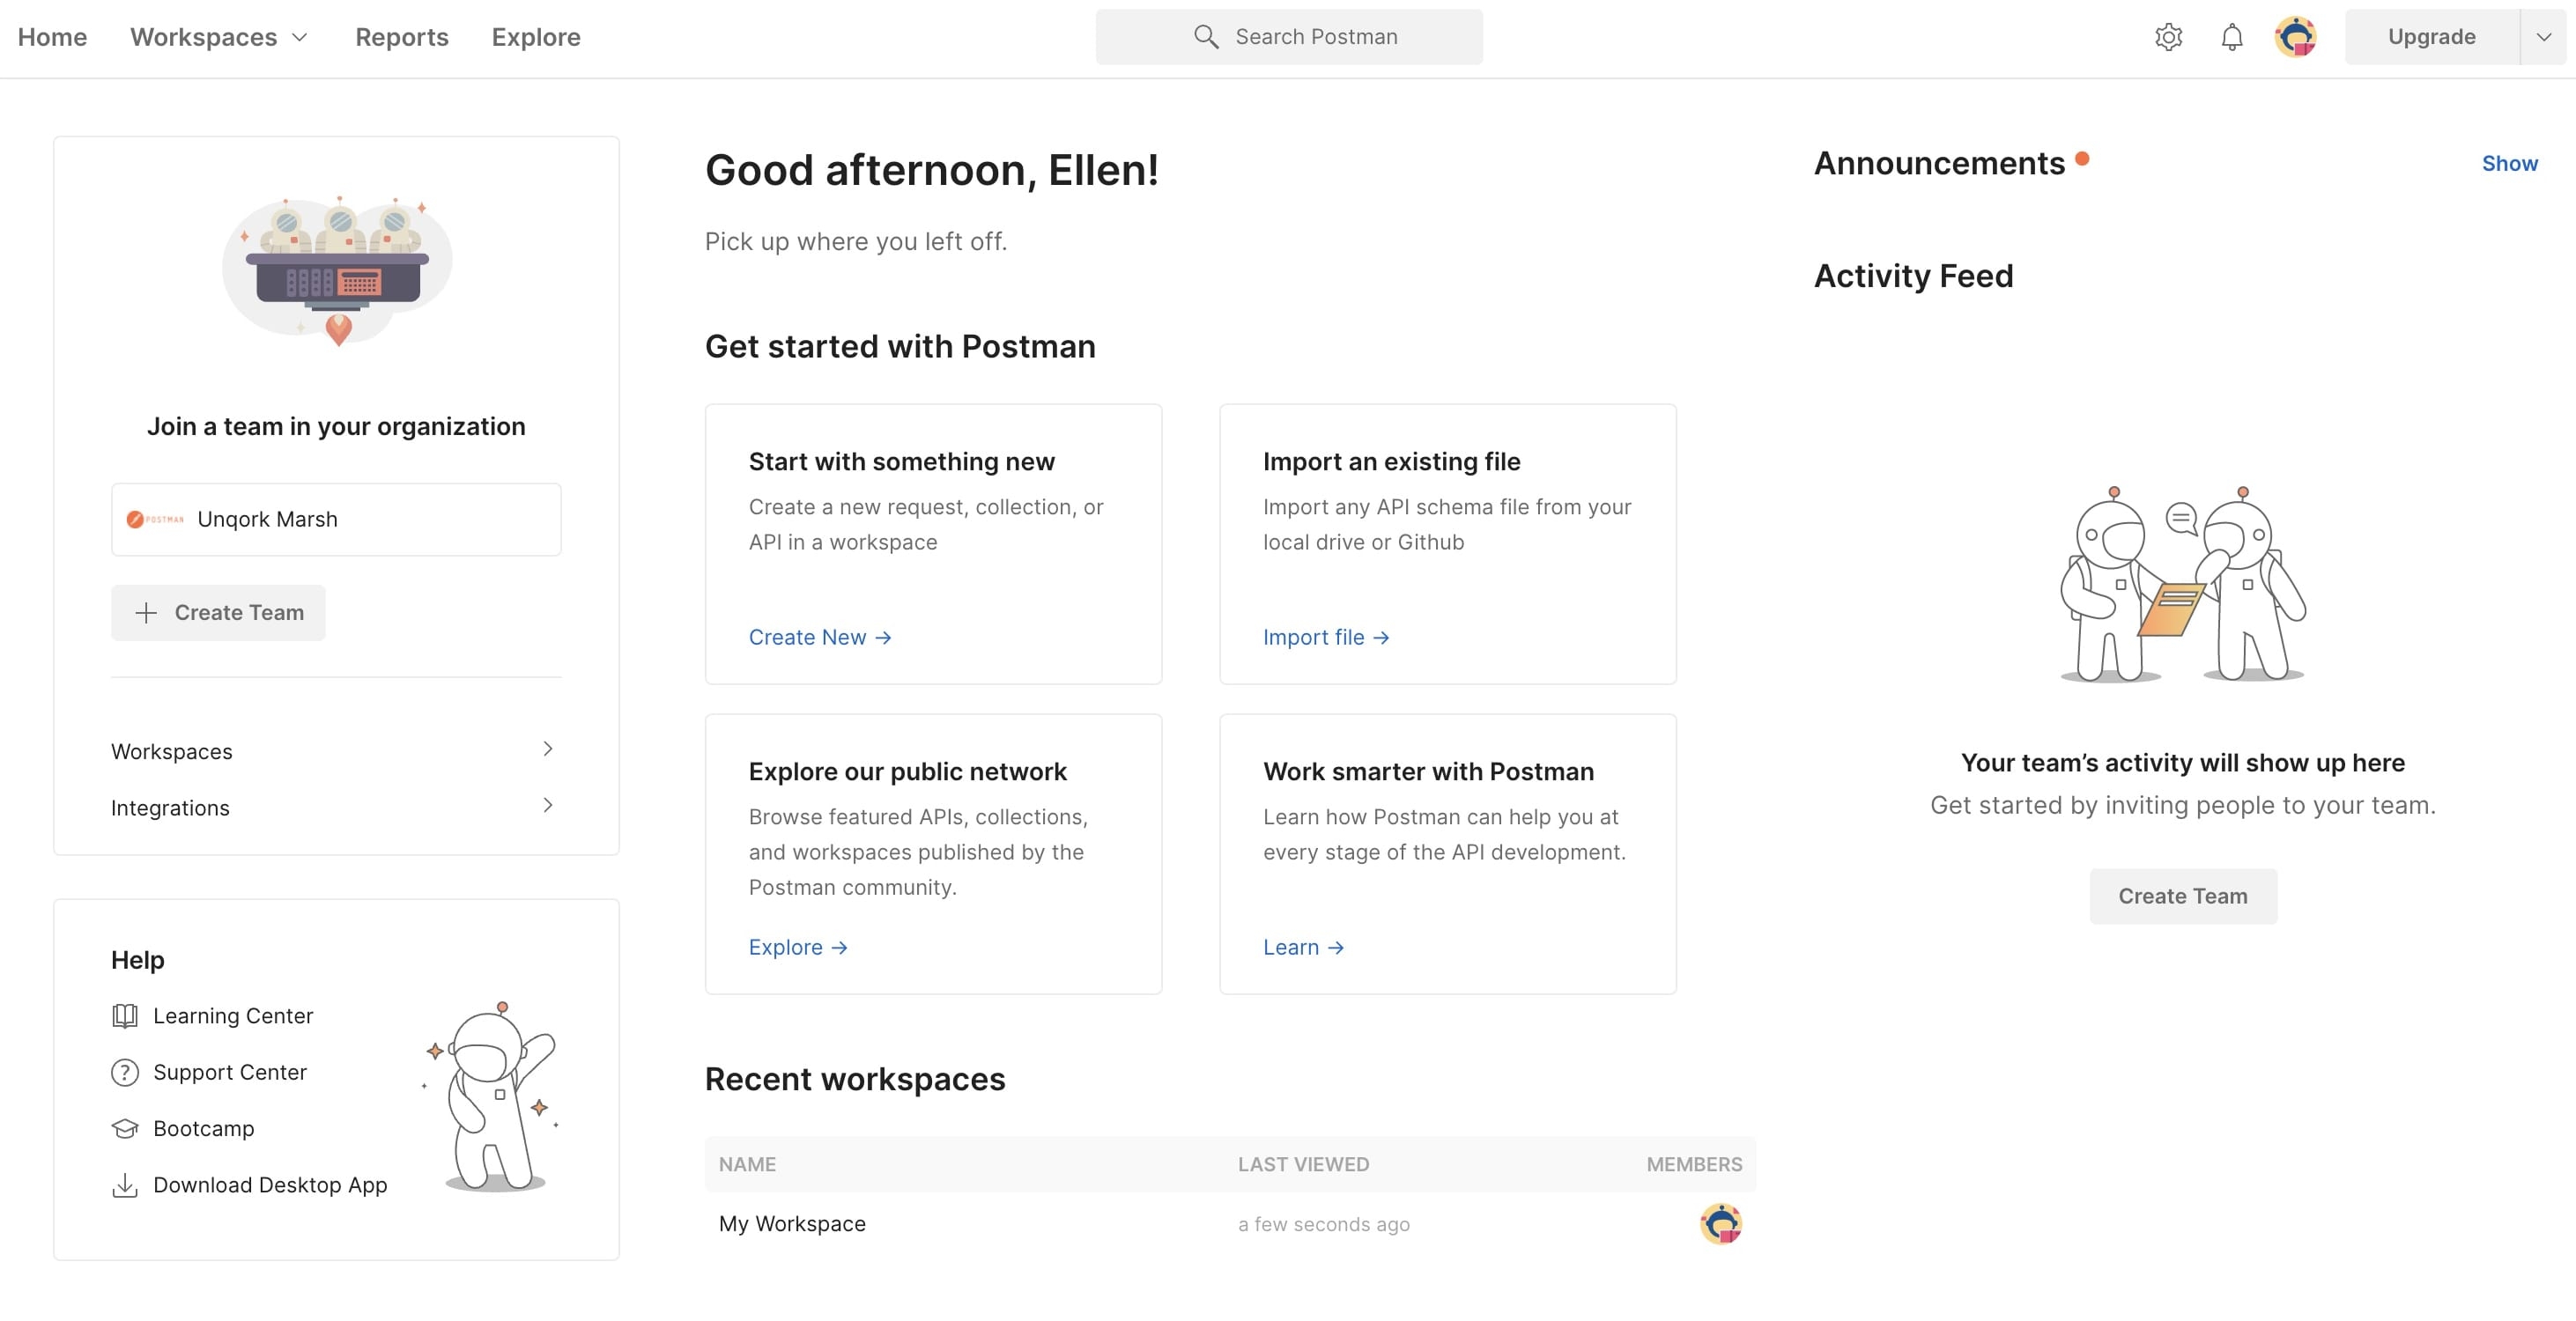
This is what Postman will look like when you log into your account:
Manually Creating Postman Collections and Requests
Postman Collections let you group and organize all your API requests. When you need to find a specific request, collections make it easier to find. This is especially helpful if you have a lot of requests. For this example, you'll create a collection for the environment you're testing in. The way to do this is by manually creating all your requests into a collection.
You can manually create collections and API requests you can't import into Postman. So, let's create a Postman Collection for all your environment's API requests. As an example, let's set up a collection for the Training environment.
To learn more about on creating Postman Collections, check out this documentation: https://learning.postman.com/docs/sending-requests/intro-to-collections/.
After creating the collection, you must set up its Authorization Type. This is how you'll add and test API requests from Unqork.
There are 2 Authorization Types you can use to test your Unqork APIs in Postman. These are:
Bearer Token
OAuth 2.0
Bearer Token
To set up a Postman Collection using a bearer token, you'll need the Unqork bearer token. Every time you log into your environment, you're automatically assigned a token. This token lets you make API calls in Unqork. This is the same token you'll use to make calls in Postman.
If you log out of your environment, the token expires. Log back in to get the token again for Postman.
To find your bearer token:
Open any one of your environment's modules in Express View.
Right-click anywhere on your Express View page.
Click Inspect. The DevTools panel opens on the right side of your page.
To open the Console in Google Chrome, you can use the Ctrl + Shift + J (Windows/Linux) or Option + Command + J (Mac OS) shortcut.
Click the Application tab at the top of DevTools panel.
If you don't see the Application tab, expand your DevTools panel. Or, click the double arrows (>>) to see more options.
Click Cookies to expand the options.
Click your environment cookies. In this example, we're working in the Training environment.
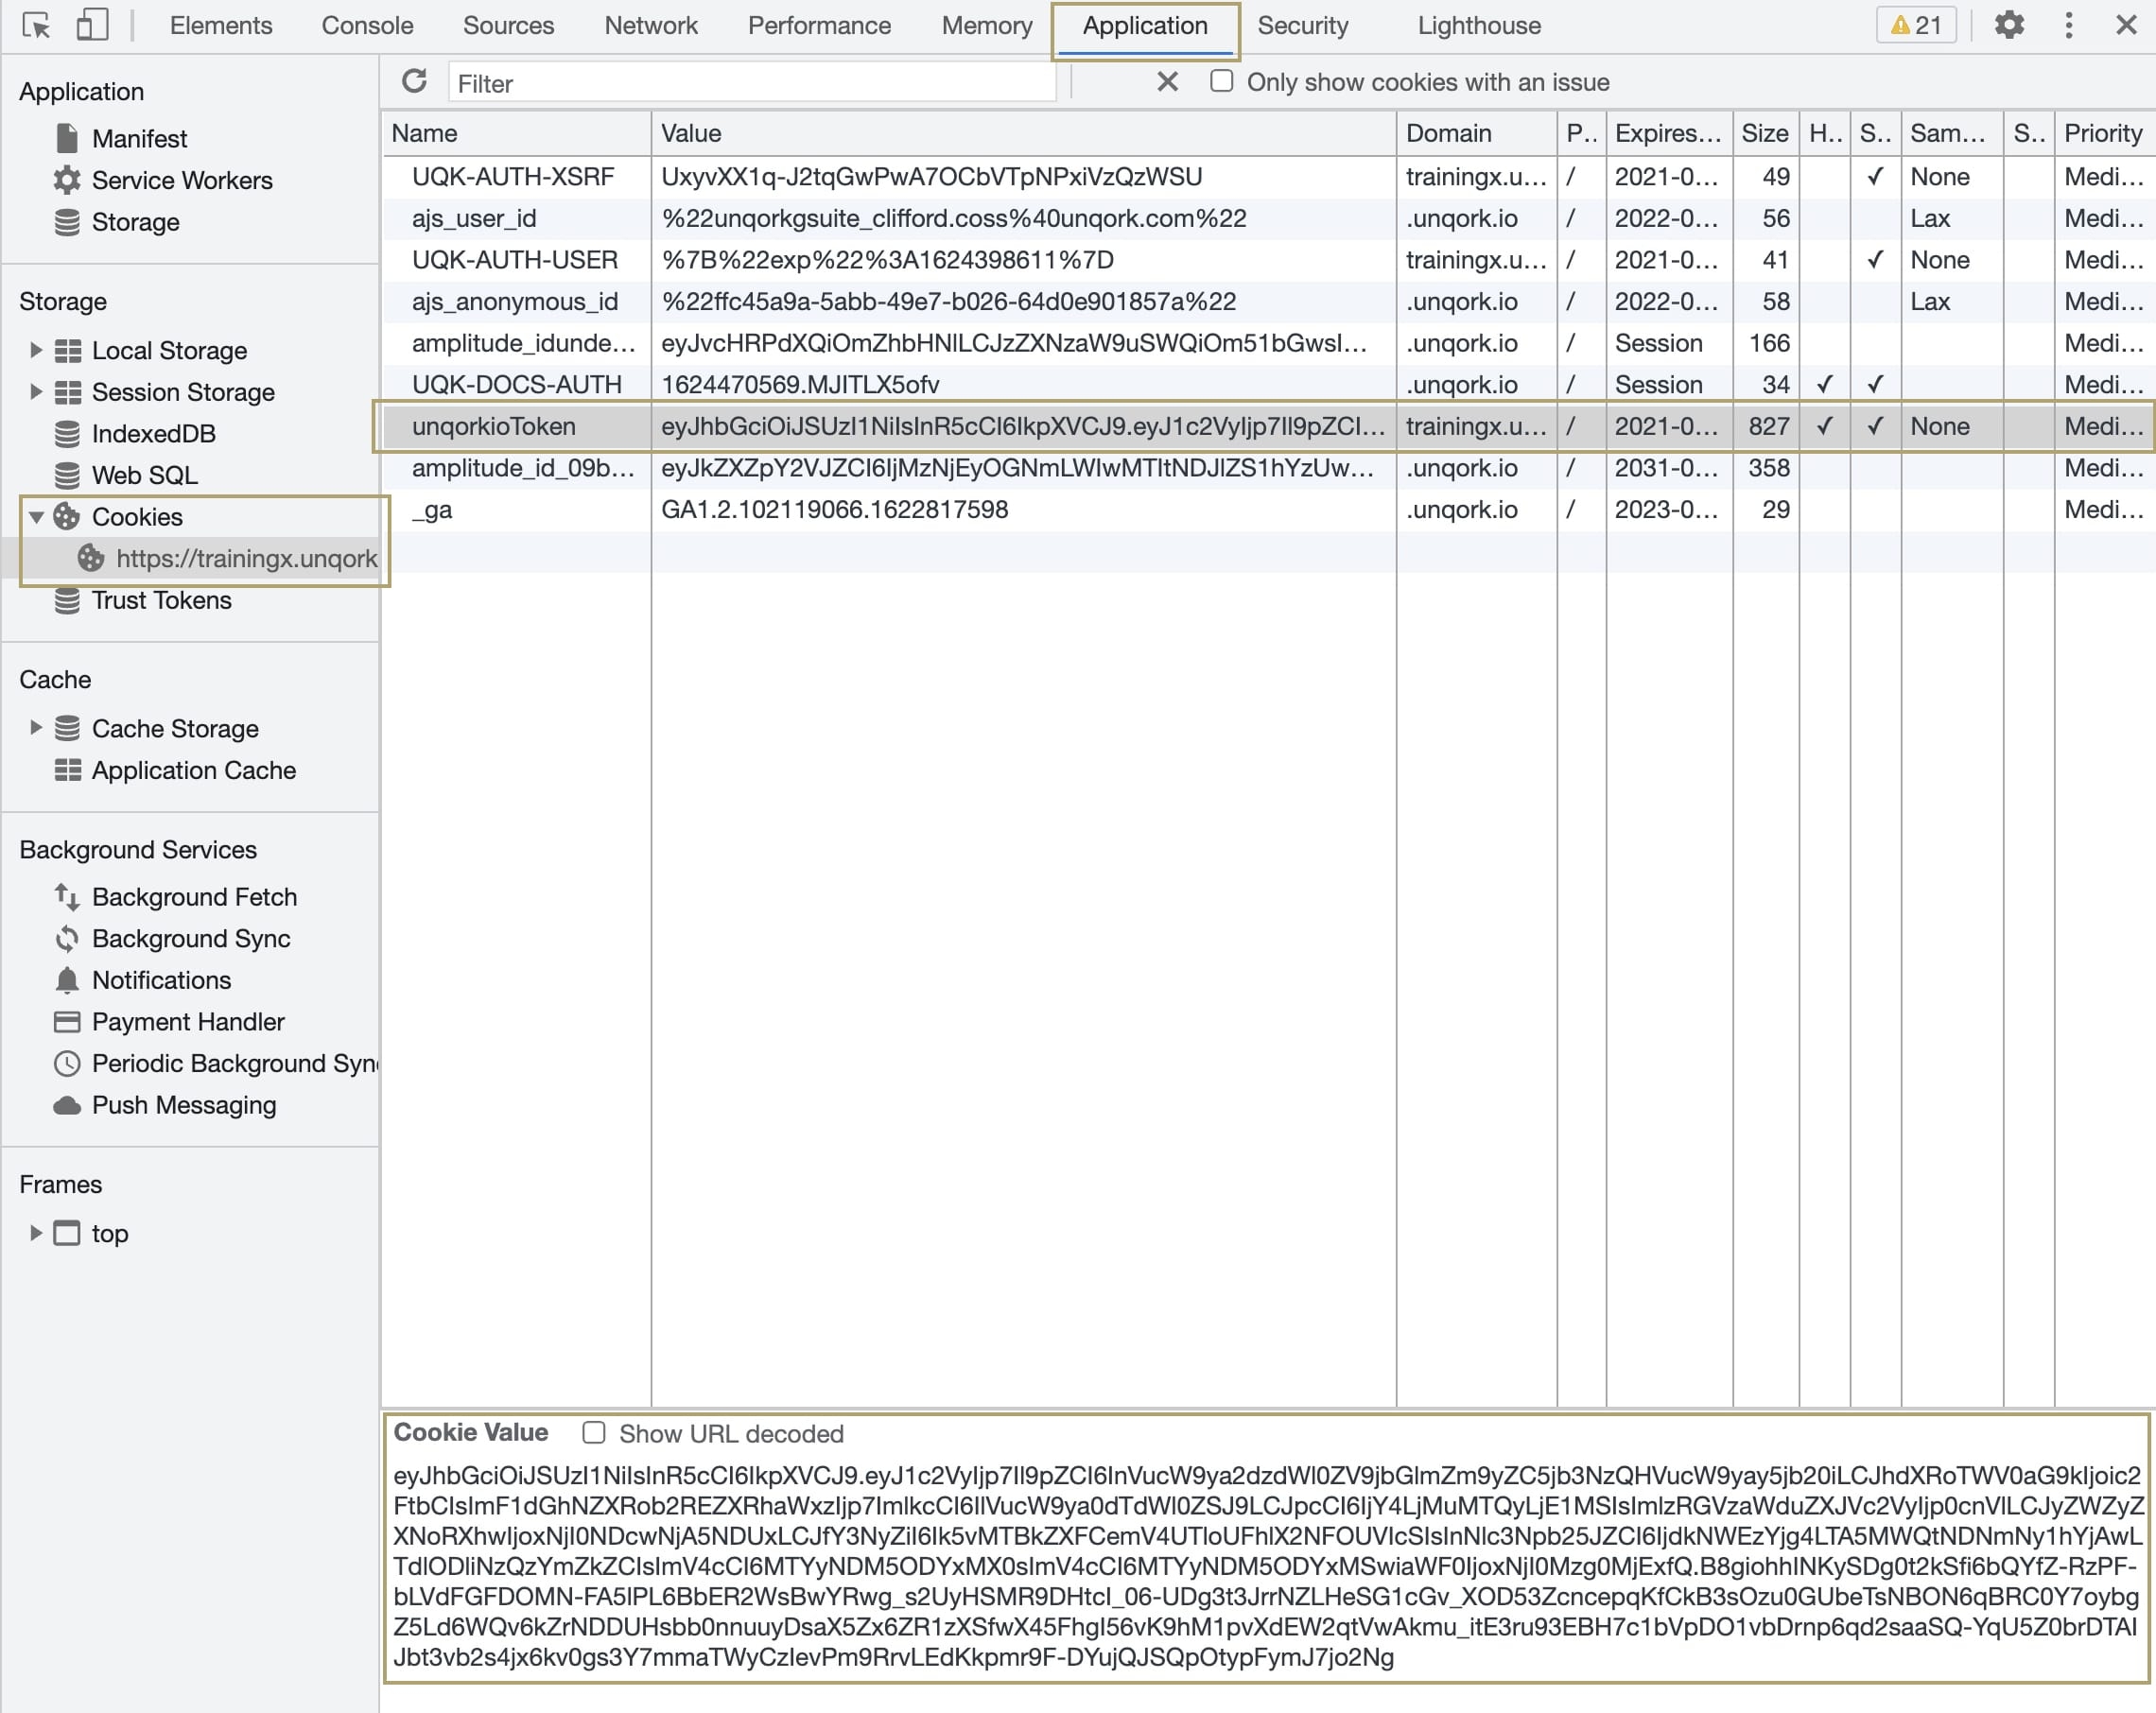
In the Name column, click unqorkioToken. This will highlight the entire row in blue.
At the bottom of the DevTools panel, highlight and copy the Cookie Value. This is your bearer token.
You can now use your copied token to create a new Postman Collection. To create a collection using a bearer token:
Log in to your Postman account.
Click Create New.
Click Collection.
Give your collection a name and press Enter. For this example, you can enter Training.
Select Bearer Token from the Type drop-down.
Paste your token into the Token field.
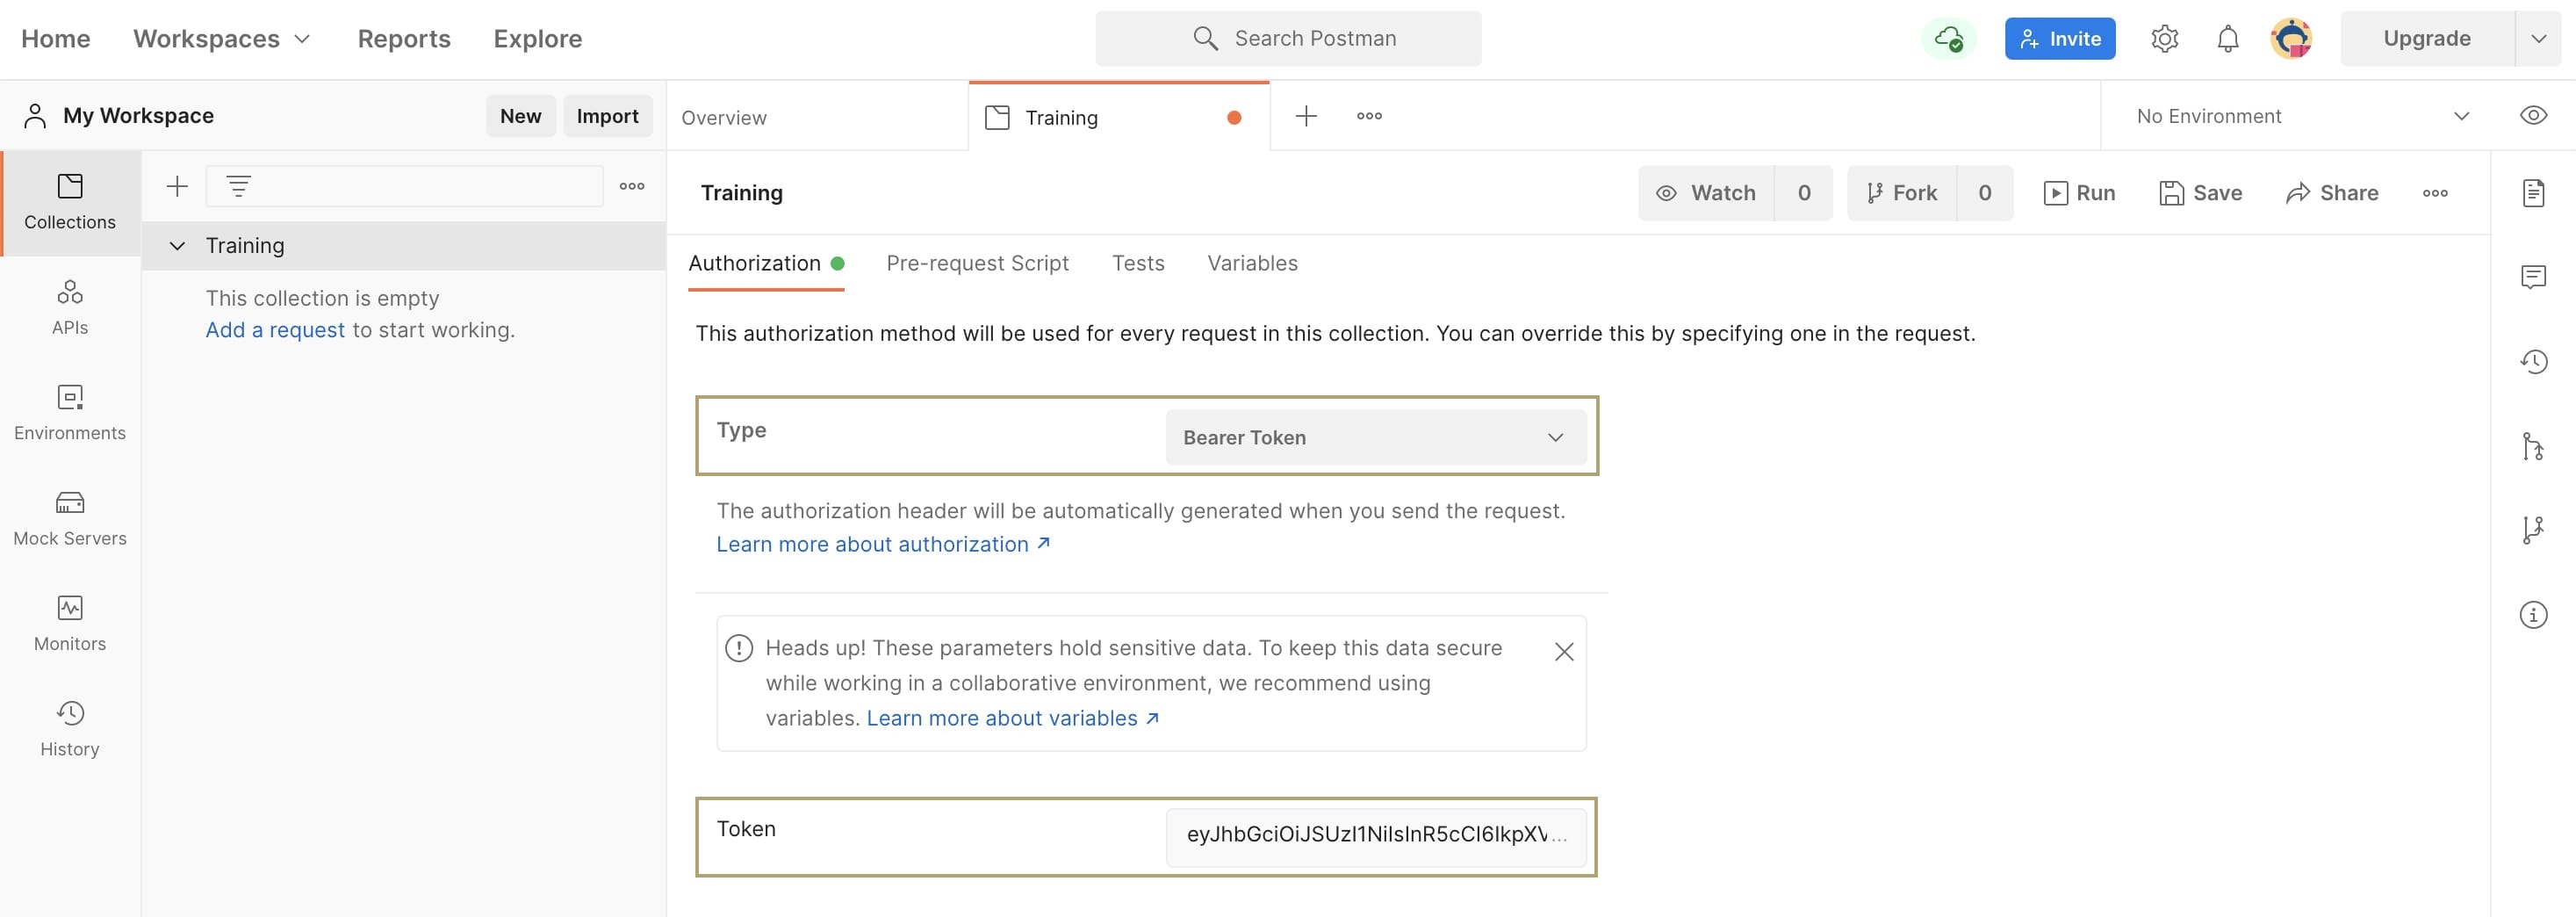
Click Save.
Great! Now let's look at setting up a collection with the OAuth 2.0 Authorization Type.
OAuth 2.0
This Authorization Type is specific for Unqork users with Services access. You can enable these in Creator (User) Administration.
To learn more about Creator Permissions, search for Creator (User) Administration in our In-Product Help.
You must also make sure that your environment has OAuth2 Password Grant enabled. You can do this in Environment Administration.
To learn more about enabling OAuth2 Password Grant, search API Authentication in our In-Product Help.
For this Authentication Type, you won't be copying and pasting a bearer token from Unqork. Instead, you'll request a token from Postman. You'll do this using your Unqork username and password credentials. You'll also need the following Access Token URL: https://{{environment}}.unqork.io/api/1.0/oauth2/access_token.
To set up a Postman Collection using OAuth 2.0 authorization:
Log in to your Postman account.
Click Create New.
Click Collection.
Give your collection a name and press Enter. For this example, you can enter Training.
Select OAuth 2.0 from the Type drop-down.
Enter a unique name for your token in the Token Name field. For this example, enter Training.
Select Password Credentials from the Grant Type drop-down.
Enter https://{{environment}}.unqork.io/api/1.0/oauth2/access_token in the Access Token URL field. For this example, we'll enter https://training.unqork.io/api/1.0/oauth2/access_token.
Enter your Unqork username in the Username field. Your username is typically your Unqork email address.
Enter your Unqork password in the Password field. This is the password you use to log into an Unqork environment.
Click Get New Access Token.

Confirm the information is correct in the pop-up and click Request Token.
Postman will now provide you with a token that looks a lot like the one you'd get from Unqork.
Manually Adding a Postman Request
With your Postman Collection created, it's time to add requests. These requests are the Unqork API requests you want to test. To add a request, you just need its URL and endpoint. To test an API request, you must start with the base URL of all Unqork API requests. You'll find it using the following link: developers.unqork.io. The base API URL looks like this: https://{yourSubdomain}.unqork.io/api/1.0.
Adding a Get Module Submissions API Request
Now, you'll need an endpoint to test. Let's look at an example. Let's say you want to test a Get Module Submissions API call in your environment. To find the correct endpoint for Get Module Submissions, click on this link: https://developers.unqork.io/#tag/Submissions%2Fpaths%2F~1modules~1%7BmoduleId%7D~1submissions%2Fget. The endpoint for this API call is: /modules/{moduleId}/submissions.
This means the full API URL you will test in Postman is: https://{yourSubdomain}.unqork.io/api/1.0/modules/{moduleId}/submissions.
Replace {yourSubdomain} with your environment and {moduleId} with the module ID of the module getting the submissions.
Now let's create a request and test your API call. When you create a new request, the request type in Postman is GET by default. If you were going to test a different request type, you'd select it from the drop-down. But, for this example, we will stick with the GET request type.
To create a Postman API request:
Click Add a Request under the name of your Postman Collection.
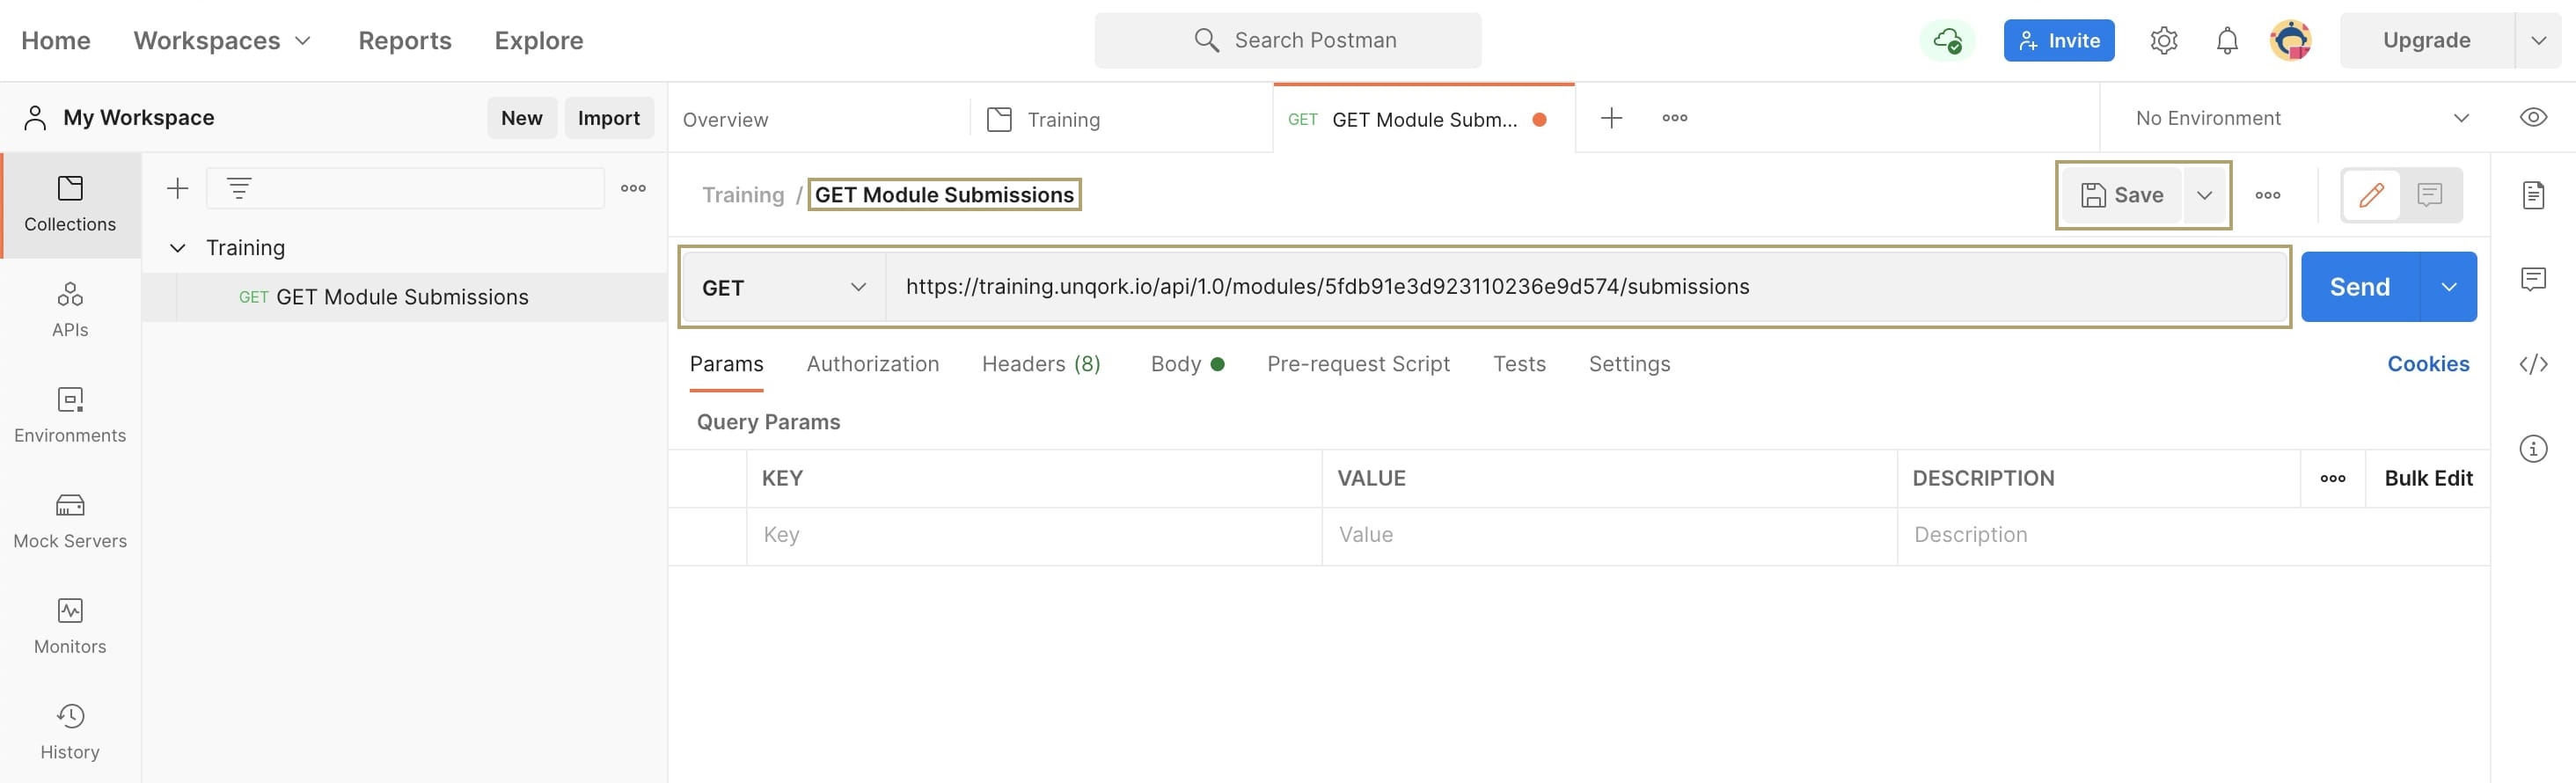
Enter a name for your request and hit Enter or Return on your keyboard. For this example, enter GET Module Submissions.
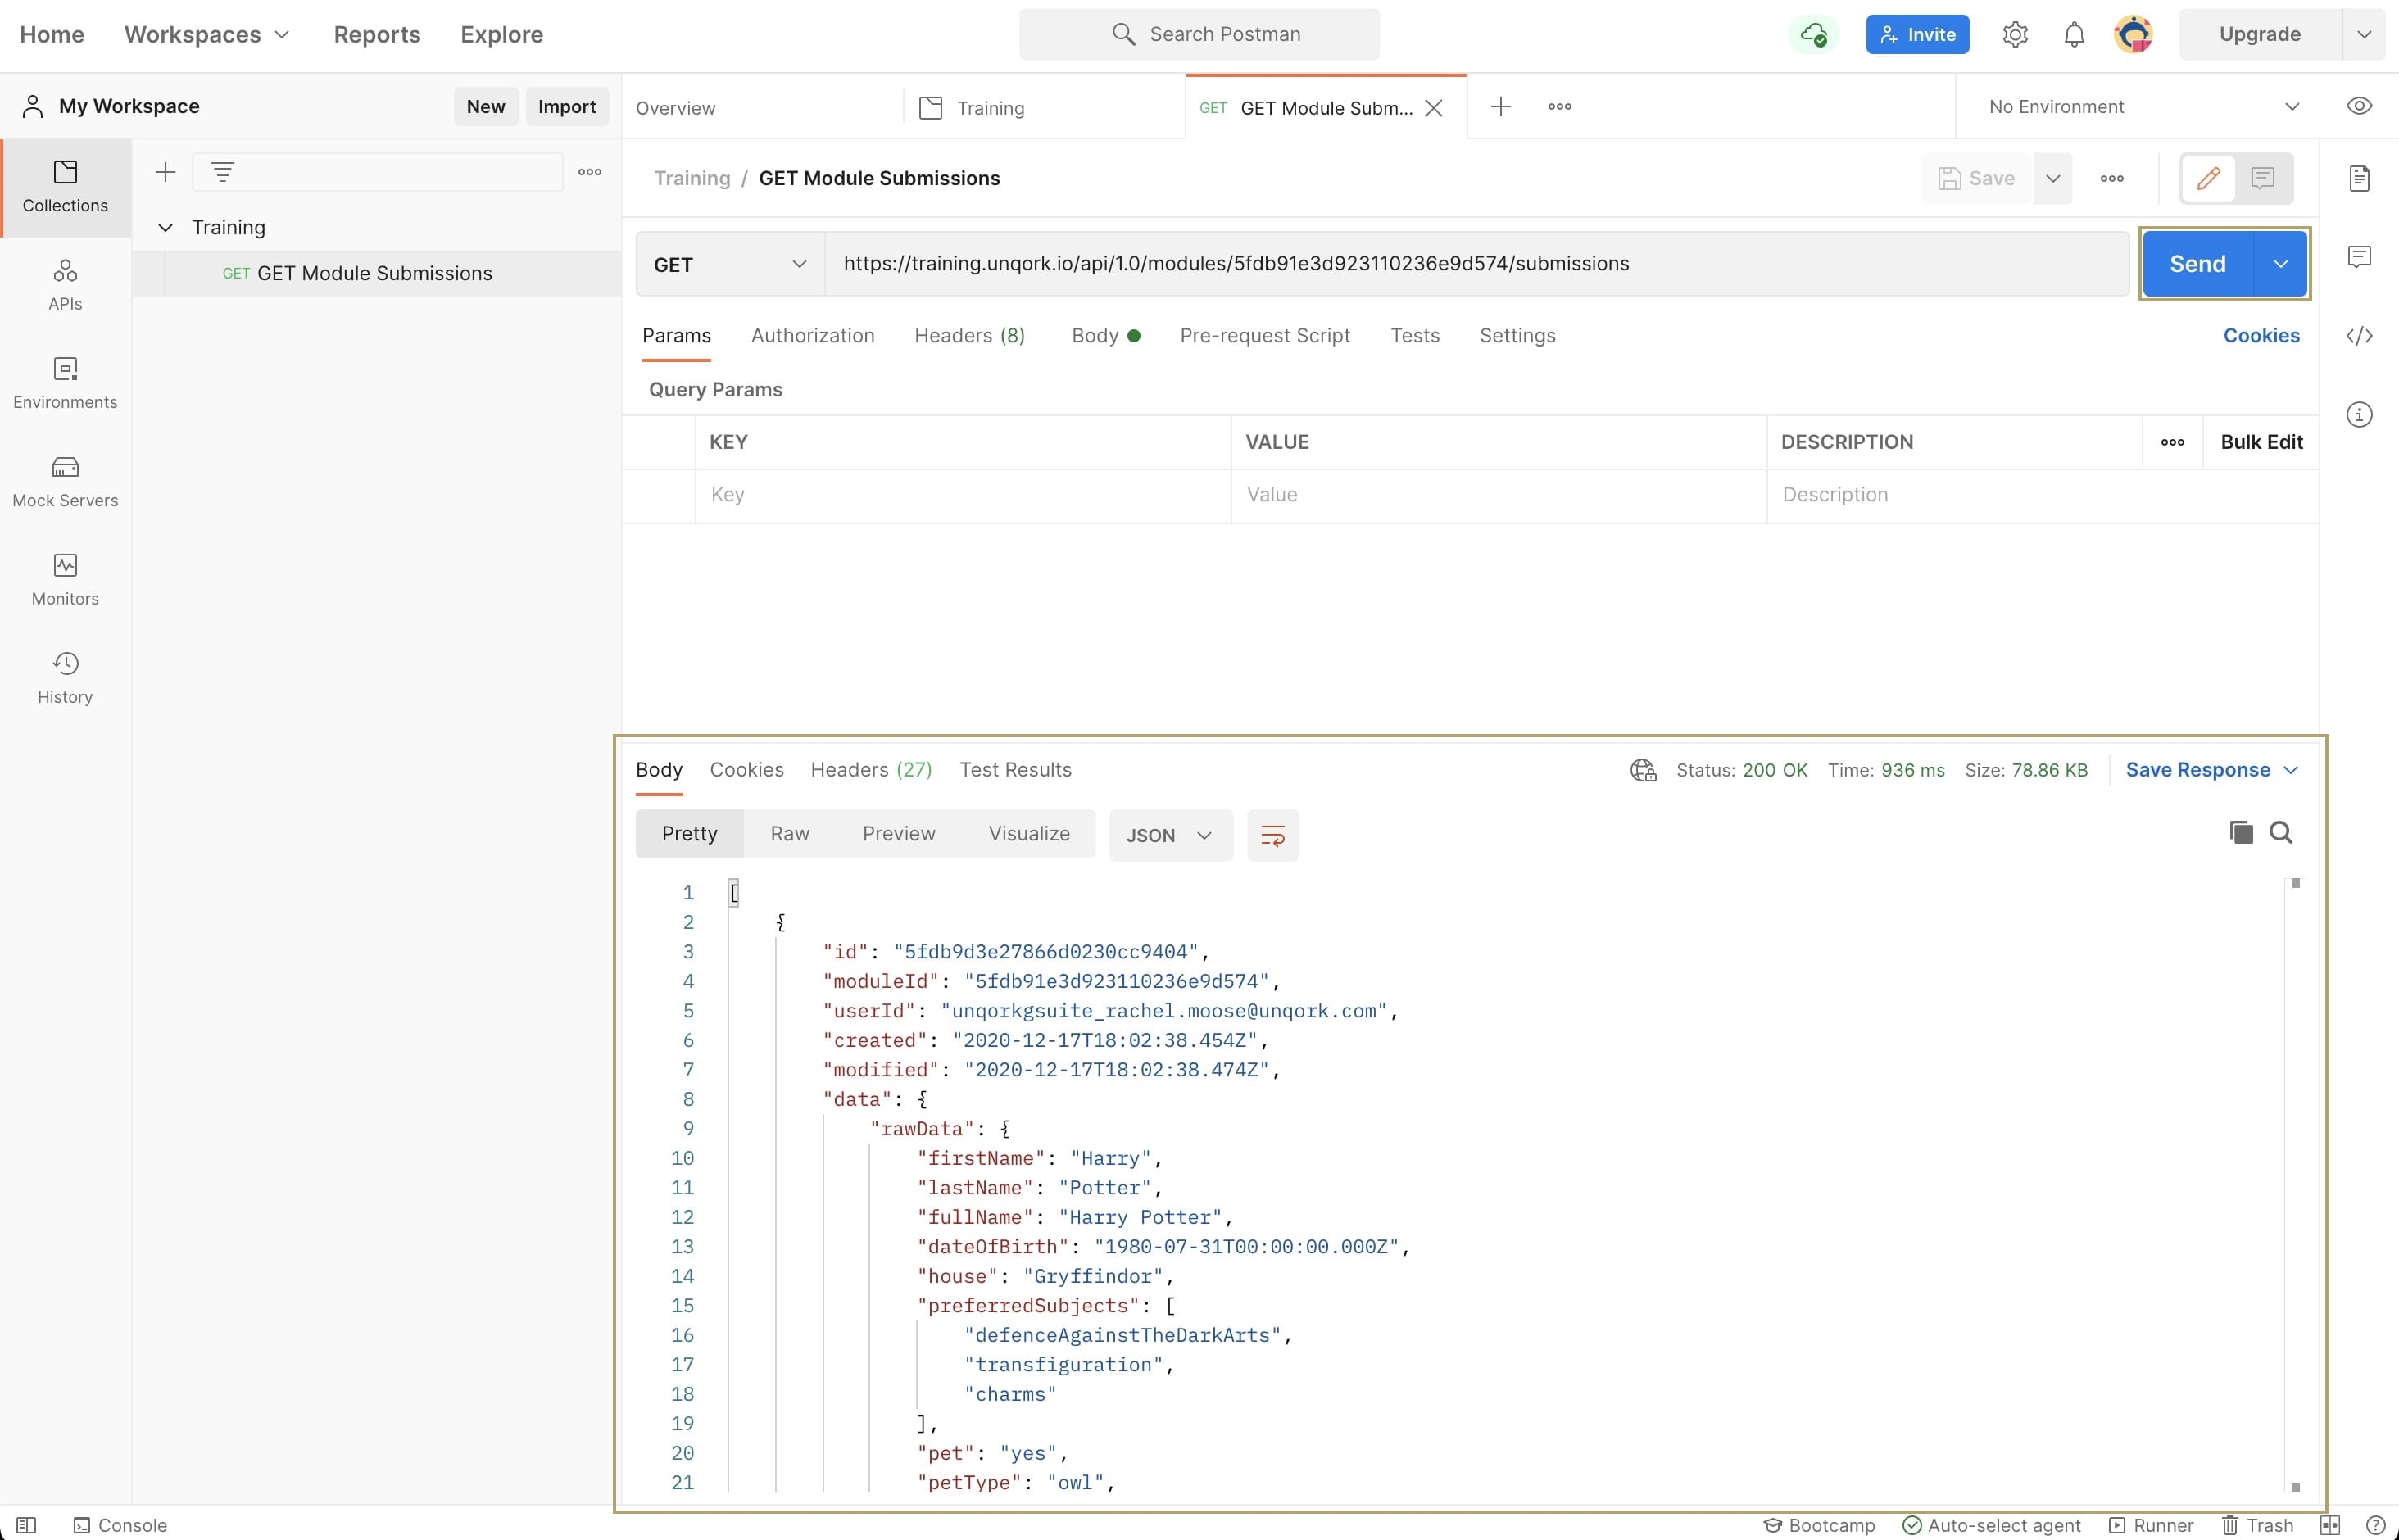
Enter https://{yourSubdomain}.unqork.io/api/1.0/modules/{moduleId}/submissions in the Enter Request URL field. For this example, you'll enter https://training.unqork.io/api/1.0/modules/5fdb91e3d923110236e9d574/submissions. You can see the environment and module ID selected in bold.
Click Save.
Now that you have your request complete, click Send. Below your request details, you'll see a response appear. You'll also see the following information in the top right of the Response panel:
The response status code.
The time it took for the API request to run.
The size of the API request.
A button to save the API response.
Adding a Create Module Submissions Request
When testing a Create Module Submissions API call, you must add request body details. Also, Unqork's API documentation shows that a Create Module Submissions request uses a POST method: https://developers.unqork.io/#tag/Submissions%2Fpaths%2F~1modules~1%7BmoduleId%7D~1submissions%2Fpost.
To add this information to a Postman request, you'll use the Body tab. This tab lets you specify the data type you need for your request. For all Unqork requests, you'll configure the Postman request body to test the JSON data type.
To add a Create Module Submissions request:
Click Add a Request under the name of your Postman Collection.
Enter a name for your request and hit Enter or Return on your keyboard. For this example, enter POST Create Module Submissions.
Select POST from the method drop-down.
Enter https://{yourSubdomain}.unqork.io/api/1.0/modules/{moduleId}/submissions in the Enter Request URL field. For this example, you'll enter https://training.unqork.io/api/1.0/modules/5fdb91e3d923110236e9d574/submissions. You can see the environment and module ID selected in bold.
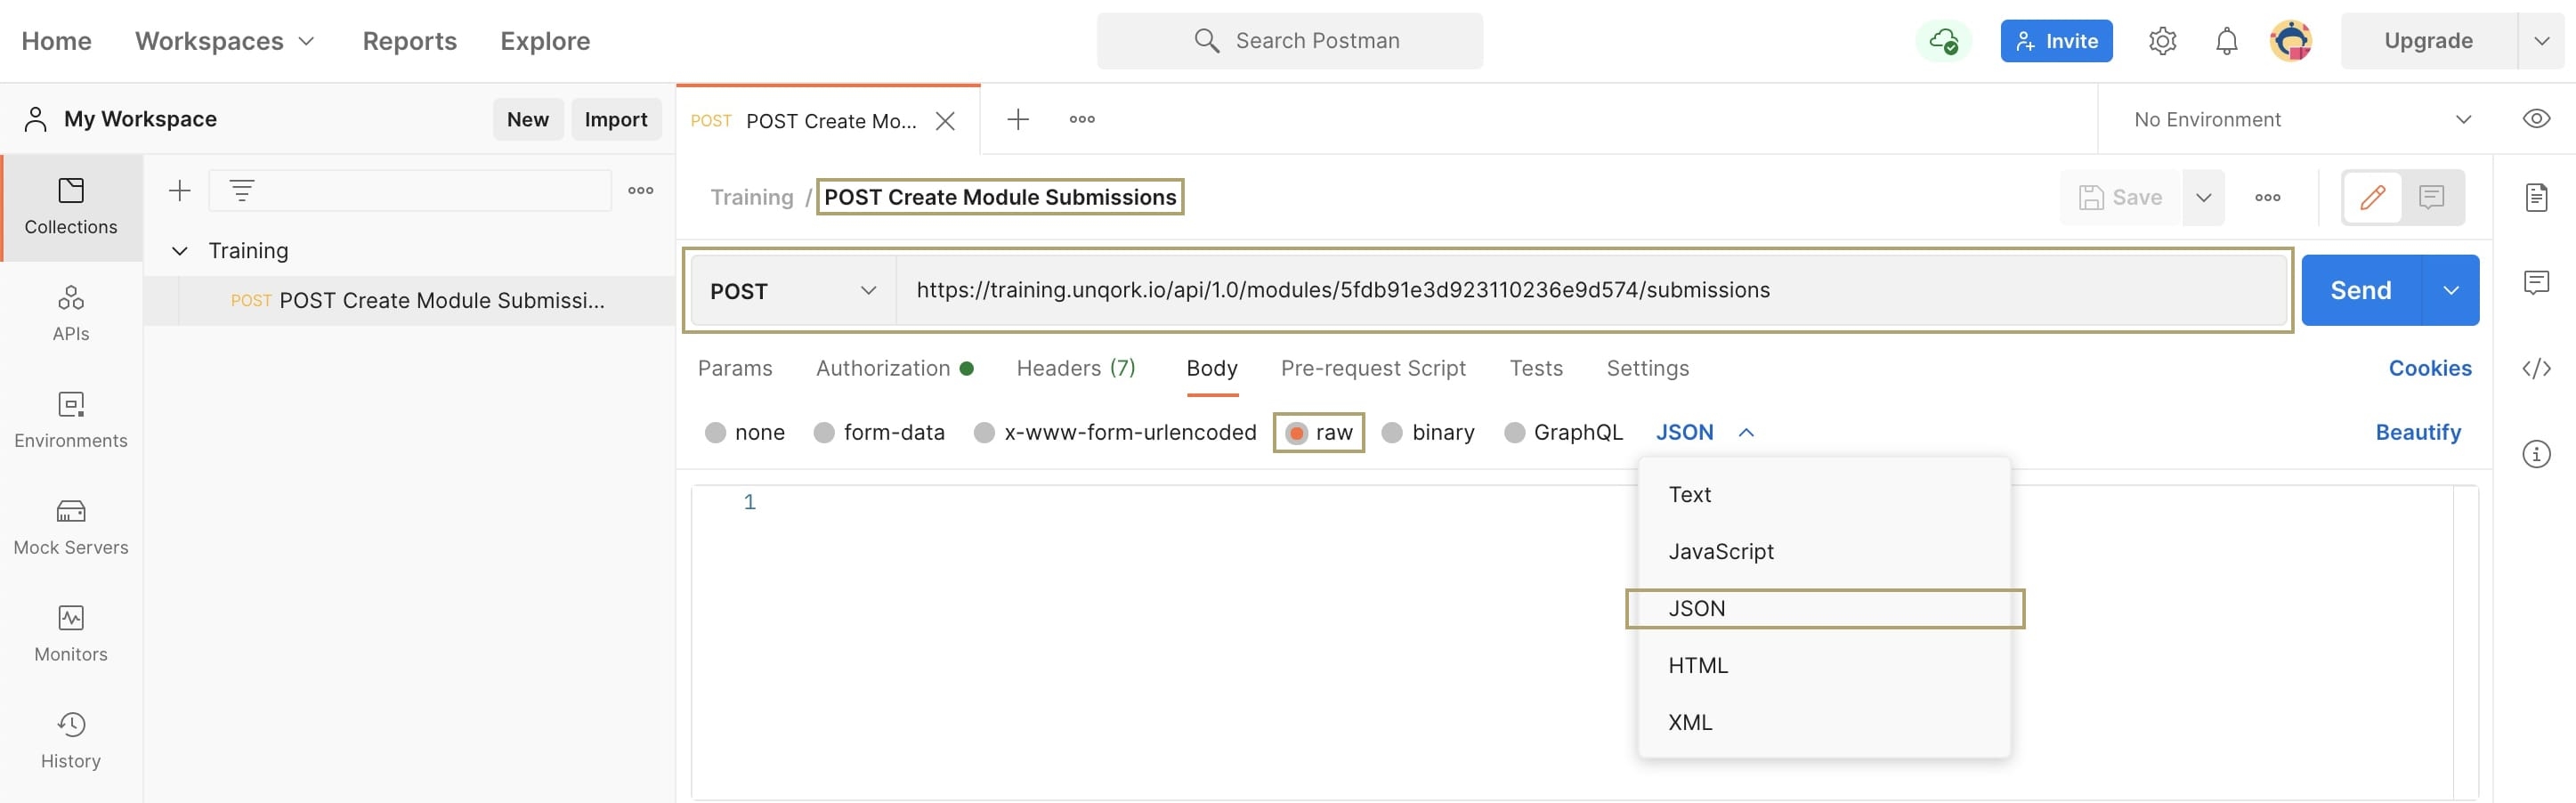
Click the Body tab.
Select the raw radio button.
Select JSON from the data type drop-down.
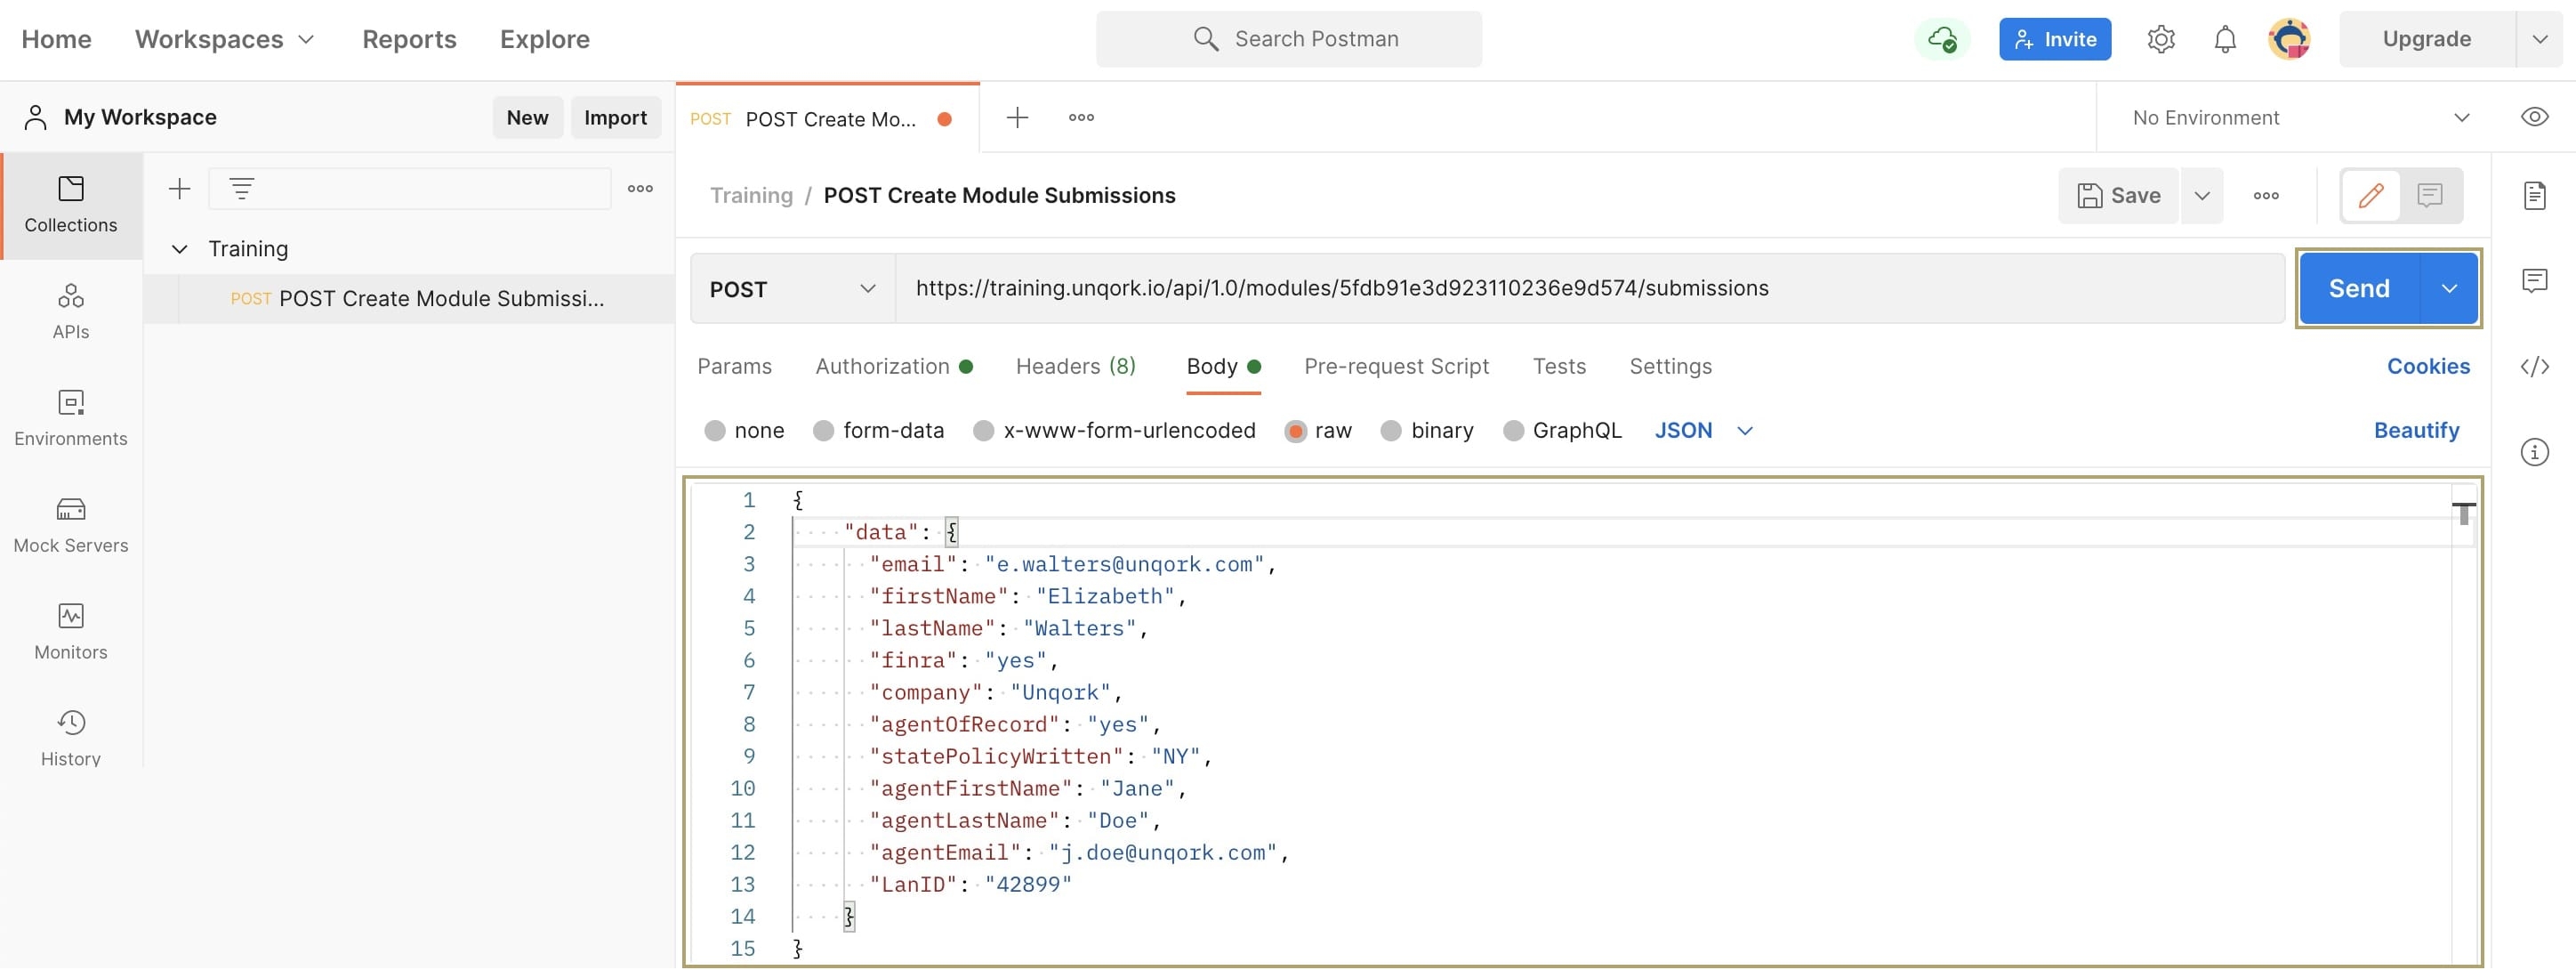
With your data type set, you can now enter raw data in the Body tab window. The first thing you must do is place a curly bracket on the first line of the window. The image below shows an example of submission data tested for this specific module ID:
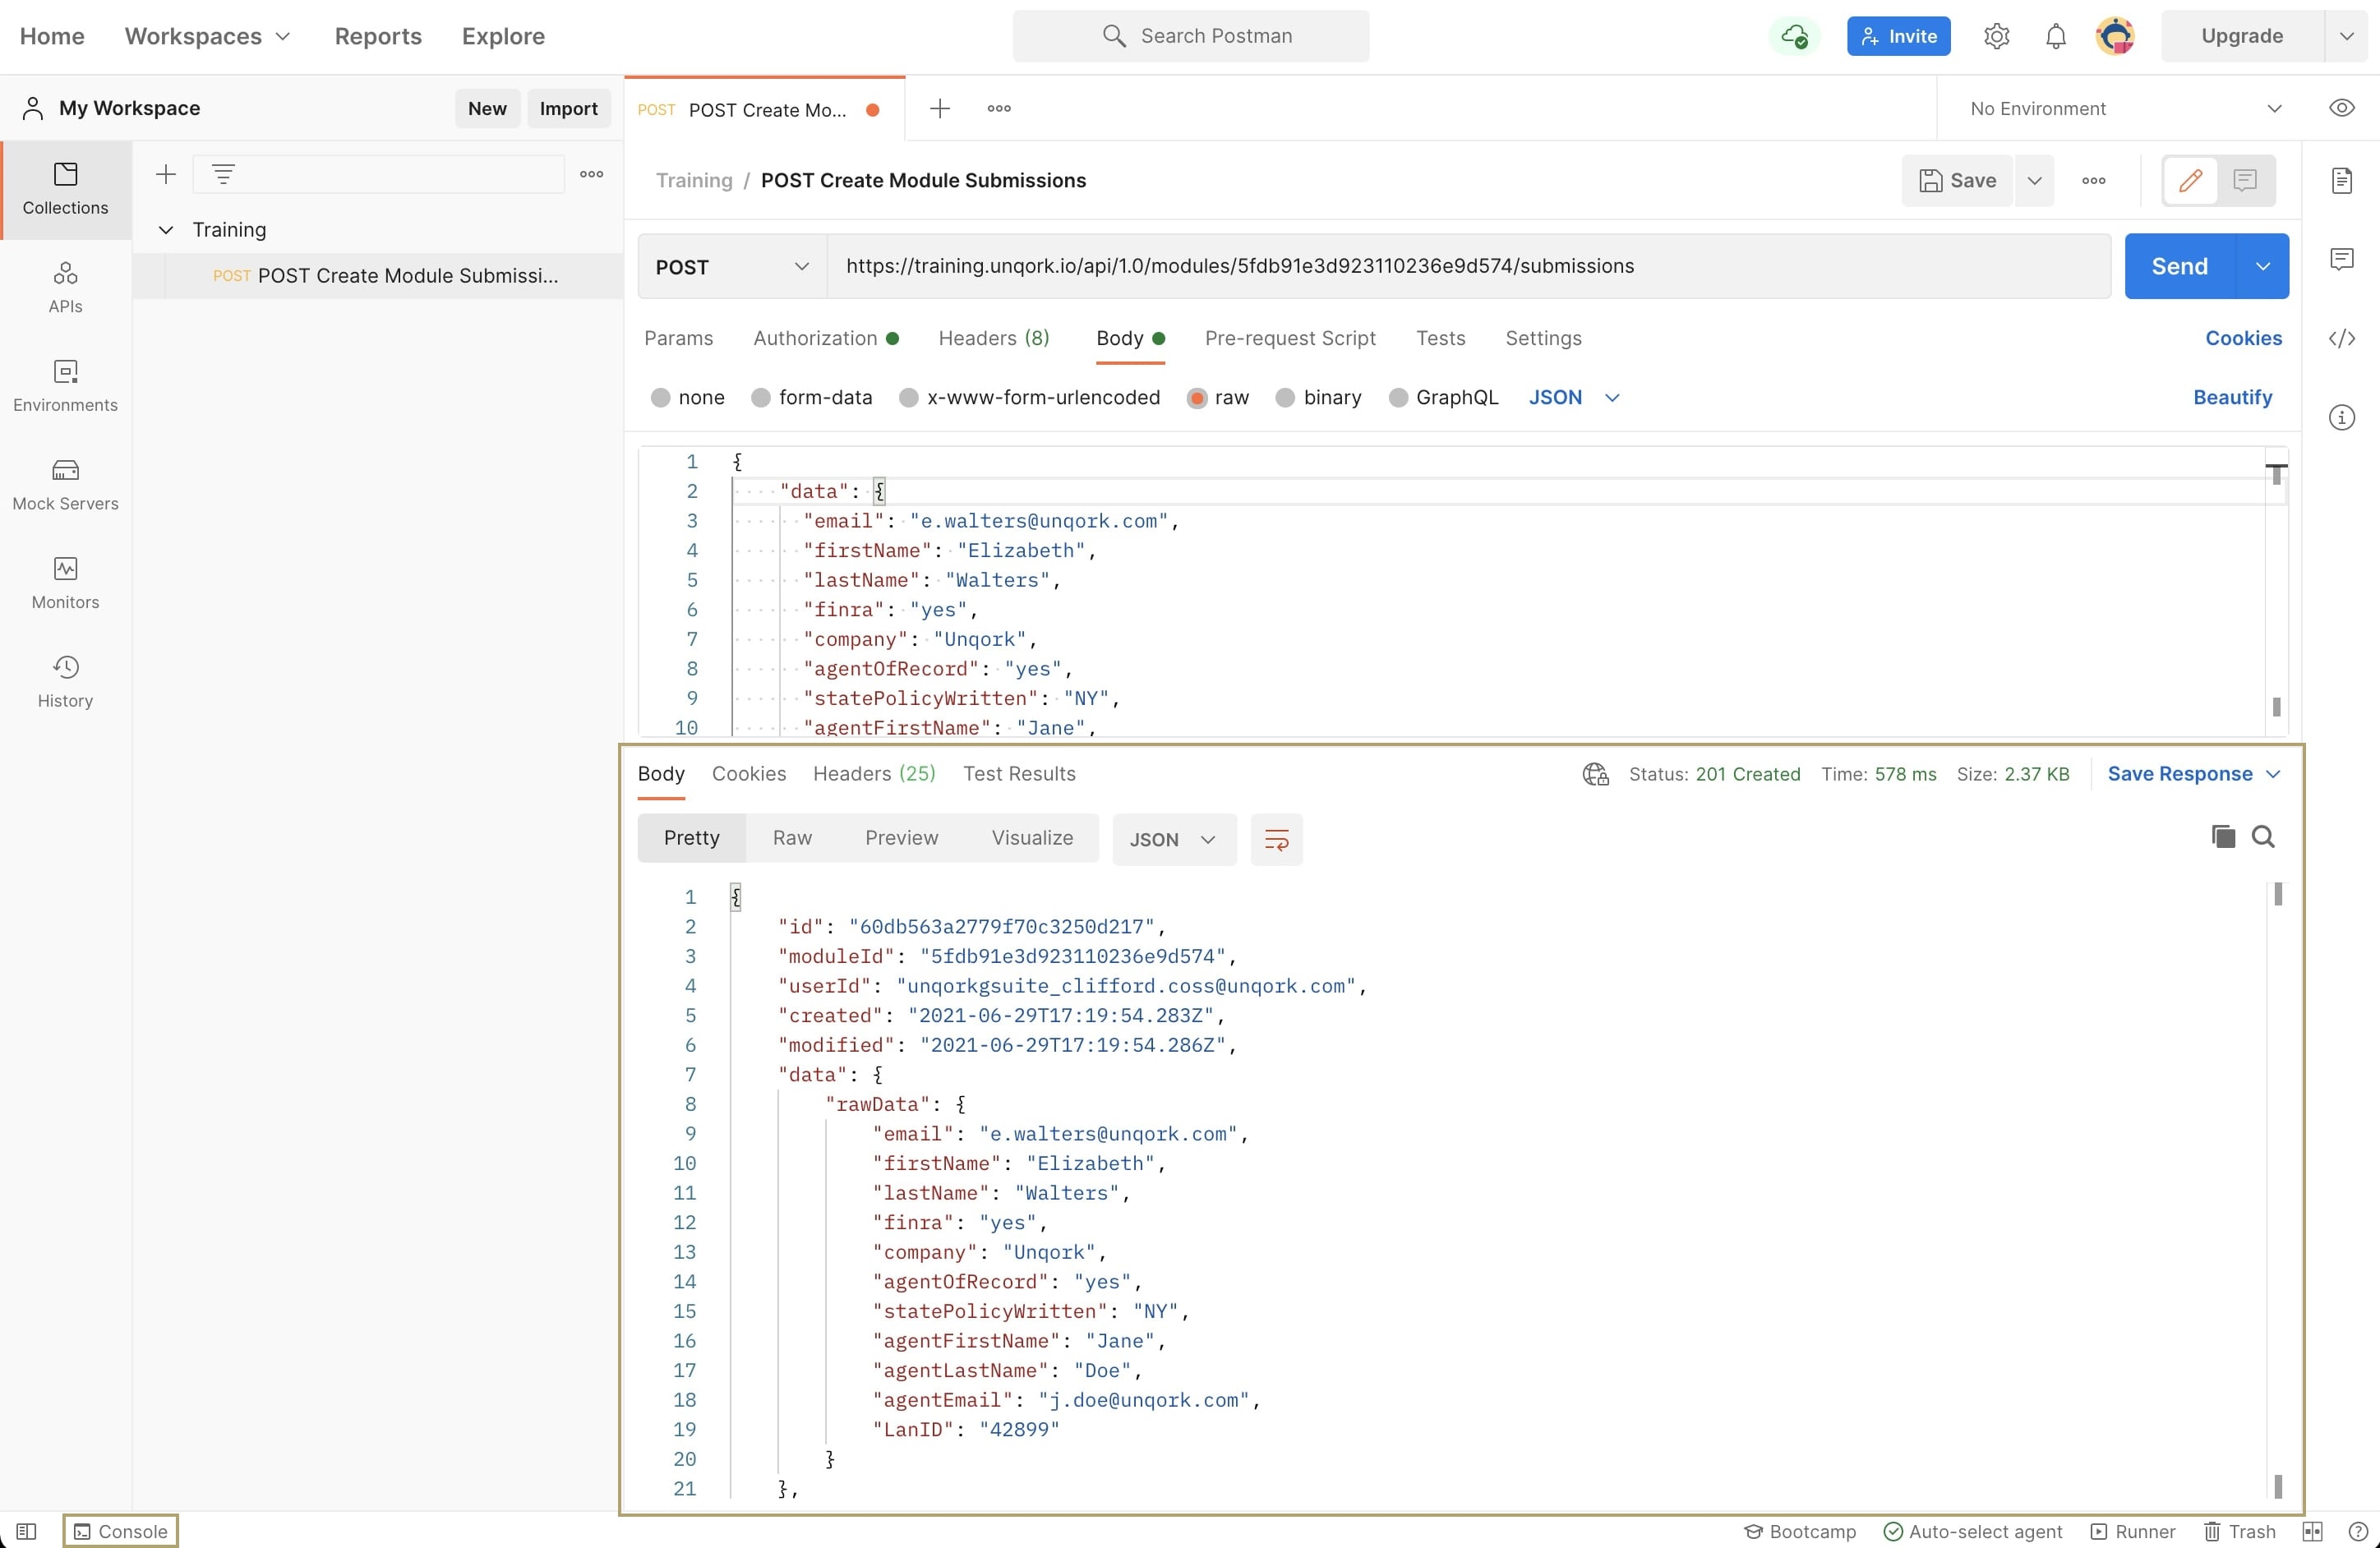
 After adding your data, click Send. After sending the request, you'll see a response appear at the bottom of the page with the following information in the top right of the Response panel:
The response status code.
The time it took for the API request to run.
The size of the API request.
A button to save the API response.
If the call fails, you'll see an error message in this panel. This helps you troubleshoot the issue. You can also click the Console link in the bottom left corner of the page to see more details. The following image shows the response body of our previous example and the Console link:
 For more information on API responses in Postman, check out the following documentation: https://learning.postman.com/docs/sending-requests/responses/.
For information on troubleshooting API requests in Postman, check out the following documentation: https://learning.postman.com/docs/sending-requests/troubleshooting-api-requests/.
Importing Postman Collections
Unqork also lets you upload API requests into Postman Collections. This process is a simple alternative to manually creating collections. You'll use Unqork's Developers page to select the API requests you want to import. You'll then import them into Postman as YML files.
To import Unqork API requests into Postman:
Click this link: https://developers.unqork.io/#.
Click Download at the top of the page to download the OpenAPI specification.
Now, let's open this file in Postman:
Log in to your Postman account.
Click Import File.
Click Upload Files.
Select the external.yml file from your Downloads folder.
Click Open.
Click Import.
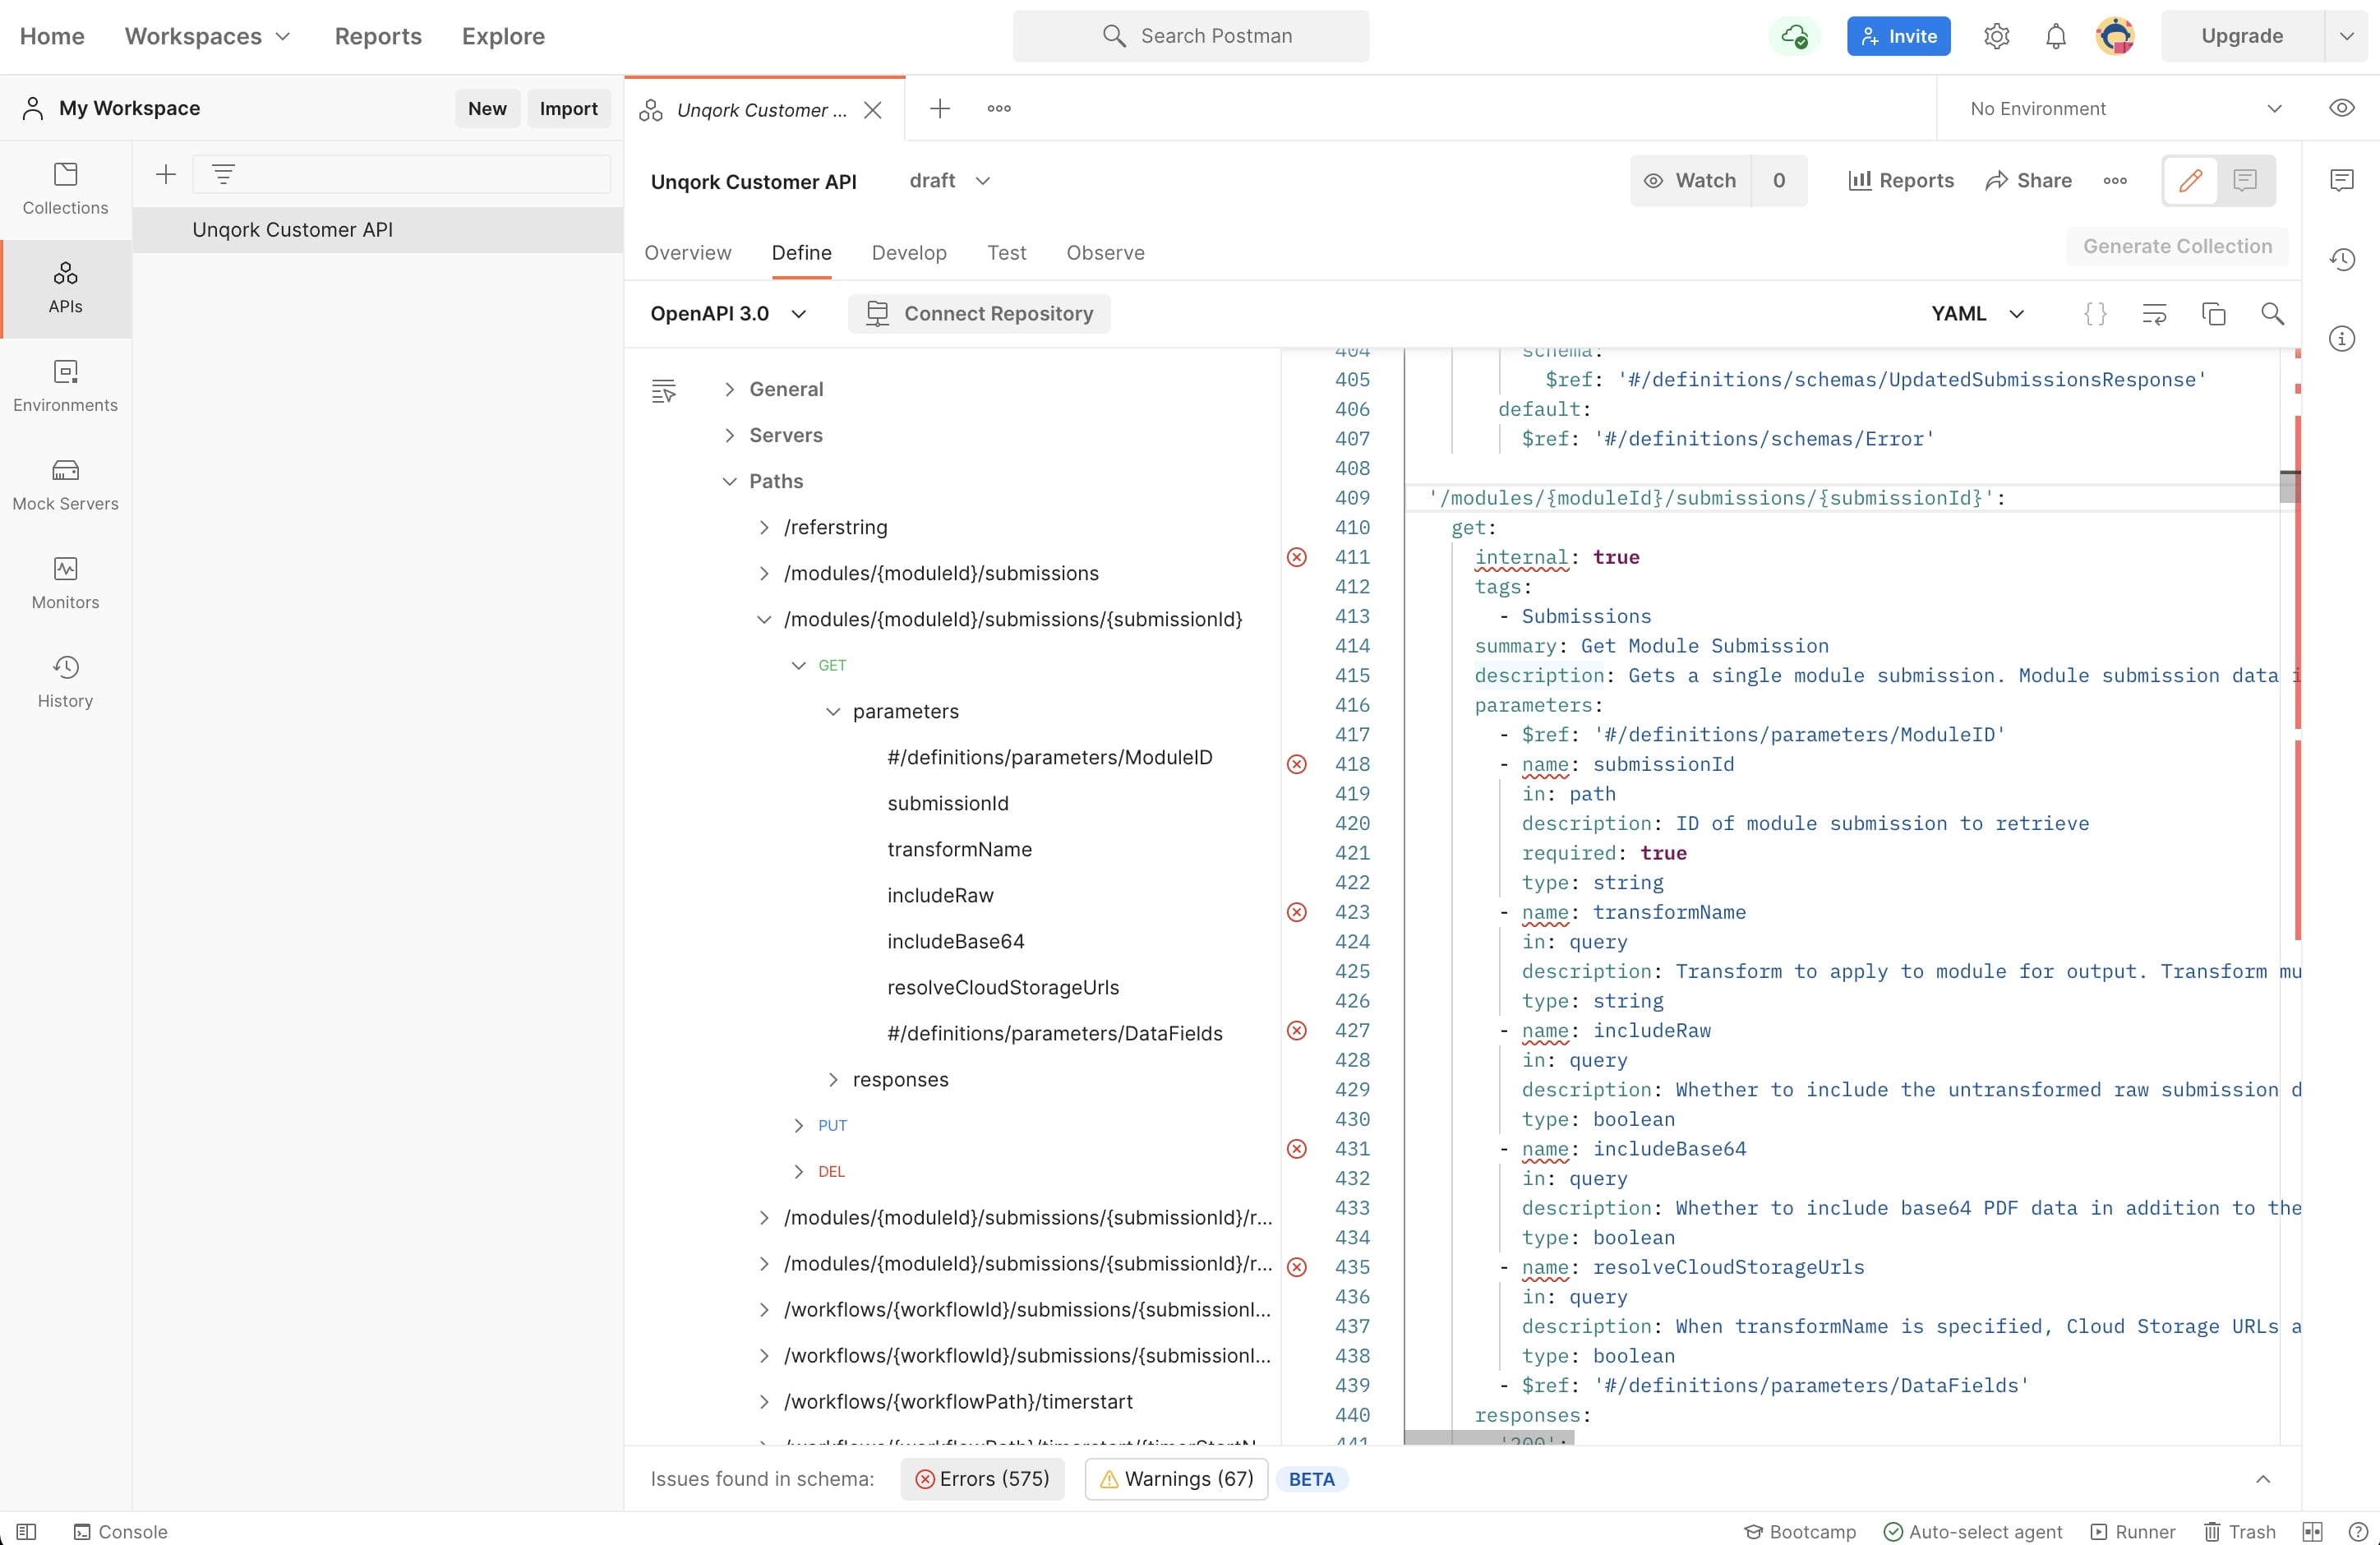
In your Postman Collections, you'll now see a collection holding all Unqork's API calls. You'll see them organized in folders, and a collection name automatically generated. Expand any of the folders, and you'll see details, examples, and even base URLs.
Here's an example of what you'll see:
Adding a Postman Request with Query Parameters
If you're looking to test an API call with specific query parameters, you can do that too. You have a couple of options for including query parameters:
You can add them directly to the end of your API URL. Then, you'll enter the full URL in the Enter Request URL field. For instance, the query parameter name could be sortOrder, and your value could be -1. So, you'll enter https://{yourSubdomain}.unqork.io/api/1.0/modules/{moduleId}/submissions?sortOrder=-1 into the Enter Request URL field.
You can add the query parameter name and value in the Query Params tab of the Postman request. This lets you easily add, edit, and delete as many query parameters as you wish. You also won't have to use the typical question mark, equal sign, or ampersand (&) formatting.
To add a request with query parameters:
Click Add a Request under the name of your Postman Collection.
Enter a name for your request and hit Enter or Return on your keyboard. For this example, enter GET Module Submissions.
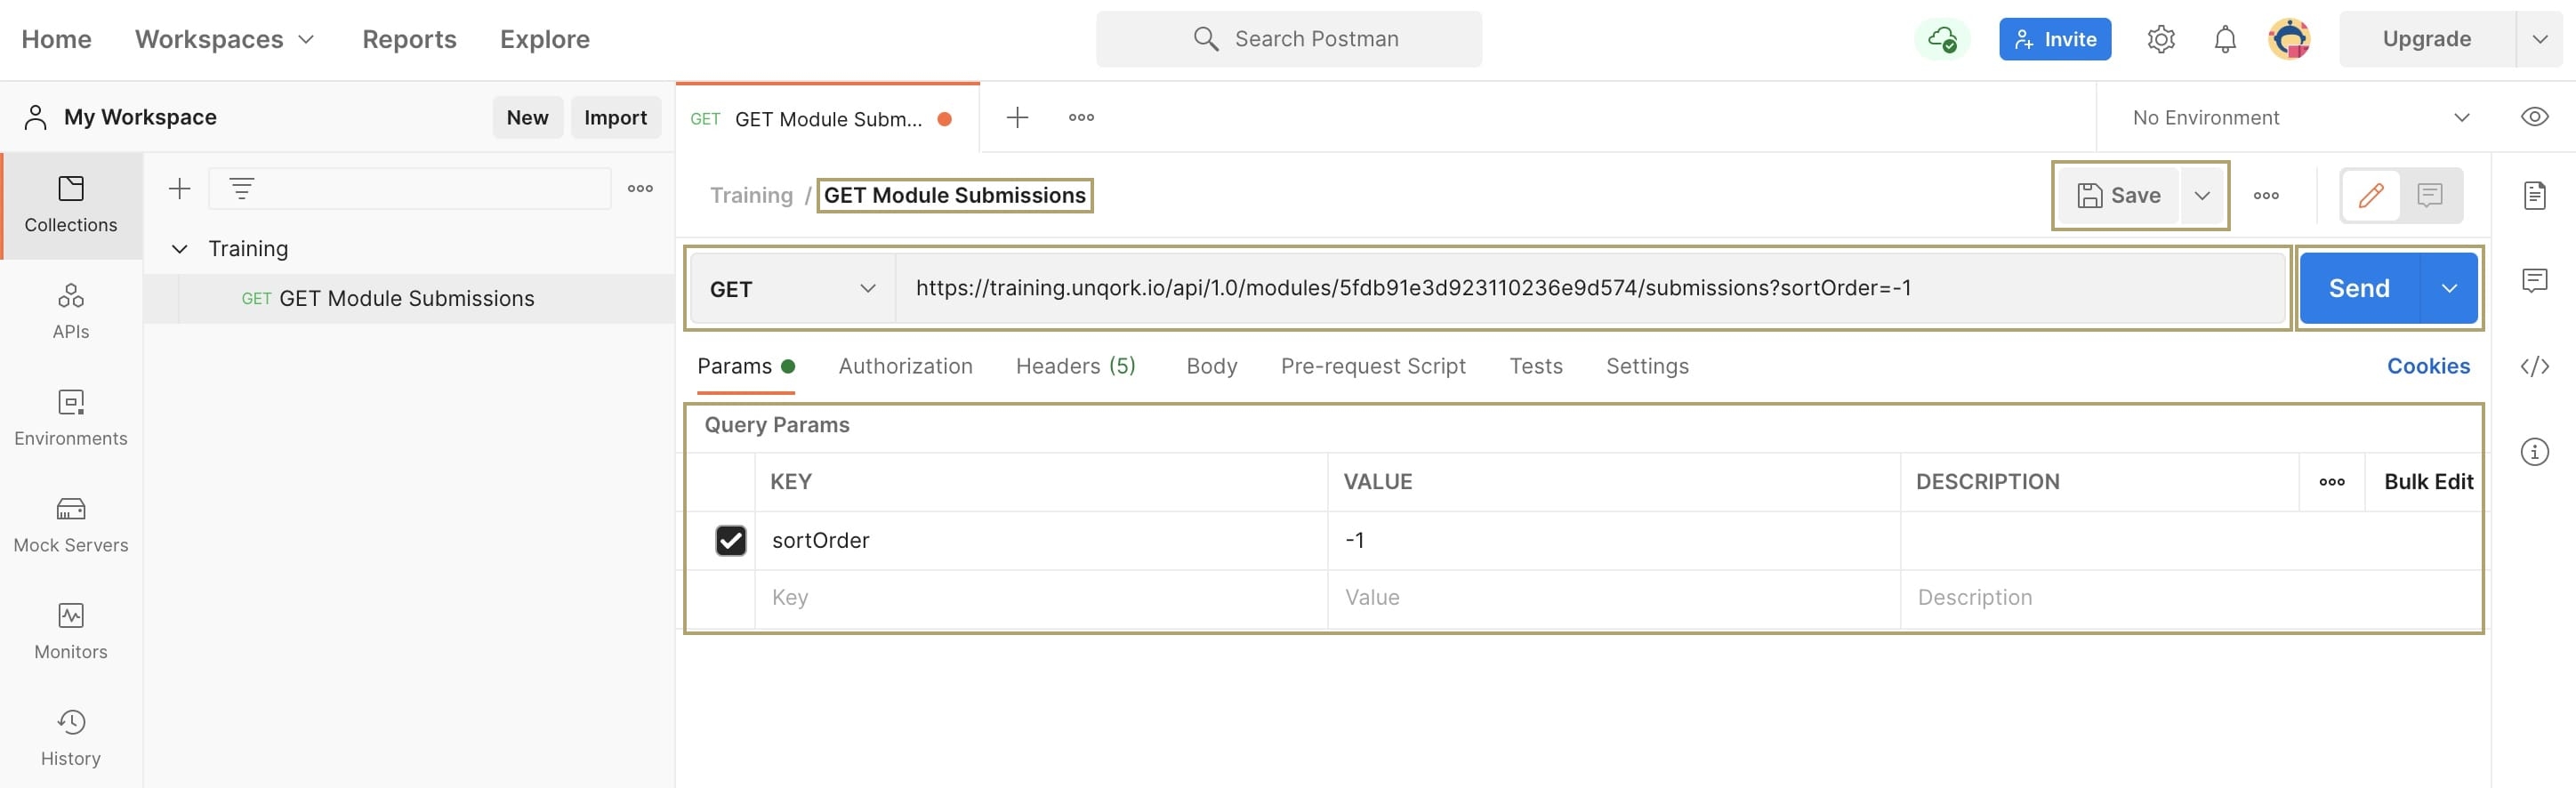
Enter https://{yourSubdomain}.unqork.io/api/1.0/modules/{moduleId}/submissions in the Enter Request URL field. For this example, we'll enter https://training.unqork.io/api/1.0/modules/5fdb91e3d923110236e9d574/submissions. You can see the environment and module ID we selected in bold.
In the Query Params tab, enter a query key in the KEY field. For this example, you'll enter sortOrder.
In the Query Params tab, enter a query value in the VALUE field. For this example, you'll enter -1.
You'll see that your new query parameters add automatically to the end of your Request URL.
Save your request.
Click Send.
For more information on testing with query parameters, check out this Postman documentation: https://learning.postman.com/docs/sending-requests/requests/#sending-parameters.
Using Postman Variables
One last note to make about using Postman is around creating variables. In all the examples in this article, you've either added the same information or copy and pasted it. For example, you've used the same base URL throughout the lesson. To simplify your experience, you could turn this URL into a variable. That way, you can add it without having to re-type or copy it each time. When you create a variable, you can store it for use in all your Postman API requests. Or, you can store it for use just in your collection.
Creating a Postman Variable
Let's look at the API URL you'vee been using as an example: https://training.unqork.io/api/1.0/modules/5fdb91e3d923110236e9d574/submissions. For this example, you'll make the https://training.unqork.io/api/1.0 portion of the URL a variable. You'll also save the variable for use in your Training collection.
To create a variable:
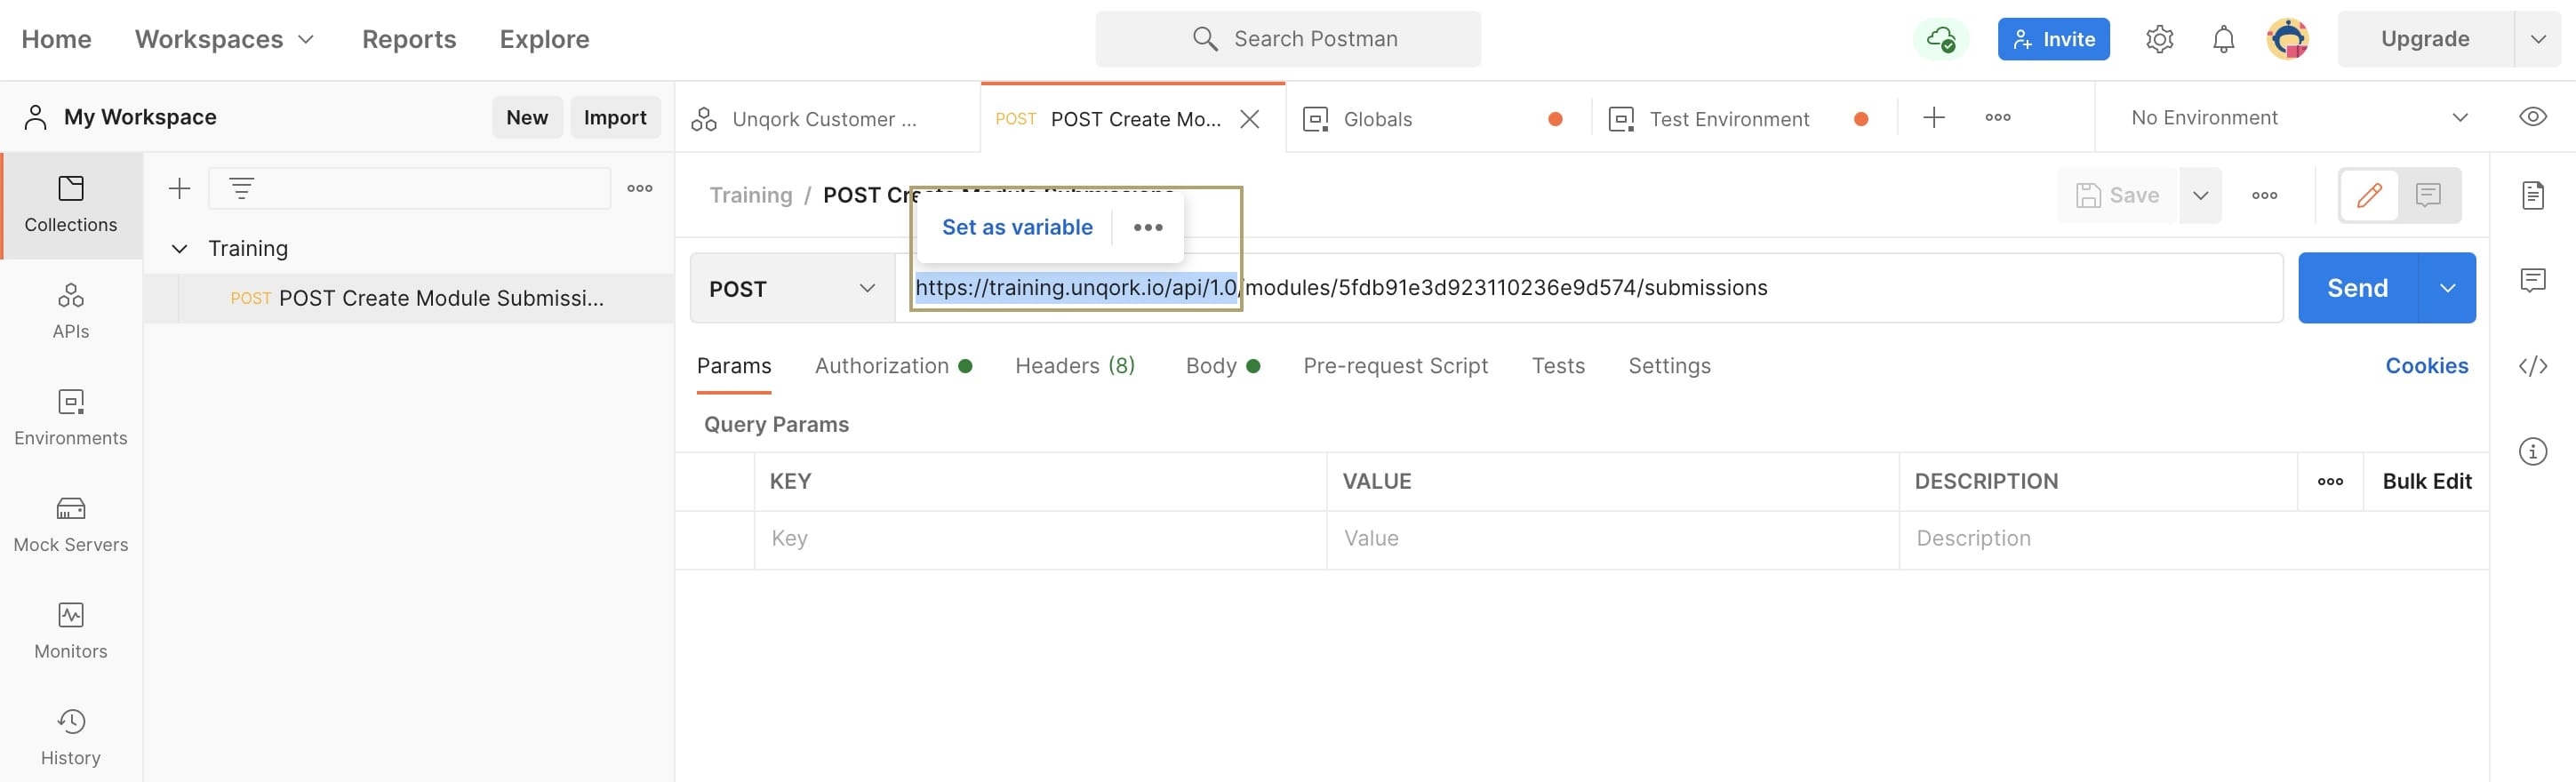
Highlight the base portion in the API Request URL field.
Click Set as Variable.
Click + Set as a New Variable.
Enter a name for your variable in the Name field. For this example, enter Base URL into the Name field.
Select a scope from the Scope drop-down. For this example, we want to use the variable only in your Training collection. So, select Collection: Training from the Scope drop-down.
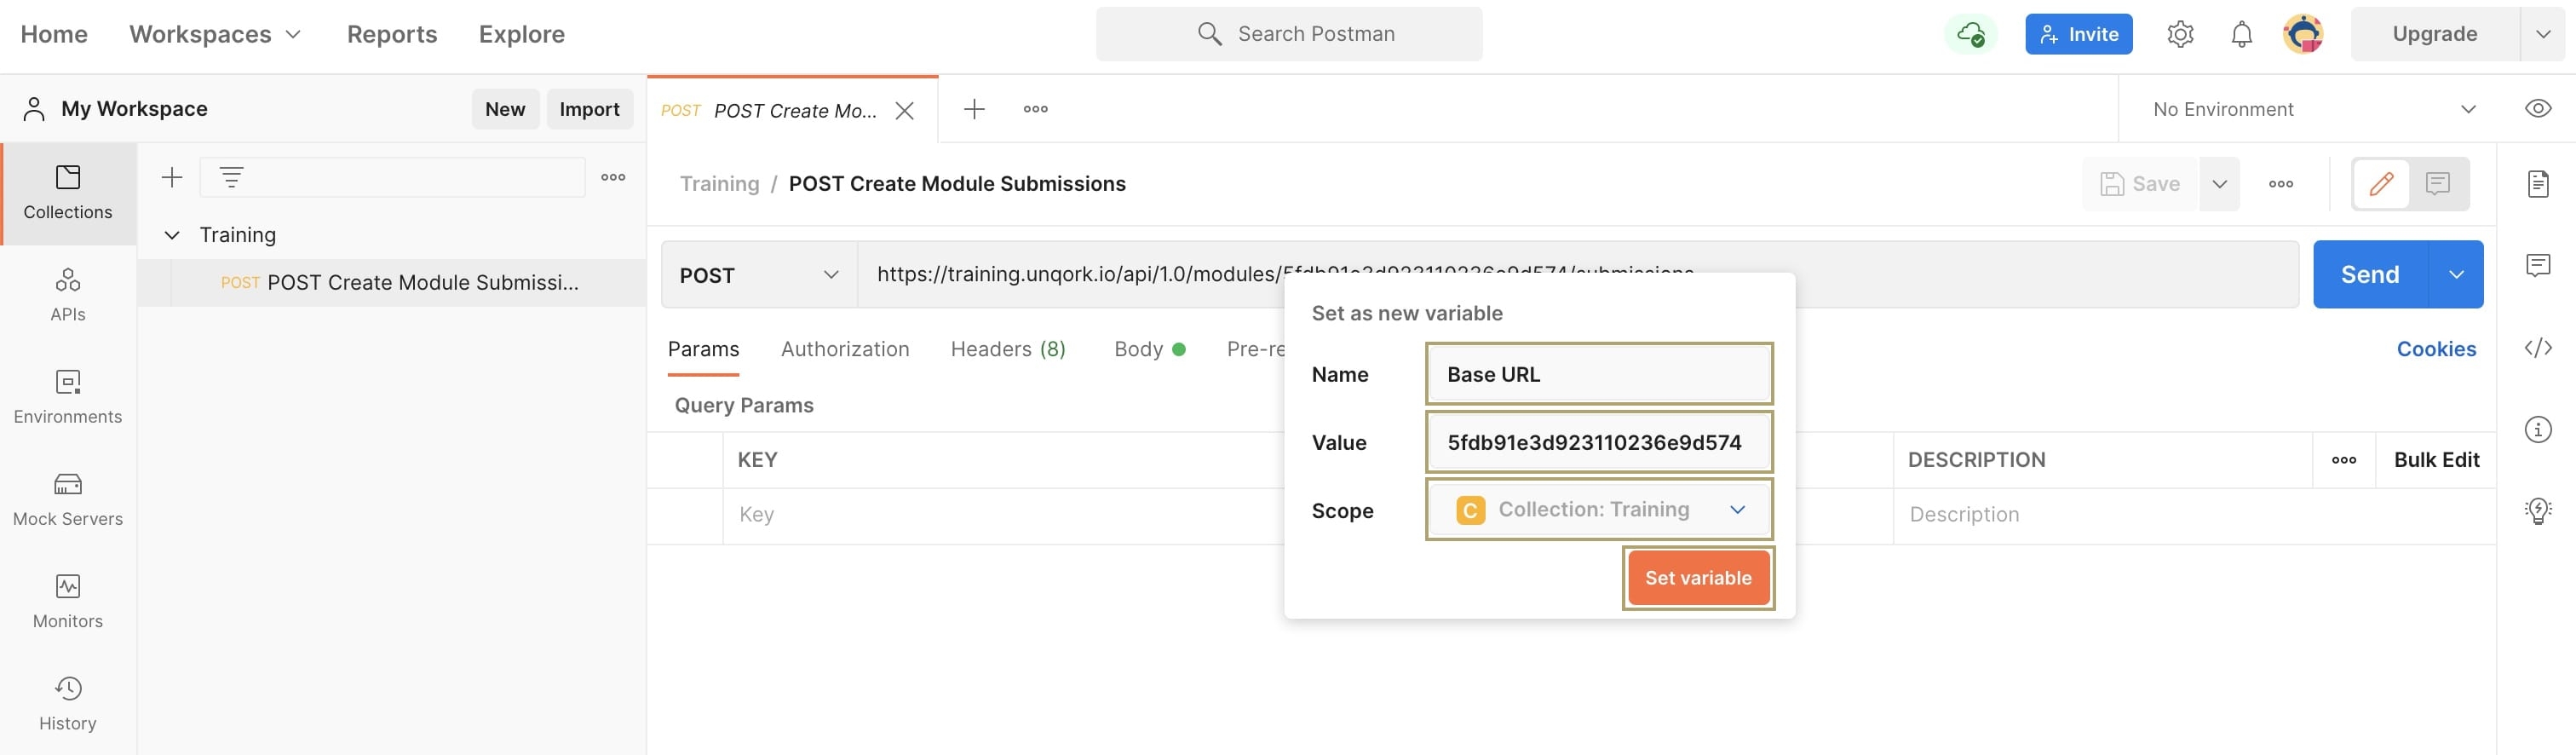
Click Set Variable.
Adding a Variable
Now let's create a new Postman request and use your new variable. To add variables in Postman, you must add them with curly braces. We won't create the entire request, but just enough to show you how this works.
To add a variable:
Hover over your collection name.
Click the ellipsis (...) to the right of the collection name.
Click Add Request.
Enter a name for your request and hit Enter or Return on your keyboard. For this example, enter Variable Test.
Enter {{Base URL}} in the Enter Request URL field.
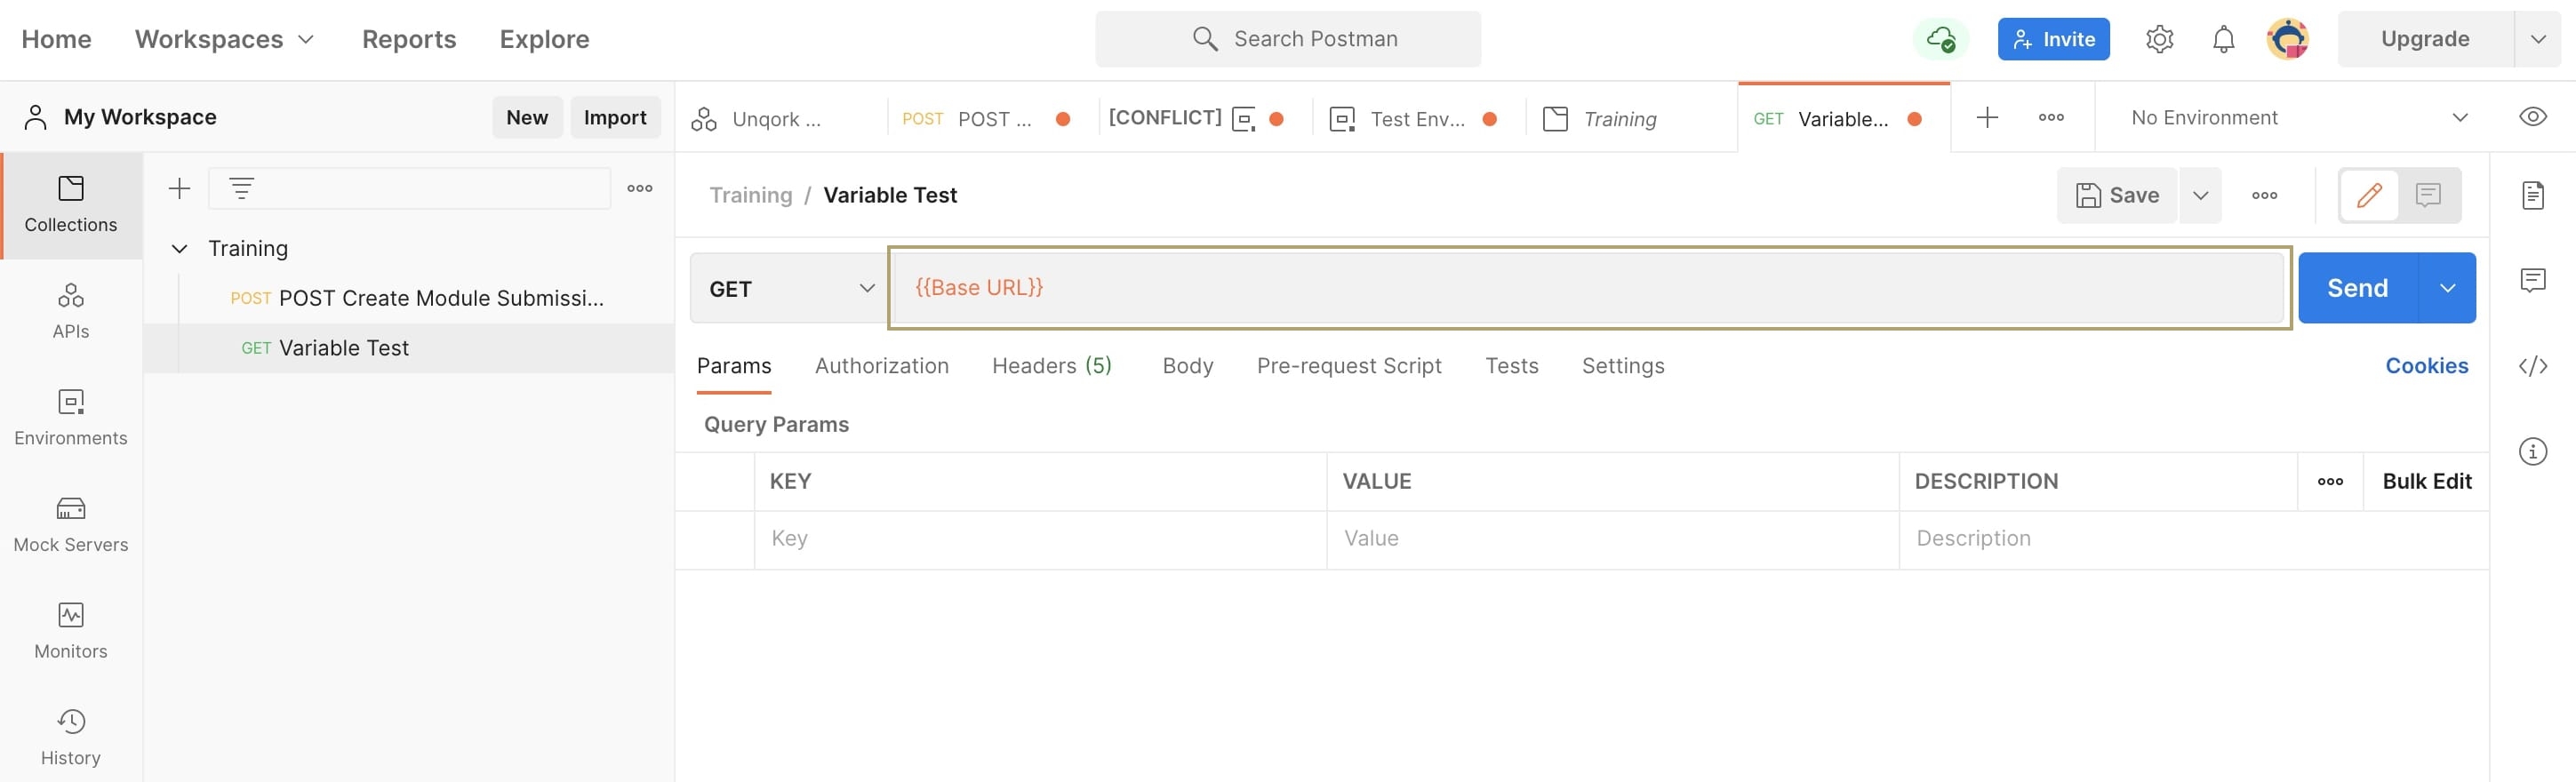
Your variable now appears orange in color. Add the API endpoint to complete and test your API call.
To learn more about Postman variables, check out this documentation: https://learning.postman.com/docs/sending-requests/variables/.