Overview
Certificates for SAML (Security Assertion Markup Language) Assertion help Creators implement higher security and compliance standards by leveraging their own trusted X.509 certificates. In this how-to guide, you'll create a certification for SAML assertion, then add it to a new or existing SAML SSO (Single-Sign On) configuration.
Create a SAML Certificate
Access the Certificate Management administration settings to create a new SSO (Single-Sign On) Certificate. For this how -to guide, you'll need access to an approved encyrption.pfx file.
To create a SAML Certificate from the Unqork Homepage:

From the Homepage, click Administration.
Under Integration, select Certificate Management. The Certificate Management page displays.
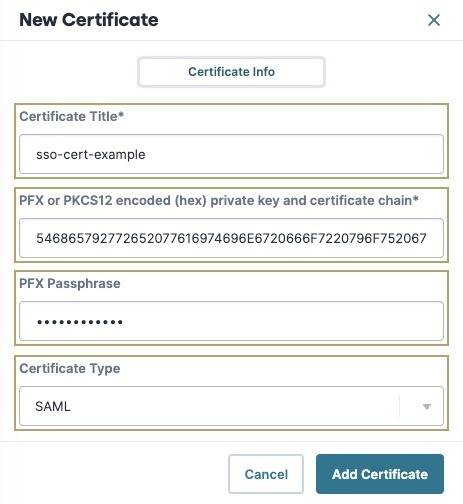
Click + New Certificate. The New Certificate modal displays.
In the Certificate Title* field, enter a name.
Unqork recommends avoiding spaces and special characters in certificate titles. For example:
sso-certinstead ofsso cert.In the PFX or PKCS12 Encoded (Hex) Private Key and Certificate Chain field, enter your
encyrption.pfxfile in Hexadecimal format with all spaces excluded. For example, if yourencryption.pfxhex code looks like the following:54 68 69 73 20 69 73 20 68 65 78 20 63 6F 64 65 2E, then remove the spacing so it looks like the following:546869732069732068657820636F64652E.The size of your
encryption.pfxhexadecimal code might require a text or coding software tool to remove all spaces between hexadecimal values.In the
PFX Passphrasefield, enter the password used to protect the certificate.Never share passphrases over unsecure networks.
From the Certificate Type drop-down, select
SAML.Click Add Certificate. The New Certificate modal closes and the certificate displays in the Certificate Management list.
The certificate for SAML Assertion can now be added to a new or existing SAML SSO configuration.
Adding a SAML Certificate to a New or Existing SSO
After creating a SAML Certificate, add it to a SAML SSO Configuration using the Single Sign-On (SSO) Management page.
Select one of the following methods below:
Add a SAML Certificate to a New SSO
For in-depth details on creating new SSO configurations, view the SSO SAML Express and Designer Guides section.
At the top right of the Unqork Designer Platform, click Administration.
Under Environment, select Single Sign-On (SSO).
Click + New SSO.
From the + New SSO drop-down, select Express or Designer.
In the SSO Name field, enter a unique name for your configuration.
This name is used to generate the default SP Entity ID.
In the Default Role drop-down, select a role.
When setting up SSO for Express View, select a default role with the lowest-level permissions. This lets you rely on the value stored in Okta to determine higher-level permissions.
(Optional) In the Default Groups list, select one or more groups.
Click Next. The Configure Protocol tab displays.
Set Select Protocol* to
 SAML.
SAML.In a text editor, open the
IdP metadataXML file provided by the SSO service.In the IdP Metadata XML* field, copy and paste the contents of the file.
The SAML IdP NameID Format, SAML IdP SSO URL, and SAML IdP X.509 Certificate fields autofill. If the metadata is incorrect, an error message displays asking you to check the XML.
The SAML IdP NameID Format field is optional. The default value for this field is
urn:oasis:names:tc:SAML:1.1:nameid-format:emailAddress. The NameID is a unique identifier that matches an end-user across multiple Unqork sessions.(Optional) In the SAML SP Entity ID field, enter a value.
This value must match the value used by the IdP. If you're asked to define the Entity ID, use a value that relates to your configuration. For example,
{environment name and codebase}-{application name}-saml. The Okta administrator might also have their own preferred Entity ID naming conventions.(Optional) You can leave the default value for the SAML Callback URL field unless the Okta app integration uses a different value.
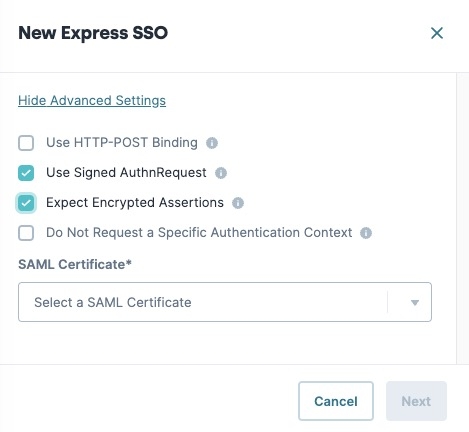
Click the Show Advanced Settings button.
(Optional) Set Use Signed AuthnRequest to
.png) (checked).
(checked).(Optional) Set Expect Encrypted Assertions to
.png) (checked). The SAML Certificate* drop-down displays.
(checked). The SAML Certificate* drop-down displays.Creators can either enable Use Signed AuthnRequest, Expect Encrypted Assertions, or enable both settings depending on their configuration setup.

From the SAML Certificate* drop-down, select the certificate created during the Create a SAML Certificate steps.
Click Next. The Attribute Mapping tab displays.
Enter the attribute mapping information for the SSO.
Learn more about attribute mapping in our SSO (Single Sign-on) Attribute Mapping article.
Click Create SSO.
Test your configuration using the Testing Your Configuration steps.
Add a SAML Certificate to an Existing SSO
After creating a SAML Certificate, Creators can edit an existing SSO configuration and add the certificate.
At the top right of the Unqork Designer Platform, click Administration.
Under Environment, select Single Sign-On (SSO).
From the left menu, select Express or Designer depending on the SSO type.
From the list, navigate to the SAML SSO you want to edit, then click Manage. A drop-down menu displays.
Click Edit. The SSO configuration's settings modal displays.
Click Configure Protocol.
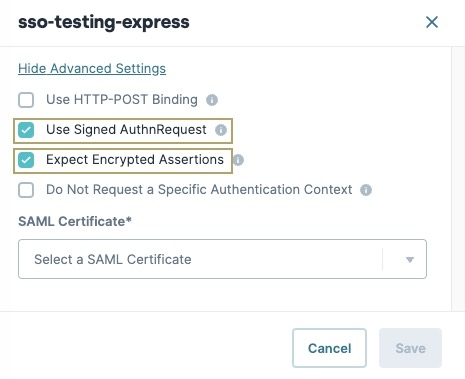
Navigate to and click the Show Advanced Settings button.
Set Use Signed AuthnRequest to
.png) (checked).
(checked).Set Expect Encrypted Assertions to
.png) (checked). The SAML Certificate* drop-down displays.
(checked). The SAML Certificate* drop-down displays.Creators can either enable Use Signed AuthnRequest, Expect Encrypted Assertions, or enable both settings depending on their configuration setup.

From the SAML Certificate* drop-down, select the certificate created during the Create a SAML Certificate steps.
Click Save. SSO configuration's settings modal closes.
Test your configuration using the Testing Your Configuration steps.
Testing Your Configuration
After completing the Unqork side of the setup, test your configuration.
You'll need a set of test credentials from the Okta administrator. The test user must be assigned to the app integration in Okta, under the Assignments tab.
Testing an SP-Initiated Flow
From the SSO dashboard, you can preview the Unqork entrypoint and use a set of test credentials from your SSO provider to test the configuration. To test the SP-initiated flow:
In the SSO dashboard, find the SSO configuration to preview.
Click Manage. A drop-down menu displays.
From the Manage drop-down, right-click Preview.
Click Open Link in Incognito Window.
By default, the Unqork entrypoint URL uses
123as the module ID. To test access to an actual module in your application, replace123at the end of the URL with your module's module ID.Log in using your test credentials.
If you see an error page, there are issues with your configuration. If you can successfully log in to Unqork, your SAML configuration of Okta as SSO provider is working.
Testing an IdP-Initiated Flow
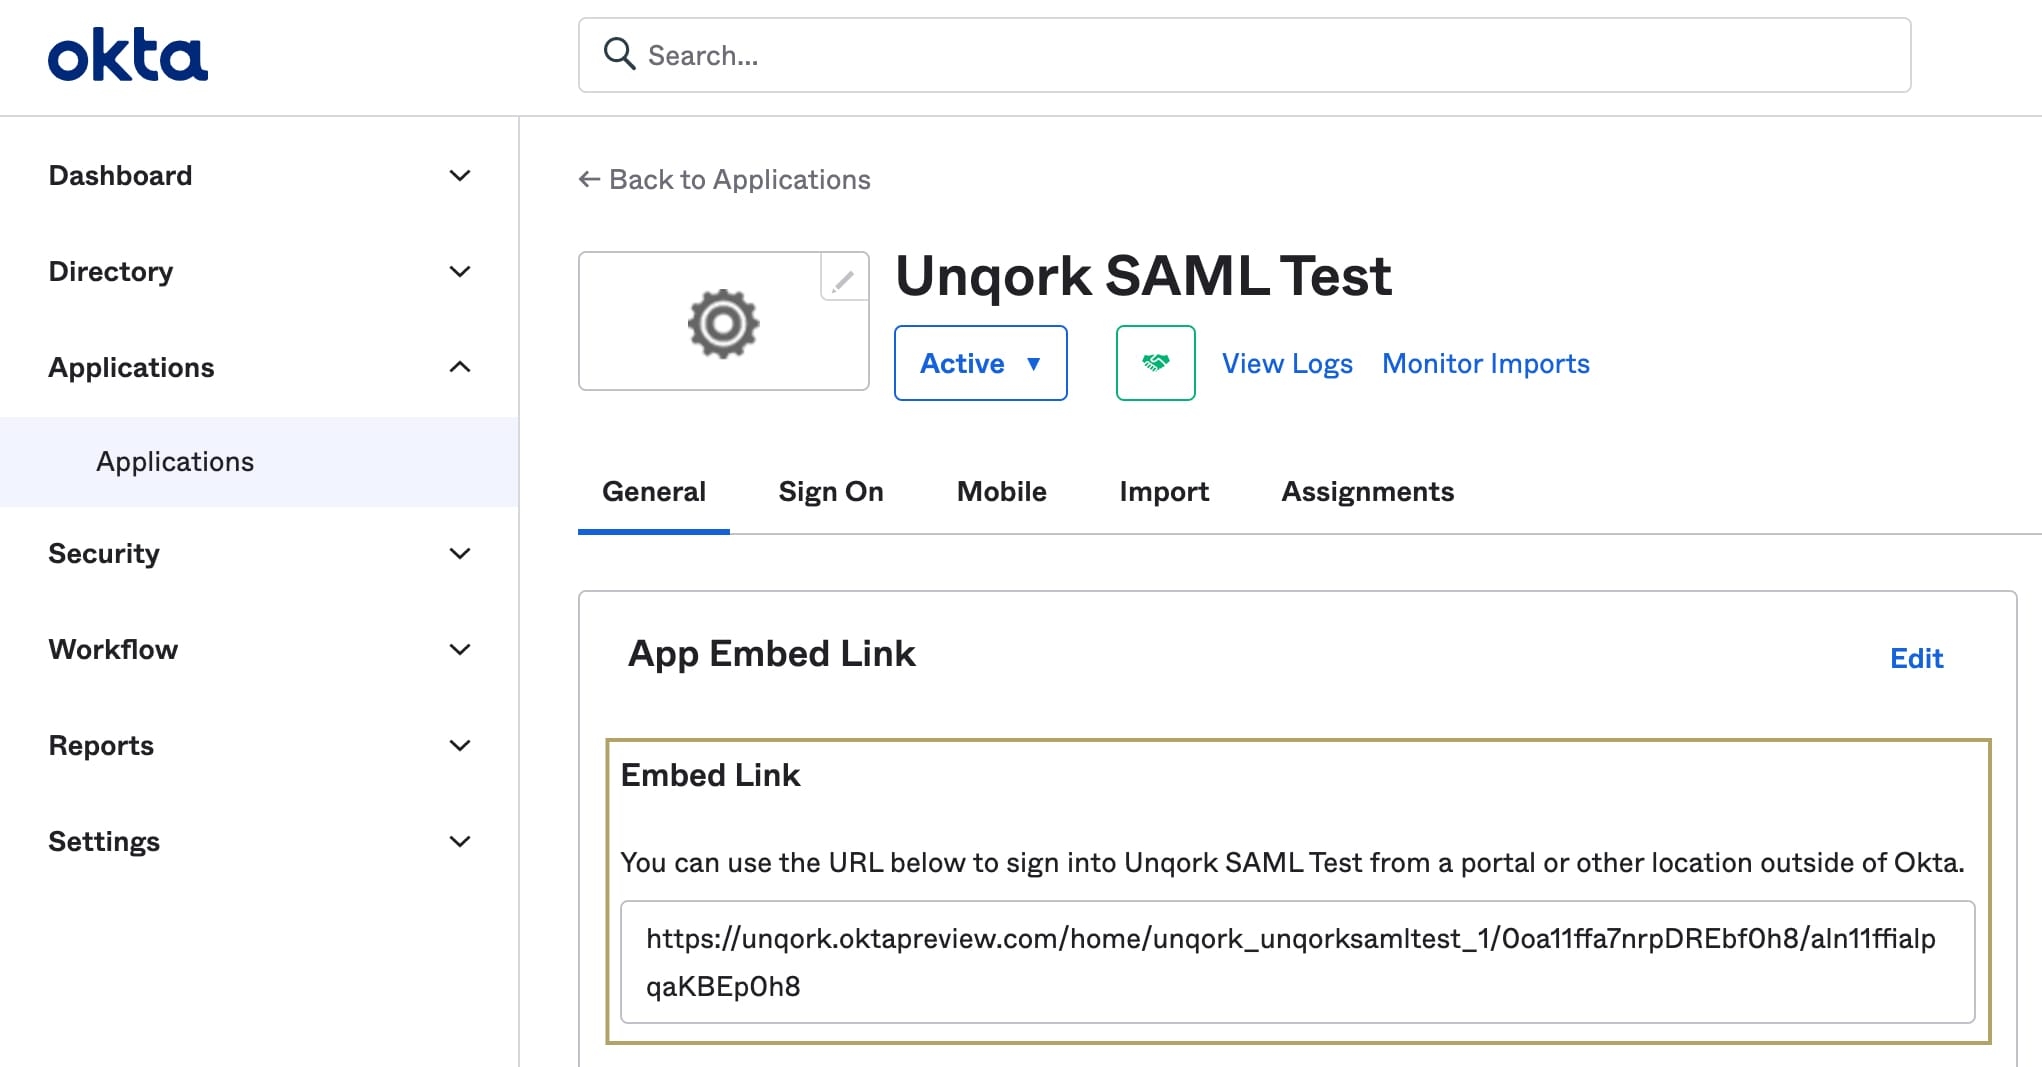
To test the IdP-initiated login flow, you'll need the Embed Link found in Okta.
In Okta, navigate to the Applications page.
Select your app integration.
In the Embed Link field, copy the value.

Open a new Incognito window of your browser.
Paste the Embed Link into the browser.
Log in using your test credentials.
If you see an error page, there are issues with your configuration. If you can successfully log in to Unqork, your SAML configuration of Okta as SSO provider is complete.
Troubleshooting Tips
Understanding what's causing an error can be a frustrating part of creating a new configuration. One of the most common sources occurs when not using the Express View -specific host value in the SAML Callback URL field. By default, new Express SSO configurations use the Express View-specific host value in the SAML Callback URL. However, double-checking the location attribute in the SP metadata XML file can confirm it's correct. Also, ensure the SAML Callback URL value exactly matches the Single Sign-On URL in Okta, with both values use the Express View-specific host value.
It's useful to view what assertions your application receives from Okta. Assertions are not logged in Service Logs. Instead, you can use Google Chrome extensions, like SAML Chrome Panel or SAML Message Decoder. Comparing the assertions you receive against the assertions you expect can help with debugging.