Step 2: Retrieving Employee Information
Estimated Reading Time: 3 minutes
Introduction
In the previous use case article, you learned how to create a Workspace and began building your employee travel request application. The first step to process an employee's travel request is to intake their information. In this module, you'll gather that information using a few Primary Field components.
You can preview an example of this completed use case step here: https://training.unqork.io/#/workflow/6465340be070300e1cbd6917/edit.
Learning Objectives
In this use case article, you'll learn how to configure the Text Field, Date Input, and Dropdown components to intake employee data.
What You'll Need
To complete this step of your application, you need
-
5 Text Field components
-
1 Date Input component
-
1 Dropdown component
Open Your Module
Start by opening the workflow-type application you previously created in the Workflow Builder.
| 1. | Open your Workspace. You can find your Workspace by selecting  (Search magnifying glass) and entering Creator Workshop Workspace [your name]. (Search magnifying glass) and entering Creator Workshop Workspace [your name]. |
| 2. | In your Workspace, select View App on your application tile. Your application title will be [initials] + “Creator Workshop App” + [date you created the application]. |
| 3. | From the menu to the left of the Application page, select  Modules. Modules. |
| 4. | Click on the Employee Information module tile. |
Configuration
Configure Your Text Field Components
Start by adding the Text Field components. You'll use these to get the employee and their manager's name, team, and department.
| 1. | Drag and drop five  Text Field components onto your canvas. Text Field components onto your canvas. |
|
Property ID |
Label Text |
|---|---|
|
employeeFirstName |
Employee's First Name |
| employeeLastName |
Employee's Last Name |
|
managerFirstName |
Manager's First Name |
|
managerLastName |
Manager's Last Name |
|
managerTeamName |
Manager's Team/Department Name |
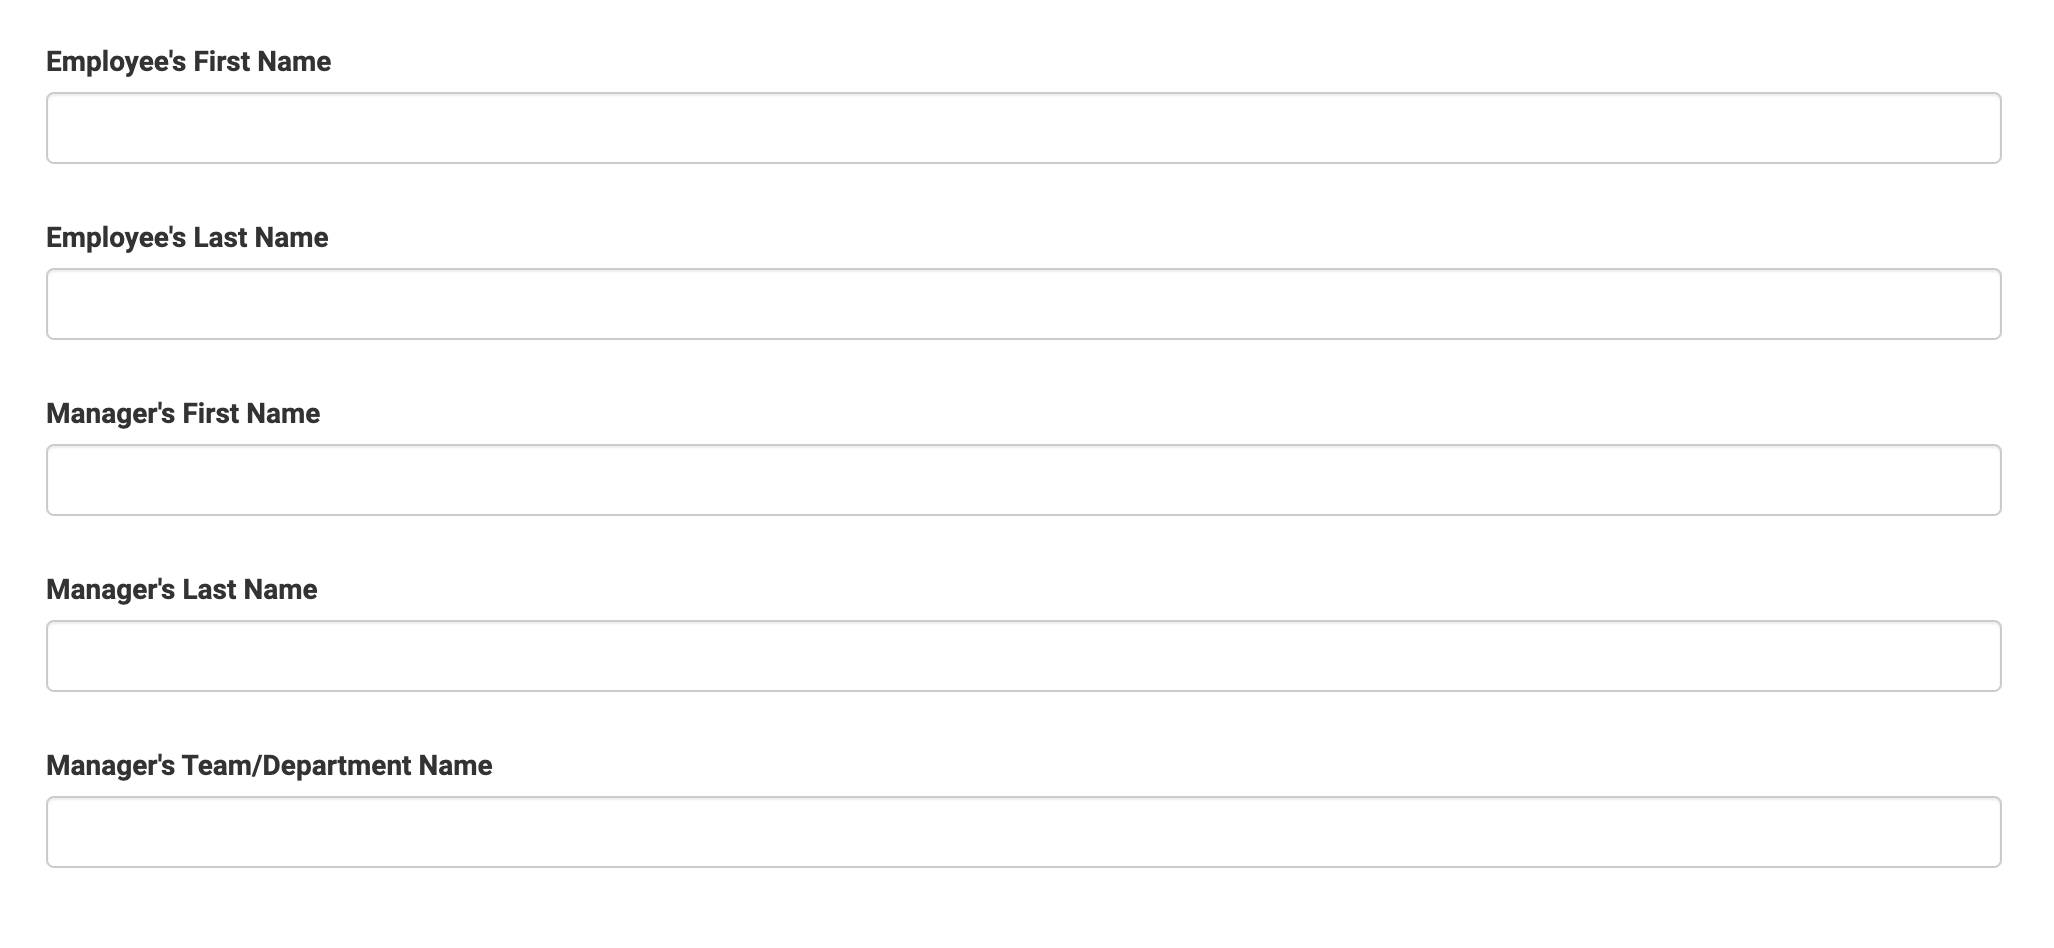
| 3. | Save & Close each Text Field component as you add it. |
Configure the Date Input Component
To track the employee's hire date, add a Date Input component.
| 1. | Drag and drop a Text Field components. |
| 2. | In the Property ID A Property ID is the unique field ID used by Unqork to track and link components in your module. field, enter employeeHireDate. |
| 3. | In the Label Text Label Text conveys what the input component is and what information it displays. Enter the purpose of the corresponding component or field. field, enter Employee's Hire Date. |
| 4. | In the Display (+/-) Years From the Current Date field, enter -10. |
| 5. | Set the Store Date Only toggle to  (ON). (ON). |
| 6. | To the left of the component's configuration window, select the |
| 7. | From the Restrict Date Selection to drop-down, select Past Only. |
| 8. | Click Save & Close. |
Configure the Dropdown Component
To get the employee's job title, use a Dropdown component.
| 1. | Drag and drop a |
| 2. | In the Property ID A Property ID is the unique field ID used by Unqork to track and link components in your module. field, enter employeeType. |
| 3. | In the Label Text Label Text conveys what the input component is and what information it displays. Enter the purpose of the corresponding component or field. field, enter Employee's Job Title. |
| 4. | To the left of the component's configuration window, select the |
| 5. | In the Data Source Type table, enter the following: |
| Option Label | Option Value |
|---|---|
|
Intern |
Intern |
| Contractor |
Contractor |
|
Individual Contributor |
Individual Contributor |
|
Manager |
Manager |
|
VP |
VP |
|
C-Suite |
C-Suite |
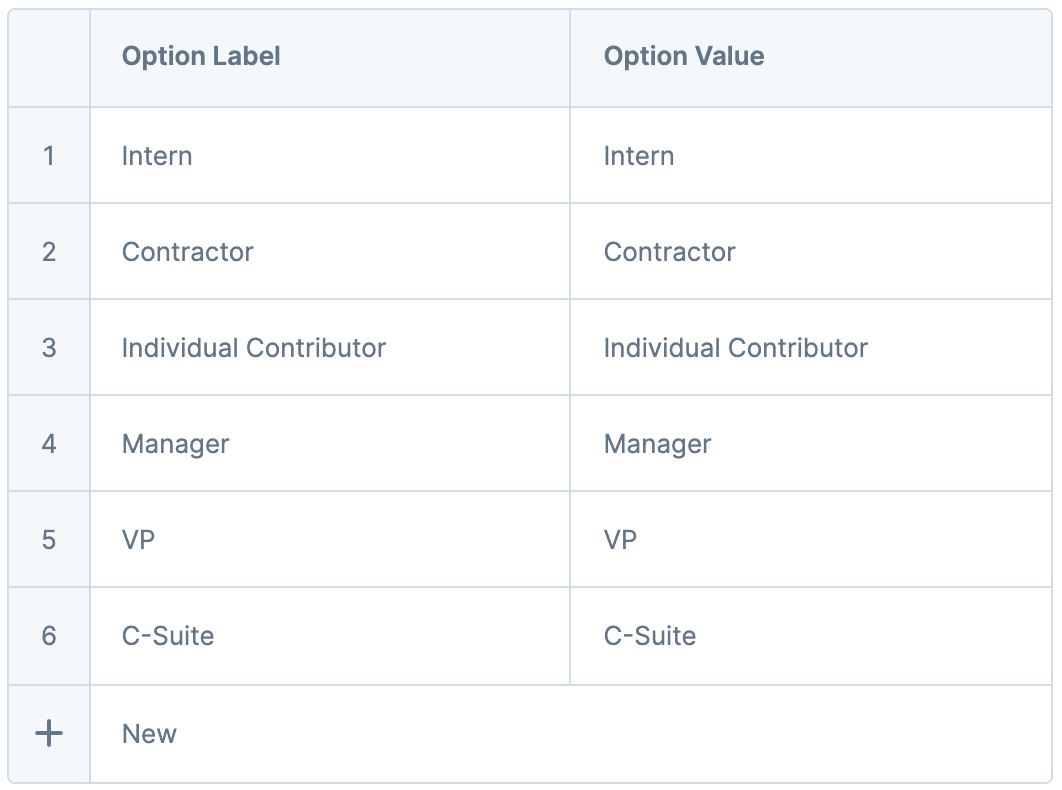
| 6. | Click Save & Close. |
| 7. | Save your module. |
View and Test the Workflow-Type Application in Express View
Now that you've completed this workflow use case, view and test it in Express View Express View is how your end-user views you application. Express View also lets you preview your applications to test your configuration and view the styling. This is also the view your end-users will see when interacting with your application. After configuring a module, click Preview in the Module Builder to interact with the module in Express View.. To do that, open your workflow and click the Preview button on the top of the Workflow Builder. Once there, interact with each field you added by entering in test values.
Ask yourself the following questions to determine whether or not your application is working as intended:
-
Are you able to enter any value into your Text Fields? If not, review the Configure Your Text Field Components section. Return to you Employee Information module and ensure each Text Field follows the correct configuration steps.
-
In the Employee's Hire Date field, are you only able to manually enter dates or select a date from the pop-up calendar? If not, review the Configure the Date Input Component section. Return to you Employee Information module and ensure your Date Input component follows the correct configuration steps.
-
In the Employee's Job Type field, does a drop-down menu appear with the job type options you populated? If not, review the Configure the Dropdown Component section. Return to you Employee Information module and ensure your Dropdown component follows the correct configuration steps.
TIP Having trouble with your configuration? Visit our Troubleshooting the Creator Workshop Configuration article to help identify and resolve any errors on your application.
Recap
Your travel request application can now intake employee and manager information. In the next use case article, you'll continue building in this module to intake and validate an employee email address.
Continue Your Learning
In the next article, you'll begin Step 3 of the Building Your First App learning module. In the first article of Step 3, you'll learn about Email components and how to configure them in the Module Builder.
