Automated Workflows Template
About this Configuration Guide
This guide covers setting up the Automated Workflows application template. Using this guide, you'll explore how this template works. You'll learn how to install the template in your environment and how to build an application from it. Plus, you'll learn how to customize the template for whatever process you want to automate.
Here's a high-level overview of the elements used in this template:
| Title | Element Type | Description |
|---|---|---|
| Workflow Automated Process |
Workflow |
The entire workflow takes place behind-the-scenes in the Automated swimlane. So, there aren't any front-facing modules in this application. This workflow starts with a Timer Start node so you can run the process on a set schedule. The Timer Start node connects to the process module. The process runs. Then, the workflow ends with an End node. |
| Automated Process Module |
Module |
This is the only module in the workflow. Once you start the automated process, this API (application programming interface) module performs the process. |
All images used in this guide are for illustrative purposes only. Images are subject to change without notice. All images were correct at the time of publication.
Overview
The Automated Workflows template is a great starting point for creating an automated process in your application. Your automated process could be whatever you want it to be. You can schedule remote executes, API calls, background processes, or anything that runs routinely in your application. This template creates a workflow you can use to schedule your automatic process.
Features
With this template, you can:
-
Schedule and automate processes directly from your workflow.
What You'll Learn
In this article, you'll learn:
Adding the Template
Before you can build an application from this template, you must install the template to your environment. Then, you can visit your Library and build an application from your new template.
Adding the Template to Your Environment
To add the template to your environment:
| 1. | Click Marketplace at the top right of the Unqork Designer Platform. |
You can also access the Marketplace at any time by visiting https://marketplace.unqork.io/#/.
| 2. | Enter Automated Workflows in the Search the Marketplace field. |
| 3. | Click on the Automated Workflows tile. |
| 4. | Click Install Template. |
If you aren't logged in, you'll see a field for Environment URL and a Login button. Enter your environment's URL where you want to install the template. For example: [environmentname.unqork.io]. Then, click Login.
Now, you can now use your newly installed template to create an application!
Creating an Application from the Template
After you've added the template to your environment from Marketplace, you can use it to create an application. This template creates a workflow-type application.
To create an application from the template:
| 1. | Click Library at the top right of the Unqork Designer Platform. |
| 2. | Find the Automated Workflows template tile. |
If the template isn't listed, head over to the Marketplace to install it in your environment. You can access the Marketplace at any time by visiting https://marketplace.unqork.io.
| 3. | Click Create App from Template. |
| 4. | Choose the destination workspace from the Workspace drop-down. This is where your application will live once created. |
| 5. | Enter your unique App Name. The App Path auto-fills as you type your App Name. |
| 6. | If you want a different App Path, enter it in the App Path field. |
| 7. | Select a preview style from the Style drop-down. A style specifies your application’s appearance in Express View. If left blank, your application uses your environment's default style. |
You'll notice the App Type and App Entrypoint are grayed out. The template automatically takes care of these for you!
| 8. | Click Create App. |
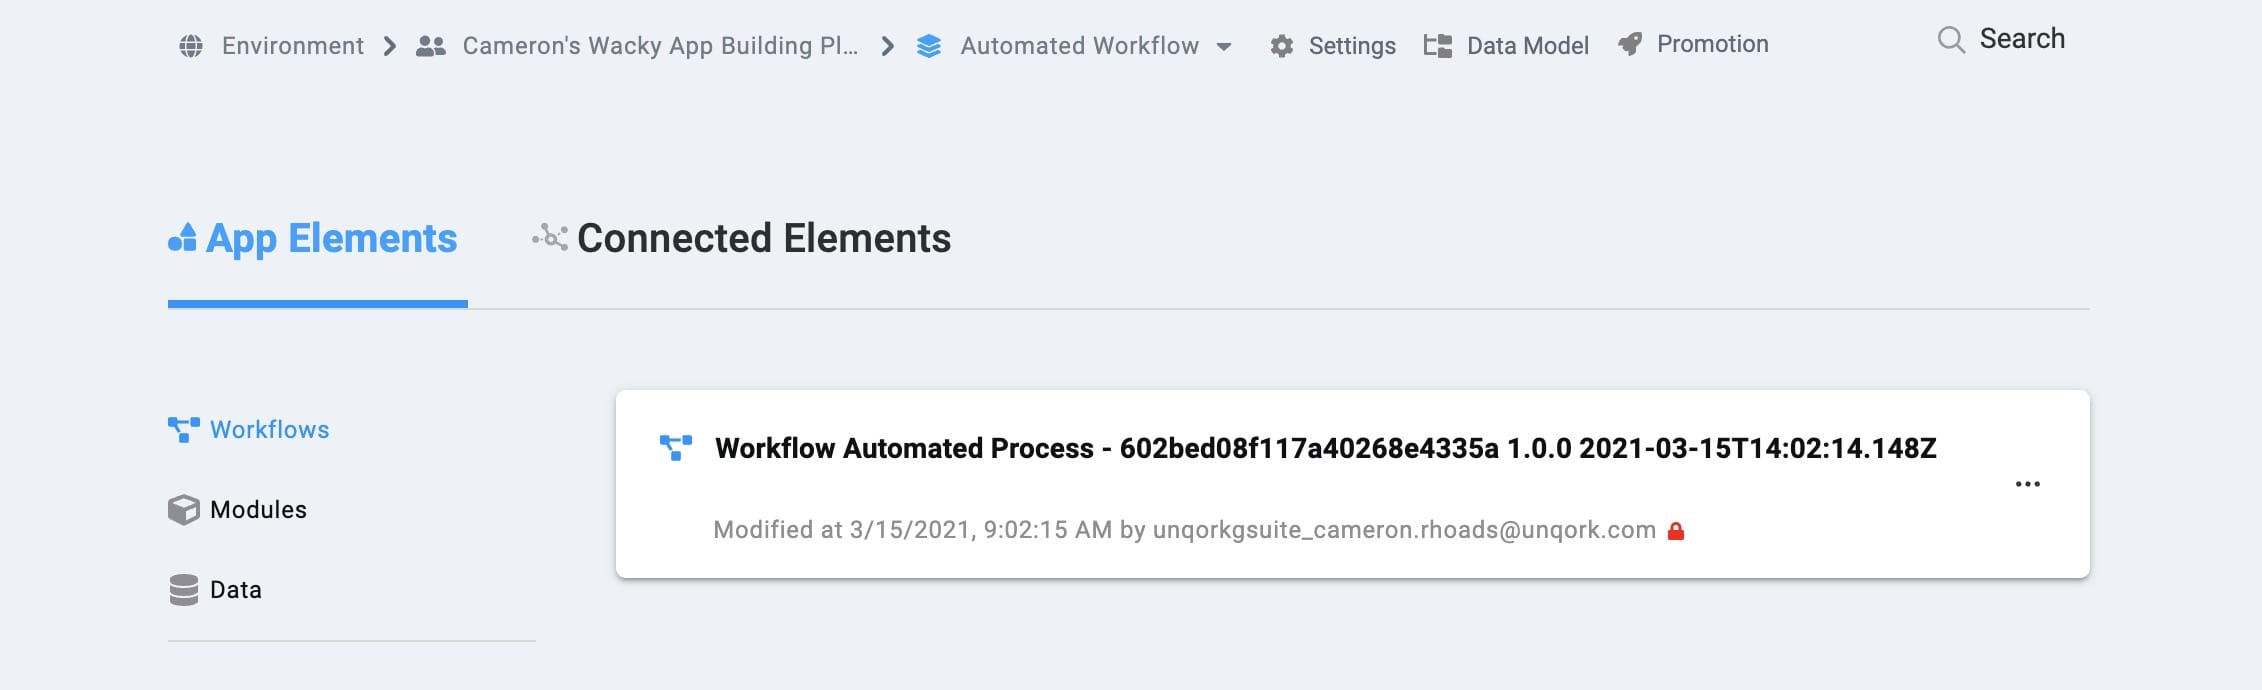
The application opens in the workspace you specified. You'll land on the Workflows tab of your application.
Your Workflows tab should look something like this:
And your Modules tab should look like this:
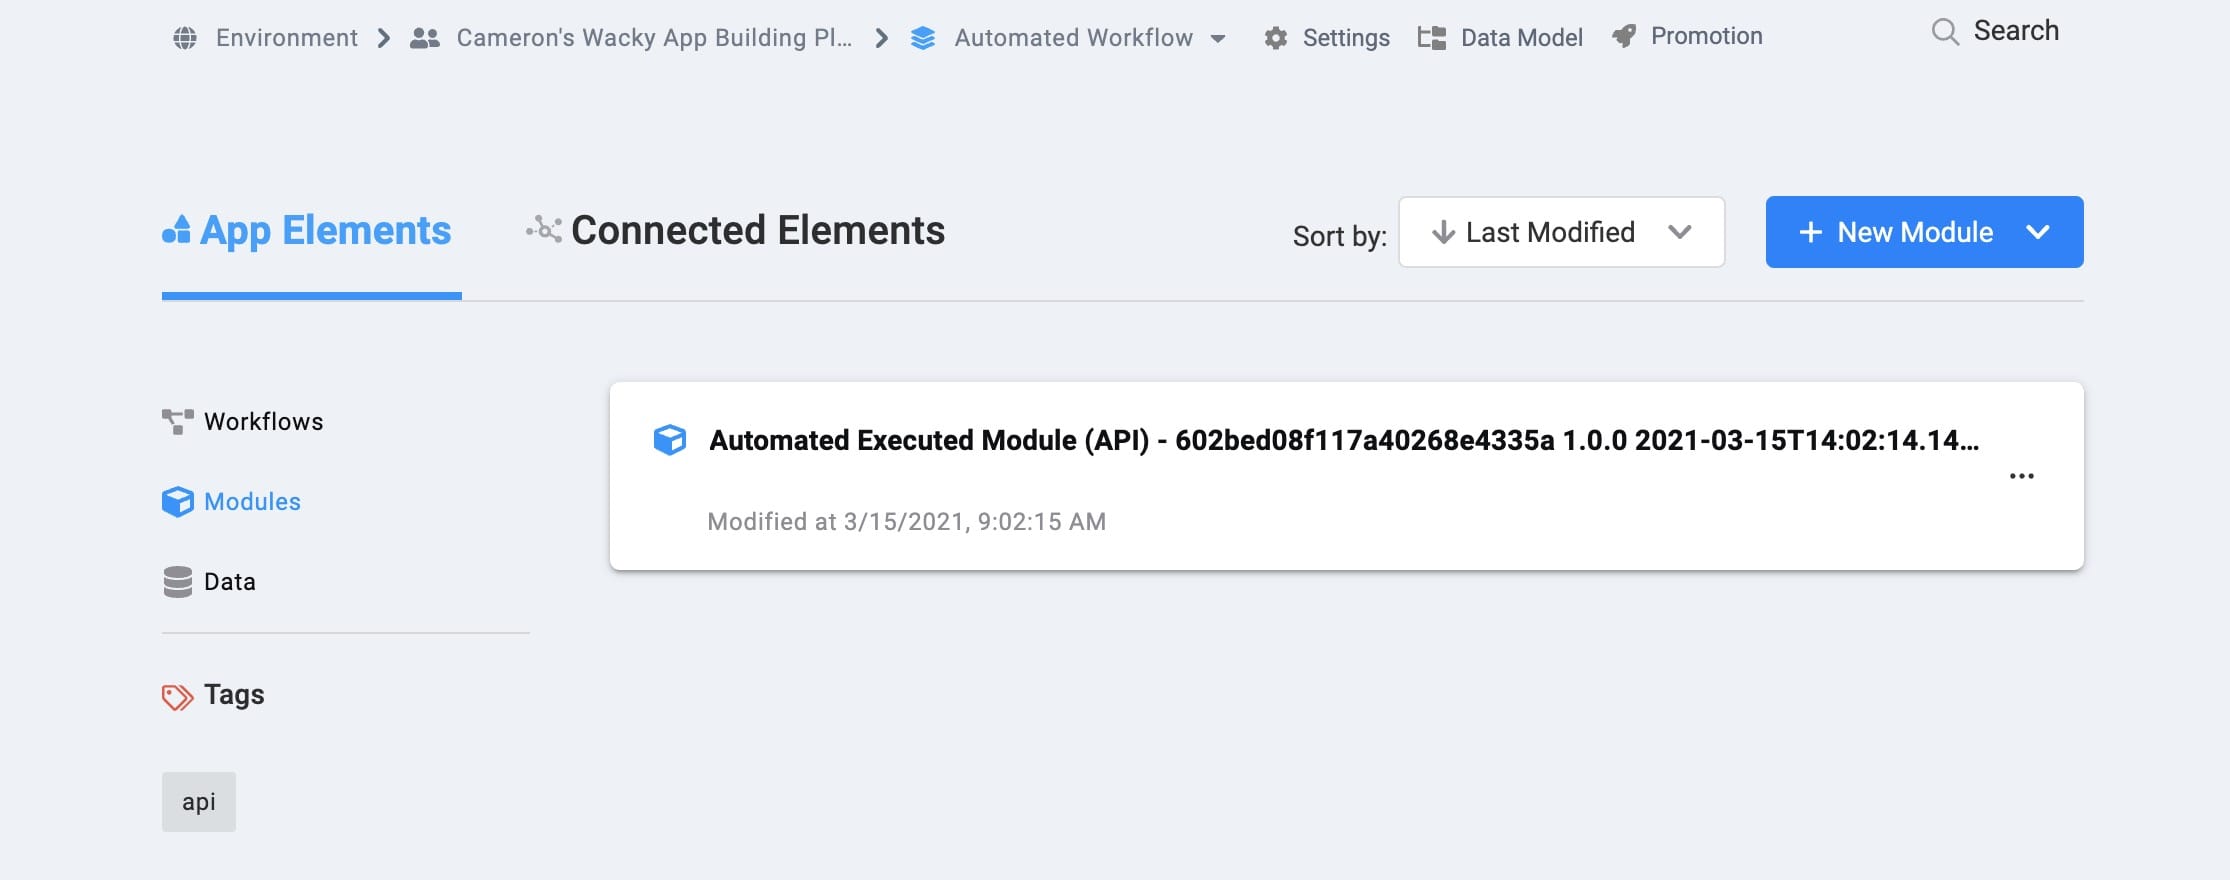
When you create an application from the template, your module names automatically include the template ID and a time stamp. This is to prevent any duplicate module paths. You're welcome to change module names and module paths at any time. Any service or workflow created with your template will also have a template ID and time stamp.
How the Template Works
This is a workflow template. So, when you add this template to your workspace, you're adding a new workflow. All this workflow does is execute an API module at a set interval. By default, the template executes the module every hour.
The template comes with an API module configured with a sample process. You'll configure your own process in the module once you add the template to your workspace.
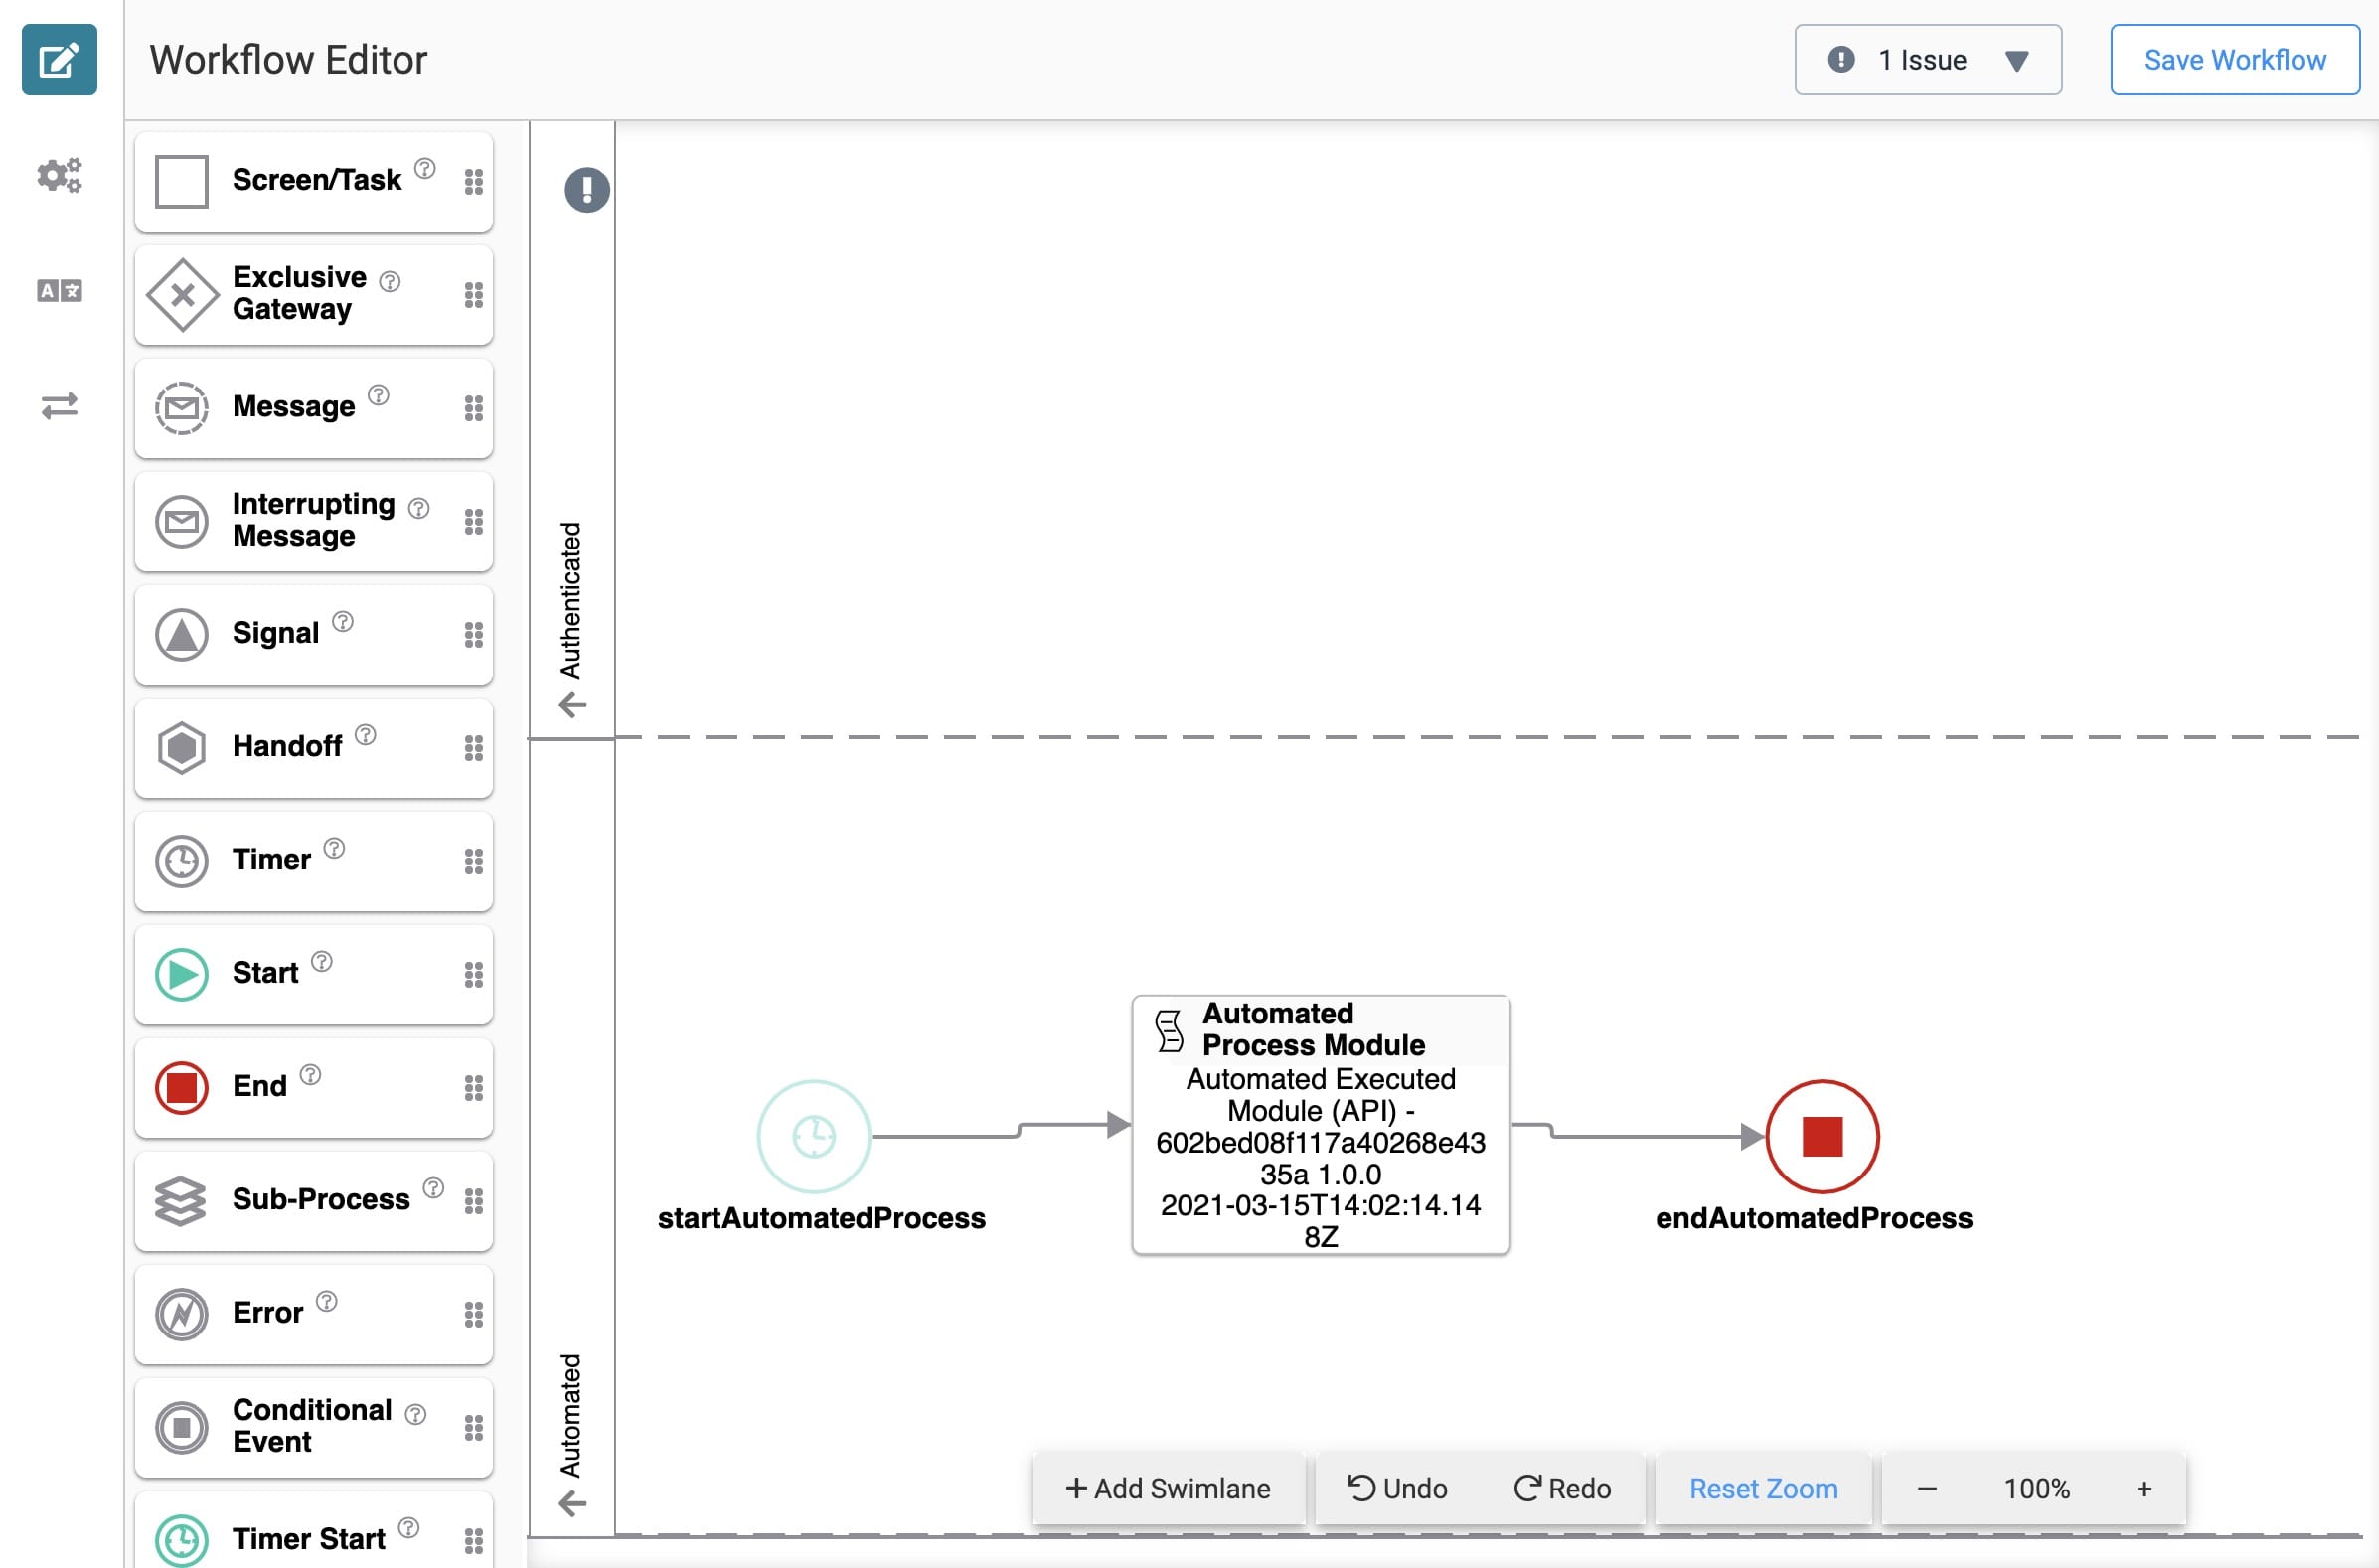
How this Template's Workflow Works
The entire workflow takes place behind-the-scenes in the Automated swimlane. So, there aren't any front-facing modules in this application. The goal is to do the basic setup and start your scheduled process. Then, the automation runs in the background on its set schedule.
This workflow starts with a Timer Start node, which lets you run a process on a set schedule. The Timer Start node connects to the Automated Process Module. That module runs whatever process you've created. Then, the workflow ends with an End node.
Here's how the workflow looks:
How the Automated Executed Module (API) Works
This is the first and only module in the workflow. By default, this module includes a process that iterates a counter. So, the counter counts every time the module gets executed. This probably isn't the process you want to put in place, but it serves as a good placeholder.
Here's how the module looks in the Module Builder:
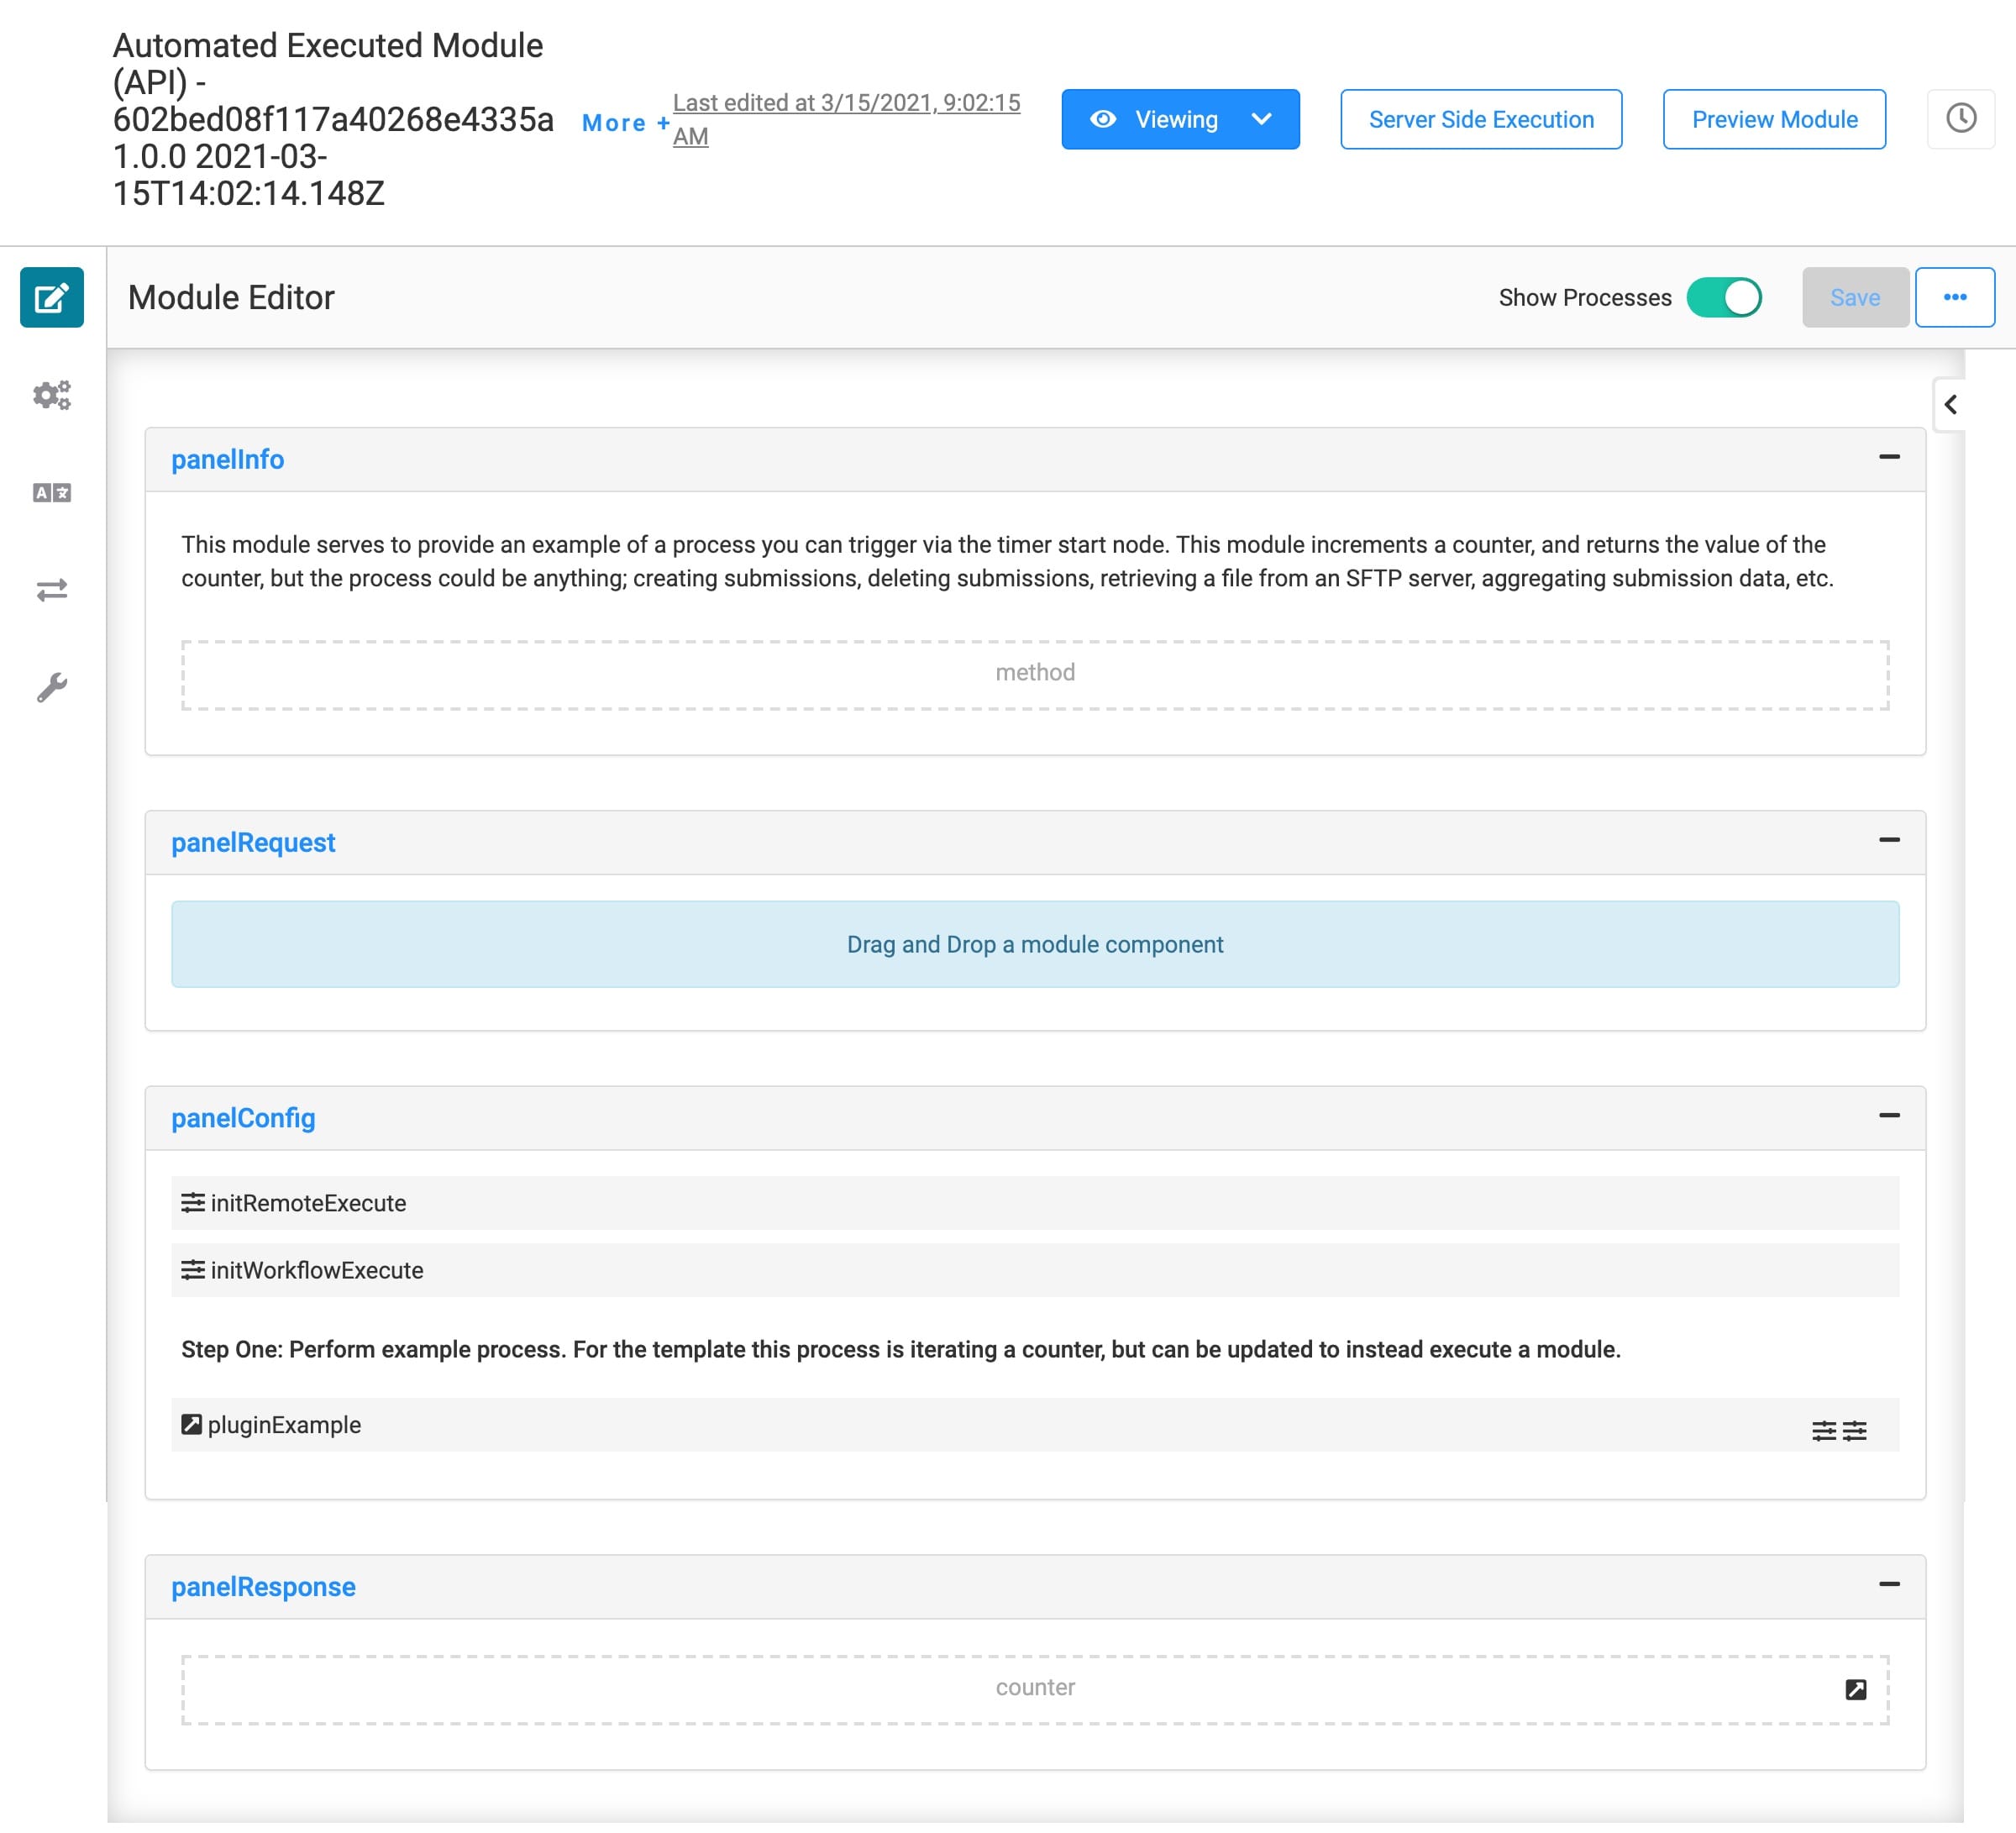
Let's look at how these different components interact with each other. First, there's the initRemoteExecute Initializer. This Initializer lets the API module trigger like a normal remote execute API without a new submission ID. It tells the logic in the module, "there's no new submission ID, but go ahead and run."
If you run your whole workflow, the initAutomatedWorkflowExecute Initializer fires instead. This Initializer triggers the pluginExample Plug-In component. The pluginExample calls the built-in Increment Counter API.
Obviously, you'll want this module to look different in your application. So, you can configure your process directly in this module. Or, if you already have your process configured in a different module, you can replace the default module in the workflow.
Configuring the Template
There are 2 broad steps you'll take to get your template up and running. First, you'll configure the Automated Process Module. Then, you'll need to start the automated process.
Configuring the Automated Process Module
The Automated Process Module is where your actual process lives. Everything else in this template just tells this process to start and stop. So, the most important thing you can do to configure this template is set up your automated process.
The template's Automated Process Module is, by default, set up according to the API Specification standards. So, make sure you follow these standards so your module gets documented. If you want to create a new module for your process, use the API Specification snippet. Just make sure you use an Initializer that expects a submission ID, as this template runs via workflow.
Start the Automated Process
Now that you've configured your service and updated your Hidden components, it's time to start the automation! By default, the automated process runs once every hour. We cover how to update this in our Customizing the Template section. There are 2 ways you can start or stop the automated process:
-
Click Run in the Timer Start node directly from your workflow.
-
Click Start in the Actions column in Start Nodes Administration.
Your process runs until you stop it. To stop the automated process, you can do one of the following:
-
Click Stop in the Timer Start node directly from your workflow.
-
Click Stop in the Actions column in Start Nodes Administration.
Customizing the Template
Since this template gives you a way to create your own processes, you'll always customize the Automated Process Module. The one thing you might customize in the workflow is the Timer Start node. To make the application work for your use case, you'll need to change when and how often your workflow will run.
Changing When and How Often to Run Workflow
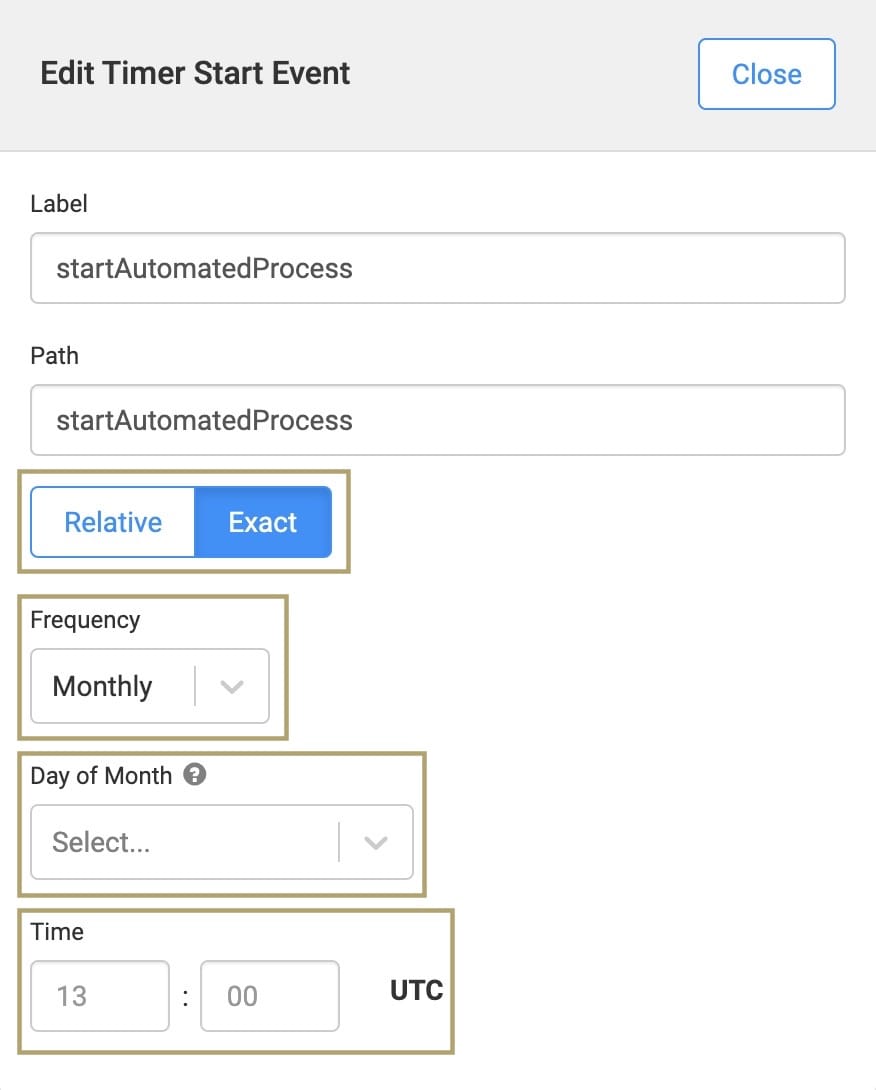
By default, your workflow's Timer Start node is set to run every hour. But, with a quick edit to the Timer Start node, you can customize the timer any way you'd like. The Timer Start node can trigger at an exact time (Tuesdays at 15:30), or a relative time (every 11 hours). The Timer Start node uses UTC (Coordinated Universal Time).
You can control this process directly from your workflow:
| 1. | Click the Timer Start node from your open workflow. |
| 2. | Click Edit. |
| 3. | Set to Relative or Exact. |
| a. | If you choose Relative, set the Frequency, Day of Month, and Time. |
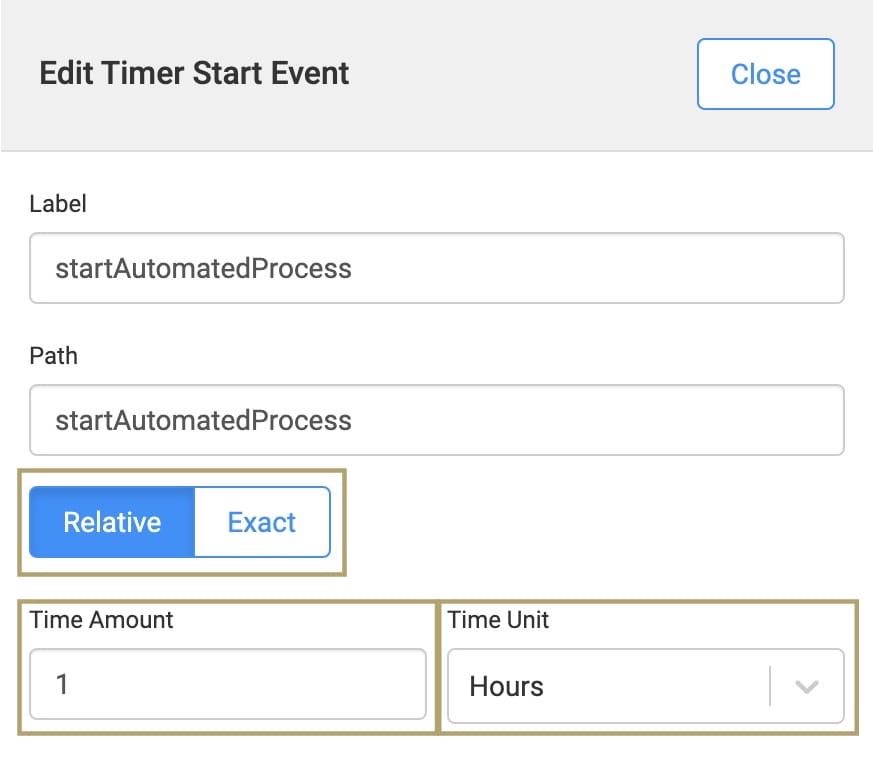
| b. | If you choose Exact, enter the Time Amount and choose the Time Unit. |
| 4. | Click Close. |
| 5. | Save your workflow. |
Testing the Automated Workflow
Once you've configured and customized your application, you can test it out to see if it works as expected. Here are a few ways you can test your automated process:
-
Test Run the workflow via the Timer Start node.
-
Execute the modules that run your process.
Next, you'll learn the most common testing method: performing a Test Run on the Timer Start node.
Test Run the Timer Start Node
A Test Run is a great way to test a workflow without waiting for the scheduled process to start. To perform a Test Run of your automated process:
| 1. | Click the Timer Start node from your open workflow. |
| 2. | Click Test Run. |
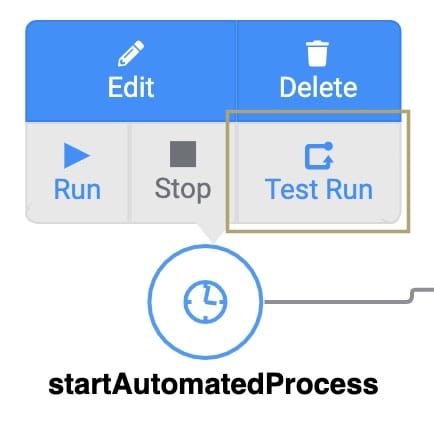
And, that's it! The workflow runs through a test run. From there, you can confirm that your workflow behaves the way you want it to.
Removing the Template
What if you no longer need this template or the application you built from it? There are 2 parts to removing this template. First, you'll uninstall it from your environment. Then you'll delete the application you created from the template. These steps are easy, and you can do them in any order.
Removing the Template from Your Environment
You might need to clean your environment and remove unused templates. The Unqork Library makes this easy. To uninstall a template from your environment:
| 1. | At the top right of the Unqork Designer Platform, click Library. |
| 2. | Find the template to uninstall. |
| 3. | Click the ellipsis (...) in the template tile header. |
| 4. | Click Uninstall Template. |
| 5. | Click Yes, Uninstall in the confirmation modal. |
You can visit the Marketplace and reinstall the template at any time.
What if you have an existing application built from this template and then uninstall the template from your environment? Your existing application remains unaffected. Also, it no longer has any ties to the template. So, let's say you reinstall a newer version of the template in the future. You can rest assured that the installation doesn't impact your existing application.
Deleting Your Application
If you no longer need the application you created from your template, you can delete it. To delete your application:
| 1. | Navigate to the Apps tab from an open workspace. |
| 2. | Find the application to delete. |
| 3. | Click the ellipsis (...) in the app tile header. |
| 4. | Click Delete. |
| 5. | Retype the provided text. |
| 6. | Click Yes, Delete. |
